Home » Food
Category Archives: Food
An Essential 2 day Gyeongju Itinerary
Gyeongju in South Korea is often described as a ‘museum without walls’ which may sound like a cliché but it couldn’t be more appropriate. It is a city with an enormously rich history that has so many fascinating sites to explore. We spent some time in Gyeongju on our recent trip to South Korea. We could easily have spent longer. Here’s our essential 2 day Gyeongju itinerary which will ensure that you see the highlights of this amazing city and leave you with a desire to see much more.
Please note that this post contains affiliate links. If you click through and decide to make a purchase we will make a small commission, at no extra cost to you, which will help towards the costs of running this site.
History of Gyeongju
Gyeongju has a long history that dates back over two thousand years. It was established in 57 BCE as Saro-guk when a number of villages in the area were united by leader Park Hyeokgose, the founding monarch of the Silla, one of the Three Kingdoms of Korea.
The city expanded over the years and eventually became the capital of the region, home to the court of the Silla people, who were the wealthy elite of the kingdom. They ruled for nearly 1000 years. Silla was known as the region of gold, and many gold objects have been found, reflecting the status of the kings.
By 668 CE the Silla had established a legal code and had adopted Buddhism to consolidate its political foundations. Gyeongju had a thriving society, prosperity was at its peak and it is estimated that the city’s population may have reached as many as one million people.
Sadly the city’s fortunes declined in later years during the Goryeo dynasty and then the Joseon Dynasty when the country’s administration moved further north. The city also suffered losses during the Mongol invasion in the 13th century and during the Imjin War with the Japanese (1592–1598). But a wealth of remarkable historic buildings and architectural treasures remain.
Naturally, the city has received UNESCO world heritage status. In UNESCO’s words: Gyeongju Historic Areas contain a remarkable concentration of outstanding examples of Korean Buddhist art, in the form of sculptures, reliefs, pagodas, and the remains of temples and palaces from the flowering culture of Silla dynasty, in particular between the 7th and 10th century.
How To Get To Gyeongju
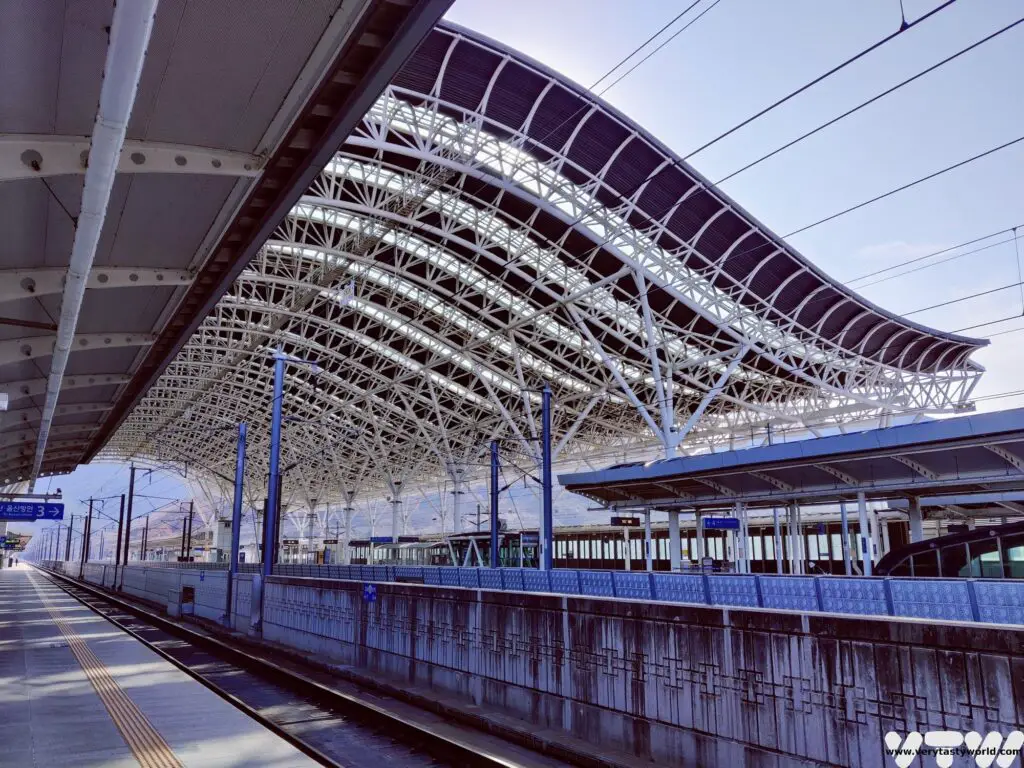
The city is located in south-eastern Korea and can be reached in around 2.5 hours from Seoul and 1 hour from Busan using the fast and efficient KTX train services. However, you don’t arrive in the city centre, but at the new station Singyeongju which is located around 10km away. We have a post about how to travel to Gyeongju.

Although there are a vast number of historic sites to visit in the region, many of Gyeongju’s attractions are within walking distance of the city centre.
Most sites are free to enter but some have a small charge, usually around 2000 Won (about $2). Many sites can be visited throughout the day and into the evening but some have opening hours, which vary from location to location. The itinerary has a fair amount of walking, although you could use buses 10 and 11 which run on a loop and stop by some of the main attractions. Taxis are also available.
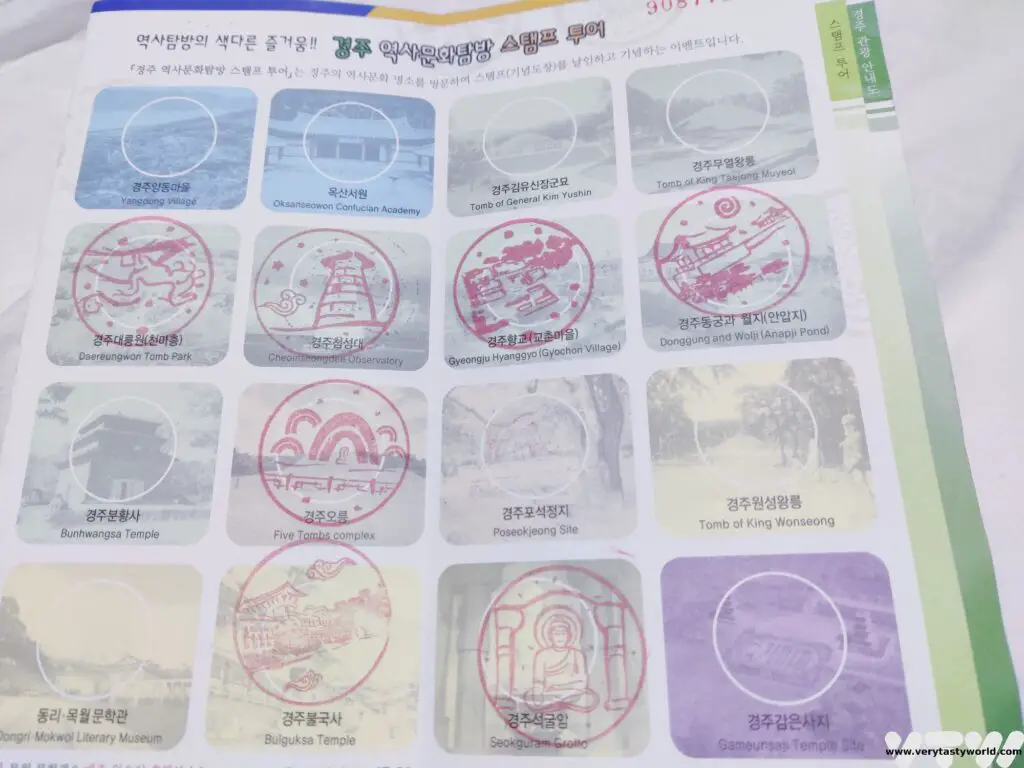
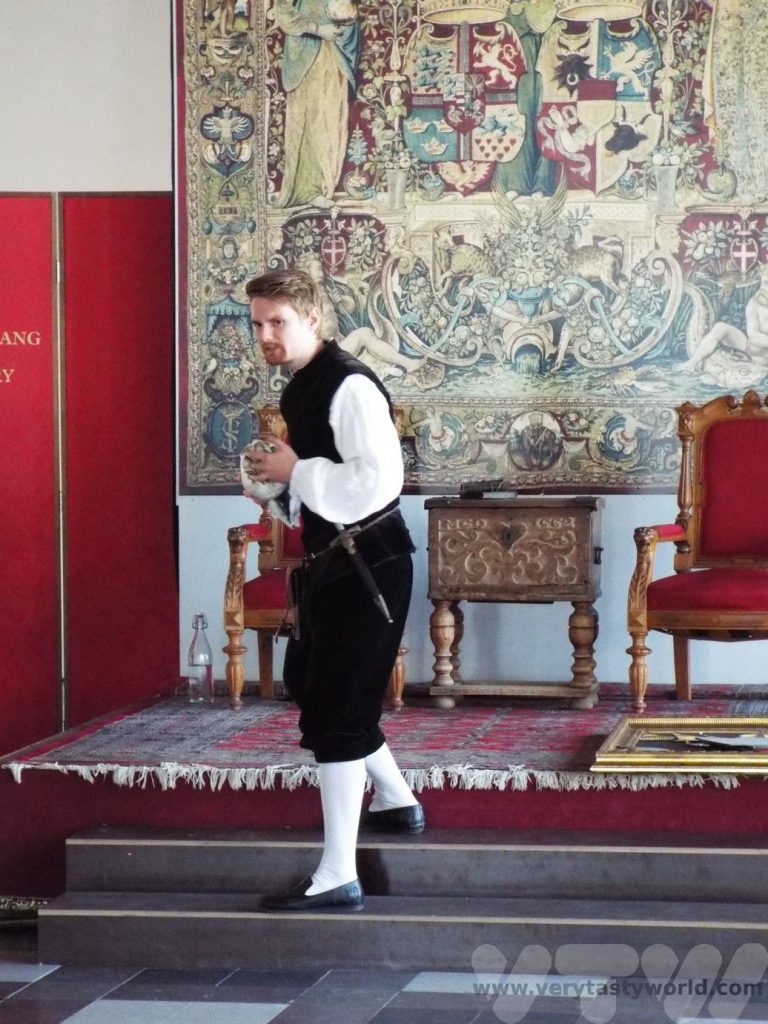
There are tourist information booths at many of the main sites. You can pick up leaflets and brochures which not only have handy maps and information about the site, but you can also collect stamps at various locations. Look out for the huts with the inkpad and stamp. Gotta collect ‘em all!
We got chatting to many of the people who were manning the booths – all had great English – and they were very keen to give us information about the site and advise on other historic areas to visit.
2 day Gyeongju Itinerary: Day 1
The first day’s attractions are within walking distance of the city centre, although you will certainly get the steps in. The main sites lie to the south of the city centre.
Day 1 Morning
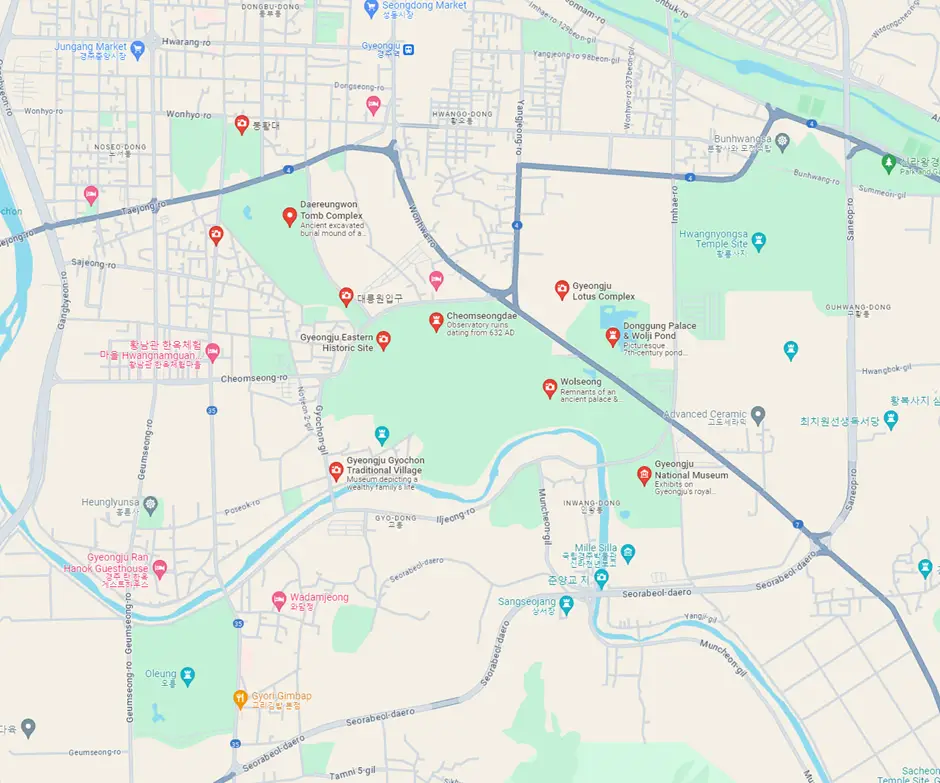
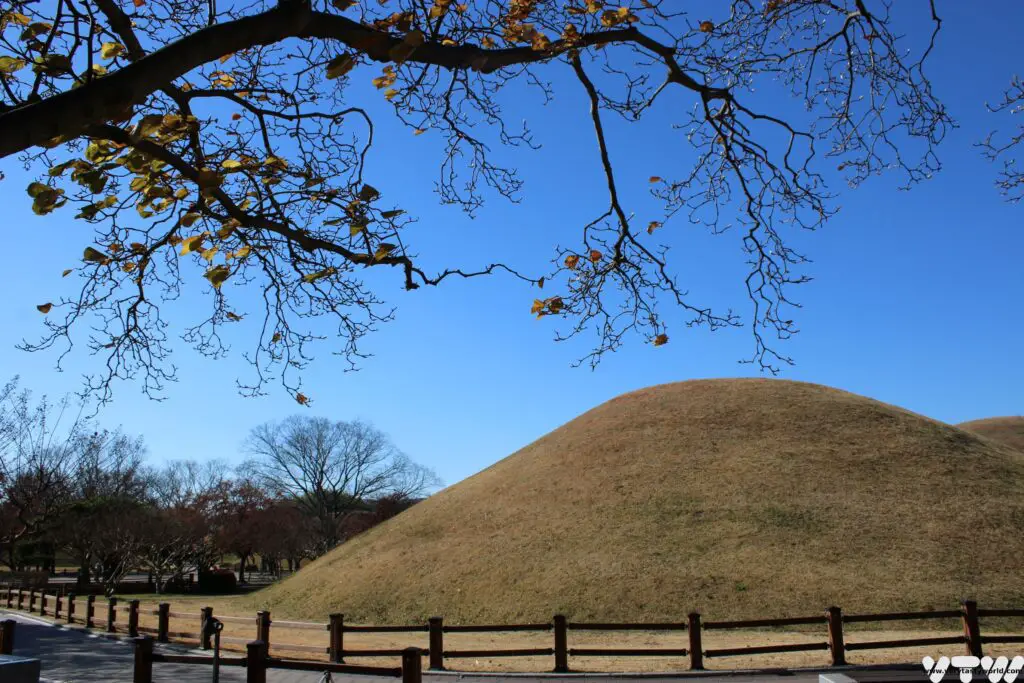
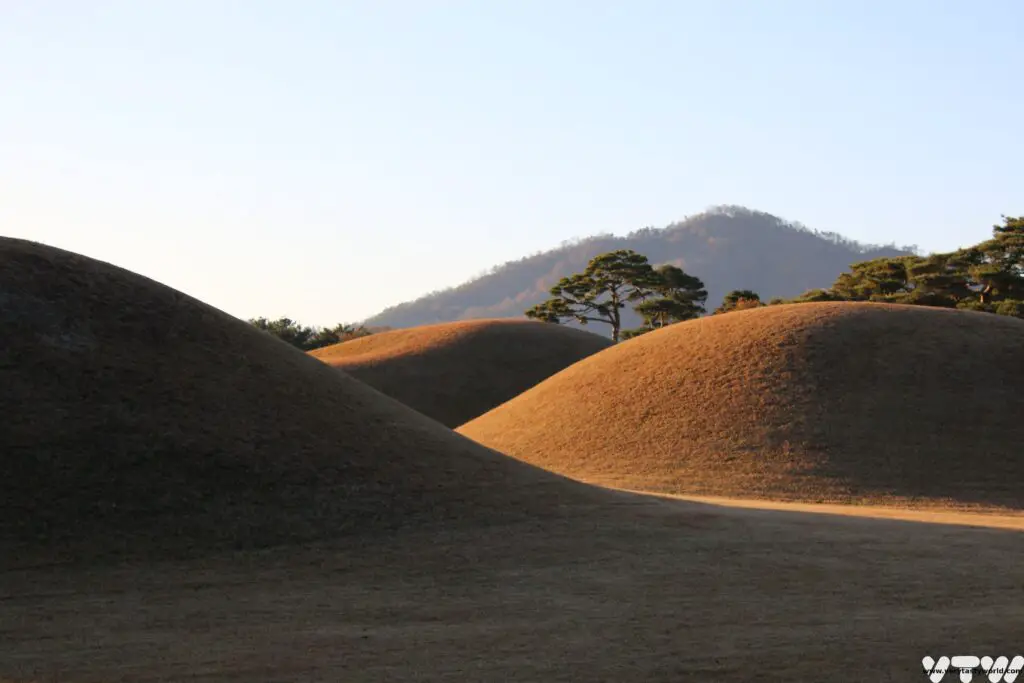
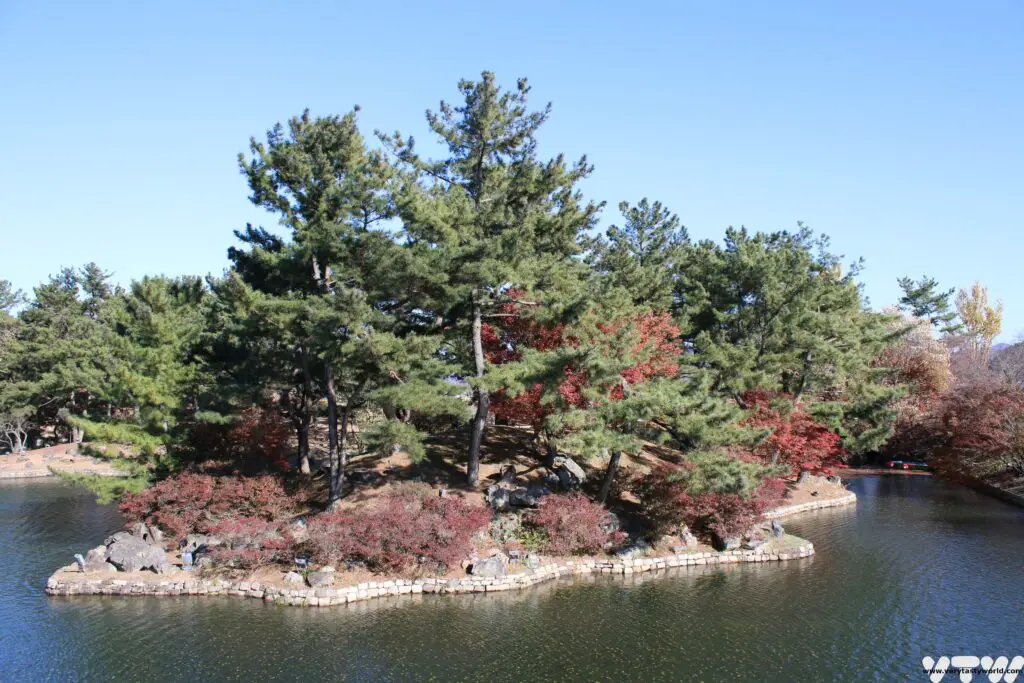
The Daereunwong Tomb Complex
This complex is the site of ancient Silla burial mounds. They are tumuli that form a distinctive part of the landscape. They are considered sacred and should be treated with respect. This complex is free to enter and you can wander around. It contains the tombs of some 50 Silla Kings, including King Michu.
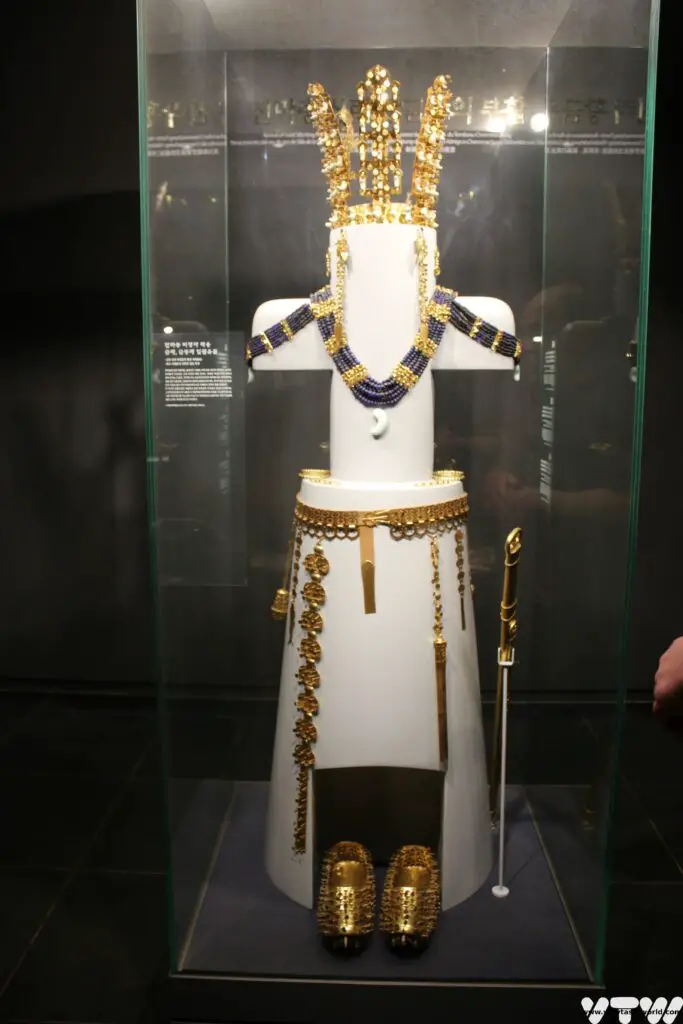
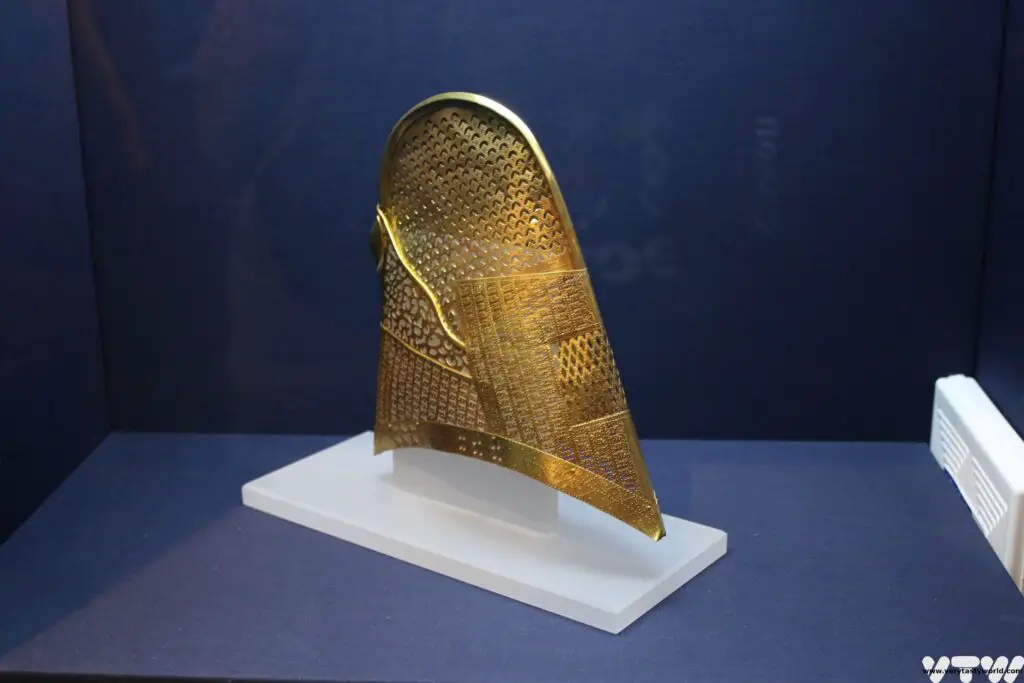
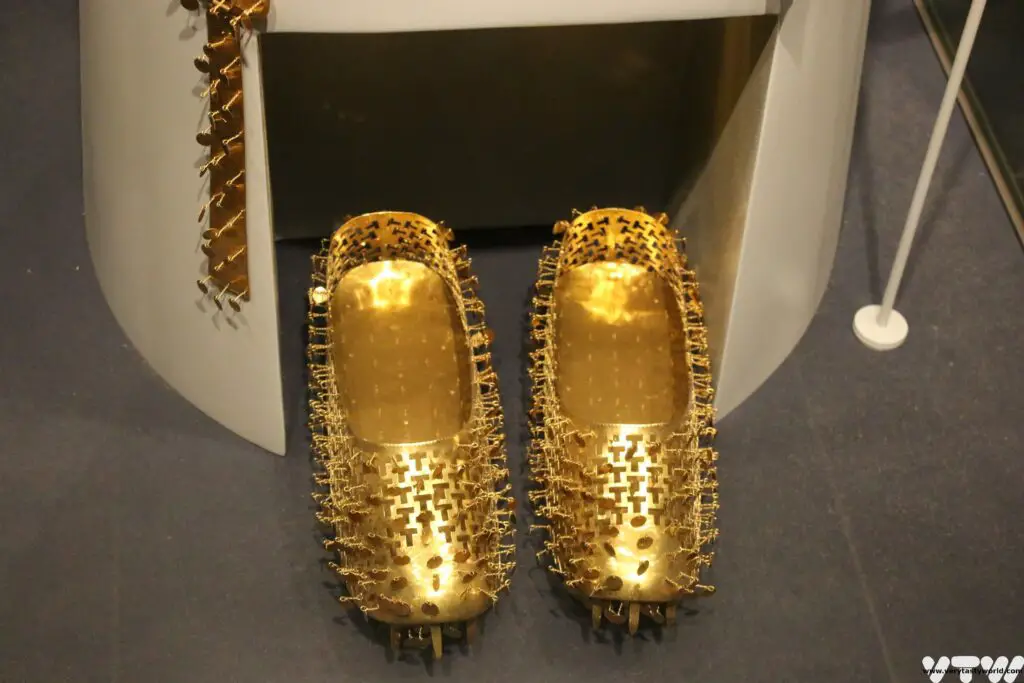
You can enter the Cheonmachong Tomb (a small fee applies). It is known as ancient tomb 155 and was excavated in 1973. Inside was a body wearing a gold crown which had been buried with a variety of artefacts.
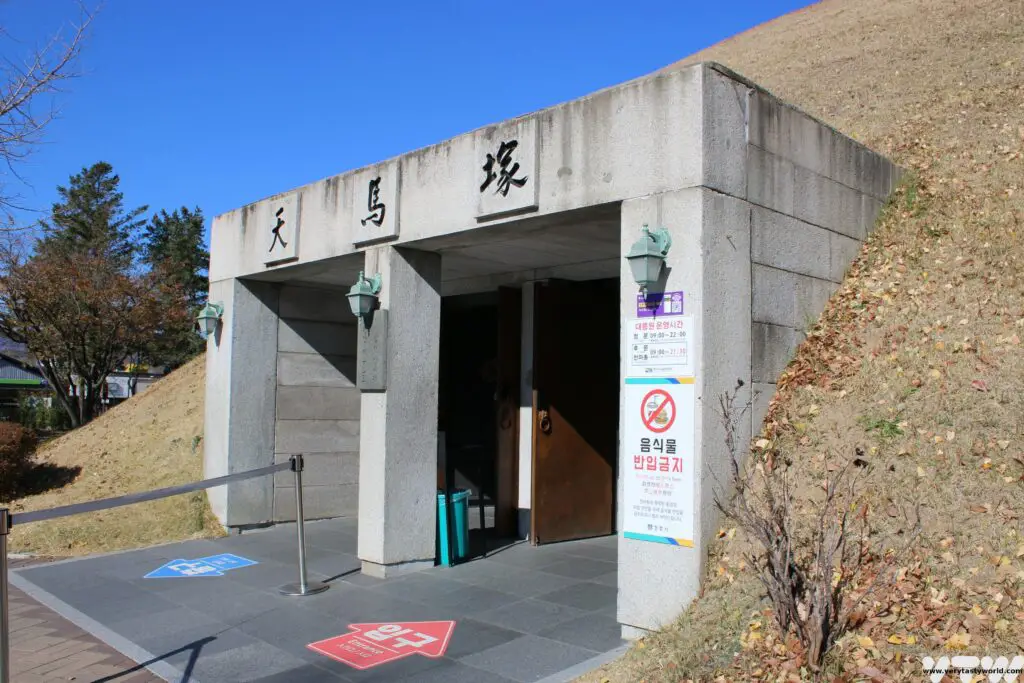
Many Silla artefacts are displayed inside the tomb and you can marvel at the craftsmanship of the intricate and delicate goldsmiths. The Silla were clearly a wealthy people and the crowns and jewels they wore reflected their status.
Exit this site to the south to visit the Gyeongju Eastern Historic Site
If you are feeling peckish, there are a number of restaurants in this area, located between the Daereunwong Tomb Complex and the Eastern site, where you can enjoy a snack or a light meal.
Gyeongju Eastern Historic Site
There are a vast number of fascinating sites to explore in this area, most of them are eminently walkable.
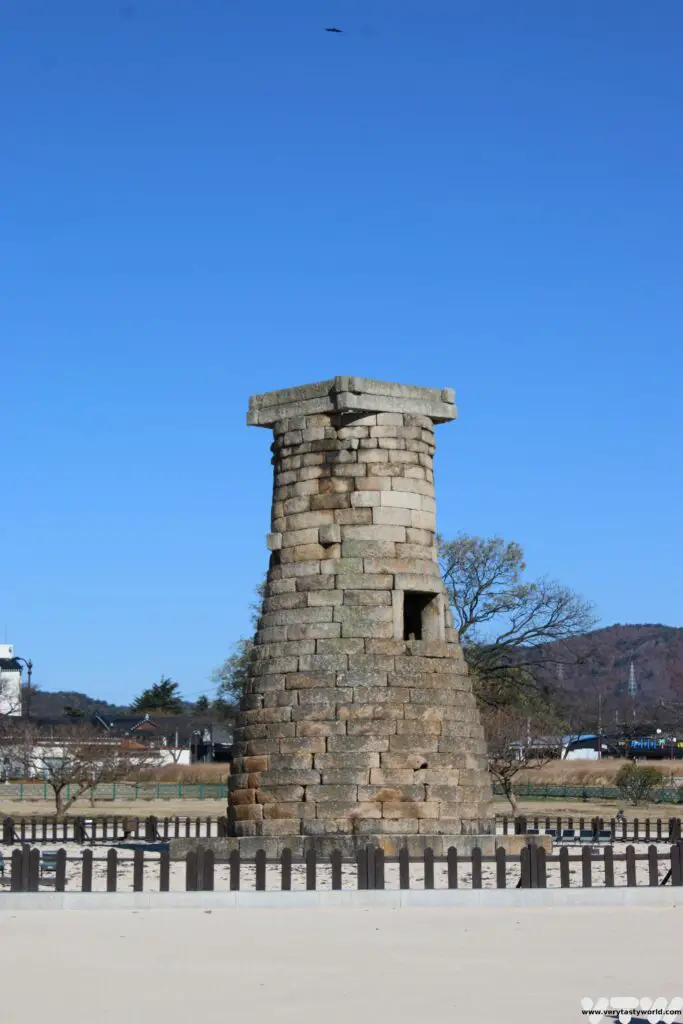
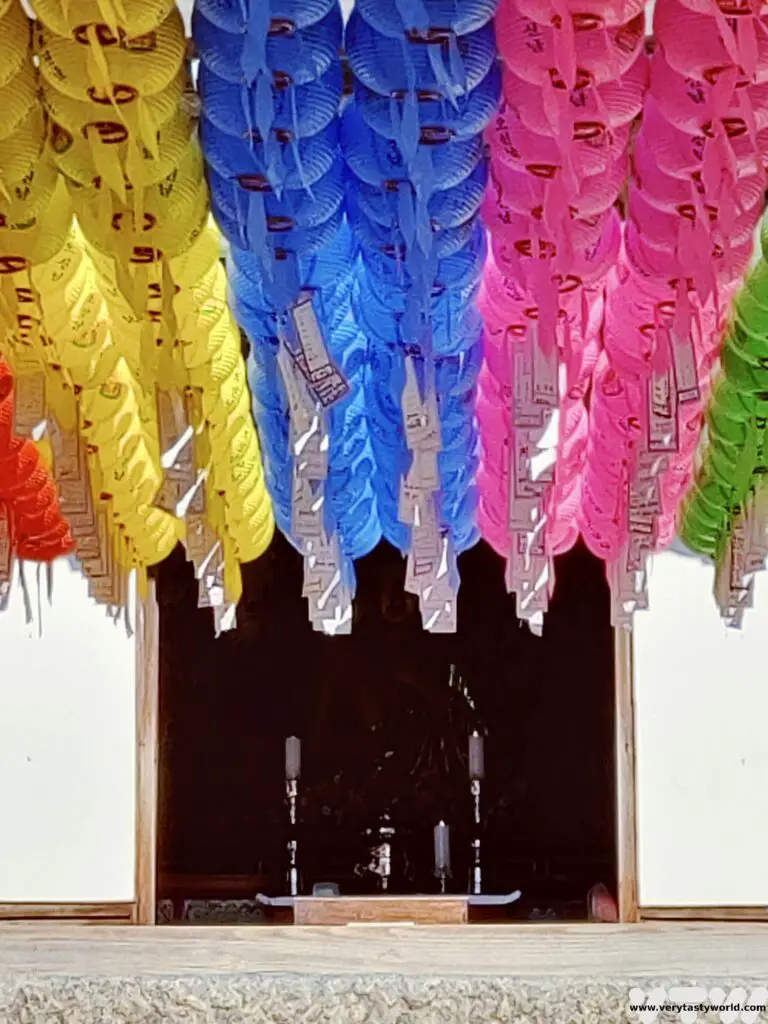
Cheomseongdae
This is the oldest surviving observatory in Asia (possibly even the world), constructed by the Silla in the 7th century. It is nearly 10 metres high and would have been used for astronomical observations. The square window halfway up the tower was also the entrance. The tower is comprised of 365 stones to represent each day of the year. It is thought that the number of the stones, and their placement, in the tower may represent astronomical figures but no one really knows what these might be so this theory isn’t certain.
As you follow the main track, take a right turn just past Cheomseongdae to walk through a pleasant path to reach the…
Gyeongju Gyochon Traditional Village
This small village has a number of houses built in traditional style, some of which are residential properties but some are accessible to enter. Many of these date from the Joseon dynasty (1392 – 1897) rather than Silla. Of particular interest is the Confucian school which is still in use to provide education of Confucian practice.

The Historic House of Rich Man Choe is a house dating back to approximately 1700, although is it is a reconstruction. The Choe family were rich through 12 generations and this house is representative of the buildings of the nobility of the Joseon Dynasty. Nearby the traditional village is the Jaemaejeoung well, situated by General Kim Yusin’s house. Next to the well is a tombstone dedicated to King Gojong (a Joseon king).
There are a number of cafes and restaurants here if you fancy having a bit of a rest from sightseeing. This is a good place to enjoy a spot of lunch.
Day 1 Afternoon
Woljeong Bridge
Moving further south from the traditional village, you will arrive at the river and the spectacularly beautiful Woljeong Bridge. This is a reconstruction of a Silla bridge that was originally built during the reign of the 35th Silla King, King Gyeongdeok.
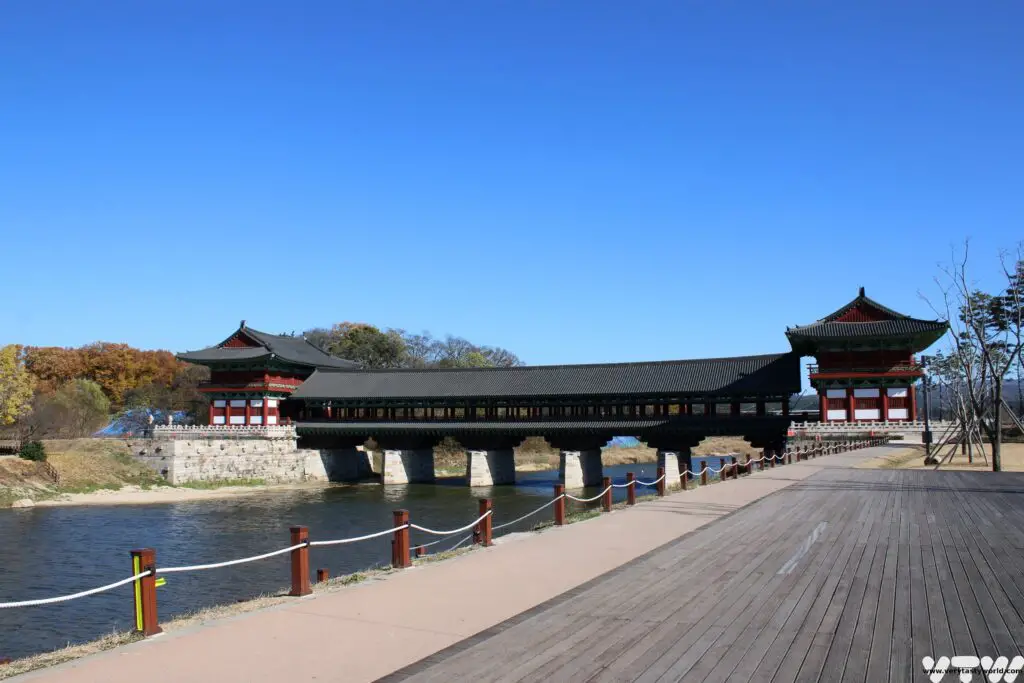
The bridge is covered all the way across, its pillars and roof highly decorated in red, green and blue.
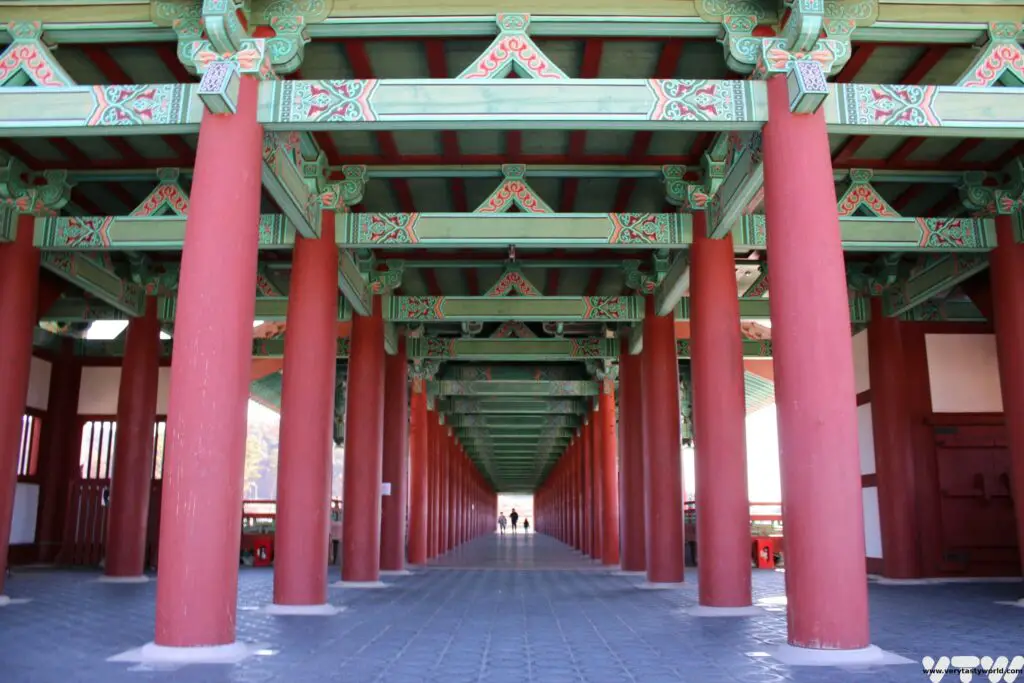
You can also climb the steep steps into the bridge towers to view exhibitions which include a number of historic artefacts.
Oleung Five Tombs Site
Beyond the bridge you can turn right and walk along the riverside until you arrive at a walled complex. Follow the wall along the river and turn left along the main road and follow the wall to reach the entrance. This site has a small fee to enter. It has four earthen mounds and a round grave. They are the tombs of a single king, King Park Hyeokgeose, who founded the Silla Dynasty.
He apparently ruled for 62 years and after he died, according to a legend, his body was ripped into five pieces and fell back to earth from heaven. His people tried to bury him in a single tomb but a giant snake prevented them from doing this, so five tombs were constructed. The tombs have not been excavated.
A lovely foodie moment happened after had left the site and were making our way back to the bridge. We were beckoned by a man who wanted us to meet his family and show us how they made kimchi. We were invited into his courtyard and he showed us a bathtub of cabbages which had been halved and brined. He, his sister and 84 year old mother were washing the cabbages. The following day each cabbage leaf would be smothered in a deliciously spicy paste and fermented. It was such an honour to be invited to this delightful family’s home and to see the kimchi making process.
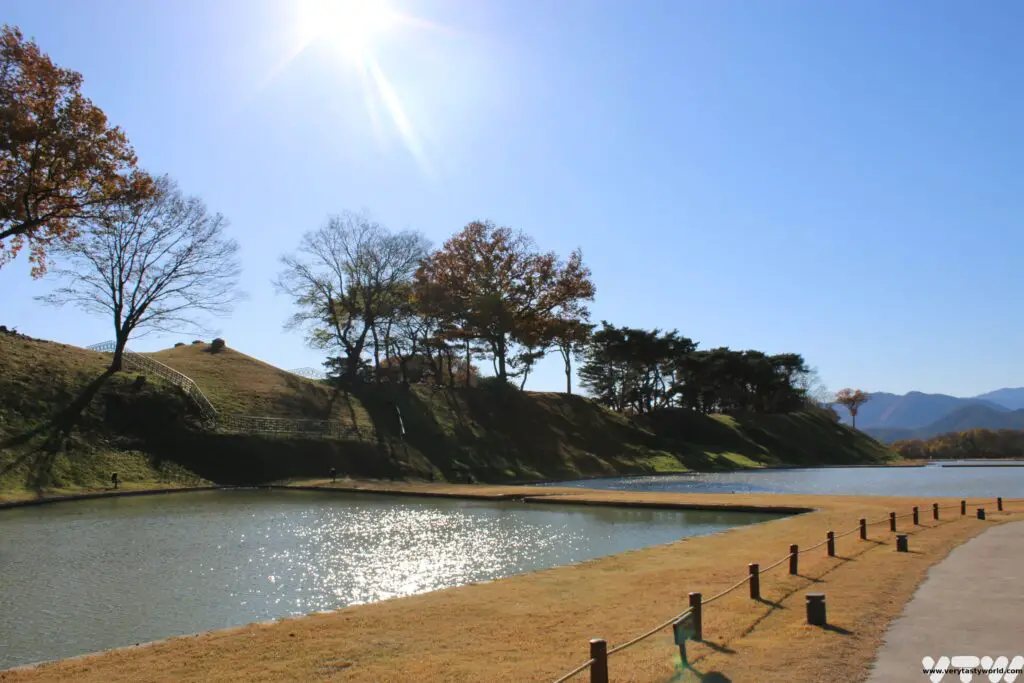
Wolseong Palace
You can walk back along the river, cross the bridge and turn right at the traditional village to go across the park and see the remains of Wolseong. This was a Silla palace that was originally constructed in the 2nd century. No buildings can be seen, save a small ice-house, but the moat has recently been restored.
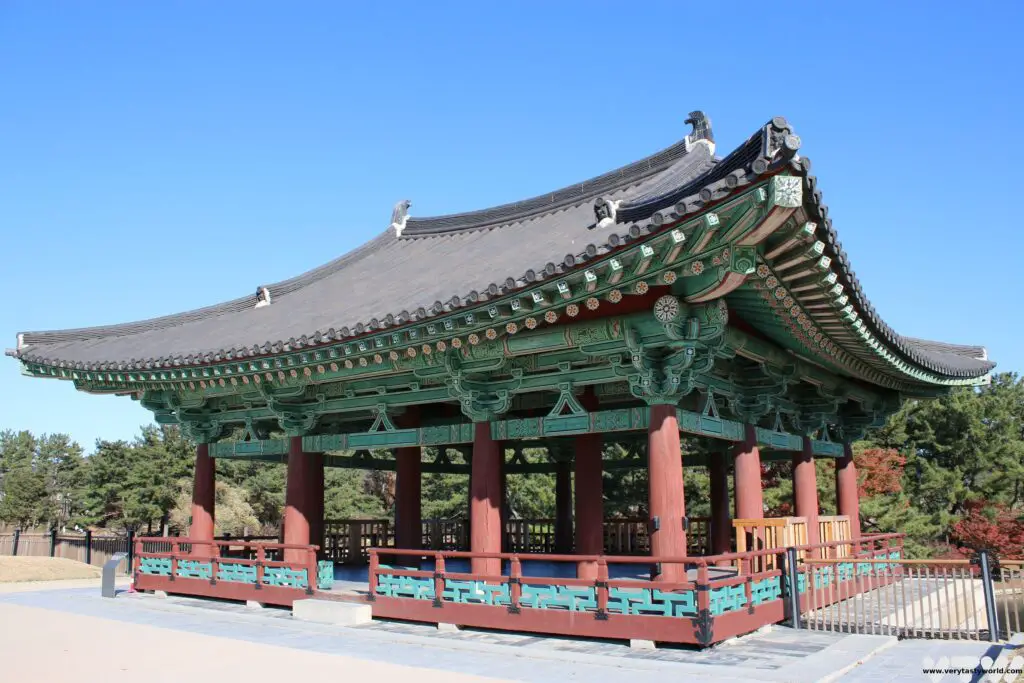
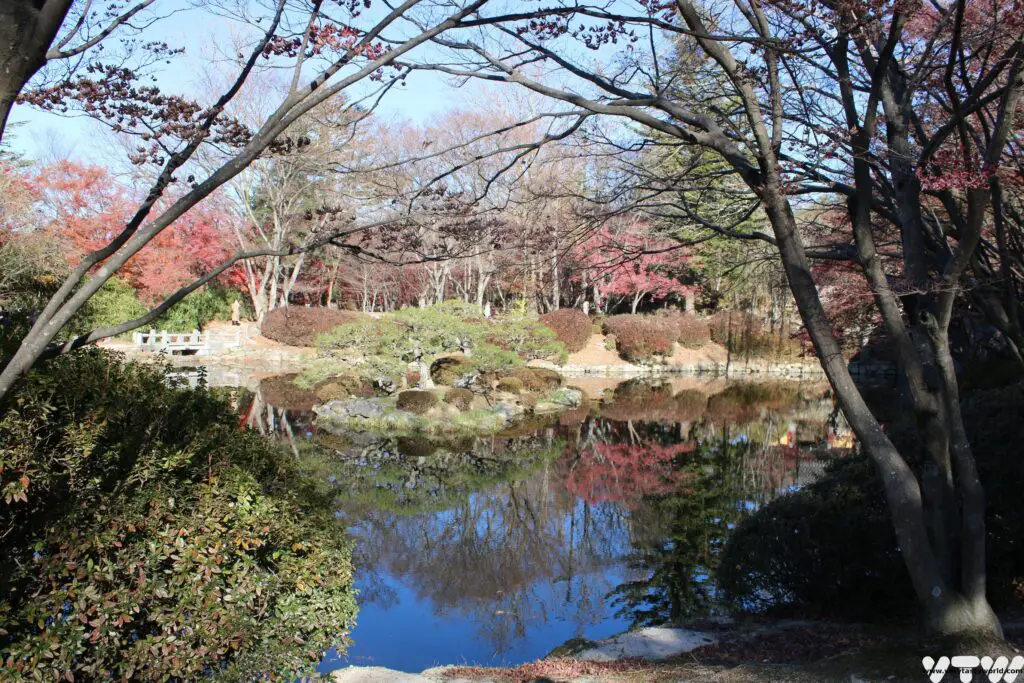
Donggung Palace and Wolji Pond
Follow the moat around and bear right. After exiting the park turn right and walk along the road, then cross to the Donggung Palace and Wolji Pond. This was a palace that was used by the Silla crown prince. The site has a beautiful pond (Wolji means “pond that reflects the moon”) which was constructed in 674 CE and is set in a lovely garden.
There is a small fee to enter the grounds. It’s possible to walk round the lovely lake to view its three islands. There are also some reconstructed lakeside buildings. It’s easy to imagine this as a place of leisure for the crown prince. It was extremely pretty, even in winter.
2 day Gyeongju Itinerary: Day 2
On the second day we suggest exploring some of the important historic sights outside the city.
Day 2 Morning – Bulguk-sa and the SeokGuram Grotto
You can catch a bus to visit the UNESCO sites of Bulguk-sa and the SeokGuram Grotto.
Bus numbers 10 and 11 go to Bulguk-sa (number 11 from the city centre is the quickest route) on a loop route.
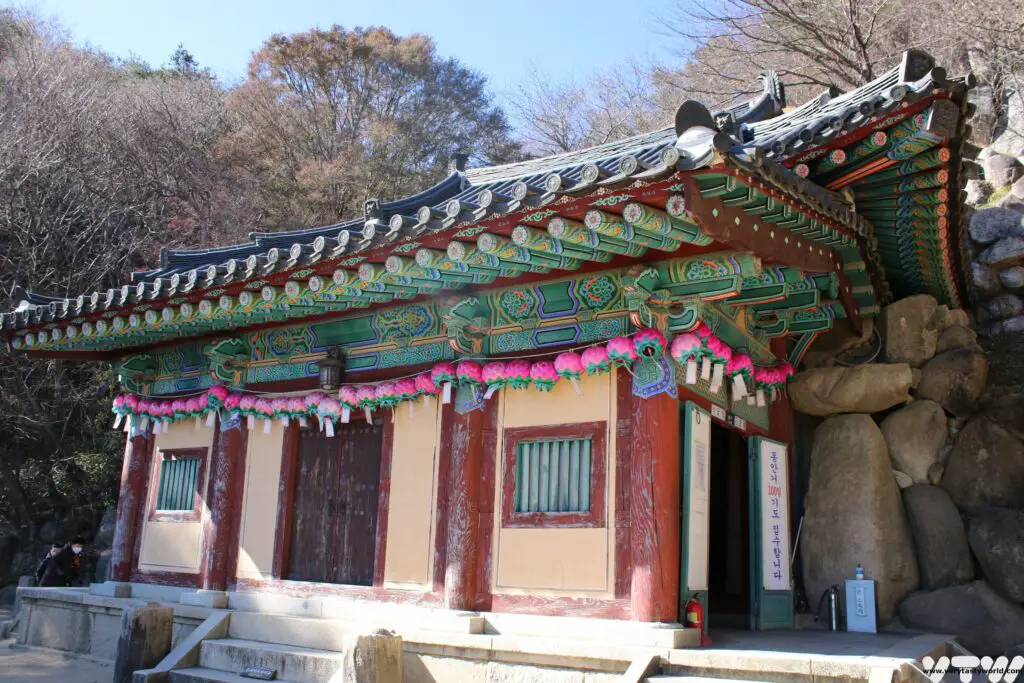
Bulguk-sa is a historic temple complex set in a beautiful garden and is a triumph of Silla architecture. It was originally built between 751 and 774 and served as the centre for Silla Buddhism and was a place for prayer to protect the country from foreign invaders.

Unfortunately the buildings were destroyed by Japanese invaders in 1593 and have been rebuilt. The main Buddha hall was rebuilt in 1765.
In front of the hall are two pagodas which survived the destruction are considered to be national treasures.
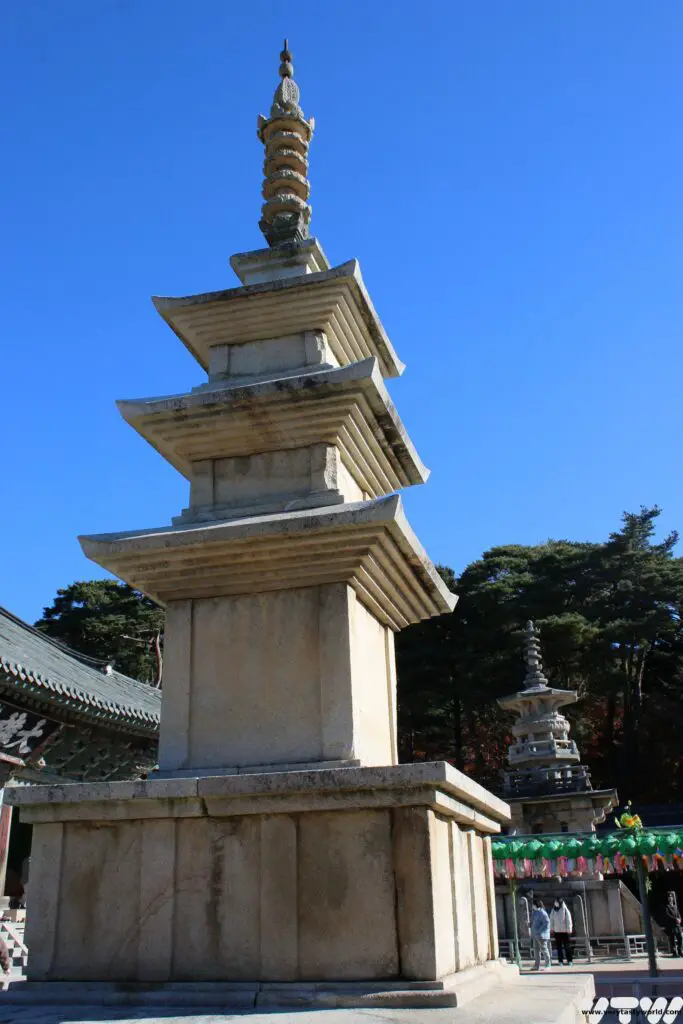
Dabotap , the Many Treasures Pagoda, is a typical Silla construction. The more ornate pagoda is Seokgatap, the Sakyamuni Pagoda, and it’s more reflective of the architecture of the neighbouring Baekje kingdom. In 1966 archaeologists discovered a copy of a sutra inside the pagoda which is an absolute treasure, considered to be amongst the world’s oldest woodblock printed books.
There are numerous other temple buildings and gardens to explore.
Bus number 12 will take you to the SeokGuram Grotto. If you’re feeling energetic, you can walk up the hill – it’s 2.2km to reach the grotto – but we’d recommend taking the bus as the road doesn’t have a great path for pedestrians. The bus stop to the grotto is at the bottom of the hill on the main road opposite the tourist information centre in the Bulguk-sa lower car park. The tourist centre will be able to give you a bus timetable.
The SeokGuram Grotto is another world heritage site. This is a cave temple, built in 751CE by the Silla people, which contains a Buddha. It is 3.23m tall, sculpted in granite and is considered to be one of the world’s most exquisite heritage carvings. The Silla cleverly designed the cave on a hillside where a stream runs underneath, perfectly regulating the humidity within the cave.
Visitors can walk into the cave and view the Buddha which is located behind a protective screen. There are deities that guard the main Buddha, two on each side. Photos are not allowed.
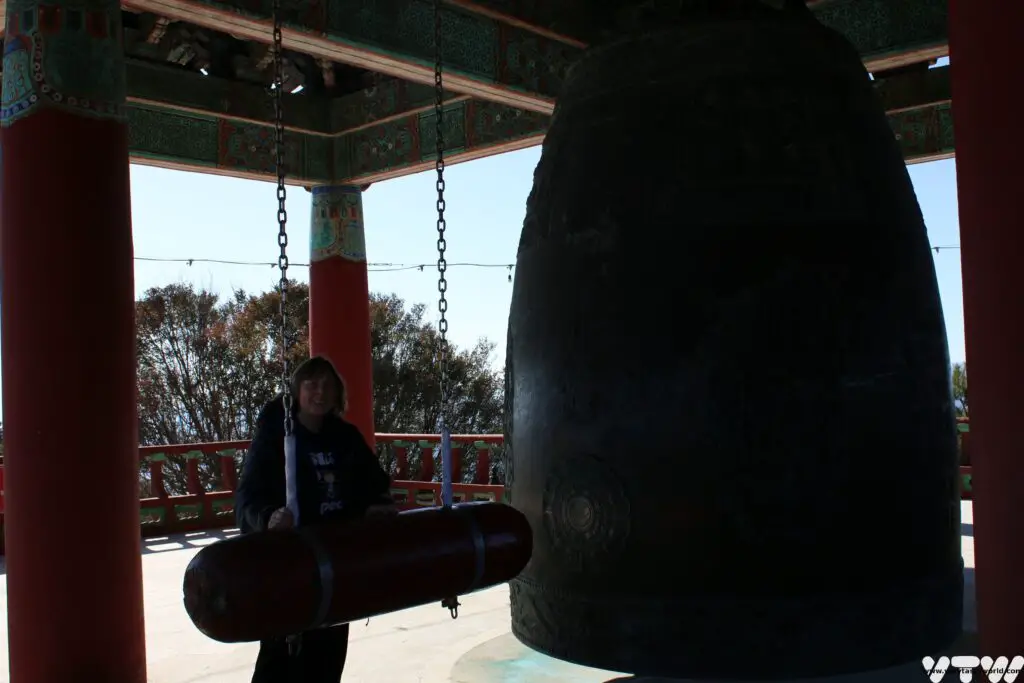
It is a short walk of around 1km along a pleasant, forested path to the SeokGuram Grotto from the entrance. At the very top of the stairs by the car park there is a traditional bell, which you can ring for a small fee of 1000Won. The money goes to charity.
Day 2 Afternoon Choices
There are choices for how to spend the afternoon.
On the way back, the buses pass by the Lake Bomun resort area. If you looking for more modern activities Gyeongju has a popular theme park which is a major draw for younger people in particular. This area also has a K-Pop museum and a museum of contemporary art. You will pass by the park on the no 10 or 11 buses and they both stop there.
Alternatively you could spend the afternoon browsing the Gyeongju Museum (open 10m-6pm, free entry) which has extensive permanent and temporary exhibitions about the Silla.
The history gallery and Silla art gallery are notable highlights, both of which exhibit precious artefacts.
Evening at the Gyeongju Eastern Historic Site
We recommend revisiting the Gyeongju Eastern Historic Site in the early evening. It’s a place where locals and visitors spend time relaxing in the park. Kite-flying is a popular activity.
Many of the historic sites are lit up after nightfall and it is especially worth walking back to Cheomseongdae and the Woljeong Bridge.
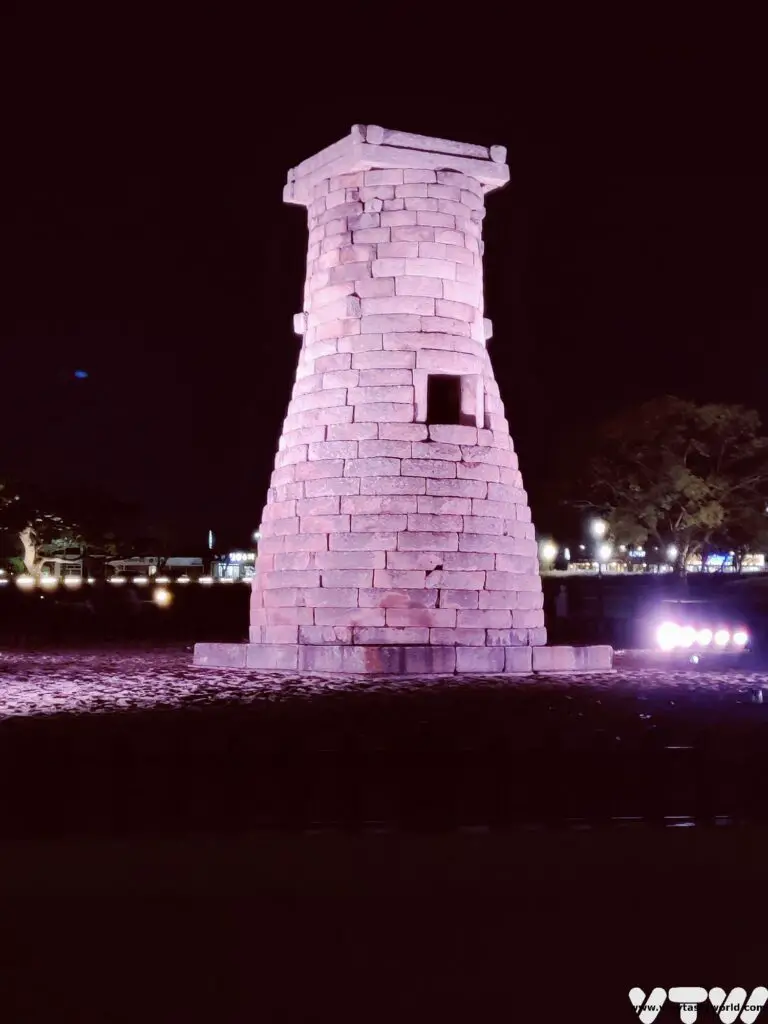
They are both impressive in the daytime but spectacular at night.

Gyeongju for Foodies
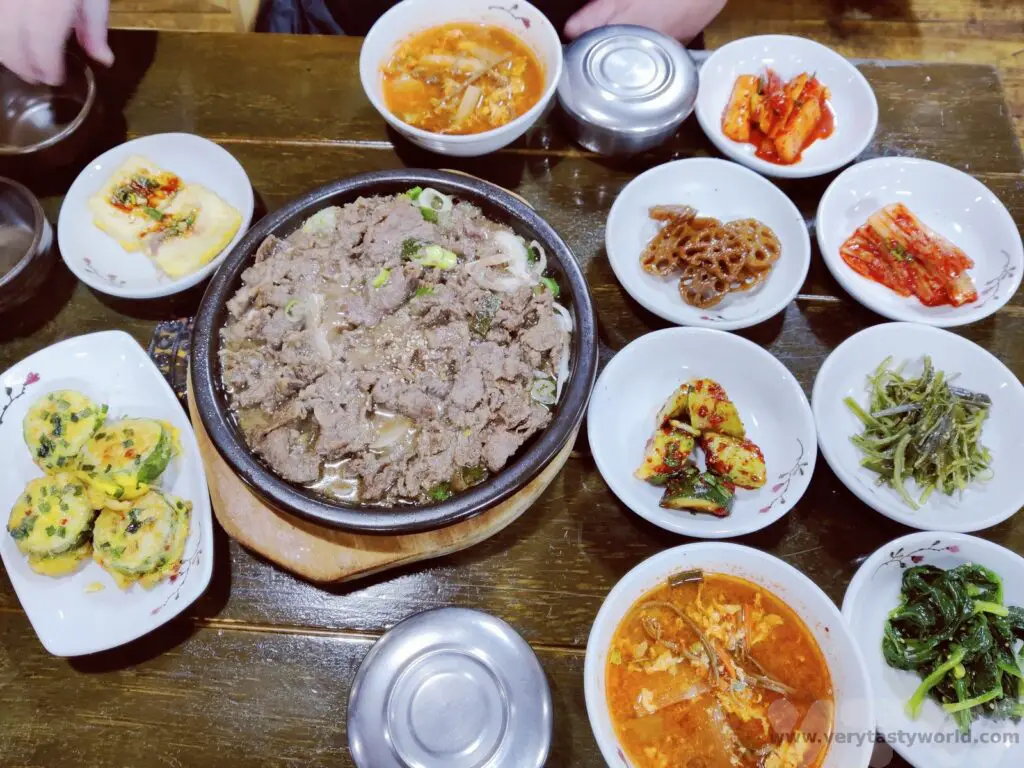
We ate very well all over Korea and the cuisine in Gyeongju was no exception. There are a plethora of restaurants in the city and around. Prices are very reasonable – most of the meals we enjoyed were around 10,000 Won (~$8) or less per person. There were a couple of excellent restaurants in the city centre or close to the Eastern Historic Site.
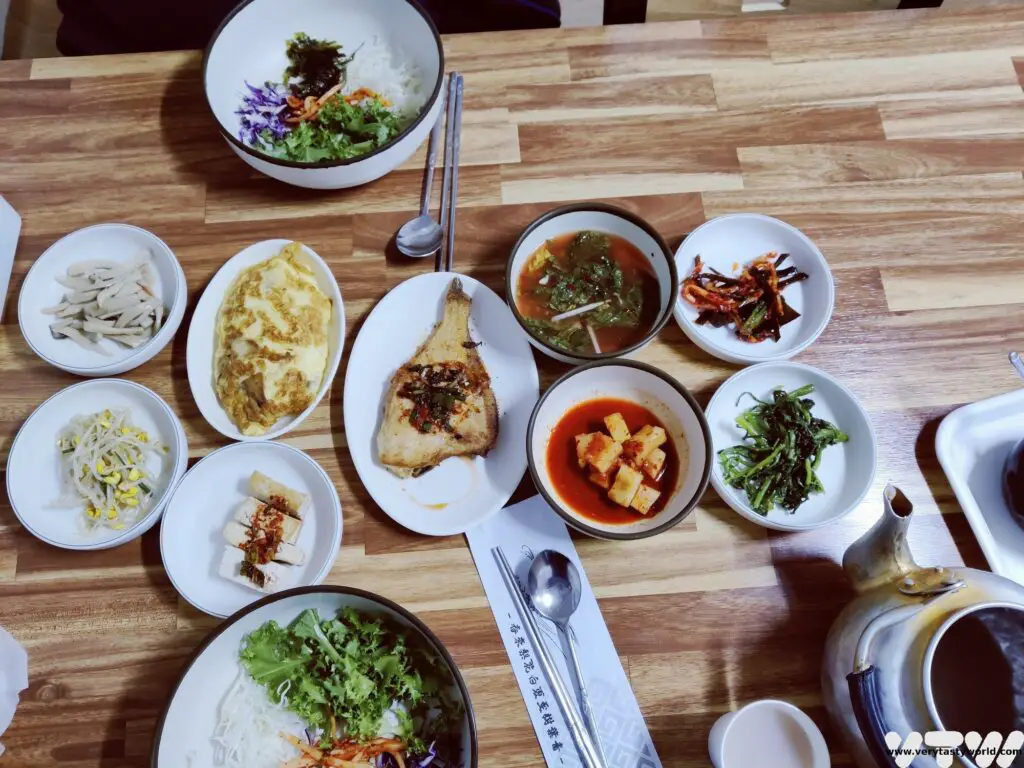
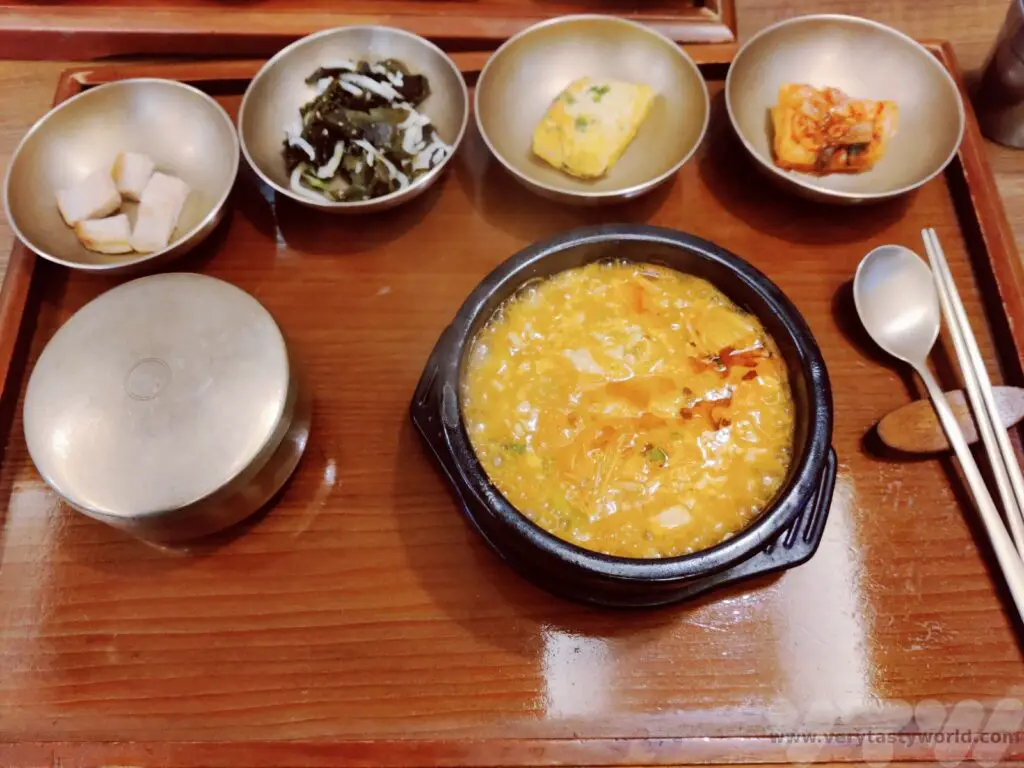
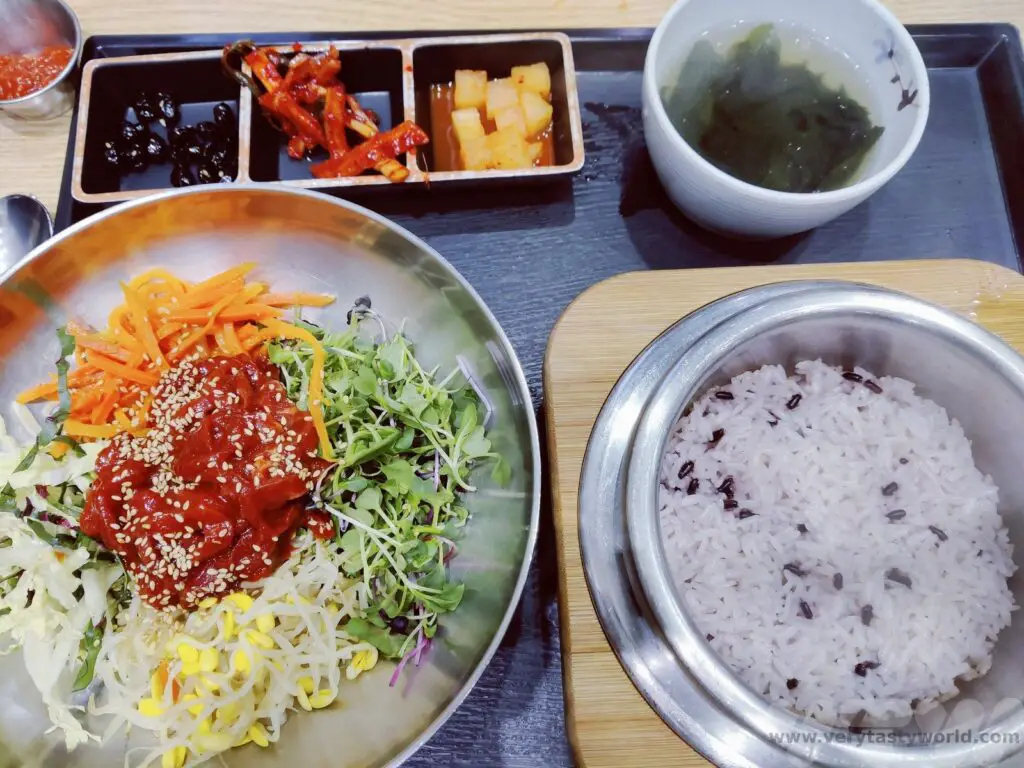
Sukyoung sikdang gyeongju on Gyerim-ro, opposite the The Daereunwong Tomb Complex, offered a home-cooked bibimbap (rice bowl) with lots of banchan side dishes and broth. This is a great option for vegetarians because all the dishes were vegetable based except for an additional order of fish (which we did order and enjoy). The sides comprised omelette, mushroom, water kimchi, radish kimchi, blanched vegetables, tofu. Barley tea was also served because it was a cold day. The proprietor also made his own makgeolli – a kind of rice wine.
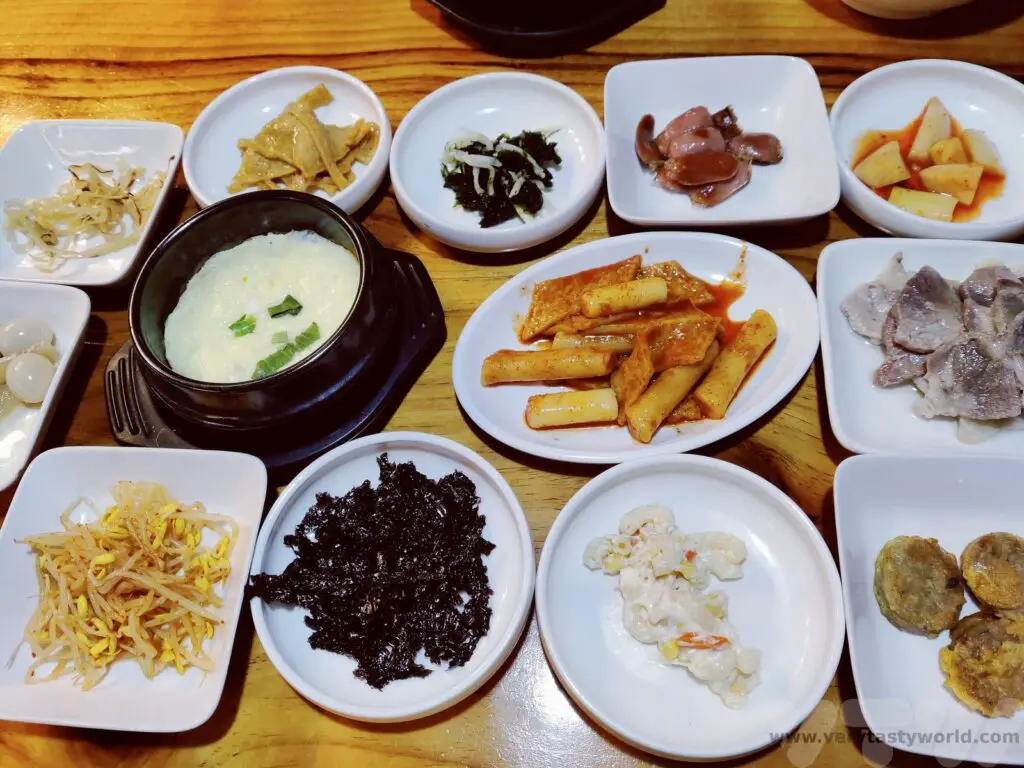
We stopped into 한식집 숟가락 젓가락 located on Taejeong-ro791 Becon-gil because we saw its sign with a huge number of dishes. This wonderful little restaurant offered a feast that was an absolute bargain. You choose a stew and then get rice, 11 side dishes and barley tea. All for 8000 Won each (about $6). And it was utterly delicious.
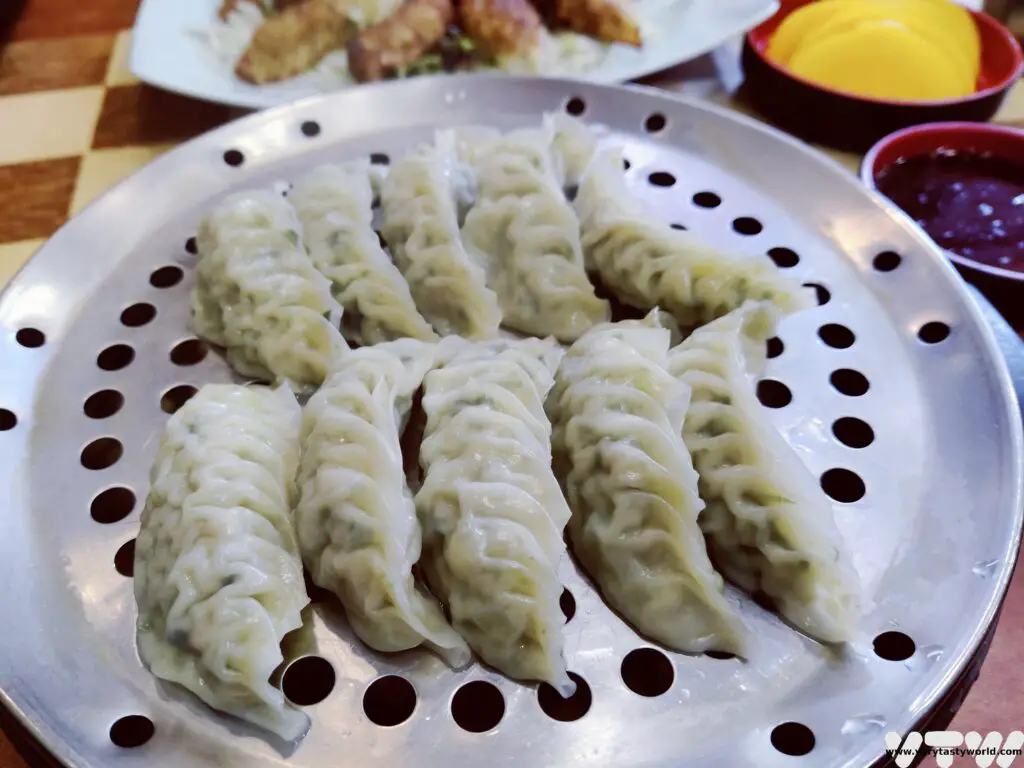
In town there is a dumpling restaurant 울타리없는만두 on Dongseoung-ro. The proprietor speaks good English and is delightful. We enjoyed two different types of dumpling. He steams them outside the shop – puts the dumplings in a basket, passes them through the window into the steamer, whereupon a rush of steam engulfs the side of the street and the dumplings cook in double quick time.
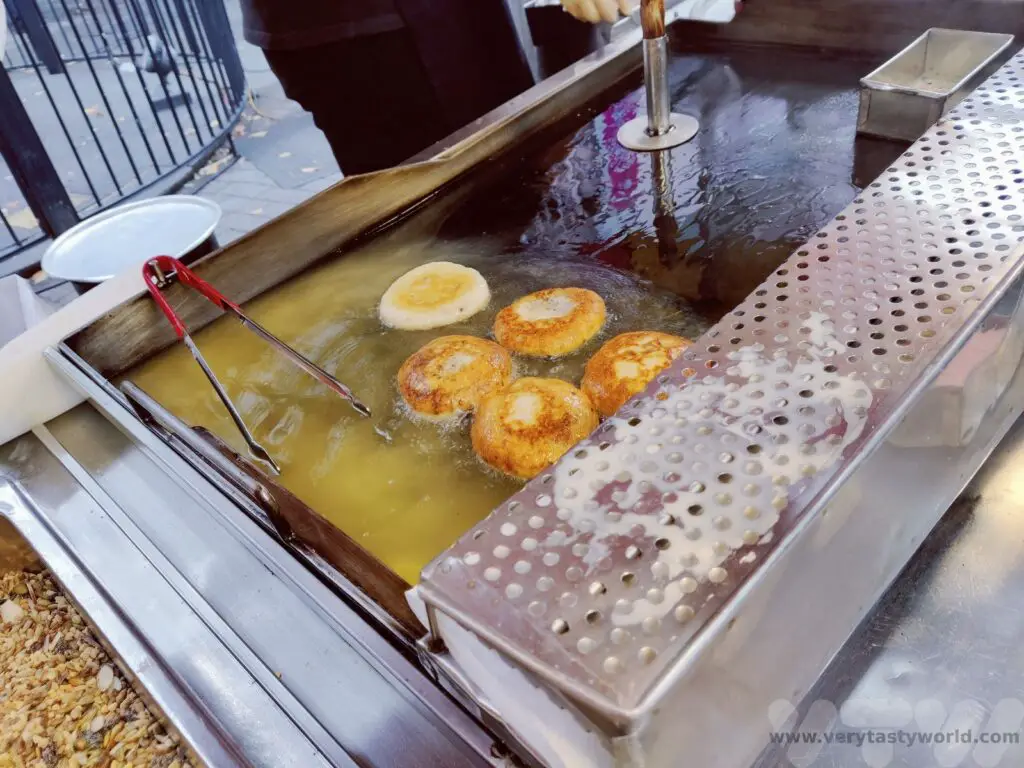
Seongdong Market, opposite the old railway station has a number of stalls if you are seeking street food. And we always advise seeking street food in South Korea – there are so many amazing dishes to try. The market also has an area with some restaurants that also serve a variety of banchan.
Gyeongju Specialty Food
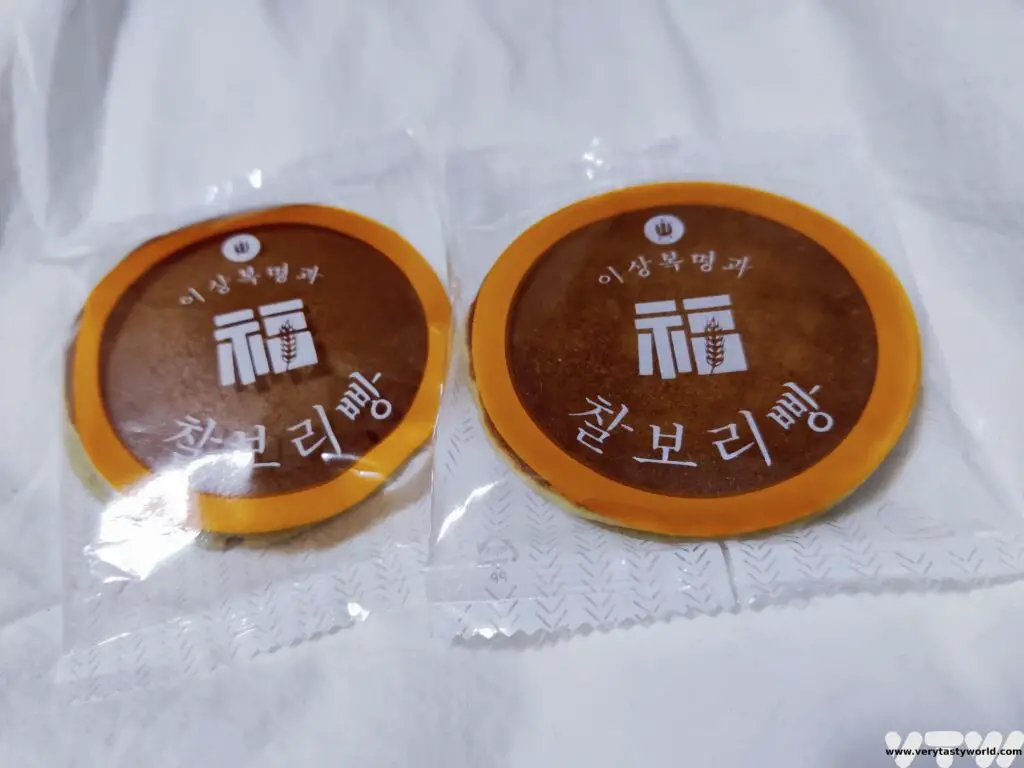
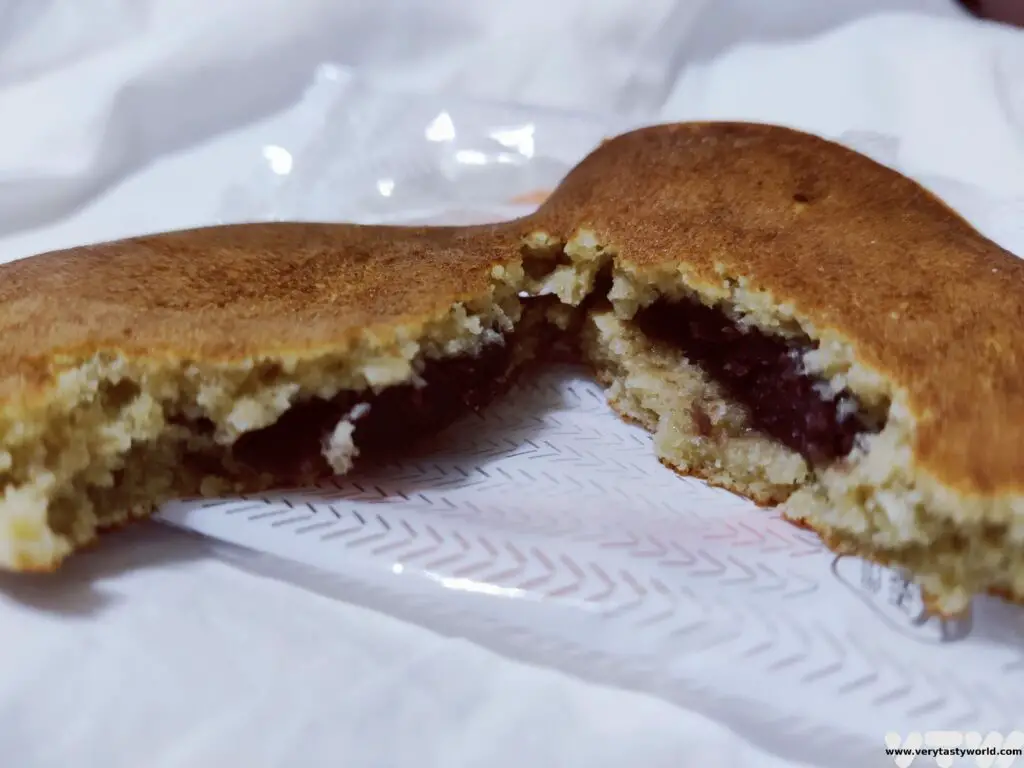
Gyeongju has its own special bread known as hwangnam-ppan. We found it quite difficult to buy in individual portions as it is usually beautifully packaged in presentation boxes. (We were backpacking and didn’t feel that if we were carrying a beautifully packaged presentation box it would survive the rest of the trip!) However, one bakery sold us two single packs. Hwangnam-ppan is a sweet bread, which tastes like a scotch pancake. It’s soft and spongy in texture. The filling is a smooth, sweet red bean paste.
So, how did we do with collecting those site stamps? This is what we covered in two days.
We can’t recommend Gyeongju highly enough. As you can see, our two day Gyeongju itinerary gave us a flavour of the highlights but there are many, many more places to see. We want to return and spend much more time exploring this remarkable region.
Related Posts You May Enjoy


- A One Day Hanoi Itinerary

- Mekong Meanderings
- A Chiang Rai Temple and A Country Retreat
- A Chiang Mai Tour in Northern Thailand

- Sunrise at Angkor Wat and Other Temples
- Mekong Delta River Cruise in Vietnam

Thanks so much for reading. We hope you enjoyed this article. If you’d like to keep up to date with new posts and recipes, please subscribe to our newsletter or follow us on social media – X, Facebook or Instagram. We always love hearing from you and would be delighted to read your thoughts about this article.

A Korean Table Setting – Eating Out in Korea
Korean cuisine is one of the finest in the world. It’s so good that UNESCO have acknowledged it. We have recently returned from a trip to this amazing country. We wanted to try as much local food as possible so ate at a variety of restaurants as well as spent time discovering the vibrant street food scene. Korean people are passionate about their cuisine. We also enjoyed learning about the importance of the Korean table setting. Here’s our guide to dining and etiquette in Korea.
Please note that this post contains affiliate links. If you click through and decide to make a purchase we will earn a small commission, at no extra cost to you, which will help towards the costs of running this site.
Our Korea trip took us to Seoul, Gyeongju, Busan, Daegu and back to Seoul, so we were able to taste dishes from all over the country. We found travelling through Korea to be very straightforward – the public transport system is excellent and very easy to use. You can buy a railcard which gives you access to the extensive rail network that will whiz you all over the country.
Dining was also easy in the main – many restaurants have multi-language menus or ordering systems. Everywhere we went, we discovered that the local people were delighted to help us learn about their delicious cuisine.
Dining Etiquette – The Korean Table Setting
The table setting is significant. Rice should be set to the left and soup to the right. (The other way round represents offerings to the dead.) The rough rule is that cold and/or dry foods are set to the left, and hot and/or wet foods to the right.
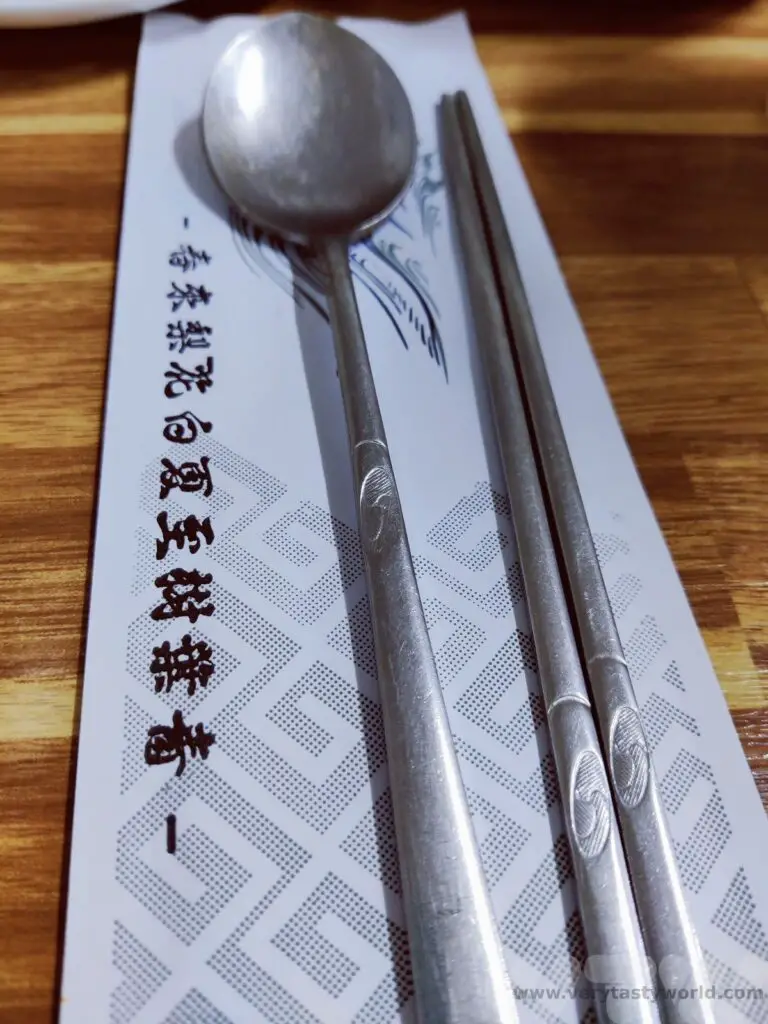
Koreans use chopsticks and a spoon to eat their food. Chopsticks are used to pick up specific items and the spoons used to scoop rice or eat soup.
Chopsticks in other Asian countries are usually made from wood but in Korea chopsticks are metal.
It is polite to use a spoon to drink soup – in fact, unlike many countries in Asia where it is okay to bring the rice or soup bowl to your lips, it is best to keep all bowls on the table. Use the spoon to bring rice or soup to your mouth.
There’s no formal way to eat rice. If served a stew with rice how you eat it depends on personal preference. Some people tip the rice directly into the stew, others scoop a spoonful of rice at a time and dunk it into the stew to pick up some of the flavour. And yet others never mix their rice with sauce and eat it plain.
Using a spoon and chopsticks is an efficient way to eat. In fact, over the course of our trip, we learned to use the spoon with our left hand and hold the chopsticks with our right – maximising eating potential! It’s absolutely fine to swap hands, put down the chopsticks down on the chopstick rest or on top of the bowl and pick up the spoon with the same hand. It’s considered that, as most people are right handed, another reason the soup is set to the right is so that it’s easier to use your right hand with the spoon to avoid spillage.
Don’t stick your chopsticks vertically into your food as that is the way that offerings are made to the deceased at funerals.
If you are eating with a group, the eldest members of the party will eat first.
When it comes to drinks it’s polite to order just a suitable number of bottles of beer, soju (a clear distilled spirit which normally has the strength of fortified wine) or makgeolli (a cloudy rice wine which has a similar ABV to beer) and share rather than order one for each person. You can always order another. You shouldn’t pour your own drink but pour for others using both hands. The recipient should hold the cup or bowl with both hands to receive.
Before starting to eat, say, ‘jalmeokgesseumnida’ which means ‘eat well’. If you get it wrong you won’t be ostracised but the correct etiquette will be appreciated.
One of the most delightful things we found about dining in restaurants was how keen the local people were to show us how to eat the food. For example, if you order bibimbap – mixed delicious things served over rice – you receive a bowl of beauty then dig in with the spoon and mix it all together before scoffing. Even if we couldn’t speak much Korean, the restaurant staff would demonstrate what we should do with each dish. It was very helpful.
Restaurant Dining
Many restaurants offer a self-ordering process where you walk up to a machine and place the order. Pretty much every restaurant we visited that had self-ordering had an English language option, as well as Japanese and Chinese. We found that most restaurants had an English menu which was sometimes quite basic but absolutely fine. Where restaurants didn’t have an English menu, we either guessed (we had learned to read Hangul before travelling so could tell what we were probably eating but didn’t know how it was cooked, but that’s okay as we eat pretty much anything) or we pointed to pictures of the food.
If you have ordered using a machine, order the food and either wait for it to arrive or for the number on your ticket to be called out. Keep an eye out at the serving hatch if you don’t know your number – the staff will most likely know that the food is for you and will beckon you over.
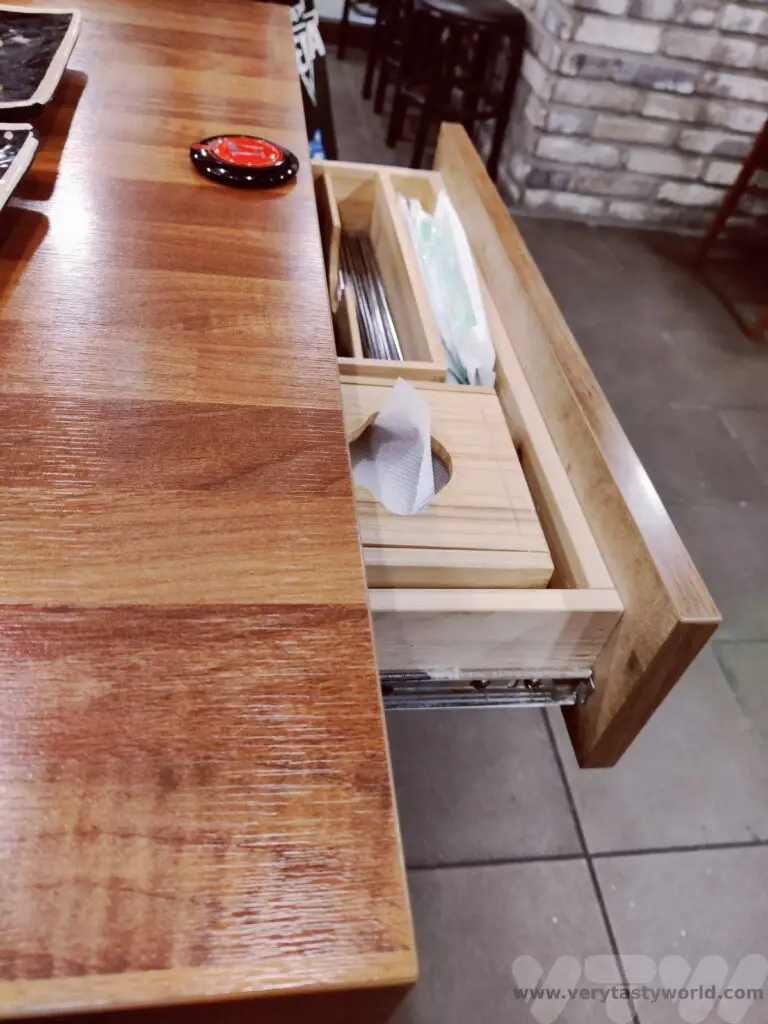
If you can’t find chopsticks and spoons on the table, they will almost certainly be available – either in a box or, rather cleverly, in a drawer under the table. The Golden Rule for a Korean restaurant: always look under the table.
Also, if you want to call over the waiting staff, there is often a button on the table which you can press.
Water is always provided and it’s free of charge. Many restaurants will bring you a bottle or jug of water and some cups but you may have to help yourself. If this is the case there will be a water dispenser and cups available somewhere in the restaurant.
Korean meals always come with banchan – side dishes. Sometimes these will be brought to the table and other times there will be a self-service bar where you can pick up a dish and fill it yourself. Look out for broths as well – there is often soup or broth in a large vat somewhere in the restaurant. It will be a rare meal when you aren’t supplied with kimchi, the ubiquitous and delicious spicy fermented cabbage, which is Korea’s national dish.
At some restaurants the bill was placed on our table when the food was delivered, at others we paid in advance using the machine and yet others the bill was calculated afterwards. You don’t request the bill – just saunter up to the payment area and pay. Cash is fine, cards were accepted in most places. Tipping is not expected nor required. Indeed, like Japan, tipping can sometimes be considered rude.
The Joy of Banchan
One of the most amazing things about Korean dining is banchan – the side dishes. The variety of banchan is quite remarkable. And they aren’t just thrown together. As much care is taken in preparing the banchan as the main dish.
And the very best thing about banchan is that you can order more for free! (It would be a bit rude to ask for more of the dish you have ordered or extra rice, unless you are happy to pay more.)
Of all the banchan, kimchi is the most famous. This crunchy, spicy fermented cabbage dish will be eaten with almost every meal. Even our airline meal to Korea included a packet of kimchi.
It is such a fundamental part of society that it has its own day – 22nd November – and families get together every year to make kimchi. Kimjang: Making and Sharing Kimchi was inscribed on the UNESCO Representative List of the Intangible Cultural Heritage of Humanity.
Korean households usually have two refrigerators – one for normal food and the other, which is set at a specific temperature, for a year’s worth of kimchi! We have been making kimchi for years and have an easy kimchi recipe.
Quintessential Korean Dishes to Try
Bibimbap
This is one of the most well-known of Korean dishes. It is a rice bowl topped with all sorts of delicious ingredients – from vegetables to marinated meat – sometimes garnished with a fried egg. Gochujang, the spicy (not overly spicy) chilli sauce forms the basis for the flavour. Sometimes the bibimbap is presented with the toppings on the rice but in ‘fast food’ bibimbap restaurants the toppings will be placed in the bowl and you will be served the rice separately, to put on top yourself.
The best way to eat bibimbap is to admire it first then get your spoon in and mix it all together, add some sauce, mix some more and then scoff.
Sharp-eyed readers will notice that in the picture above the rice is served to the right. This is because we were given a tea pot and , after transferring the rice into the bowl of goodies, we then added hot stock to the rice crust inside the bowl to make a lovely soup.
Gimbap
They may look like Japanese sushi maki (sushi rolls) but gimbap (gim = seaweed, bap = rice) are very different. They are not seasoned with vinegar but sesame and they are sauced internally. Whereas maki often largely comprise raw fish, gimbap includes a vast array of ingredients – there is much more filling than rice. You can expect pickles, fresh vegetable, meats/fish or omelette all lovingly wrapped in a seaweed casing. You don’t dip them in soy sauce or wasabi. Many gimbap outlets in the cities are open 24 hours so this makes a great breakfast option.

BBQ
Another essential meal to enjoy while visiting Korea is BBQ – luscious cuts of meat, sizzling on a hot plate, cooking over fire (sometimes butane but charcoal is traditional which adds a delightful smoky element).
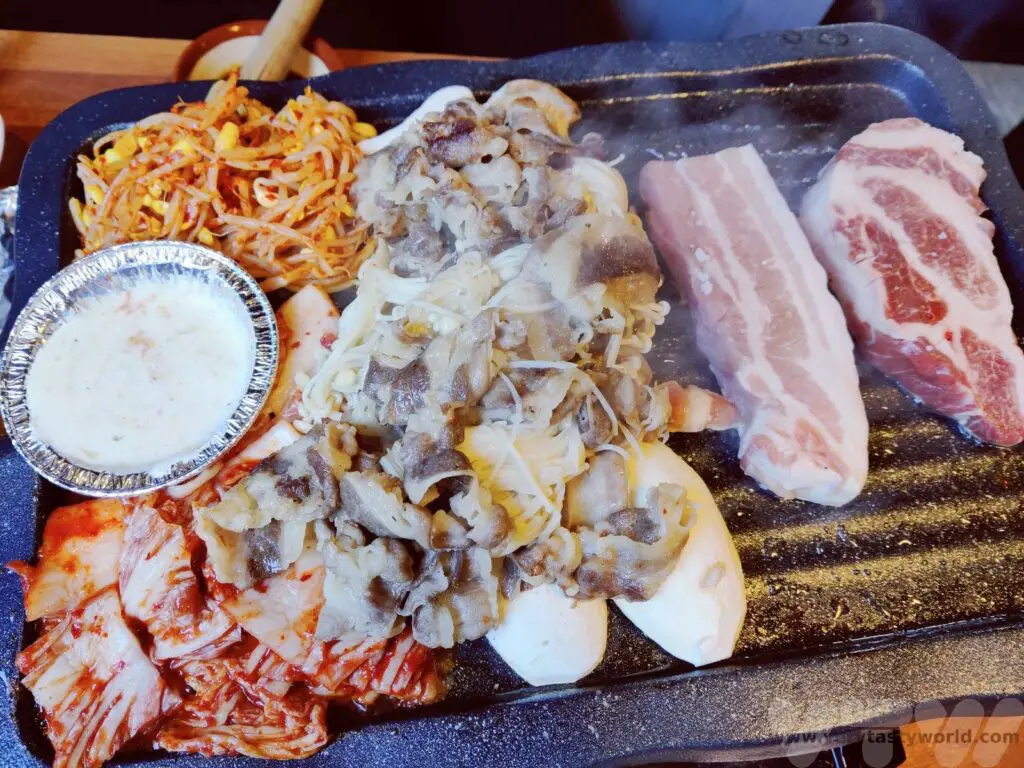
And BBQ is where another brilliant Korean table setting element comes into its own: the scissors! Korean kitchen scissors are the absolute best, they have thicker blades than ordinary scissors and cut food quickly and efficiently.
The meat is initially seared and cooked as a full joint. Then, as it cooks, tongs and scissors are used to cut the meat into bite-sized strips.
If you aren’t confident doing the cooking, the staff are absolute experts and will know exactly what to cook and in what order, so you can sit back, sip a soju and enjoy the show. But if you fancy having a go it’s fine to go for a DIY approach.
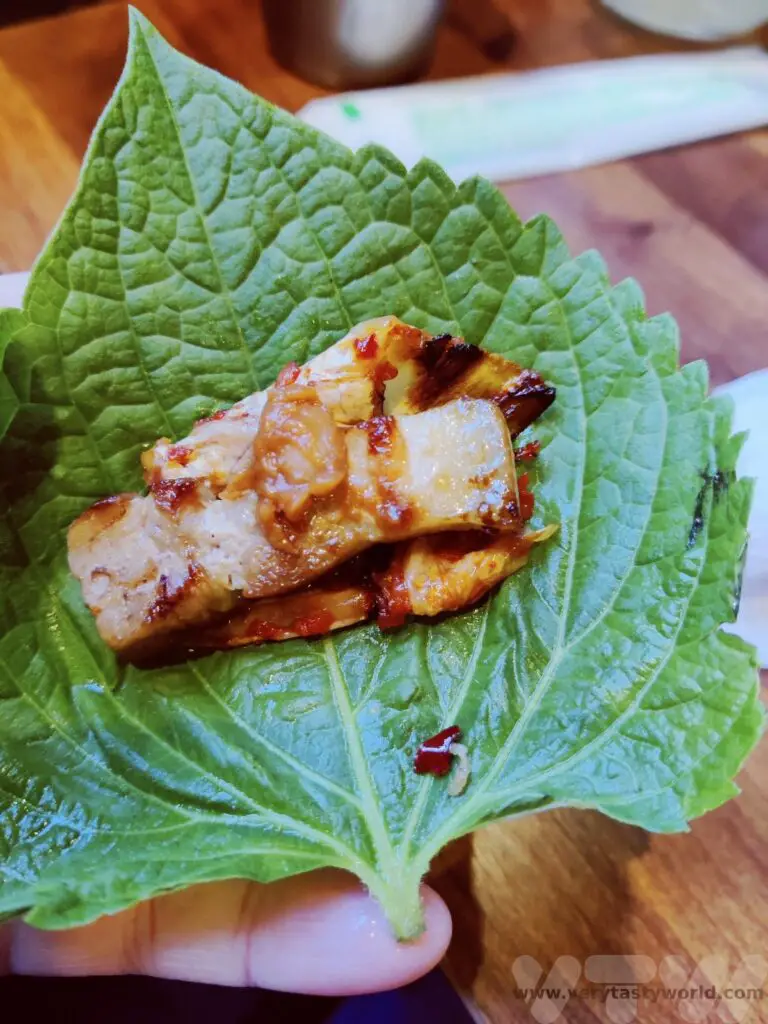
Ssam, which means ‘wrapped’, is a great way of enjoying BBQ. As well as banchan, a number of different leafy vegetables will be supplied – lettuce leaves or herbs such as perilla (below). You pick up a juicy piece of bbq meat with your chopsticks, place it on the leaf, add some kimchi and a dab of sauce, then wrap it up and pop it into your mouth – delish! If you run out of leaves, you can always ask for more.
Chimaek (Chicken and Beer)
KFC is an essential item to try when visiting Korea. Not that KFC, of course, but Korean fried chicken. Chimaek 치맥 derives from chikin = fried chicken (unsurprisingly) and maekju = beer.
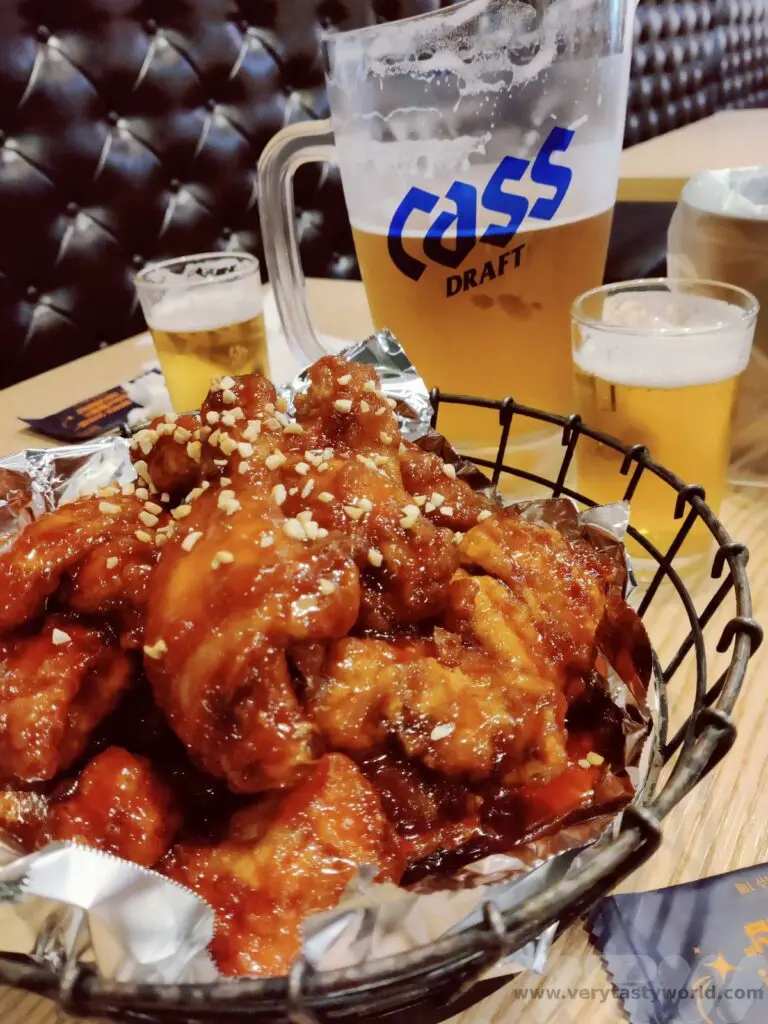
A very sociable way to enjoy fried chicken is to scoff it with beer and enjoy it with friends. When we visited a chicken and beer restaurant in Busan a single order provided a whole chicken’s worth of deep-fried joy, in a spicy sauce. Local beers are much cheaper than imported.
Bulgolgi
Bulgolgi is very popular dish comprised of marinated thinly slices of meat, usually beef, cooked on a griddle. The name translates as fire meat (bul = fire, golgi = meat). Some restaurants will offer a set menu where bulgolgi forms the centrepiece of the dish and you have multiple banchan to accompany, other restaurants let you cook the meat at the table. Just use your chopsticks to pick heavily flavoured, succulent pieces of meat.
Jjigae (Korean stew)
We visited in November and temperatures were dropping fast as winter approached. Jjigae is comfort food – warming and delicious. There are many varieties available – meat, tofu and vegetables – seasoned with a variety of sauces. Gochujang (chilli paste) and doenjang (soy bean paste, a bit like miso) are popular options. Stews will always be accompanied by rice and banchan. It makes for a feast.
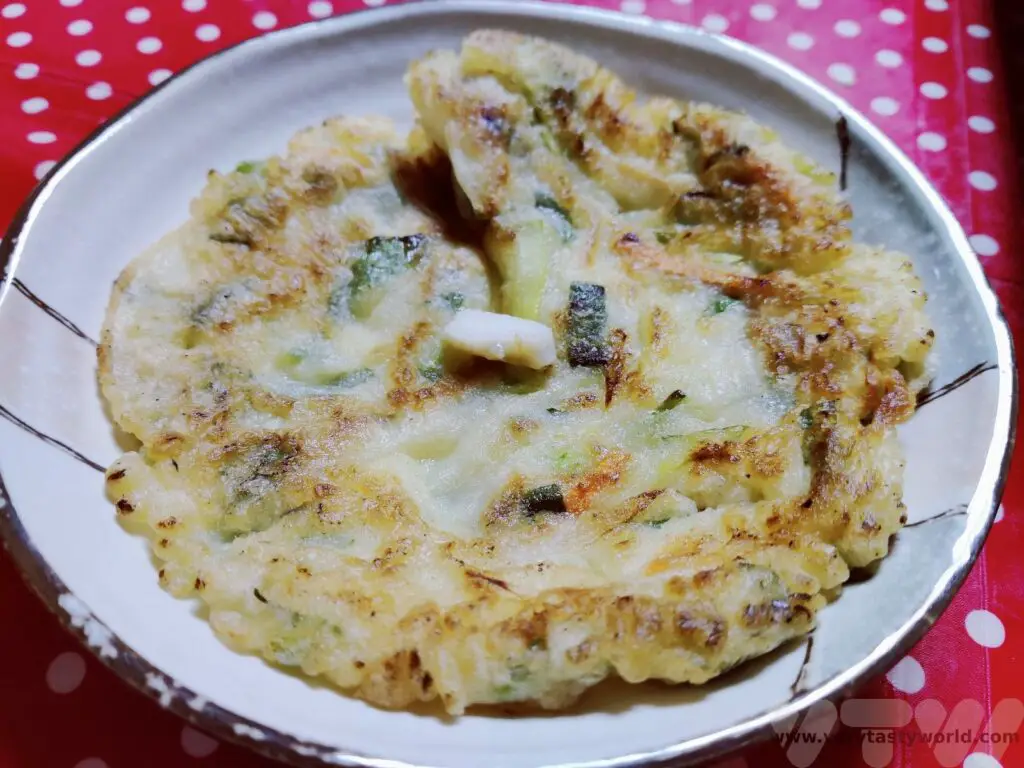
Pajeon (Korean pancakes)
Pajeon is a celebratory food. These are pancakes that incorporate vegetables (largely spring or green onions) and other delectable fillings such as seafood.
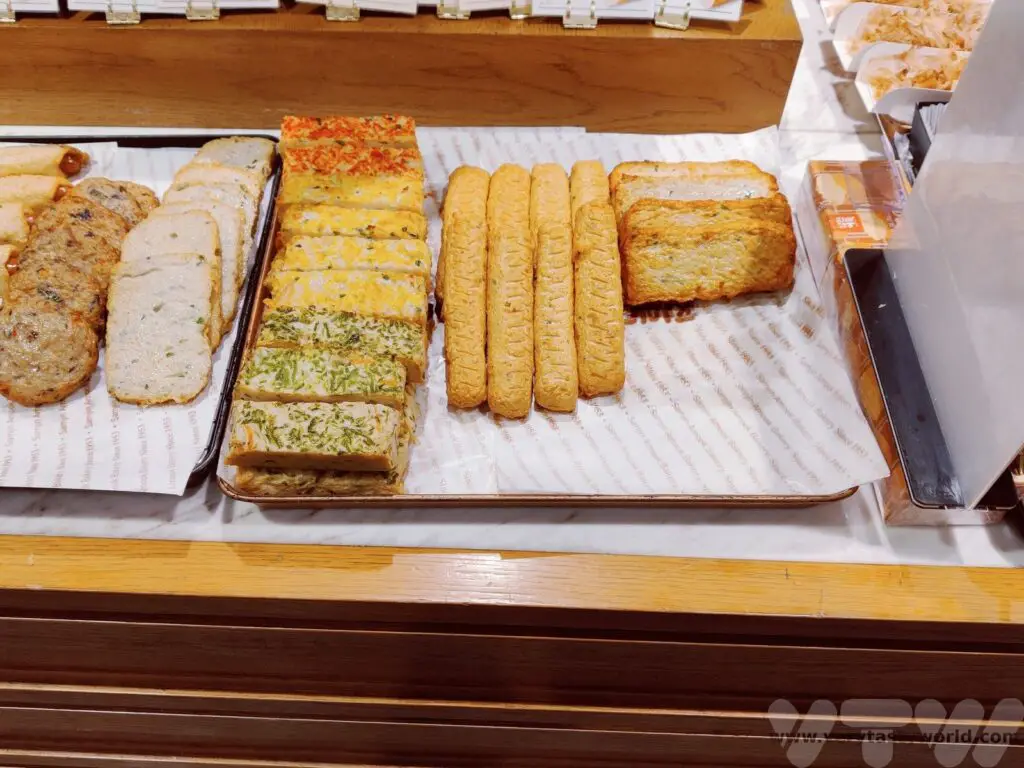
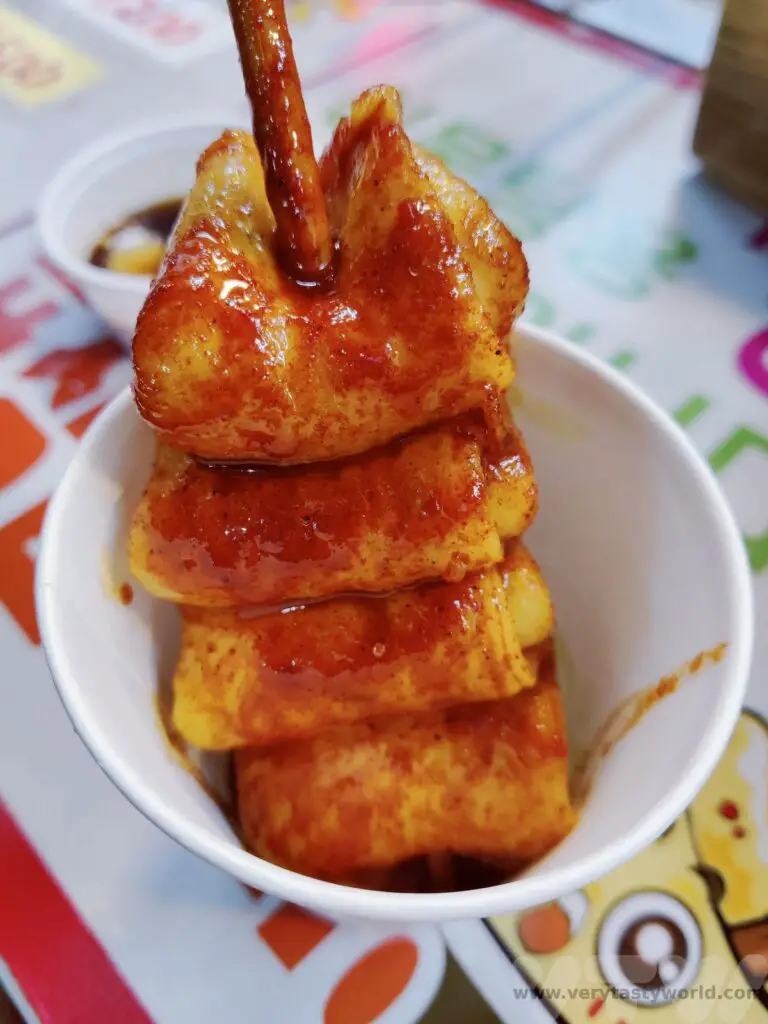
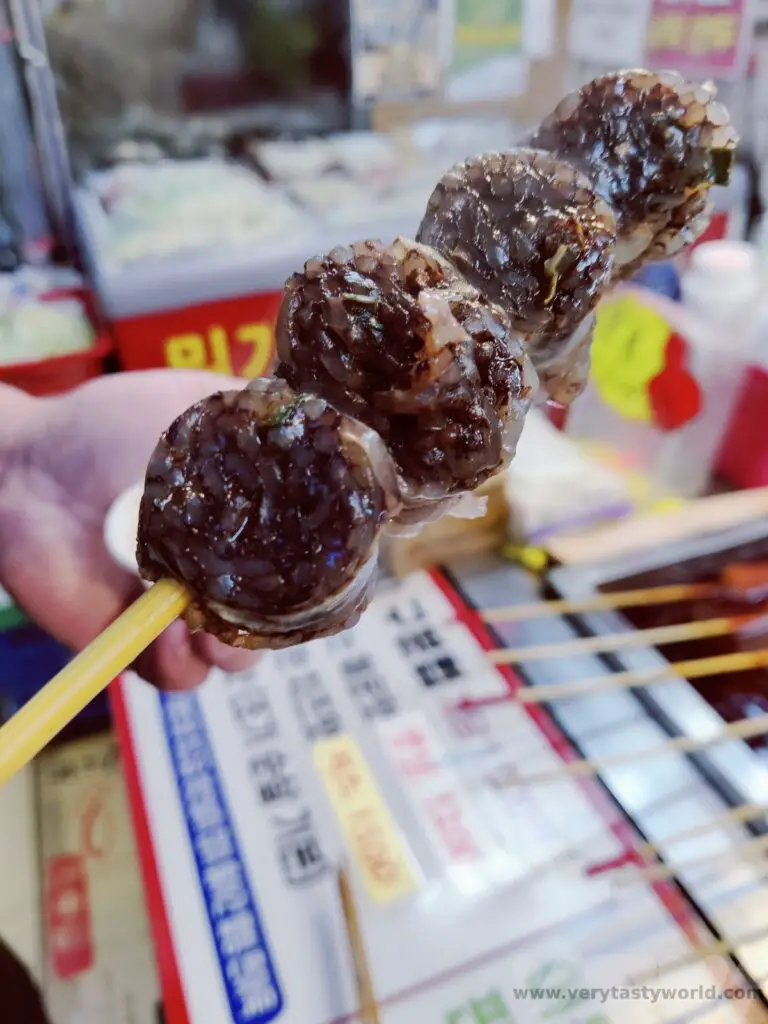
Eomuk – Fishcakes
Minced fish with vegetables and seasonings is another popular dish. These are available in shops/restaurants but are also widely available as street food.
Dining At The Market
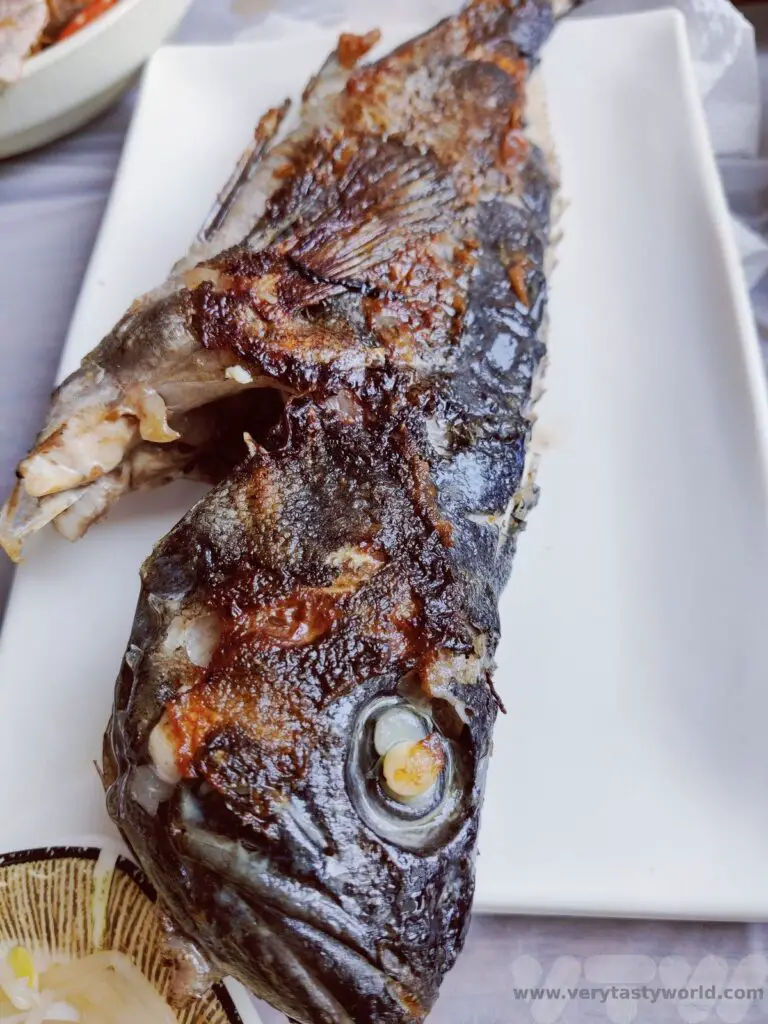
Both Seoul and Busan have large and extensive fish markets and it is possible not only to visit them but you can also eat incredibly fresh fish in the restaurants on the upper floors.
If you want, you can buy the fish in the market and then take it upstairs to be cooked to your liking. There will be a table charge (which may be reduced if you decide to order the restaurant’s fish stew) and a cooking charge.
In Busan, the Jalgachi market is the largest in South Korea and has multiple restaurants on the first floor, which all have the same menu. In Seoul some of the restaurants in the Noryangjin fish markets will help you – either by explaining the process, or by offering a picture menu where you can choose your fish/shellfish (they will give the market price) and they will go downstairs to buy the fish for you.
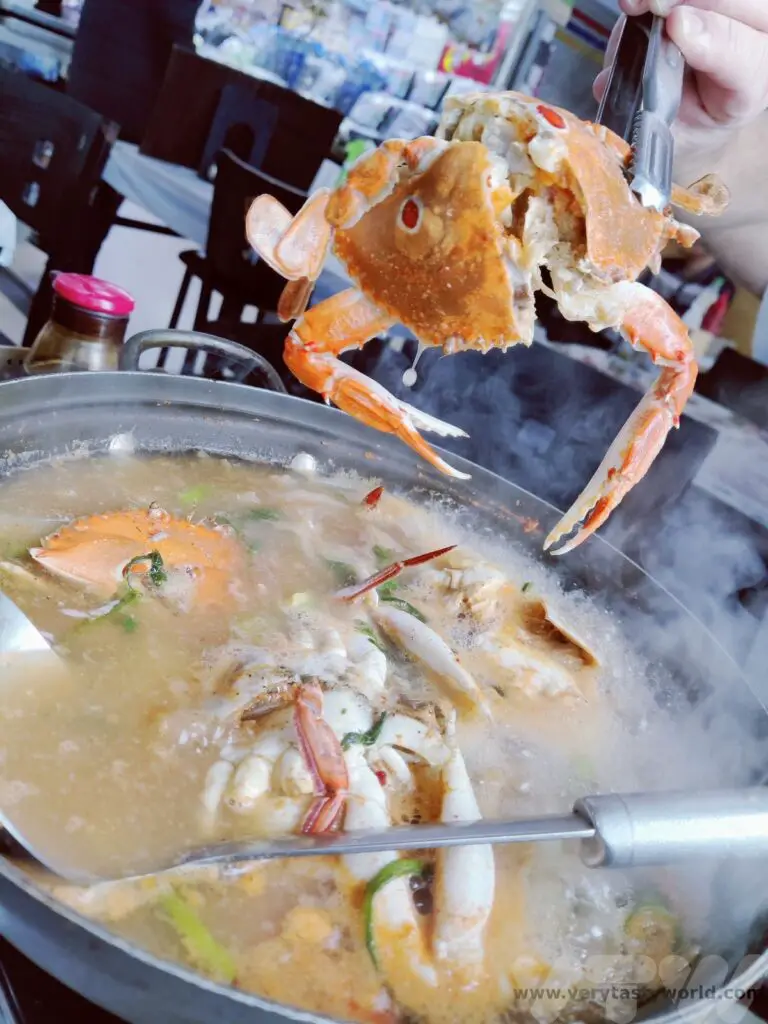
We enjoyed a plate of raw wild fish, sashimi style with eye-wateringly fiery wasabi. It was very different to the Japanese sashimi we have eaten in the past. It didn’t melt in the mouth but had a much firmer texture. The sashimi was accompanied by wonderfully sweet pan-fried rockfish, fresh crab and deliciously umami fish stews.
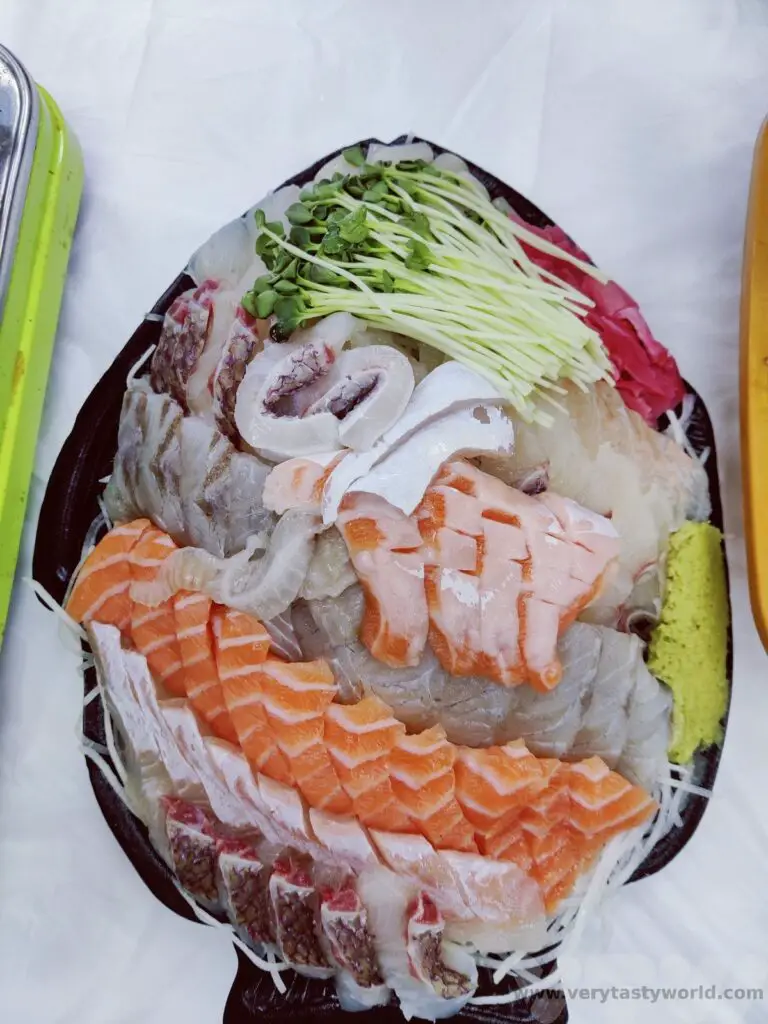
If you’re eating crab those amazing Korean scissors come into play – they will easily cut through the hard shell then you can use a chopstick to pick out the sweet and succulent crabmeat.
Street Food
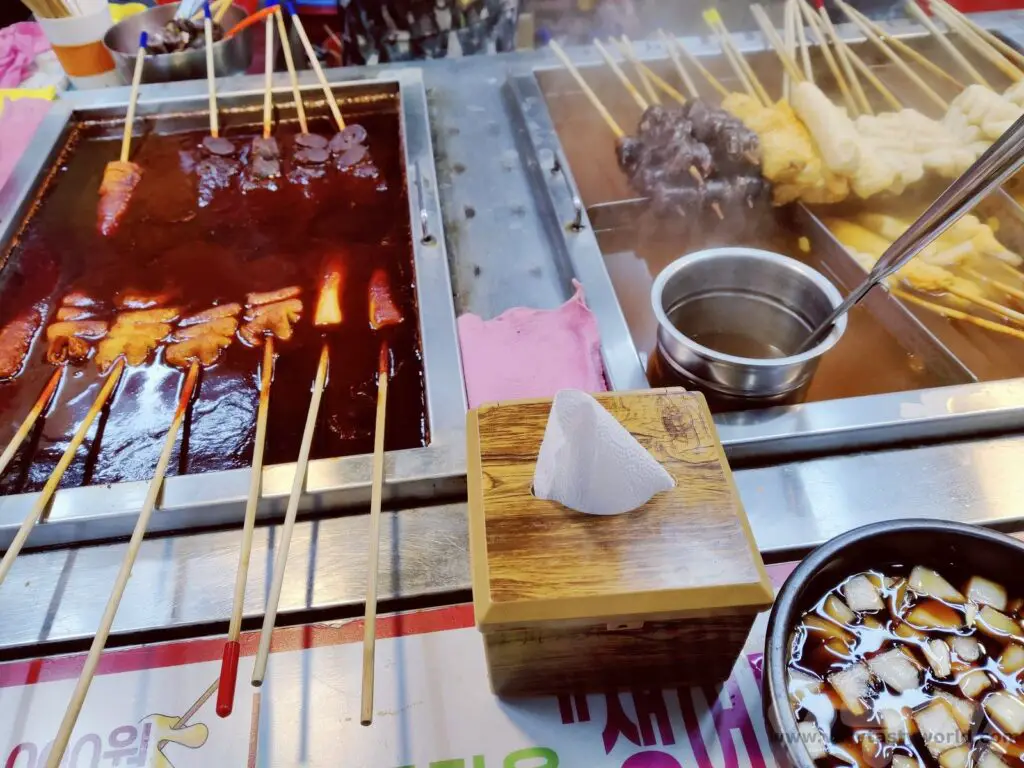
The very first Korean food we tried was at a local market which we had decided to explore just as we had arrived in the afternoon in Seoul. Feeling tired and slightly woozy after a 16 hour journey, we sauntered up to a market stall and bought a fishcake for a mere 1000 won (less than $1). This undulating slice of fishy goodness woven along a wooden stick and served in a cup with a generous splash of stock was sublime – warming and packed with umami. We were instantly sold on street food.
We decided to have breakfast at Seomun market in Daegu one day. There was a wide variety of food on offer. Some of the fishcakes keep warm in a broth – watch out for the red-tipped sticks as those will be the spicy ones!
Hotteok (sounds a bit like hot-dog) is a fluffy fried doughnut filled with seeds and nuts.

Many market stalls make pancakes fresh to order.
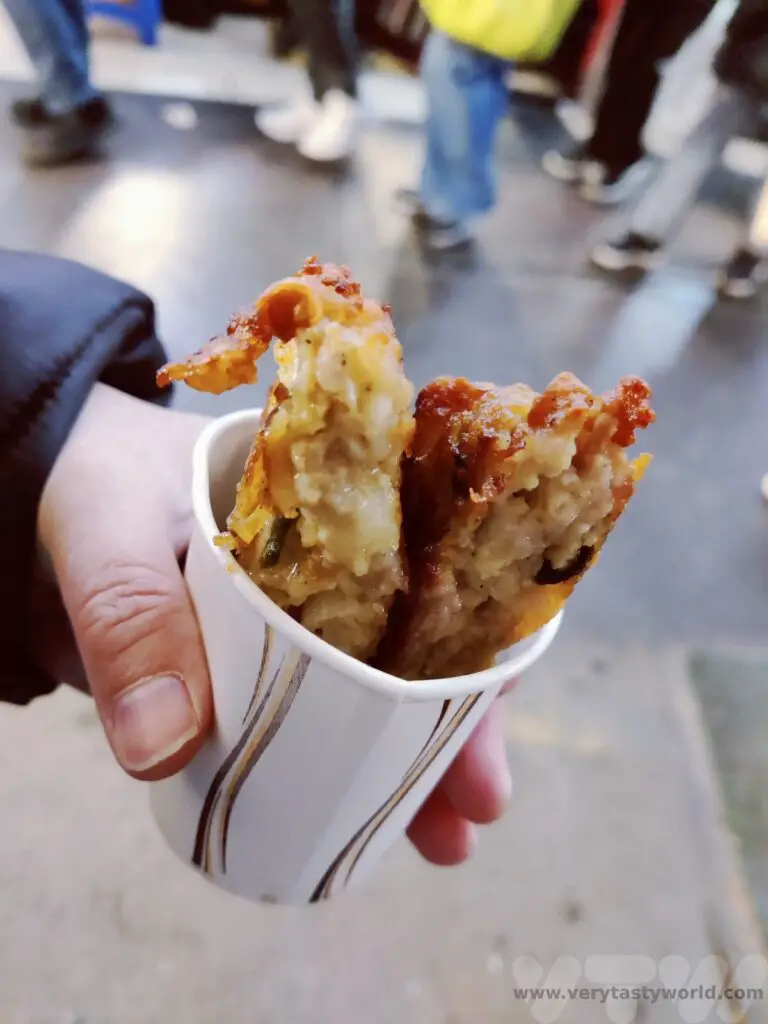
Most street food is served in paper cups.
Vegetarians/Vegans
It is not impossible to dine well if you are vegetarian or vegan. We did spot some vegan restaurants in many of the cities we visited. Veggie options will be available – e.g. tofu stews – but you might have to be careful that the base stock is vegetable based as some of these may use fish.
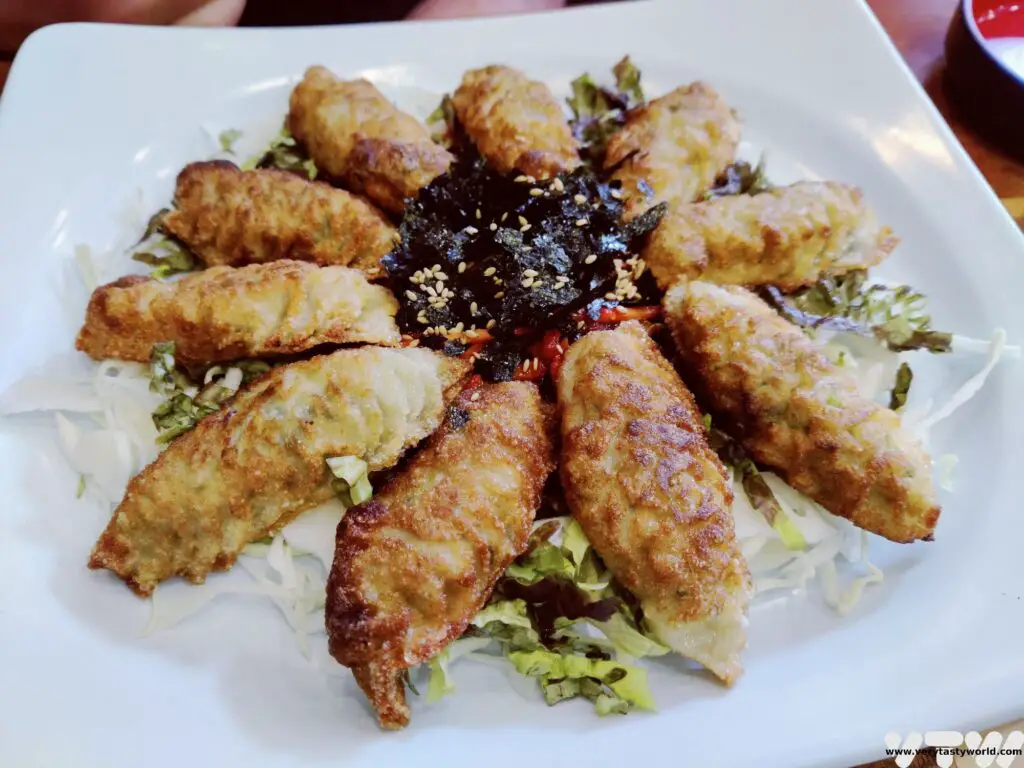
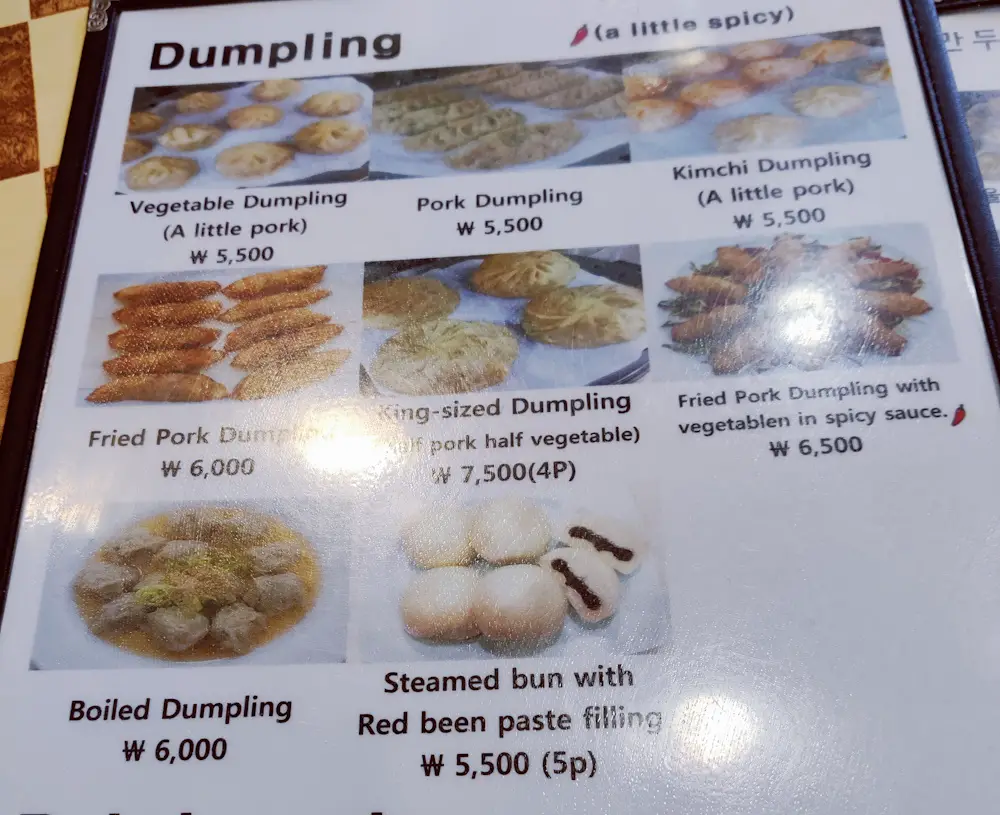
A menu that did make us laugh a little was a dumpling restaurant in Gyeongju. The proprietor was absolutely delightful and made awesome dumplings, plump and filling, in a variety of styles. But the menu was admirably honest about the fact that there was pork in all the savoury dumplings. Which is actually reassuring.
Some Useful Phrases
| Please give me | 주세요 | joo-say-yo | Say at the end of the sentence after the thing you want. e.g. banchan joo-say-yo |
| Excuse me YOU – over here | – 저기요 | juh-gee-oh | To get attention |
| People | 세명 | doo myung | 2 people. If you want a table for 2, it’s fine to just indicate with your fingers |
| Bottle | 맥주 여섯 병 | maek-ju doo byung | maek-ju (beer) doo byung (2 bottles) |
| 1 more bottle of soju please | 소주 두병 더 주세요 | so-ju hana-byung duh joo-say-yo | |
| More | 더 | Duh | |
| Please give me more kimchi | 김치 더 주세요 | kimchi duh joo-say-yo | |
| This please (pointing) | 이거 주세요 | Ee-guh joo-say-yo | |
| Delicious | 맛있어요 | mah-shis-say-yo | Saying this was guaranteed to raise a smile at the end of our meals! |
| NUMBER | KOREAN | Korean pronunciation |
| One | 하나 | hana |
| Two | 둘 | dool |
| Three | 셋 | sayt |
| Four | 더섯 | nayt |
| Five | 더섯 | duh-suht |
| Six | 여섯 | yuh-suht |
| Seven | 일곱 | ill-gope |
| Eight | 여덜 | yuh-duhl |
| Nine | 아홉 | ah-hope |
| Ten | 열 | yuhl |
| Eleven | 열하나 | yuhl-hana |
A Cookery Class
A fun way to spend an afternoon in Seoul or Busan is to join a cookery class. With a small group of fellow travellers these classes usually involve a visit to a local market to learn about the amazing produce on sale – from the familiar to some enticingly unusual foods.
Then you’ll go on to visit your host’s home to cook several delicious dishes. We made pajeon – and had great fun flipping the pancakes. Bibimbap and dakgalgi (a spicy chicken dish) were also on the menu.
Related Posts You May Enjoy

Thanks so much for reading. We hope you enjoyed this article. If you’d like to keep up to date with new posts and recipes, please subscribe to our newsletter or follow us on social media – X, Facebook or Instagram. We always love hearing from you and would be delighted to read your thoughts about this article.
A 2 Week Patagonia Itinerary
Patagonia is a dream destination for many people and we had longed to visit this stark, beautiful and remote region for several years. The prospect of travelling to the far southern reaches of the American continent and exploring its wild and beautiful landscapes, gorgeous glaciers and, of course, meeting penguins was irresistible. But unless you live in South America, it is a very long journey to reach Patagonia. And when you get there, distances are long. But it is possible to see many amazing sights within a fortnight. Here is our 2 week Patagonia itinerary.

Patagonia 2 Week Itinerary
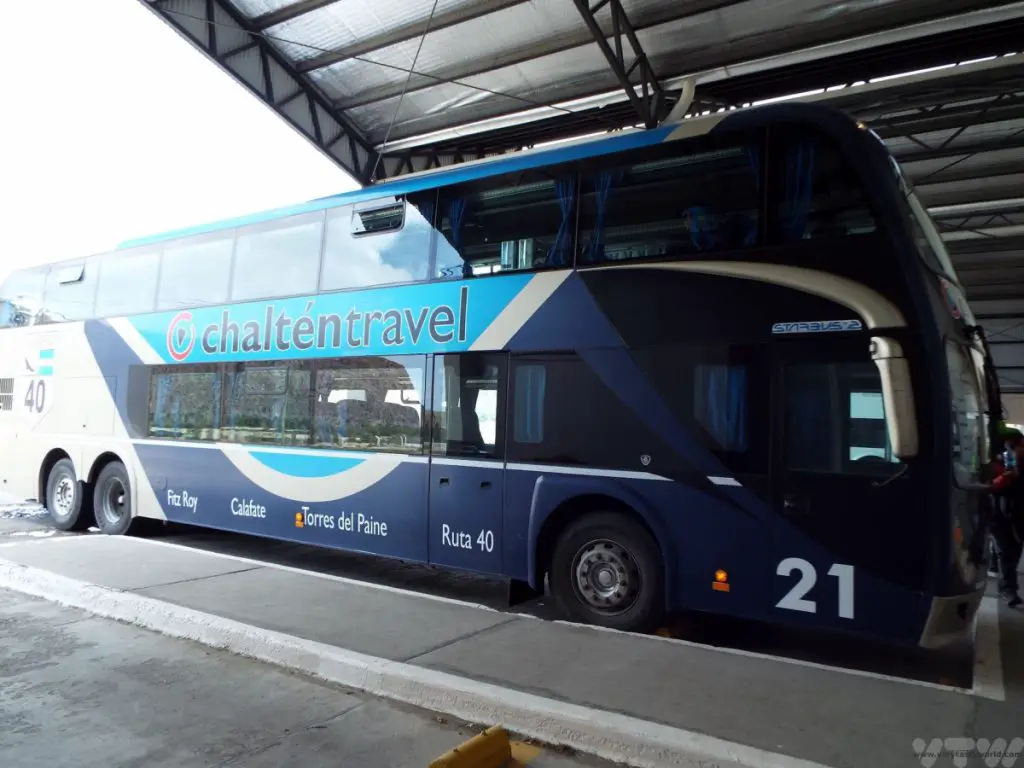
This Patagonia itinerary is quite full on. It starts in Santiago, Chile and finishes in Buenos Aires, Argentina as those are the best cities to connect with most international flights. There is a lot of travelling and we mainly travelled on buses. They are reasonably cheap and pretty comfortable. It’s a very relaxing way to travel and a great way of seeing the countryside. And, needless to say, the scenery was spectacular all the way.
Please note that this post contains affiliate links. If you click through and decide to make a purchase we will earn a small commission, at no extra cost to you, which will help towards the costs of running this site.
Day 1 Fly to Santiago
Day 2 Santiago
Spend a day exploring Santiago. We don’t recommend flying directly to Patagonia immediately after your international flight, just in case there are any delays.
There are lots of options for things to do in Chile’s capital city. It is lovely to wander through and the metro system cheap and reliable. You can buy a BIP card and share it between your travelling companions. Our hotel kindly lent us a card and we were able to charge it with exactly the right amount of money for the journeys we wanted to take. We just asked the nice lady at the metro ticket office, told her the routes we wanted to take and she charged up the card accordingly.
Set in a valley amidst the towering Andes Santiago is undulating and features a number of hills popping up from the urban sprawl, many of which have become parks. San Christobal park is the largest green space in the city. You can ride the teleferico or funicular and there are plenty of attractions including a zoo, a number of gardens, swimming pools and playgrounds.
The city centre offers some interesting museums, including the national museum, which has some interesting historic objects including a large number of indigenous artefacts. The Museum das Bellas Artes is a grand building with interesting art exhibitions.
Foodie Recommendation: Make sure to visit the Mercado Central de Santiago – it’s the fish market which also has a number of restaurants. Avoid the big, flashy and expensive affair in the middle, there are loads of much smaller restaurants around the perimeter which offer great seafood at reasonable prices, although you may have to avoid the enthusiastic but not overly pushy touts.

A slightly unusual option for Santiago is taking a day trip to wine country. Just a couple of hours’ drive from the bustling city is the Maipo Valley, where a lot of Chile’s splendid wine is produced. You can tour some of the wineries in the region and enjoy a tasting. Chile’s climate is suited to growing vines and the wines it produces are exceptional quality.
(NB – we didn’t do all these activities on the day before our Patagonia journey, we had visited Santiago on a previous trip. These are just some of the options for spending time in the city before travelling south.)
Day 3 Fly to Punta Arenas
Back to the airport for the five-hour flight to Punta Arenas. If the weather is clear you will see fantastic views of the Andes and will also fly over Chile’s ‘lake district’. Punta Arenas itself is around half an hour away from the airport and there are plenty of options for the 30-40 minute ride into town, including taxis and shared shuttle buses.
Located on the Strait of Magellan Punta Arenas has some interesting museums including Museo Naval y Marítimo, a maritime museum, Museo Regional de Magallanes, a grand mansion.
There are a number of monuments in the city, including Monumento A Tripulantes Galeta Ancud which commemorates the Strait of Magellan becoming part of Chile on 21st September 1843.
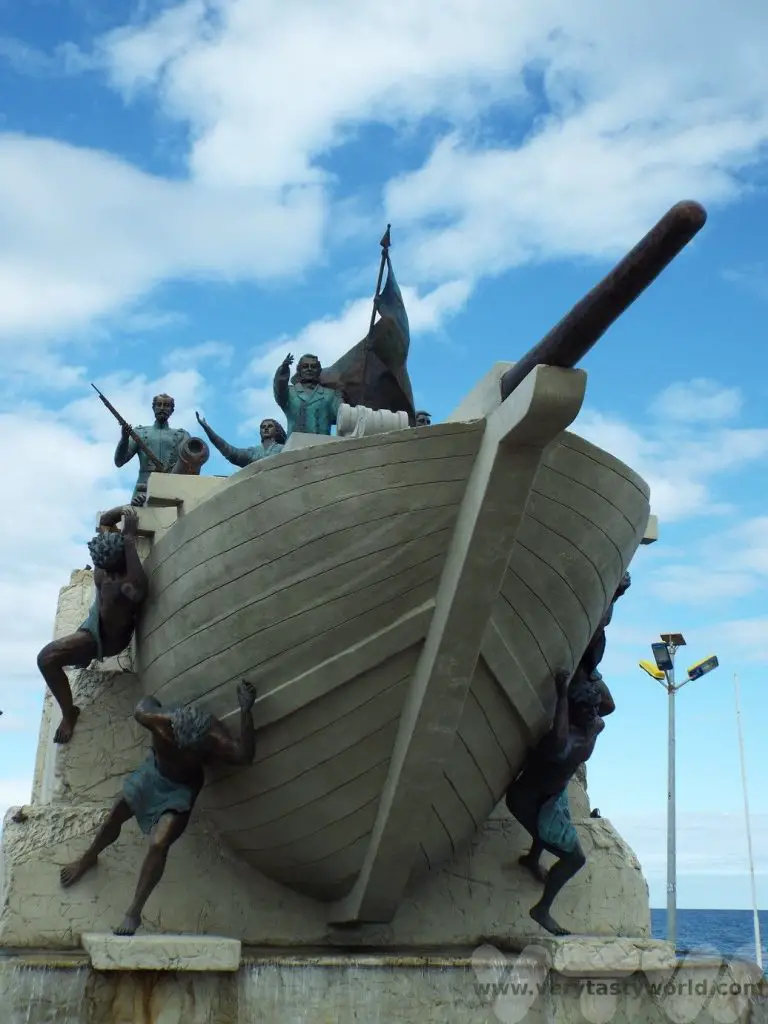
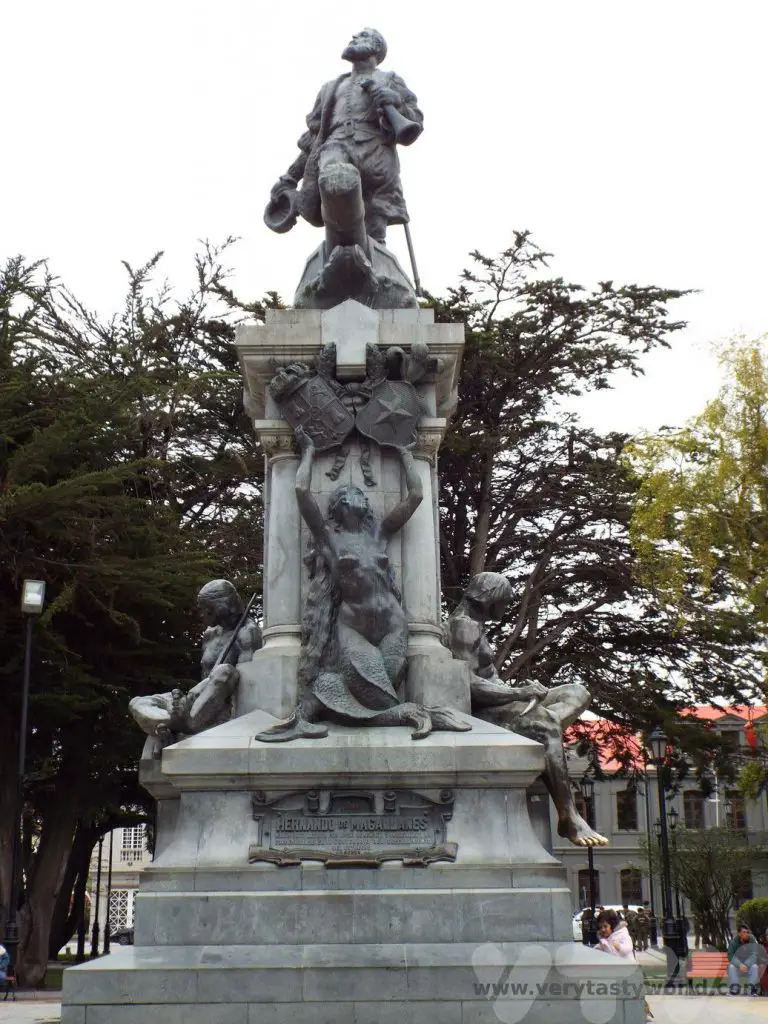
And a monument to famous Portuguese explorer, Ferdinand Magellan.
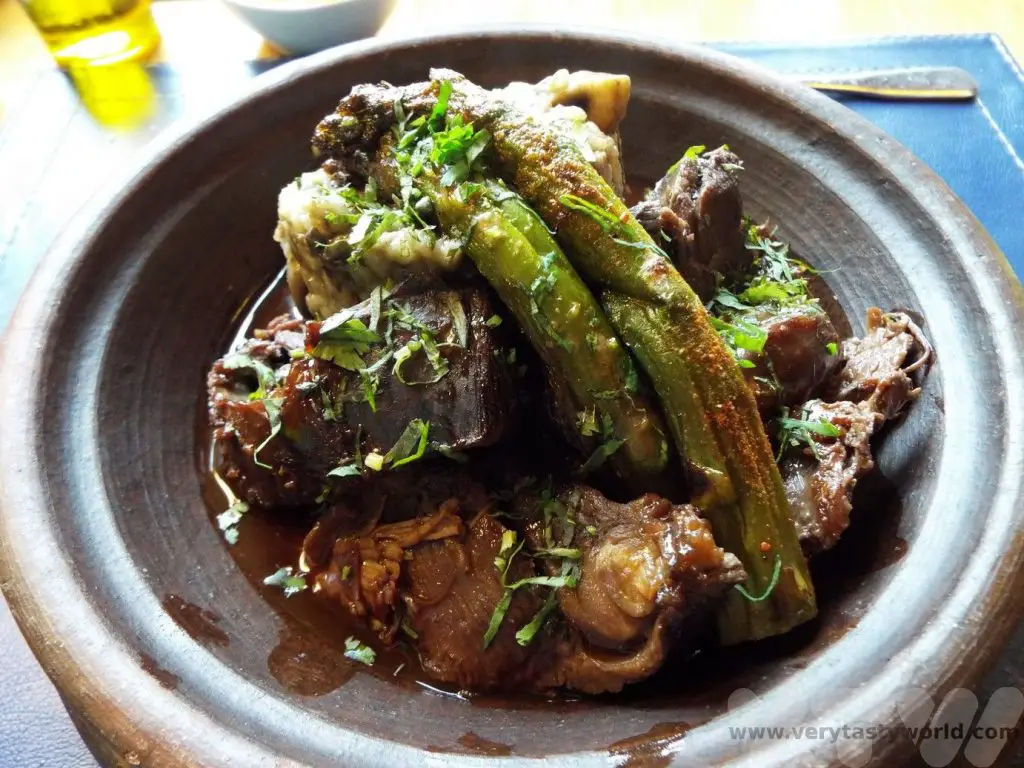
Foodie Recommendation: La Marmita, on Pl Francisco Sampaio 678, is an excellent restaurant to try local food. Guacano carpaccio, hare stew and Patagonia lamb were amongst the dishes we tried.

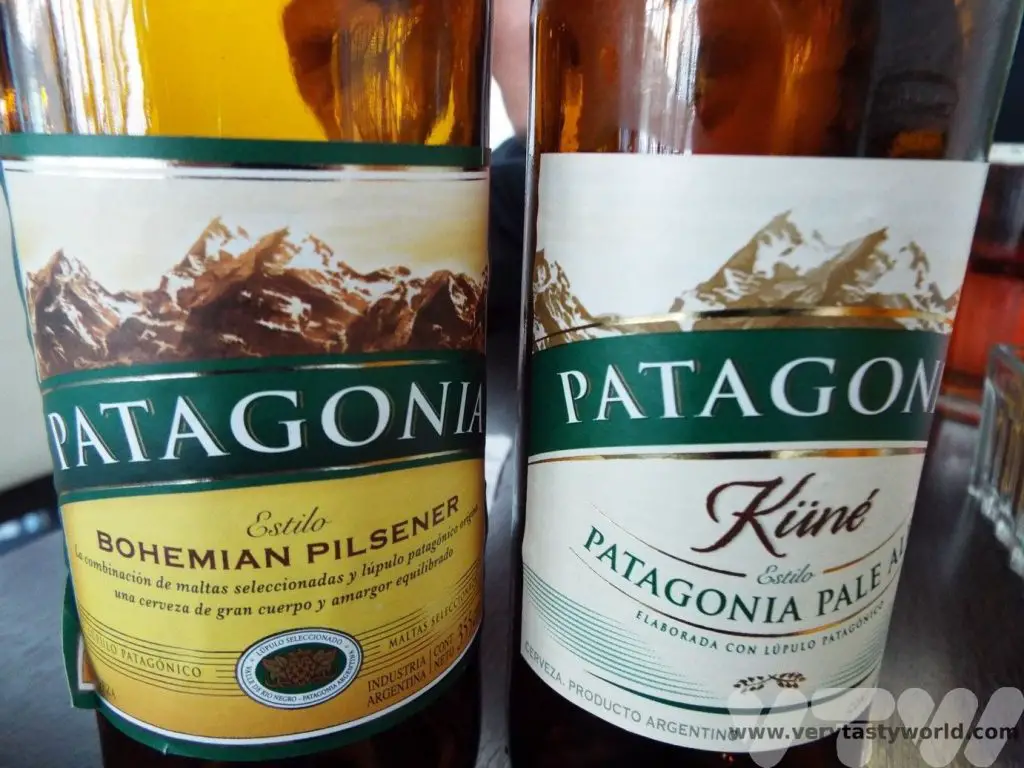
It’s more expensive than some of the other options but prices were reasonable, especially for the quality of the food. It’s popular so worth booking a table if you are likely to be eating in the evening. Don’t forget to try the local craft beer – there are a lot of varieties available and they are rather good.
Day 4 Penguin Excursion to Magdelena Island
You can’t come to Patagonia and not see penguins! One of the most popular things to do in the area is to take an excursion to Magdelena Island to see the Magellanic penguins. There are lots of tour operators who can arrange the excursion – many will offer a hotel pickup.
The trip involves a short drive to the coast where you will pick up a boat that will take you to Magdelena Island, which is located in the Strait of Magellan around 35km from the mainland.
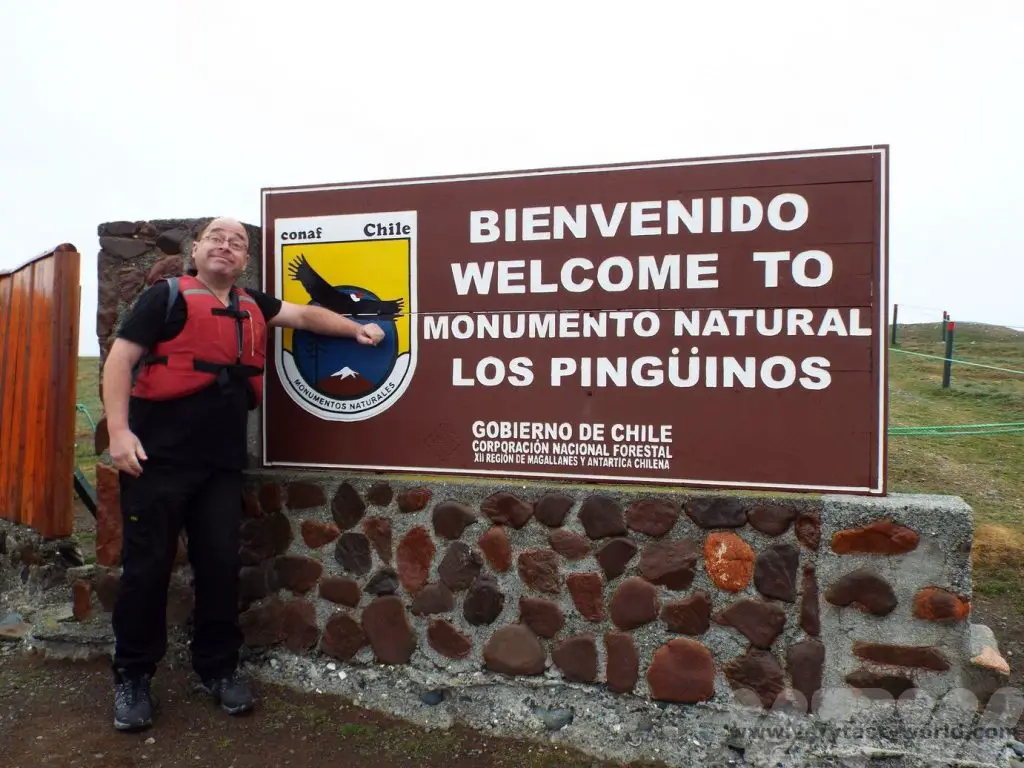
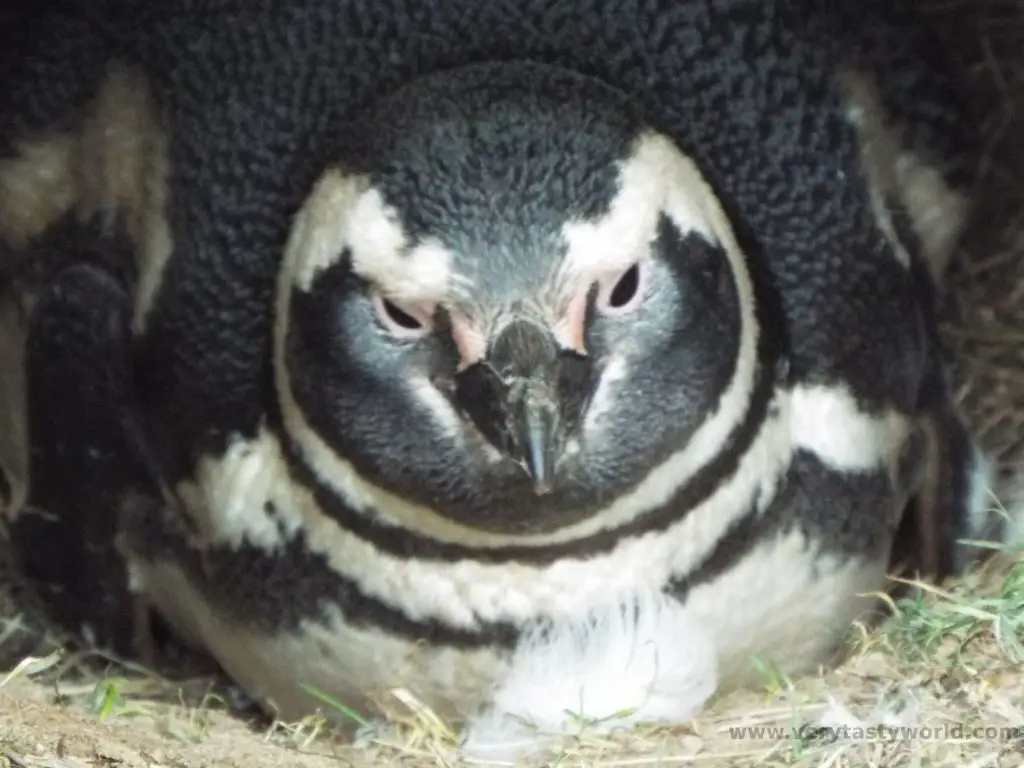
The island is inhabited by over 100,000 Magellanic penguins and a just few rangers, so you have an excellent chance of encountering them. In fact, you may well be able to get very close. You are asked not to approach or touch the penguins but they may well waddle over to you!
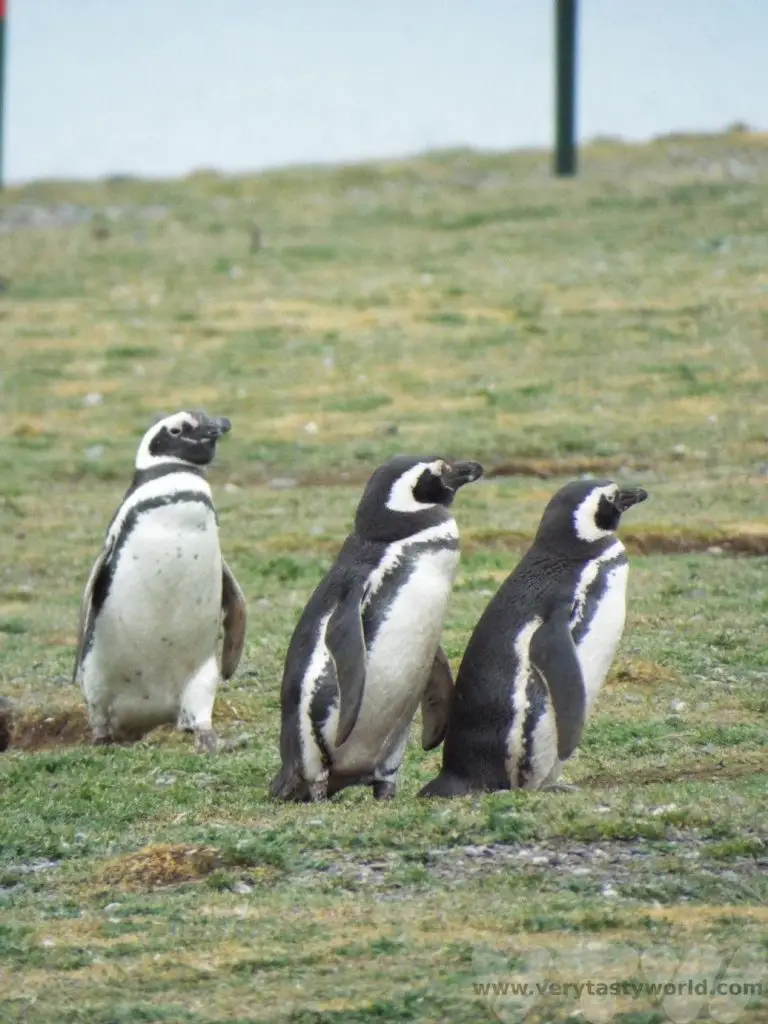
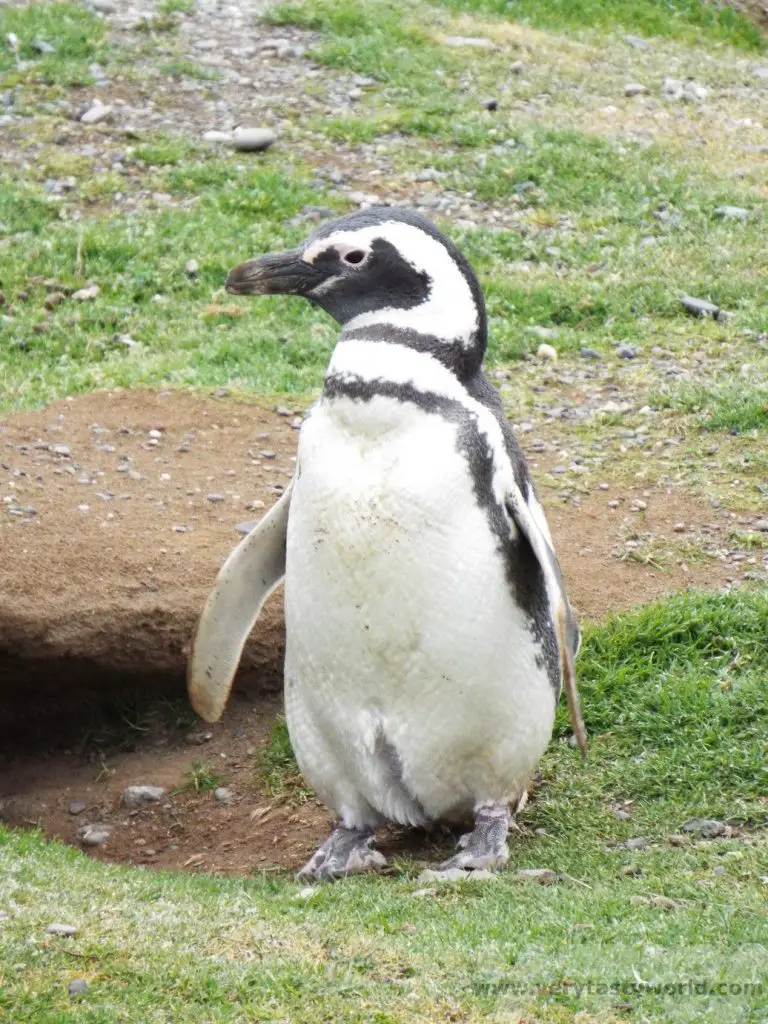
They build nests in the ground, so you have to follow a clearly marked set route as you walk around the island. Nesting season is from October to March.
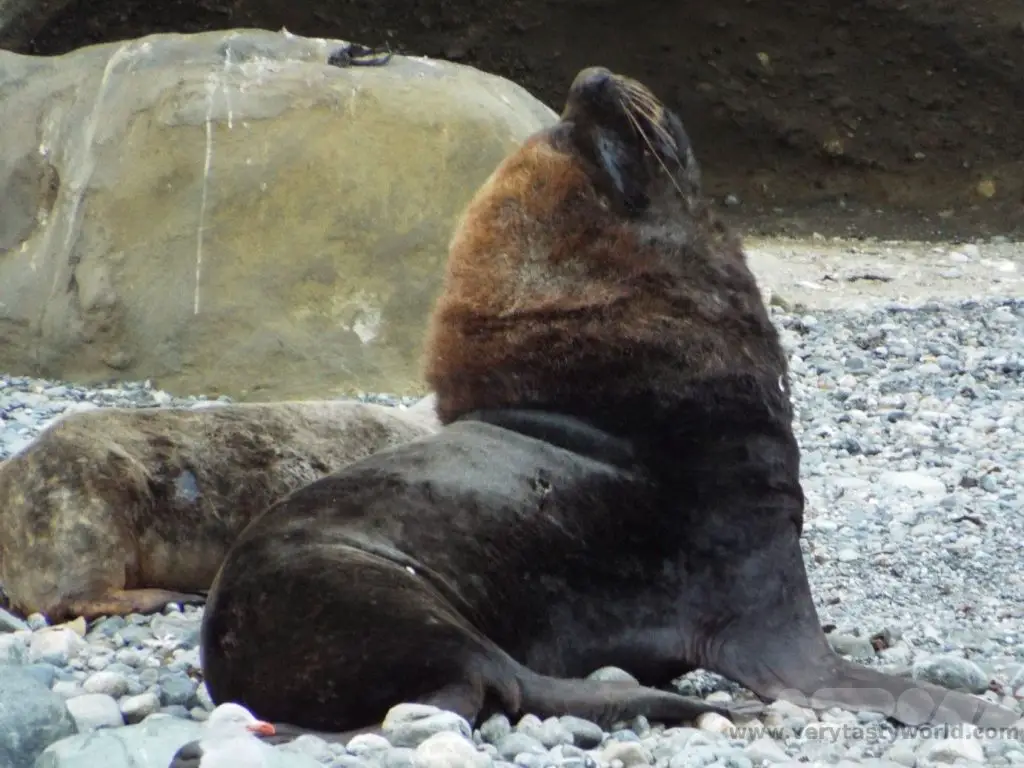
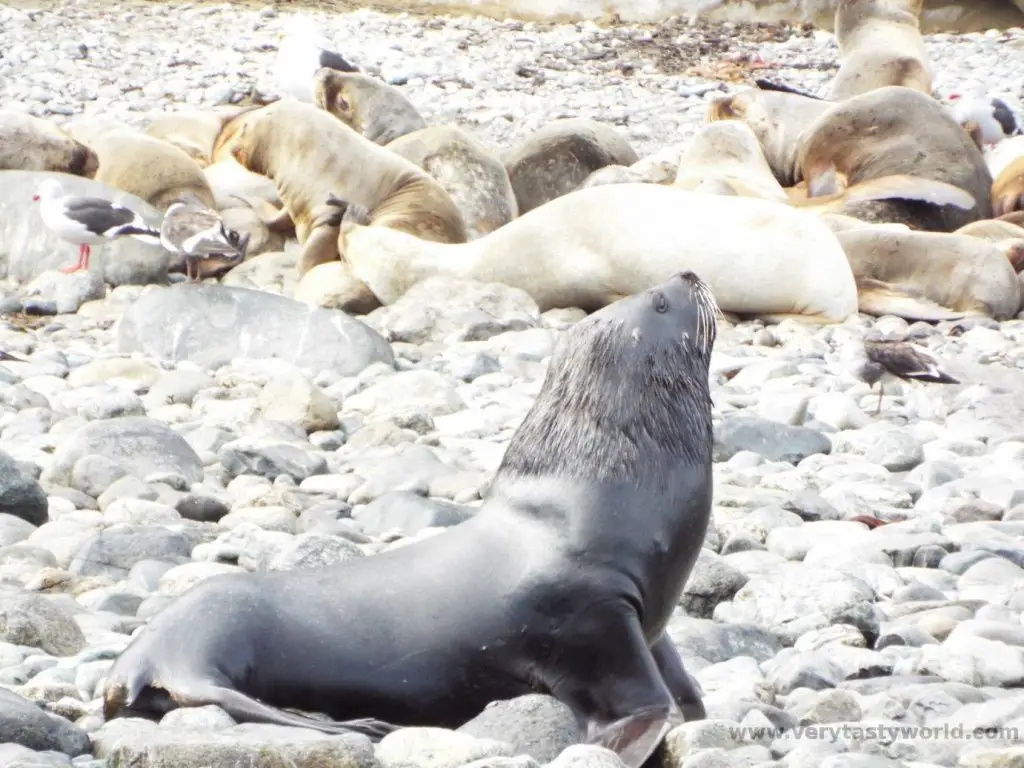
After around an hour walking round the island, it’s back on the boat to pass by Isla Marta to view the sealions, posing proudly on the shore and occasionally having a territorial spat.
There are alternative excursions available to see King Penguins on the Tierra del Fuego island. It’s a long day – a much further drive and you can’t get so close to the penguins, but if you’re passionate about penguins, it’s worth considering. We loved being able to get so close to the little Magellanics.
Day 5 Bus to Puerto Natales (4 hours)
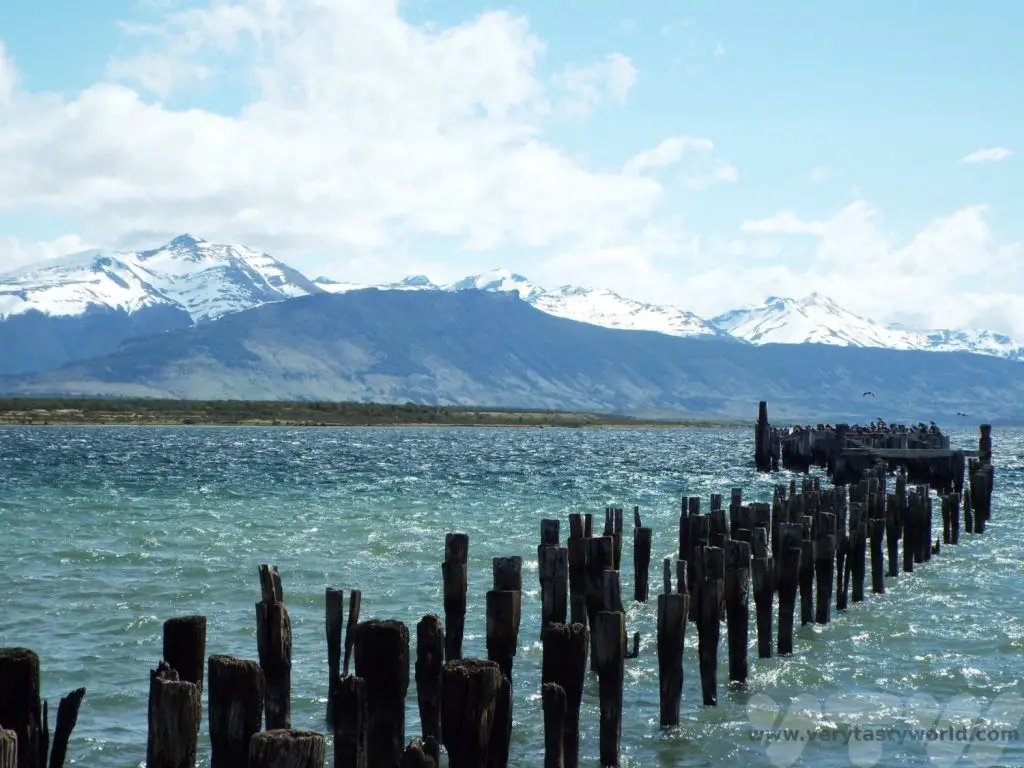
The bus station in Puerto Arenas is located in the centre of town, so it’s easy to pick up the bus for the drive to Puerto Natales. This is a small port town which is quiet but friendly. It is the main stopping point for the Torres del Paine National Park so is geared for tourists and has plenty of hostels and restaurants.
There is a lovely walk along the waterfront with the majestic mountains providing a backdrop.
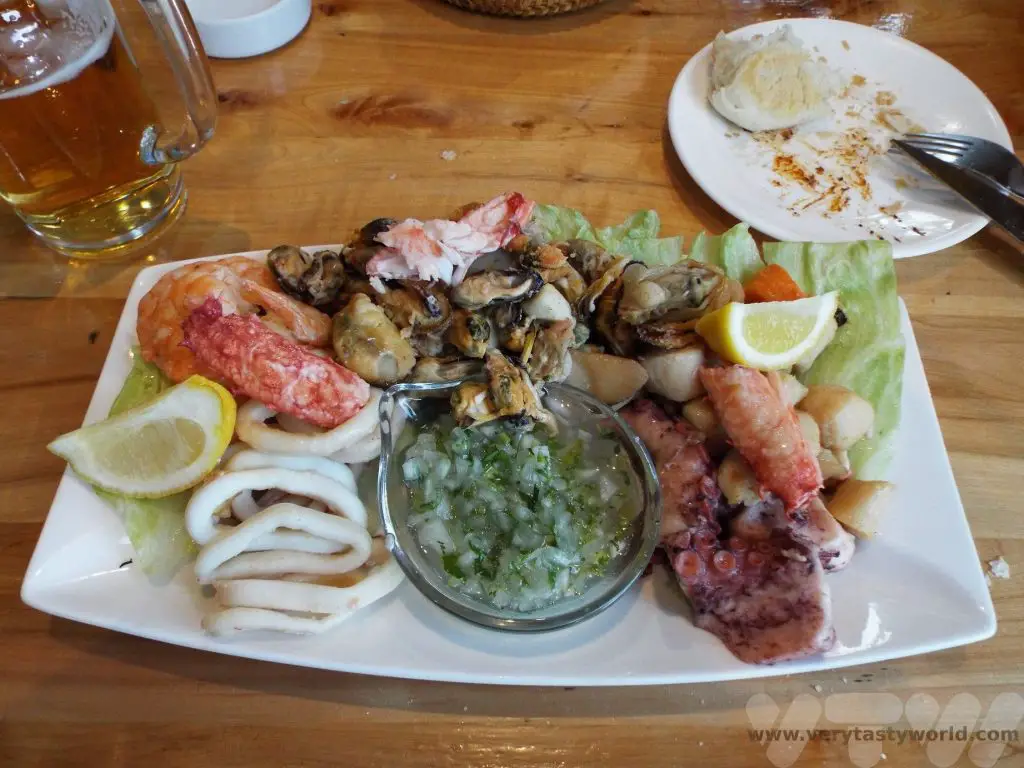
Foodie Recommendation: Make sure you enjoy some of the seafood at the plentiful restaurants in the town. The crab is particularly good.

Day 6 Drive to Torres Del Paine
Although tour options such as coach trips are available in Puerto Natales (and indeed from Punta Arenas) we recommend hiring a car to explore this most spectacular region. There are a number of hire car companies in Puerto Natales – just remember to bring your driving licence and an international driving licence. You can travel at your own pace. Driving is very easy on clear roads (follow route 9) and you can choose your route and take your time to stop off at the many gorgeous attractions in the area. Depending on which entrance you decide to drive to the journey should only take a couple of hours, leaving you plenty of time to explore the park.

Days 7-8 Torres Del Paine
We have a full post about visiting Torres Del Paine. This wild, windy and wonderful wilderness was one of the highlights of the trip. You will need a ticket to enter the park and you have to register with the park authorities when you arrive.
Some of the main attractions include:
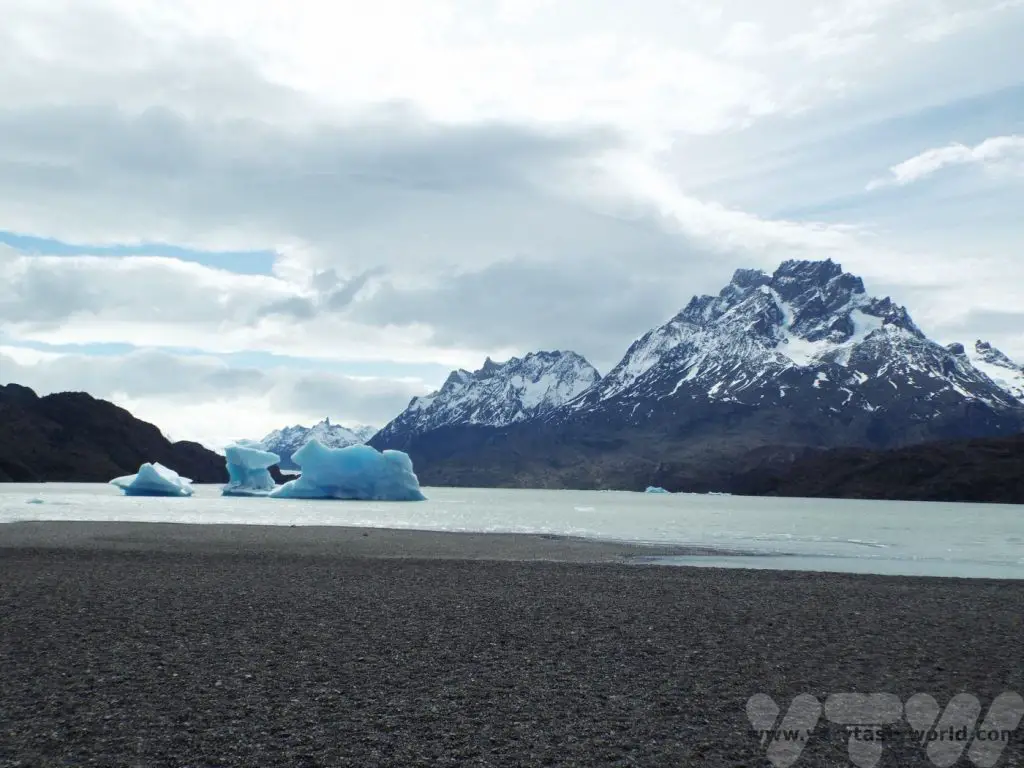
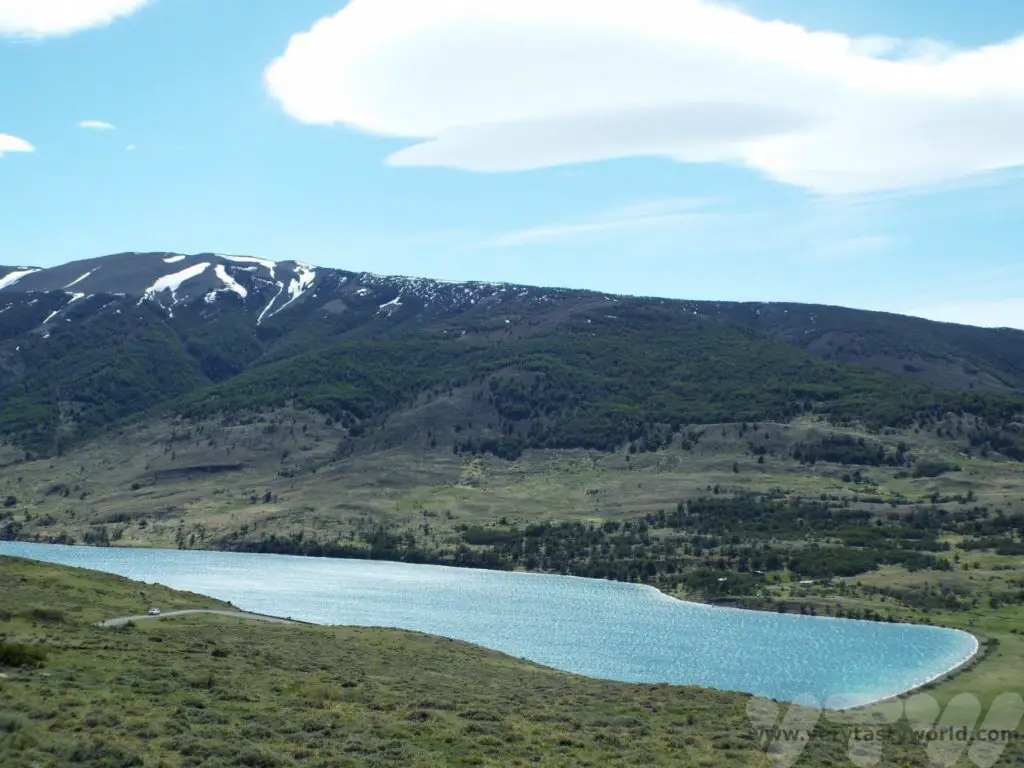
Lago Grey – Grey lake which is fed by Grey Glacier. You can walk a trail onto the strangely beautiful beach. Icebergs that have broken from the glacier contrast with the stark grey of the lake.
Salto Grande Waterfall

Laguna Azul
You may want to hike to the famous Base de Torres. This is a seven-hour round trip so is possible to do in a day.
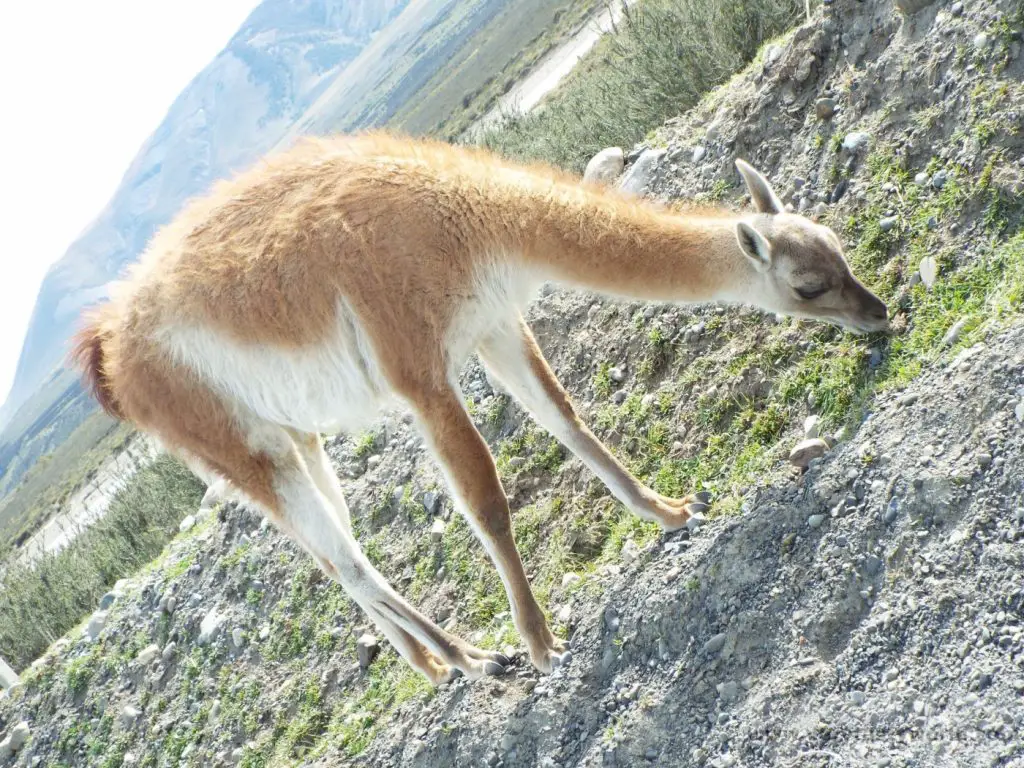
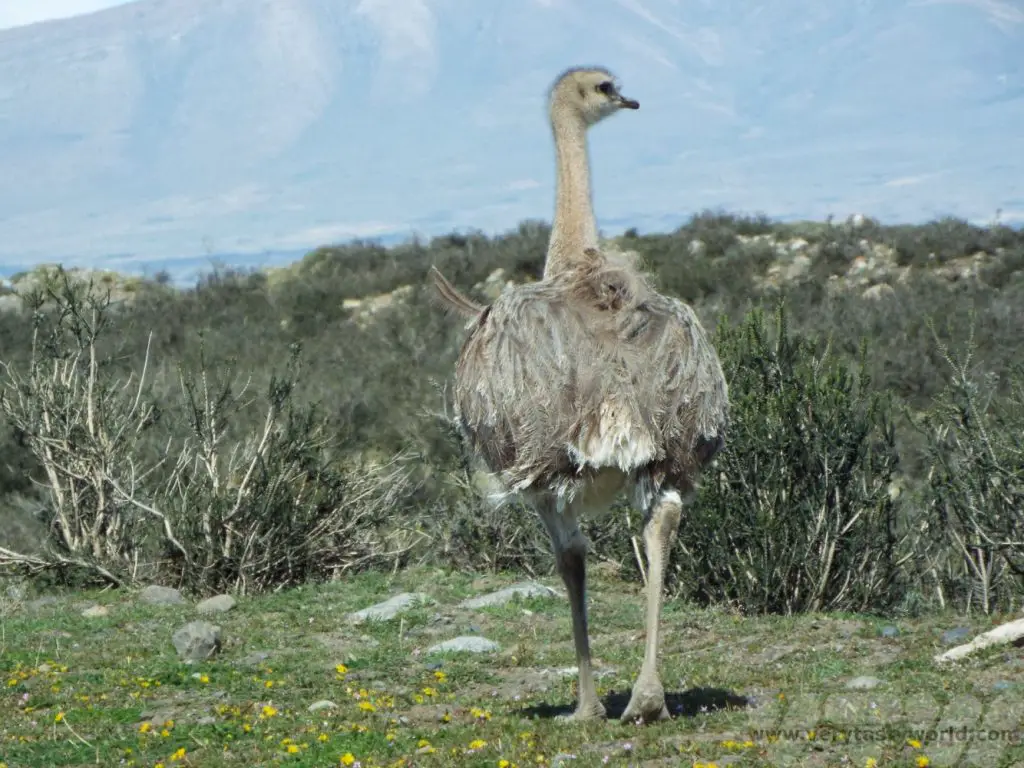
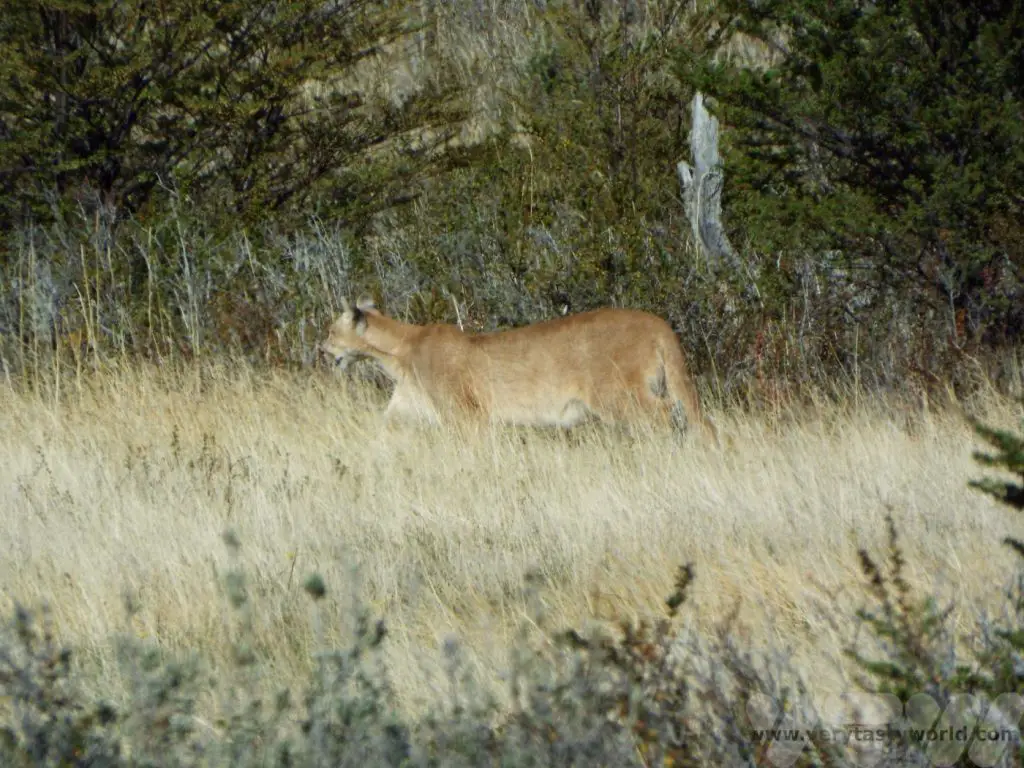
There is also plenty of interesting wildlife to see. You will be certain to see guanacos but maybe you will get lucky and see a large flightless rhea or even a puma!
There are plenty of attractions to explore and hikes to enjoy, but make sure you have enough time to return the car to Puerto Natales.
Day 9 Bus to El Calafate (7 hours including the border crossing)
This is the longest bus journey and involves crossing the border from Chile into Argentina. The crossing takes a little time but is very straightforward. As you leave Chile, everyone troops off the bus, queues inside a little hut to get their passport stamped and jumps back on the bus. You will then drive a few hundred metres to the Argentina side whereupon everybody troops off the bus, queues inside a little hut to get their passport stamped and jumps back on the bus.
Don’t forget to keep your passport with you. It’s always good practice to carry it on your person instead of packing it into your luggage. Before you travel it would be wise to check whether you need any visas to enter Argentina.
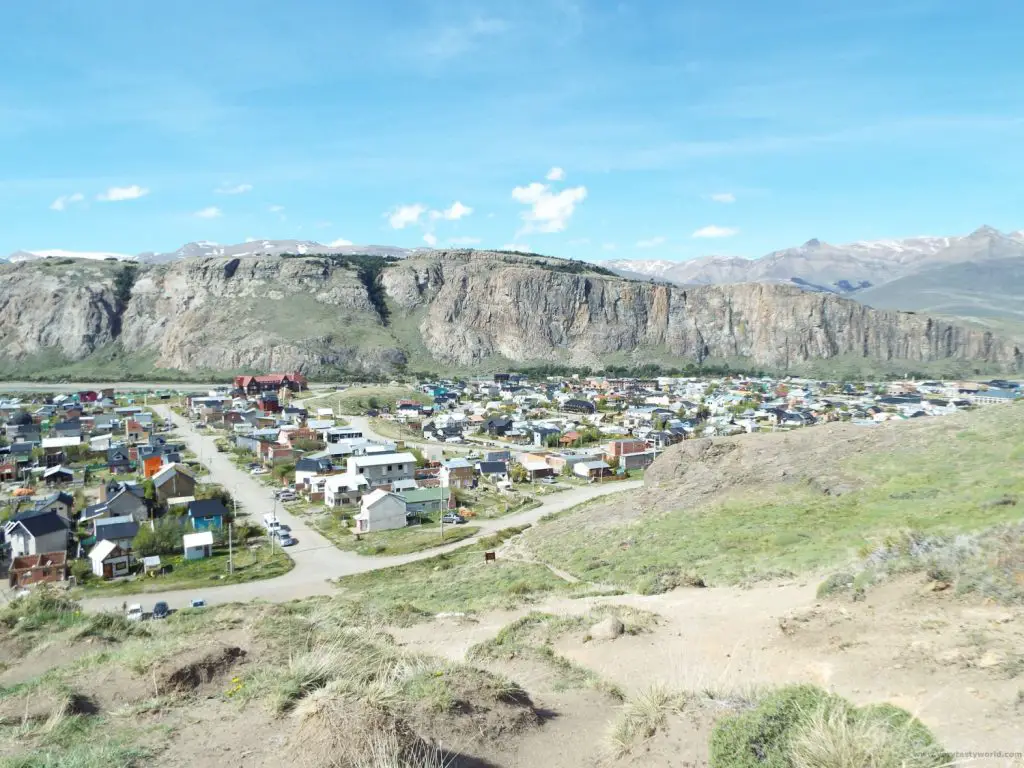
El Calafate is a town that is often called the ‘gateway to Los Glaciares National Park’ as this is the primary draw for visitors.
There are lots of tour companies in town which can offer excursions. We recommend spending at least a couple of days here, particularly taking a boat trip to the Los Glaciares lake and another day visiting the stunning Perito Moreno glacier.
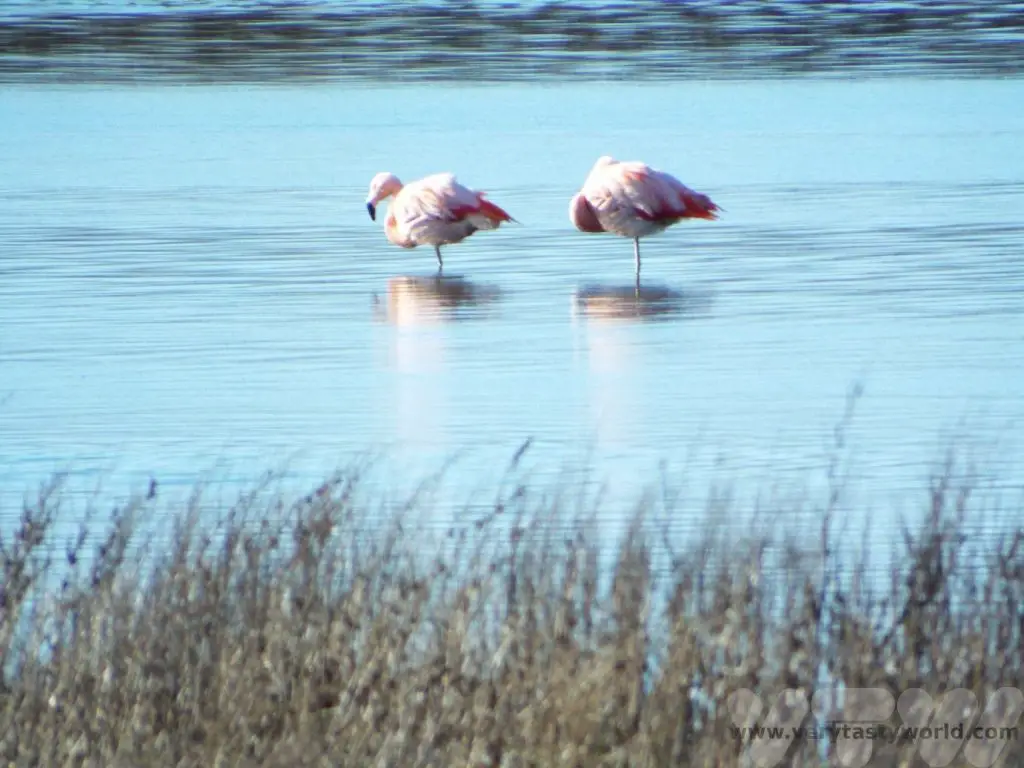
There are some things to do in El Calafate itself. It has a bird sanctuary, Laguna Nimez Reserva, which has some 80 different species of bird to see – local and migratory species. You pay a small fee and can walk around the lake. Binoculars and bird guides are available. If you’re lucky you may see some flamingos!
The Centro de Interpretación Histórica is a small but fascinating museum which showcases fossils, particularly of giant mammals that roamed the earth several millennia ago around the time of the last ice age. It’s a really friendly place to visit and you can enjoy a free cup of mate (pronounced matay) – a herbal infusion that is enormously popular throughout Argentina – indeed it’s the country’s national drink.
Just out of town is the Glaciarium, a museum inside a beautifully designed building, which is an impressive education centre focussing on glaciers and ice.
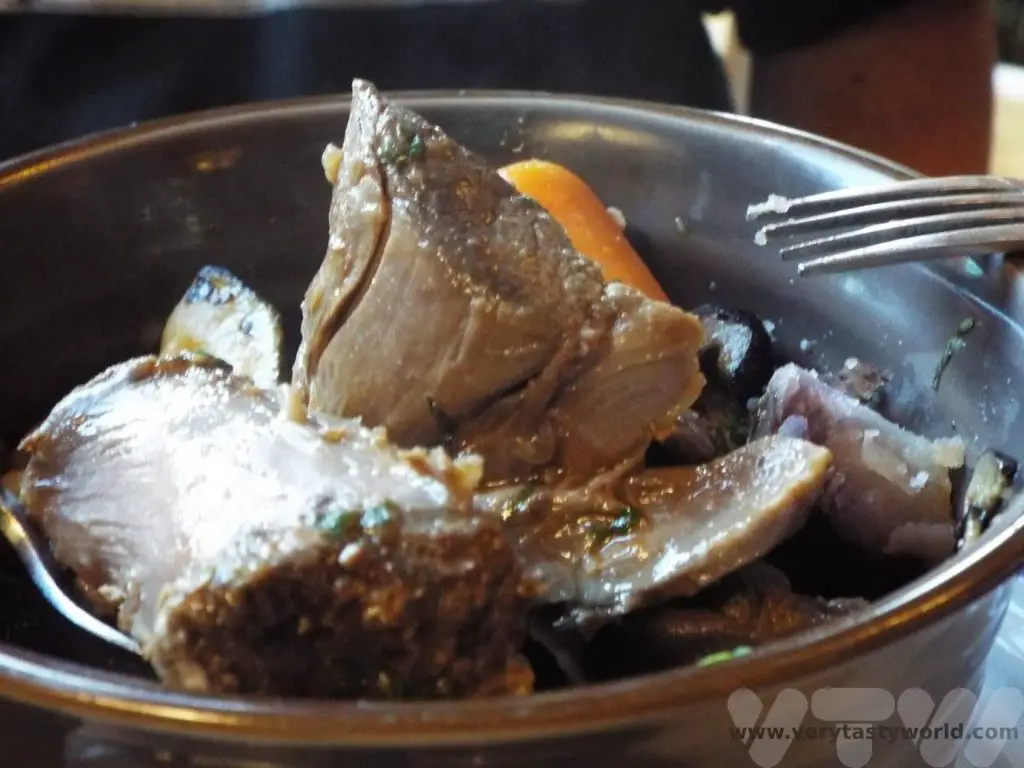
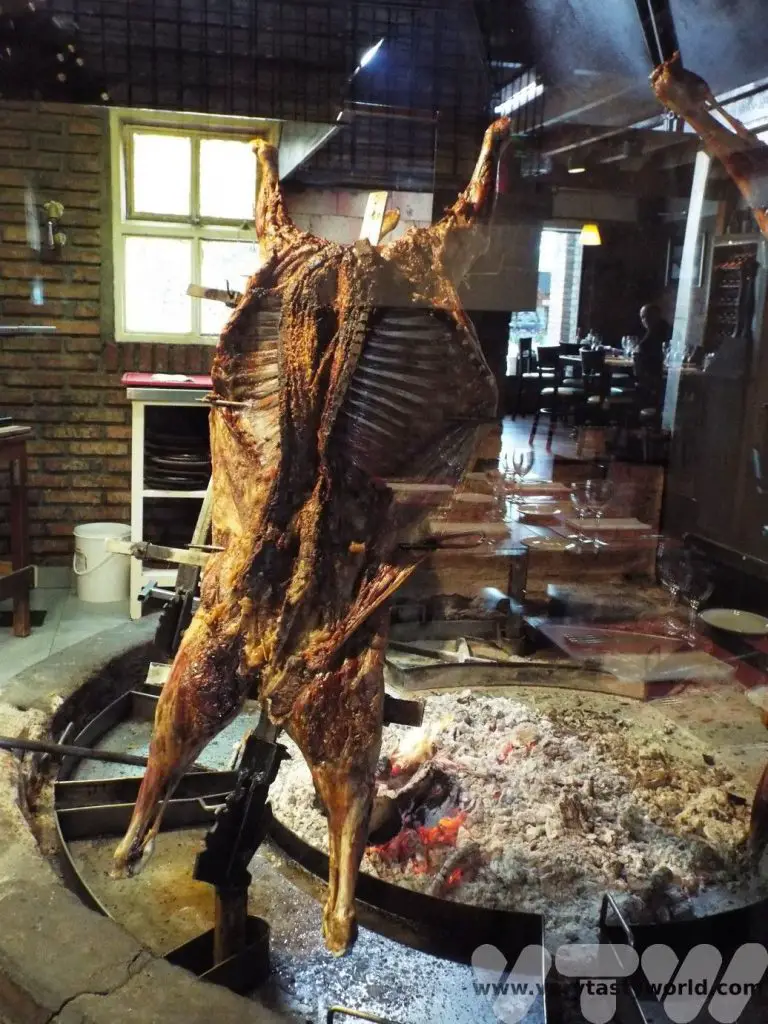
Foodie Recommendation: Vegetarians look away now. Meat eaters – you can’t come to Patagonia and not taste Cordero a la Estaca. This is Patagonian lamb slow roasted for hours on a spit above the flames of the fire. Because it is cooked on a vertical spit, the fats and juices from the cooking flow back into the meat constantly basting it and enhancing its flavour. It literally falls apart when it is served. If you go to a restaurant you are quite often given free bread with the meal – we found this offered more than enough carbs and was perfect for soaking up those luscious lamby juices.
The meat is great quality and utterly sumptuous. However, after a few days in the area we did find ourselves craving salad! (And it was available.)
It has to be said that good dining is more difficult – but not impossible – in Argentina if you don’t eat meat.
El Calafate also – curiously – has a sushi restaurant of all things! Well, we had to try sushi at 50 degrees south of the equator! We received a welcome from the friendly proprietors and, although the sushi was very much adapted to local tastes (salmon with cream cheese) it was tasty.
Day 10 Los Glaciares Boat Trip
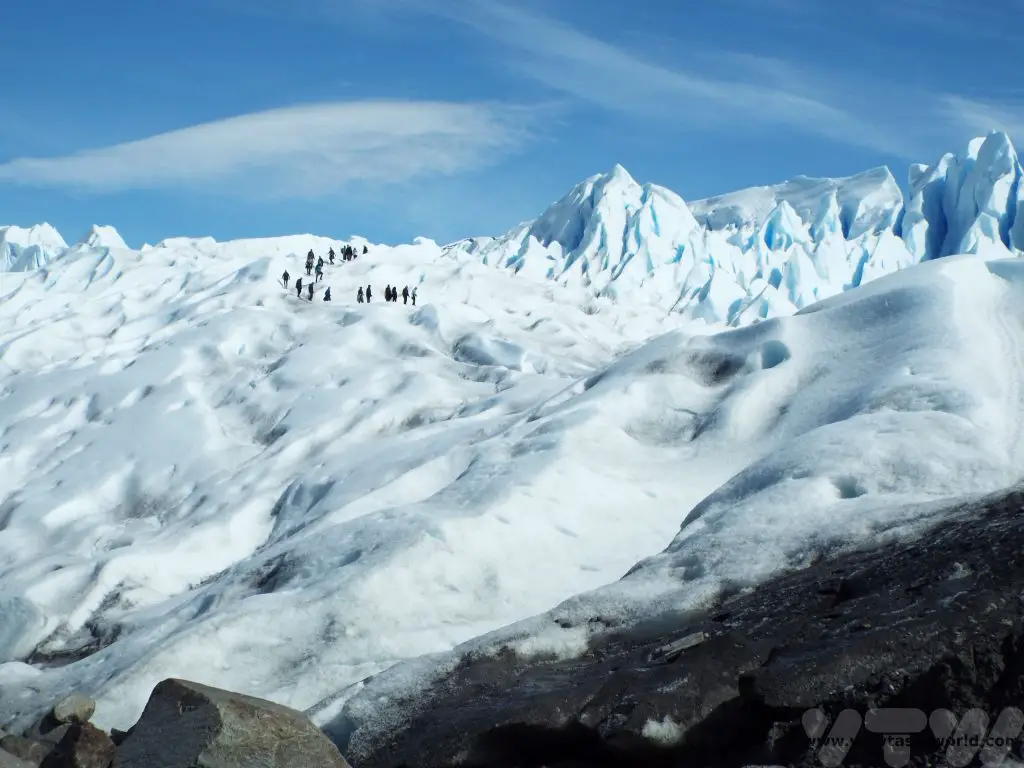
As its name suggests Los Glaciares is a national park which is not only stunningly beautiful but is a place where you can really get close to the many glaciers of the region. A UNESCO site, thirty percent of this region is covered in ice and the park contains the world’s third largest ice sheet after Antarctica and Greenland. It has more than 40 glaciers in the area.
The first day involved a boat trip across the azure waters of Lago Argentina. Hotel pickups are available and you drive around 50km to Puerto Bandera to catch the boat.
The boat accommodates around 100 passengers. It travels across the lake towards the north channel to the Upsala glacier, South America’s largest ice sheet which is 50km long and 10km wide.

Icebergs regularly calve from the glacier and float serenely across the lake.


Cruising along the coastline you can see how the glaciers have slowly but surely shaped the landscape.
The next glacier is the Spegazzini. It’s just 1.5km wide but is incredibly tall.

Day 11 Perito Moreno Glacier Day Trip
What can beat viewing spectacular glaciers? Walking on a spectacular glacier, that’s what! The following day we enjoyed a visit to the Perito Moreno glacier where we could don crampons and walk on the ice.


There are various options from a couple of hours’ trekking to the Big Ice, an 8 hour full-on hike right onto the glacier.
The shorter visits are well worth doing. And there’s a treat at the end. You can read about the full details about hiking the Perito Moreno, including what clothing to wear, in this post.
Because this glacier is accessible by land there is also a viewing platform and boardwalk. So even if you don’t want to trek on the glacier it is possible to admire it. The boardwalk area has a restaurant and bathrooms.

Note: You need to pay a fee to enter Los Glaciares National Park each time and this usually isn’t included in the cost of a tour. As at 2023, the cost is $10,000 AR. We paid in cash, so it’s worth making sure you have enough money with you.
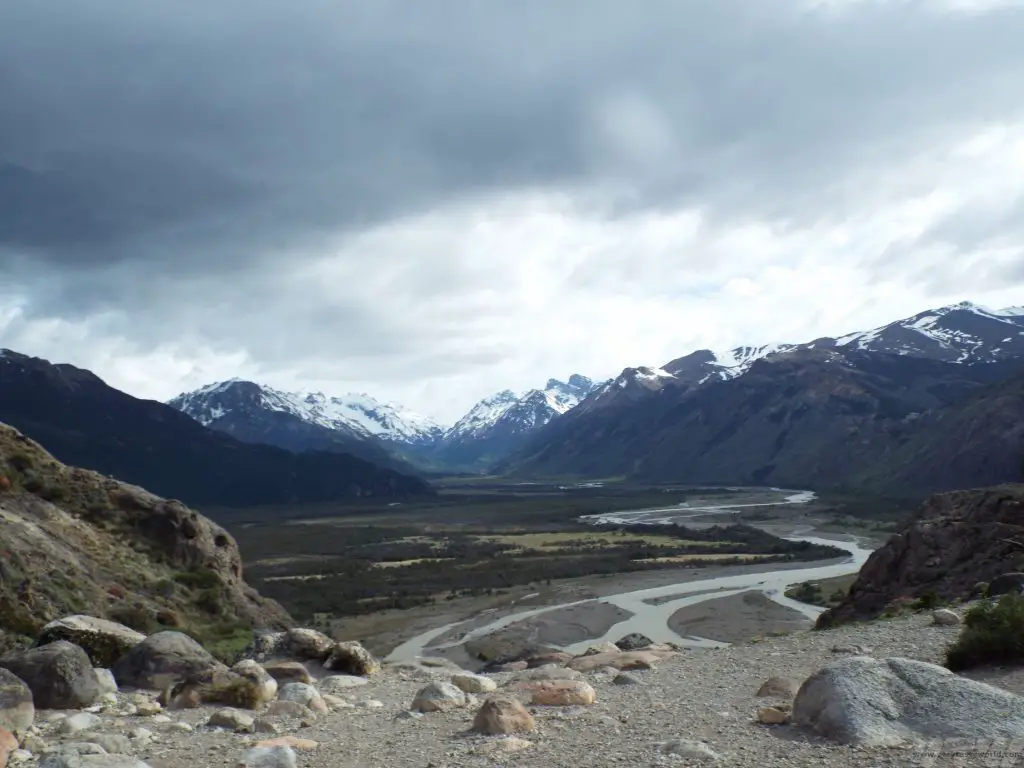
Day 12 Bus to El Chalten (3.5 hours)
Depending on where your hotel is located, the bus station is a short, cheap taxi ride away from the bus terminal on C510, and from there you can catch a bus to El Chalten. It’s around a 3-3.5 hours journey but the scenery is just lovely. When you arrive, the bus stops briefly by the tourist information hut, which is located just out of town. Here you can get a hiking map and briefing about the area in English or Spanish. Then hop back onto the bus for the three-minute drive across the pretty river to the terminal. El Chalten is a very small town and many hotels/hosteria are within walking distance of the bus terminal, but plentiful taxis are available if needed.
Day 13 Hiking in El Chalten
El Chalten is a hiker’s haven and a climber’s paradise. There a loads of trails in the area, ranging from easy to challenging amidst stunningly beautiful scenery. There are many serious climbers who want to attempt the granite heights of the Fitz Roy Massif, but there are some fantastic walks for casual – and significantly less ambitious – hikers. The weather can be very variable and some paths may be closed off for safety reasons if the wind is howling more than usual – and it howls a lot! But even the easier walks are guaranteed to offer great hiking in gorgeous scenery.

We have details of the hikes we enjoyed in El Chalten.
Foodie Recommendations: There are a number of restaurants in the town which offer local fare. There is also craft beer available and the quality is excellent, perfect for a post-hike drink.
Day 14 Bus to El Calafate (3.5 hours)
Depending on when you wish to leave for Calafate (and if the weather is on your side) there may be a chance to get in a few hours’ hiking in the morning. There are regular buses to take you back to El Calafate. It’s worth noting that even if you have pre-booked tickets you may be able to catch an alternative bus. There isn’t a lot to do in town if the weather is bad and you have checked out of your hotel/hosteria. We had planned to do more walking on our last day but it was really wet and very windy and not much fun for hiking. Our lovely hosteria hosts phoned through to the bus station and arranged an earlier bus for us.
Day 15 Fly to Buenos Aires
El Calafate has an international airport around 16 km from the town so is ideal for getting back north. You can get a taxi or a shuttle bus – your hotel should be able to help arrange this.
As with our inbound our flight to Santiago, we gave ourselves a day in hand to catch our international flight, just in case there were delays with our flight from El Calafate. This meant we had a day to explore Buenos Aires before catching our flight home.
There are loads of things to see in BA. We stayed in the Palermo area, which is a cool place to hang out, with plenty of bars and restaurants if you just want to chill after your trip. But there are lots of sights to see within walking distance of Palermo. (It’s a fair walk, depending on where you are staying, so if you’re feeling a bit jaded at the end of your trip, it should be easy to pick up a taxi.)
We particularly enjoyed visiting the famous Cementario de Recoleta, a remarkable cemetery which comprises a huge number of highly decorated mausoleums and tombs. Many famous people have been interred there, including Eva Peron.

The Museo Nationales de Bellas Artes is a fantastic space for discovering local and international art. It’s free to enter and hosts a variety of permanent and temporary exhibitions. Museo de Arte Latinoamericano de Buenos Aires, known as MALBA, also has some great exhibitions.
In the adjacent park is the Floraris Generica, a huge sculpture of a flower which opens and closes with the daylight.

There are a number of gardens in the area, including a Japanese garden and botanical gardens, where you can see the yerba mate tree from which mate tea is derived.
When To Visit Patagonia
In the southern hemisphere November to March is Patagonia’s summer, where the days are longer and the temperatures warmer, and hence the most popular time to visit. The shoulder season is November. We travelled in late October (we don’t mind the cold!) and were largely lucky with the weather.
Dining and Drinking in Patagonia
If you are an omnivore, Patagonia has a huge amount of excellent food. The seafood in Chile is fantastic -with an incredibly long coastline the country has some of the best fish dishes on the planet. We particularly recommend the crab.
In Argentina the Patagonian lamb is an essential meat to try. Steaks are also available – they are good value and usually cooked very well. Guanaco often appears on menus – the flavour is akin to venison. Empanadas – pasties with a variety of fillings – are also fantastic and definitely worth taking with you on a hike or on the bus if you want a packed lunch. Vegetarians may struggle to find a decent variety of dishes but most restaurants will have vegetarian options.
In terms of drinks, Chilean and Argentinian wines are fantastic and there are even some vineyards in Patagonia, albeit much further north than the places visited in this itinerary! Beer drinkers will find a wide variety of excellent local craft beers.

The tap water is fine to drink. In some areas, notably El Chalten, you can even refill your water bottle directly from the streams and rivers as the water is pure.
Getting Around Patagonia
We travelled on buses throughout our trip, apart from the couple of days in Torres del Paine, when we hired a car.
Buses are large and comfortable and run on a regular schedule. There are usually toilets on board.
You can get tickets at the bus station or online and often your accommodation can help. We recommend pre-booking if you can, especially if you are travelling in high season – it means you can ensure a place on the bus. When you buy a ticket you will be assigned a numbered seat. The other great advantage is that the bus driver knows the route so you can simply sit back and just enjoy the scenery. Obviously delays can sometimes happen but all the buses on our journey ran on time.
It would be difficult to do this full itinerary using a car rental because you would be driving through two countries so would need a special permit to take a car from Chile to Argentina. And it would be either very difficult or very expensive to do a one-way return of the car to an agency in another country. If you wanted to drive it would be possible to rent a car in each country and just cross the border on the bus. But, honestly, the buses are a convenient – and much cheaper – way to travel.
What To Bring to Patagonia
Hiking boots/shoes. We recommend wearing these on the plane and putting your other shoes in your checked-in luggage. It’s easier to replace lost ordinary shoes than expensive, properly worn-in walking boots.
Warm clothing. Patagonia can be very cold and, even if it isn’t cold, it can be very windy. We suggest bringing lots of layers so you can add/discard clothes as required.
If you do the Perito Moreno glacier walk you will need long-sleeved clothes, long trousers and gloves. You will wear crampons, so sturdy shoes (or your hiking boots) will be needed.
Wet weather gear – although we were generally lucky with the weather on our trip, you never know when it’s going to rain! Ponchos are a good idea if you get caught in a rainstorm.
Sun protection and sunglasses
Water bottle, particularly if you are hiking.
Patagonia really is one of the most remarkable places on the planet. It is remote but the effort to reach this stunningly beautiful wilderness is emphatically worth it.
Related Posts You May Enjoy

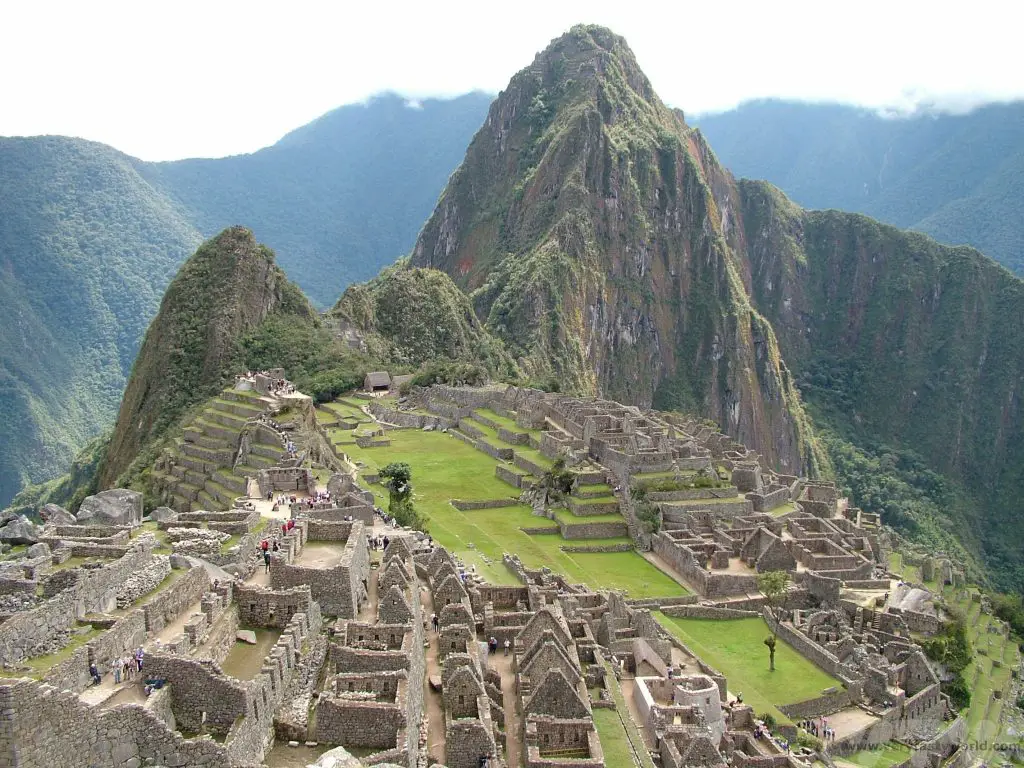

- Best Time To Visit Machu Picchu 2024 Update
- A 2 Week Patagonia Itinerary

- Day of the Dead in Campeche
- A Galapagos Land Based Itinerary

- RECIPE: How to Make Costa Rica’s Gallo Pinto
- A Tasty Puebla Food Tour
- Costa Rica Wildlife Sanctuary – Caño Negro
- Visit Torres del Paine National Park in Patagonia
- Atacama Desert Itinerary
Five days in Copenhagen
When we were children there was a very popular vinyl record which was comprised of a whole bunch of songs, sung by Danny Kaye, based around Hans Christian Anderson’s fairy tales. One of these was the song, Wonderful, Wonderful Copenhagen. We’ve recently returned from a short trip to Denmark’s capital and the song, somehow recalled from many years ago, gave us a semi-permanent ear-worm as we explored the city. But is Copenhagen wonderful? We think so. We spent five days in Copenhagen, and around, discovering what the city had to offer.
Getting to Copenhagen Central from the Airport
We got chatting to a number of people during our trip, some of whom had very different experiences of getting into the city. An elderly couple from the USA were shocked to have paid around 55 Euros for the journey in a taxi. And at the other end of the travelling spectrum – we met a holidaymaker from the UK on his first ever visit abroad who decided to walk the 8km from the airport for free! We recommend the train.
The easiest and most cost-effective way is to take the train or the metro. On arrival at the airport, after exiting the baggage area, follow the signs to the train station. There will be a whole bunch of ticket machines just before the entrance to the platforms. The ticket machines are red.
You can choose the English language option. Just select the destination, number of passengers and time of travel. You will receive a zone 3 card, which covers both passengers, that can be used within an hour and a half time slot. Head down to the platform. Trains are very regular, there will be signs on the platform indicating the destinations and you want to make sure your train stops at København H. The journey takes around 15-20 minutes and costs 30DKK (August 2023).
Accommodation
Accommodation in Denmark is on the pricey side. We chose a small room at the Wake Up, which was just a 10 minute walk from the main station. We were delighted to be upgraded to a larger room on arrival, but it did rather make us wonder what the small room was like because the large room was pretty compact! Still, as with most accommodation, we don’t need anything more than basic facilities – a bed and a bathroom will do just fine.
Planning Your Visit
There are a fair few things that you can do in Copenhagen for free but many attractions have a charge and Denmark isn’t a cheap country to visit. So, prior to taking our trip, we looked into the Copenhagen Card. Depending on what you are planning to see you can make good savings by purchasing a card which offers admission to over 80 attractions and free public transportation within the Copenhagen area. You can select a card for 24, 48, 72, 96 or 120 hours. Download the app onto your phone and you can activate the card at the first attraction/transport option. It will then count down the time until it expires.
You can only visit each attraction once, with the exception of Tivoli where you can re-enter the park on the same day only, if you get a stamp.
For our five days in Copenhagen we chose to buy a 72 hour card.
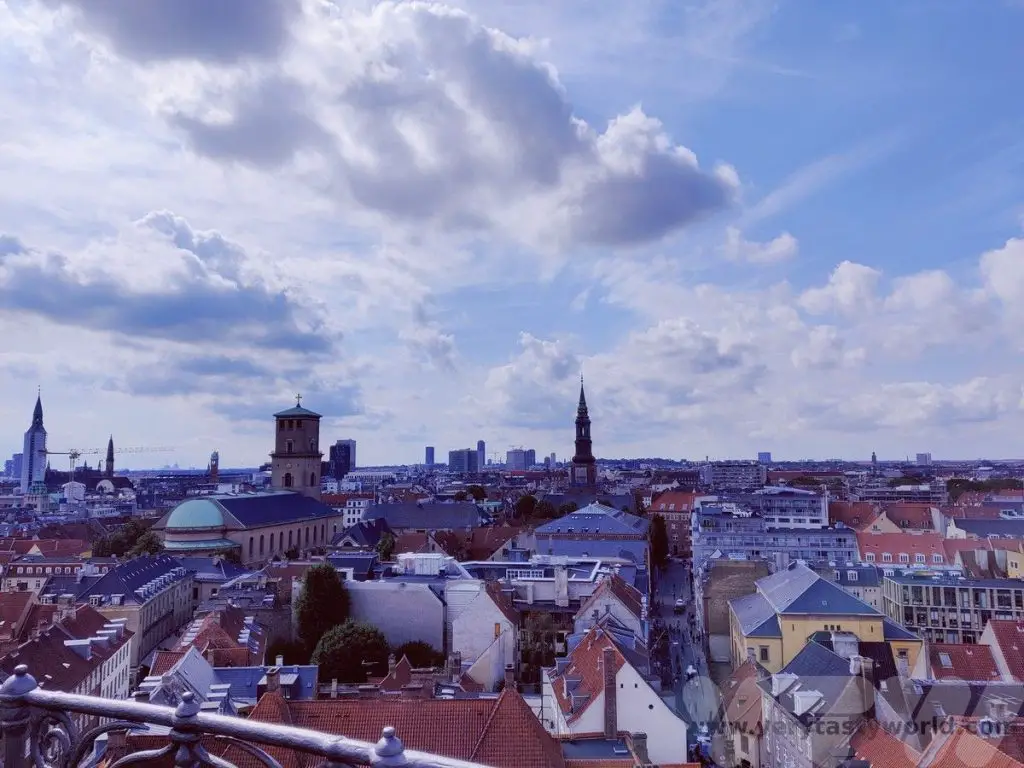
Five Days in Copenhagen: Day 1
National Museum of Denmark
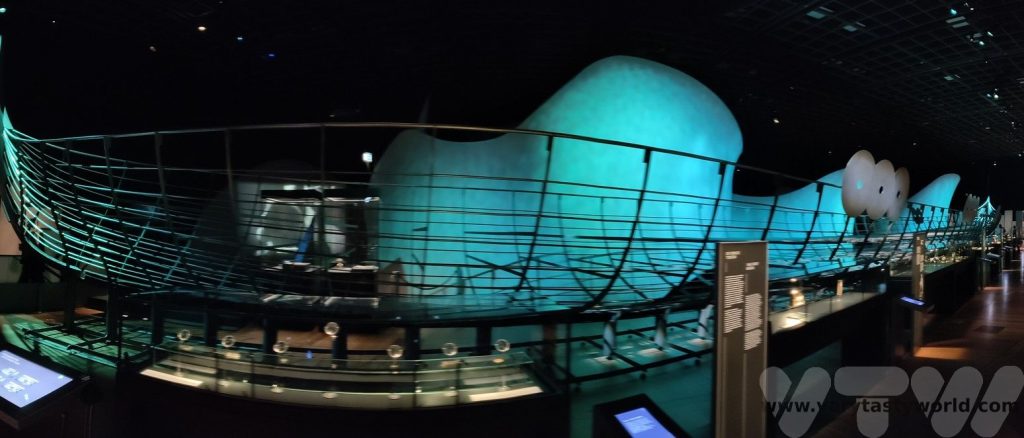
The National Museum is located on Ny Vestergade. It showcases Denmark’s long and fascinating history with both permanent and temporary exhibitions. Particular highlights include the Viking history exhibition, which feature wooden parts of an extraordinarily long longboat and include an audio-visual opportunity to join a Viking raid, and the modern collection which shows many aspects of Danish culture.
On our visit there was an interactive exhibit about money and finance around the world which was surprisingly fun.
Ride the Rollercoaster at Tivoli Gardens
One of the most delightful things about Copenhagen is that, rather than having a central business district full of corporate offices and commercial buildings, it has a park right in the middle of the city. Directly opposite the central station and just a 10 minute walk from the National Museum, this delightful amusement park is the third oldest in the world and dates from 1843. It is one of Denmark’s most visited attractions and is a lovely place to visit for both the young and young at heart. Set in a very pretty garden, it has a number of stages for performances and white-knuckle rides for intrepid thrill-seekers.
The Copenhagen card will provide entrance to the park but not the rides. If you plan to spend a lot of time in Tivoli and want to enjoy all the rides it’s worth buying a wristband for unlimited access. There are machines all over the park. If you just want to go on a ride or two you can queue as normal then pay for each with your credit card at the gate just before you get on.
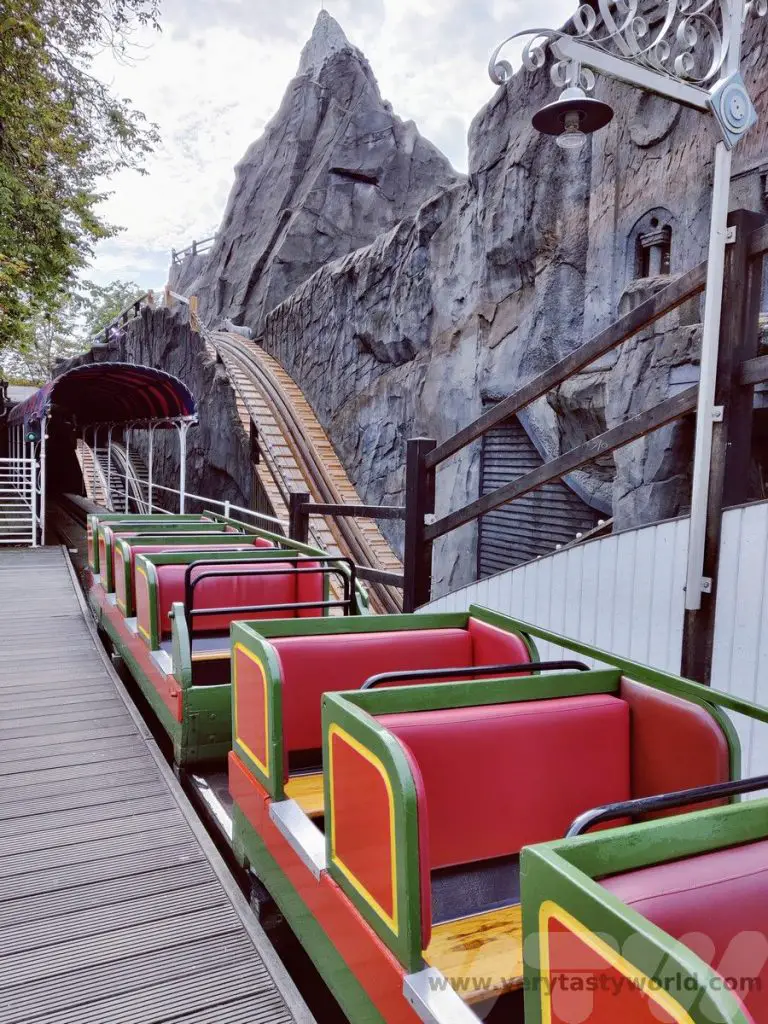
We didn’t plan to spend all day in the park but we did want to ride Rutschebanen, a wooden rollercoaster which dates from 1914 and is one of the oldest still operating. It is one of the few left in the world which has a brake operator in a car on each train, manually slowing the cars on the big slopes if needed.
It’s great fun to ride.
If you are visiting Tivoli you can get a stamp which allows you re-entry to the park on that day only. The security guards at the exits, armed with ink, will be able to provide one.
Tivoli food hall is adjacent to the park and has the same opening hours. You don’t need a ticket to Tivoli to visit the food hall. There are all sorts of Danish and international dishes on offer.
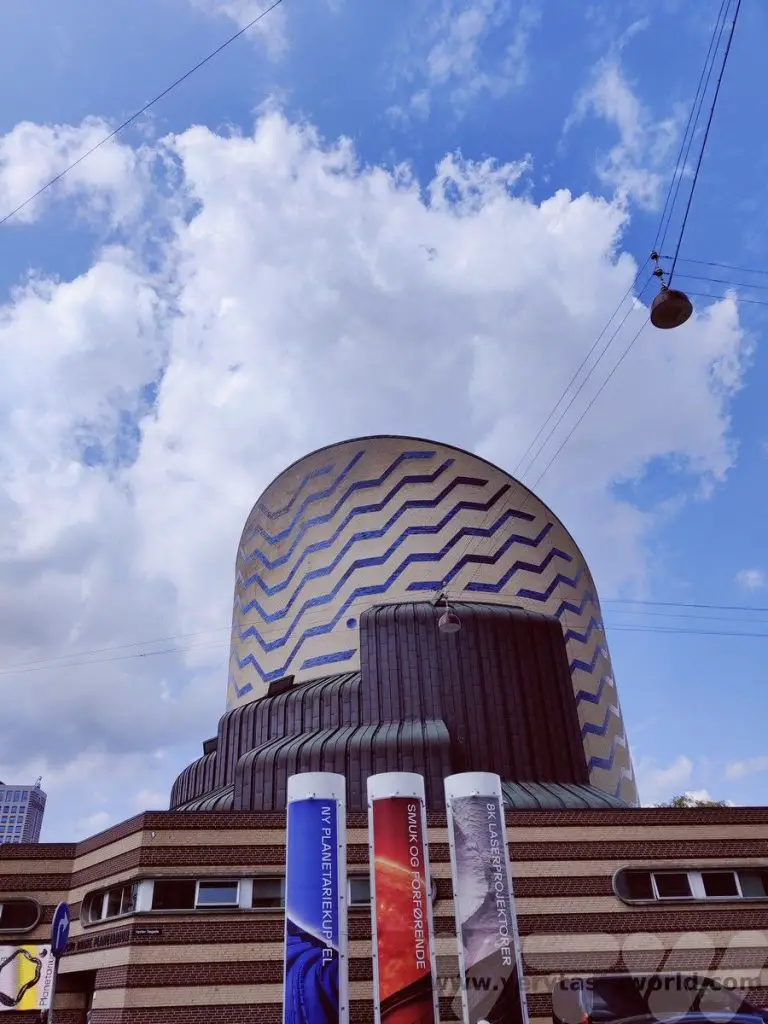
The Planetarium
The Planetarium, on Gammel Kongevej, is well worth a visit. It has a number of exhibitions on the ground floor and also runs a number of films in the largest tilted dome in Europe, a hugely impressive space. It offered a view of the current night sky and then ran a documentary about the probes that have been exploring our planets over the years. Headsets for an English translation of the commentary are available at reception.
Fredericksberg Area
We walked from the Planetarium to the Fredericksberg area. Bus 7A will go there from the city centre if you don’t fancy walking and the Copenhagen card will cover the cost – just show the card to the bus driver. You will need to get on at the front of the bus. There are lots of things to do here, including visiting the zoo. We had some cultural activities in mind.
Storm
This is the museum of humour and satire where we received a very friendly welcome.
The downstairs area showcases the history of Danish humour (only in Danish but you can use a QR code on your phone to get a translation) but also has a few rooms dedicated to humour for children – chock full of surreal objects and fart gags.
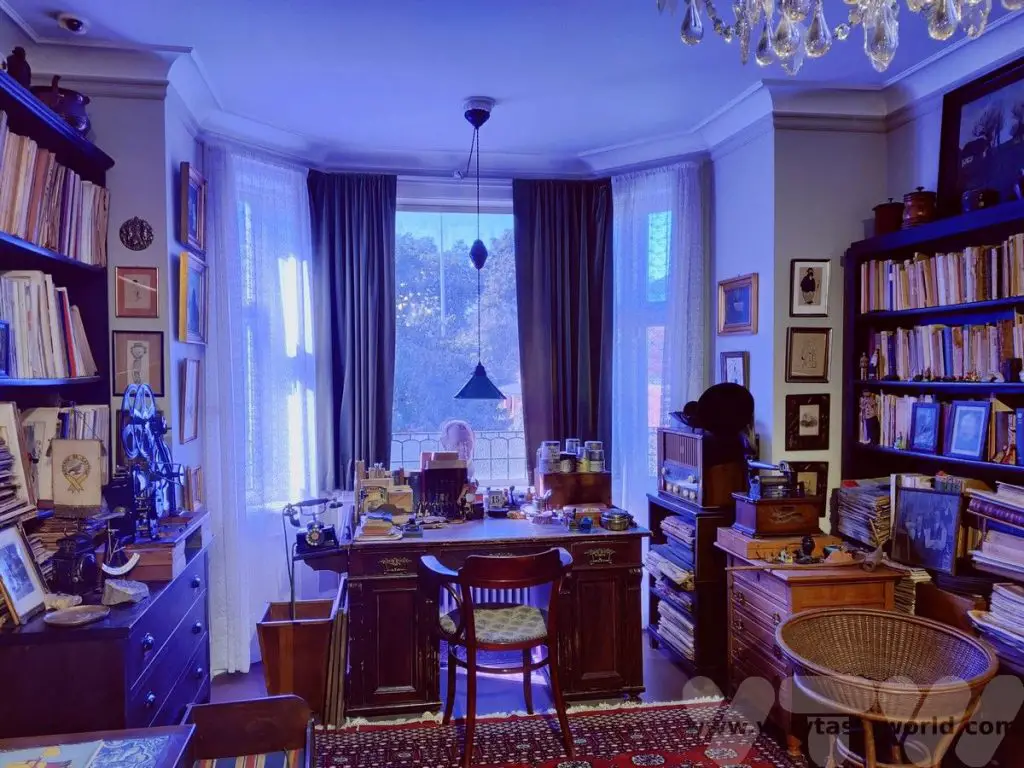
Upstairs is an exhibition dedicated to the work of Storm P, the cartoonist, illustrator and satirist Robert Storm Petersen. There is a large collection of his artwork with explanations in English as well as a set-up of his workspace.
Cisternene
A fabulous idea for an art gallery, Cisternene used to be an underground reservoir! Beneath the green, green grass of Søndermarken Park this dark, cavernous space hosts an exhibition by a different artist each year. You need to be a bit walking careful inside – it’s dark and damp and you need to keep on the pathway or get wet feet – but it was one of the most delightful and unusual art galleries we have ever visited.
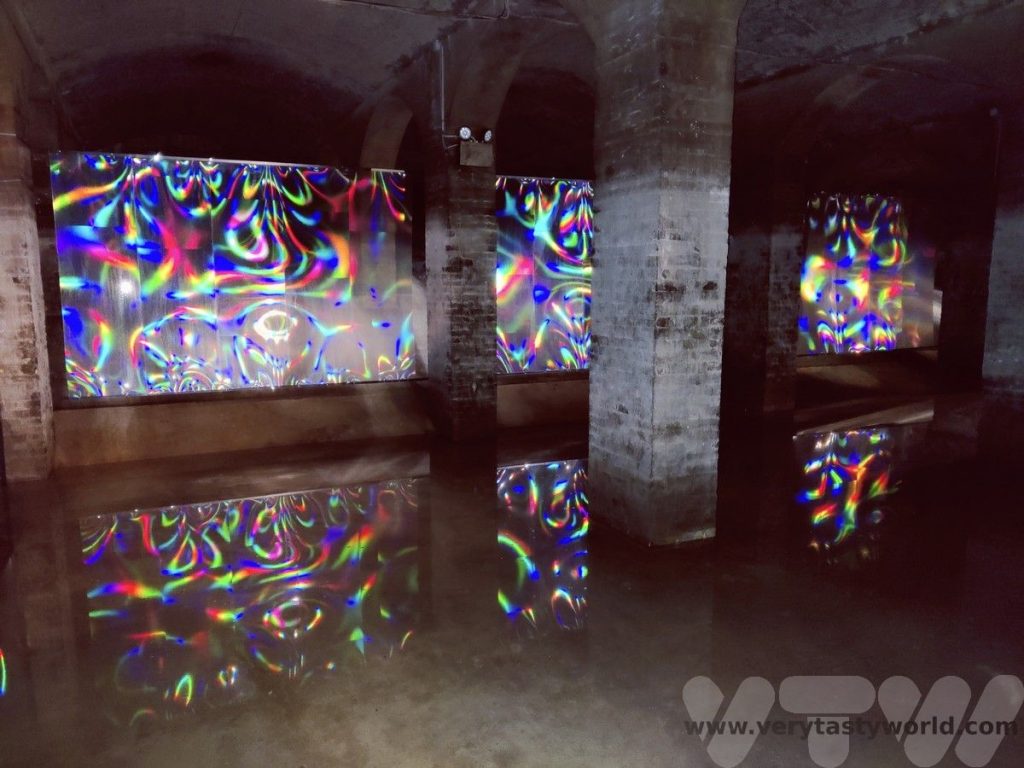
We saw the display from South Korean artist Kimsooja whose light installation was colourful, beautiful and otherworldly.
Evening at Tivoli
The 7A bus (the bus stop is just outside the zoo) will take you back to the city centre to enjoy dinner and a beer. Because the stamps on our arms were just about visible, we popped back to Tivoli. There were performances on some of the stages interspersed with squeals of delight as the white-knuckle rides simultaneously enthused and terrified.
Day 2
A Day Trip To Hamlet’s Castle and A Fabulous Art Gallery
The Copenhagen card also includes the opportunity to take some day trips outside of Copenhagen. You can take the train from Copenhagen Central to Helsingor to visit Kronborg castle. Just get on the train. If you are asked for a ticket, show the officer the card and they will scan it. If Helsingor sounds familiar, it is more commonly known as Elsinore in England and is, of course, the location of Shakespeare’s Hamlet’s Castle. Kronborg is a 15 minute walk from the station – you can see the castle from the station.
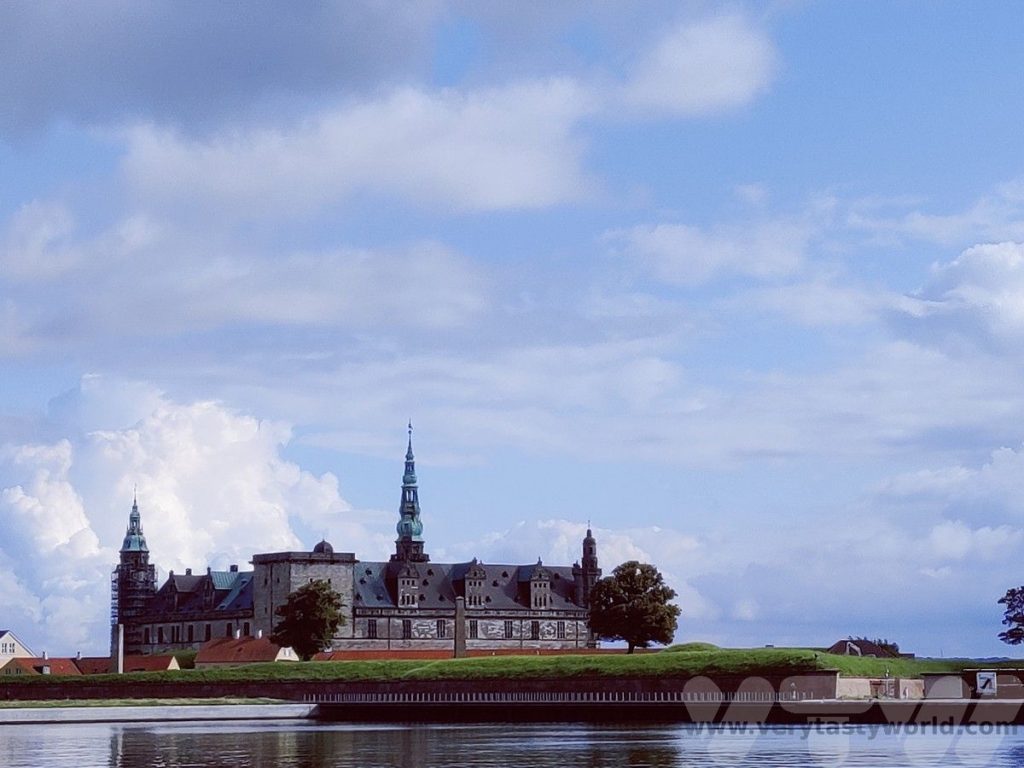
Originally built as a fortress in the 15th century, it was significantly upgraded by Frederick II between 1574-1585, and again by Christian IV following a fire. A UNESCO heritage site, it’s a highly interactive attraction with actors and jesters throughout the castle as well as guides who can offer information about the history of the castle. You can even meet ‘Hamlet’ and ‘Yorrick’ in the grand ballroom.
Yes, that’s Hamlet and Ophelia just outside Helsingor station.
Louisiana Museum of Modern Art
The return train stops at Humlaebek, just 10 minutes from Helsingor, and this is an essential stop for the Lousiana Museum of Modern Art. A 15 minute walk from the station this remarkable modern art gallery, also included on the Copenhagen Card, offers an amazing collection, including works by Warhol, Lichtenstein, Picasso, Bourgeois, Bacon, Hockney and Moore, amongst many, many others, as well as temporary exhibitions showing the work of local and international artists.
It has the most wonderful setting as well, a light, airy space for the network of galleries that all surround a sculpture park which looks out to the sea. Highly recommended.
Day 3
A Boat Trip
We got up early to be first in the queue for a boat trip around the canals of Copenhagen. These are included on the card if you are boarding at Stromma (but not at Nyhavn). You need to show your card at the ticket office then get a ticket to board the broad boat for a journey that takes around an hour. There will be a commentary in English and usually another European language.
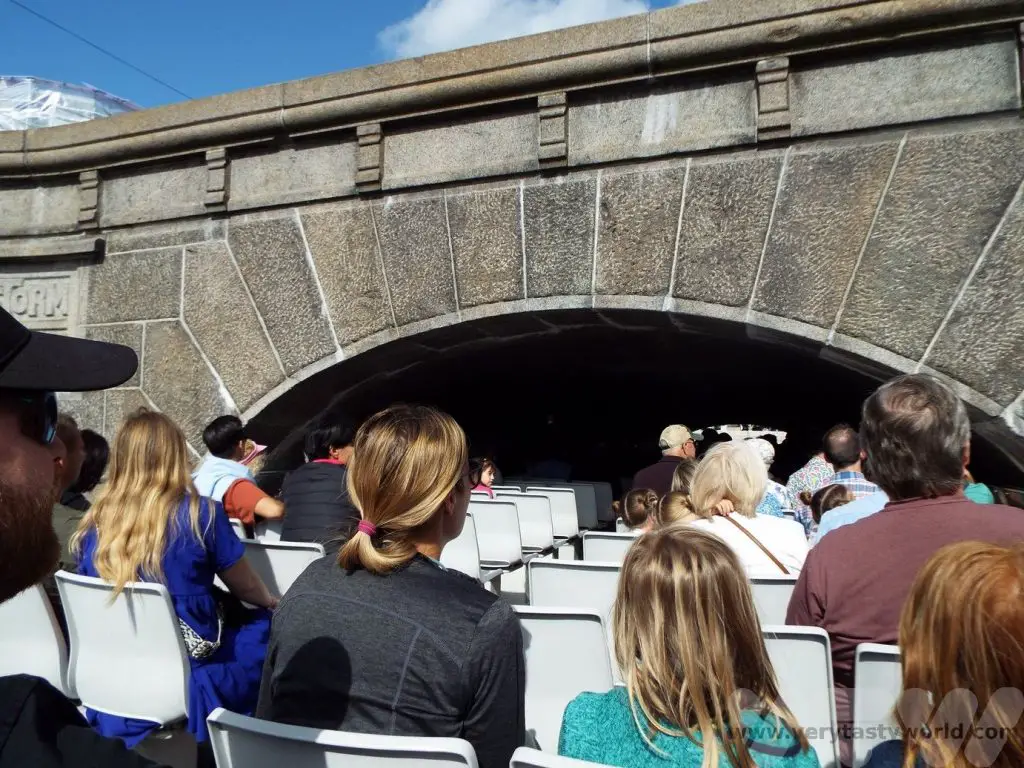
It’s a pleasant way to see Copenhagen from a very different perspective.
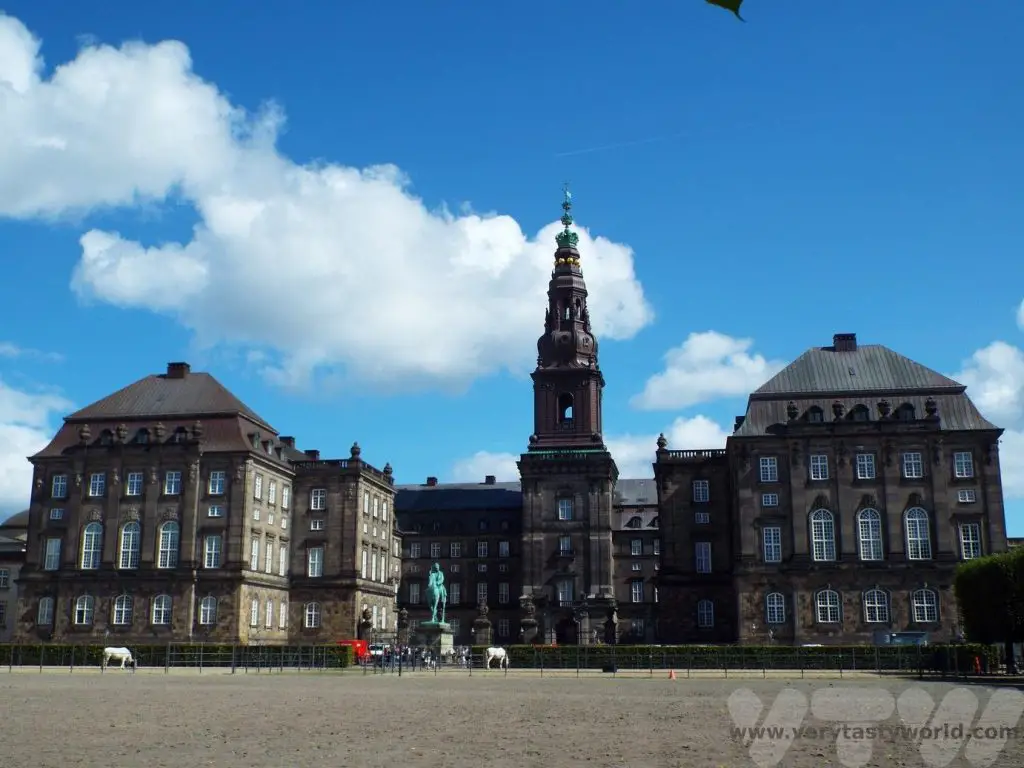
Visit Christiansborg Palace
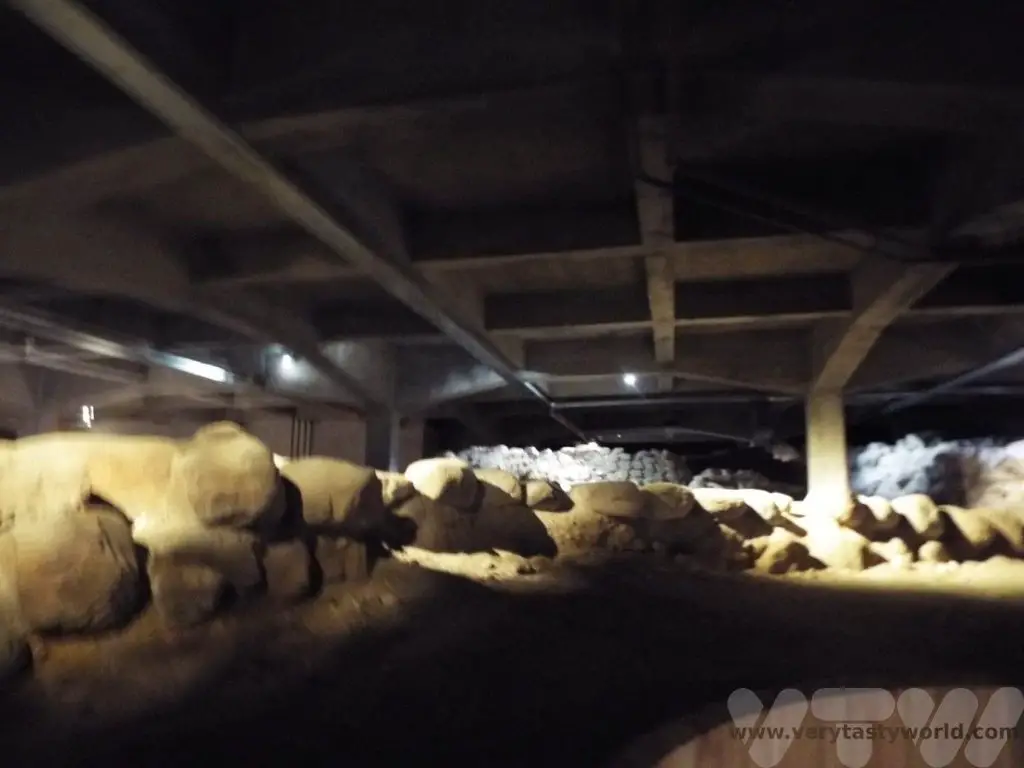
Although Christiansborg Palace now houses the Danish Parliament it used to be the palace of the Danish kings and queens.
A visit to the ruins underneath the palace offers a fascinating history of the development and construction of the building and you can also visit the former kitchens and stables. The card covers entry to all these, but you need to show it at each location.

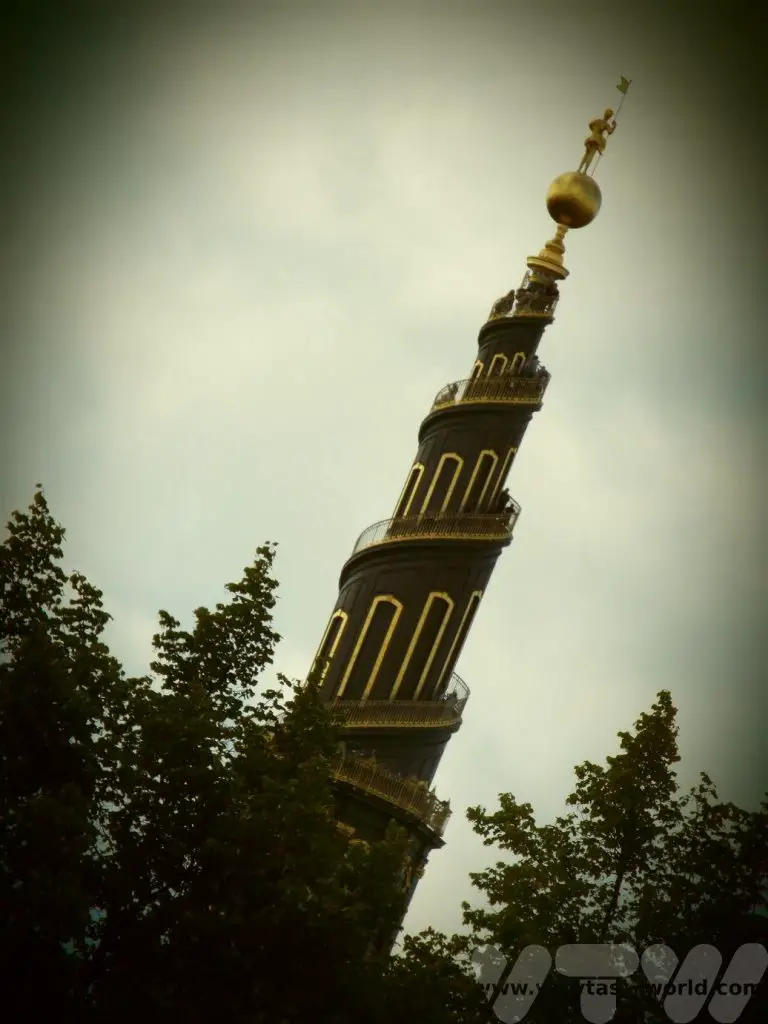
The Round Tower
We then headed to the northern part of the city. The Round Tower was constructed between 1637 and 1642 and is the oldest functioning observatory in Europe. Located adjacent to Trinity Church it was designed to be Denmark’s national observatory. You can climb the tower. One of the great things about this is that there are very few stairs. Like Seville’s Giralda tower, you ascend via a ramp with just a few steps at the top.
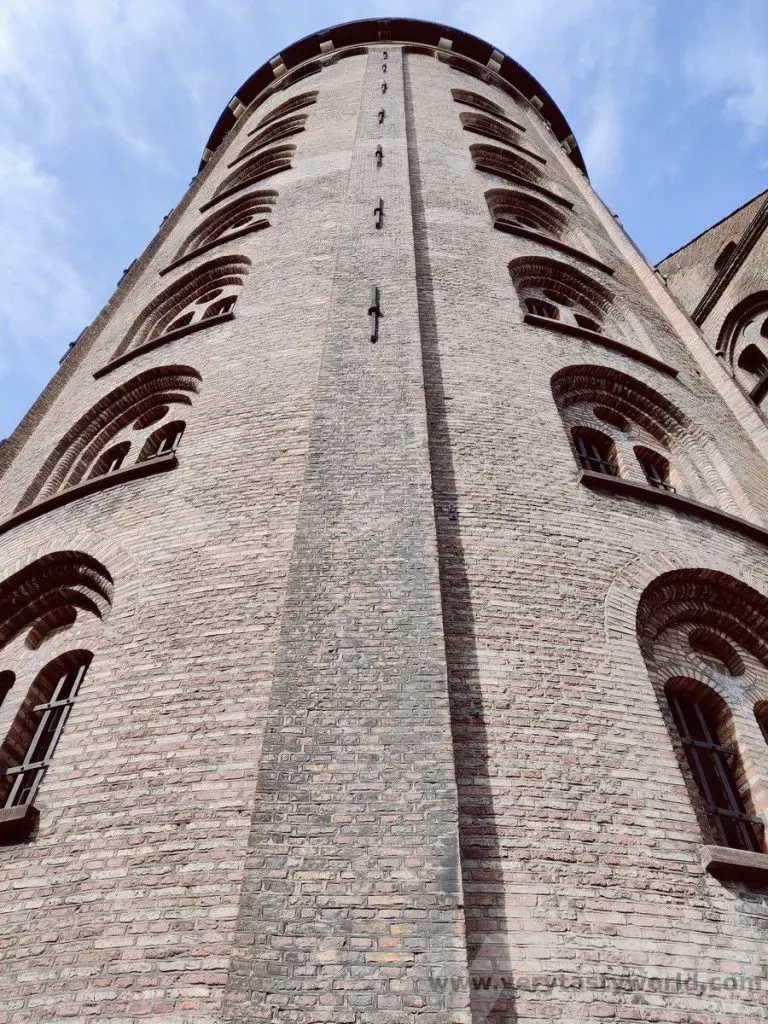
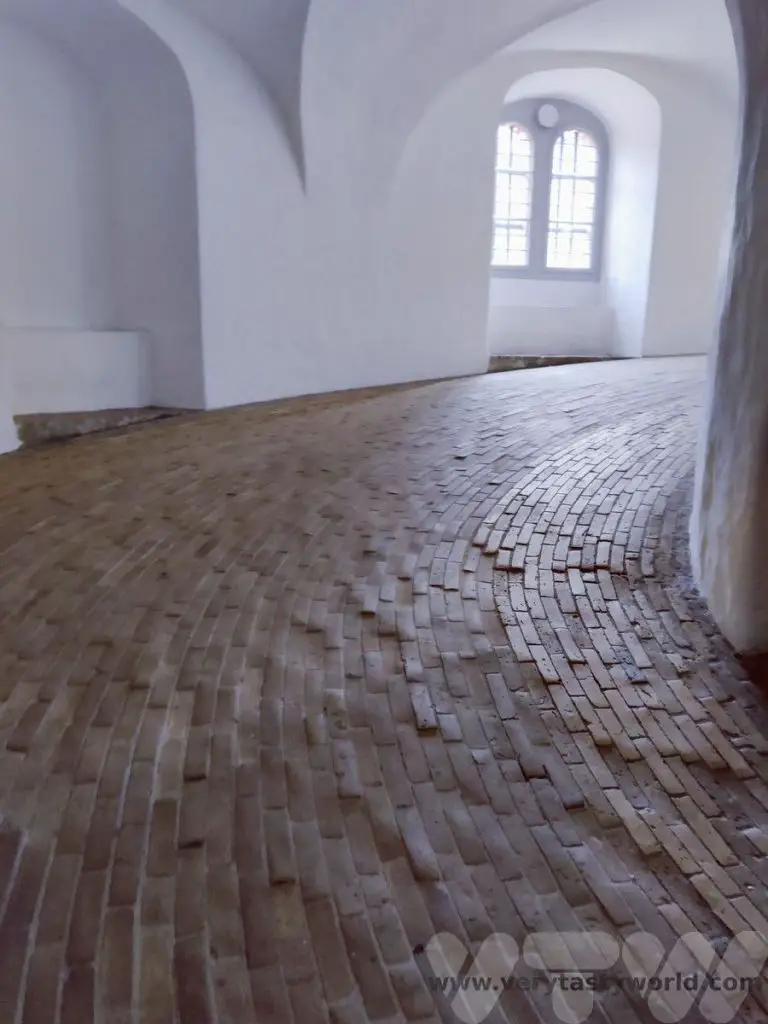
The Round Tower’s final staircase is quite narrow but, thanks to Danish efficiency, there is a red light/green light system to allow visitors to go up and down in turns. The view from the top is wonderful.
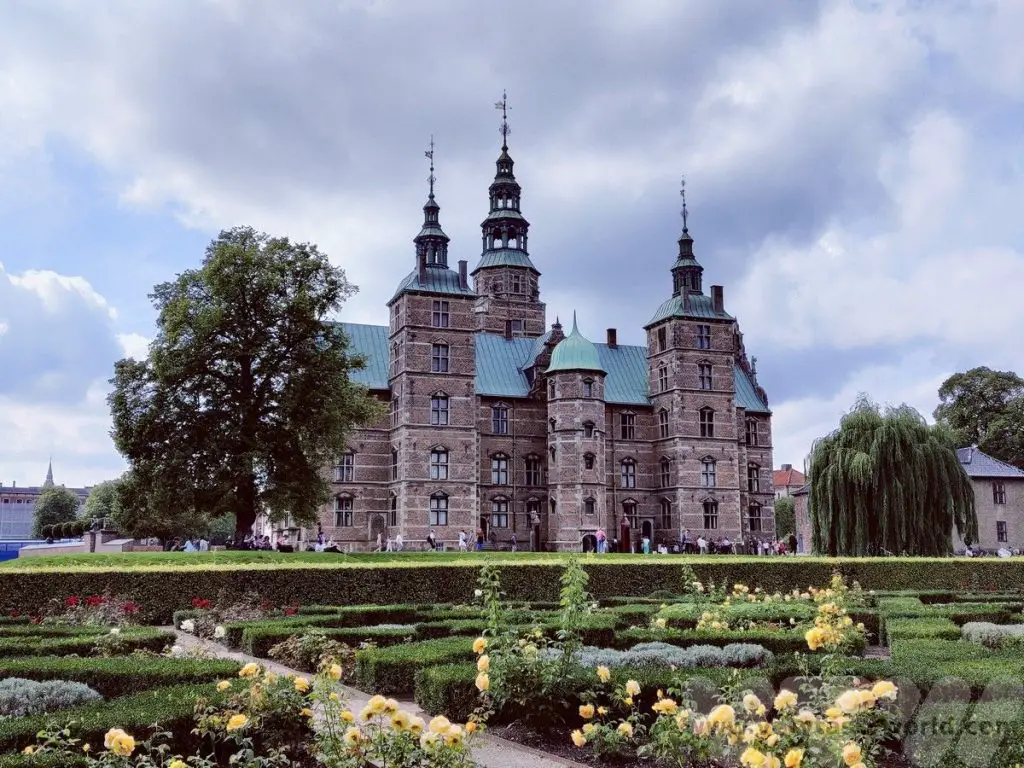
Rosenborg Castle
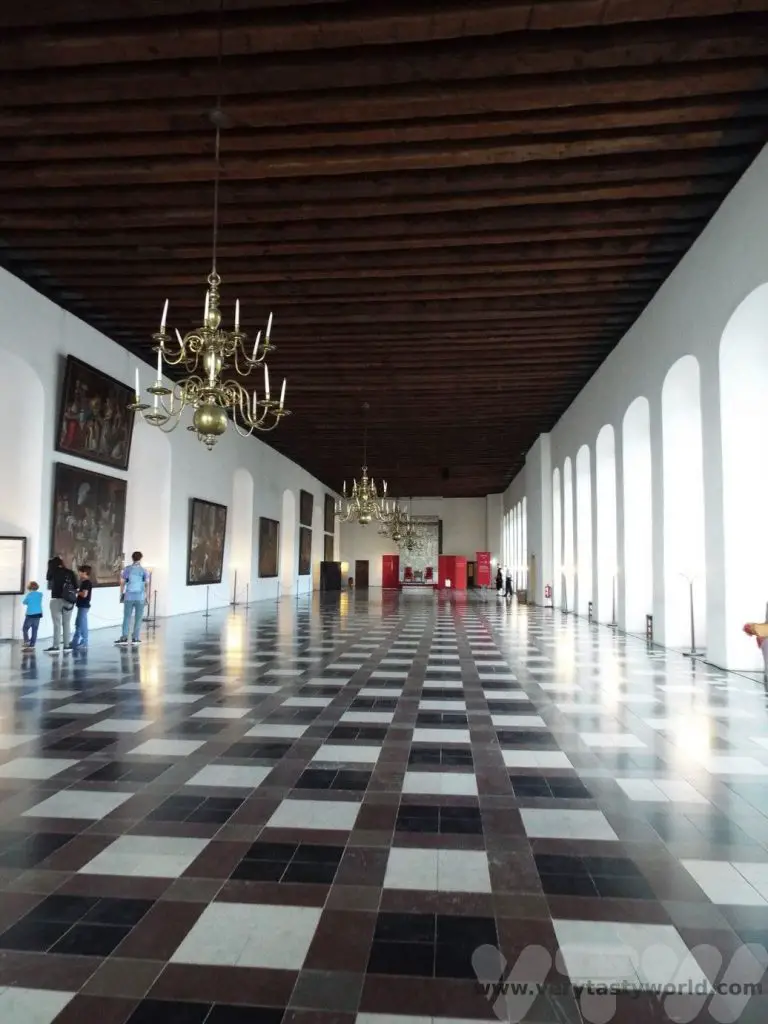
Another construction built by Christian IV, Rosenborg palace was apparently the revered king’s favourite. Set amidst a large park, this impressive castle is very popular as a tourist attraction, so tickets should be pre-booked (go to the website and select the Copenhagen card option). One of the top attractions are the crown jewels, and apparently the only jewels in the world that are on display and used by the Danish queen.
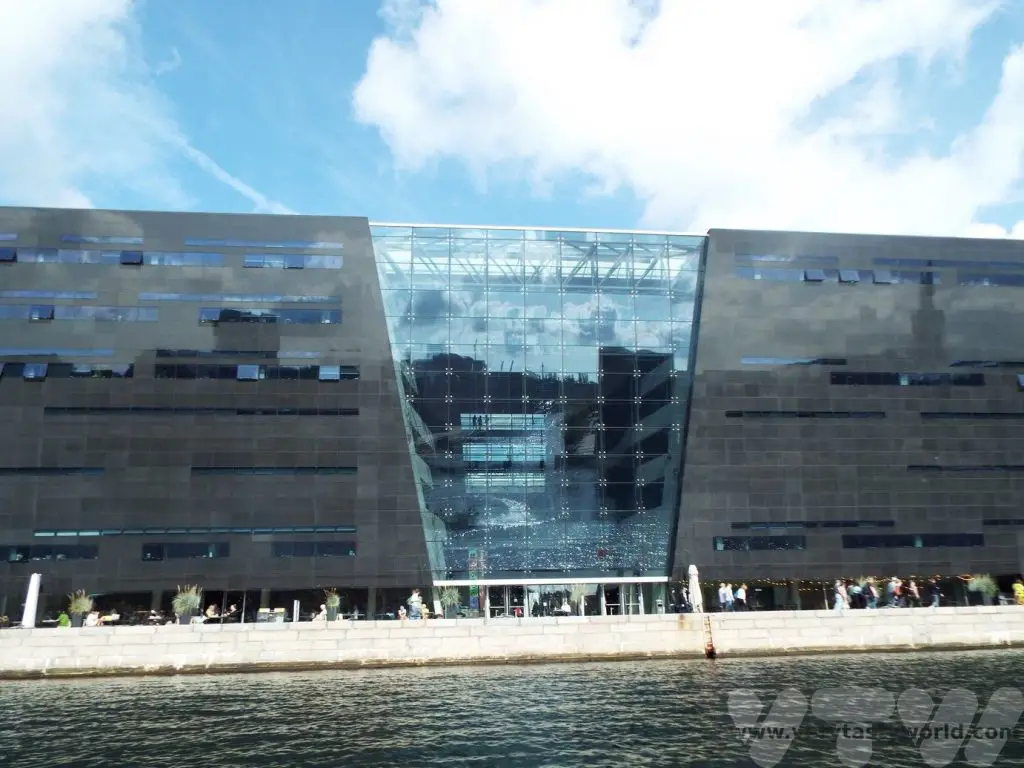
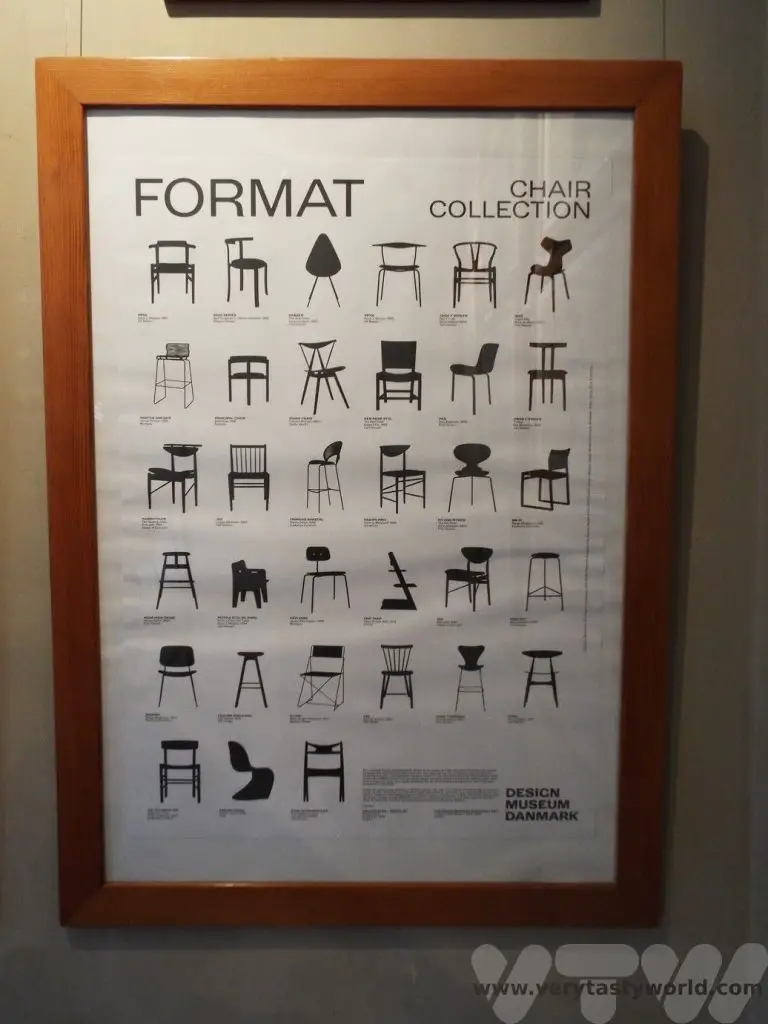
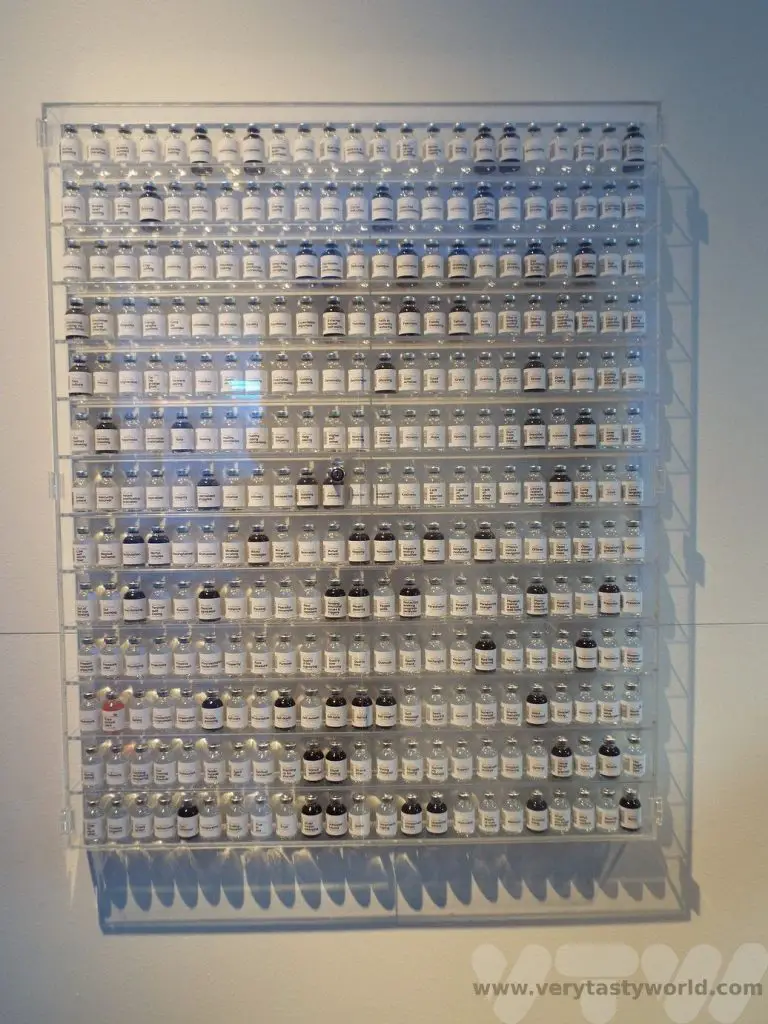
The Design Museum of Denmark
Highly recommended, the Design Museum of Denmark, on Bredgade, is a brilliant space showcasing art, crafts and design from a number of Danish and international designers. It explains the difference between art and design and also reinforces how important design is within our everyday lives. Thought-provoking and interesting, this was a highlight museum.

Day 4
On day 4 we sneaked in a visit to the Museum of Copenhagen, during the very last hour of our Copenhagen card. If the card expires during a visit, don’t worry, they won’t kick you out!
Museum of Copenhagen
This interesting museum takes you on a historical journey through the development of the city. It also has temporary exhibitions and we were lucky to catch one about commercial artist and designer Ib Antoni, known as The Great Dane, who created highly distinctive art, much of which was to promote Denmark and Copenhagen.
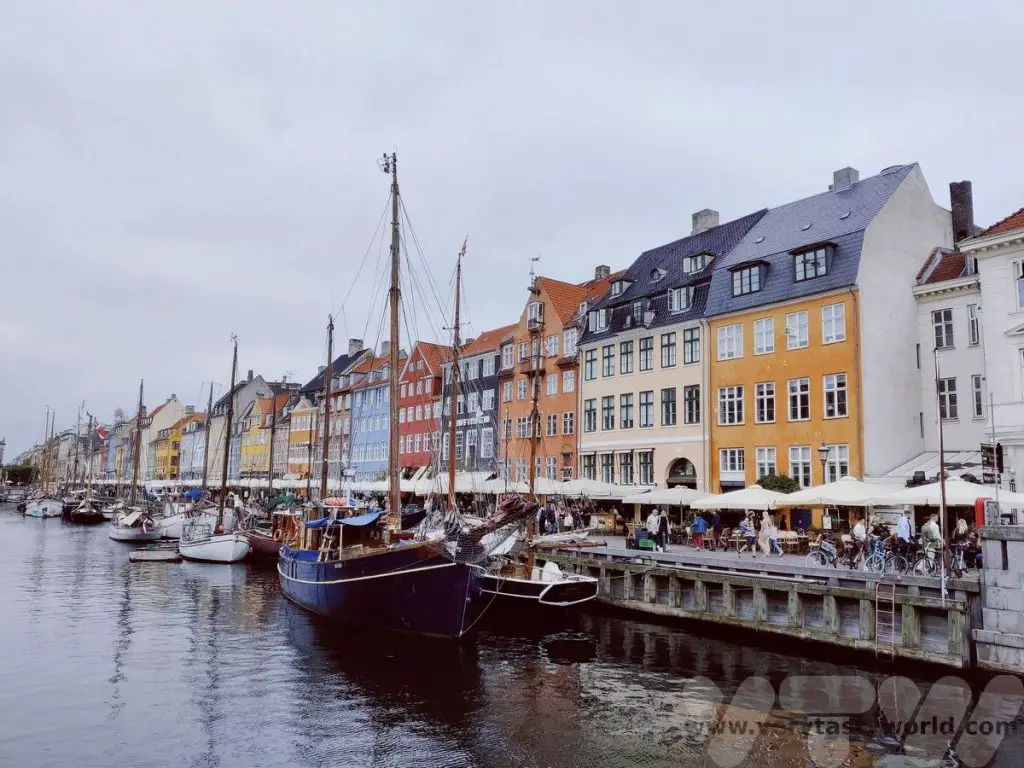
Nyhavn
No visit to Copenhagen would be complete without seeing Nyhavn, the gloriously colourful canal district. The canal was constructed between 1670 and 1675, intended to enable a passage from King’s Square in the city to the sea. It was notorious for being an area of ill-repute, where salty sailors and prostitutes hung out and much beer was consumed – the water not being very conducive to healthy living at the time.
Hans Christian Anderson lived at no 67 between 1845 and 1864. It became less important as ships became larger and these days there are loads of bars, restaurants and tourists. The area is undeniably pretty though.
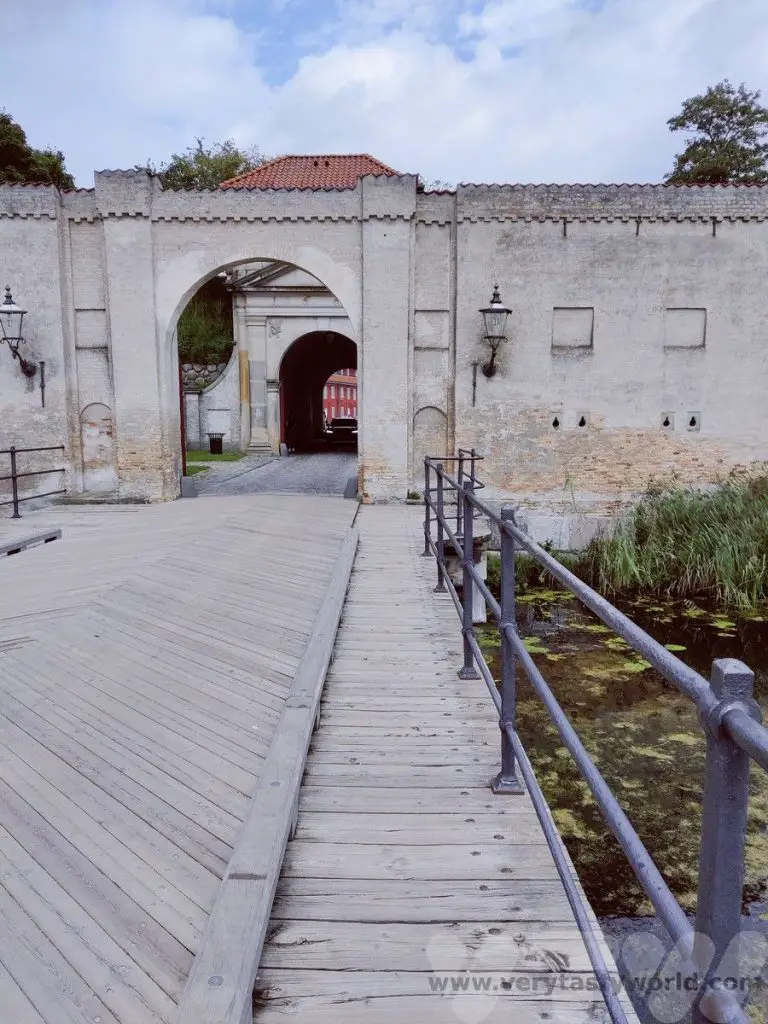
Visit the Kastellet Fort
Walking further north from Nyehavn is the Kastellet, also known as the citadel. It is a fort designed in the shape of a pentagon. Originally part of the wider ramparts that circled Copenhagen, this is all that remains. It was constructed by Christian IV in 1626 and is one of the best preserved fortresses of its type in Europe.
There is a lovely park to wander through and a number of buildings within the site’s grounds. It currently houses military barracks and offices but some of the buildings are open for visitors with exhibitions to explore.
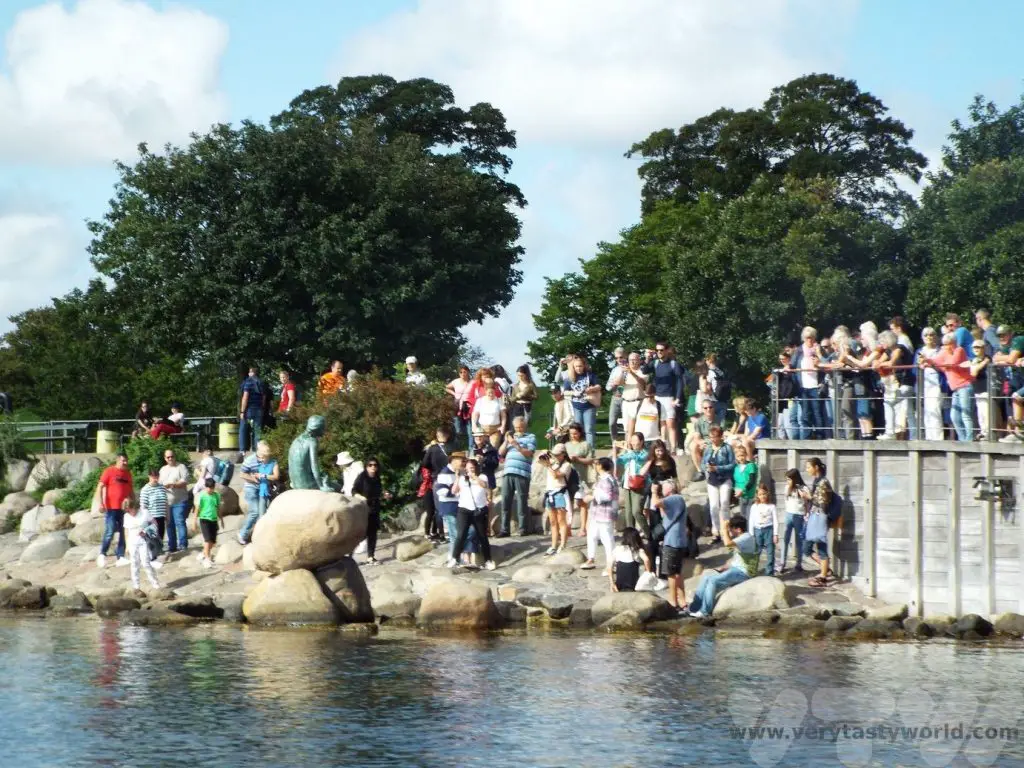
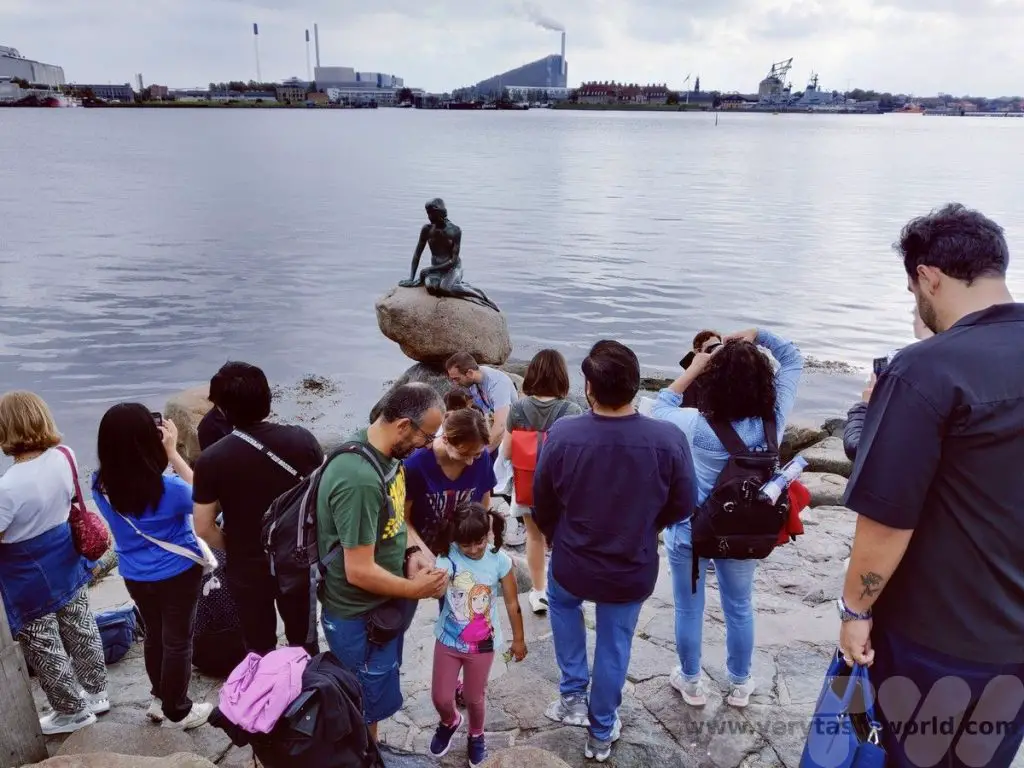
The Little Mermaid
Located on the shore on the far side of Kastellet is the city’s most photographed attraction. Based on Hans Christian Anderson’s fairytale, this bronze statue by Edvard Eriksen, depicts the mermaid as she transforms into human form.

Be prepared for a plethora of tourists surrounding the mermaid, who is genuinely little at just 1.25m tall, climbing over the rocks to snap that perfect shot. A zoom on your camera and a bit of patience is a safer option.
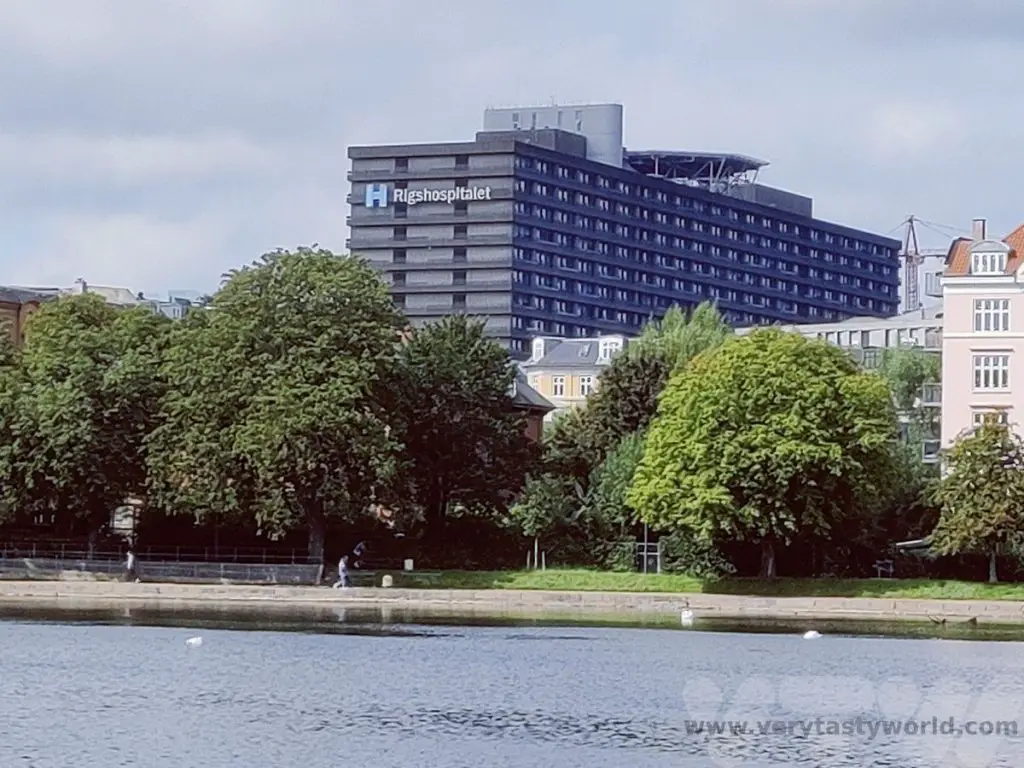
A Quick Trip to Hospital
Okay, so almost certainly not top of anyone’s list of places to visit (or indeed on anyone’s list at all) we just had to check out Rigshospitalet. As fans of Danish cinema and TV, we adored Lars Von Trier’s utterly bonkers and completely brilliant series, The Kingdom. Realising it was set in Copenhagen’s actual hospital, we just had to stop by to take a photo!
Day 5
A Day Trip to Sweden
Another TV connection with Copenhagen is that of The Bridge, the popular Scandinavian-noir drama series. It was set on and around the Oresund Bridge, a remarkable construction that joins Denmark with Sweden.
There are loads of trains that leave from the central station to Sweden. You can reach the nearest city, Malmo, in around 45 minutes and it’s a nice place to spend the day. If you do take the train, pick up at ticket from the machine at the station and don’t forget to bring your passport. We weren’t asked to show ours but checks do happen.
Malmo is a pretty city with a cute canal, where you can take a boat trip. And there are plenty of squares filled with restaurants.

Lilla Torg is a popular – and very picturesque – square with plenty of restaurants.
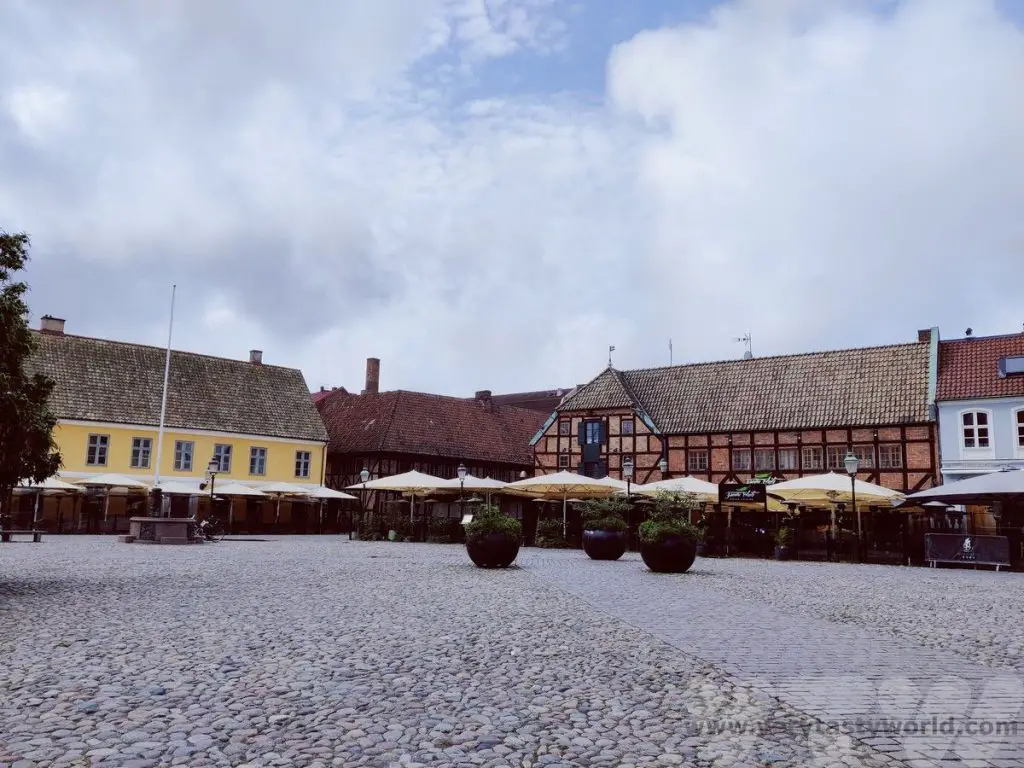
Disappointingly they were all serving international food and we really struggled to find a Swedish restaurant in Sweden!
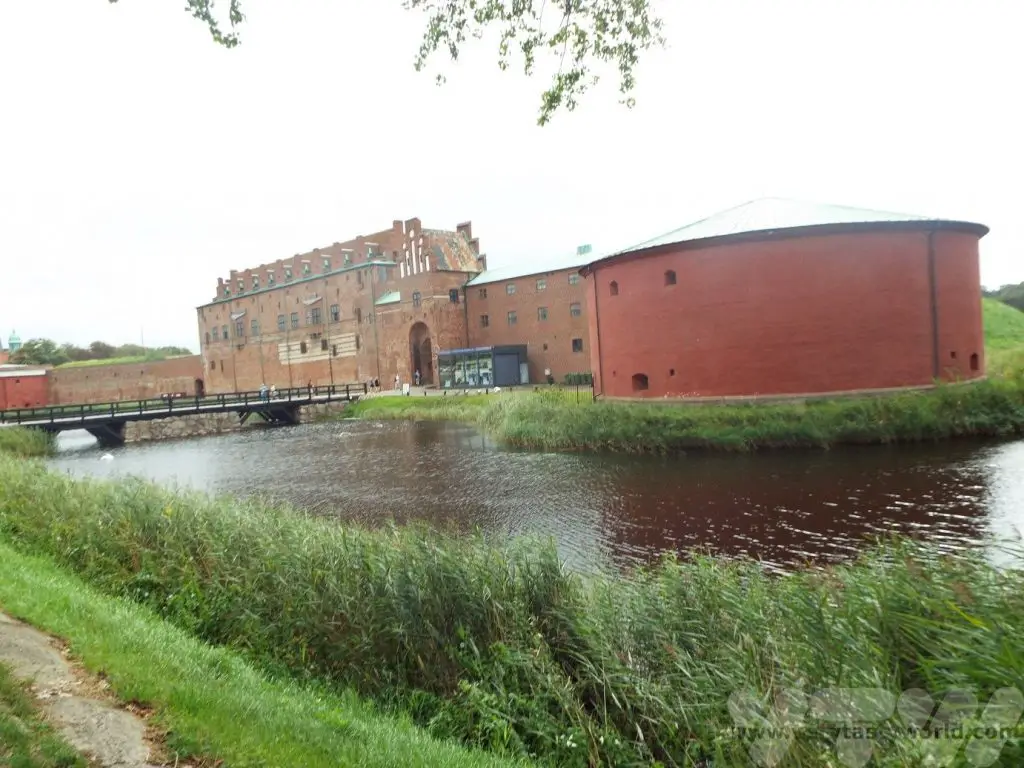
Malmo castle is well worth a visit. Part castle, part museum, part art gallery, part natural history museum and part aquarium, there is something for everyone! A combined ticket for 100 SK will also ensure entry to the science and maritime museum across the road.
Five Days in Copenhagen – ‘Let Us Clink and Drink One Down!’
Copenhagen has a plethora of restaurants and drinking establishments. Chatting to some local people about Danish cuisine we were told that it wasn’t that exciting, largely in the realms of meat and potatoes.
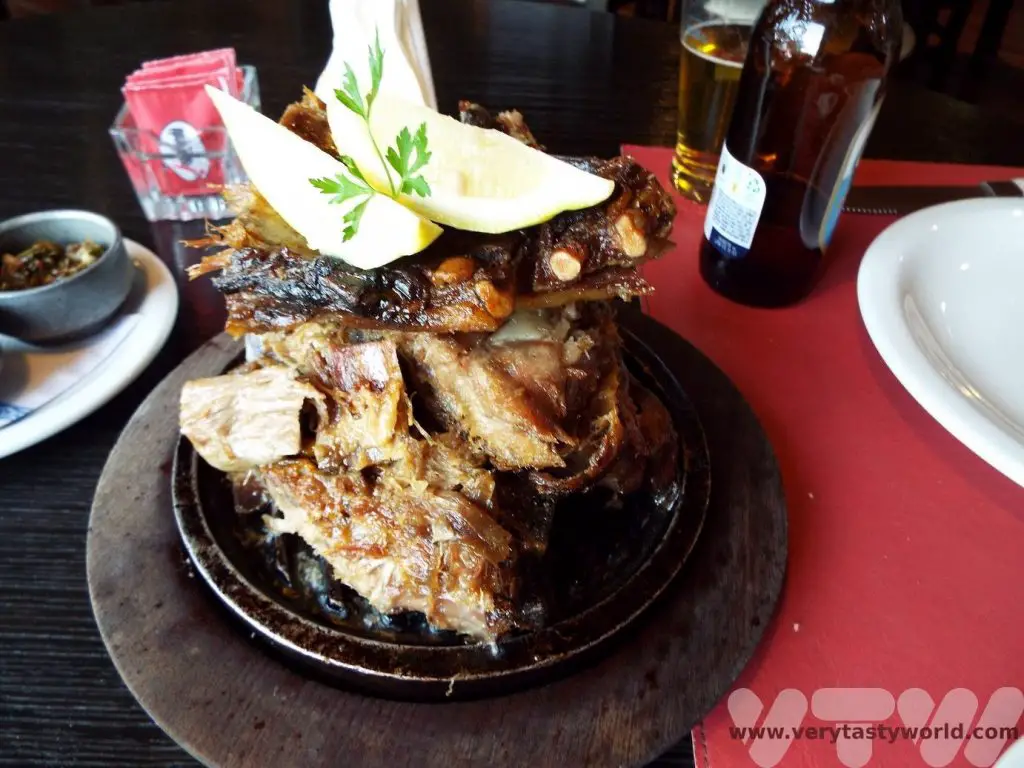
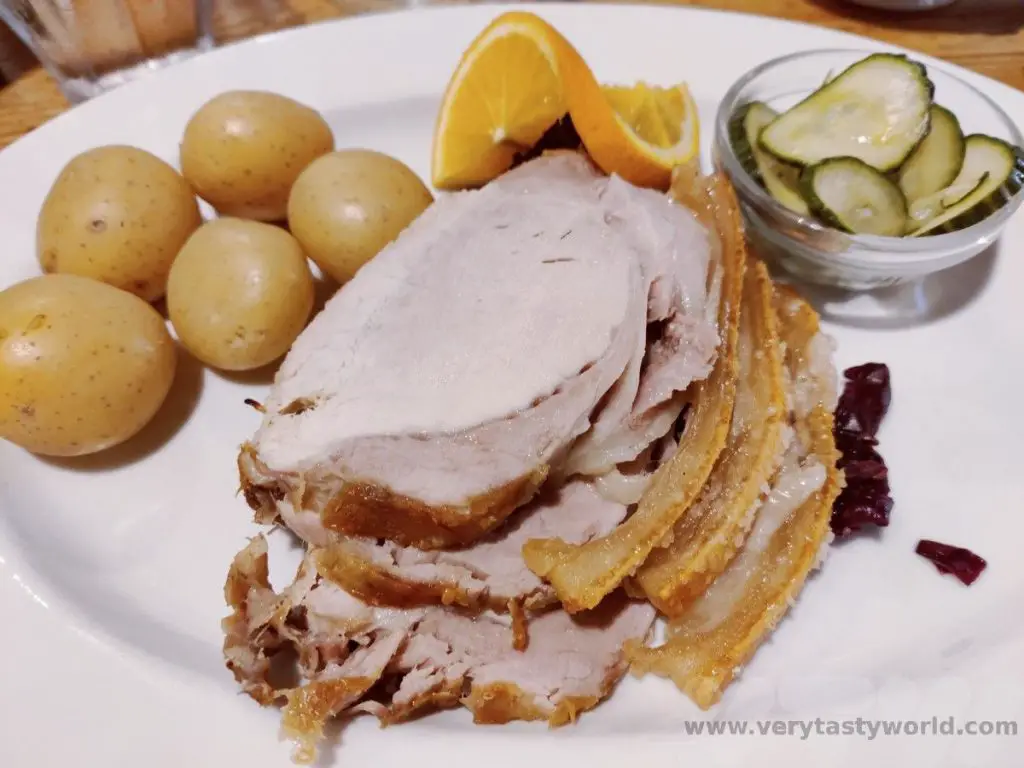
But it’s good, honest, filling grub – meat, potatoes and pickles. Pork is a popular menu item – and the best restaurants deliver crackin’ crackling!
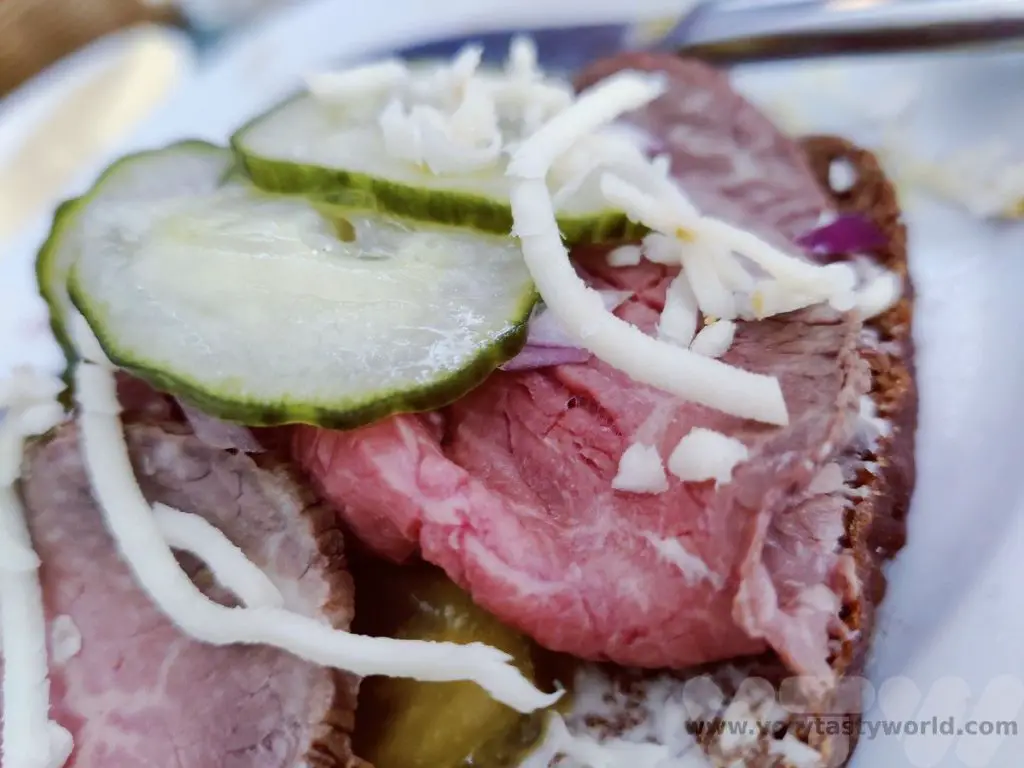
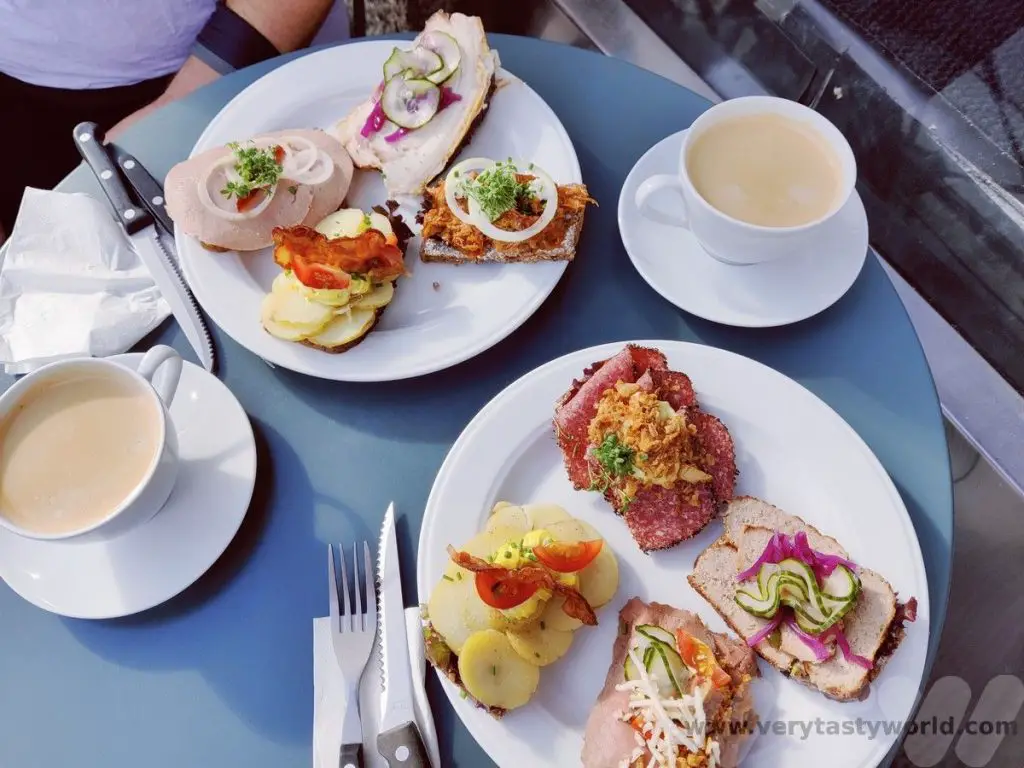
But Denmark is also the land of the smorrebrod – the open sandwich of great deliciousness and beauty!
We enjoyed a lunchtime special of a smorrebrod platter at the Canal Caffeen restaurant. You are provided with bread, butter and a platter of various ingredients. Then you butter the bread (smorrebrod literally means ‘buttered bread’) and combine the toppings to make your own smorrebrod. We were advised about traditional Danish combinations but also told it was perfectly okay to make our up own.

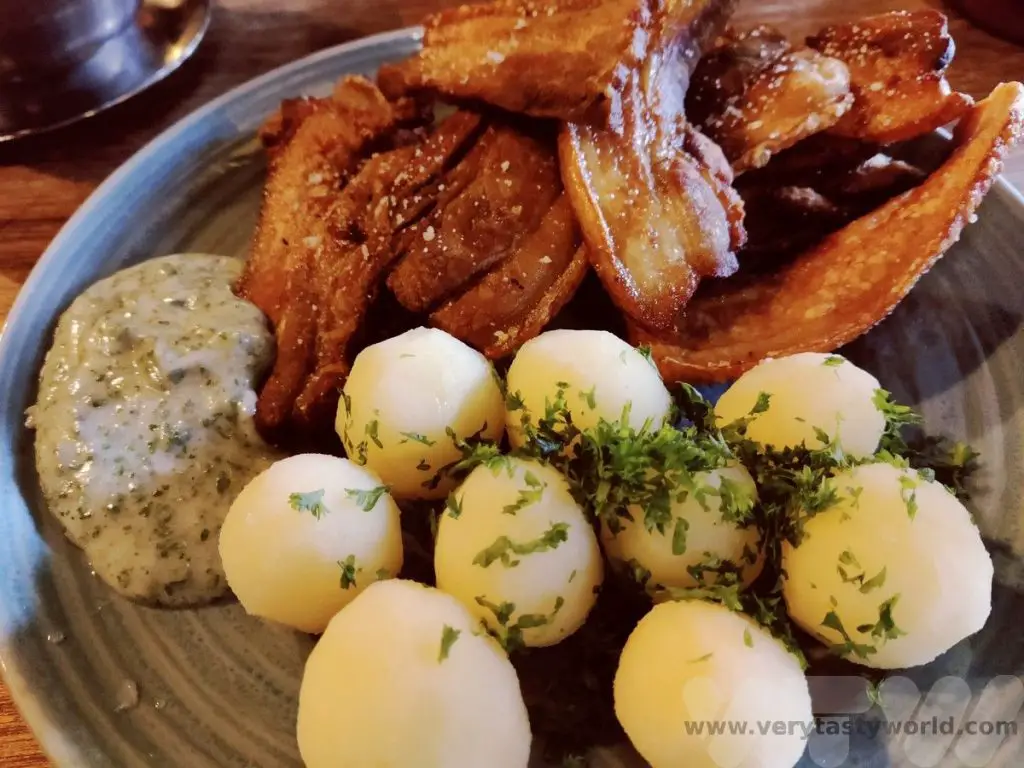
The platter comprised: fried fish fillet with remoulade, herring (to be eaten with the rye spread with lard instead of the usual butter), roast beef with onion, horseradish and remoulade, chicken with mayonnaise, roast pork with cabbage and pickles and brie with radish. It was a feast.

The meat packing district behind the central station (i.e. on the opposite side to Tivoli) is a former market trading area and now home to a large number of restaurants.
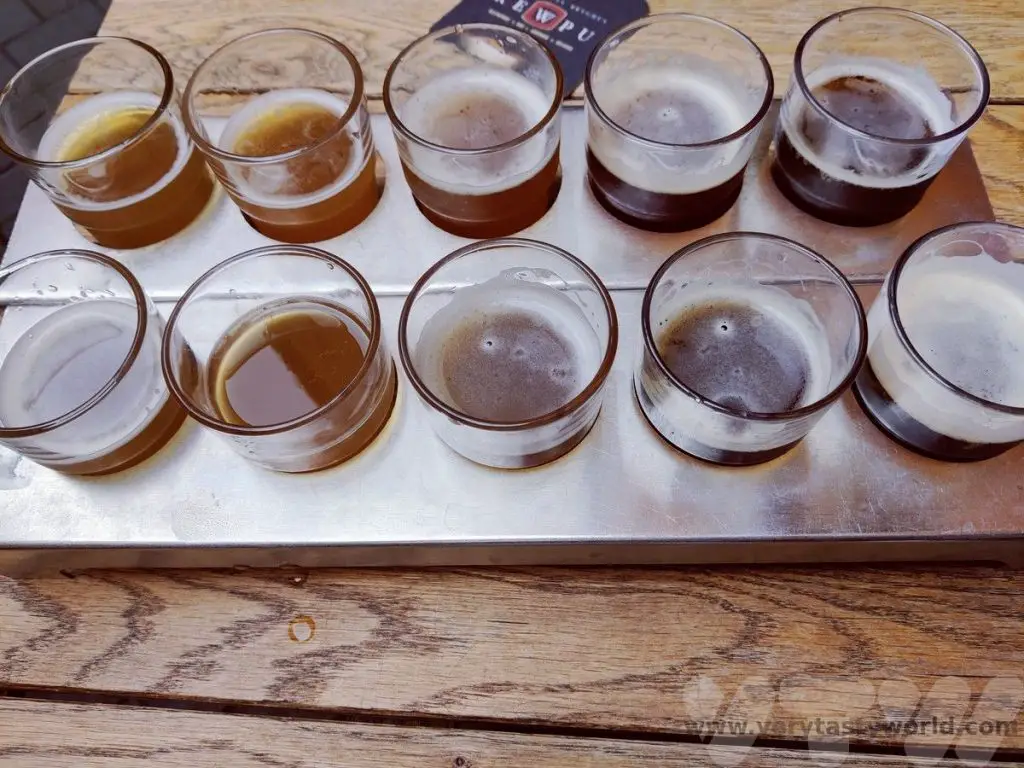
Brewpub War Pig not only offers a range of its own beers but the smokehouse has a variety of meaty dishes on offer.

Copenhagen also has many varieties of beer on offer. In centuries past the water supply wasn’t as clean as it could have been so it was safer for the locals to drink beer than water. They developed a taste for it. Denmark may be the home of Carlsberg but there are also lots of (more) interesting craft beers to try. Brewpub on Vestergade offered a tasting flight featuring a variety of their own brews.
Cheap Eats and Drinks
There’s no getting away from the fact that Copenhagen, like many Scandinavian countries, is not a cheap place to visit if you are not from Scandinavia. We found Denmark to be cheaper than other countries we have visited in this region but still more pricey than home. However, we did find a few places to eat and drink that weren’t bank-breakingly expensive and offered good value.
Lilian’s Smorrebrod on Vester Voldgade was our top breakfast location. With a friendly welcome and huge variety of smorrebrod on offer from around 22-25DKK each, plus a cup of good coffee for the same price, we enjoyed breakfast/brunch at Lilian’s almost every day.
Rio Bravo on Vester Voldgade offered typical Danish fare including an all-you-can-eat pork, potato and parsley sauce dish if you’re feeling super-hungry. Well, you have to try Danish bacon in Denmark, right? The plate comes piled high and you are offered seconds – but we couldn’t manage them!
For cheap beer, Heidi’s on Vestergade offers a selection of good beers at what we would term UK prices (probably cheaper than London prices!).
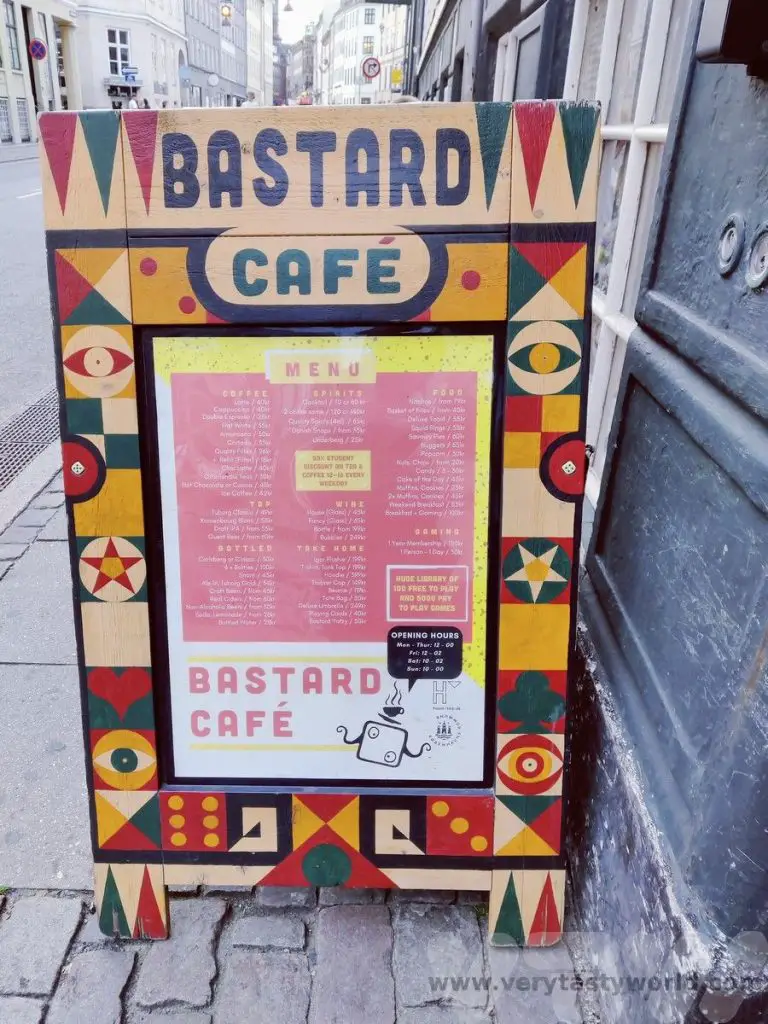
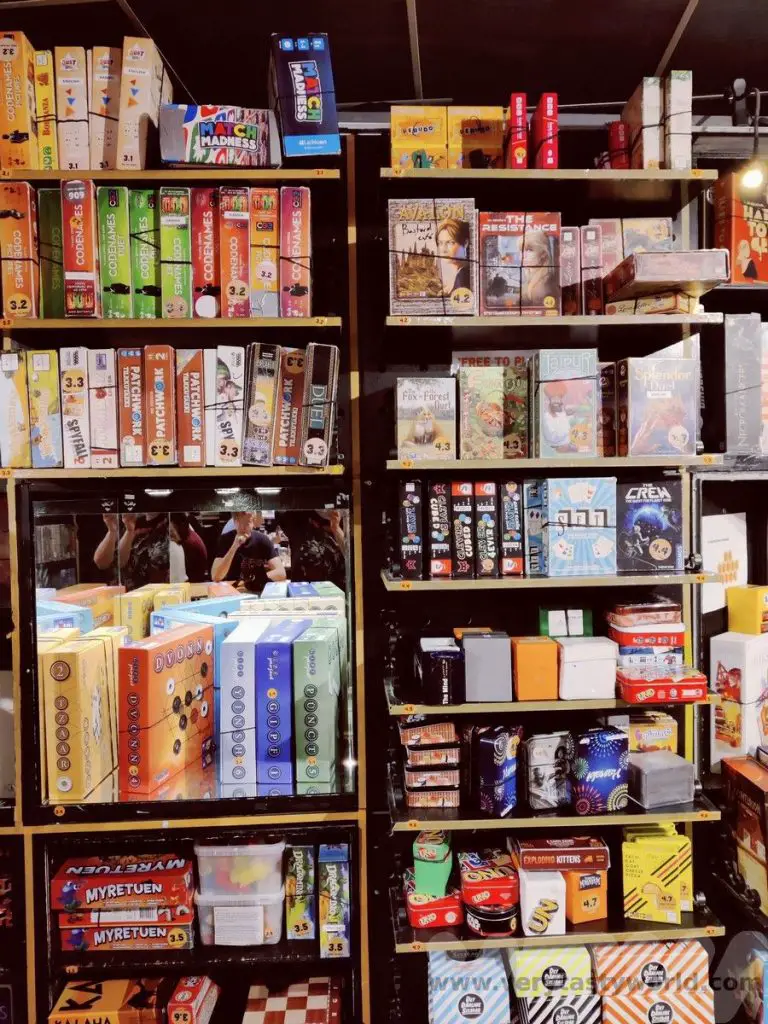
The amusingly named Bastard Café on Rådhusstræde also offered a decent selection of reasonably cheap beer. This sprawling café, sited across multiple rooms within a large building which also houses a deeply cool cinema, has a plethora of board games you can borrow. The beer is good but the food not that exciting – toasted sandwiches and fried things – but you’re not really there for fine dining.
Singing Copenhagen, wonderful, wonderful – Copenhagen for me!
Our five days in Copenhagen were pretty packed and that reflects the diversity of things to do in this vibrant and cosmopolitan city. It really does have something for everyone.
Danny Kaye was right all those years ago. Copenhagen is truly wonderful.
Related Posts You May Enjoy


A One Day Hanoi Itinerary
The northern city of Hanoi is an essential place to visit on a trip to Vietnam. It’s a city we would describe as ‘shabby chic’ compared with the ‘bling’ of Ho Chi Minh City (aka Saigon) in the south. Hanoi has a long and interesting history and lots of fascinating sights. Many are located within a reasonable distance of each other, close to the old part of the city. Here are our suggestions for a one day Hanoi itinerary.
A Brief History of Hanoi
The location where the city now stands has been populated for around 5000 years, and was the capital of the Au Lac, the Vietnamese nation during the 3rd century BCE, but the area was conquered by the Han Dynasty and ruled by China for hundreds of years. In 939 the Vietnamese Ngo dynasty was founded when Ngo Quyen conquered the Chinese in the Battle of Bach Dang River. The last king of this dynasty, the sadistic Le Long Dinh died in 1009.
Power transferred to a palace guard chief called Ly Cong Uan who became Emperor Ly Thau To, founding emperor of Ly dynasty. He established a political centre in the north of the country, naming it Thang Long which means ‘ascending dragon’. Highly revered, he was the emperor who established an era of prosperity for the city. Thang Long was the capital of Vietnam until 1802 when the Nguyen dynasty moved the administration to Hue. In 1831 Thang Long was renamed Hanoi, which means ‘inside the rivers.’ Vietnam was colonised by the French in 1873 and they designated Hanoi to be the capital of the whole of French Indochina. The French abandoned Vietnam during World War 2.
Ho Chi Minh, leader of the communist revolutionary party the Viet Minh, declared Vietnamese independence on the 2nd September 1945 and established Hanoi as the capital of the Democratic Republic of Vietnam, an independent country. The city endured turbulent times during the last half of the twentieth century – the French returned in 1946 so Ho Chi Minh led a guerilla war and defeated them in 1954 in the First Indochina War.
The Second Indochina War, better known as the Vietnam War (although in Vietnam, local people refer to it as the American War) followed immediately and was fought from 1955 to 1975, eventually leading to the reunification of Vietnam. Since 1976 Hanoi has been the capital of the Socialist Republic of Vietnam.
Getting Around Hanoi
There are plenty of options for getting to Hanoi’s attractions. We stayed very close to the Old Quarter which was perfect for exploring the area. Most of the attractions mentioned here are within walking distance. Although beware, the very first thing that will strike you about Vietnam is the sheer number of scooters and motorcycles. They are everywhere!

The next thing that will strike you is – how do you cross the road? We have a helpful video guide in this post. Wandering around Hanoi is a pleasure in itself – an undeniable assault on the senses perhaps, but walking in this city is a great way to discover its marvellous nooks and crannies.
Alternatively, there are buses and taxis available for transportation.
One Day Hanoi Itinerary – Morning in The Ba Dinh District
Ho Chi Minh – The Father of the People
The morning started with a visit to the Ho Chi Minh Mausoleum on Ba Dinh Square, the final resting place of the highly revered Vietnam revolutionary leader. Inspired by Lenin’s tomb and other communist leaders, the body of Ho Chi Minh has been embalmed and lies in state, guarded at all times. It is possible to visit the grand marble construction and file past the body.
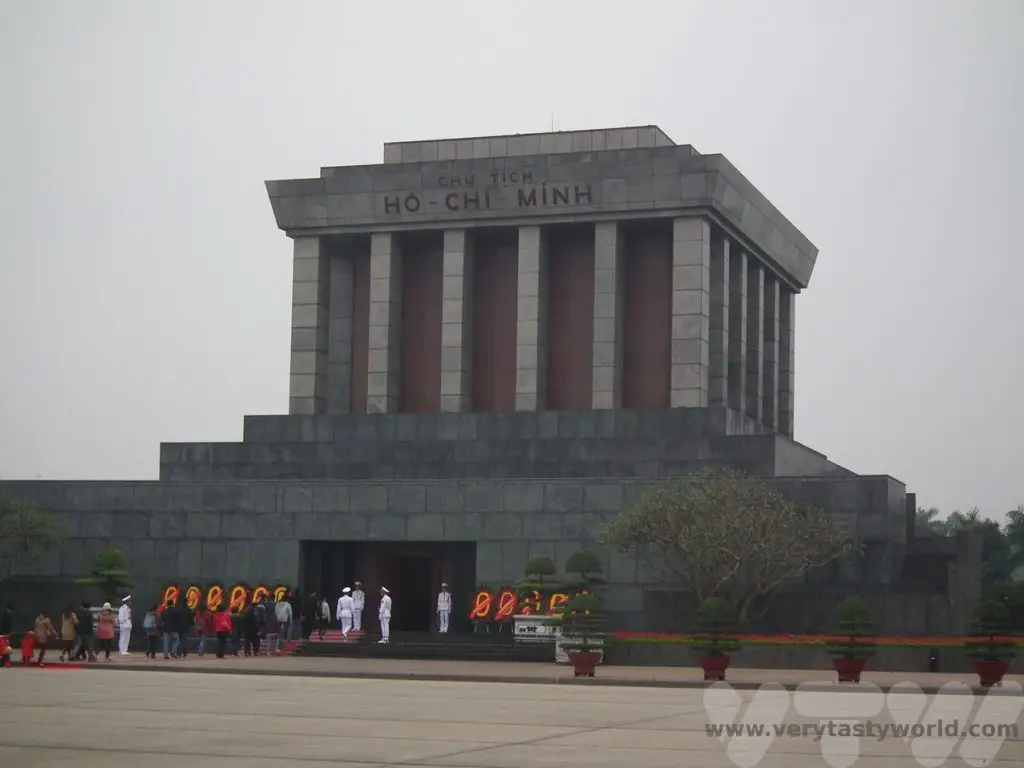
You will most likely need to queue to enter the mausoleum. Respectful dress is required (sleeveless shirts and shorts are not allowed) and you may need to leave your backpack in a locker. You are also expected to pass by the body in silence as a mark of respect. If you are visiting the mausoleum between the 4th of September and the 4th of November, the body will not be available for viewing because it goes to Russia for maintenance at this time.
Interestingly, Ho Chi Minh himself wanted to be cremated and have his ashes distributed through different regions of Vietnam. But the communist party wanted to celebrate and commemorate him, so the mausoleum was constructed in his honour. His wish seemed, to us, to be a much more humble approach.
Our next stop was the presidential palace and former residence of Ho Chi Minh.
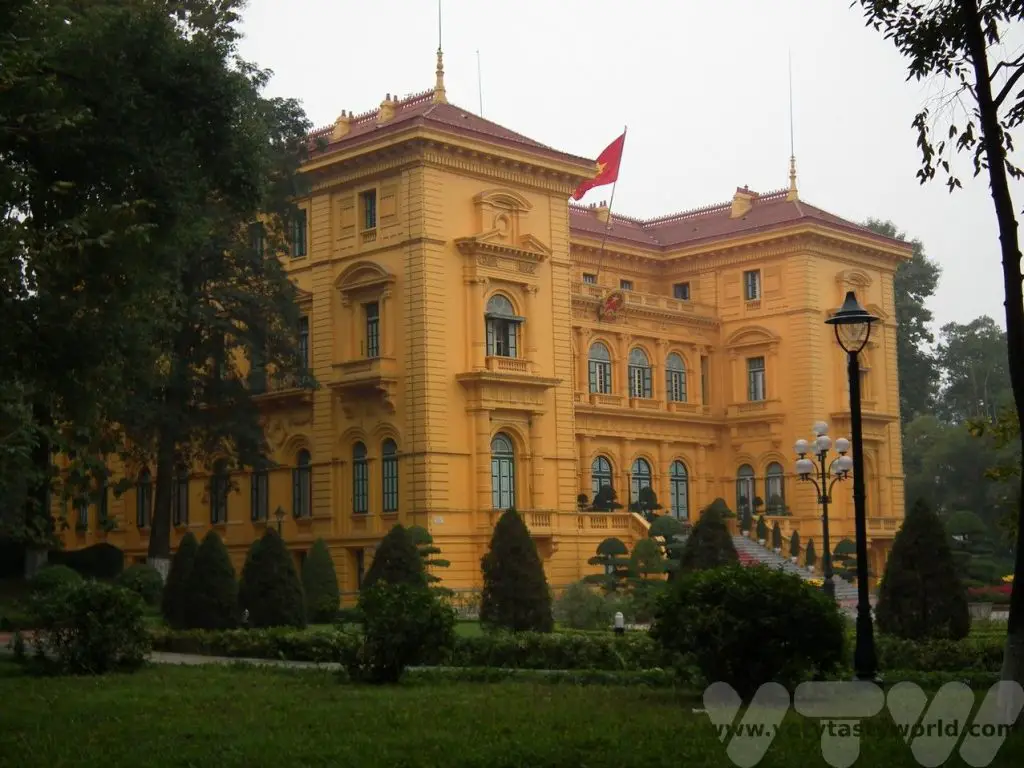
Although Ho could have used the opulent presidential palace as a residence he chose to live somewhere much less ostentatious. The two room stilt house, set amidst a pretty garden with a carp pond, was his ostensible home from 1958 to 1969. A simple traditional building with minimal facilities. It’s possible to look through the windows to see how Ho lived.
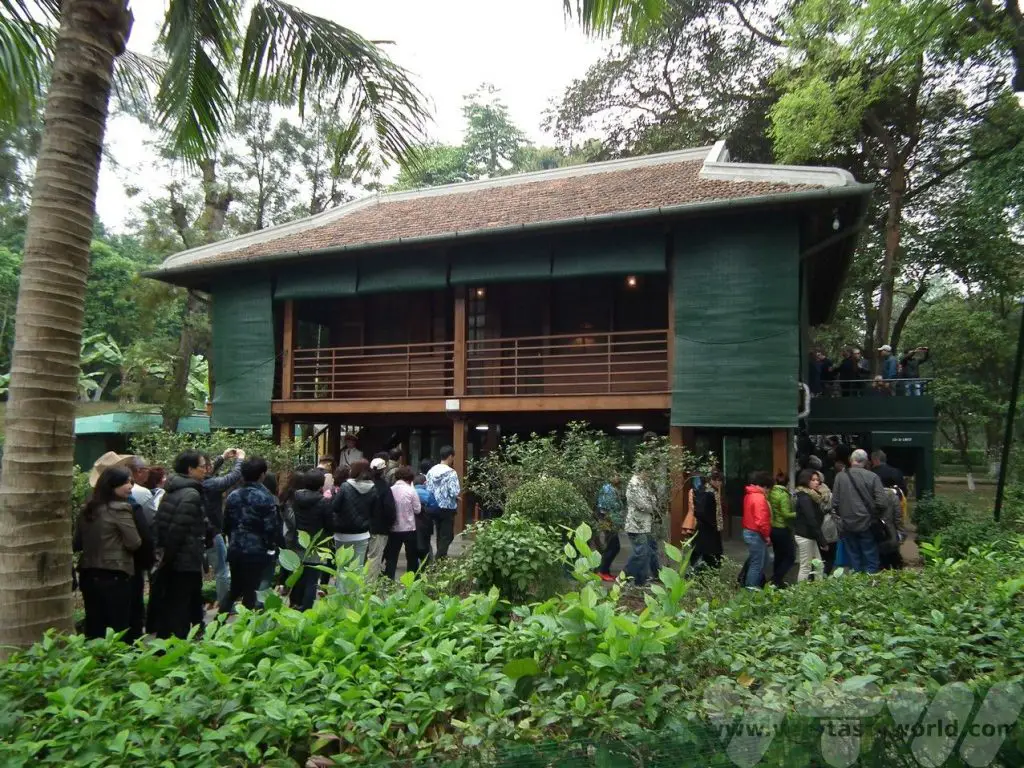

It was fascinating to learn about Ho and quite easy to understand how he was – and still is – revered by the Vietnamese people in Hanoi.
One Pillar Pagoda
Just to the south of the complex is the One Pillar Pagoda (note this is open every morning but closed on Monday and Friday afternoons). It is a wooden pagoda built on a single stone pillar that sits in the middle of a serene lotus pond that is designed to give the appearance of a lotus flower emerging from the water. It is a Buddhist pagoda and was constructed in 1049 by Emperor Ly Thai To apparently to celebrate the birth of a male heir.
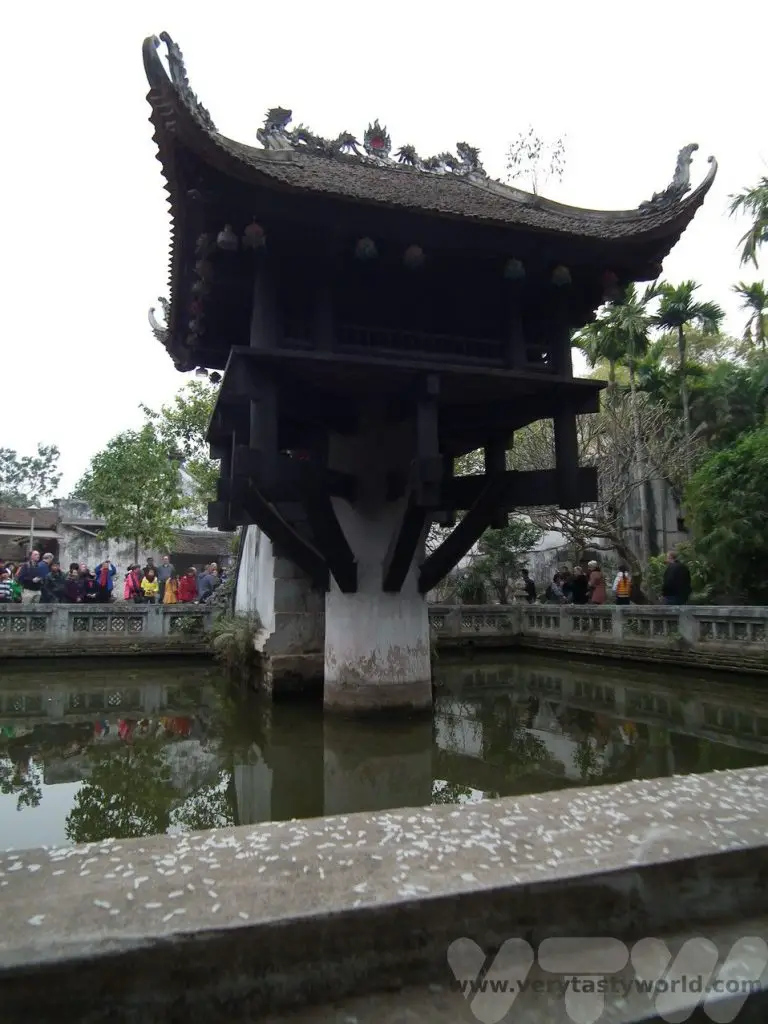
The Temple of Literature
Moving south again, the morning concludes with a visit to the remarkable Temple of Literature. It was constructed in 1070 to honour philosopher Confucious and went on to become Hanoi’s first university in 1076, a prestigious seat of learning. It is another legacy of the Ly dynasty. Students learned mathematics, literature and calligraphy. Although it is no longer a university (and hasn’t been since 1779) it is a monument to education. Even today, Vietnamese students often visit the temple to receive blessings for their own studies.
A beautiful site to visit it has five courtyards.
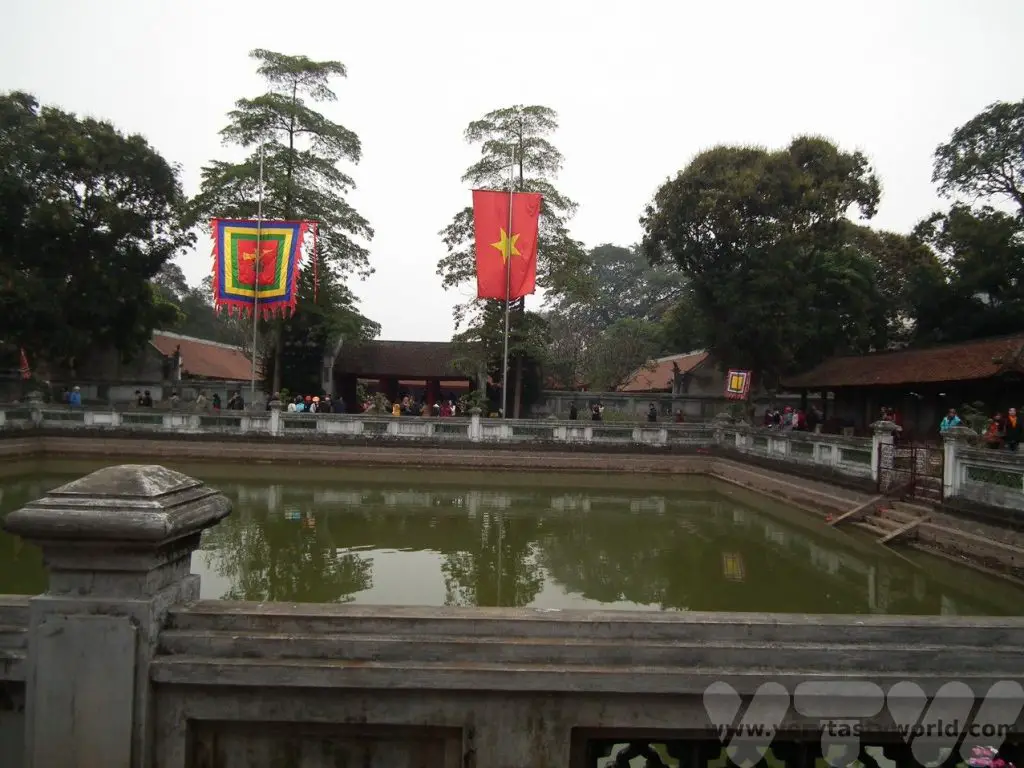
In the centre is a pool, the well of heavenly clarity. It can be seen on the 100,000 dong note.
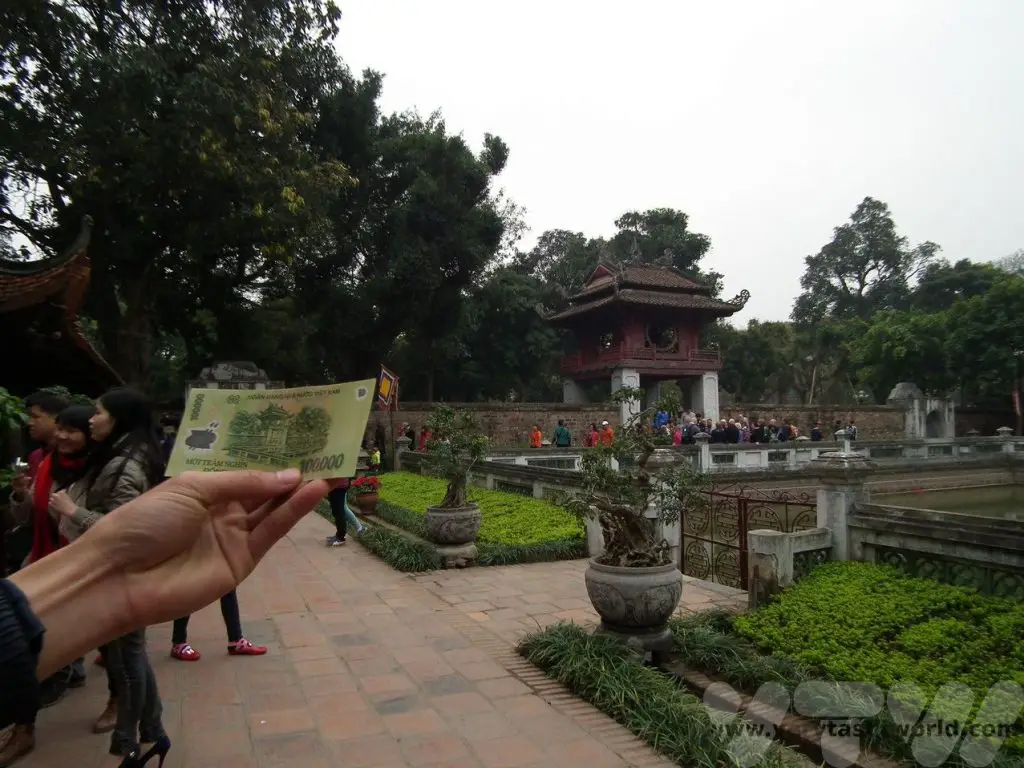
You will see many tortoises throughout the temple – these represent wisdom. There are multiple stelae onto which the names and birthplaces of graduates of the university (renowned for its incredibly difficult exams) are carved. The crane standing on top of a tortoise is a symbol of longevity.
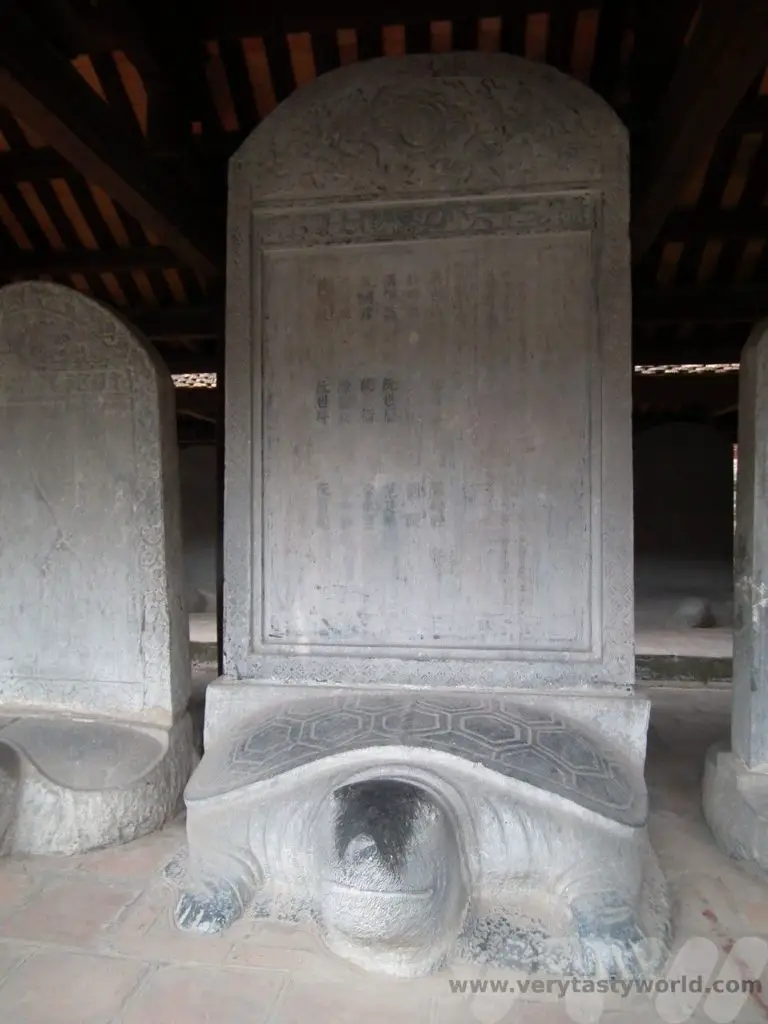

Again, this is a site that is considered hugely culturally important so it is important to behave respectfully. There are even rules about not stroking the tortoises’ heads (quite right too!).
The street on the eastern road adjacent to the Temple of Literature has a large number of restaurants. There’s a great variety of local food here, perfect for stopping for lunch.
One Day Hanoi Itinerary – Afternoon In The Old Quarter
Just up the road from the Temple of Literature is the Vietnam Museum of Fine Arts. If you like art, especially discovering local art, this is definitely a must-see attraction. It’s perfect for a leisurely after-lunch visit.
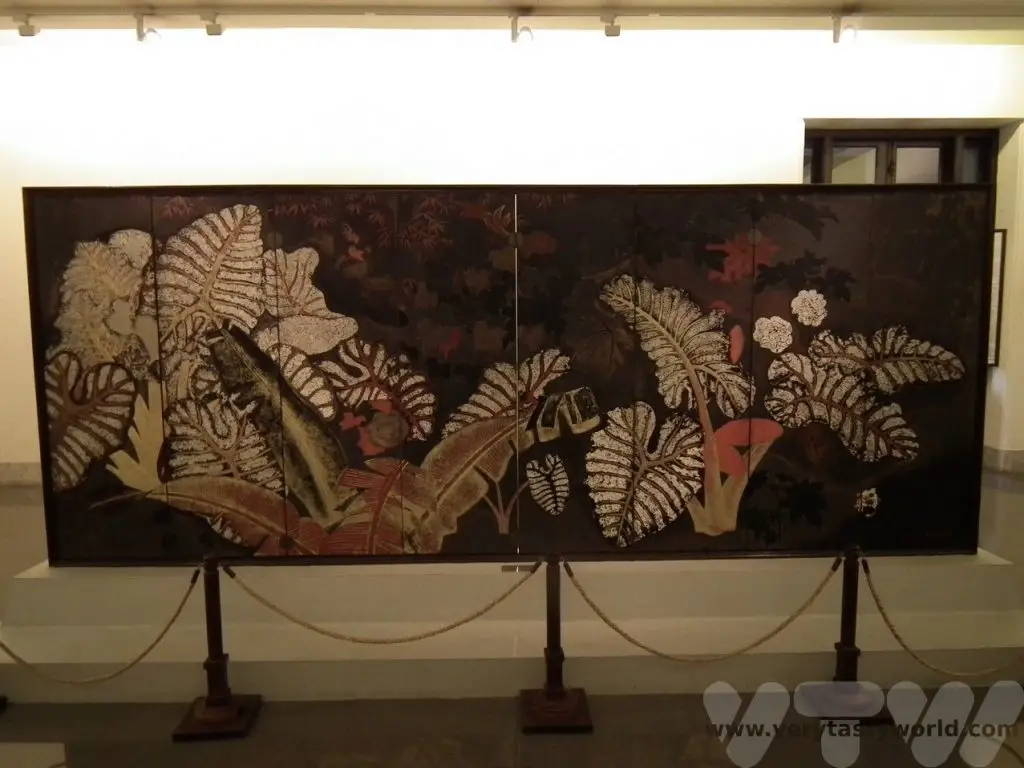
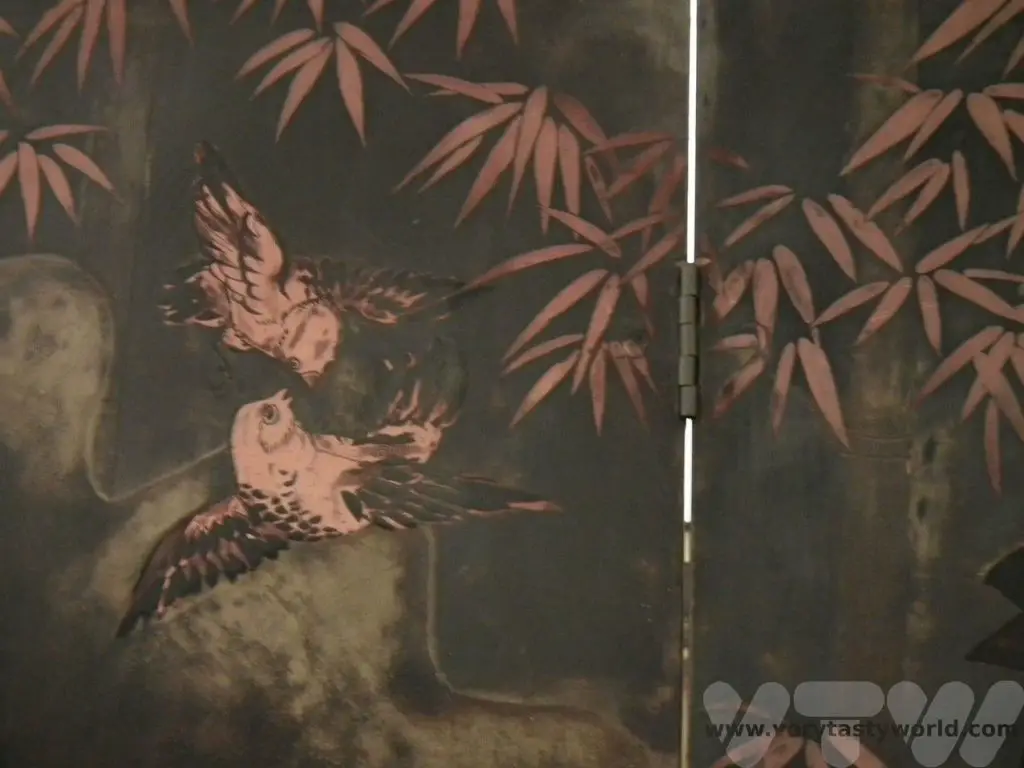
Hoan Kiem Lake
Visiting Hanoi’s old quarter, which lies around a kilometre to the east of the museum. Follow Trang Ti to reach Hoan Kiem Lake (also known as the Lake of the Restored Sword) and the Ngoc Son Temple.
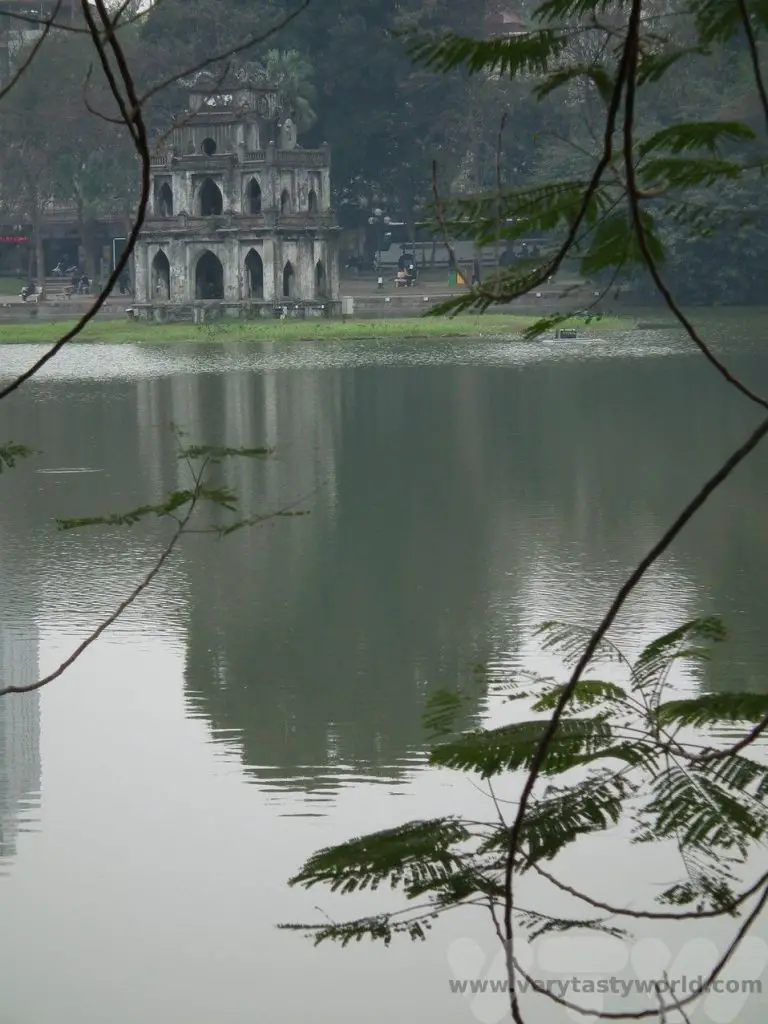
Again, this is a hugely important historic area with a legend that dates back to the founding of Hanoi (as Thăng Long) by Emperor Ly Thai To. A giant golden turtle lived in this lake and gave the Emperor a magical sword which he used to defeat the Chinese occupiers. As soon as he had won the battle, Ly Thai To respectfully returned the sword to the turtle, who dived back into the lake in order to give it back to the gods. It’s very pleasant to walk around the lake.

The lake has an island where the Ngoc Son Temple, also known as the Temple of the Jade Mountain, is situated. It is accessible via a vermillion bridge.
It celebrates Van Xuong who was a revered scholar, La To, and General Tran Hung Dao who defeated the Mongol invaders in the 13th century, a glorious victory.
A Cyclo Tour
An enjoyable way to explore the old town is via a cyclo tour. An hour’s tour takes in the atmosphere of Hanoi’s old quarter and is a relaxing way to end this busy day of sightseeing. You also get to experience the thrill of being on the road amidst all those scooters – an experience in itself.
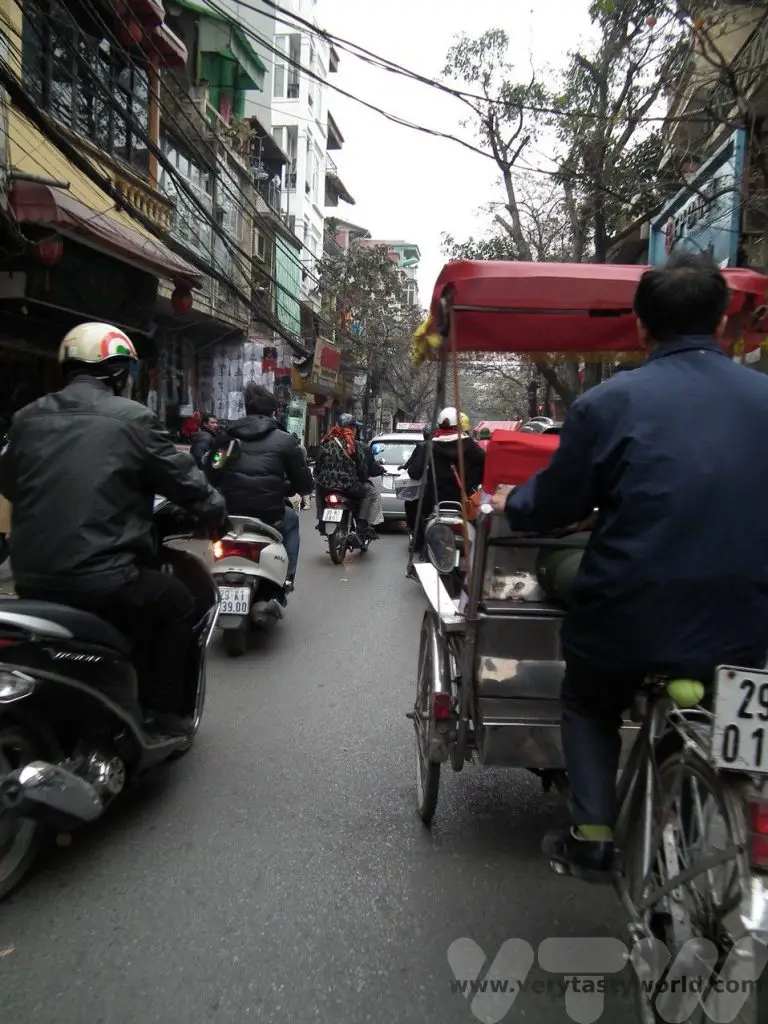
The old quarter is comprised of 36 streets located within a square kilometre just north and west of the lake. The streets have been named for the artisans and craftspeople who traded specific merchandise in that street: bamboo street, silver street, decoration street and silk street to name a few.

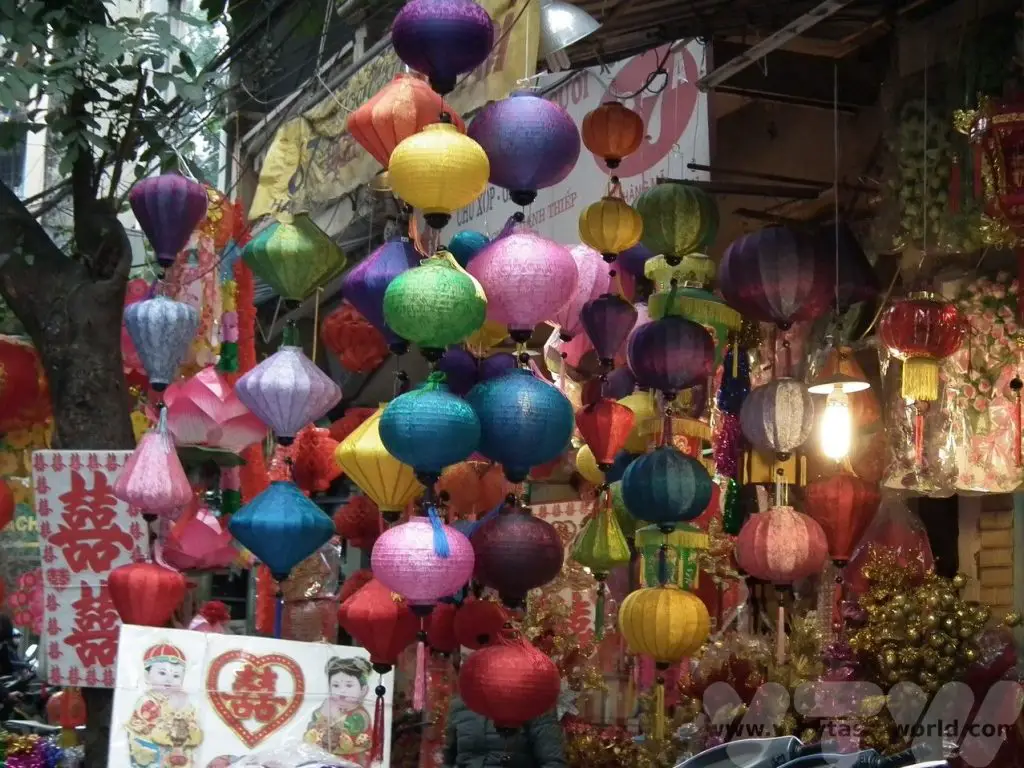
Part of the tour can include a visit an ancient Vietnamese ‘long house’. One of the characteristics of the architecture in Hanoi is that the houses are very thin and tall. The width can be as short as just 2.5m, sometimes up to 5m. However, when you go inside the houses seem to stretch forever. This is because properties used to be taxed according to the amount of façade on the street, so they were constructed this way to minimise costs. This house had a lovely open feel to it thanks to its open balconies, despite the narrow width.
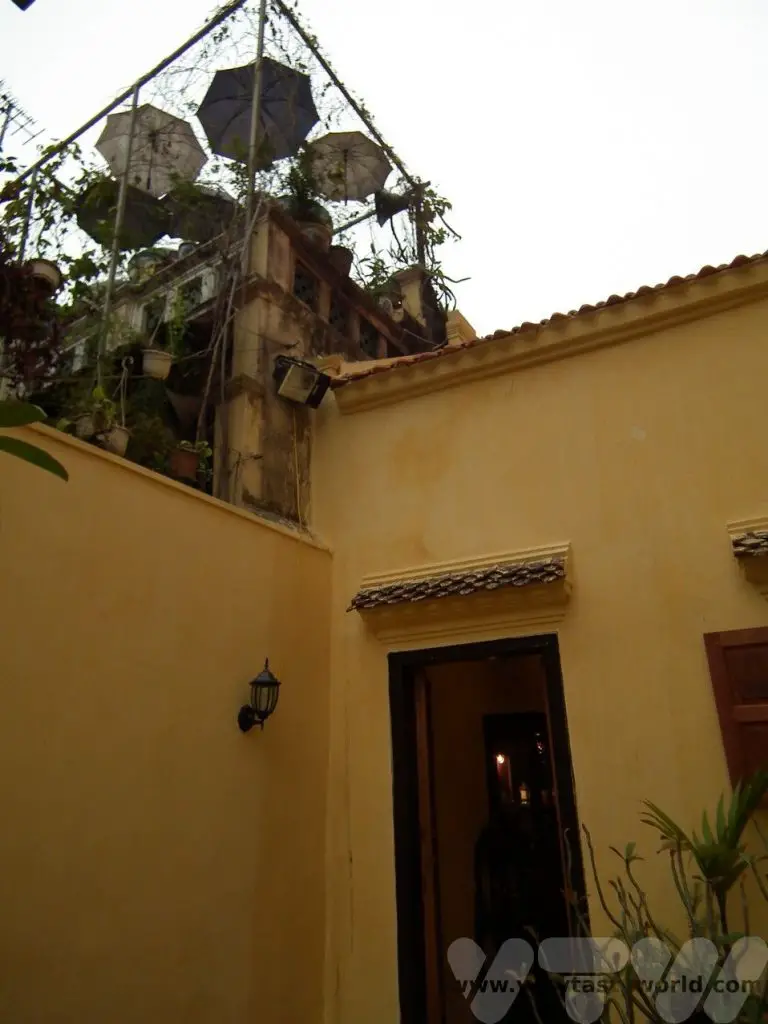
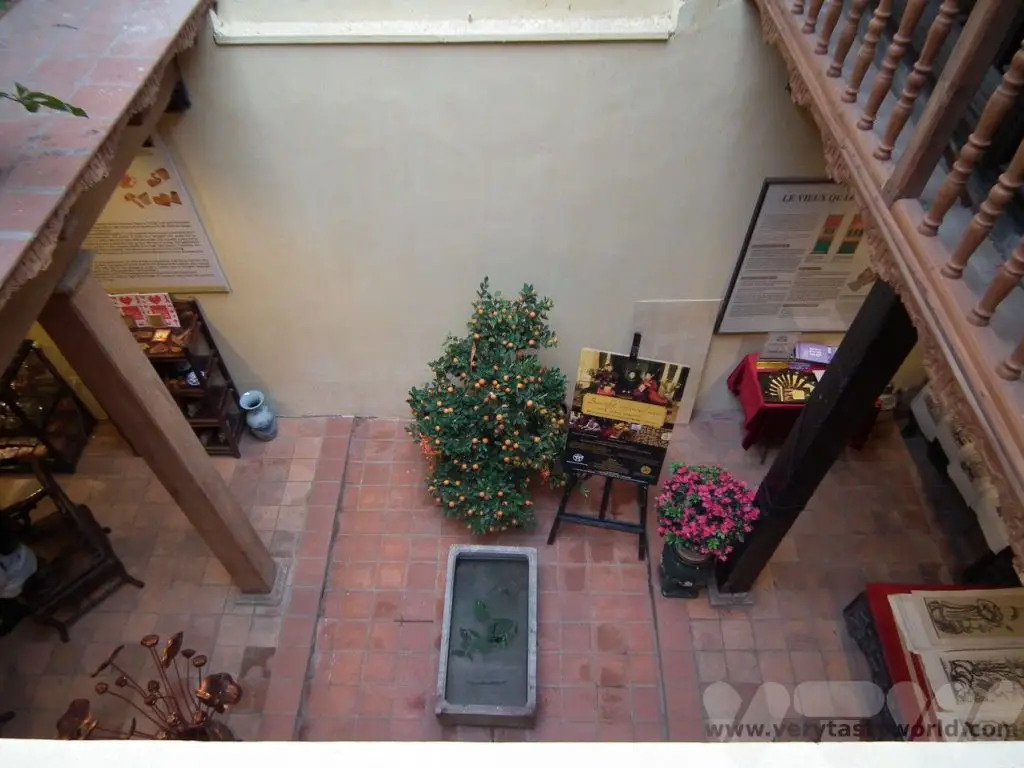
Evening in Hanoi
There are lots of places to eat in Hanoi, ranging from posh dining to street food. The old quarter is a perfect place to hang out in the evening. There is a night market right in the heart of the area. Another popular place is the Bia Hoy Corner which is frequented by both tourists and locals. Be prepared for plastic seats, street snacks, cheap beer and a chance to get chatting with new friends.
The Water Puppet Theatre is a popular attraction, and it’s worth making a booking. It’s located by the north side of Hoan Kiem Lake.
While this is a pretty intense itinerary, it is possible to make the most of a single day in Hanoi.
Vietnamese Food
Just as there are differences between the culture of north and south Vietnam, the cuisine reflects this as well. Food from northern Vietnam is subtle with a balance of flavours, whereas southern dishes are often more spicy. And even though regional variations exist, pho can be found all over Vietnam and is the country’s national dish.
There’s No Business Like Pho Business
Pho is a noodle soup – soft rice noodles served in a warm, very slightly spicy, bone broth with thin slices of meat such as beef (pho bo) and chicken (pho ga). These are the traditional varieties of pho in Hanoi.
Pho is a staple of Vietnamese cuisine. Its pronunciation is like the French word, feu (fire), which is appropriate because it’s thought that the name derives from the term ‘pot au feu’, or French beef stew. It’s so good that you can have it for breakfast, lunch or dinner. Or indeed breakfast, lunch and dinner if you feel so inclined. Yes, we did. In Vietnam it is primarily a breakfast dish – healthy and hearty – it truly sets you up for the day ahead.
The soup is meant to be drunk. Like Japanese ramen, the broth is absolutely key to the flavour. The best broths will have been simmered for hours. A beef stock will use the bones, a chicken stock often uses an entire chicken. Spices such as cinnamon, ginger, cardamom and cloves may add a subtle heat in addition to flavour. The soup should be clear.
The noodles are soft but with a bit of bite. They are cooked separately inside a wire basket that is plunged into boiling water for a few minutes. These are then added to the serving bowl before the broth and meat are added.
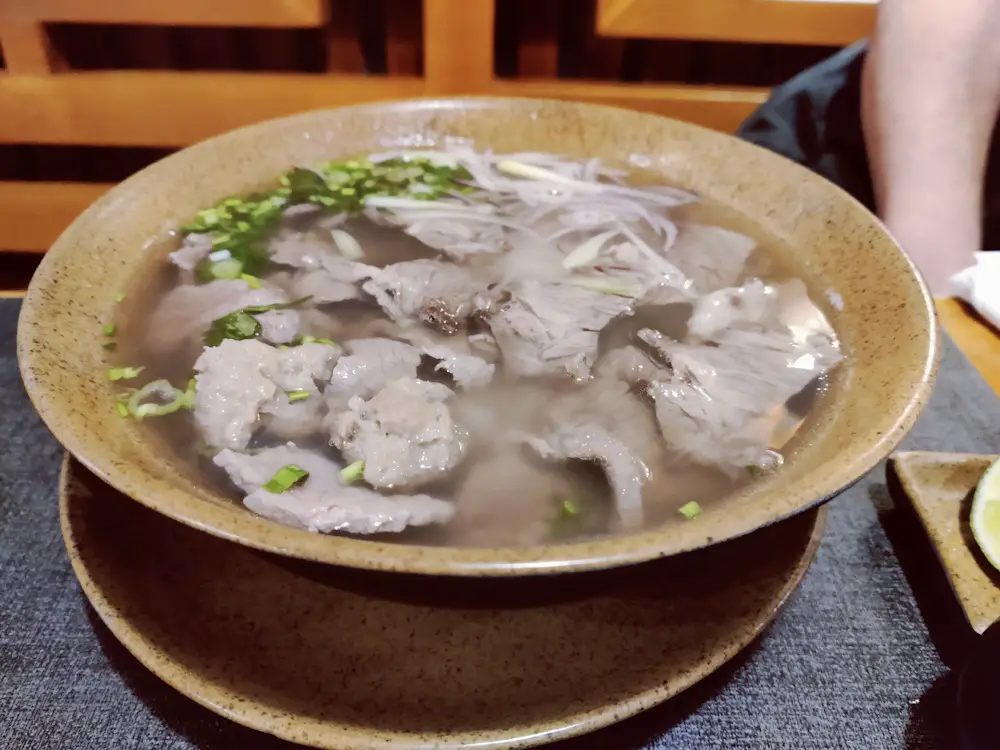
One of the best things about pho is that you can flavour it to your own taste. Alongside each nourishing bowl of pho a plate containing all sorts of potential flavours and textures will be served. Want heat? Add chilli (the smaller the chilli, the hotter the spice). Like sour flavours? Squeeze in some lime juice.
Texture and crunch? Add beansprouts or green onion. More flavour? You’ll be offered a variety of aromatic herbs, commonly coriander, holy basil and mint which can be added in whichever ratio you desire.
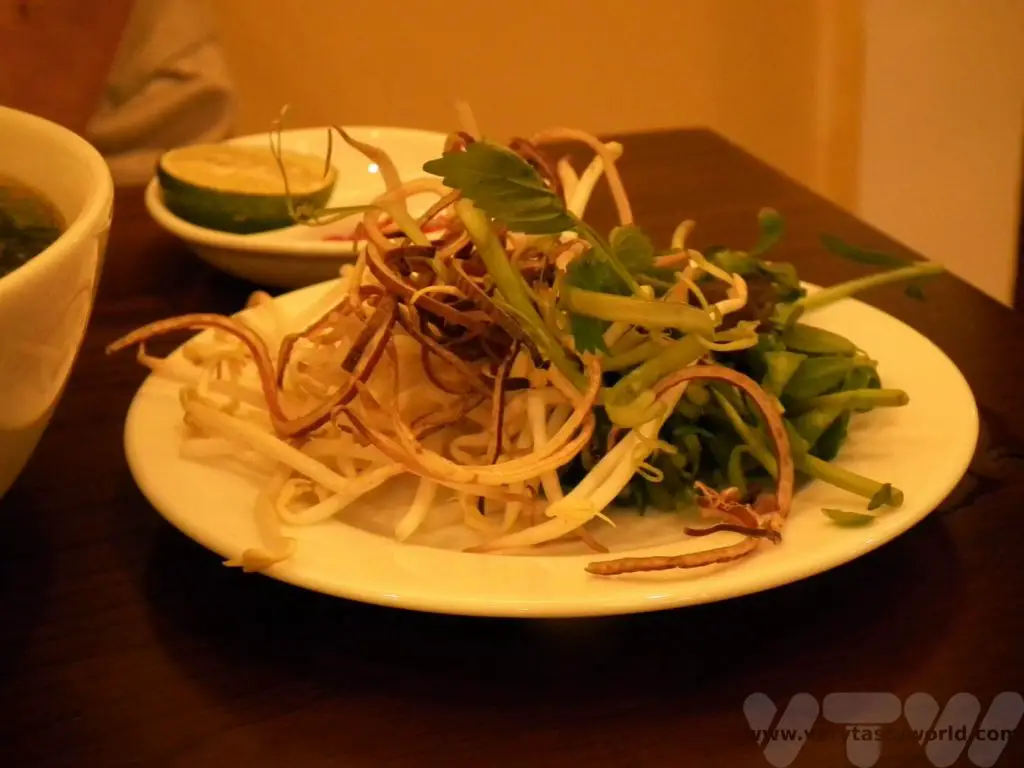
But the key is making sure that you taste the broth before you start wading in with additional garnishes. And, while Vietnamese pho restaurants in other countries often offer sauces such as hoisin or chilli to add to the soup, it is unlikely that you would ever see this in Vietnam. It would be a shame to add sauce which detracts from the delicate flavour of the broth.
You eat pho using chopsticks to pick up the meat and noodles. There is usually a spoon available to sip the broth. Actually, it’s okay to bring the bowl to your lips and drink directly from it. Slurping is fine. For British people who were brought up to believe that it’s rude to slurp your soup, it’s actually quite difficult to do this without spilling the broth or accidentally spluttering! A very positive side effect of consuming so much pho was that we were kept well hydrated in the warm, humid climate.
Bun Cha Ha Noi
Another typical dish from the northern region is Bun (noodles) Cha (grilled pork). It is a delicious combination of grilled pork slices and/or meatballs accompanied by rice noodles and herbs, in a spicy and flavoursome sauce. It is thought to have originated in Hanoi.
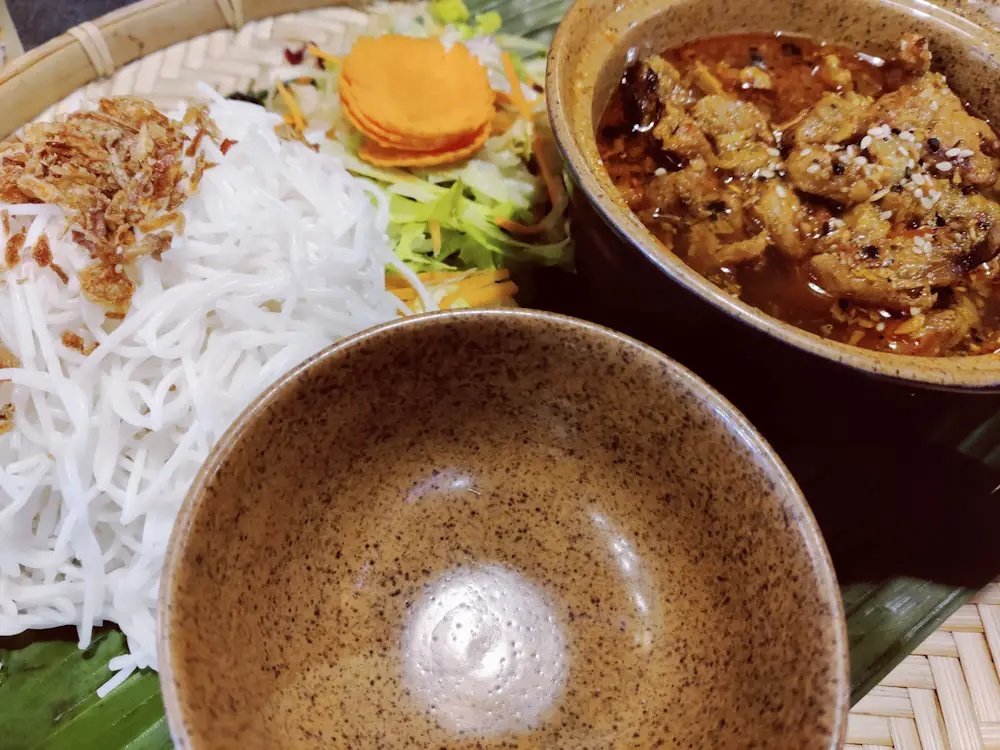
Bo La Lot
Another delicious dish is Bo La Lot – grilled beef balls wrapped in betel leaves. Served with a sweet and fragrant dipping sauce, these are juicy, full of flavour and make for a brilliant starter or snack.
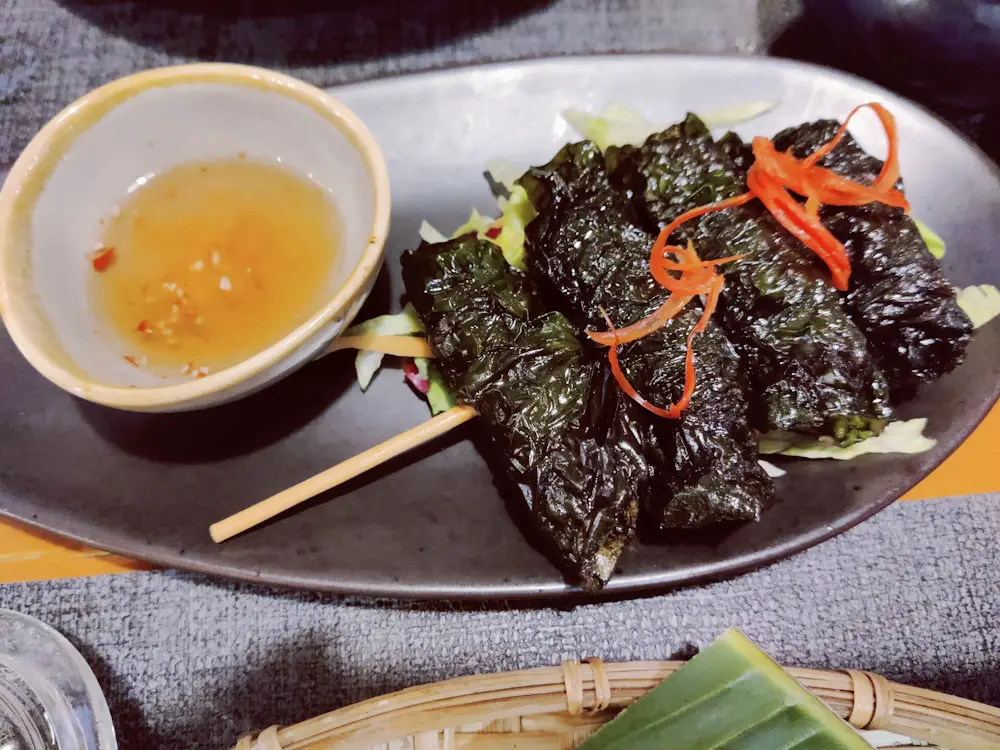
One of the best garnishes is Vietnamese pickled garlic, a zingy condiment. We have a recipe for this – it’s great for accompanying Vietnamese food but really versatile for other dishes as well.
Related Posts You May Enjoy
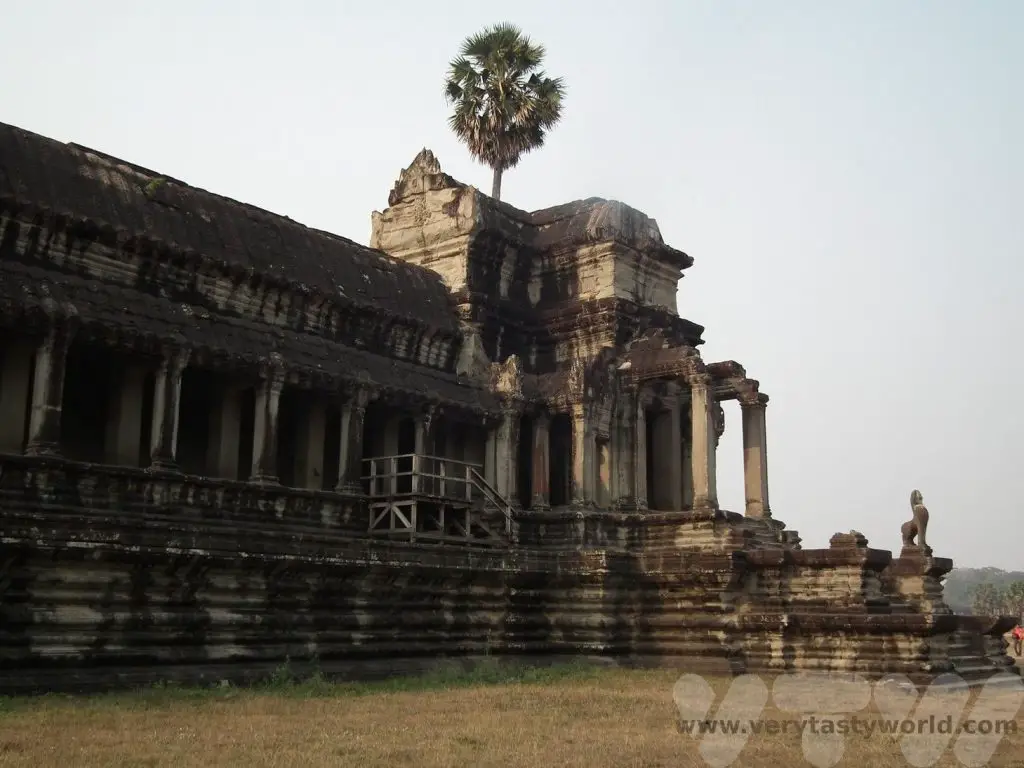
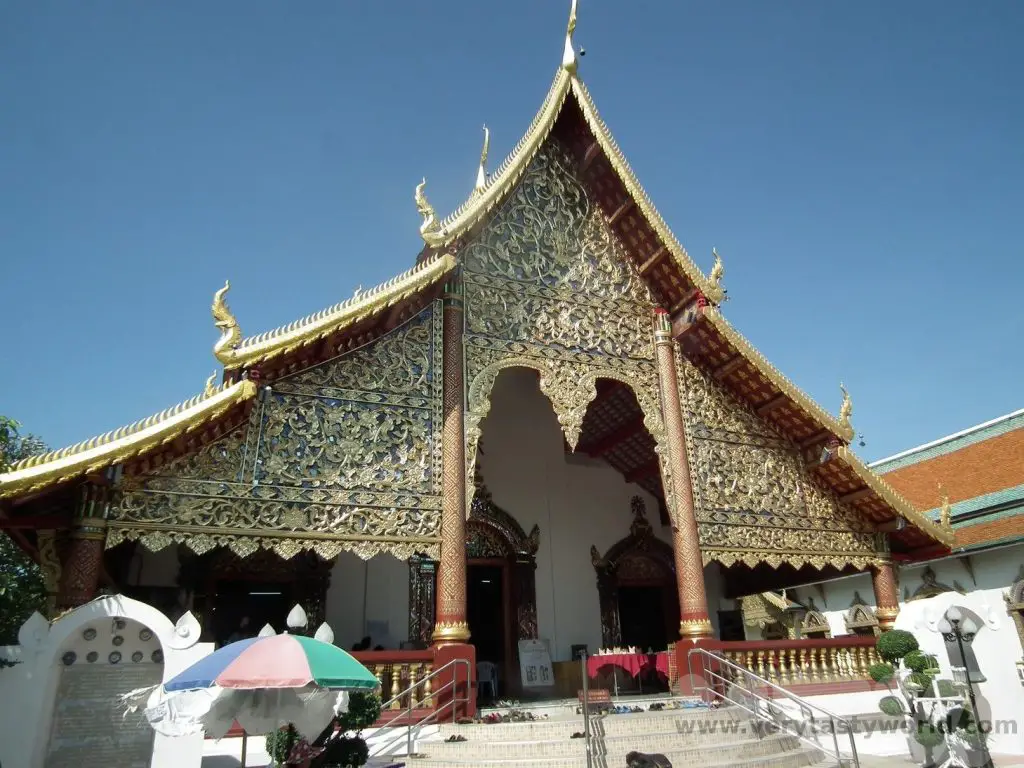
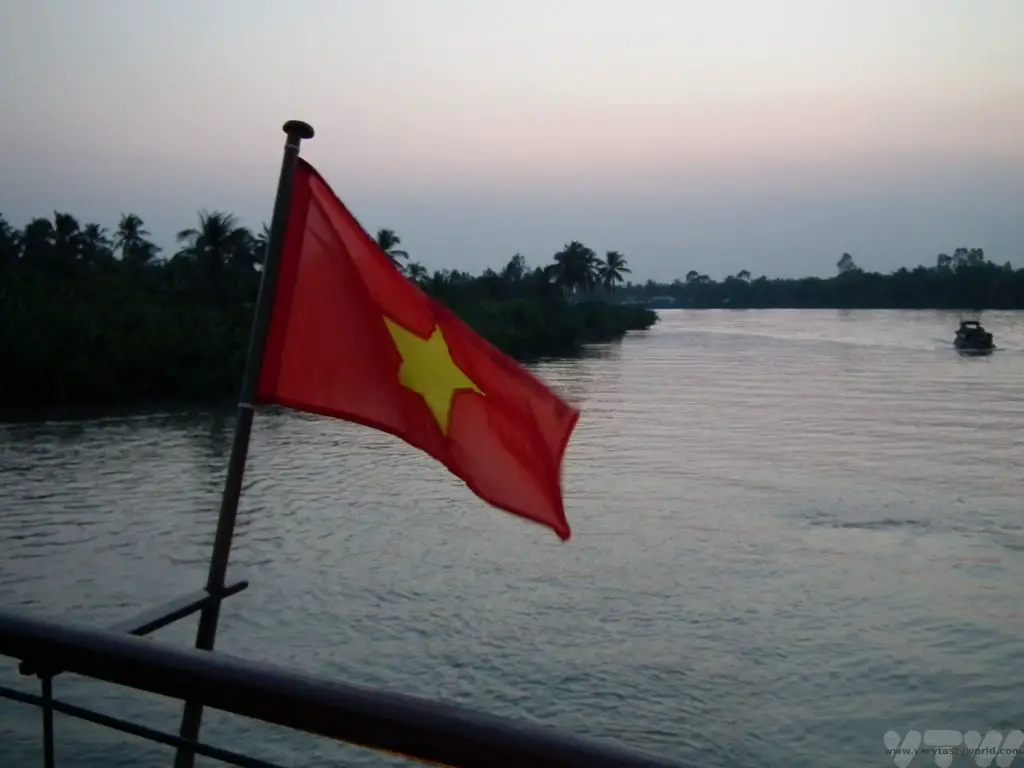


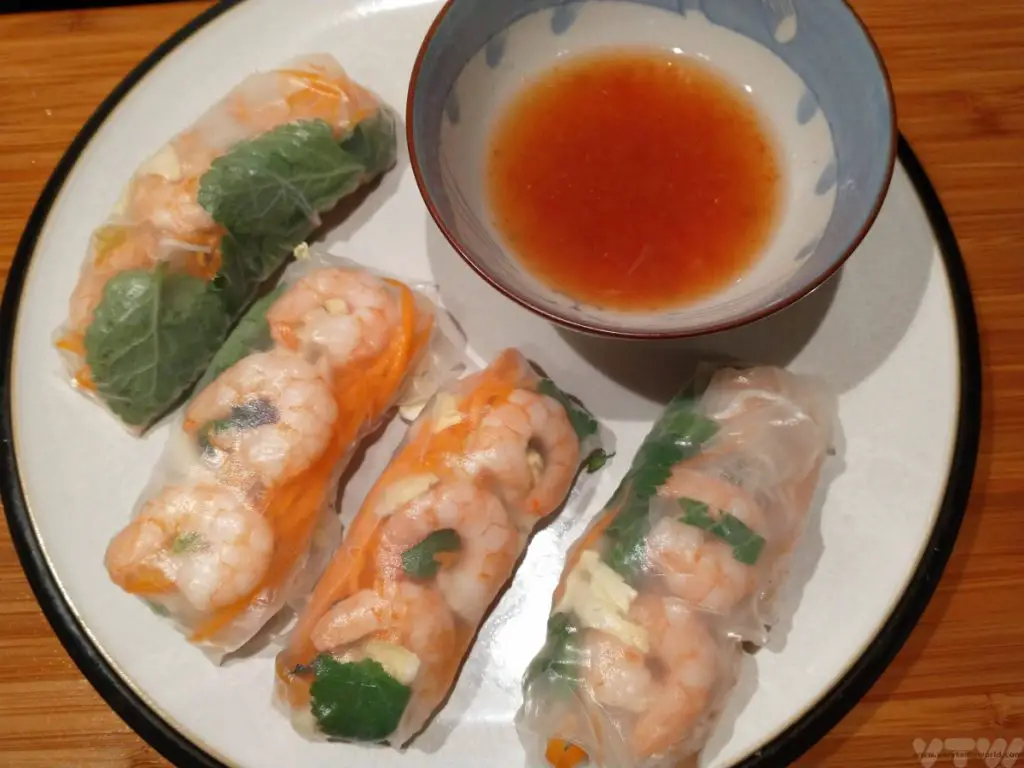
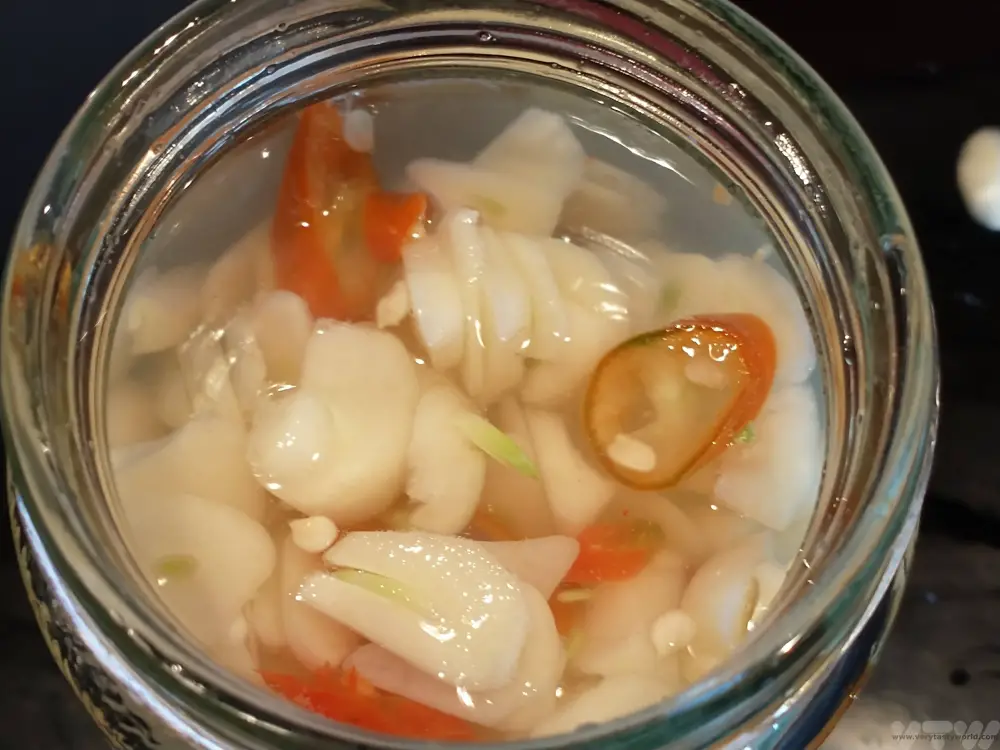
Is Sarajevo Worth Visiting?
Sarajevo is the capital of Bosnia and Herzegovina. It is situated inland and lies in the valley of the Miljacka River in the Dinaric Alps. We visited this lively and cosmopolitan city as part of a road trip though Bosnia and Croatia.It takes a couple of hours to reach there from Mostar and an hour or so from Travnik and Konjic. So is Sarajevo worth visiting? The answer is an emphatic yes! It’s a lovely city with a fascinating history as well as plenty of things to see and do.
Driving in Bosnia is generally a pleasure, but is quite slow in the countryside. The closer you get to Sarajevo the wider and faster the roads become. Driving in the city itself isn’t too difficult either, the traffic was busy but not overwhelming, but make sure you have practiced your hill starts if you’re driving a manual transmission car – the suburbs are very hilly and some of roads are quite narrow.
Welcome to Sarajevo
A walking tour is a really good way to discover a new city, it’s a great means of finding your bearings and discovering places to explore in more depth. Local guides are also a useful resource for getting recommendations for places to eat and drink. We spent our first morning on a walking tour with a small group of international visitors who were also keen to discover what Sarajevo had to offer.
When we first met the guide he asked us, “can you tell me anything about Sarajevo?” Sadly, the only things we could think of were negative – the siege of Sarajevo during the Bosnian War in the 1990s and the shooting of Archduke Franz Ferdinand which led to the commencement of the First World War. Our guide acknowledged that Sarajevo has had more than its fair share of world history, but also that it hosted the Winter Olympics in 1984, which was a positive thing. And he also pointed out that Sarajevo is a hugely multicultural city with a rich history.
Our walking tour started in the old town. On the pavement of Ferhadija there is a plate bearing an inscription:
This represents the boundary between the old (Ottoman) and new (Austro-Hungarian) parts of the city. The walk conveniently followed the history of Sarajevo.
Sarajevo’s Ottoman Old Town
Although there had been settlements in the area, Sarajevo as we know it was founded during the Ottoman empire in 1461 by Isa-Beg Ishaković, who constructed a number of buildings including mosques, a market and bath houses.
It was Gazi Husrev-beg, governor of the Sanjak of Bosnia in the mid 16th century, who developed the city and enabled it to thrive. Importantly, he recognised Sarajevo’s strategic importance along trade routes and set up free accommodation for traders passing through the city. It reflected the hospitality of the time but also ensured that the area flourished. The old city has a large covered marketplace and several mosques.
The city’s clock tower was an important building. It tells the time in an unconventional way – when the hands are at midnight this denotes the time of sunset. This would have been an important way for Muslims observing Ramadan to know when they could start eating.
Of course, sunset occurs at a slightly different time every day, so the clock would have had to be changed manually. In addition, Sarajevo is a located in a steep valley, surrounded by mountains and the city has outgrown the clock. These days, a cannon is fired from the Yellow Fortress to mark an audible sunset alert for all Muslims.
Gazi Husrev-beg Mosque is dedicated to the city’s benefactor and was built in 1530. It is an impressive structure, highly decorated.
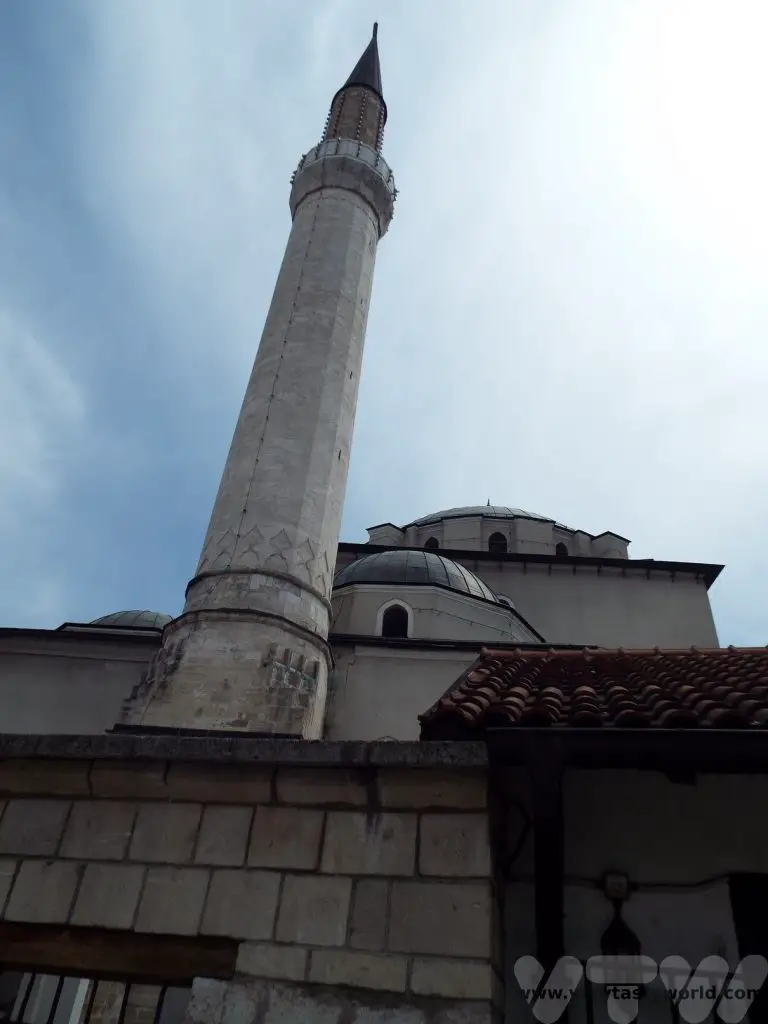
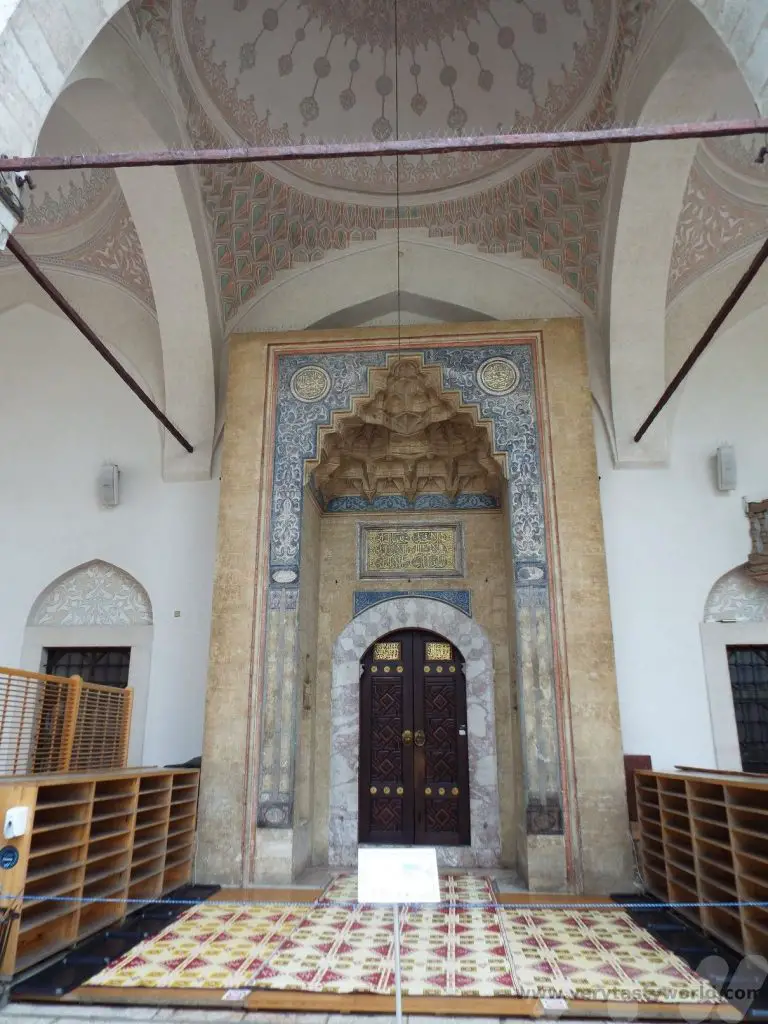
It is located next to the covered market, which still operates as a market, albeit with more touristy goods on offer these days.
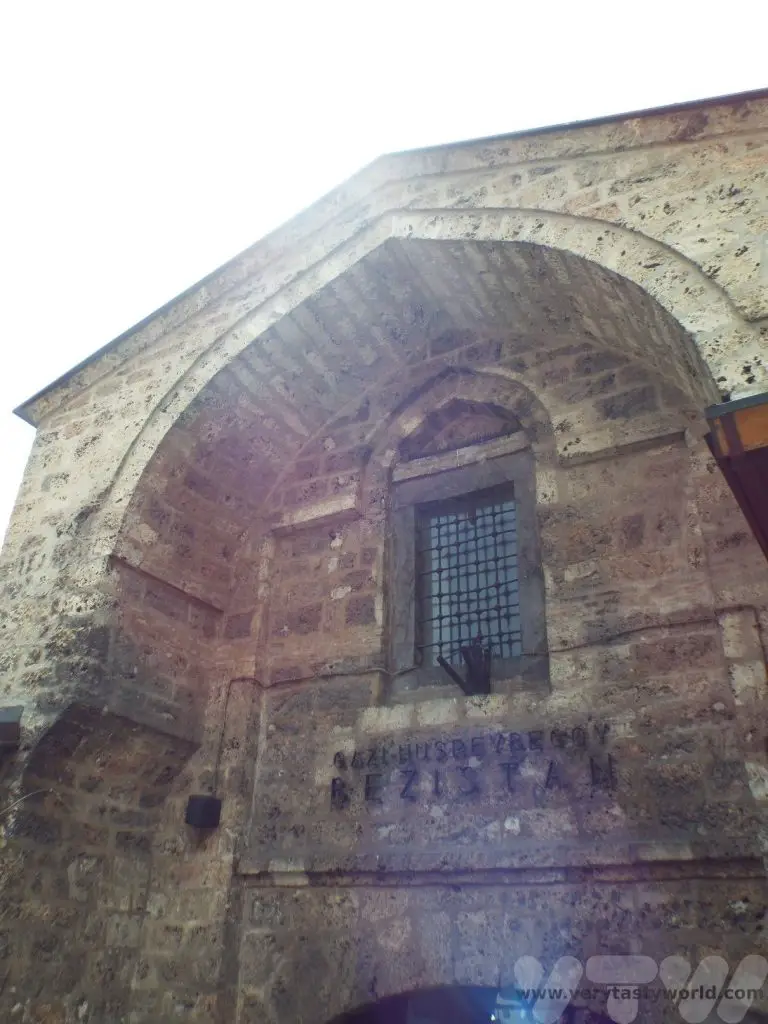
The complexity of the water system that was developed during Ottoman times can be seen in the ornate fountains.
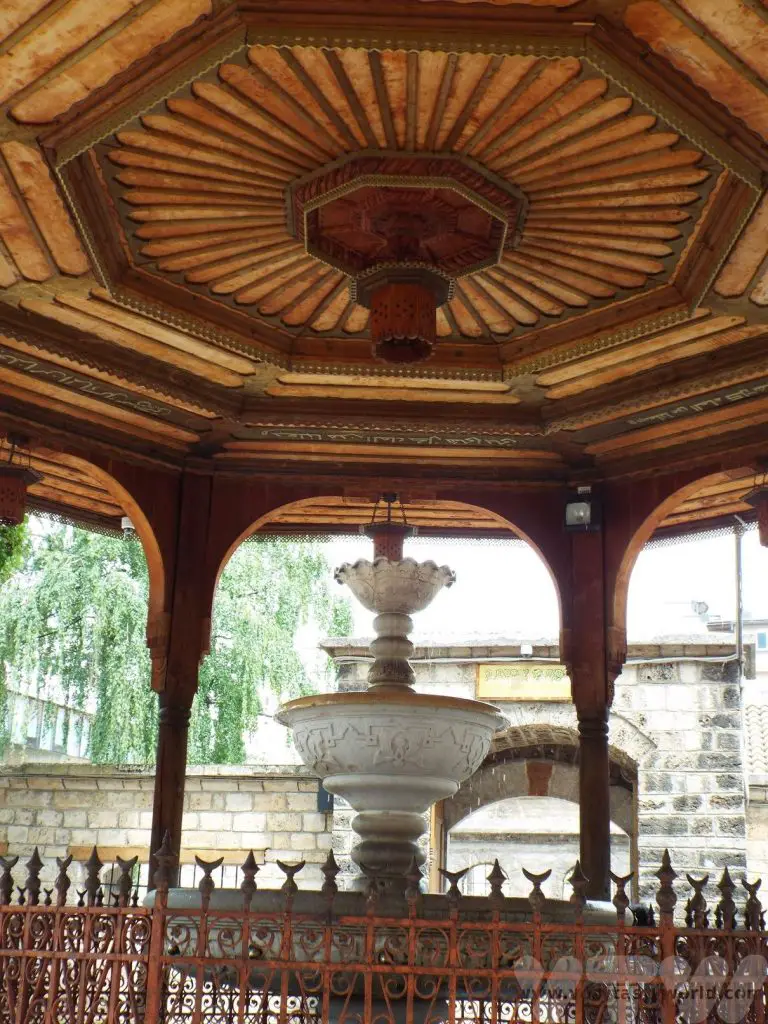
With a clock tower, library, religious schools, bathhouses and a sophisticated water system, Sarajevo was one of the most important and enlightened cities of the Ottoman empire, second only to Istanbul.
It is a delight wandering through the old town. There are lots of streets with all sorts of goods to buy and craftspeople making and selling their wares. Lots of foodie shops and restaurants too! If you want to buy a coffee set or indeed some delicious coffee there are plenty of emporia in the area to choose from.
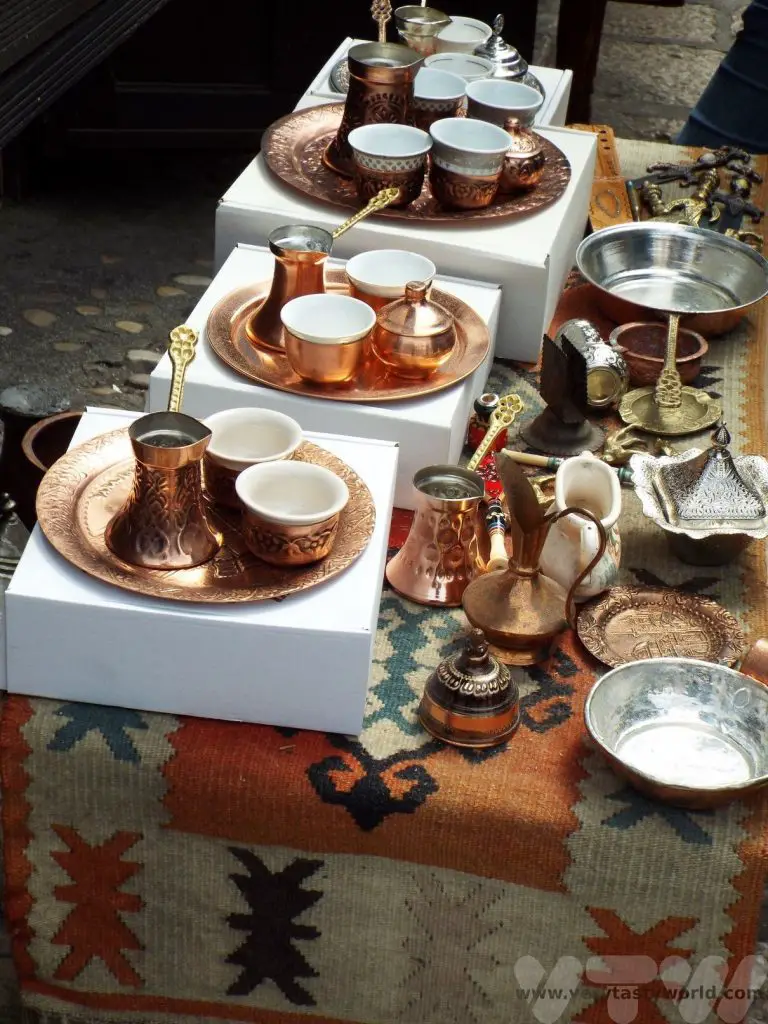
Like many places it can get crowded, so we were advised to beware of pickpockets, be alert and keep valuables safe.
In the 16th century Christians and Sephardic Jews, who were fleeing persecution, moved to the city and established places of worship. Sarajevo remains a places where people of multiple religions live together.
Austro-Hungarian Sarajevo
After walking through the old town we reached the river Miljacka which has carved its way through the mountains over the millennia. By 1878 Bosnia Herzegovina had been annexed to the Austro-Hungarian Empire. A series of modern buildings were constructed along the river’s banks. One of these was the town hall. Designed in 1891 it bears Moorish influences.
This impressive building had many functions over the years, including as a parliament building and national library.
It was hit by incendiary bombs in 1992 during the Bosnian War and the library, along with most of the books, was lost in a fire which destroyed the building. However, it was rebuilt and opened again in 2014.
On the other side of the river is a building known as the spite house, which was located on the site where the main building was to be constructed. Despite many financial incentives, the owner refused to sell his house and so the authorities eventually relocated it on the other side of the river. Known as Inat Kuca, it is now a restaurant.
It’s a pleasant walk along the river banks, although the muddy river was very much a contrast to the crystal clear waters of Mostar and other rivers in the region.
Crossing back over the river via the Latinska Ćuprija bridge we reached another location that placed Sarajevo in the history books.
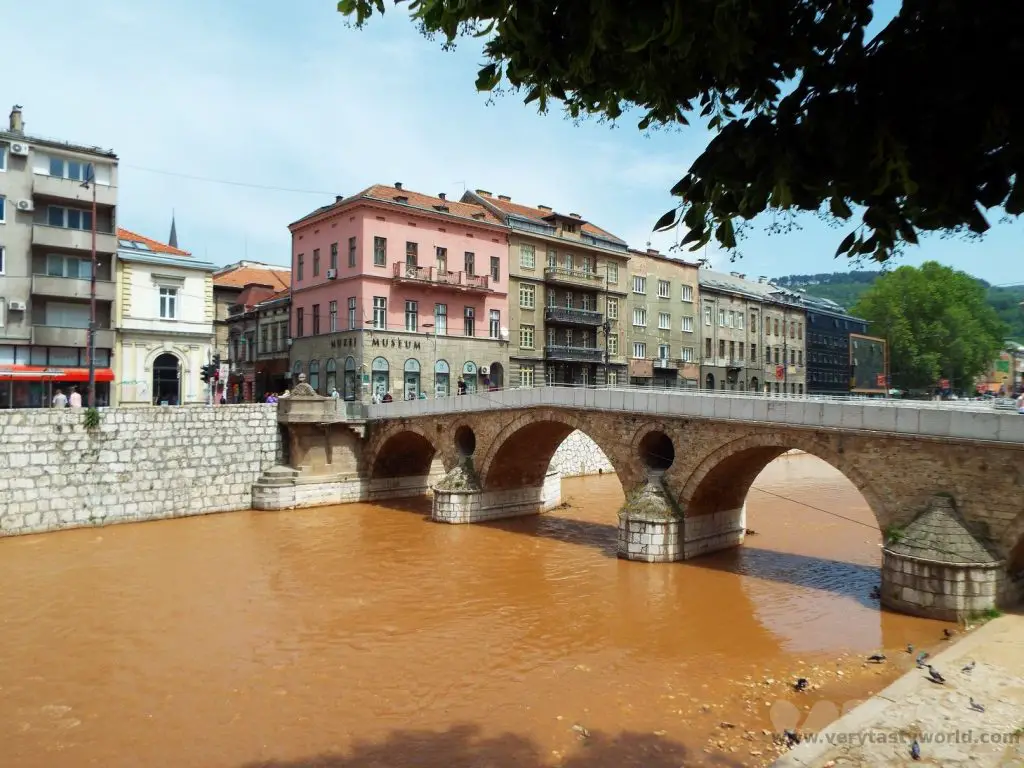
It was on the corner of the street leading onto this bridge where Archduke Franz Ferdinand of Austria, who was heir presumptive to the Austro-Hungarian throne, and his wife, Sophie, were shot at close range on 28 June 1914 by nationalist Bosnian Serb student Gavrilo Princip. This event led to the start of World War One.
Following the end of the war, the Austro-Hungarian Empire collapsed and Bosnia and Herzegovina was absorbed into Yugoslavia. During World War Two the city was invaded by the Nazis. Of the 12,000 Jewish people living in Bosnia and Herzegovina 10,000 lived in a thriving community in Sarajevo. It is estimated that 8,000 lost their lives in the Holocaust.
Learning About The Siege of Sarajevo
1992 saw the break up of Yugoslavia and, tragically, the commencement of the Bosnian War. Bosnia and Herzegovina declared independence from Yugoslavia but following a referendum, which Bosnian Serbs refused to participate in, the Serbs encircled Sarajevo and blocked all routes to and from the city. Sarajevo remained besieged for 1425 days, the longest siege in modern history.
During our Sarajevo walking tour we learned about how the local people coped during this horrific time. The city was constantly shelled by forces located in the surrounding hills. Our guide told us that when the water and electricity supplies were halted, people would have to risk their lives crossing the river carrying containers so that they could get access to water from the Sarajevo brewery. It is estimated that nearly 14,000 people were killed, over a third of them civilians.
The film Welcome to Sarajevo (1997) by Michael Winterbottom tells a powerful story, which includes real footage of the war. It makes for difficult viewing but offers a compelling insight into a horrible war.
The siege ended on the 29th February 1996. In the years following the war a number of perpetrators and their superiors were convicted for Crimes Against Humanity.
Further Exploration of Sarajevo
We thoroughly enjoyed the small Sarajevo brewery museum. The delightful guide showed us around and told us about the history of the brewery.
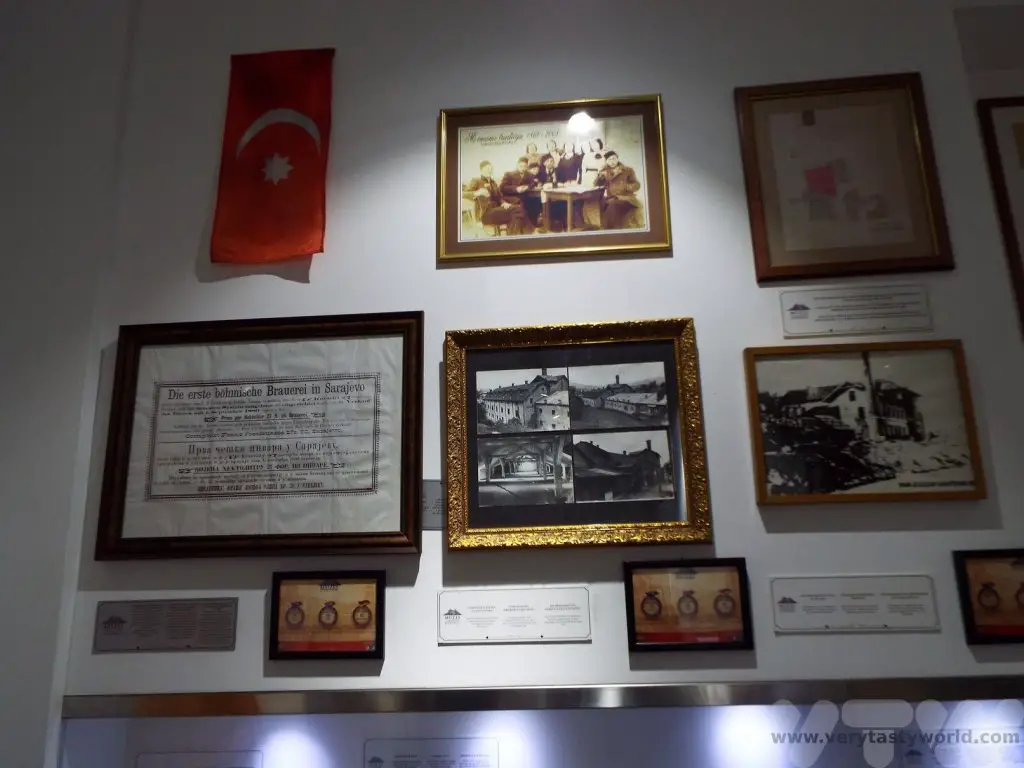
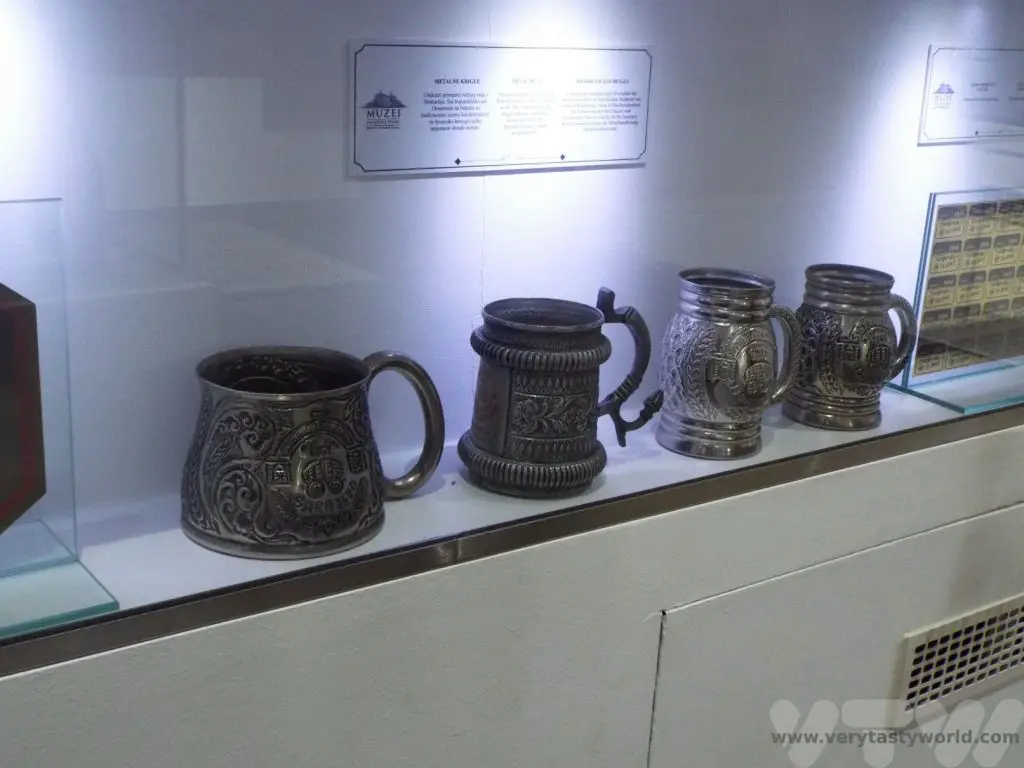
However, when we went to the adjoining bar to enjoy some of their beers, we were turned away because apparently we didn’t comply with their dress code. We were wearing t-shirts, long trousers and walking shoes, not tracksuits, trainers and baseball caps. We checked the requirements and confirmed that we were not in contravention. The manager, dressed in a t-shirt and shorts, eventually accepted that we were dressed correctly. To be honest, though, we didn’t want to drink where we weren’t welcome. Their loss.
We also visited some of the churches. Sacred Heart Cathedral is a catholic church and the largest cathedral in the country. It was completed in 1887. It was damaged during the siege of Sarajevo but has since been restored.
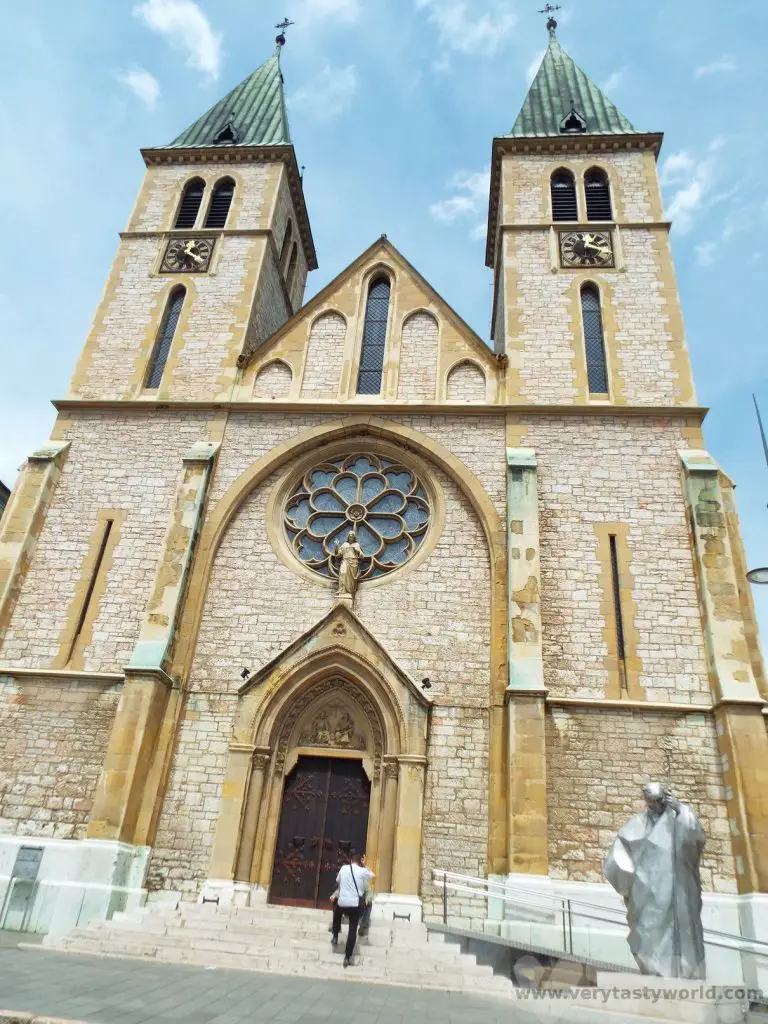
In the pavement in front of the church there is a square which has a mortar shell crater filled with red concrete, creating a pattern. It’s there to remind people of the war.
Constructed in 1863, the Cathedral Church of the Nativity of the Theotokos is Sarajevo’s largest Orthodox church.
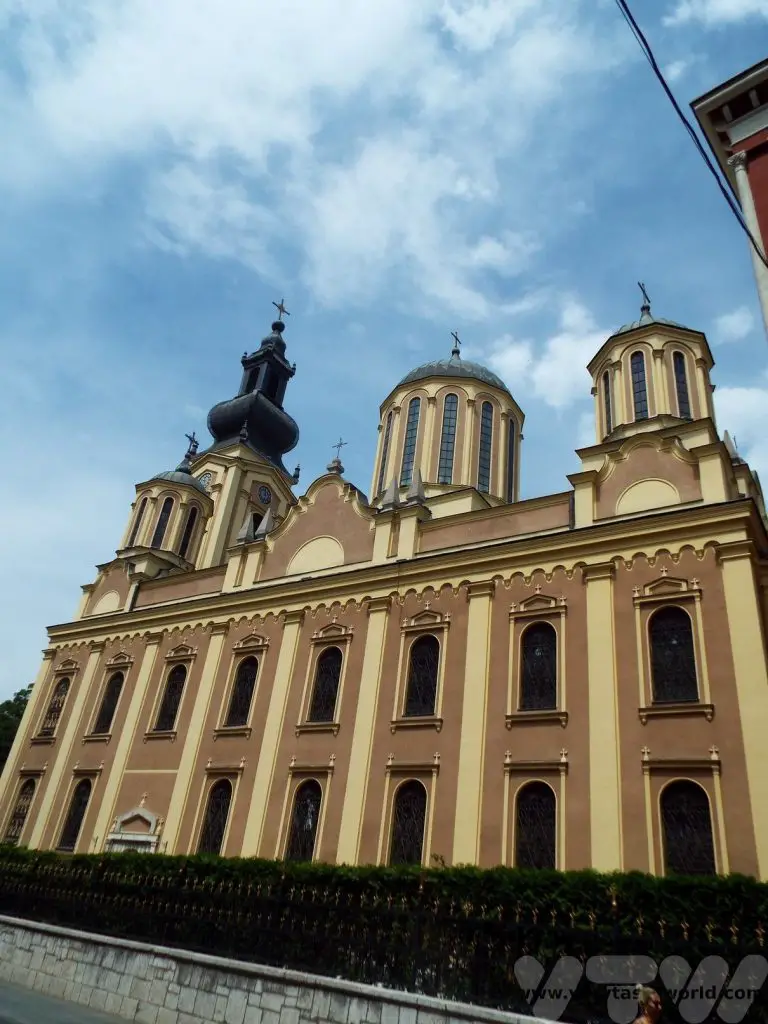
Beside the Europa Hotel it is possible to see the remains of a caravanserai, known as Taslihan, which was originally constructed in the mid-16th century. It was only discovered when the hotel was being renovated but now the former walls are a part of the garden. In its day it was a large market which also offered accommodation for merchants.
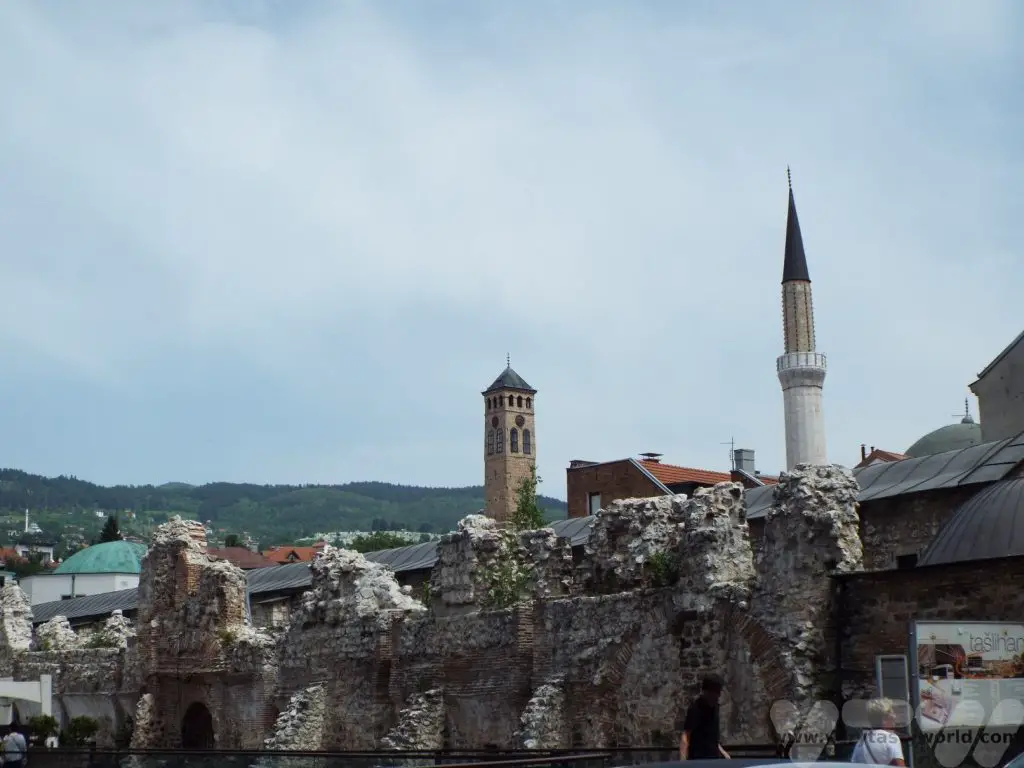
A Bosnian Cookery Course
Aside from city walking tours we also love taking cookery lessons whenever we visit a new country. We were delighted to join Mersiha and Mustapha from Bosnian Cooking Lessons at their home to learn how to cook traditional Bosnian cuisine. There were five dishes on the menu:
Sogan dolma – Onions filled with minced meat, rice and spices
Japrak mangel/spinach leaves rolled and filled with minced meat, rice and spices
Dolma paprika filled with minced meat, rice and spices
Bosnian pita – Phyllo dough rolled with cheese and phyllo rolled with peppery potatoes
We arrived at Mersiha and Mustafa’s home located high in the hills surrounding Sarajevo. It had a lovely view of the city. Mersiha and Mustafa grow a lot of vegetables in their garden and we enjoyed chatting with them about growing food. We were offered some traditional Bosnian snacks and a nice cool beer.
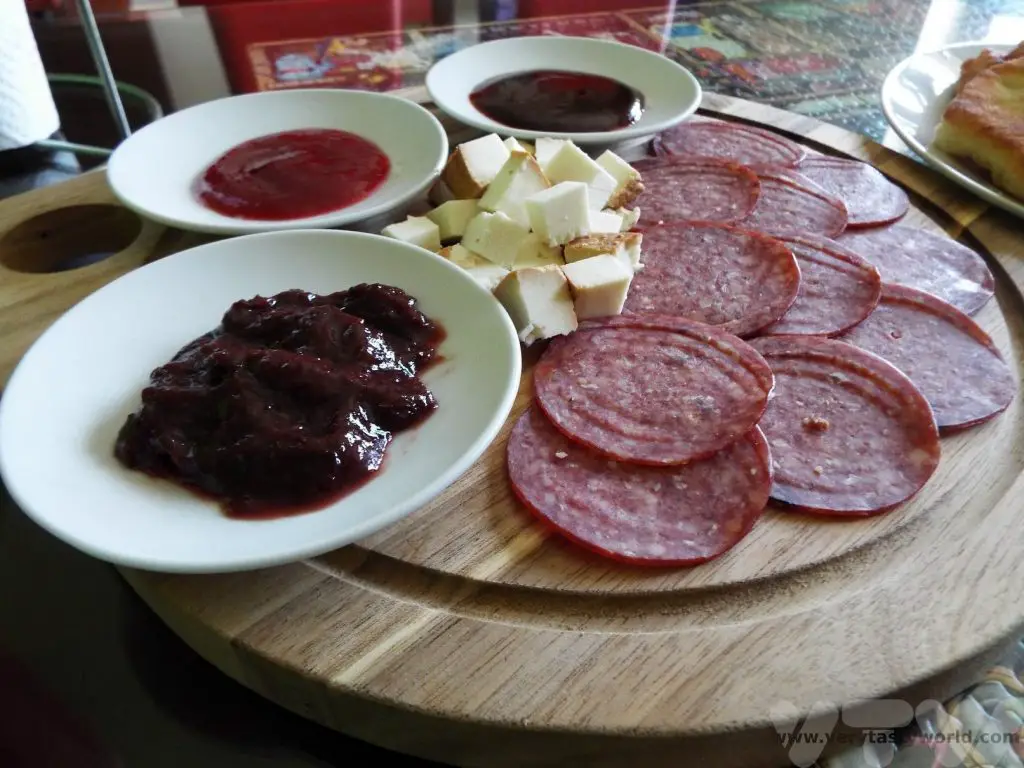
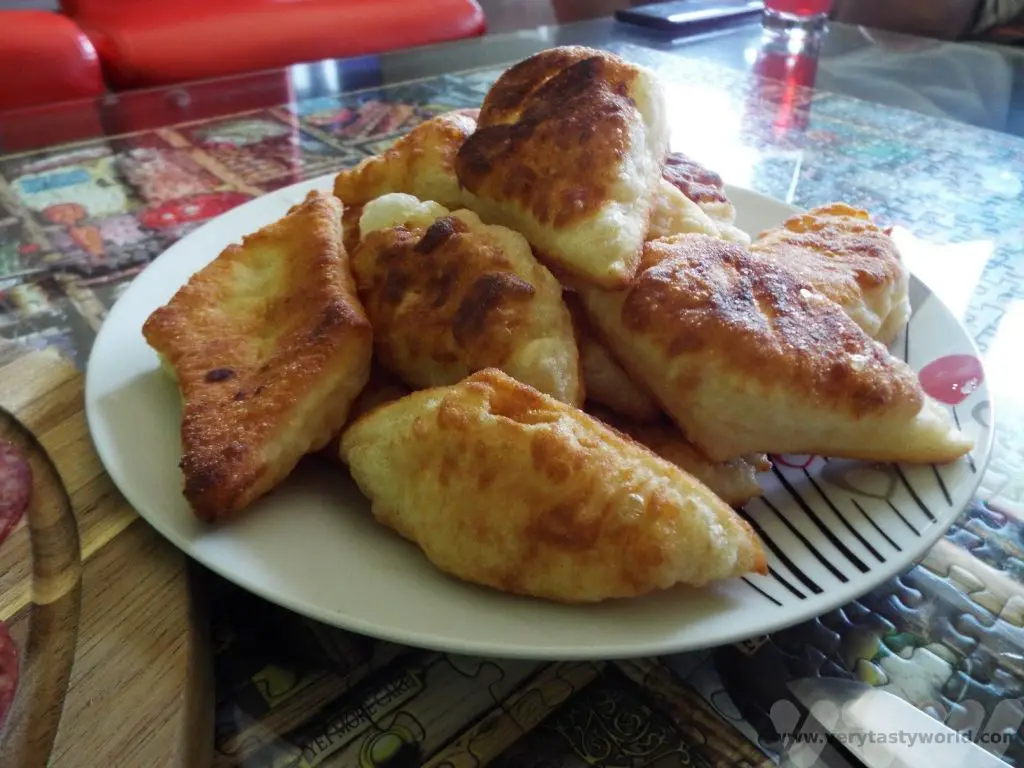
Then it was into the kitchen. Firstly we made the stuffing preparing the minced meat with rice and spices.
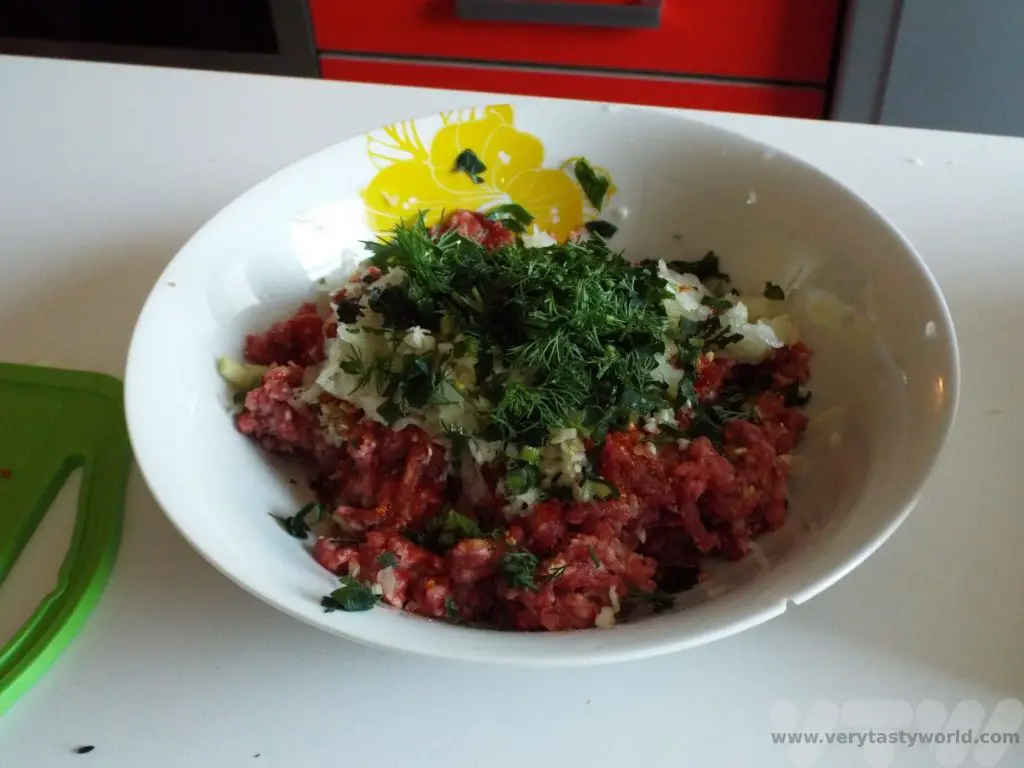
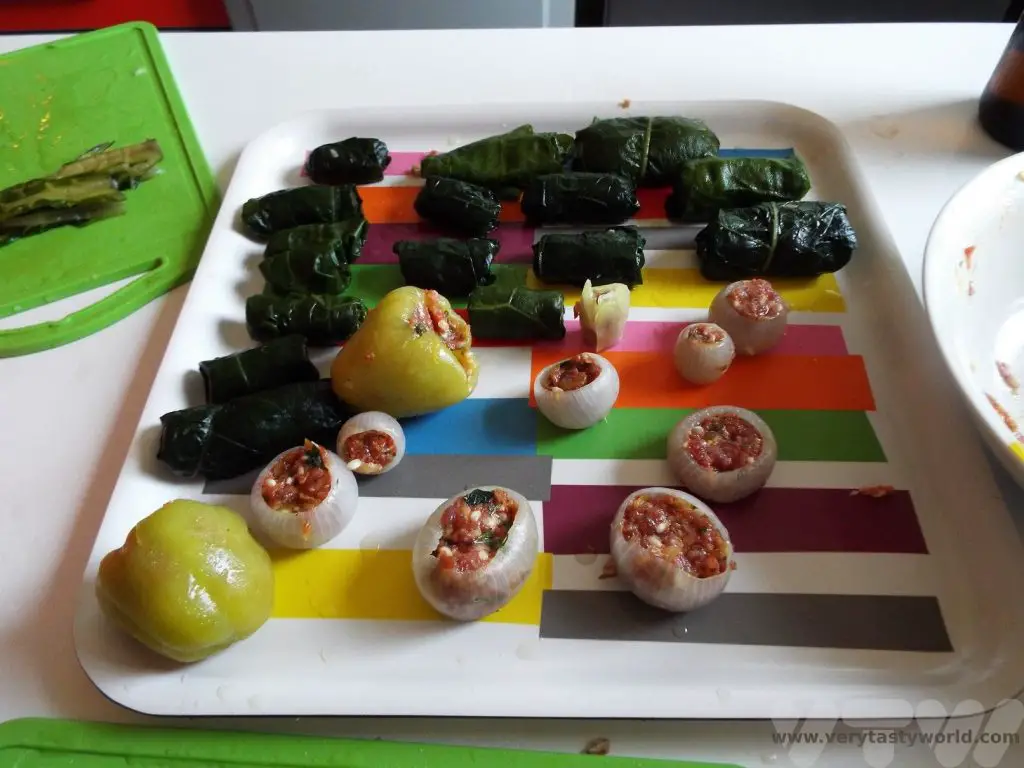
We learned how to stuff onions, layer by layer, as well as paprika. We also learned a technique for preparing and filling the mangel leaves. The folding technique was brilliant and we have used it since. These would all be cooked together in a lovely, lightly spiced, tomato sauce. We were impressed that Mersiha made sure that nothing went to waste. Any leftover bits of vegetable went into the sauce to add to its richness.
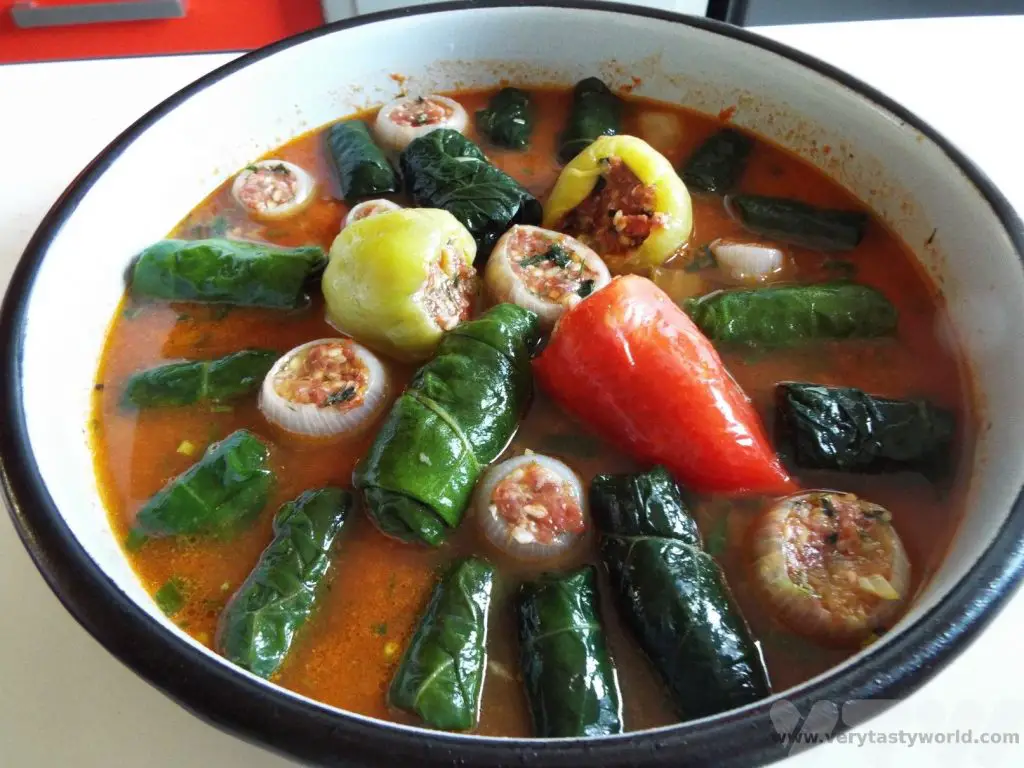
Next step was preparing phyllo. Mersiha expertly prepared a dough to exactly the right consistency and let it rest. When it was ready it was rolled onto the tablecloth and had another rest while we prepared two fillings: one of soft cheese and egg, and another of grated potato with lots of black pepper. Then we pulled the dough, by hand, so that it covered the entire table! It was so very thin – paper thin – but yet elastic and strong enough to take a filling. Mersiha was an excellent teacher and guided us really well.
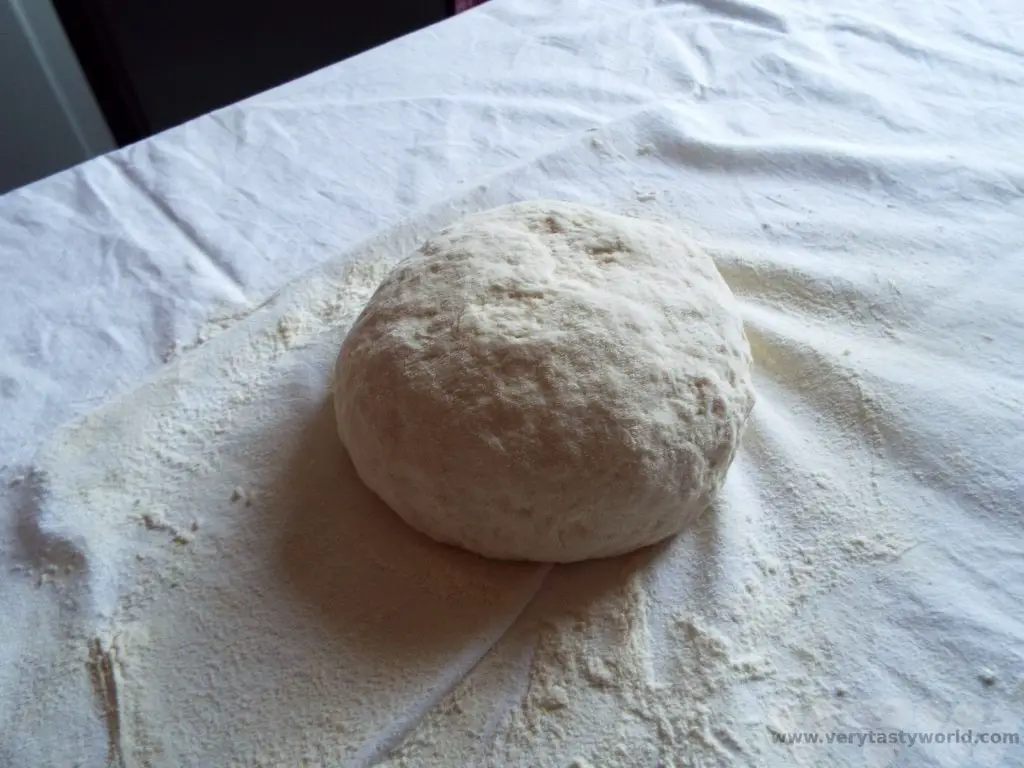
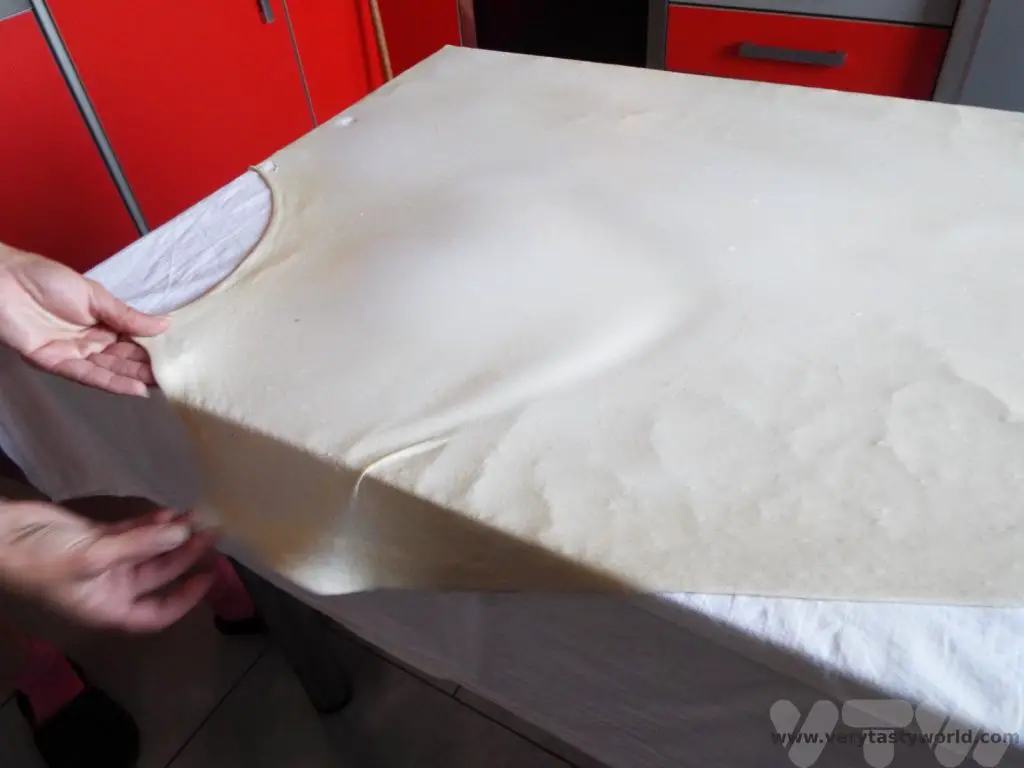
After adding the filling in a long line, the phyllo was rolled up to create a sausage shape, then cut into pieces and rolled into swirls before baking.
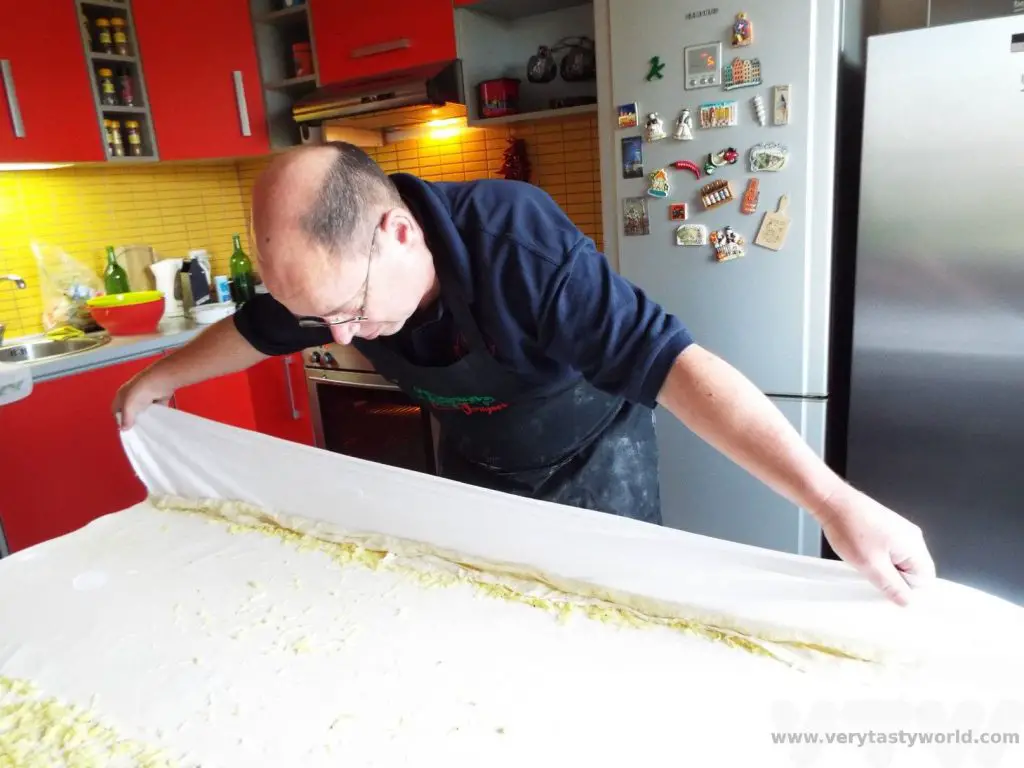
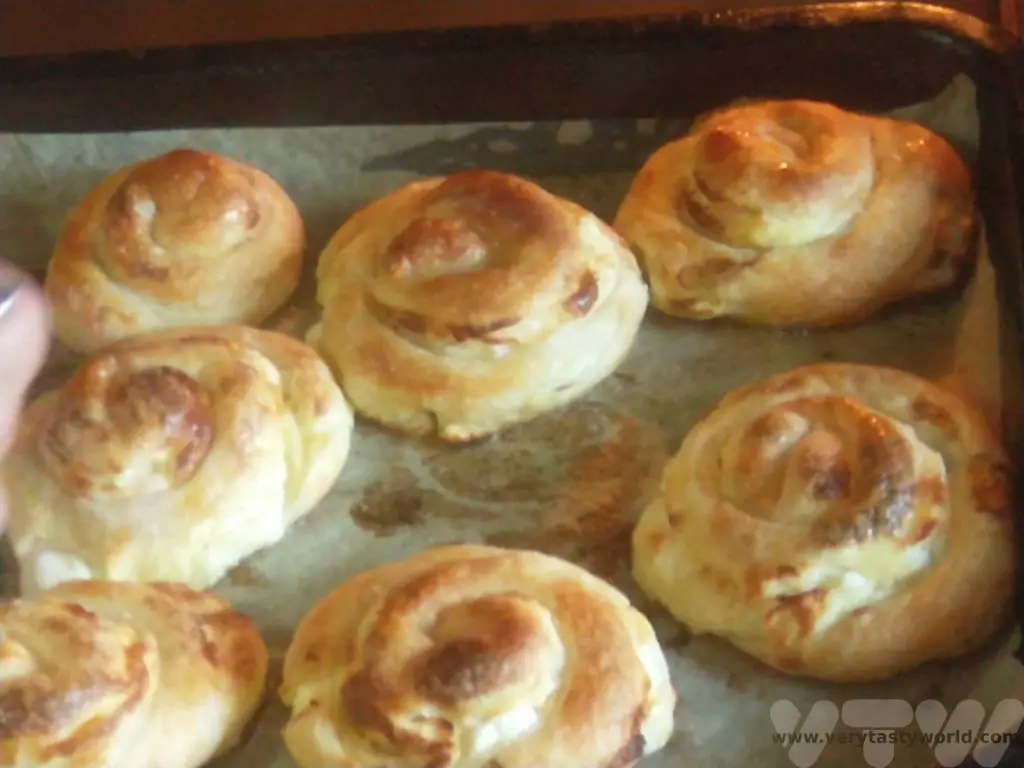
Both dishes came together at the same time. It was a really fun afternoon which culminated in us all enjoying a delicious dinner together.
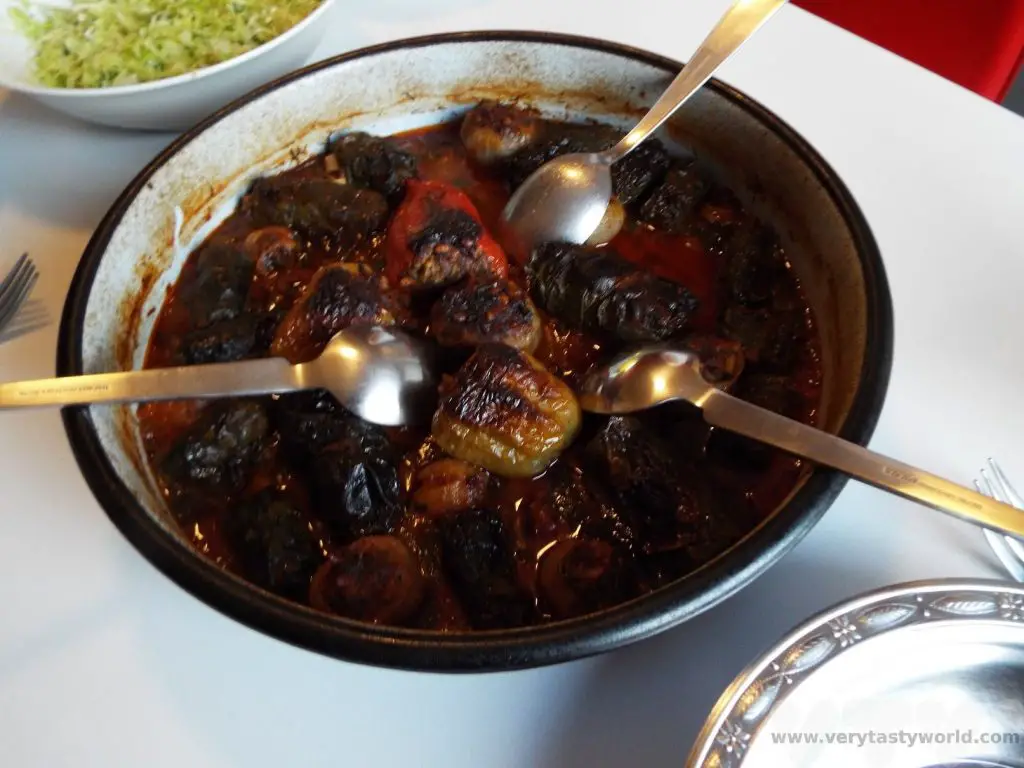
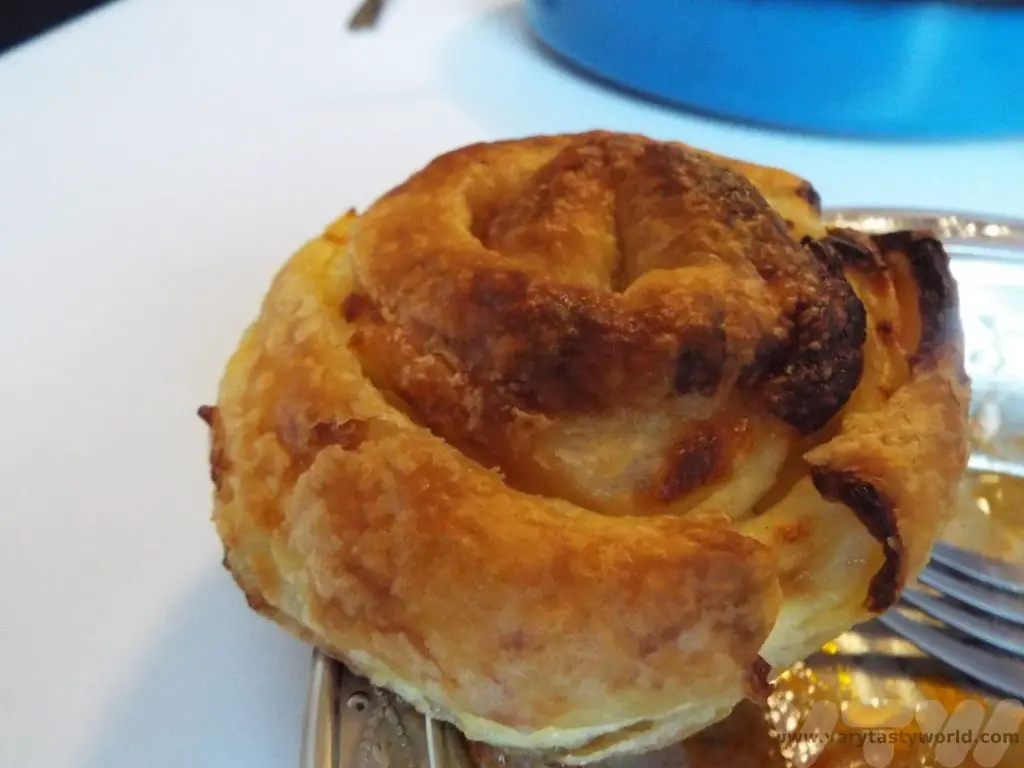
Mustapha and Mersiha were delightful hosts and excellent teachers. We thoroughly enjoyed not only cooking and dining with them, but also chatting with them about life in Sarajevo.
Sarajevo for Foodies
We stayed at the Hotel Aziza, which was close to the Yellow Fortress and a short downhill walk from the old town. You quickly find that you get a good workout walking anywhere in the city, especially in the suburbs, and it was a robust walk back up the steep hill every time we wandered into the old town. The Aziza offered a buffet breakfast with all sorts of interesting goodies, while not necessarily typical Bosnian, definitely the best brekkie we enjoyed in Bosnia.

There are loads of restaurants in Sarajevo offering typical Bosnian fare. Bosanski sahan is a dish comprising meat with mixed vegetables in a sauce and sitni cevap is veal meat in sauce. These were served with delicious fluffy Bosnian bread and salad.
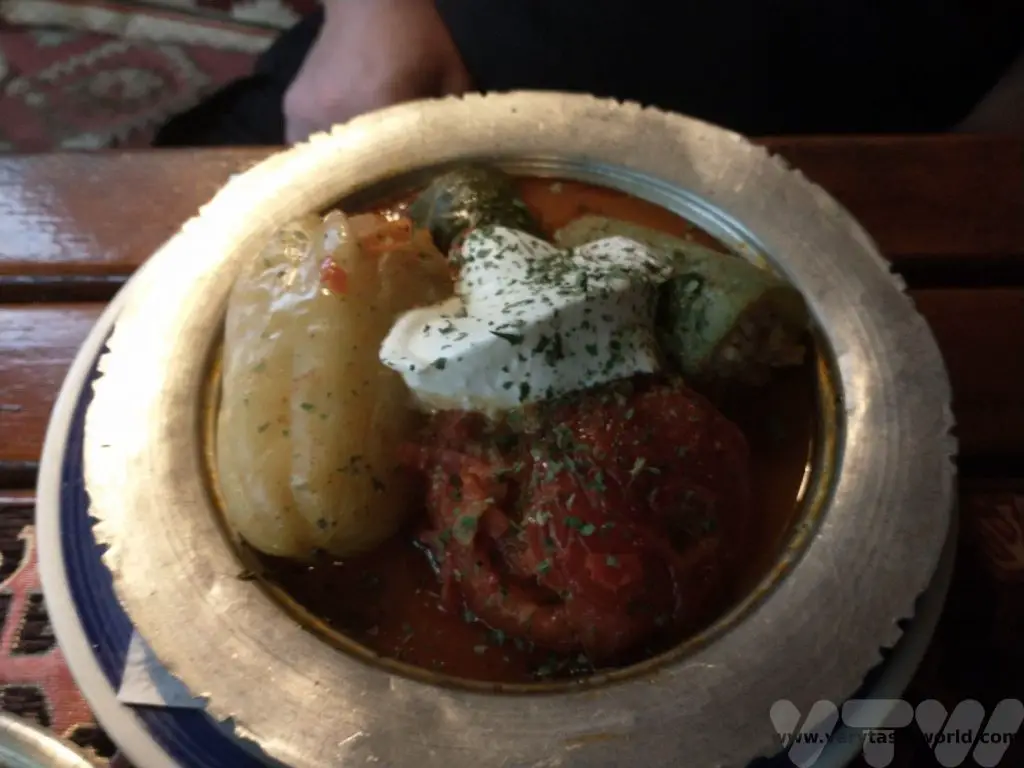
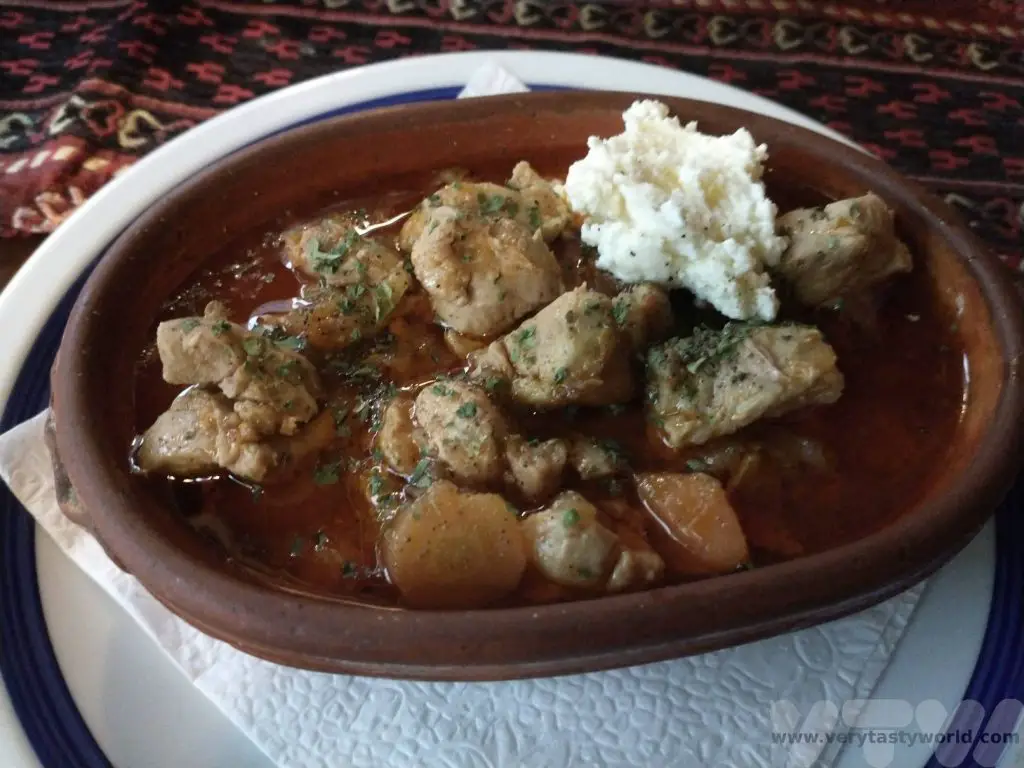
It’s essential to try cevapi – little meat sausages inside soft pillowy bread, accompanied with finely sliced onion. Make sure you order a large portion, they are so delicious.
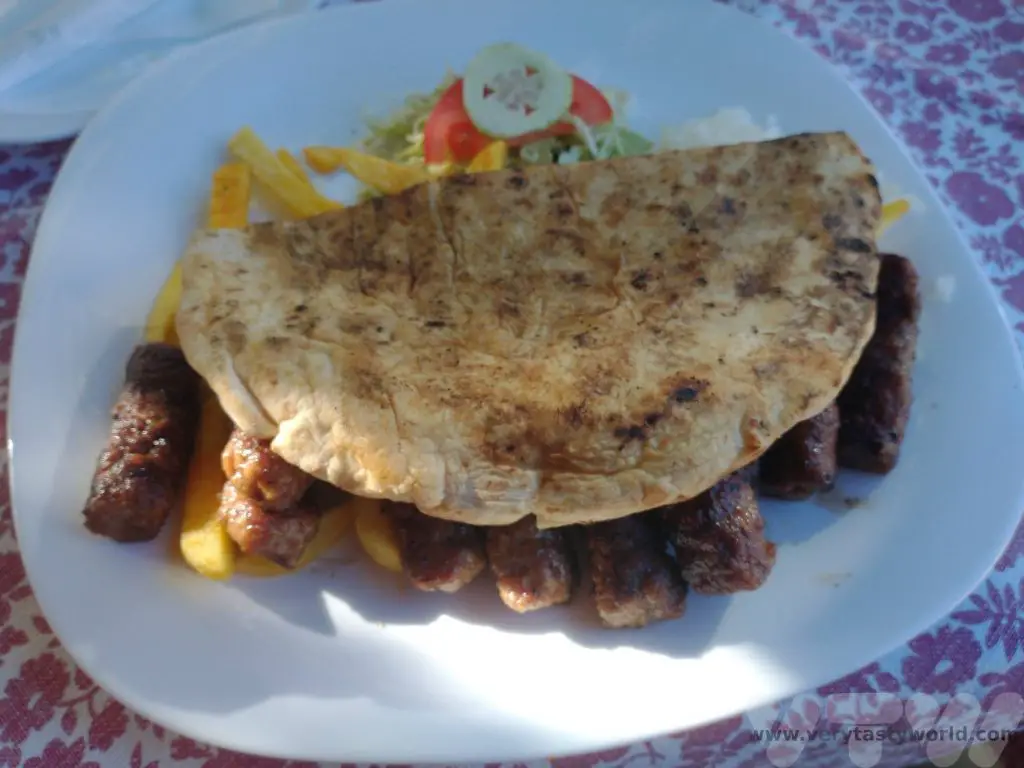
Desserts are luscious and sweet. We particularly enjoyed hurmasica, a gooey, syrupy cake. Coffee culture is also very important and the sweetness of the desserts is beautifully offset by the bitterness of the strong coffee.

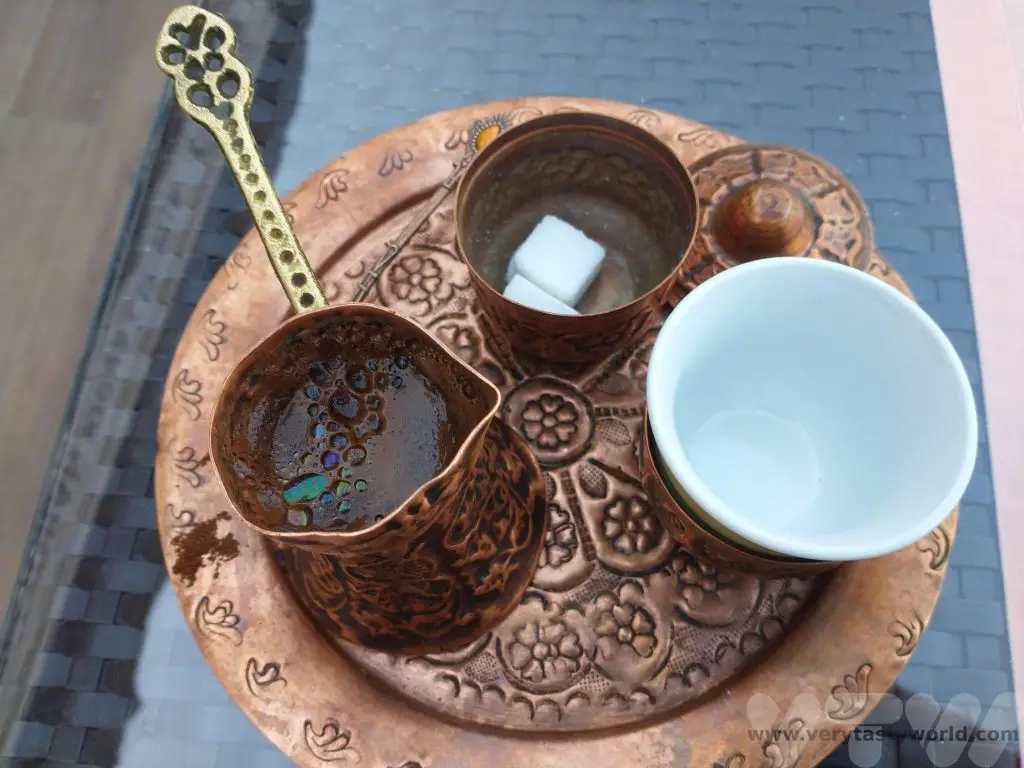
If you enjoy a tipple, it’s impossible to visit Bosnia without tying domace rakija – homemade brandy. It is made from fermented fruits which are distilled. The more common fruits that form the base of the rakija are grapes and plums but other fruits such as pears, cherries and raspberries are used as well. Some of the more unusual flavours are honey, quince and walnut.
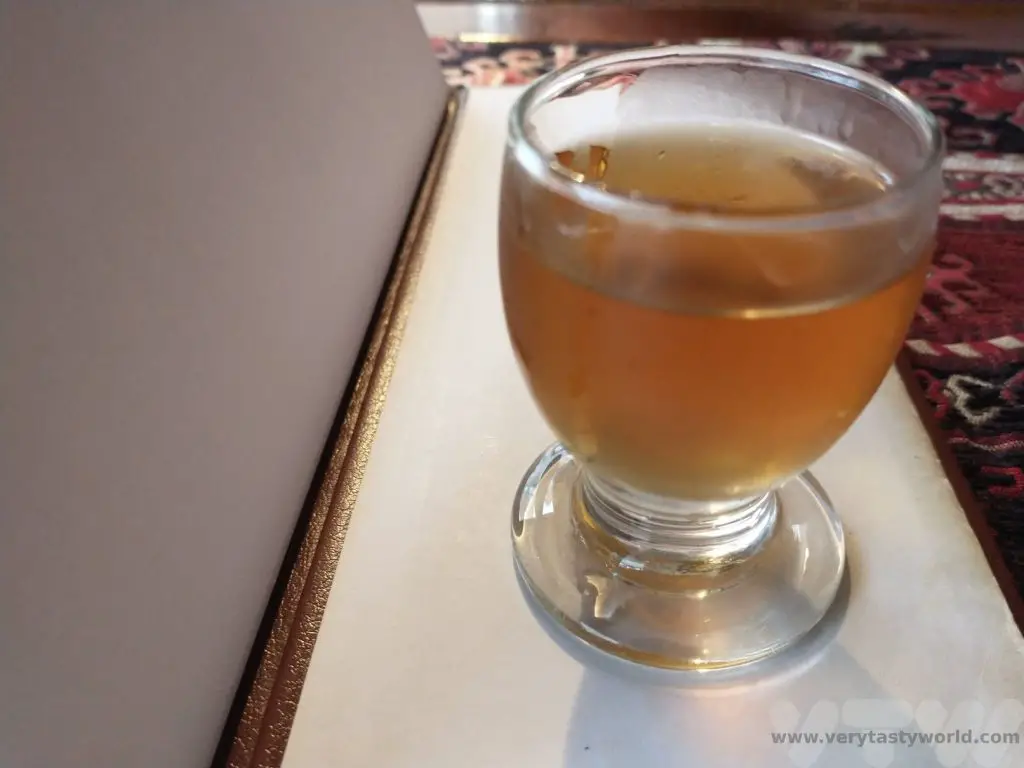
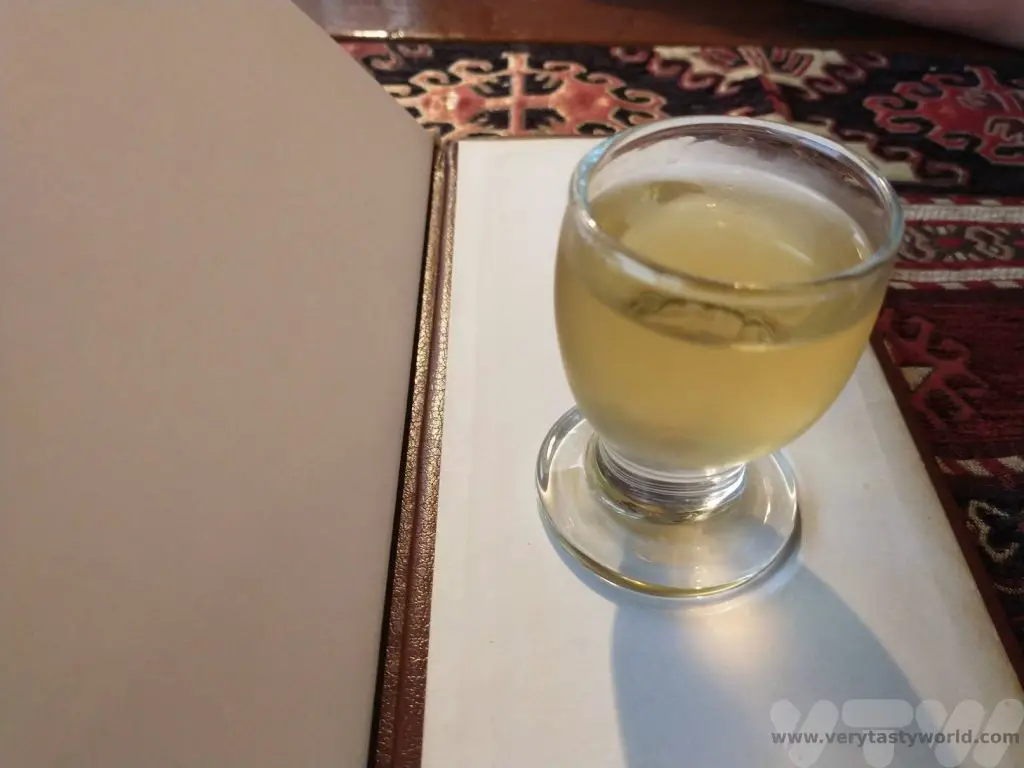
Related Posts You May Enjoy
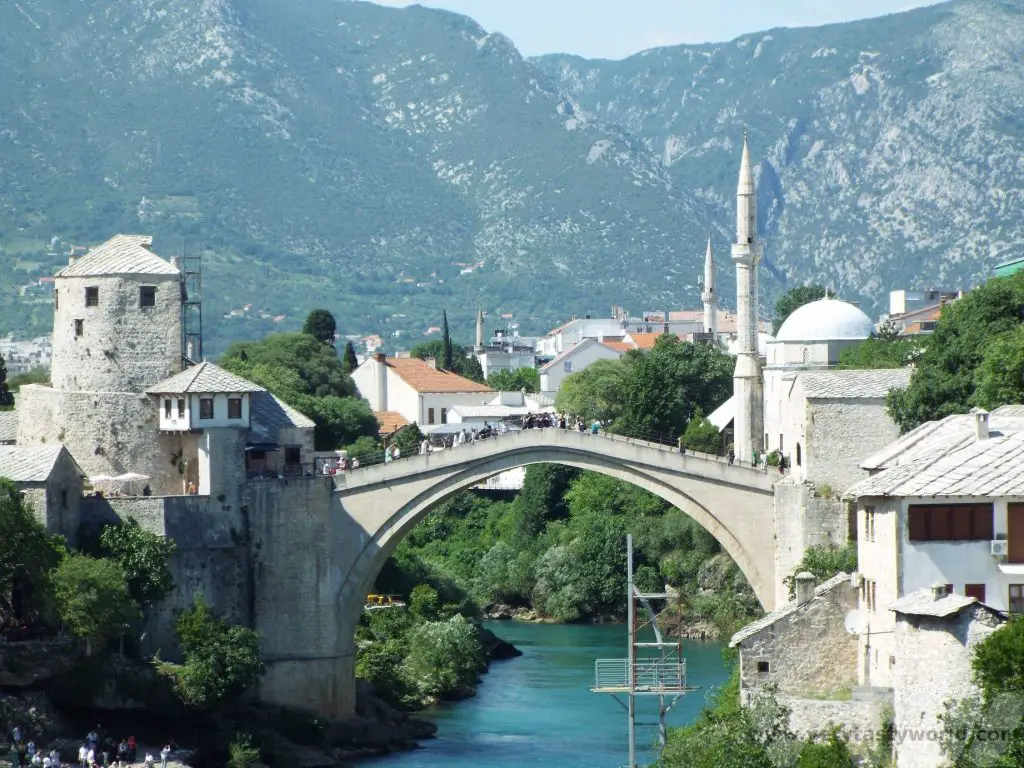
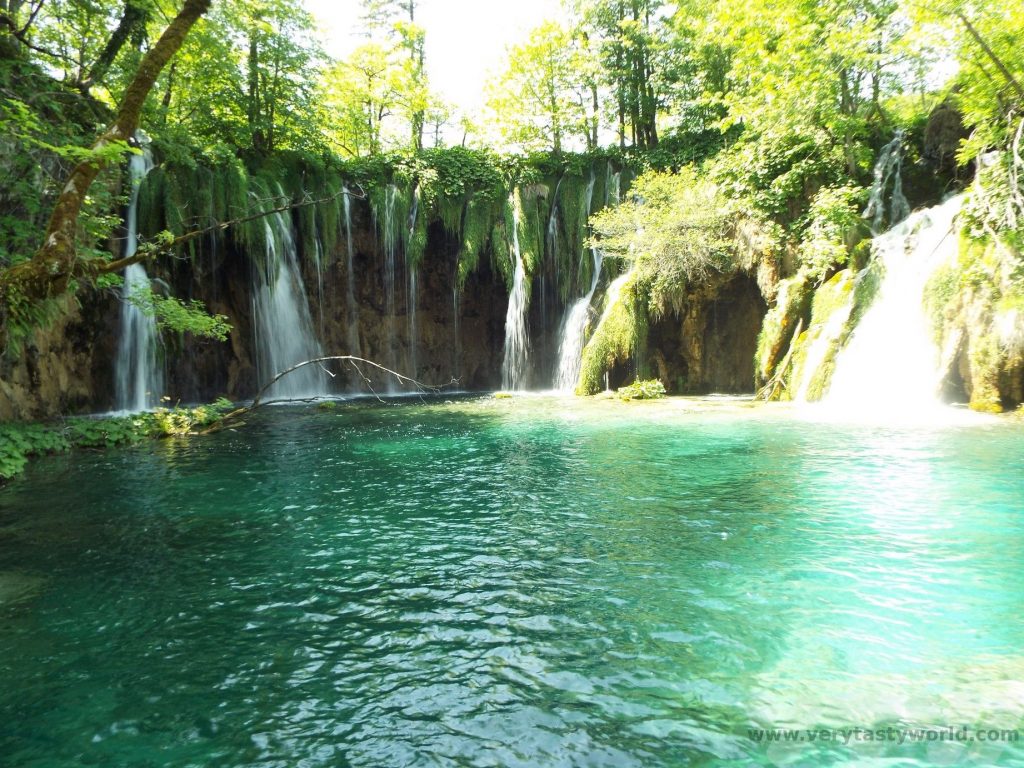
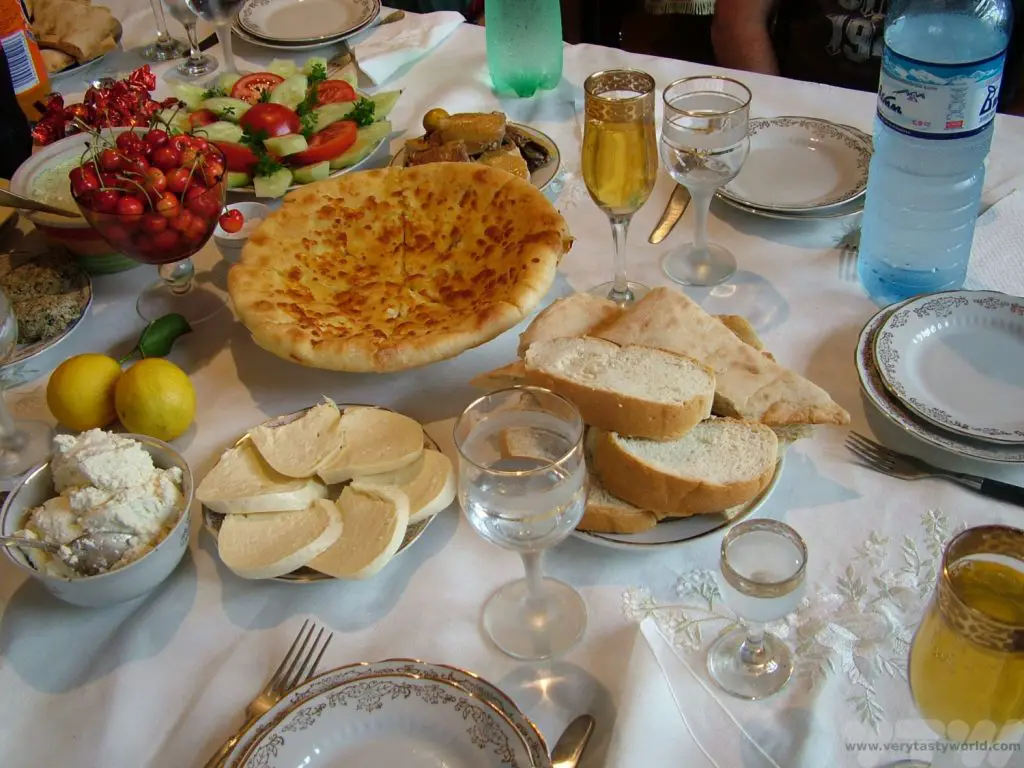
- Things To Do In Rovaniemi In Winter

- Avebury Stone Circle vs Stonehenge
- Five days in Copenhagen
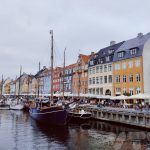
- Is Sarajevo Worth Visiting?
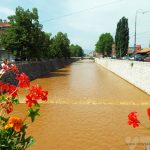
- A Svalbard Holiday – Land of the Midday Moon
- Afternoon Tea in Coventry
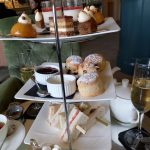

- RECIPE Oyakodon Donburi
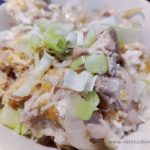
- Zero Waste Recipes Before Your Holiday

- RECIPE: Vegetable Biryani Tamil Nadu Style

- RECIPE: Vegan Wild Garlic Pesto
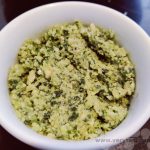
- Recipe: Venetian Pasta Sauce
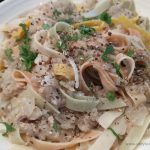
- RECIPE: Biryani Raita Recipe

- RECIPE: How to Make Costa Rica’s Gallo Pinto
- Recipe: Japanese Simmered Pork Belly – Buta no Kakuni
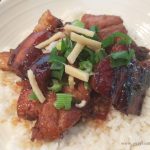
- RECIPE: How to Make Umeboshi
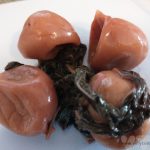
RECIPE: Vegetable Biryani Tamil Nadu Style
Biryani is a delicious aromatic spicy rice dish that is a meal in itself. Eaten all over India, it is also very popular in Tamil Nadu, the south eastern state which runs from Chennai in the north, all along the Bay of Bengal to Kanyakumari in the south. We visited this brilliant state a couple of years ago and were not only inspired by wonderful places to visit but also the deliciousness of south Indian cuisine. And we have a recipe for vegetable biryani Tamil Nadu style.
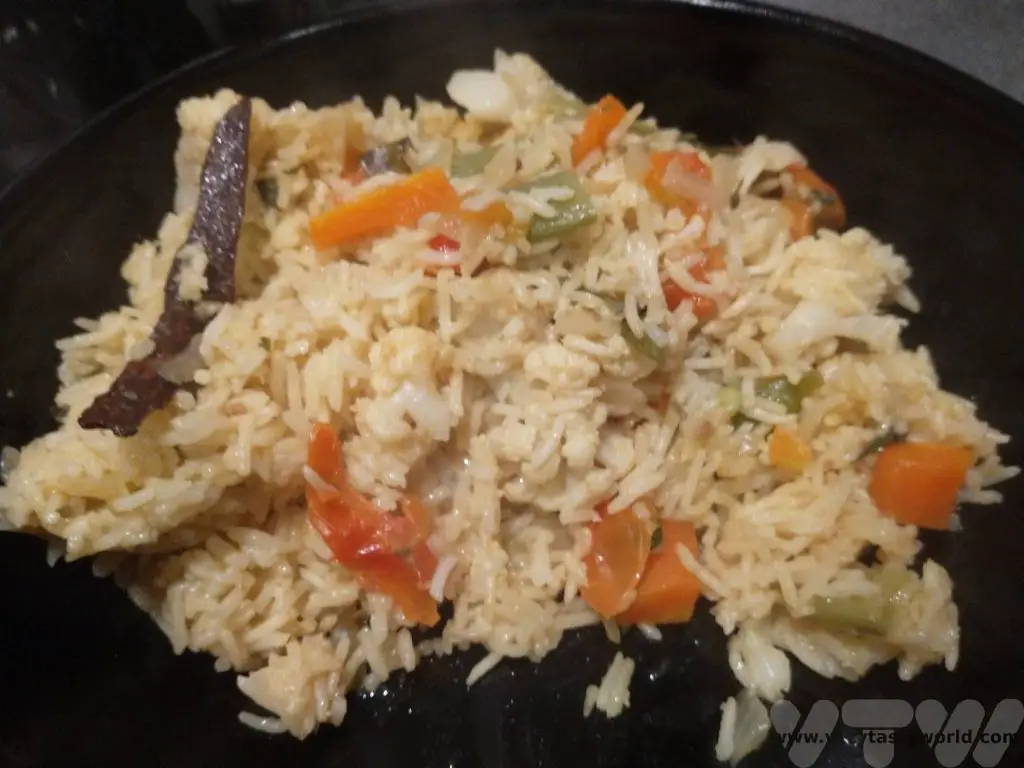
Although biryani is best known as a dish from India it is thought that it probably originated in the Middle East. The Persian word ‘birinj biriyan’ means ‘fried rice’. The cuisine of the Mughals, who ruled much of South Asia between the 16th and 19th centuries, had a significant influence on Indian food. The Mughals also introduced ingredients, such yoghurt, and also the ‘dum’ technique of cooking the dish over a low heat in a sealed pot which helps retain all the flavours as the food cooks.
This recipe comes from Tamil Nadu courtesy of our dear friend, Shankari. We were lucky to be gifted a traditional Indian pressure cooker which is absolutely perfect for cooking this delicious biryani but we have adapted and tested the recipe for a standard hob top pan as well. We often use a rice cooker to cook rice but we find it really doesn’t work very well with biryani because you are sautéing spices and vegetables beforehand and the rice is layered on top of these. A rice cooker can do this to some extent but not really enough to properly cook the spices.
Many people in Tamil Nadu are vegetarian so this dish contains no meat. When we visited this region every restaurant offered both a veg and non-veg meal option. This biryani could easily be adapted to include lamb or chicken but we love the simplicity of the vegetables and it is so tasty, you really don’t miss the meat. The spice combinations are warming and aromatic. If you wish to make the dish vegan, fry the ingredients in oil and omit the yoghurt.
The process involves cooking whole spices first to release their oils and to maximise the flavour. We leave the whole spices in the finished biryani but they aren’t really designed to be eaten – they won’t harm you if you do but you might get an overly intense hit of flavour if you chomp on a clove!
The quantities here will serve 2 hungry people but you can double up to feed more people, or you can use these quantities if you are accompanying the biryani with other dishes. We use a cup that is around 200ml in volume.
How To Make Vegetable Biryani from Tamil Nadu
Ingredients:
1 bay leaf
1 stick of cinnamon
3 green cardomom pods
3 cloves
2 tbs mint leaves
2 tbs coriander leaves
½ teaspoon red chilli powder
½ teaspoon coriander powder
1/8 teaspoon turmeric powder
½ teaspoon garam masala
1 cup of Basmati rice
2 tbs ghee or butter (use vegetable oil for a vegan biryani)
Small, finely chopped tomato
2 tbs natural yogurt
1 tsp ginger garlic paste (you can buy this frozen or in jars, or you can crush 2 cloves of garlic and a thumb of ginger in pestle and mortar)
1 green chilli (add another if you like spice)
Chopped vegetables (anything you like but beans, carrot, peas and cauliflower work really well)
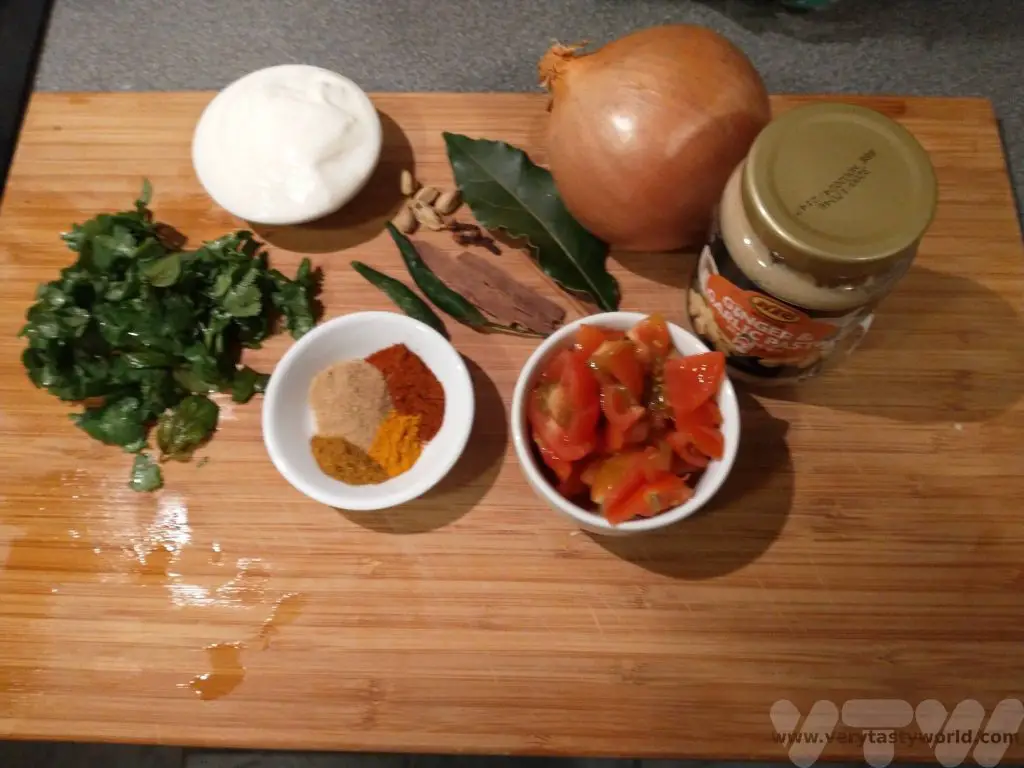

Method:
Add 1 cup basmati rice to a bowl and soak it in water for 30 minutes.
Heat 2 tablespoons oil or ghee or butter in a pot or pressure cooker.
Add whole spices:
1 bay leaf
1 inch cinnamon
3 green cardomom
3 cloves
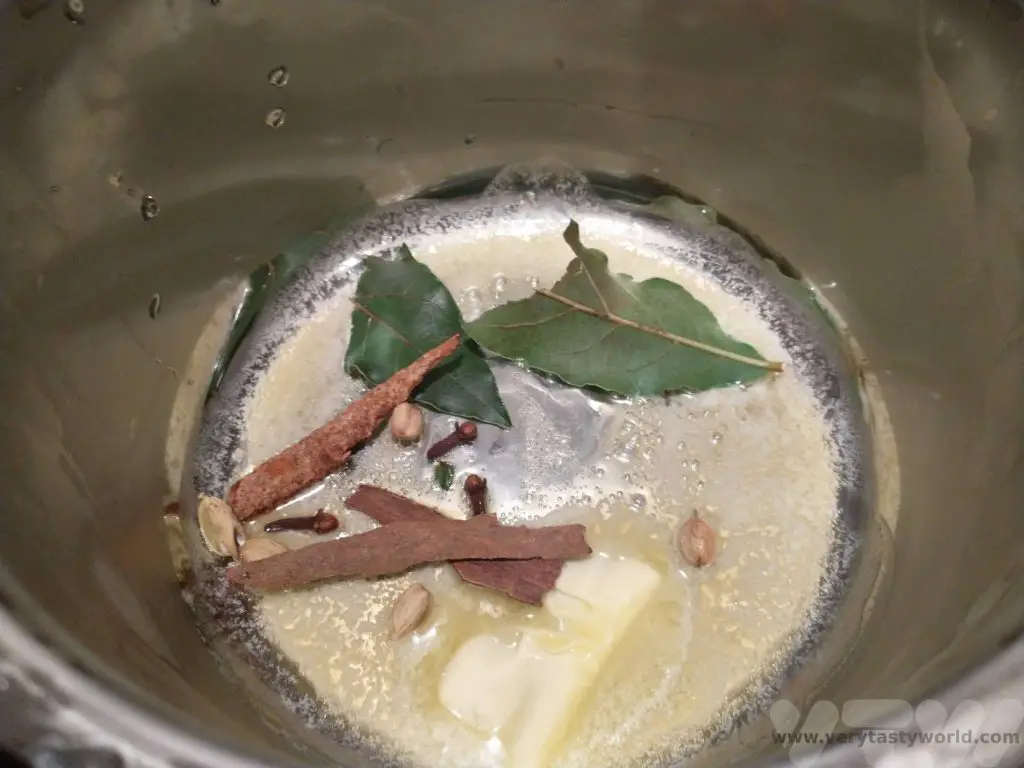
When the spices, begin to crackle, add 1 sliced onion and 1 chopped green chilli. On a medium heat, sauté until the onions turn golden.
Add 1 teaspoon ginger garlic paste. Sauté this for a couple of minutes until the raw smell goes away.
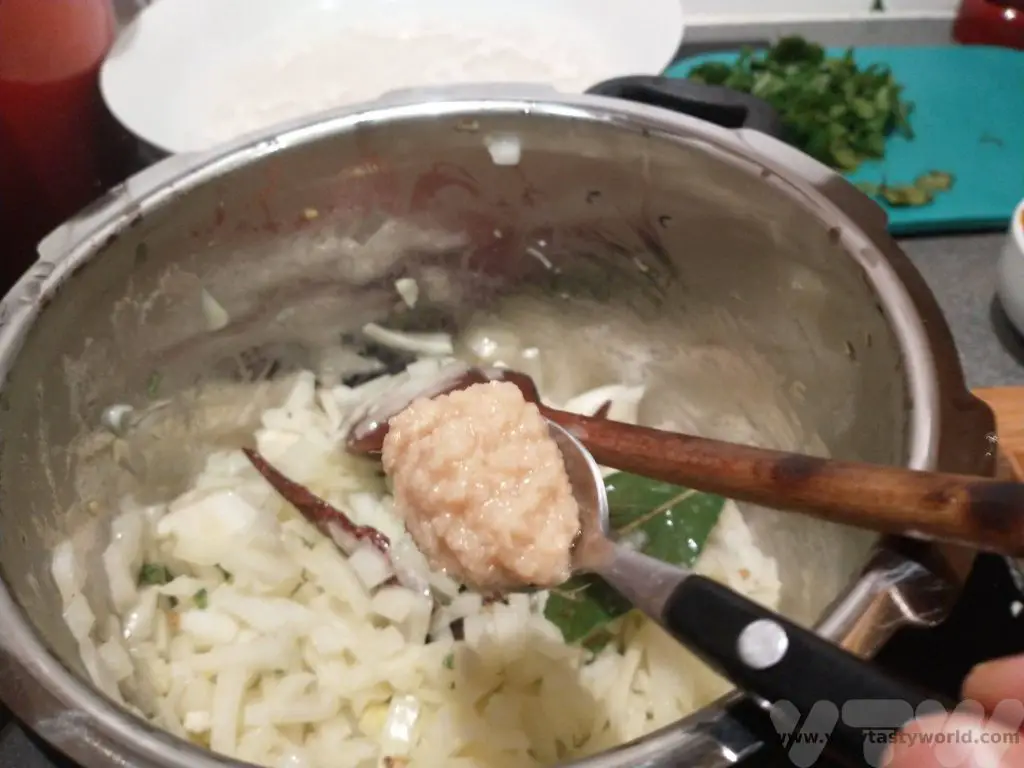
Add 1 cup chopped mix veggies and sauté on a medium heat for 2 -3 minutes.
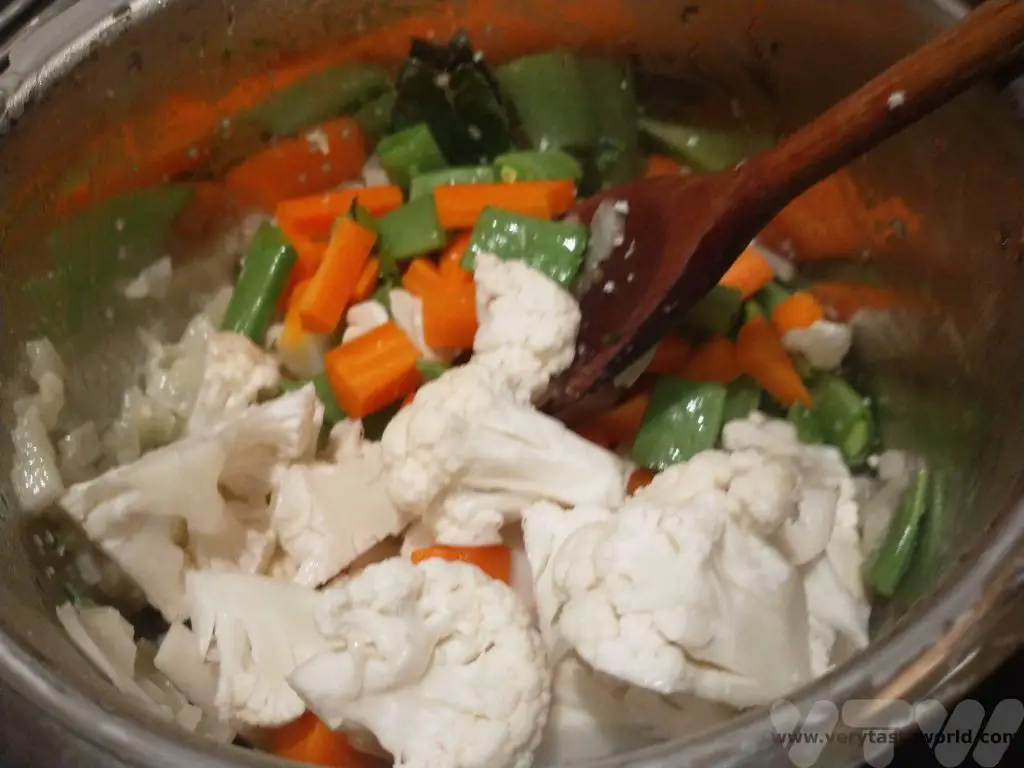
Add the following:
2 tablespoons mint leaves
2 tablespoons coriander leaves
½ teaspoon red chilli powder
1/2 teaspoon coriander powder
1/8 teaspoon turmeric powder
½ teaspoon garam masala
1 small finely chopped tomato
2 tablespoons of yogurt
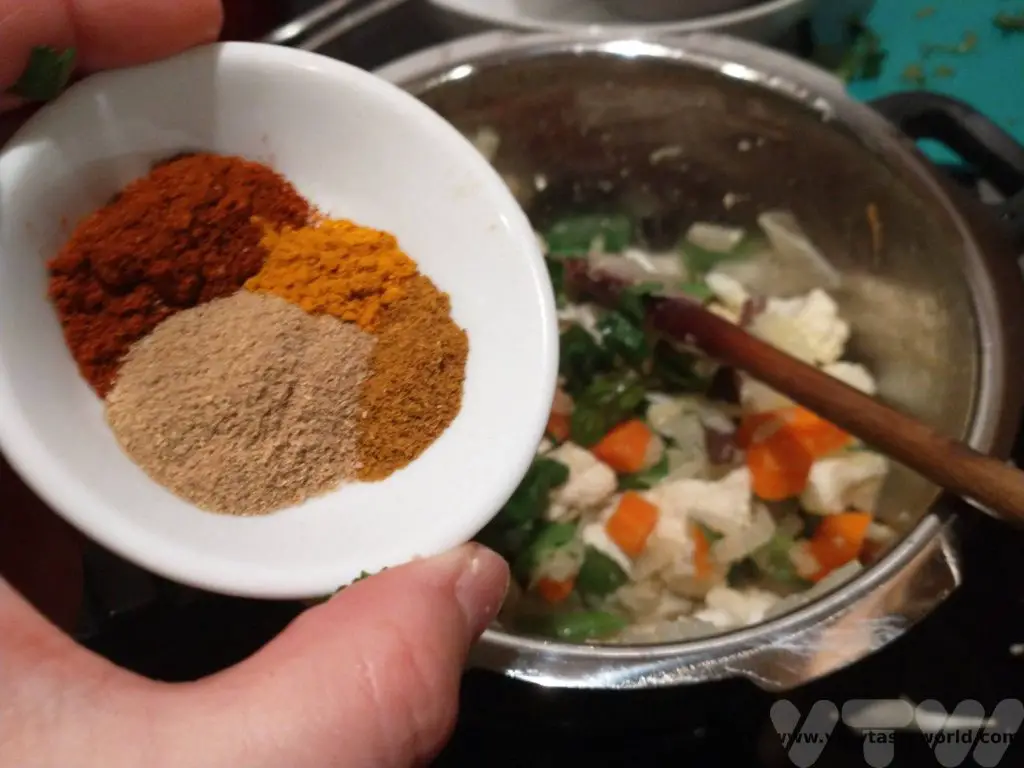
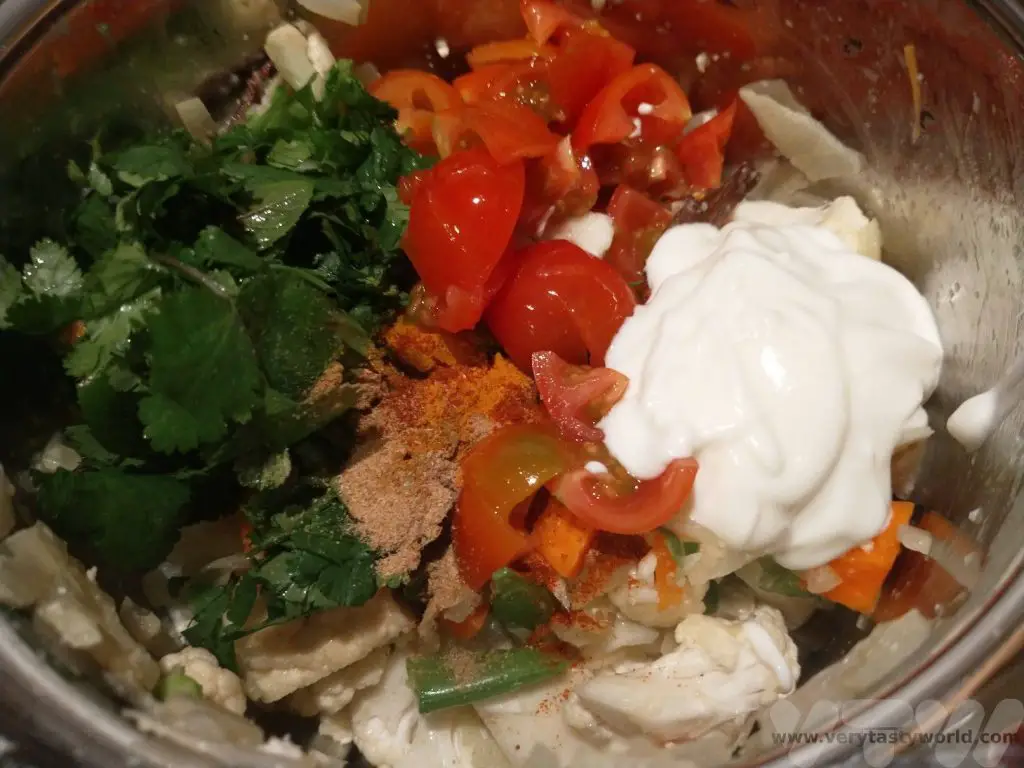
Mix and fry again for 5 minutes on a medium heat until the tomatoes break down. The mixture turns aromatic after frying.

Add the drained rice and spread it evenly across the top of the mixture.
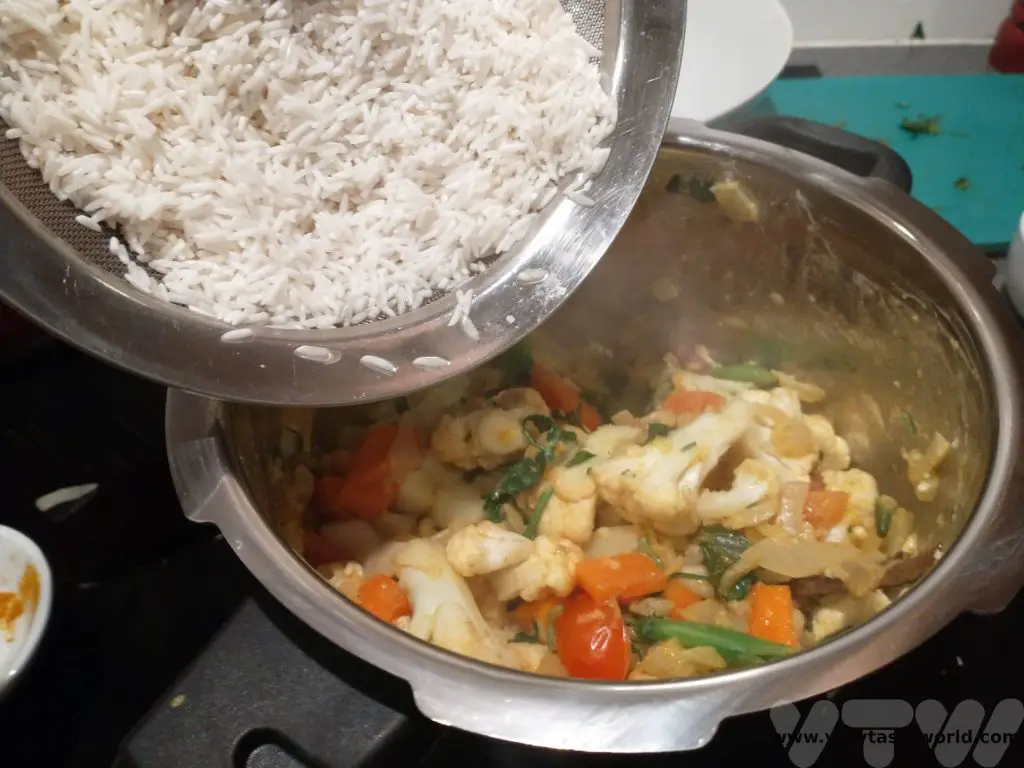
If you are using a pressure cooker: add 1 cup of water and salt to taste.
If you are using a pot: add 1.5 cups of water (this is because some steam will escape) and salt to taste.
Cover the pot or pressure cooker with the lid.
Pressure cooker – cook on a medium-high flame for one whistle
Pot – cook on low heat until all of the water is absorbed and rice cooked is nicely.
Once the rice is cooked, take the biryani off the heat and let it rest for 15 minutes.
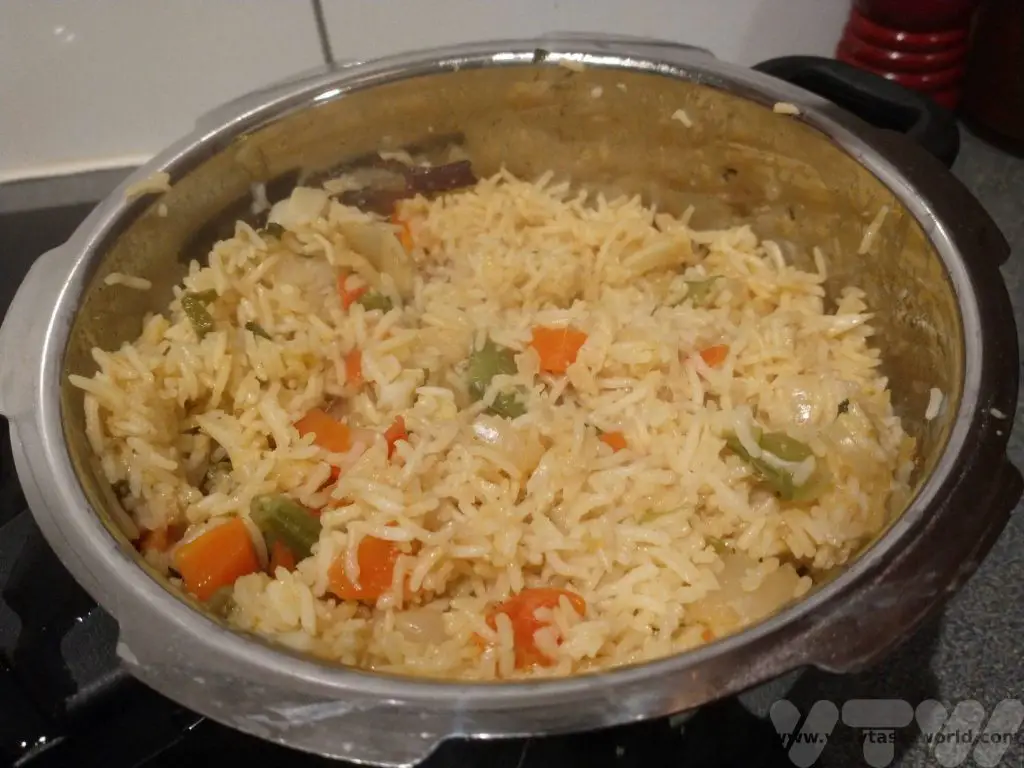
Serve on its own as a main meal, with a biryani raita, or it also makes a great accompaniment to other dishes.
We often enjoy it as an accompaniment to palak paneer – a paneer cheese and spinach curry – for a really delicious veggie meal.
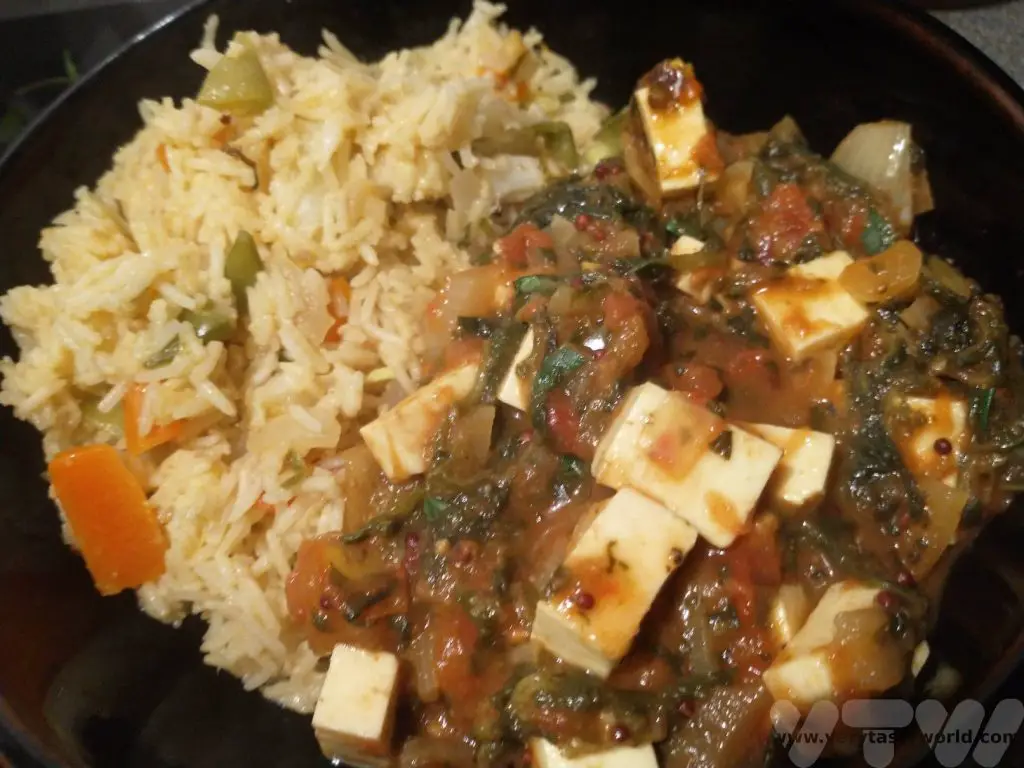


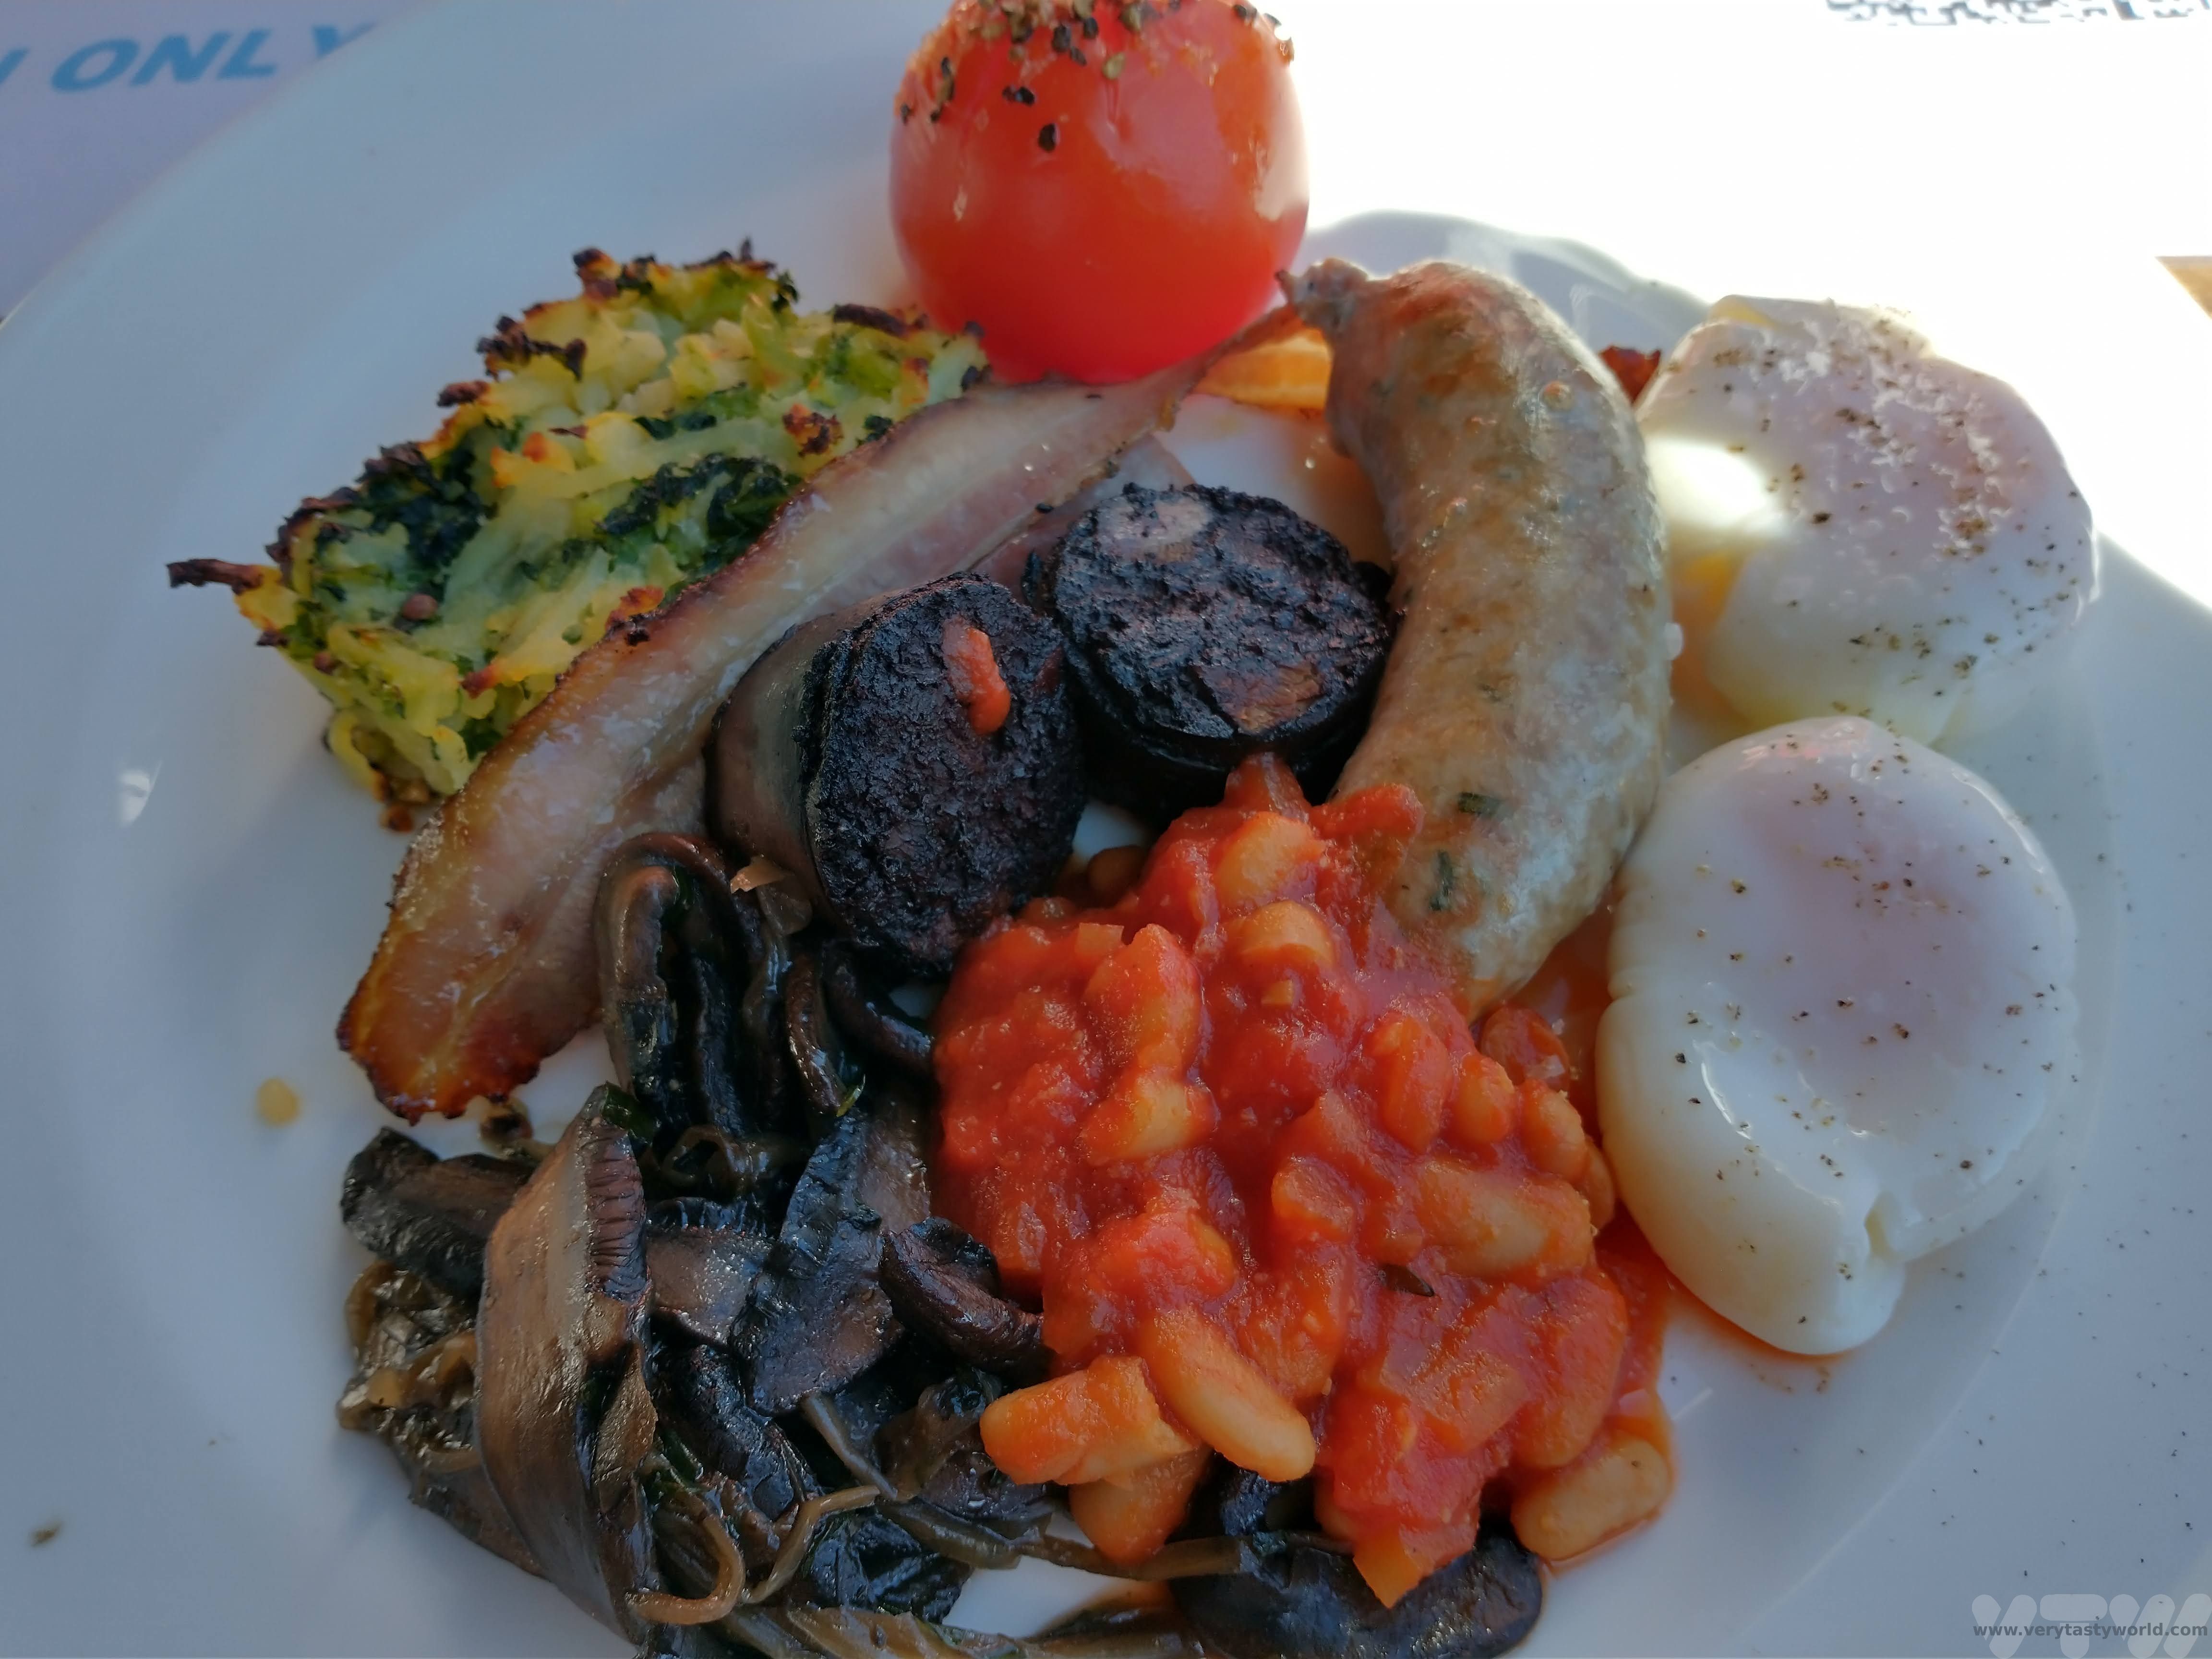
A Svalbard Holiday – Land of the Midday Moon
It has long been an ambition to see the Aurora Borealis, that strange and ethereal natural phenomenon when charged particles from the sun crash into the earth’s ionosphere and the Northern Lights dance in the sky. We failed to see them on a winter trip to Iceland so thought we would try again in a new country – Norway – a place we had very much wanted to visit. Our plan was to spend some time in the lovely northern city of Tromso from where we could fly up to enjoy a Svalbard holiday.
Svalbard is also known as Spitsbergen. It’s an archipelago in the Arctic Ocean located about halfway between the top of Norway and the North Pole. It is part of the Kingdom of Norway.
The islands were discovered by a Dutchman, Willem Barentsz, in 1596 and were used as a base by whalers in the 17th and 18th centuries. A coal mining industry was established in the early 20th century and people began to settle there. Longyearbyen is the largest settlement and has a population of around 2000 people from 50 different nationalities.
We visited Svalbard in winter but many of the activities we enjoyed can also be adapted for summer visits.
Arrival at Longyearbyen
As we flew from Tromso, we could see the sun slowly setting from the window. This would be the last daylight we would see for four days.

It was already night time when our aeroplane landed at 2pm, with only the runway and terminal building lit up in the perpetual darkness. All passengers will have their passports checked before flying in, so we effectively entered Svalbard when we left Tromso. Hence there was no need to go through any form of immigration on arrival at the airport.
Transfers are easy to arrange – there are two buses which each follow a particular route, dropping visitors off at hotels or the university accommodation. Alternatively it is possible to get a taxi.
We were travelling with carry-on luggage so hopped straight off the plane and found the friendly bus drivers who indicated which bus we should get on to reach our hotel. We had to wait inside the terminal until everyone was ready to leave. Well, we didn’t but it was really cold outside! Basically as soon as all the passengers have grabbed their stuff, the staff switch off the lights at the airport and everyone goes home.
The bus fare was 200NOK (Jan 2023). It is possible to pay with plastic everywhere in Norway, we didn’t need the nominal amount of cash we brought. (The bus drivers were happy to take cash as well and even joked that they’d have our boots if that was our only means to pay!) The bus dropped us off on the road by our hotel, The Vault, which was just a two minute walk (five minutes if we were walking on ice without spikes) from the town centre.
(The transfers back to the airport basically follow the bus routes in reverse. Your hotel should be able to give you the bus pickup time for your flight. It’s worth arriving a few minutes early – wrapped up warm, of course. There isn’t a bus stop per se – we just waited on the other side of the road from where we were dropped off and flagged the bus down when it arrived.)
On arrival in our cosy room the TV screen was on. It was counting the days until the sun would appear as well as providing useful weather information and aurora forecasts.

Practicalities for Visiting Longyearbyen
Most shops and restaurants are located along the main road in Longyearbyen. There is a supermarket, booze emporium, various clothing stores, a mini mall and a tourist information centre all within close vicinity. If you have forgotten any items of kit or haven’t brought warm enough clothing there are shops where you can buy suitable outdoor clothes or expedition gear if you are feeling intrepid.
If you are walking around Longyearbyen you must stay within the safe zone. This defined area means that you are safe from polar bears! If you are outside the zone, marked by the polar bear sign, you should carry a gun (eep!) and know how to use it (double eep!). The safe zone is pretty large and covers the main town area.
Hence, as visitors, while it is fine to walk around the safe zone and visit local attractions it is essential to pre-book tours with operators who know the region and know what they are doing in terms understanding the risk.
During winter in Svalbard it is dark all the time. And cold all the time. But it’s a strangely refreshing cold because the humidity is very low. However it is absolutely essential to wrap up warmly because when the wind blows it blows right through you.
Things to do on a Svalbard Holiday
While we travelled in the hope of seeing the Northern Lights, we didn’t plan to sit around waiting for them to appear. It’s largely a matter of luck as to whether they will come out to play when you are there. Longyearbyen has a couple of interesting museums, an lovely art gallery and plenty of excursions to enjoy.
North Pole Museum
This small and friendly museum showcases expeditions to the North Pole. Unlike Antarctica, where the South Pole is located on a land mass, the North Pole is located on top of the sea, so expeditions to travel to reach it were significantly more challenging. Throughout our trip to the Arctic, we discovered the bravery and ingenuity of explorers, who attempted to reach the pole via ships drifting through the pack ice or by airship.
The museum offers a plethora of exhibits, including documents, newspapers, cine-films, letters, artifacts and even bits of airship.

The whole exhibition is fascinating. And, we learned, it wasn’t until 1969 that a British Trans-Arctic Expedition actually managed to reach the North Pole on foot, just a couple of months before humans landed on the moon!
Svalbard Museum
The Svalbard museum has a large interactive room exhibiting all aspects of the archipelago, from the geology and geography to the wildlife and industry.
They also offered a small temporary exhibition about the people of Longyearbyen.
Art Gallery
Located on the main road in town a new art gallery has opened recently. It’s a cool space to view art and also has a café.
We discovered the remarkable works of Kåre Tveter, an artist whose minimalist approach to painting perfectly captures Svalbard’s landscapes.

With just a few colours his art conveys the stark beauty of the region.

Husky Sled and Ice Cave Visit
One of the best trips we took was a full day husky sled drive excursion to an ice cave. Nikolas from Green Dog picked us up from our hotel and took us to their base a few kilometres out of town.
Green Dog provided all the equipment we needed so we changed into our exposure suits, mittens, hard hats with torches and boots, and went straight out to the dog yard. Karl was the first dog we met and he was super-keen to have a hug. In fact, all the dogs wanted cuddles.
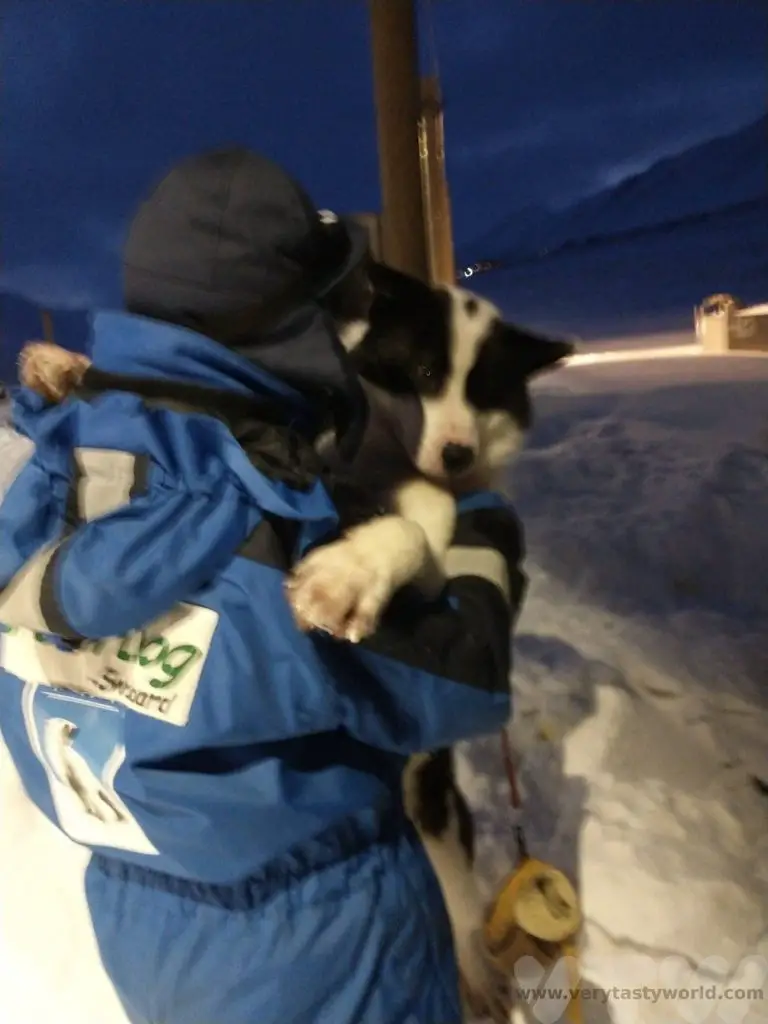
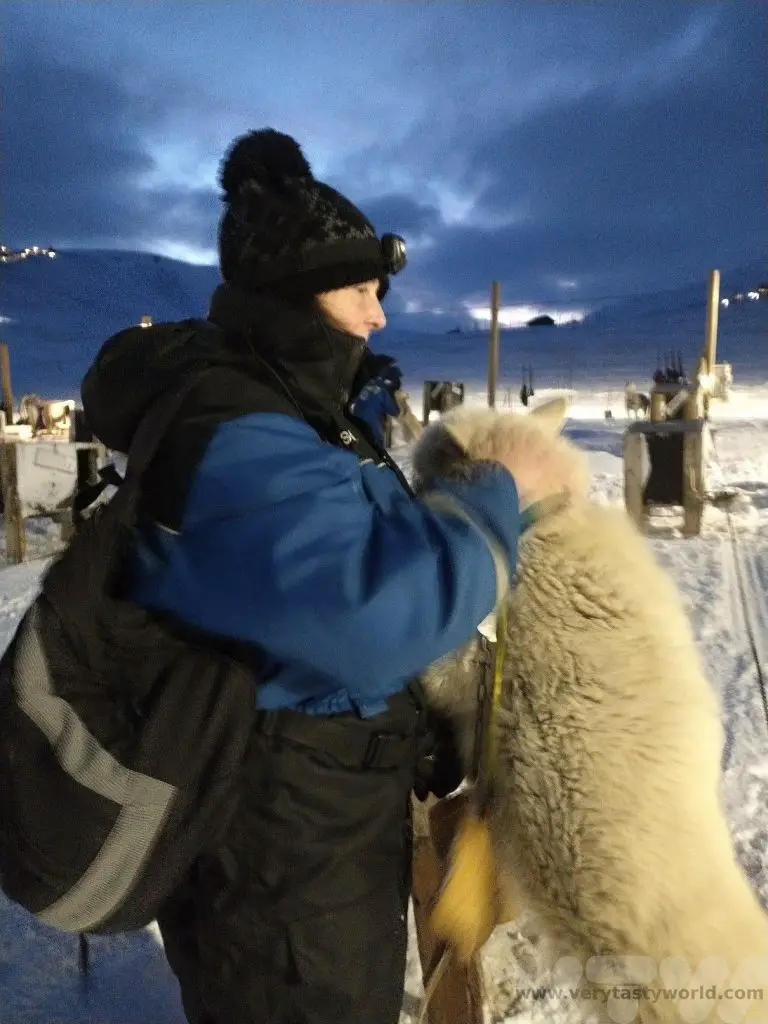
Huskies have evolved and been bred to enjoy the cold weather. They have two coats – a thick undercoat for warmth and a guard coat with coarse hairs that are water, wind and snow-proof. Each dog has its own kennel in the yard but it had to be really cold for them to actually sleep inside them.
We received a briefing on how to use the sled, how to direct the dogs, how to get them to stop and how to get the sled to stop in an emergency.
Then we fastened the dogs to the harness. They were itching to go, barking excitedly and jumping. As soon as we set off the dogs were absolutely silent, fully focussed on pulling the sled.
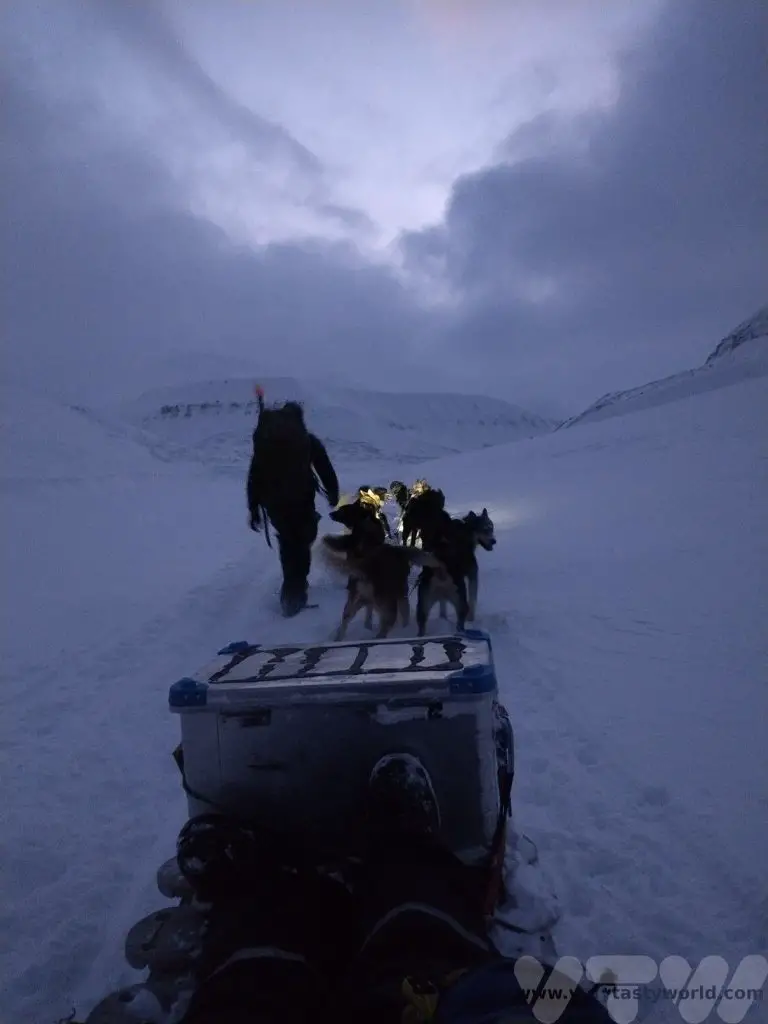
We travelled through stark and beautiful landscapes in the dark. As we reached the ice cave we let the dogs off their harnesses and rewarded them with some hunks of meat.
Then it was time to visit the ice cave. The cave is part of a glacier – around 60% of the archipelago is covered with glaciers. The ice cave changes each year as the glacier melts during the summer months and re-freezes. There are some wide bits and wiggly bits to traverse through. It’s not an extensive route but it’s great fun to slip and slide inside the cave and marvel at the ice formations – you can see rocks sticking out of the sides of the wall and crystal-like icicles.
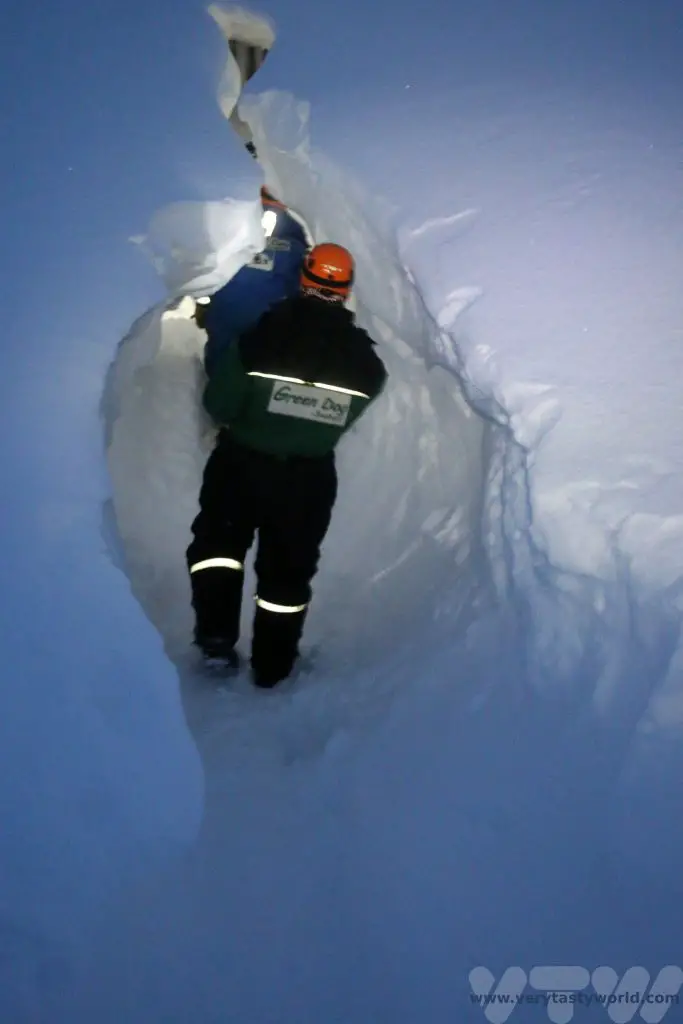

After a quick lunch of rehydrated food – which was surprisingly tasty – we hitched up the dogs and started the return journey. We flew across the glacial moraine fields back to the dog yard.
We are always cautious about doing activities which involve animals as we want to be sure that they are treated well but we can honestly say that the huskies were the happiest dogs we had ever met.
If you visit in summer it is possible to go sledding on wheeled sleds. The ice cave isn’t available for exploration but the route will take you through some interesting scenery.
It is also possible to visit the ice cave via snowmobiles during the winter. You need a valid driving licence and a good command of Norweigian or English to be able to drive one.
Gruve 3 Coal Mine Visit
We also enjoyed an excursion to Mine Number 3. Longyearbyen was established as a settlement after excellent quality coal was discovered. It might seem surprising that an Arctic landscape with no trees should have coal. But around 65 million years ago Svalbard was located near the equator and the movement of tectonic plates over the millennia has now placed it in its icy position in the world. The seam is very thin – twelve metres of forest turned into just one metre of coal.
We were able to visit the mine and learn about its history, construction, its people and how they mined. There is around 200 metres of mountain above the mine so safety was really important, especially in terms of shoring up the tunnels. Apparently you can hear the mountain creak.
This was also the first mine to employ female workers. They were largely involved with engineering jobs but some women worked at the coal face and were very much respected by their male counterparts.
The miners would crawl along the seam, in a tunnel that was between 38cm and 50cm high, and mine using heavy drills for 8 hours a day. Pay was exceptionally good.
You can borrow an overall (choose one that’s size larger than your usual size as you just wear it over your clothes) and crawl into the seam. It is incredibly claustrophobic. Not sure either of us would last even an hour in there, no matter how much pay we received.
The mine also holds a seed bank and archive for a number of countries.
The trip is easy to book via Get Your Guide.
The world international seed bank is also located near the mine. It stores millions of seeds from all around the world, the idea being to help provide a degree of food security for the world.

Snow Cat Northern Lights Tour
The aurora forecast indicated that our best chance of seeing the lights was on our last day so we booked a snow cat tour to take us out to the countryside, away from the city lights, to see if we could spot them.
The trip is probably more exciting if the Northern Lights are in the sky. You get in a big vehicle with a load of other people, drive to a hut, have a warm drink, wait for the lights, come back.
Sadly, we didn’t get to see the Aurora. With this sort of thing it is pure luck; we had booked the trip several weeks beforehand so there was no real way of knowing how active the sun and how cloudy the weather would be. Ever the optimists, we plan to try again!
Svalbard for Foodies
The great thing about Longyearbyen is that it’s located at 78 degrees north so you can say that you’ve eaten the world’s northernmost food, drunk the world’s northernmost beer and so on. The fish in Svalbard – and indeed the rest of Norway – is excellent quality and highly recommended. Our breakfast at the Vault was a buffet comprising smoked and pickled fish, rye bread, brown cheese and pickles. Perfect!
Svalbard Brewery
Svalbard Brewery is located a couple of kilometres out of town (but still within the polar bear safety zone). They are open for brewery tours and some evenings the taphouse is open for drinking but you do need to book in advance.
We enjoyed a tasting flight and then some more of their fine beers. They have a broad variety of styles on offer.

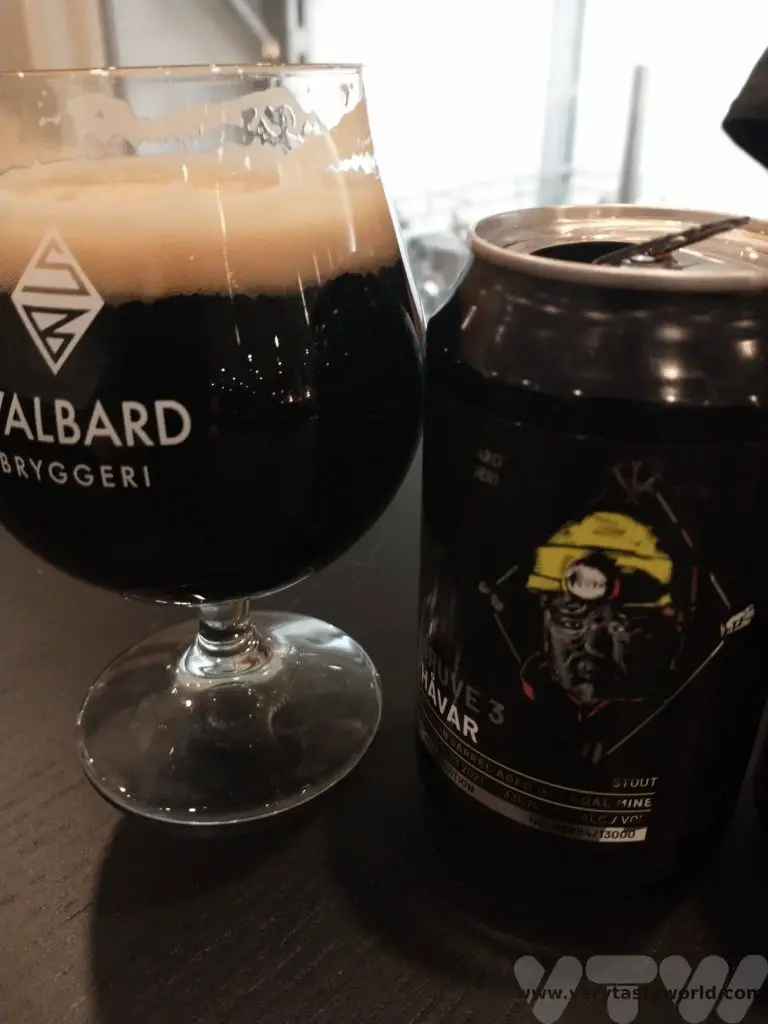
The best was the Gruve 3 stout, inspired by a local miner – bourbon and caramel flavours combine in this delicious 9% beer. Yeah, we caught a taxi back to the hotel. (The brewery kindly phoned for one for us.)
Fine Dining at Huset
We decided to treat ourselves to a dinner at acclaimed restaurant Huset. Set in a former community centre built in the 1950s, it’s located a few kilometres out of town, so we needed to take a taxi to get there. Taxis are plentiful but not very cheap. Still, this was a treat. The ethos of this restaurant is to present food from the region in the form of a Nordic tasting menu.
Our welcome was warm and friendly, each dish was presented beautifully and came not only with an explanation of what we were eating but information about its provenance, sometimes even including the name of the hunter. It was also lovely to see the chef himself serve some of the courses – it’s always nice to be able to compliment the cook directly.
Prices for the tasting menu were similar to tasting menus in the UK.
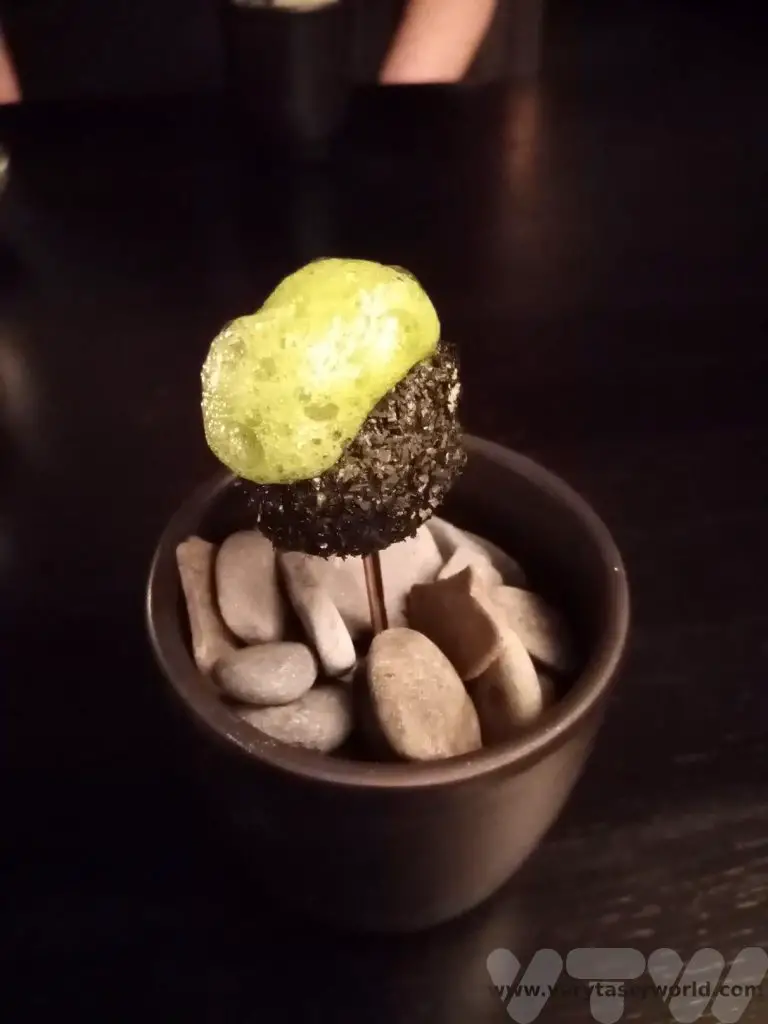
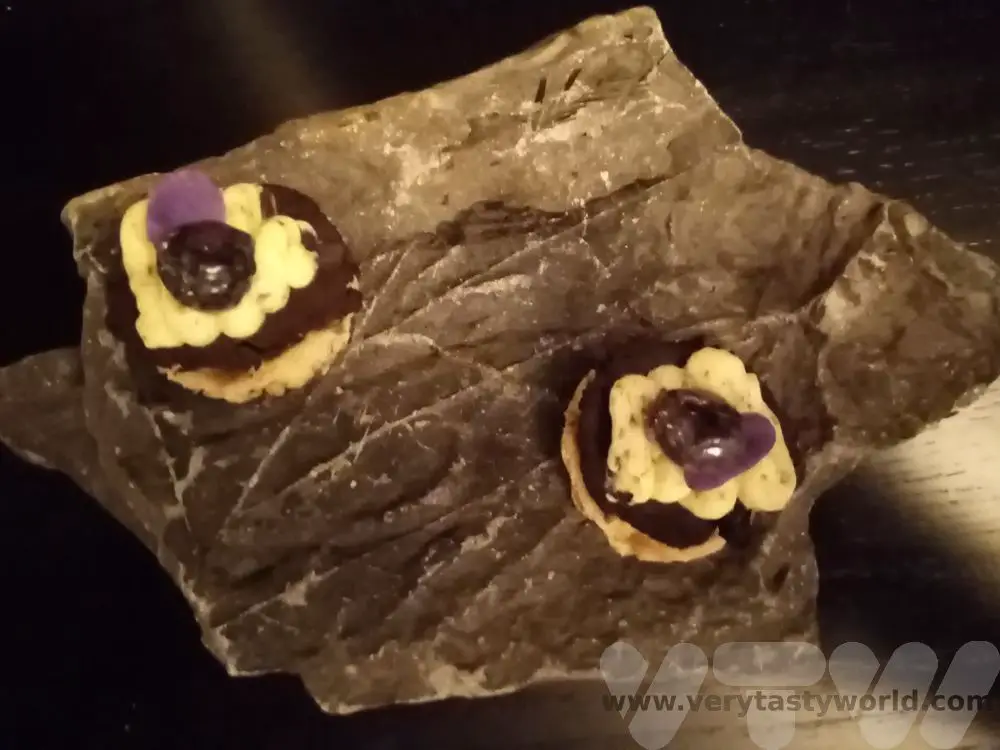
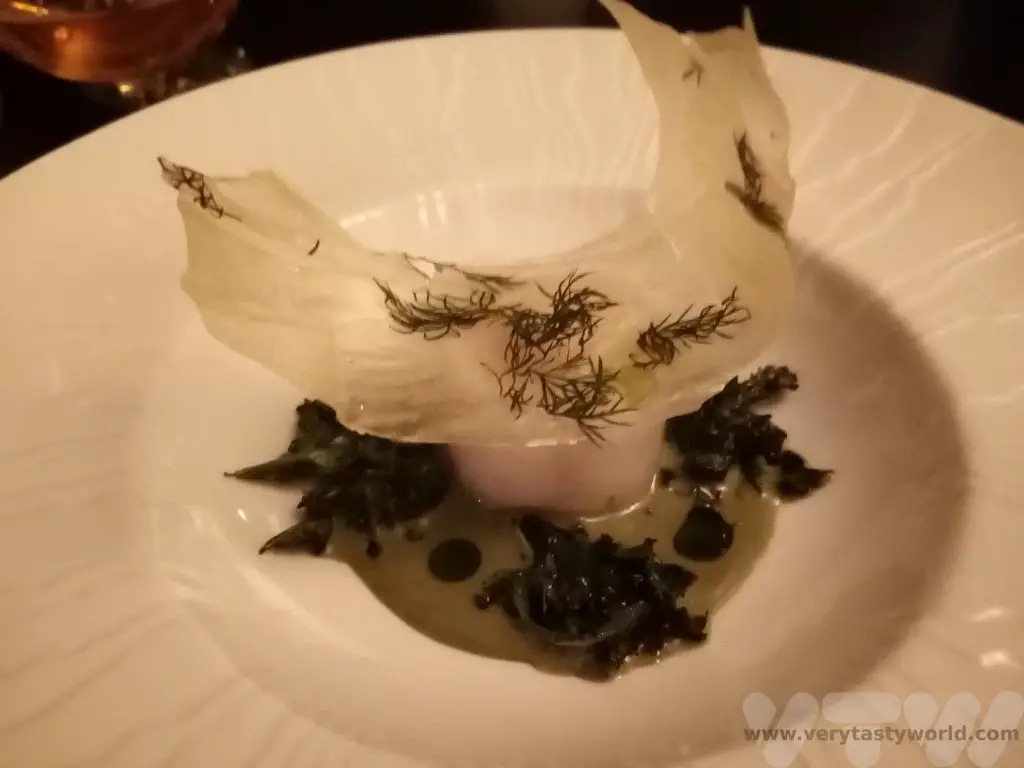
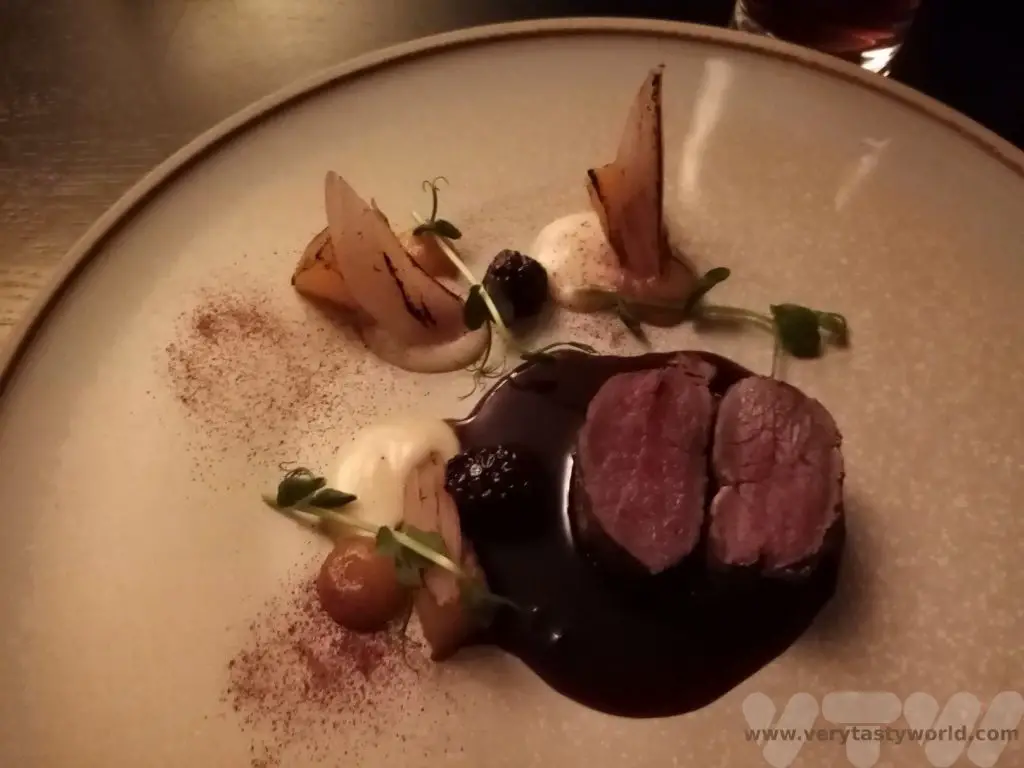
The lovely staff at Huset also offered us a chance to tour the building and see their astonishingly well-stocked wine cellar. It’s one of the best in Europe and has around 15,000 bottles. We tentatively tiptoed around the cellar, a little bit scared of turning too quickly and knocking over several thousand pounds worth of exceptionally good wine.

The tasting menu can be accompanied by a wine pairing and it is also possible to request a beer pairing to accompany each dish. All the beers are local and supplied by Svalbard Brewery.
The food was exquisite and beautifully presented. It made for a truly memorable evening.
Sushi
Our hotel restaurant just happened to transform into the Nuga Sushi Bar in the evenings so we felt it would be rude not to partake, especially as sushi is our favourite food in the world. It’s always interesting to see how other cultures present sushi and Norway is one of the largest seafood exporters in the world, so local fish is guaranteed to be very fresh and top quality. We enjoyed a sushi platter. The tuna was – unsurprisingly – not the greatest we have ever tried (tuna not being a fish indigenous to Norway’s waters) but the salmon was fresh and delicious and the scallops were probably the largest and juiciest we have ever eaten.
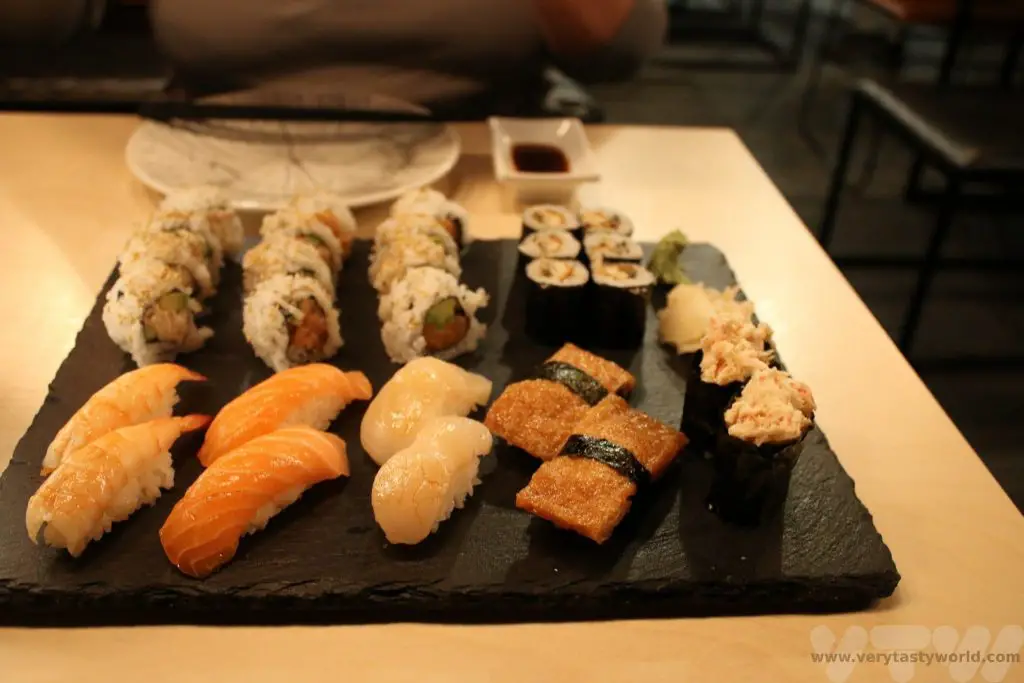
There are plenty of restaurants along the main street and in the mall. Stationen offered what we would call pub grub. Straightforward honest food and some seriously good fish and chips!
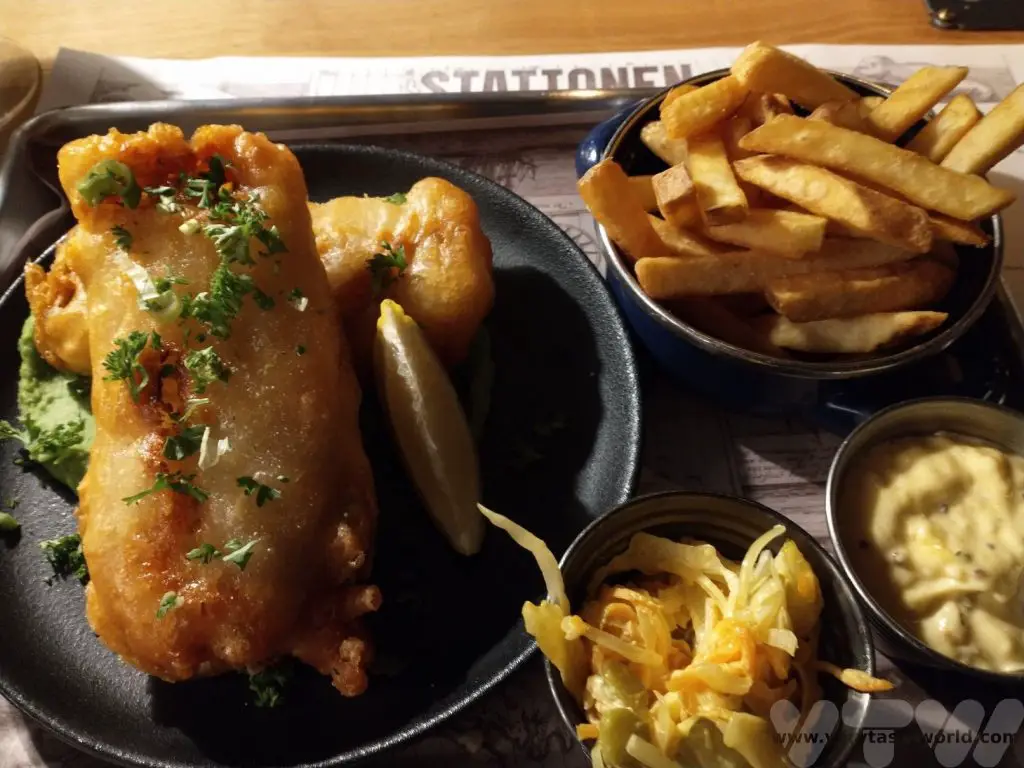
DIY Food
The supermarket in town has a wide variety of products if you don’t fancy eating out. There are all sorts of fresh products and convenience food. You can even buy dried expedition food which you can rehydrate if you have a kettle in your hotel room.
DIY Booze
If you enjoy a tipple, alcohol in Norway is expensive. Svalbard is actually less expensive than the mainland due to a different tax regime but it’s still pretty pricey. You can only buy booze in the alcohol store, next door to the supermarket. Keep an eye out for opening times.
There are alcohol restrictions for local people. They can buy as much wine as they like but are restricted on how much beer or spirits they can buy in a month. Residents have an alcohol card to record their purchases. This convention dates back to Longyearbyen’s mining heritage – apparently miners aren’t fond of drinking wine but enjoy beer and spirits!
Tourists can buy as much booze as they can drink but will need to show their airline boarding pass or ticket at the checkout to prove that they are not living in the area. And there will be restrictions on how much alcohol you can take off the island.
What to Bring to Svalbard in Winter
Warm clothes. When we say warm clothes we mean proper warm clothes. We recommend layers and clothing to cover your whole body. We took a base layer (tops and bottoms), several long sleeved tops, thick trousers, double pairs of socks plus hats, gloves, scarves and balaclavas.
Solid outdoor shoes – in winter you will be walking on ice and in snow. You need to have decent walking boots and they need to be waterproof.
Spikes – these nifty little rubber fittings have small metal spikes underneath and can be attached to most types of shoe and boot. They give a massive amount of grip when walking on ice and make the world of difference between slipping and sliding all over the place and walking normally.
Reflective jacket or strips. It’s dark all the time so it’s good to be visible to oncoming cars if you need to cross the road. The tourist information bureau has some that you can borrow if you wish.
Indoor Shoes – Longyearbyen was established as a mining settlement and the miners spent long days at the coal face. When they returned to their accommodation their boots would be covered in coal dust – so there is a convention that people remove their shoes indoors. Our hotel had multiple lockers to put boots in. We did take some indoor shoes to wear but changing them was a bit of a faff so we ended up walking around indoors in our socks, which worked fine for us. But bring some indoor shoes or slippers if you wish.
A camera that works well in low light. In retrospect, our phones and camera struggled with the darkness. Many of the shots we took were wobbly due to the light conditions.
Although some of the shots turned out to be quite arty and cool – quite by accident.

Even though we didn’t see the Northern Lights, we had an amazing time in Svalbard. Everyone was very friendly and welcoming and it was strange but curiously wonderful to experience darkness all day.
Related Posts You May Enjoy

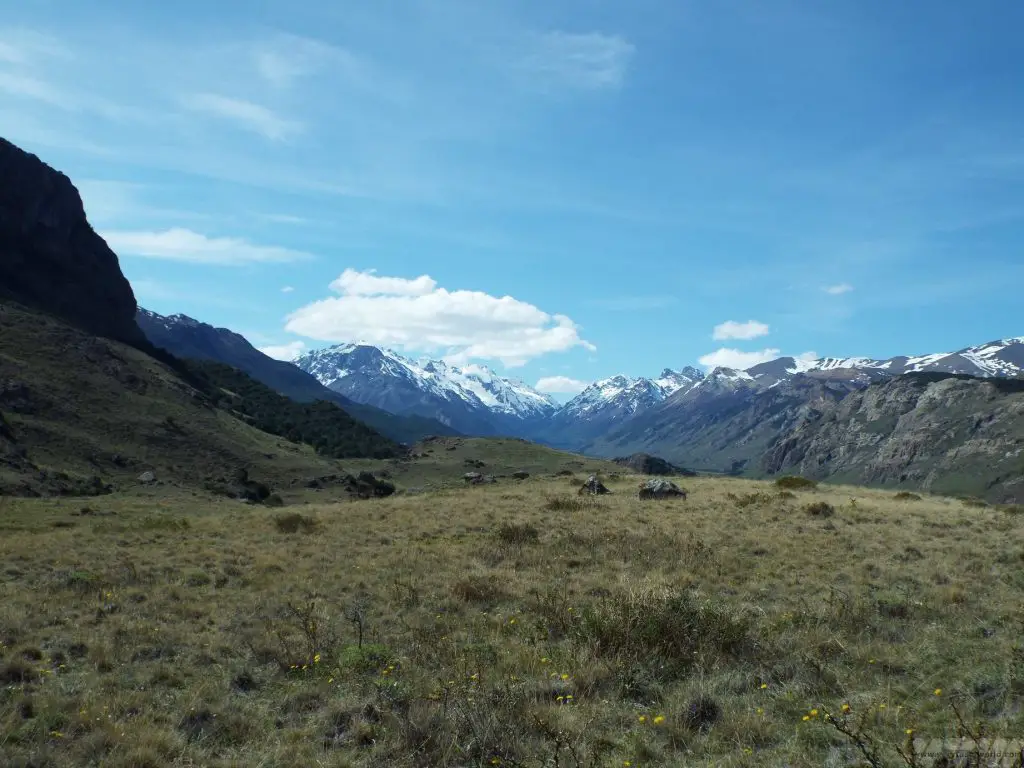
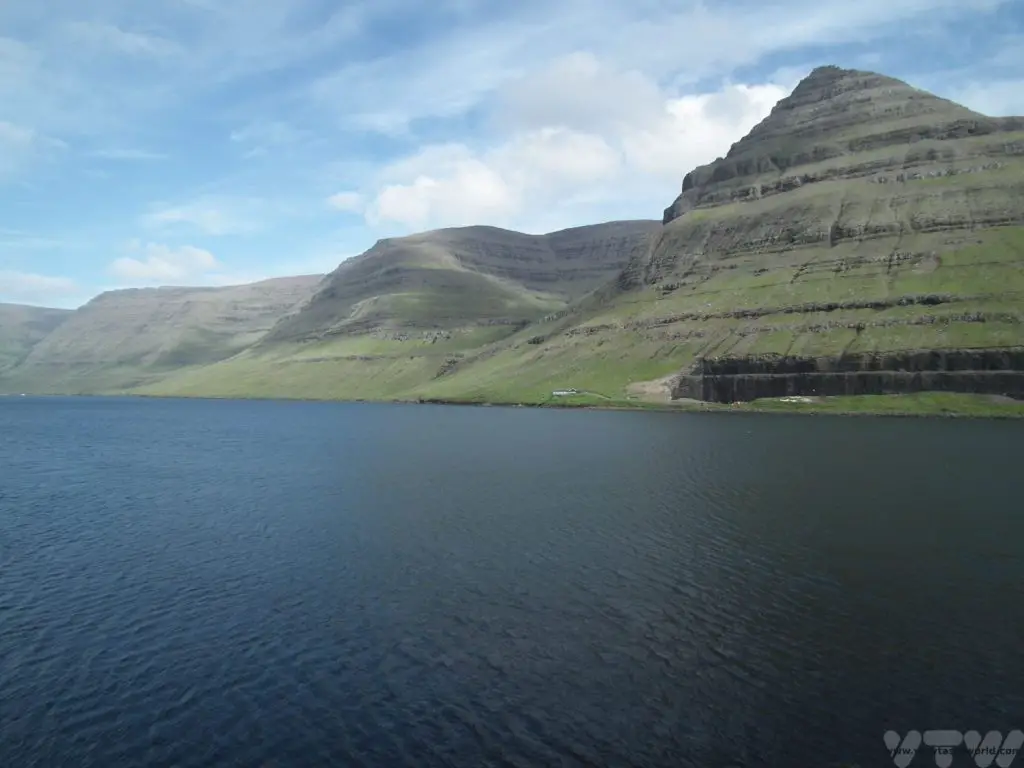
Afternoon Tea in Coventry
Everything Stops for Tea
Afternoon tea is a very British tradition. The British are, of course, well known for their love of tea.
Tea to the English is really a picnic indoors.
-Alice Walker
Afternoon tea originated in the early 19th Century. It was a time when tea drinking was becoming extremely popular amongst all classes but this was also a time when people tended only to have two meals a day: breakfast and supper. Supper was usually taken around 8pm in the evening which meant that there was an awfully long gap between meals.
Anna Russell, Duchess of Bedford and friend of Queen Victoria, invented the afternoon tea. She had decided that the gap between breakfast and supper was just too long (who can help but agree?) and she would start feeling peckish mid-afternoon. She solved this problem in around 1840 by indulging in a cup of tea and a snack at around 4pm. The tea was generally accompanied by bread and butter and some cake. She invited her friends to join her and soon enough afternoon tea became highly popular amongst high society.
The elements comprising afternoon tea evolved over the years. Fortunately sandwiches had already been invented by the Earl of Sandwich, who had discovered the joys of putting something delicious between two slices of bread in 1762, so afternoon tea could accommodate this as a menu item as well.
Scone? Or Scone?
Scones are also considered to be an essential element of afternoon tea these days. These are traditionally sweet scones, eaten with jam and clotted cream. The scones are presented whole: they should be cut in half and the jam/cream or cream/jam combination applied copiously. Never reveal whether you put the jam or the cream onto the scone first to anyone from the West Country. Devon and Cornish folk have very different ideas about the order in which the scone should be adorned. We politely suggest that they taste wonderful either way.

As well as disputes about how to eat scones the English also disagree on how to pronounce the word – is it scone to rhyme with ‘gone’ or scone to rhyme with ‘stone’? We’re originally from the south of England so both use the former but have regular arguments with friends about the true pronunciation.
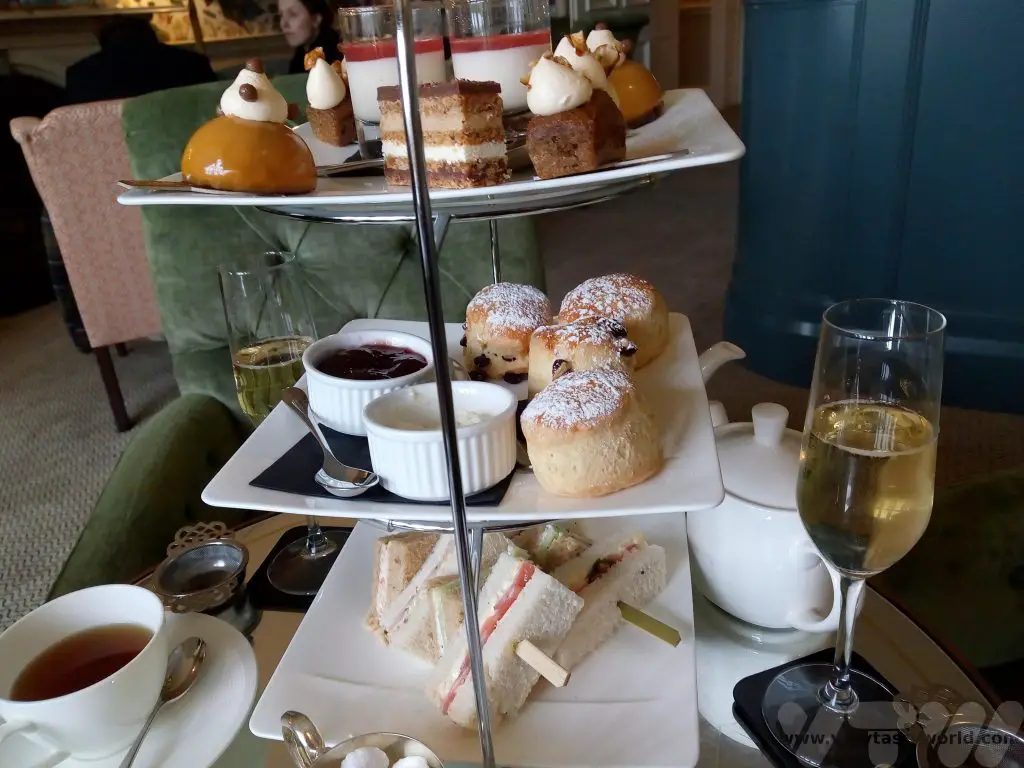
How To Enjoy Traditional Afternoon Tea
The quintessential afternoon tea comprises a selection of sandwiches, a couple of scones served with clotted cream and jam and a variety of miniature pastries, cakes or sweet treats. Served with a cup of tea. This might simply be an ordinary cuppa but it is more likely that you would be offered some speciality teas or herbal infusions. Coffee and hot chocolate are usually available for non-tea-drinkers. The more indulgent modern afternoon teas may also offer a tall glass of fizz; Champagne (preferably) or Prosecco to accompany the treats.
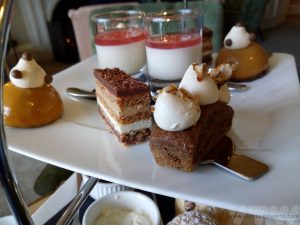
Etiquette suggests that you start with the savouries on the bottom tier. Scones should be eaten next, then finish with the sweet treats on the top tier.
This particular tea had four pastries each, including a fruity pannacotta and layered cake.
Almost a meal in itself, afternoon tea is refined and decadent.
Afternoon Tea in Coventry – Coombe Abbey Country Park
Coombe Abbey and Country Park is located a few kilometres outside Coventry city centre and is a delightful place to not only enjoy afternoon tea but also to spend time in the extensive 500 acre park, woodlands and gardens.
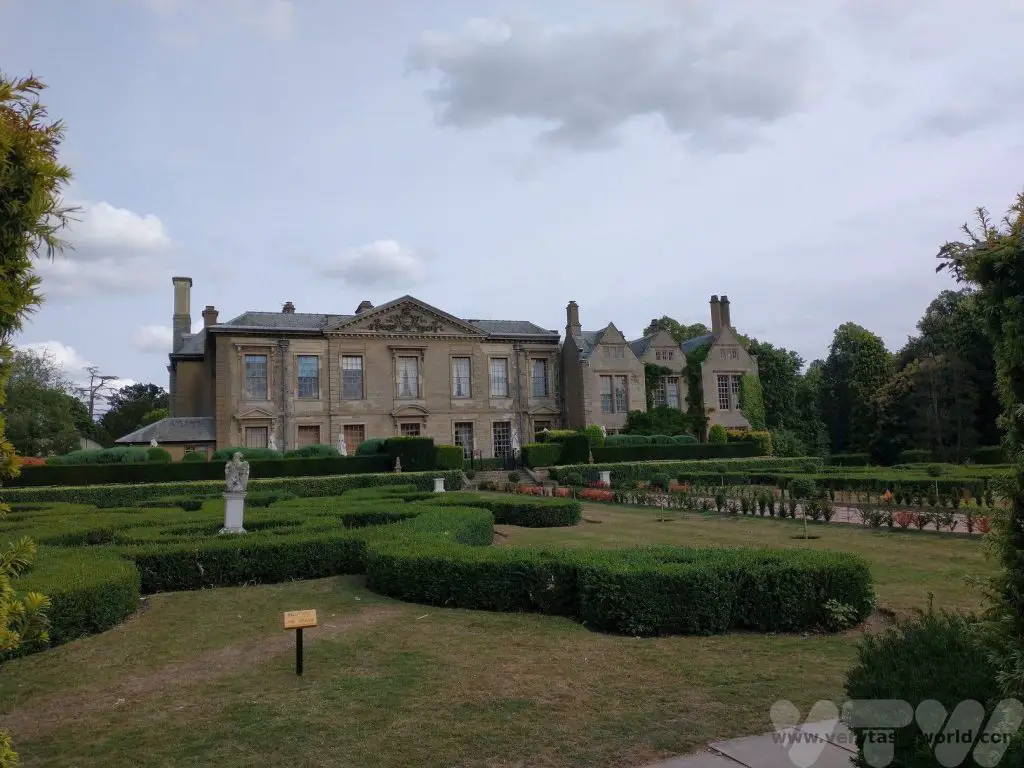
It’s possible to drive to Coombe Abbey. It takes around 15 minutes from Coventry city centre and parking fees are payable. It is a very popular place to visit at weekends and bank holidays, so sometimes the car park can be full. Alternatively you can catch the bus from Coventry’s central Pool Meadow bus station. The No 53 bus will get you there in about 40 minutes.
Coombe Abbey was originally a 12th-century Cistercian abbey that has now been converted into a hotel.
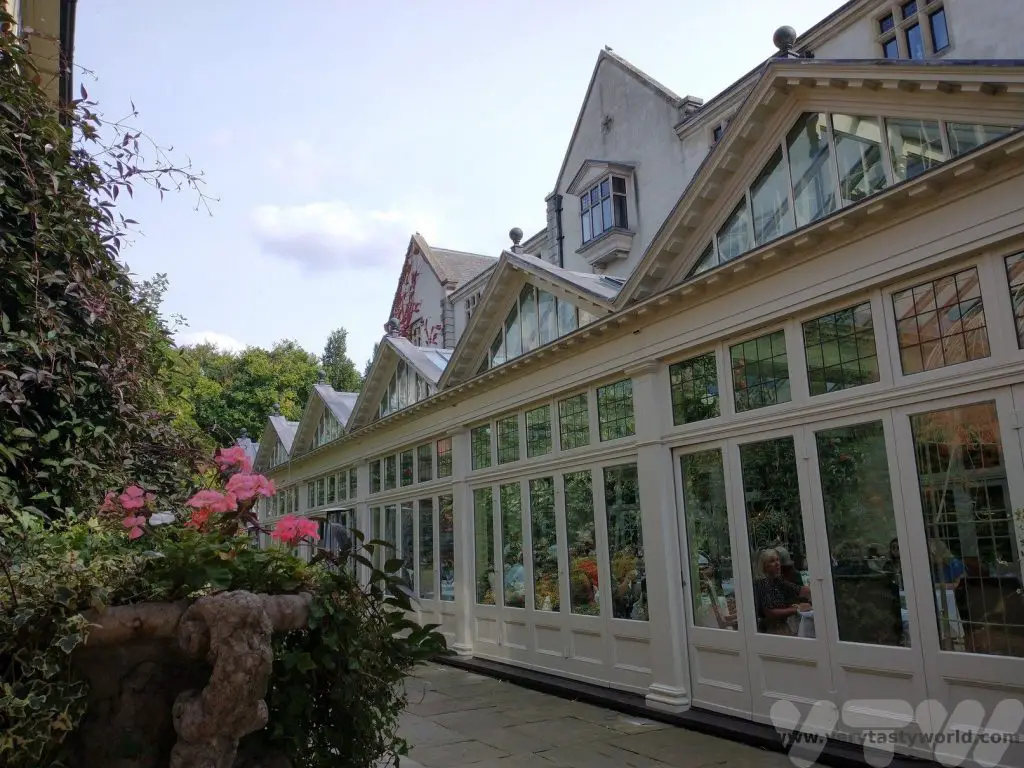
Afternoon tea is held in a lovely garden room, a light and airy space.
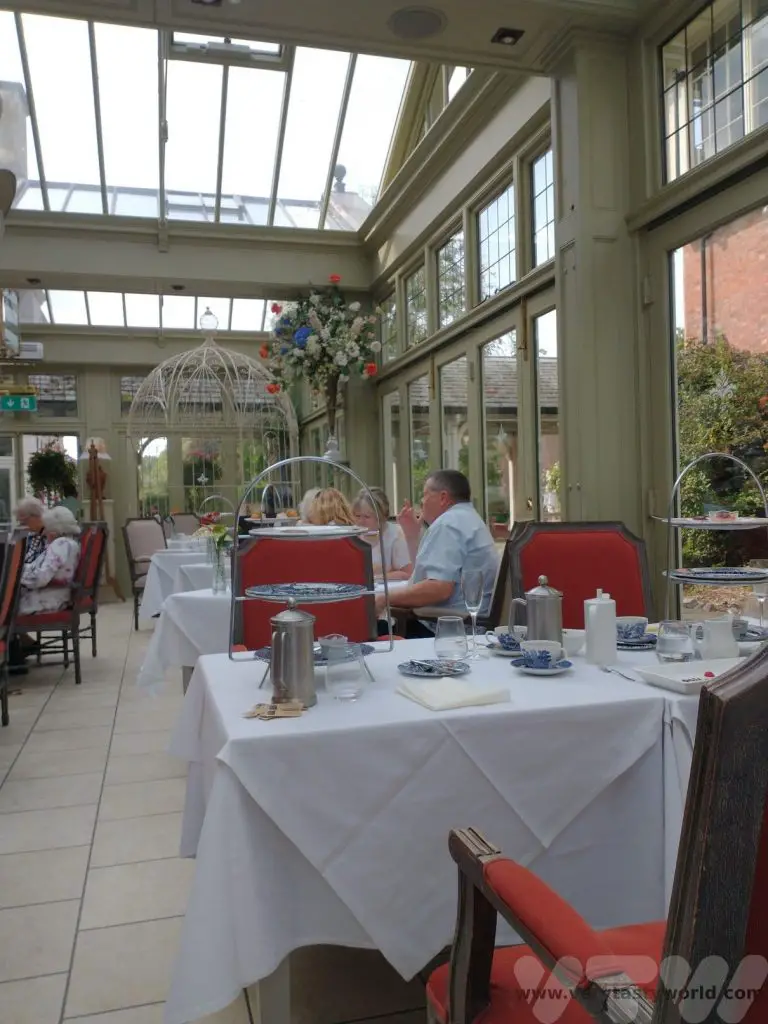
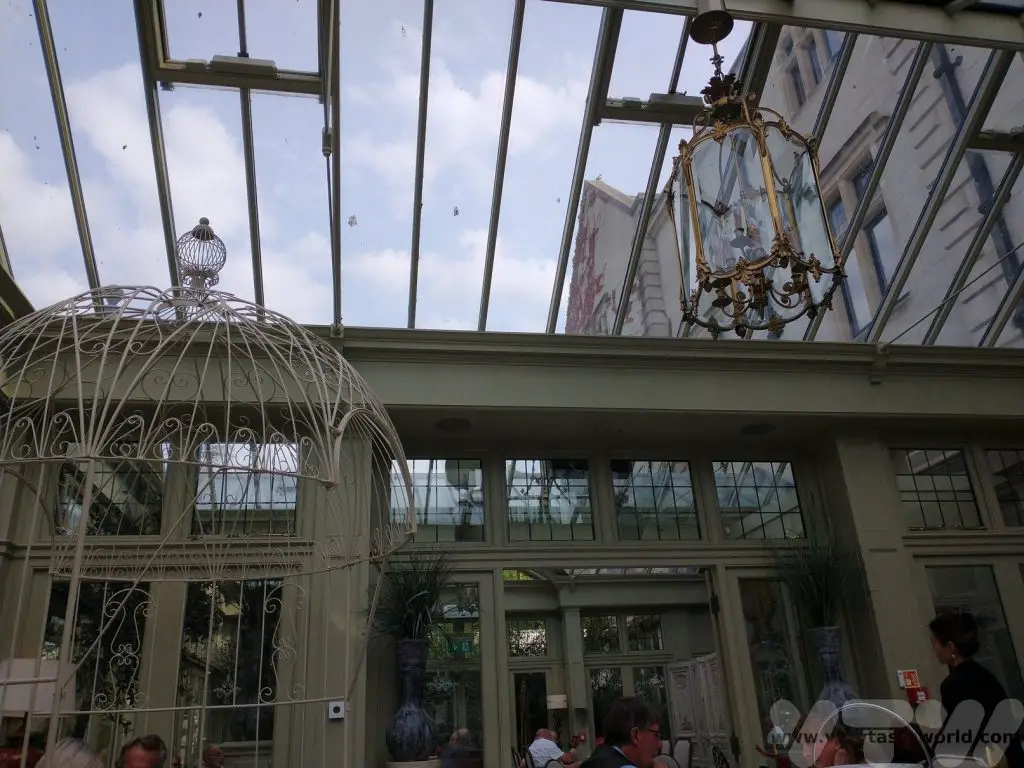
There are a variety of options available from traditional afternoon tea to savoury offerings. There is a wide variety of teas on offer – from great quality black tea to some more unusual options such as gin and tonic tea. If you’re feeling decadent, a glass of bubbly is also available.
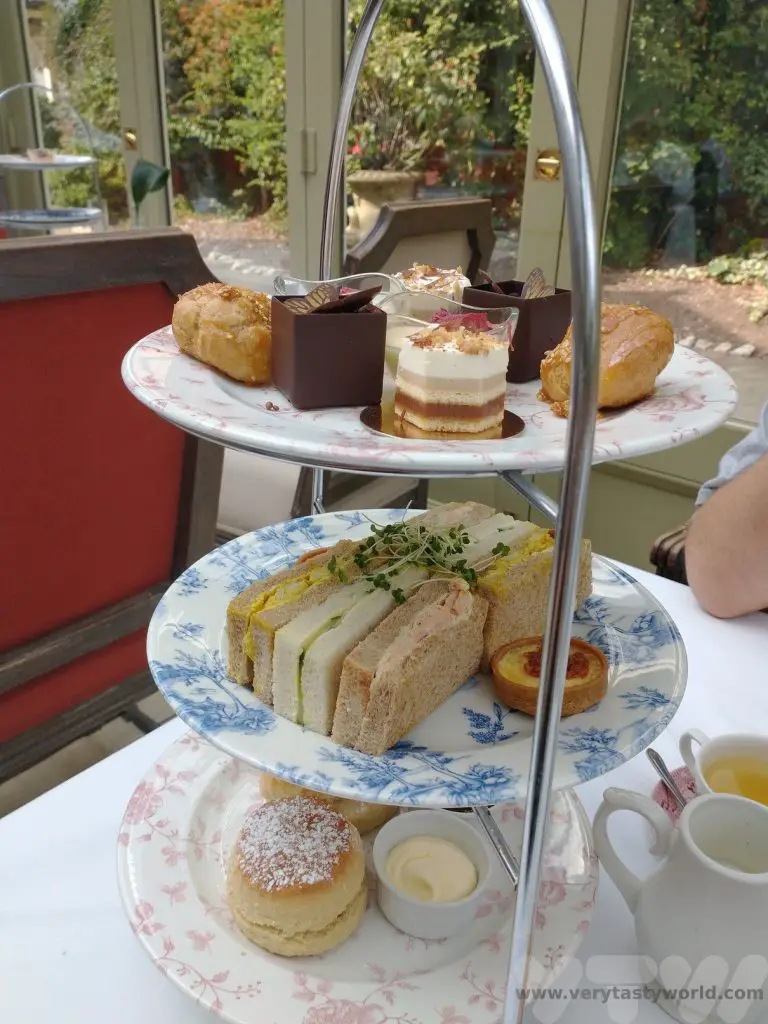
The petit fours are beautifully made.
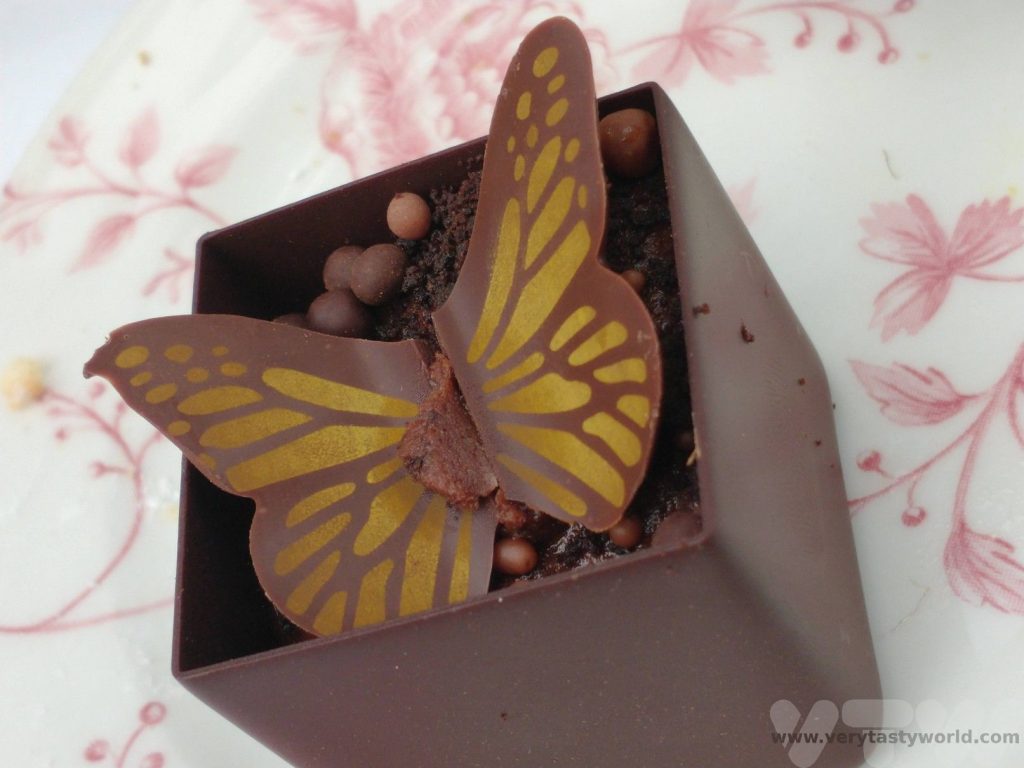
Prices range from £20 to £47 (July 2023) depending on the decadence of your choice of tea and whether you wish to indulge in fizz. The prices also vary depending on whether you are visiting during the week or at the weekend (weekend prices are higher). Afternoon teas at Coombe Abbey are very popular so booking is essential.
Other Things to Do In The Area
The grounds of the country park are delightful for walking in. There are several lakes and an extensive woodland to explore.
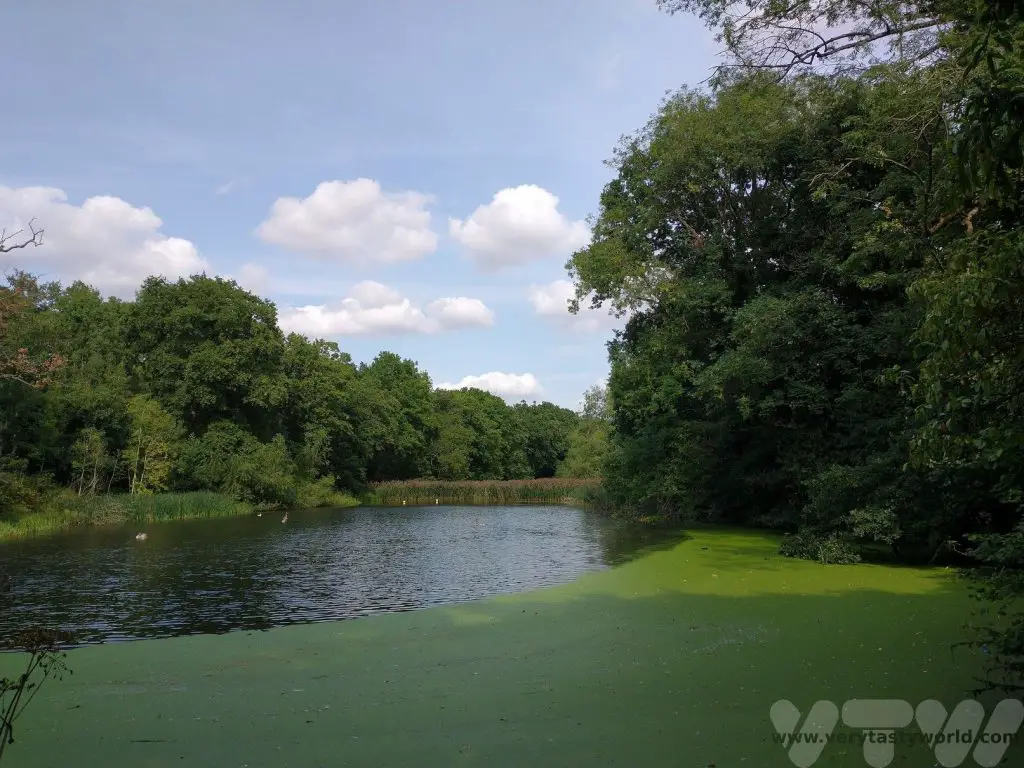
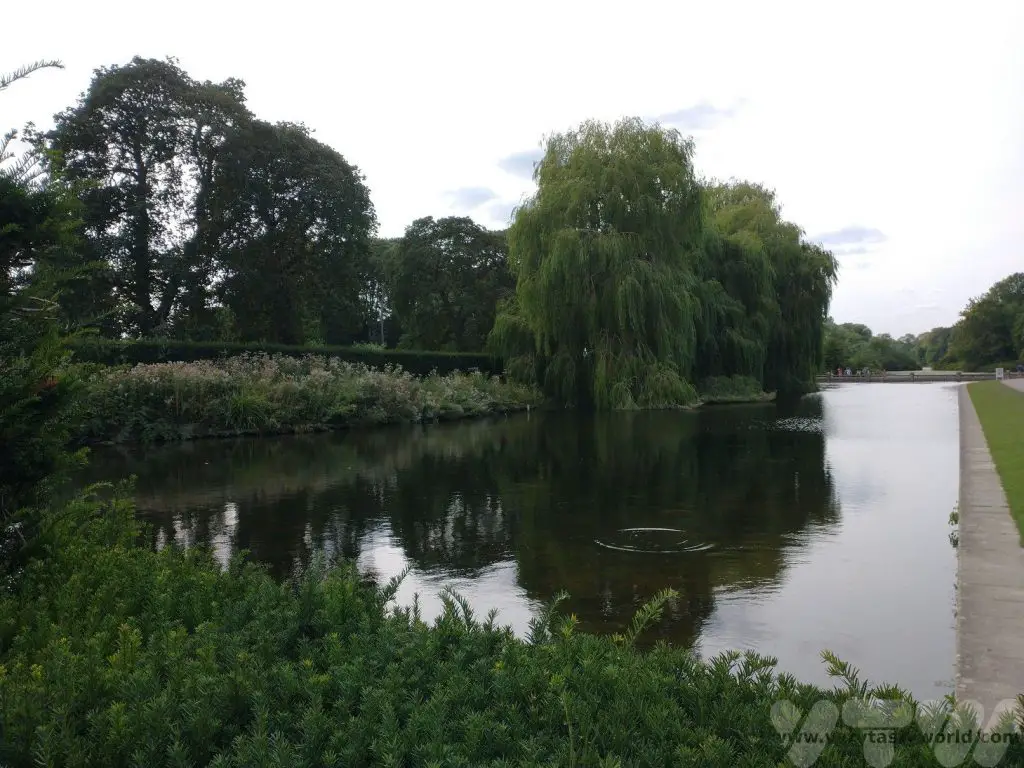
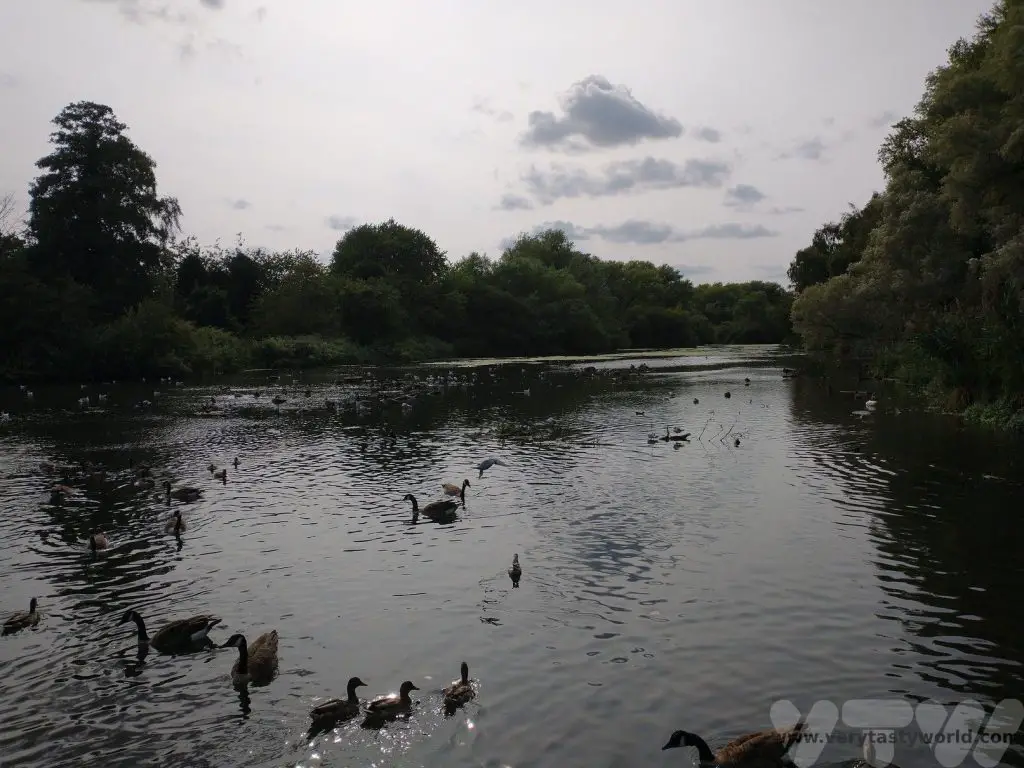
If you are feeling adventurous there is also a Go Ape facility where you can exercise your inner child and go climbing in the treetops and enjoy the exhilaration of zip wires and a tarzan swing! (Probably best to enjoy before taking afternoon tea!)
And if you’re still feeling hungry, Coombe Abbey offers mediaeval banquets in the evenings – great food and entertainment guaranteed.
Afternoon Tea in Coventry – Tales of Tea at St Mary’s Guildhall
Recently refurbished, St Mary’s Guildhall is one of the most important surviving guildhalls in the country, dating back to the 1340s.
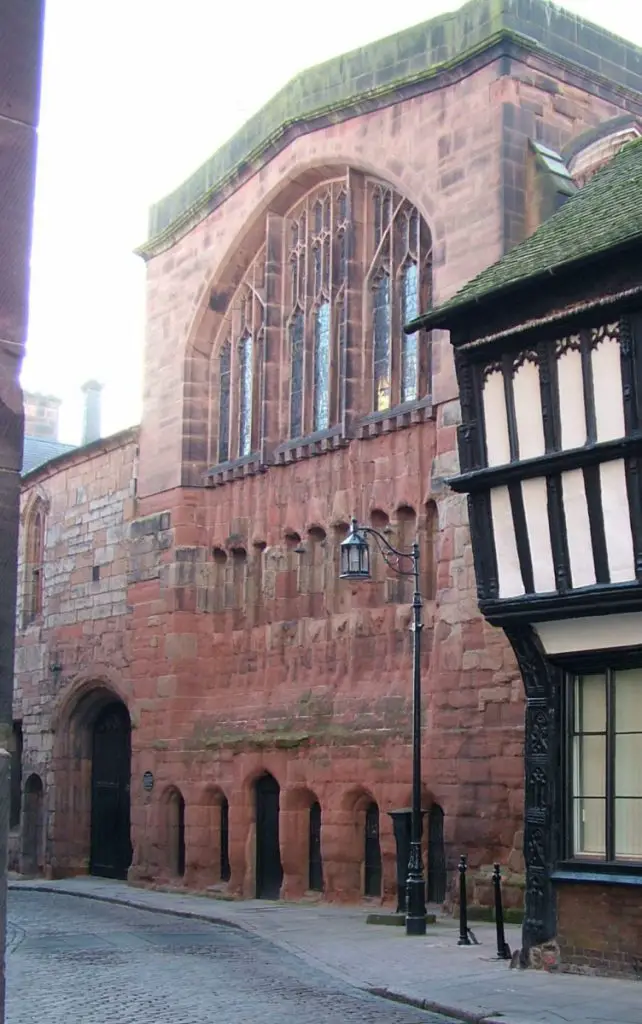
Afternoon tea at Tales of Tea is served daily in St Mary’s undercroft, a delightful and historic setting.
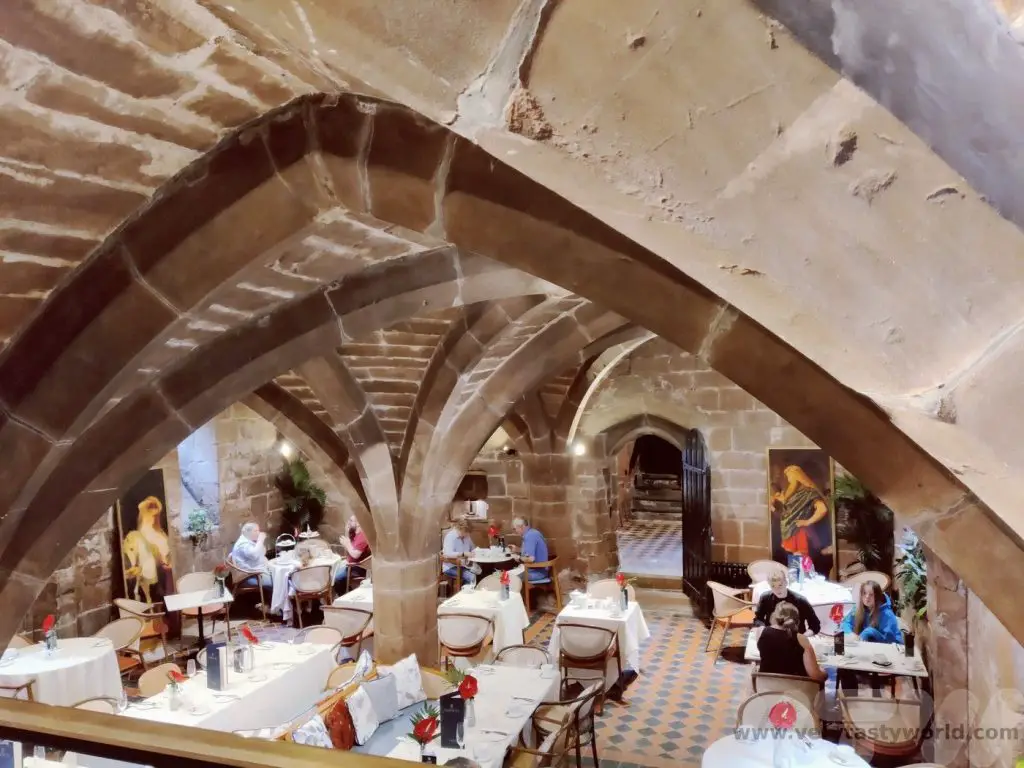
On this occasion we enjoyed a savoury tea. Although afternoon tea is delightful we do sometimes find that by the time you have eaten the scones and the first of the petit fours there is a bit of a sugar overload.
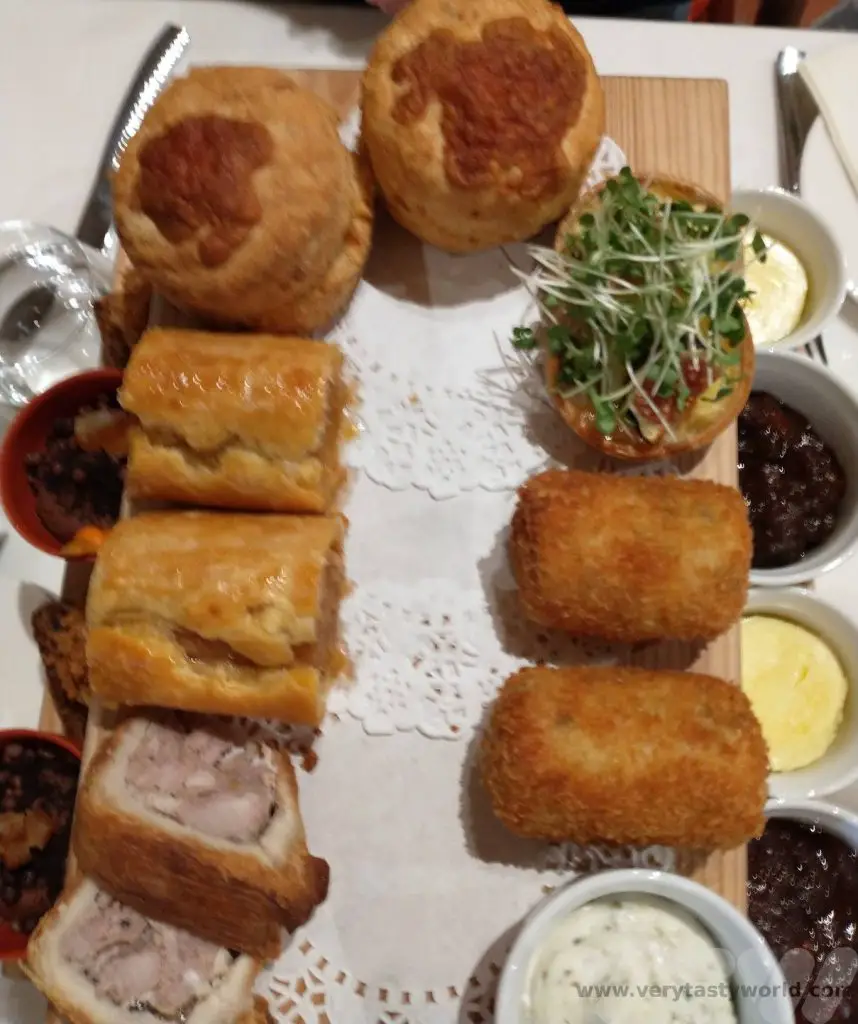
The menu does vary regularly but we enjoyed sausage rolls, pork pies, haddock croquettes, mini quiches and cheese scones amongst other savoury delights
And just a little sweetness with an edible flowerpot filled with mousse and dark chocolate ‘soil’.
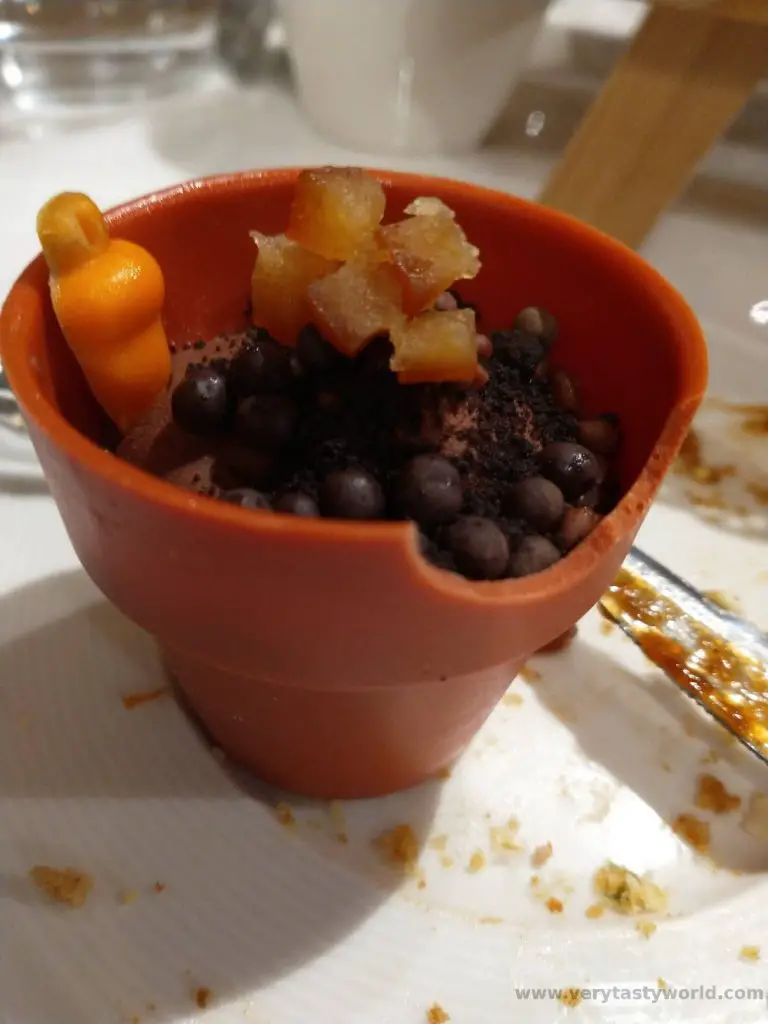
Tales of Tea is very popular so we recommend making a booking. Prices range from £25-£30 depending on whether you want a sweet or savoury tea. (July 2023) The undercroft becomes a fine dining restaurant in the evening.
Other Things to Do In The Area
St Mary’s Guildhall itself is definitely worth visiting so make sure you pop across the atrium from the undercroft.
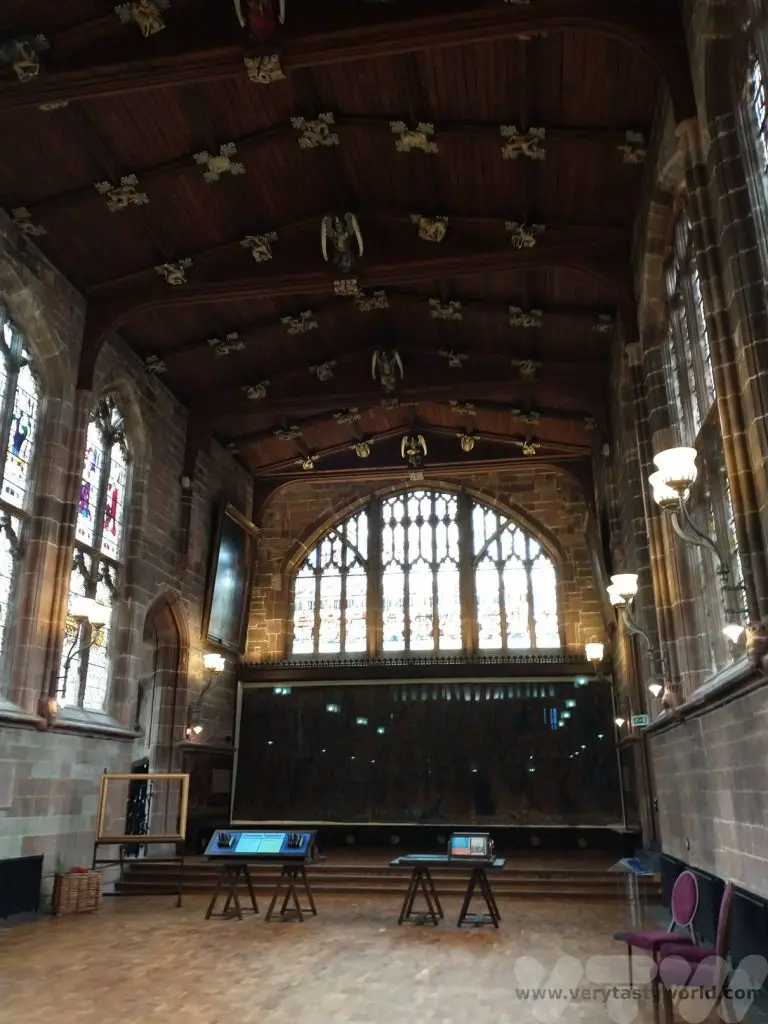
It boasts the England’s oldest mediaeval tapestry, a remarkable work that was woven in its original place – it is over 500 years old.
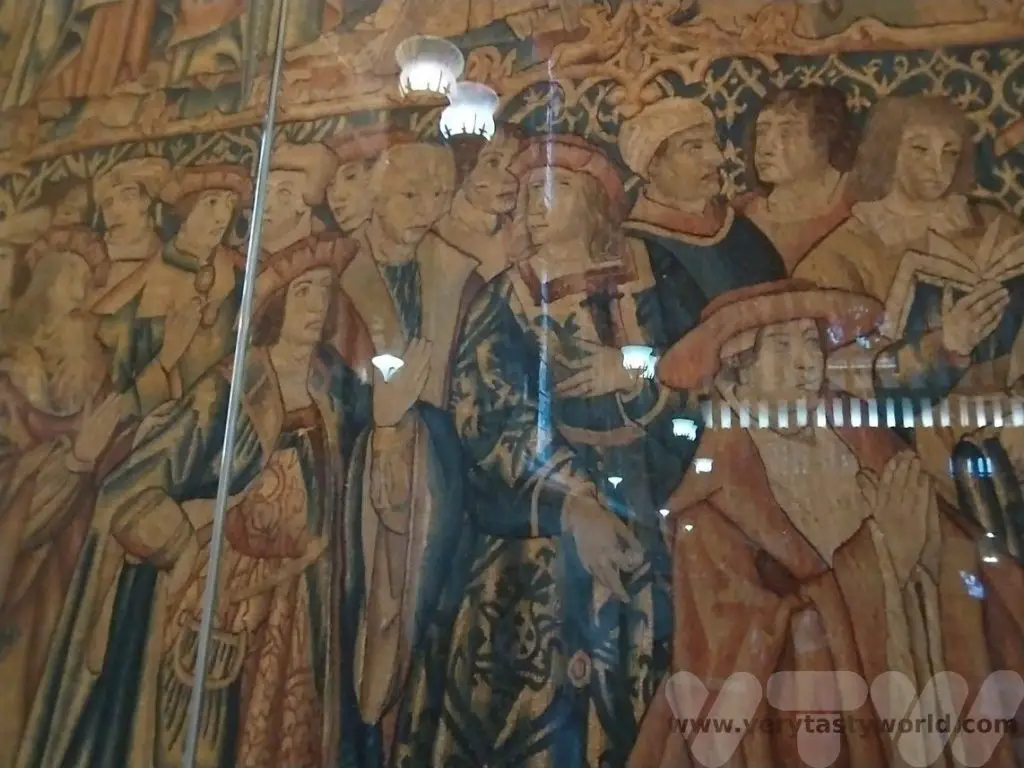
A recent refurbishment has revealed a mediaeval kitchen now restored to its former glory.
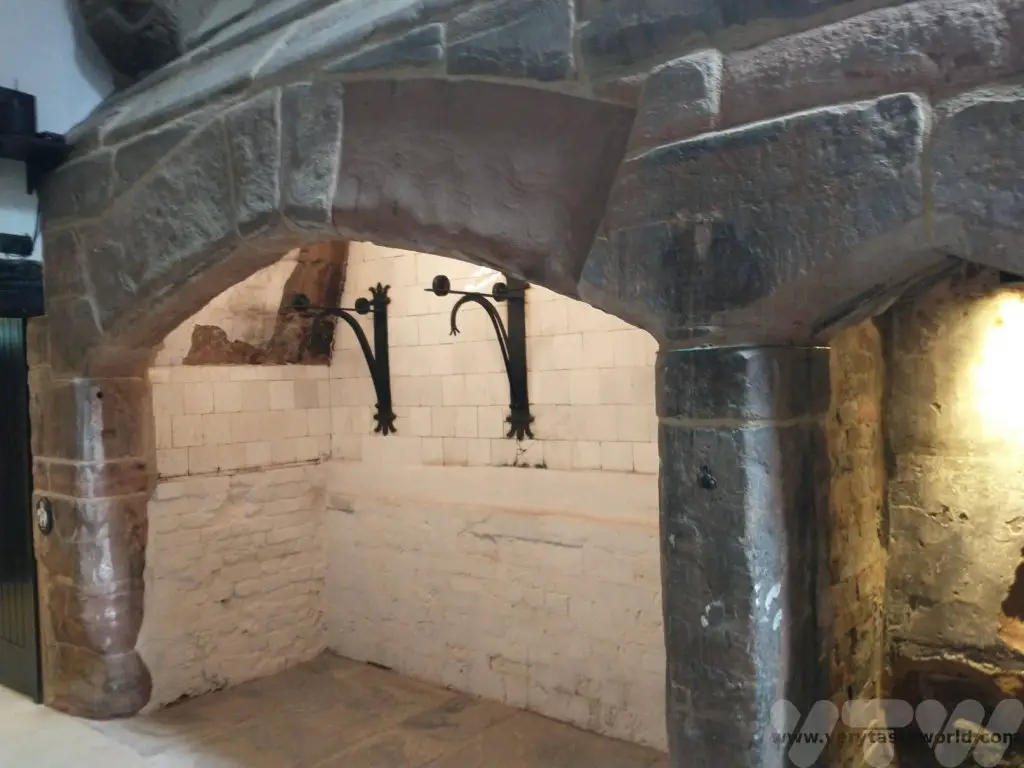
The Guildhall is located next to the ruins of Coventry’s cathedral which itself has a fascinating history. St Michael’s cathedral was constructed in the 15th Century but destroyed in 1941 during the Coventry Blitz in World War 2.

A new cathedral was built alongside the ruins of the old. Both are very much living spaces – both for worship as well as art, music and cultural events that are held throughout the year.

The Herbert Museum and Art Gallery is a 2 minute walk away. It hosts multiple free art exhibitions several times a year and has a permanent exhibition space on the ground floor showcasing Coventry’s history.
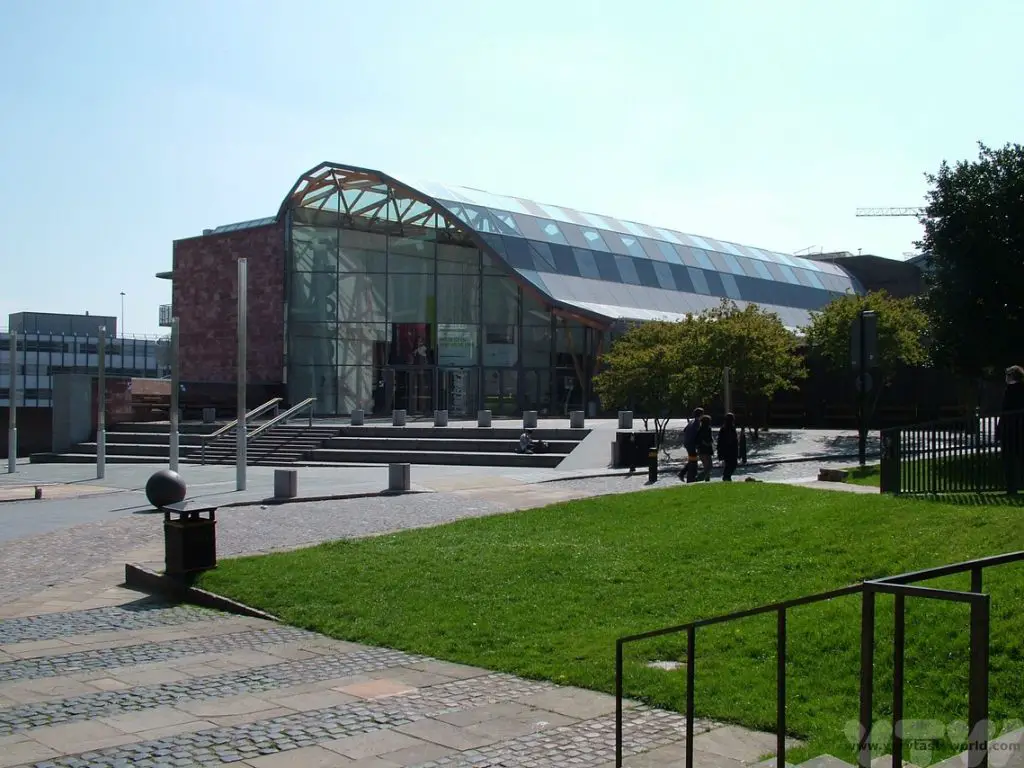
Afternoon Tea in Coventry – Telegraph Hotel
Founded in 1891 as The Midland Daily Telegraph, but with a name change in 1941, The Coventry Evening Telegraph was the city’s first daily newspaper. In times gone by it was a tabloid paper located in a large building in the city centre which housed enormous printing presses. But times have changed and the printing presses are no longer needed, so staff have relocated to the Canal Basin in Coventry. The site was opened up to the public in 2017 and temporarily hosted local art exhibitions.
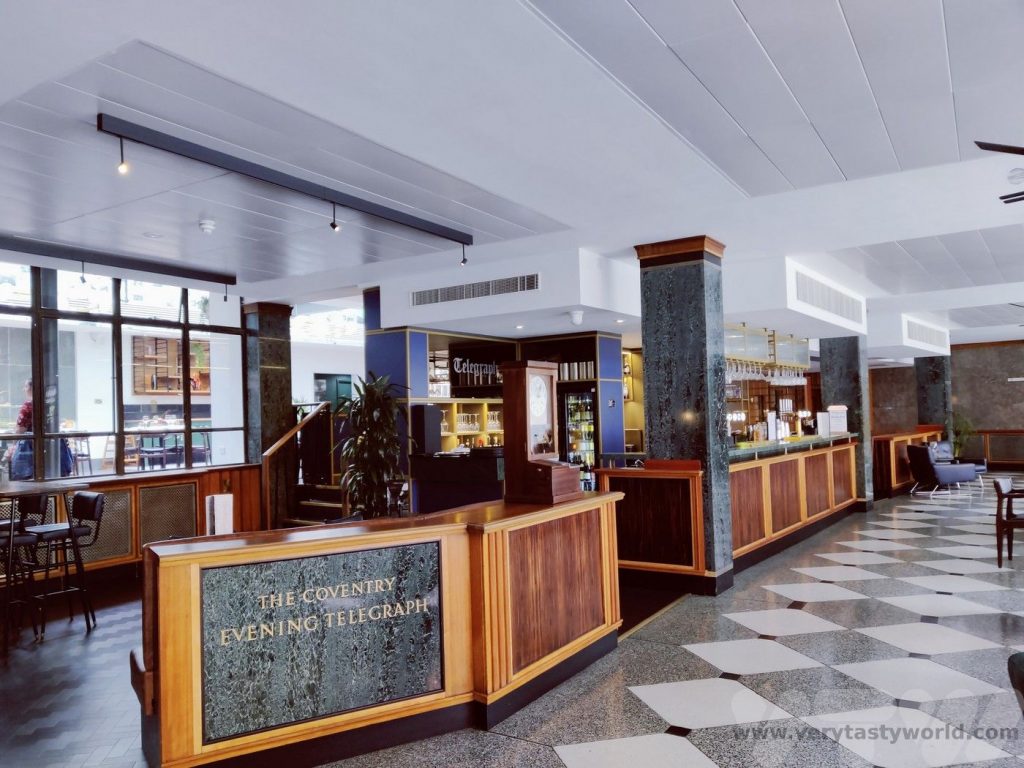
The building has now been converted into a hotel but the decor very much reflects its heritage. Afternoon tea is available. Currently on offer, afternoon tea for two people, with a glass of fizz costs £39.50 (July 2023).
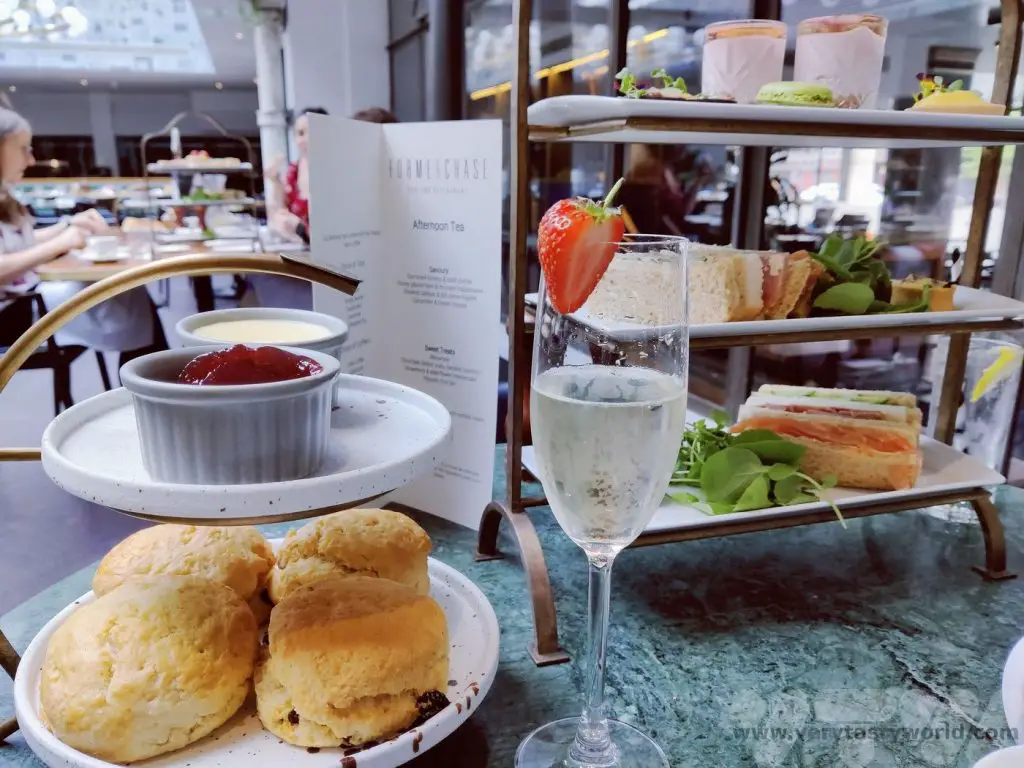

The afternoon tea is more traditional but generous and delicious. The sweet treats included pistachio macarons, chocolate delice with yuzu gel, passion fruit tarts and a strawberry and elderflower cheesecake. The tea was so filling we had to ask for a box to take some scones home with us.
Other Things To Do In The Area
Coventry Transport Museum is around a two minute walk away. It’s a great museum to visit, even if you’re not particularly interested in cars. Coventry was once the city of motor manufacturing and the museum houses a huge number of vehicles from some of the earliest vehicles to land-speed-record breakers.
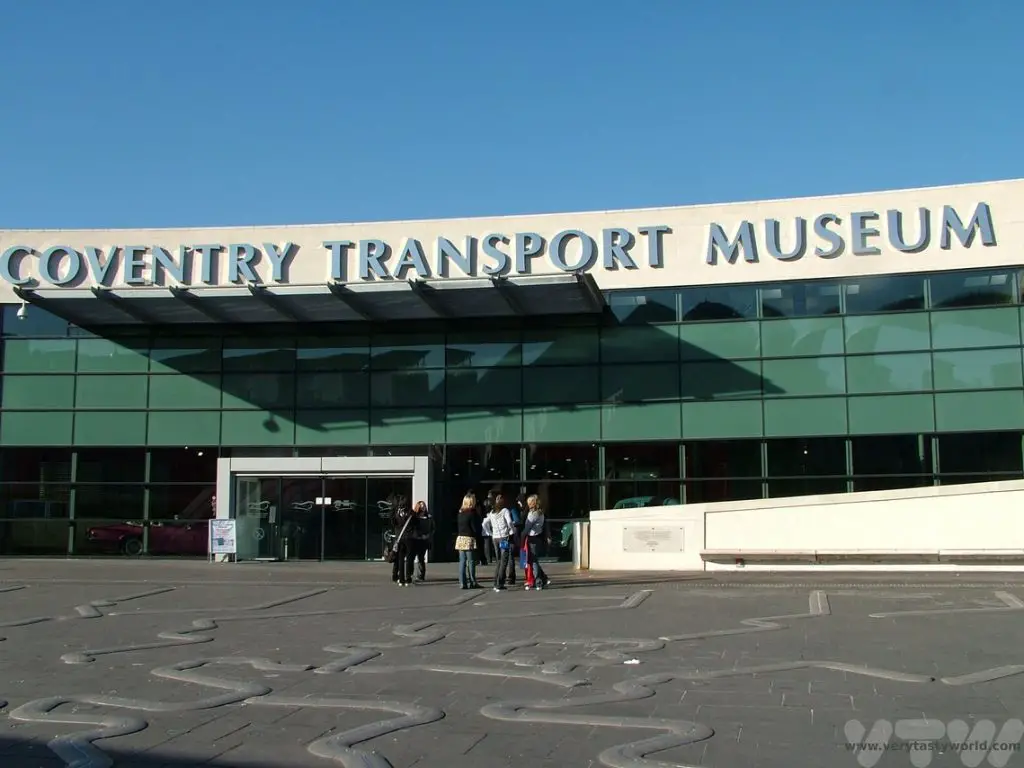
Related Posts You May Enjoy
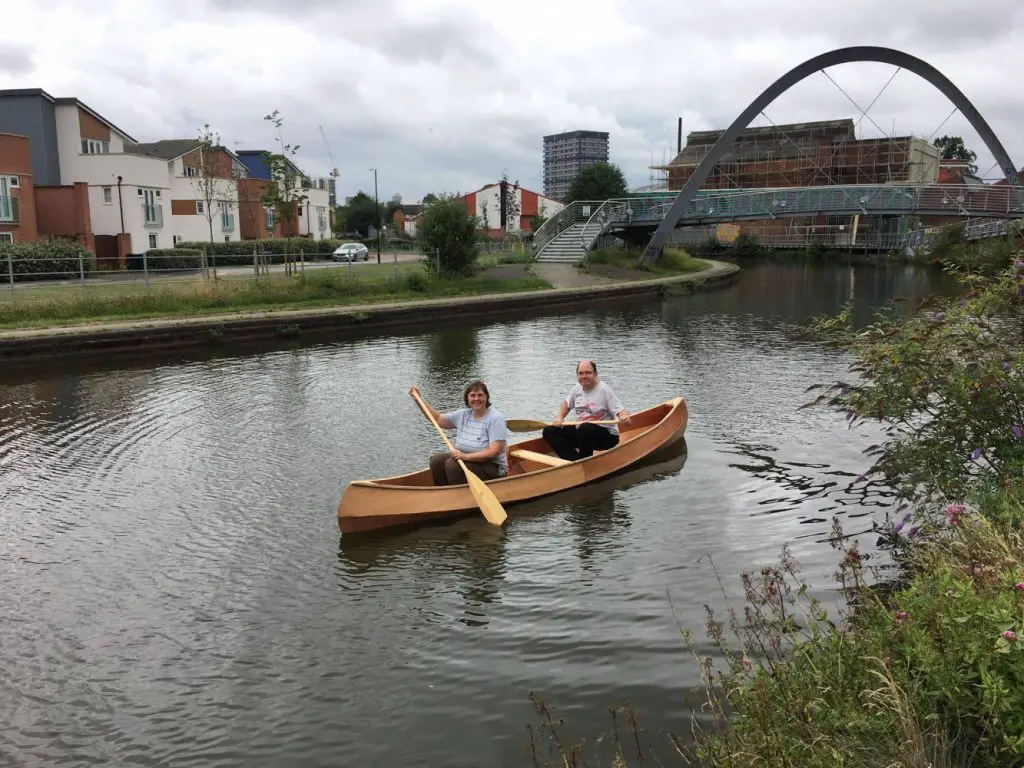
RECIPE: Vegan Wild Garlic Pesto
Every spring we make the most of foraging for greens in the English countryside. Wild garlic is our absolute favourite and we have a fabulous recipe for wild garlic pesto. But pesto uses cheese! So we also have a recipe for vegan wild garlic pesto.
In the UK you can forage wild garlic for free as long as you just take the leaves, stems and flowers. All these parts are edible. We make it a rule never to take more food than we need as it’s nice to leave some for other people and also ensure that the plant will appear next year. We try to pick one leaf from each stem so as not to disturb the plant too much.
Foraging for Wild Garlic
Wild garlic is pretty easy to recognise and has a very definite garlicky smell. Pick a leaf and crush it in your hand – it has a wonderful scent.
A little later into the season lovely white flowers appear. These have a very mild garlic flavour – we use them to garnish dishes.
As with any foraging, you have to be 100% certain of what you are picking. Poisonous plants can grow near wild garlic. Arum maculatum, also known as Lords and Ladies, is very toxic. Apparently even putting the leaves into your mouth will result in an immediate burning sensation. It can grows worryingly close to the wild garlic. When it’s more mature it develops shiny arrow-head shaped leaves but when young, looks very similar to wild garlic.

Bluebells, or their white-flowered counterparts, which can also easily be confused with wild garlic’s white flowers, can also grow nearby. Bluebells are extremely pretty but also poisonous.
If you are the slightest bit uncertain, DON’T eat it!
Vegan Wild Garlic Pesto Recipe
Just like our standard recipe our vegan wild garlic pesto isn’t precise. We use cashew nuts but you can also use pine nuts (and weep at the expense) or pistachios. You can use a blender to mix everything together but if you’re feeling hardcore you can use a pestle and mortar.
We use nutritional yeast as a substitute for the cheese. It’s a brilliant product that is really good for you – a great source of protein, fibre, vitamins and minerals. More importantly it has a cheesy flavour, perfect for adding that umami element to the pesto amidst the creamy cashew and heavenly garlicky scent.
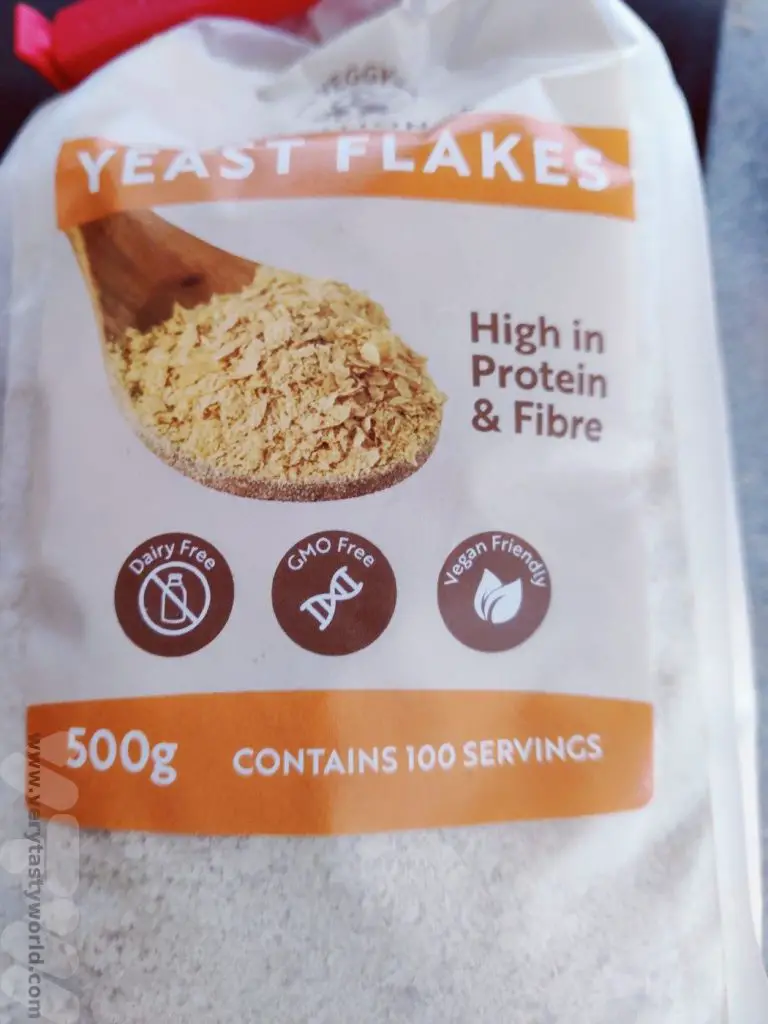
Ingredients
Bunch of wild garlic leaves (around 150g)
Handful of cashew nuts (around 150g)
Generous sprinkle of nutritional yeast flakes (we recommend couple of tablespoons if you’re measuring)
Slosh of extra virgin olive oil
Squeeze of lemon
Pinch of salt
Method
Roughly chop the wild garlic leaves and place into a blender. Throw in the nuts and nutritional yeast flakes. We recommend adding the leaves first – to the bottom of the blender – so that the weight of the nuts helps with the grinding process.
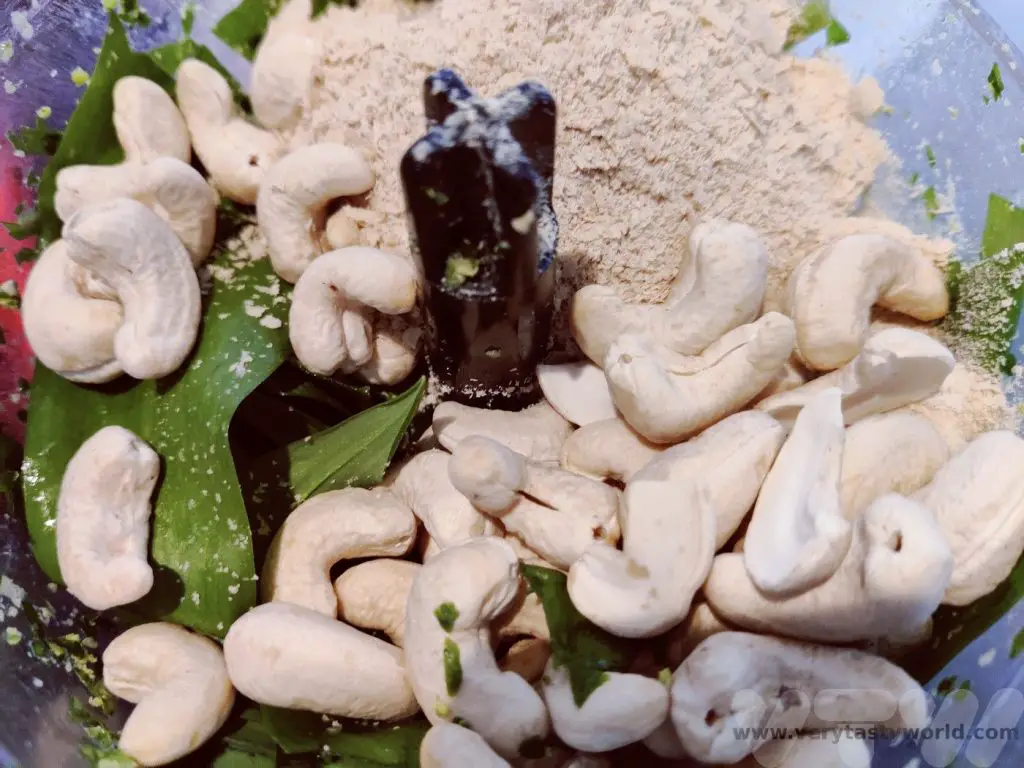
To take advantage of the season we make industrial quantities and freeze it, so we can enjoy the scented flavour of spring throughout the year. We don’t add the oil, lemon and salt before seasoning but stir it in after it has defrosted.
Blend together until you get the texture you like – smooth or nutty – both work well.
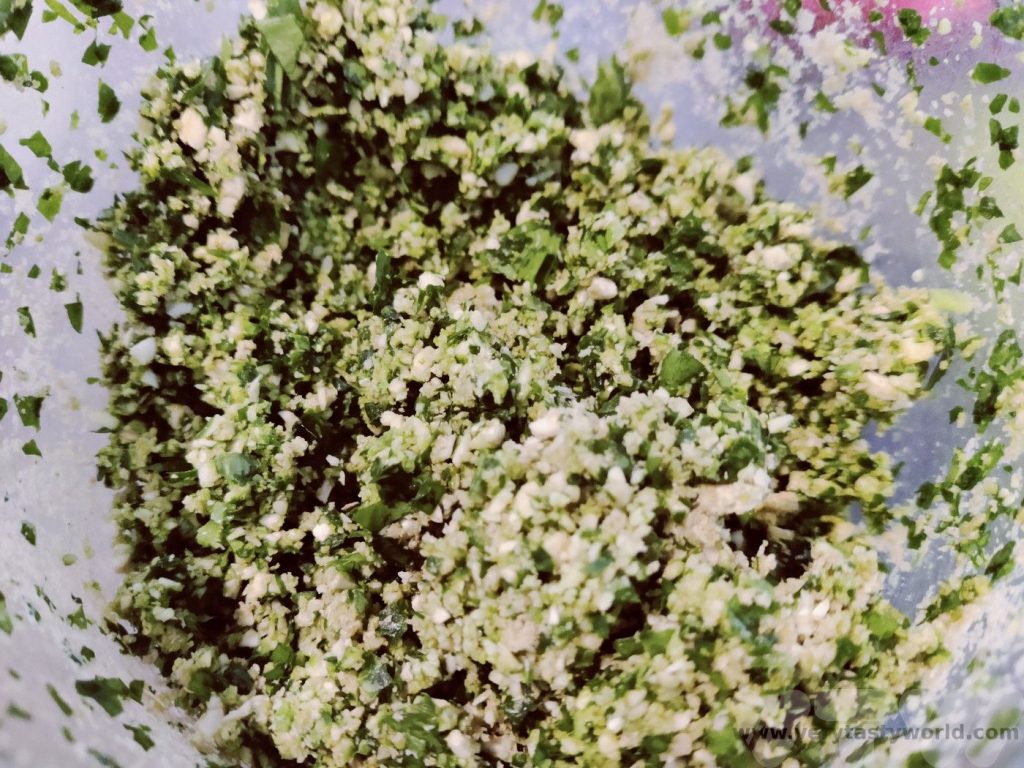
If you want to freeze the pesto, decant it into containers and put it into the freezer. It will freeze well and will last many months.
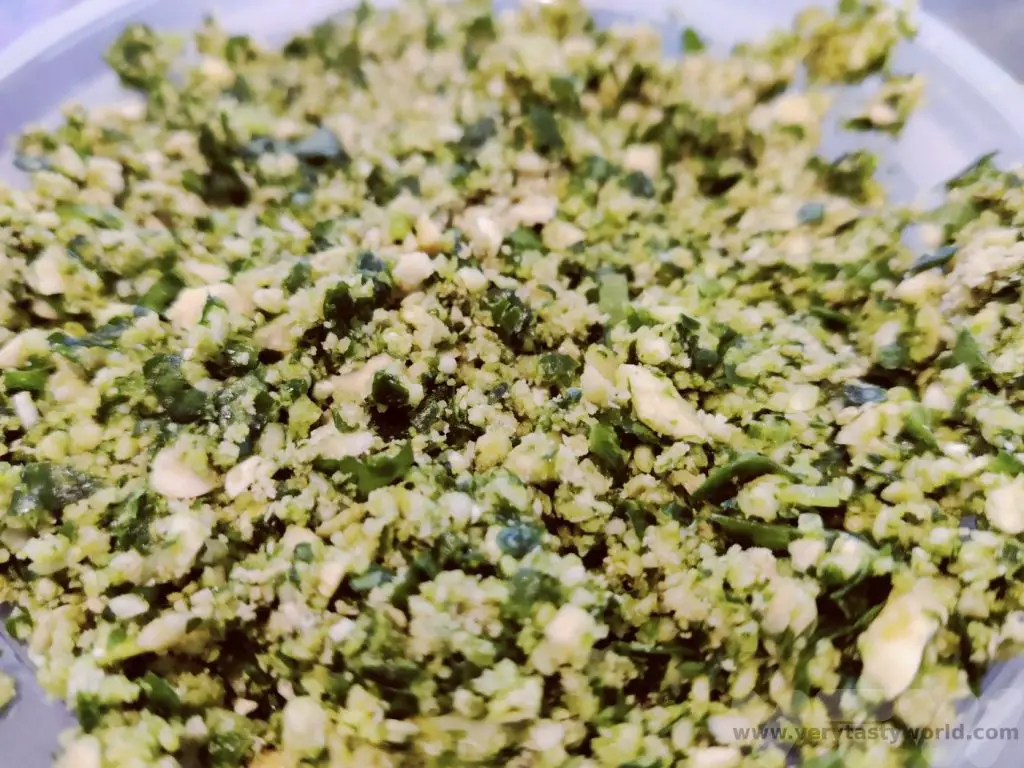
If you want to eat the pesto straight away (or store it in the fridge for a couple of days) add the oil, lemon juice and salt.
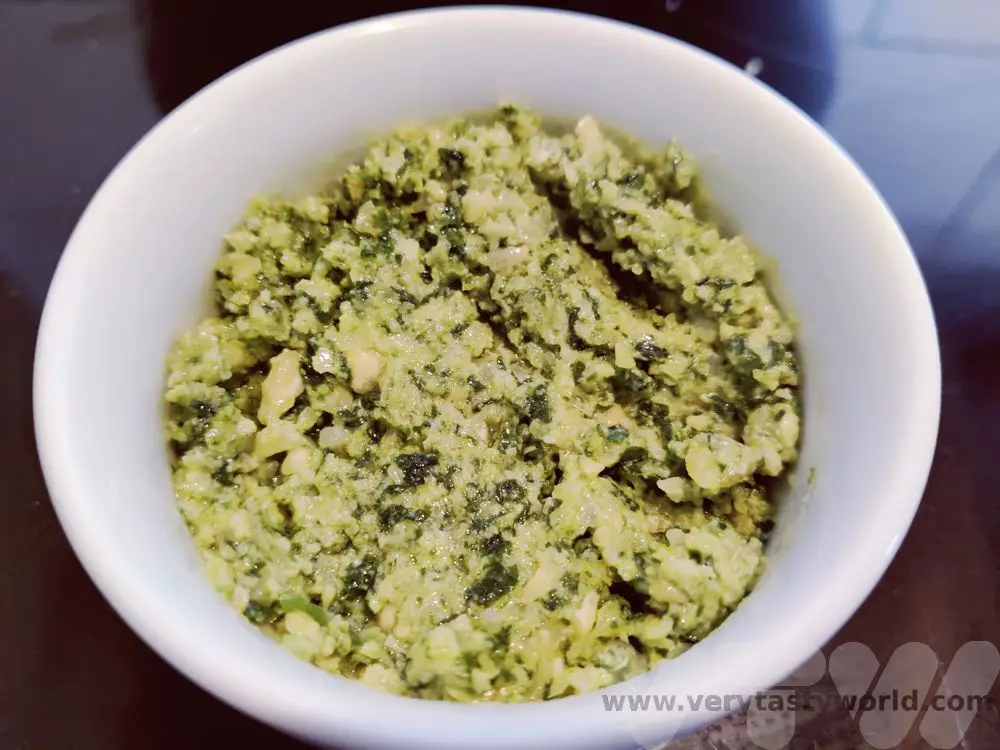
The great thing about this recipe is that is so easily adaptable – you can mix and match ingredients. It’s the underlying gentle garlicky flavour that the wild garlic leaves produce that make this such a brilliant pesto. We’ll be foraging and freezing for as long as the season lasts.
Related Posts You May Enjoy
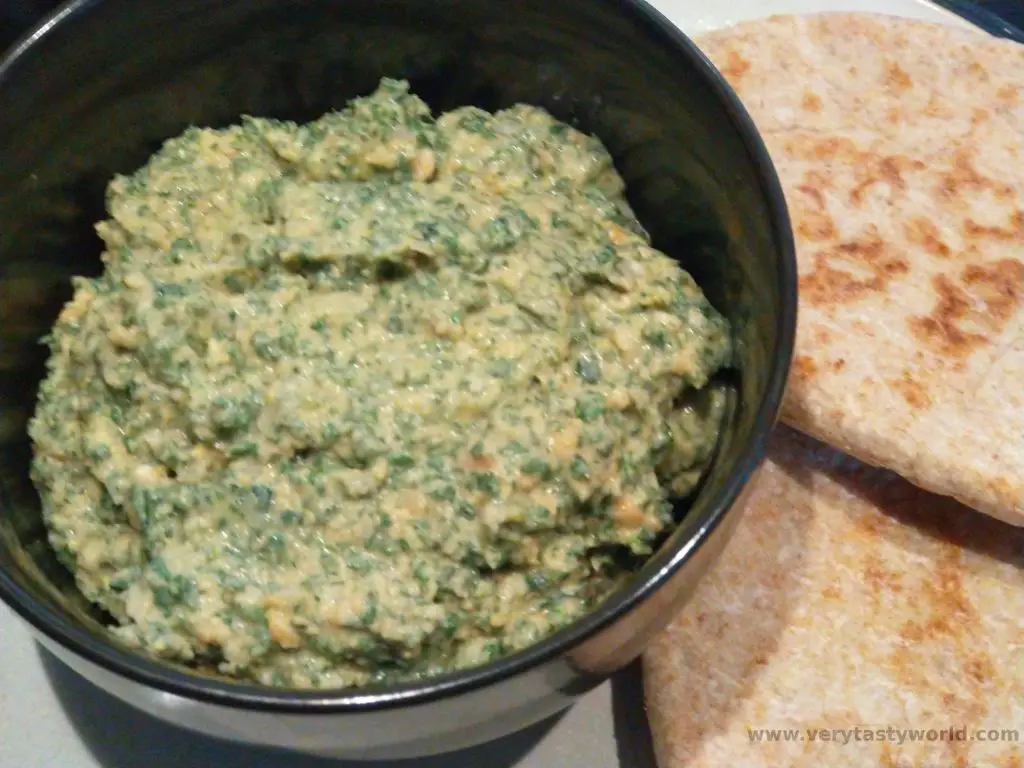
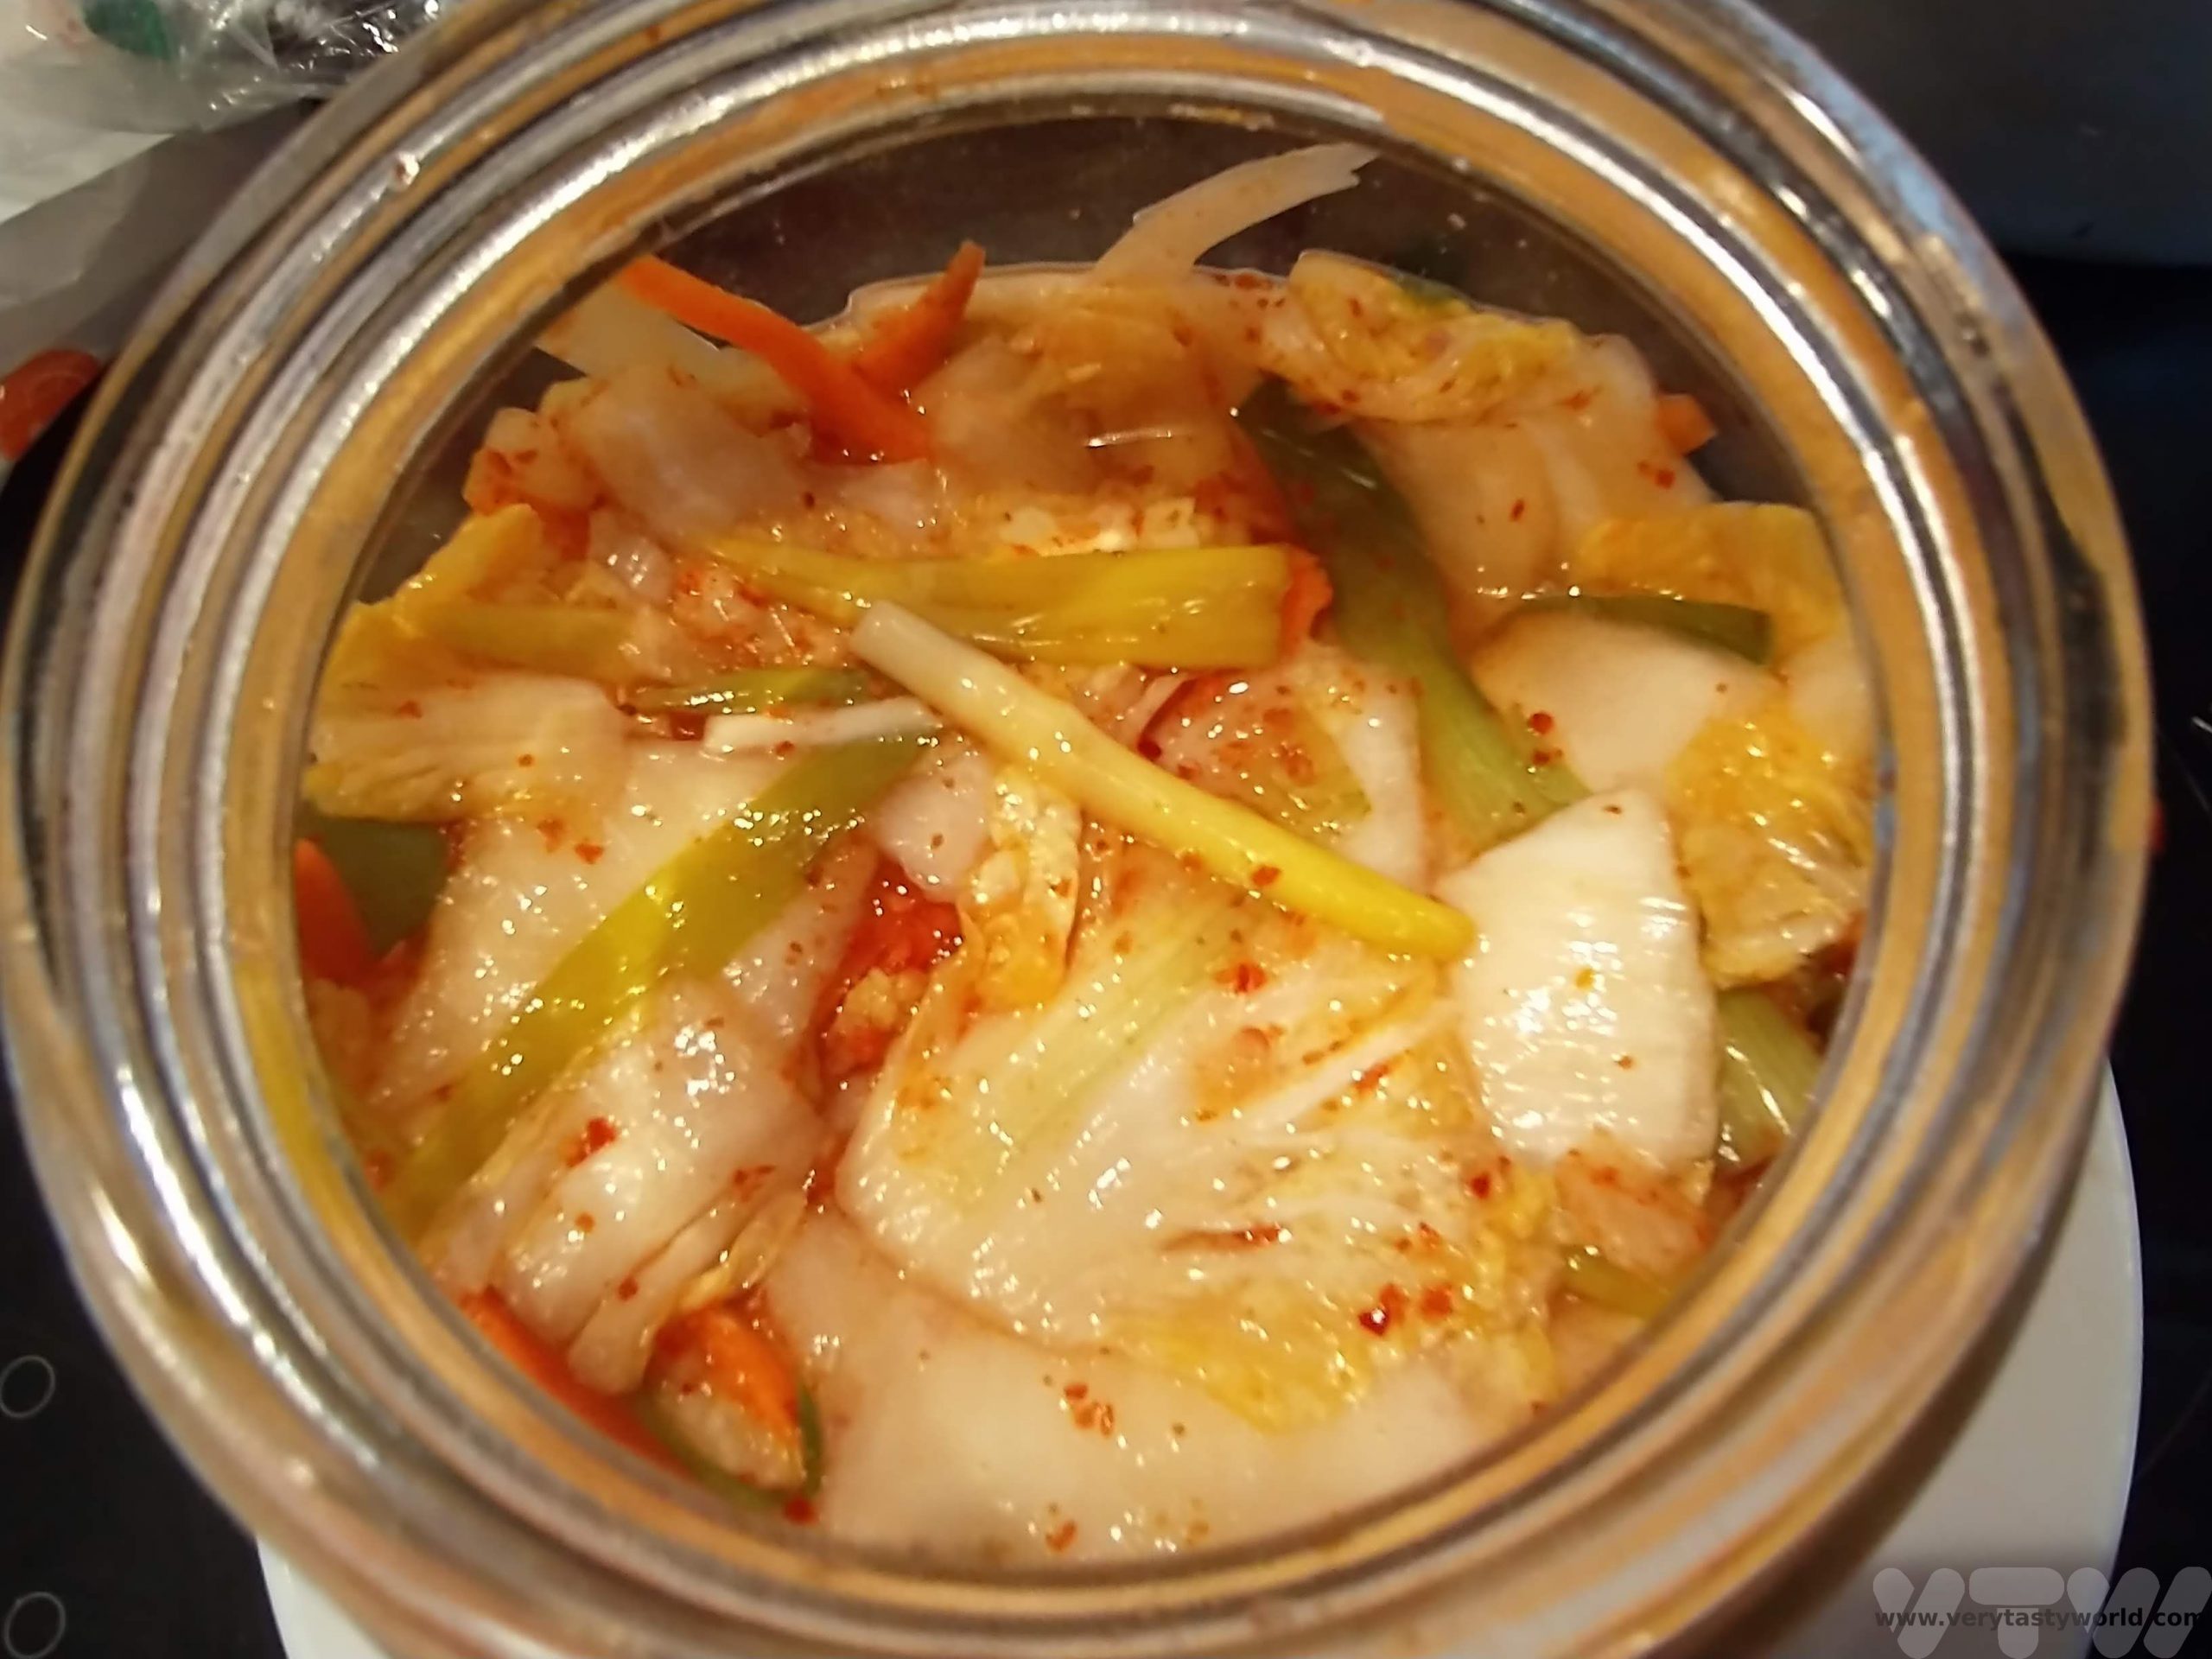
- RECIPE Oyakodon Donburi
- Zero Waste Recipes Before Your Holiday
- RECIPE: Vegetable Biryani Tamil Nadu Style
- RECIPE: Vegan Wild Garlic Pesto
- Recipe: Venetian Pasta Sauce
- RECIPE: Biryani Raita Recipe
- RECIPE: How to Make Costa Rica’s Gallo Pinto
- Recipe: Japanese Simmered Pork Belly – Buta no Kakuni
- RECIPE: How to Make Umeboshi