Home » Posts tagged 'japanese food'
Tag Archives: japanese food
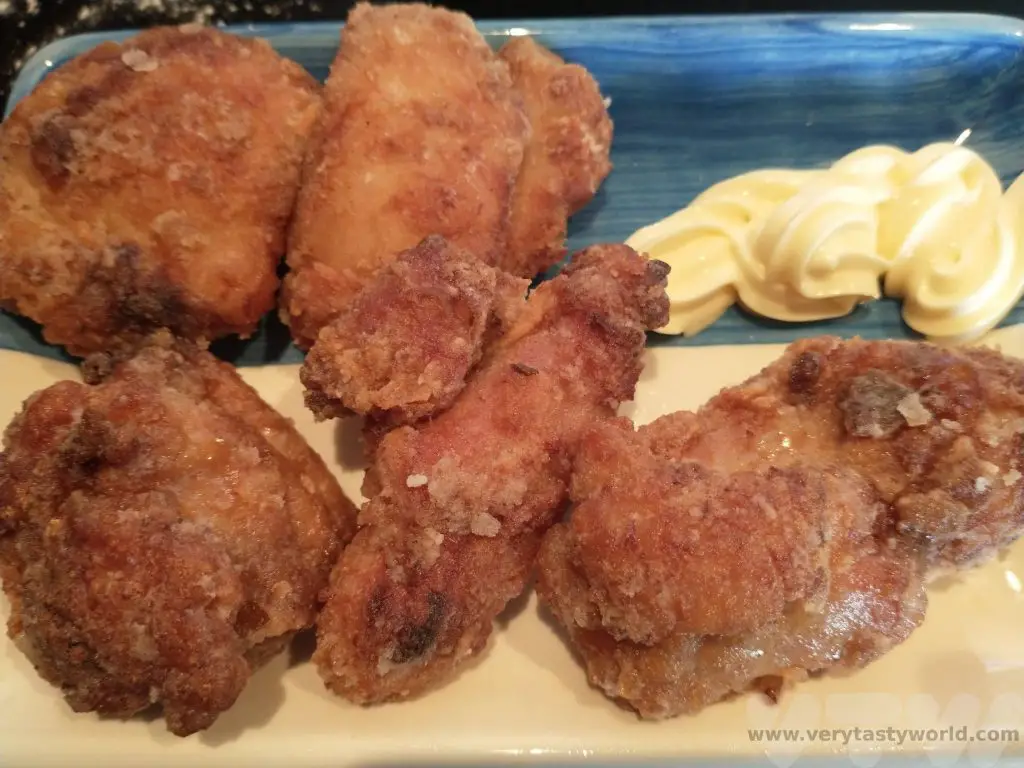
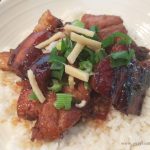
RECIPE: Japanese Fried Chicken Karaage
Fried chicken is one of life’s great pleasures. And Japanese fried chicken karaage is no exception. In Japan, it is a tradition to eat fried chicken from KFC on Christmas Day before the traditional new year celebrations commence. However, we feel that JFC offers far superior fried chicken.
Always use chicken thigh meat. It has so much more flavour than breast meat and is guaranteed to be juicier and more succulent.
Making karaage isn’t difficult but it also isn’t a quick process. However the results are definitely worth taking the time to make the dish. The chicken absolutely needs to be marinated – this adds so much flavour. The word karaage refers to the cooking technique, that is frying the food in oil. You don’t need equipment such as a deep fat fryer – a frying pan will be just fine.
Recipe for Japanese fried chicken karaage:
Ingredients
Serves 4
800g boneless chicken thigh (skin-on is fine), each thigh cut into 4 pieces
For the marinade
4 tbs soy sauce
1 tbs mirin (if you can’t get this, add a little more sake/wine and a tsp of sugar)
1 tbs cooking sake (or white wine if you can’t get that)
1 inch of ginger (finely grated)
1-2 cloves of garlic (finely grated) depending on how garlicky you like your food
For the coating
Potato starch. If you can’t get this, fine rice flour or even cornflour will be fine. (Icing sugar would not!) We didn’t have quite enough potato starch so mixed in a little rice flour. About a cup’s worth (275ml) – as much as you need to coat all the chicken.
For the cooking
Vegetable oil (enough to get about 1 cm depth of oil in your pan)
Method
Place the chicken thigh pieces in a bowl and add the soy sauce, mirin, sake, ginger and garlic. Mix well and leave to marinate for at least an hour.

Pour the oil into a frying pan until it’s about 1 cm deep. Heat up. The oil will be hot enough when you put a little flour into it and it sizzles.
When the chicken has had a chance to acquire those lovely flavours pour the potato starch into a bowl.
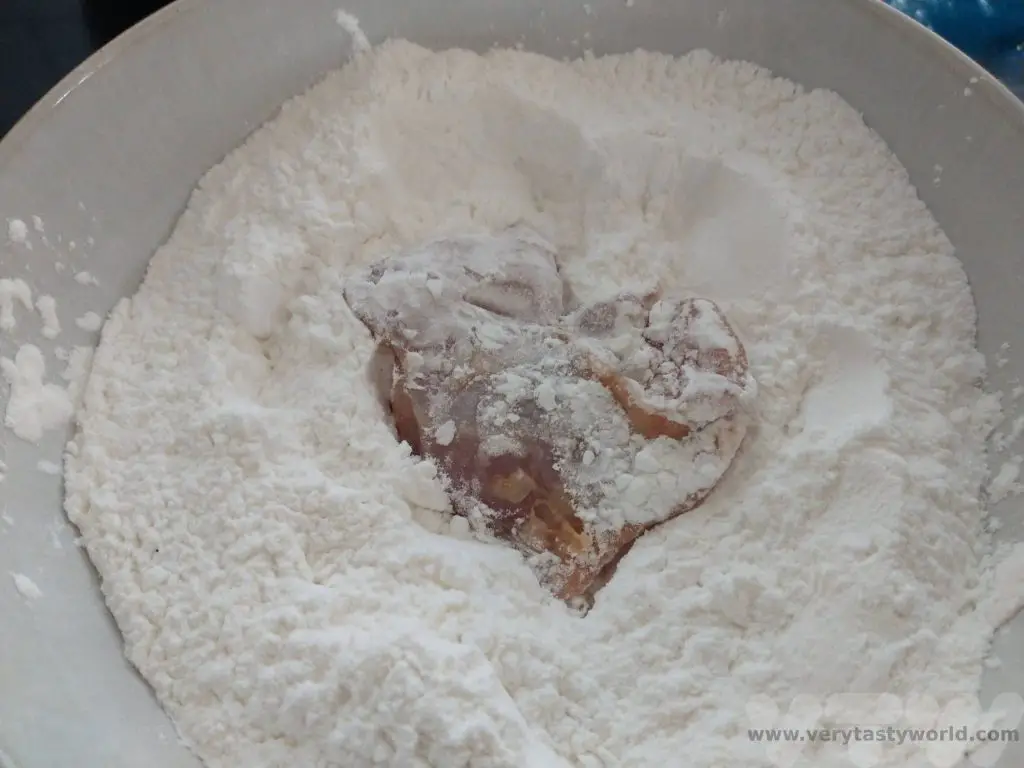
Take each piece of chicken, dip both sides in the flour, shake any excess off, and then carefully place in the oil.

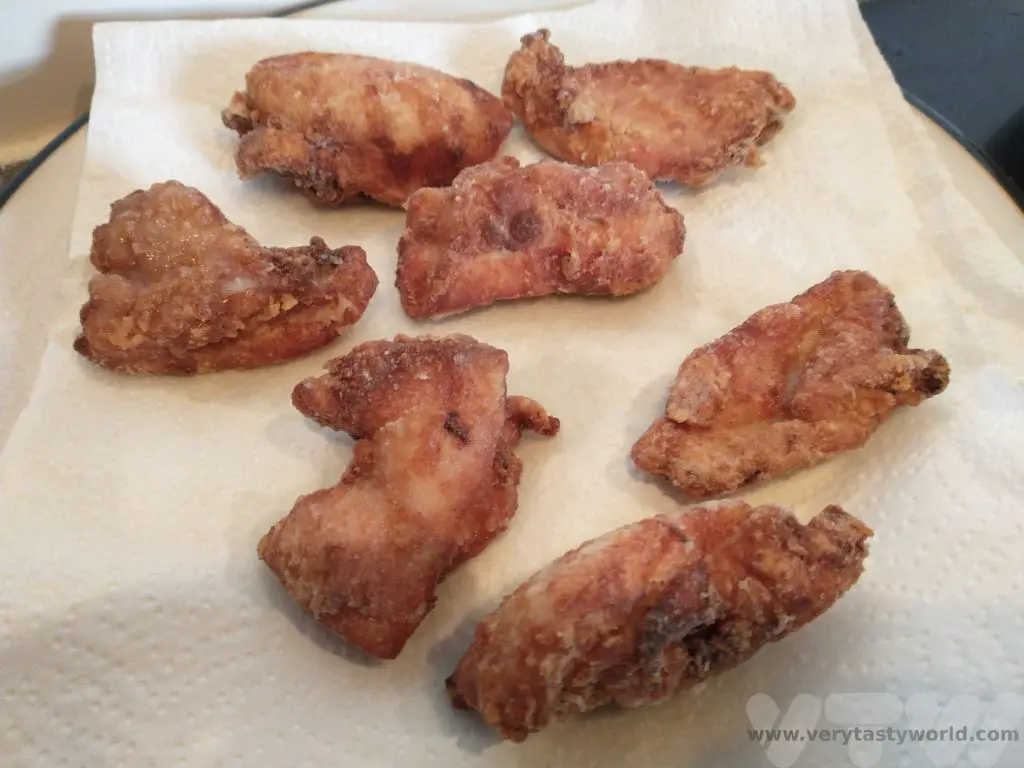
Repeat for further pieces of chicken. Do not overfill the pan – this is a process whereby the chicken should be cooked in batches. We tend to use a clock method – put a piece of chicken at the top, then go round the pan putting further pieces in in a clockwise direction so we know which piece was put in first. Cook the chicken for 5-7 minutes, turning occasionally, until the pieces are golden brown.
Then remove from the oil and place on kitchen paper to soak up excess oil. You can transfer the chicken from the first batches into a heatproof bowl in the oven set on a low heat to keep them warm.
Start the next batch and repeat until all the chicken has been cooked.
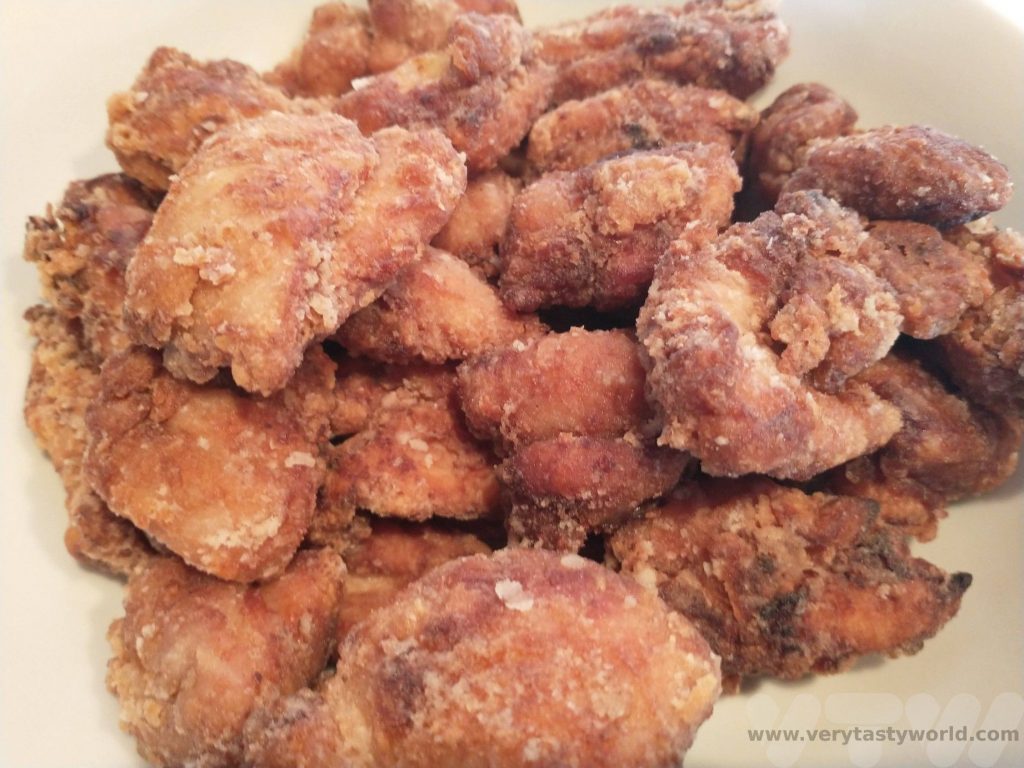
Serve with Japanese mayo. It’s not at all healthy but it’s oh, so decadent and delicious! If you’re feeling more health conscious, shredded cabbage is a popular accompaniment.
Karaage chicken is also yummy when served cold the following day. It often features in bento boxes.
Related Posts You May Enjoy

- RECIPE Oyakodon Donburi
- Zero Waste Recipes Before Your Holiday
- RECIPE: Vegetable Biryani Tamil Nadu Style

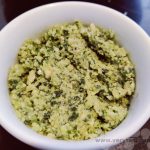
- RECIPE: Vegan Wild Garlic Pesto
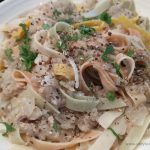
- Recipe: Venetian Pasta Sauce
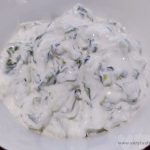
- RECIPE: Biryani Raita Recipe
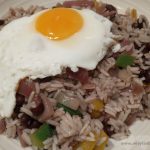
- RECIPE: How to Make Costa Rica’s Gallo Pinto
- Recipe: Japanese Simmered Pork Belly – Buta no Kakuni
- RECIPE: How to Make Umeboshi
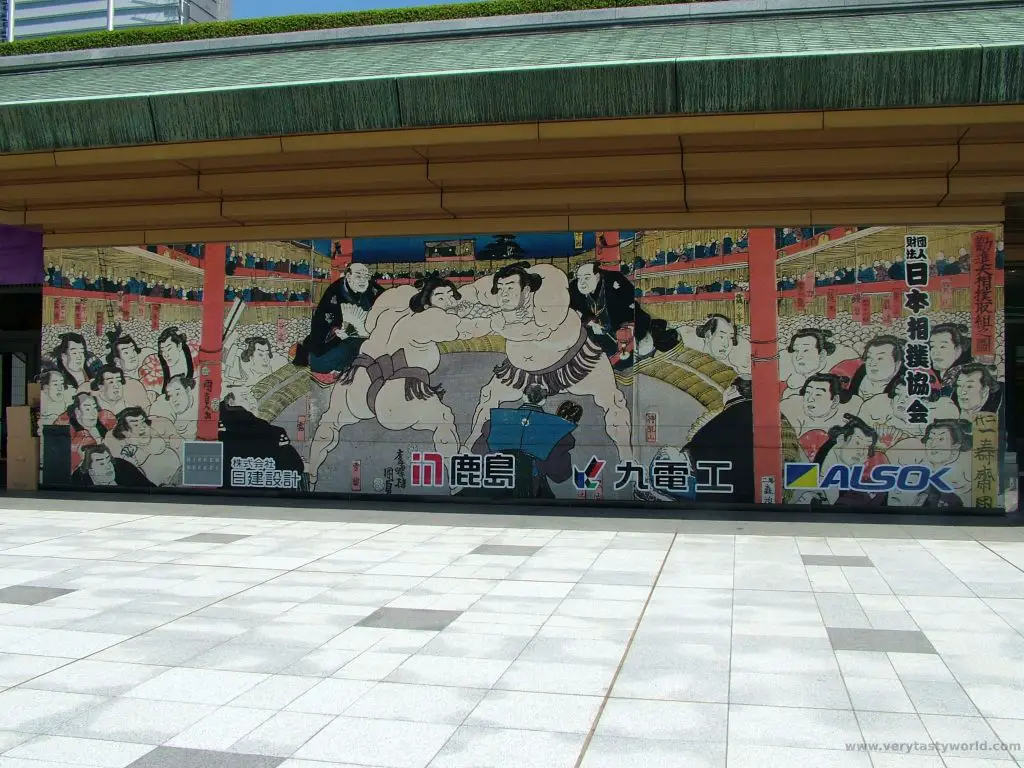
Sumo Tokyo Tickets – Big In Japan
Sumo wrestling is the national sport of Japan and is steeped in tradition. The origins of sumo are thousands of years old and it is thought to have originated in the Yayoi period in Japan (300 BCE-300 CE). There are six sumo tournaments each year and watching the sumo is a great day out. Here is a guide to what to expect at a basho and how to get sumo Tokyo tickets.
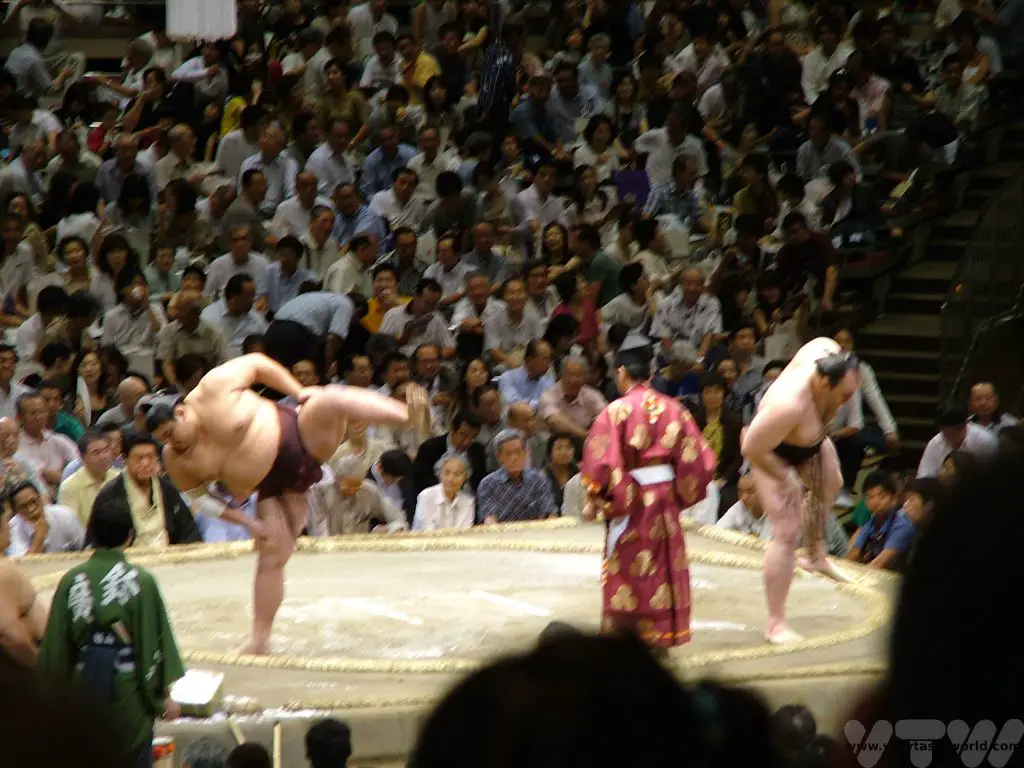
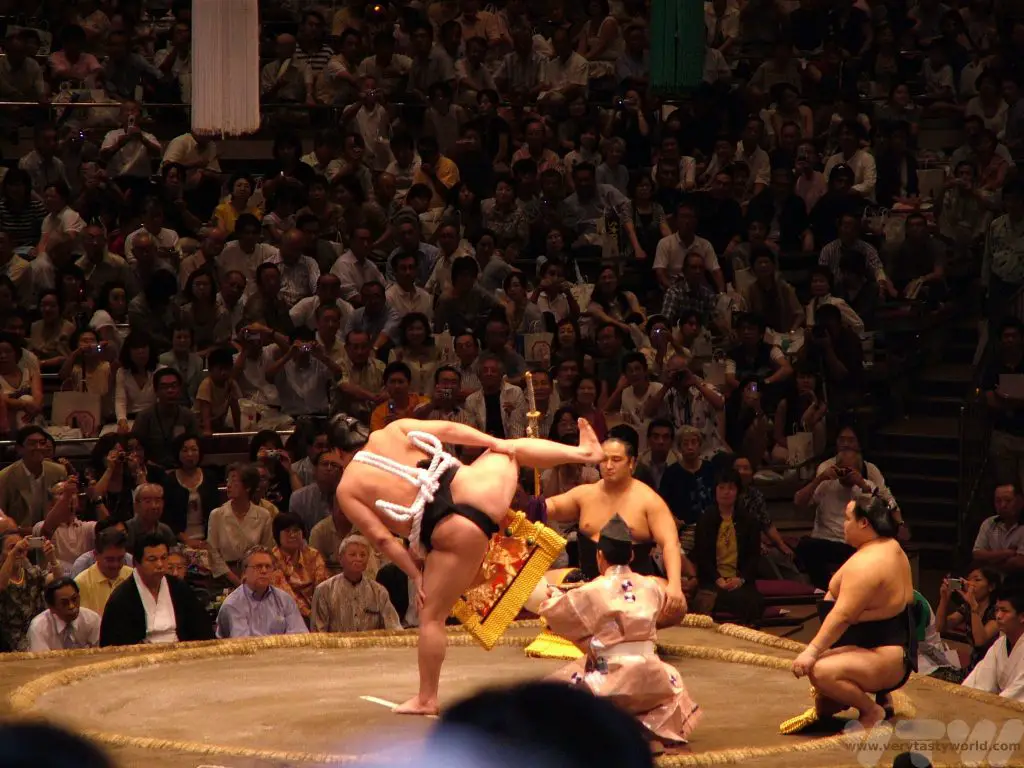
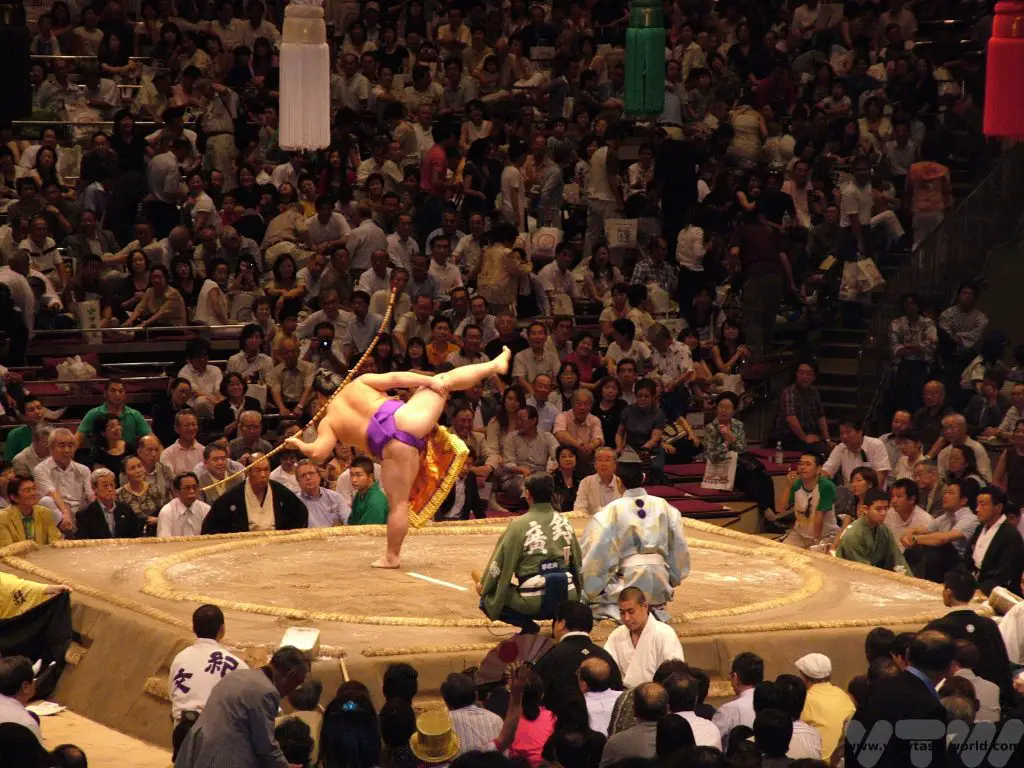
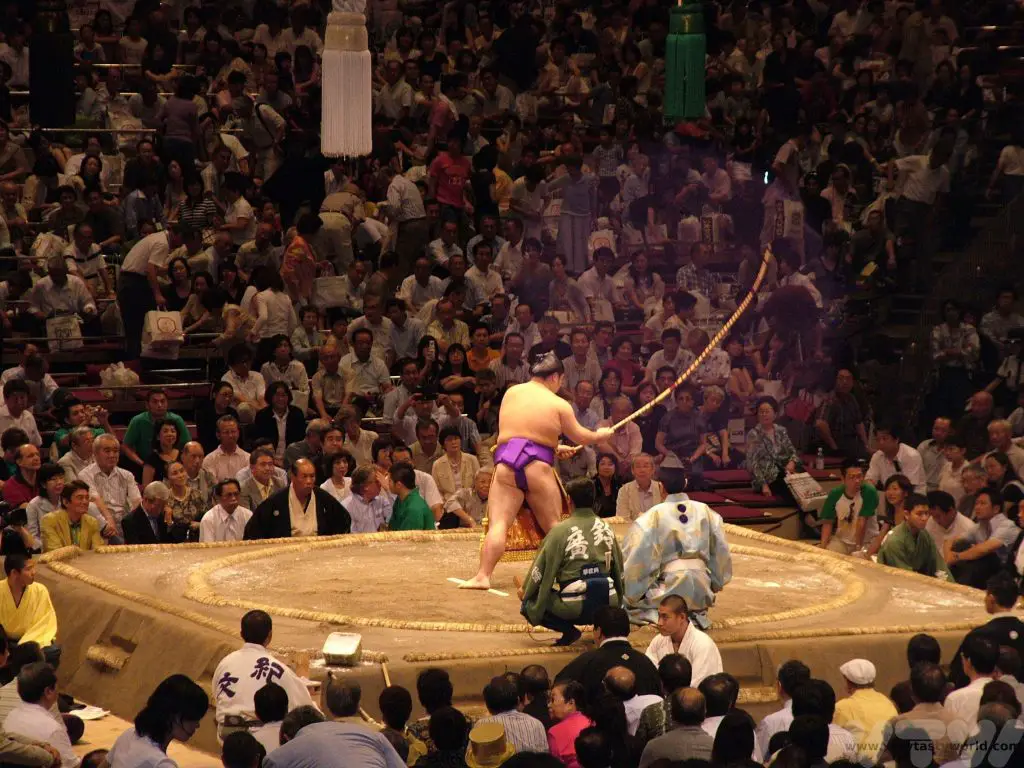
The rules are very simple: Two rikishi (wrestlers) face each other in a ring known as a dohyo, which is 4.55m in diameter. When mutual consent is given to begin, signified by each wrestler touching his fists to the floor, the bout commences. A rikishi loses when he is either forced out of the ring or touches the floor with any part of his body other than his feet. The wrestlers wear just a mawashi (belt), which can be grasped and used to push, throw or lift their opponent out of the ring or onto the floor. Some rikishi don’t use the mawashi and tend to have a push and thrust approach to taking on their opponent.
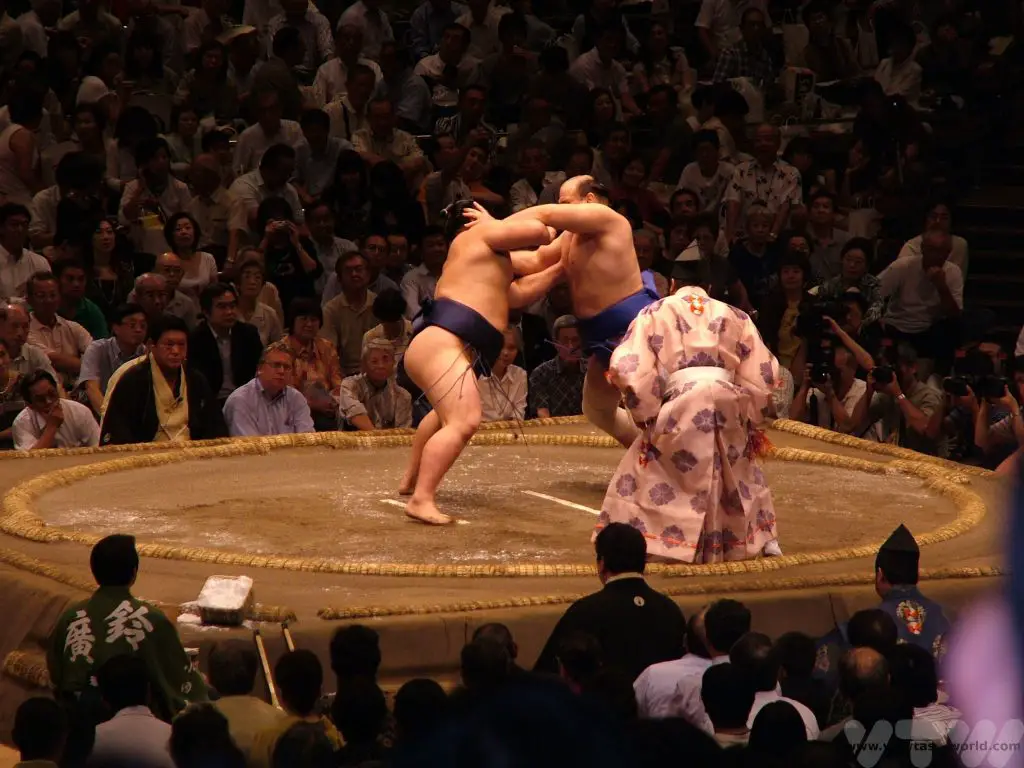
There are very few techniques that are banned, but fist punches, poking the opponent in a vulnerable area or pulling the opponent’s top knot, which is part of the chonmage (the hairstyle), are all considered to be unacceptable and any rikishi that uses these moves will automatically lose the match. A gyoji (referee), wearing robes based on medieval imperial court attire, oversees proceedings, encouraging the rikishi to spar and deciding which has won the bout. Sometimes the outcome is extremely close so additional judges sit around each edge of the dohyo in order to assess which wrestler first exited the ring or touched the floor.
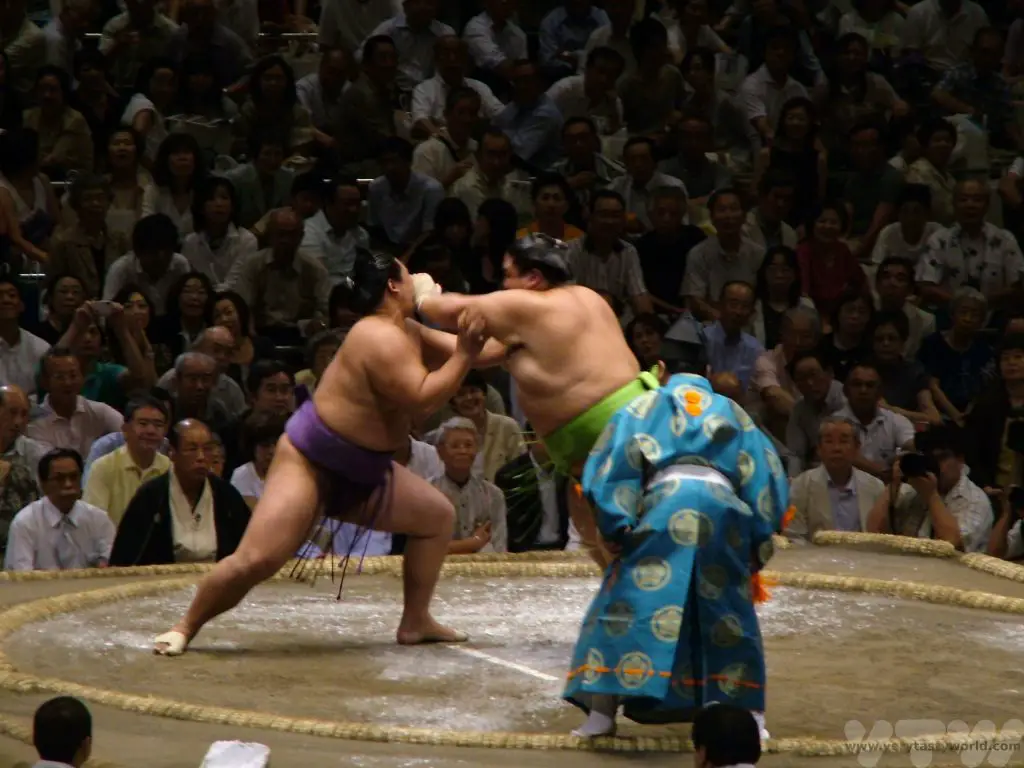
The first characteristic that most people notice about sumo wrestlers is their weight, which can be substantial. Sumo wrestlers put on weight because it is more difficult to force a heavy opponent from the ring. But they are extremely fit, flexible and agile. There are no weight categories in the sport so a 100kg wrestler could easily face an opponent twice his weight. This is also what makes sumo so exciting – weight isn’t necessarily an advantage as the smaller rikishi may be more nimble and can employ moves that outsmart their opponents.
The bout itself is often, but not always, short in duration, although there is no time limit. It is always preceded by a series of rituals that have origins both in Japan’s Shinto religion and ancient warfare. The rikishi throw salt into the ring to purify it. Other practices include wrestlers raising a leg and stamping on the ground to scare away enemies and also clapping their hands. Once ready, they take their mark and squat in a position known as shikari, facing their opponent, ready to thrust forward when the bout begins. It’s often an explosive start as two large men crash into each other and it’s hugely exciting.
Tournament Schedule
Grand Sumo Basho, or tournaments, are held six times every year. Three are held in Toyko at the Ryogoku Kokugikan (January, May, September) and then there is one each in Osaka (March), Nagoya (July) and Fukuoka (November). (These schedules have changed a bit during the last couple of years due to Covid.) Each tournament lasts 15 days. The most popular days to attend are weekends and the final days of the basho as the excitement mounts to see who will win the Emperor’s cup. We were honoured to be invited to the sumo by a family friend a few years ago. It made for the most excellent entertainment. The tournament schedule can be found at the Japan Sumo Association website.
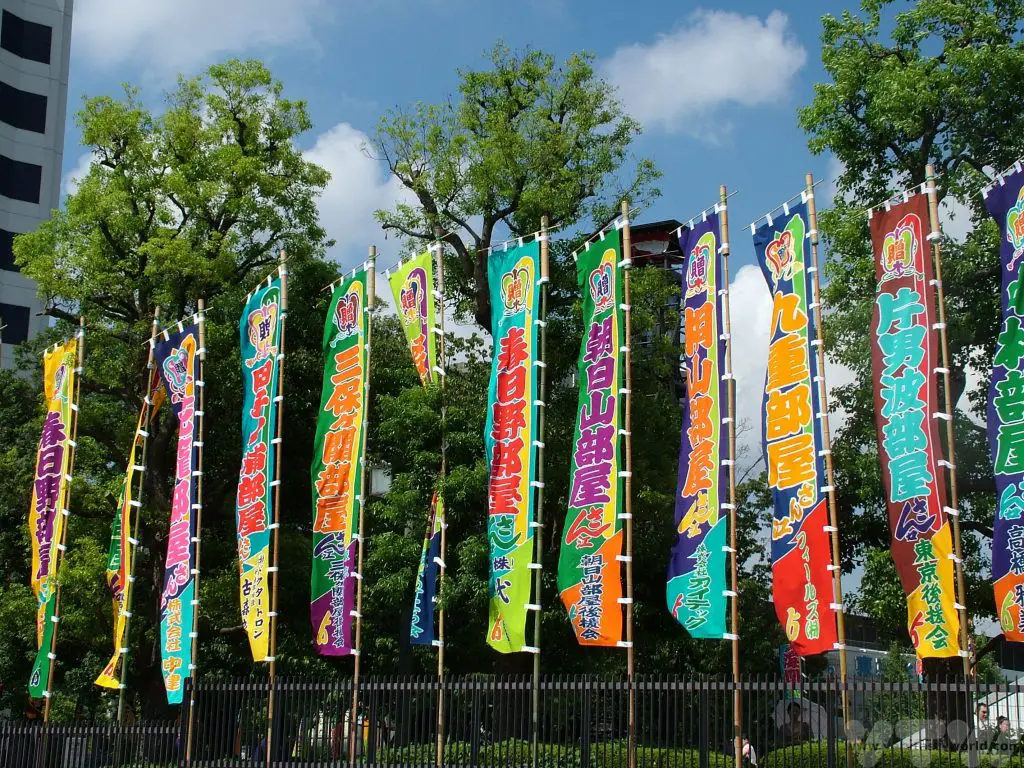
The Ryogoku Kokugikan dohyo in Tokyo is located just a two minute walk from the JR Sobu Line Ryogoku Station West Exit (useful if you have a JR pass), or five minutes walk from the Toei Ryogoku Station A3 exit on the Toei Subway Oedo Line. The Ryogoku Kokugikan is easy to find and outside you will see the brightly coloured flags bearing the rikishi names lining the route to the entrance.
Sumo Tokyo Tickets
There are various tiers of ticket available and the most popular seats do sell out quickly. Ringside tamari seats are the most expensive. They are the closest you can get to the action and sometimes audience members can be a little too close if an energetic bout results in a wrestler falling on top of them!
Box seats are designed for either four or six people and you have to buy all the seats within the box. This suits a group of people viewing together. They have a tatami mat base and cushions. The boxes closest to the dohyo are more expensive and they become progressively cheaper the further back they are located. The box seats are very popular.

Arena seats are located on the upper floor in a standard tiered seating arrangement, further away from the action but they offer a good view at a much cheaper price. For the die-hard fan who cannot pre-order tickets, jiyu seki, (free-seating tickets), located right at the top of the building just below the rafters, can be purchased each day at the Kokugikan from 8am. These will go quickly though and if you want some, you may well need to start queuing very early in the morning.
The tickets are valid for the entire day and bouts start from around 8:30am. Sumo is divided into a number of divisions and the lowest ranked wrestlers will spar earliest in the morning. As the day progresses and the higher ranked rikishi start making an appearance the stadium will slowly fill up. By the time the Makunouchi (the highest division) commences the Kokugikan will be full and the atmosphere incredibly lively as the audience members support their favourite rikishi. You can buy banners, t-shirts and other souvenirs at the concession stands.
Watching The Sumo In Tokyo – Make A Day Of It
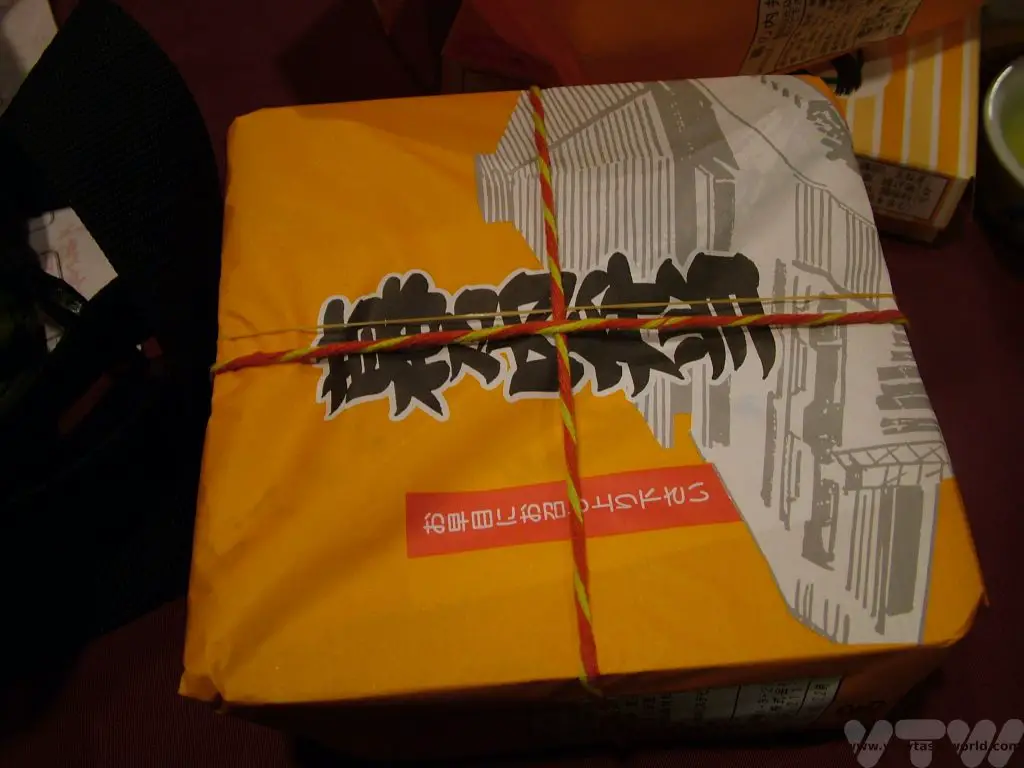
On arrival at the Kokugikan main entrance, if you have tickets, you will be guided to your seat. It is possible to pre-arrange a bento and drinks. (Alcohol is allowed.) The stadium even has its own kitchen in the basement. There, they make yakitori chicken, which is often eaten as part of the bento meal. There is a reason that chicken is on the menu – it is a bird that stands on two feet, something that the rikishi most definitely want to emulate. It’s also absolutely fine to bring your own food and drink if you wish.
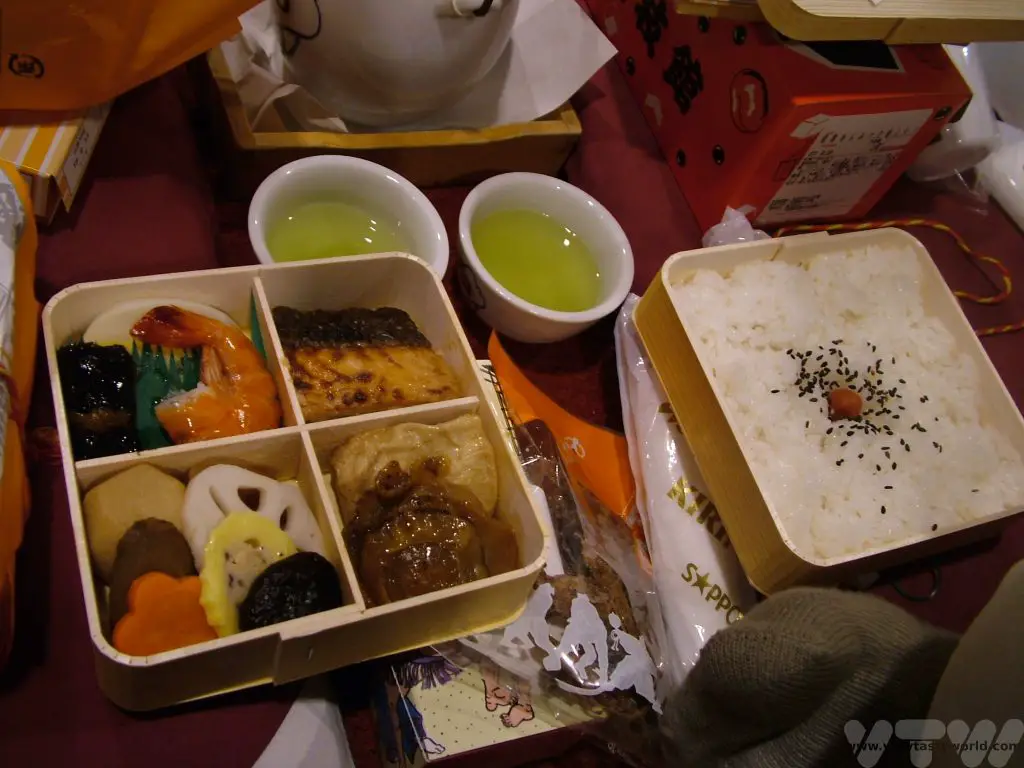
Then it’s a case of sitting back and watching the action, whilst enjoying delicious food, a cup of green tea and, later on, a few beers as well.
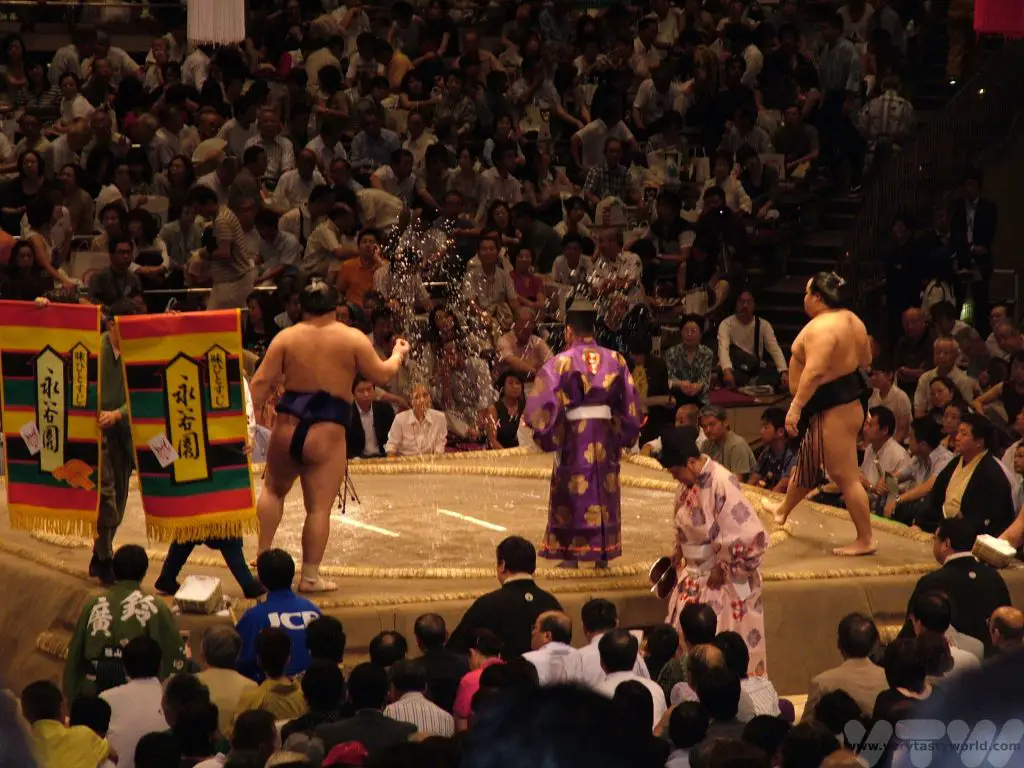
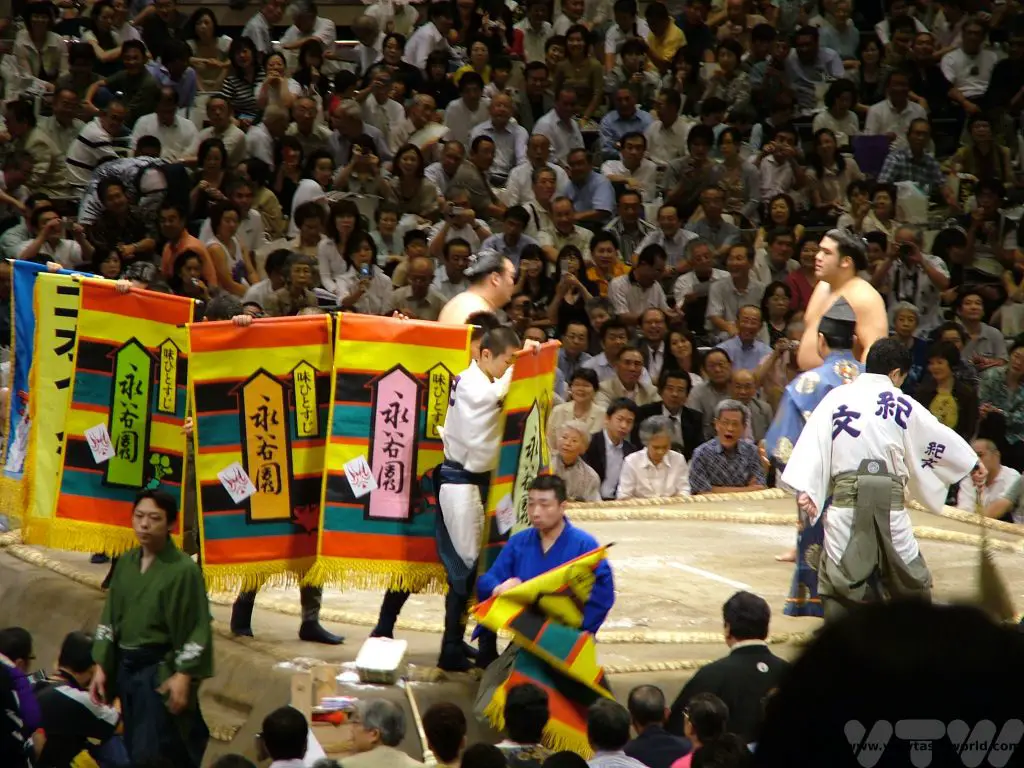
You will often see the banners from sponsors of a particular rikishi parade around the dohyo before the bout. These organisations put up prize money for their sponsored wrestler. If he wins, he receives cash in an envelope offered by the gyoji but if he loses, his opponent wins the prize. The higher ranked and more popular the wrestler the greater the number of envelopes. If a lower ranked rikishi beats an ozeki (second highest rank) or Yokozuna, he wins a magnificent wadge of cash.
One of the wonderful things about when you watch the sumo in Tokyo is that you can wander around the arena between bouts and will often see rikishi in their yukata (light cotton kimono). More often than not, they are happy to pose for photos.
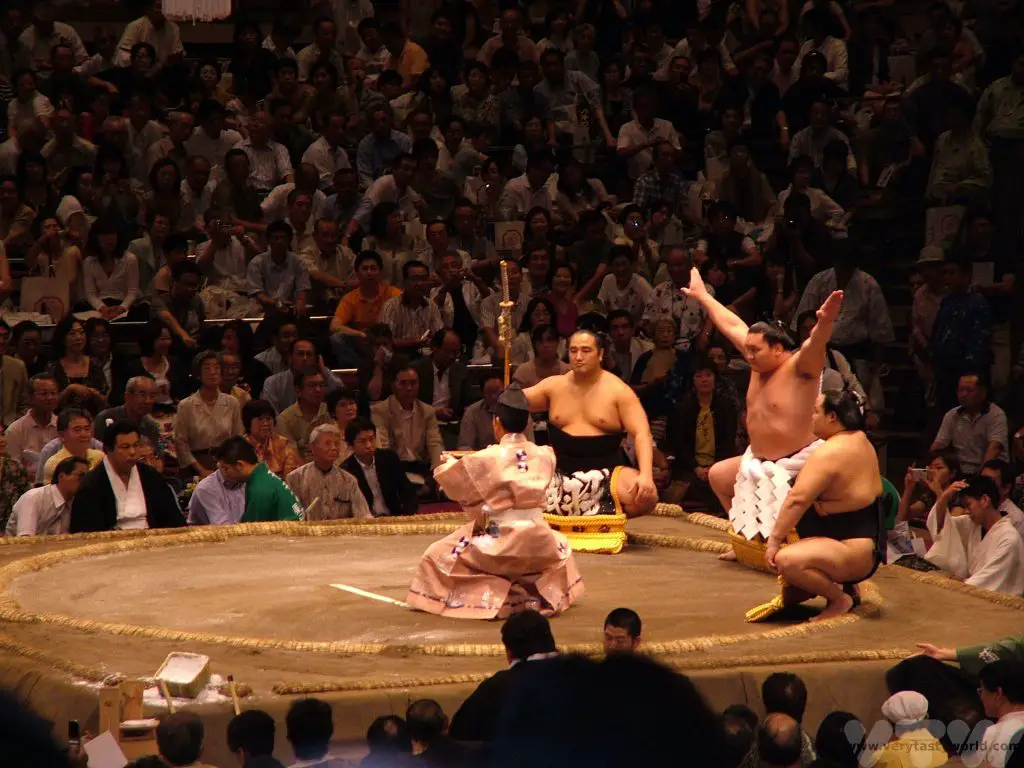
When it’s time for the Makunouchi bouts, the top tier rikishi will enter the dohyo wearing their keshō-mawashi, which are beautifully decorated ceremonial silk aprons, and form a circle. They perform a number of symbolic movements together before they leave and prepare for their bouts.

The Yokozuna, accompanied by two top division wrestler ‘assistants’ then enters the dohyo, wearing a tsuna (ceremonial rope, the word Yokozuna literally means ‘horizontal rope’) around his waist, to perform the ring entering ceremony. There are two types and the Yokozuna will choose which one he will perform soon after his promotion.
The highest ranked wrestlers fight the final bouts and the crowd become increasingly excited. When the very last bout has been fought, there is a closing bow-swirling ceremony – another ritual steeped with symbolic meaning.
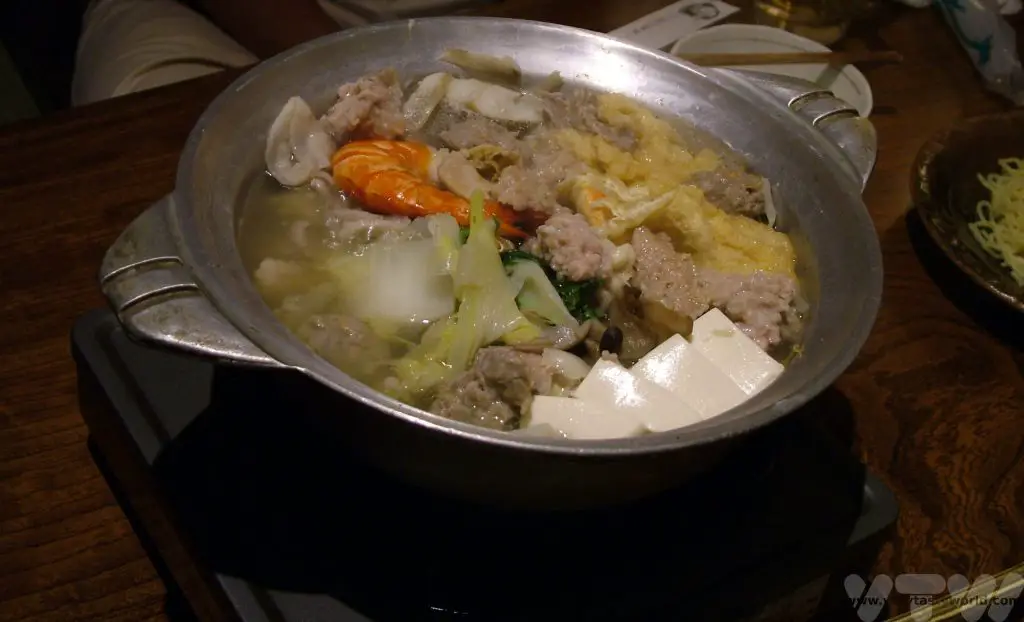
Sumo Chanko Nabe Restaurant
And what better way to round off a wonderful day’s entertainment watching the sumo than going out for dinner at a local restaurant? Of course the only meal we could have was chanko nabe – sumo stew. This is the meal that sumo wrestlers eat at their stables in large quantities after their training sessions. (They go to sleep after eating chanko nabe and this helps them gain weight.) It’s filling and nutritious and, importantly, delicious. It’s a great sharing dish – a hot pot that sits in the middle of the table and everyone helps themselves. It comprises meat and vegetables, sometimes with seafood and tofu, that simmers in a dashi broth (a recipe for dashi can be found here). Sometimes sake or mirin is added to the broth to add flavour. There is no specific recipe which means that loads of scrumptious variations are possible. Unsurprisingly, there are a cluster of chanko nabe restaurants in the Ryogoku area.
If you are visiting Tokyo at a time when there is no basho tournament, it is possible to watch sumo wrestlers training in their stables. There is no cost to this but you’ll have to get up early as they usually train between 7:30 and 10am. You generally don’t get to enter the stable itself but can watch through a large window. Alternatively there are some guided tours that will take you behind the scenes at a sumo stable.
And if you can’t get to Japan at all it is possible to watch sumo basho on TV. Japan’s national broadcaster NHK World present the highlights from each day over the entire fortnight. The first and final day’s events are also shown live.
If you are likely to be in Tokyo at the time of a basho we highly recommend trying to obtain tickets for the sumo. It really is the most lovely way to spend a thoroughly enjoyable afternoon watching this unique and fascinating sport.
Related Posts You May Enjoy


- Recipe: Simmered Shiitake Mushrooms
- How to Use Public Transport in Japan

- RECIPE Oyakodon Donburi
- Planning a Trip to Japan
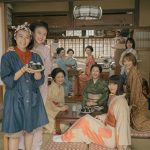
- The Makanai: Cooking for the Maiko House
- Setsubun Food – Bean Throwing Day

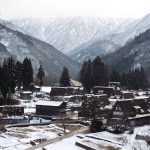
- The Gassho Farmhouses of Rural Japan
- Recipe: Japanese Simmered Pork Belly – Buta no Kakuni
- RECIPE: How to Make Umeboshi
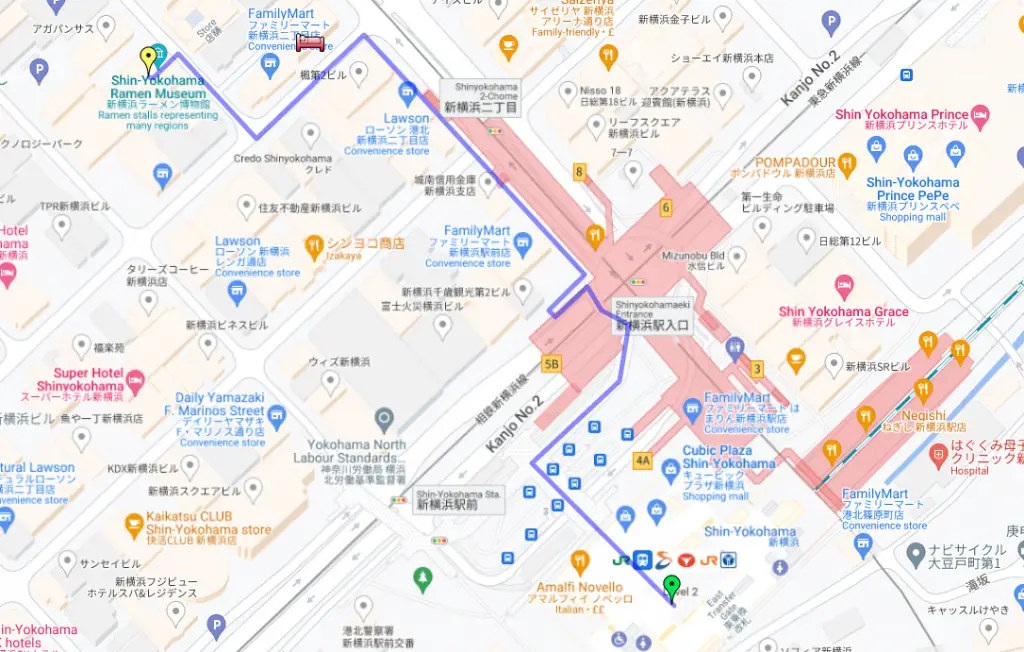
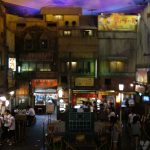
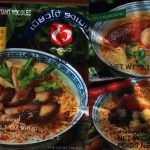
Noodle Nirvana at the Yokohama Ramen (Raumen) Museum
Here at Very Tasty World we have a passion for pasta and, as our regular ramen reviews emphasise, there is a joy in the variety of internationally available variants of noodle niceness that you can enjoy at home with just a kettle, a bowl and a pair of chopsticks. Of course, ramen restaurants are also available, if you are lucky enough to be able to reach one, so you don’t even have to trouble yourself to turn on the kettle.
But what if you want more?: To learn more and to taste more? What if you want to understand the history of ramen, instant or traditional, and to try various examples with different flavours from around the country for which ramen is best known? There is only one place to go, a foodie theme park where you can learn the history and, importantly, taste many different types of ramen in all their broth infused glory. The Shinyokohama Raumen Museum (The English site is here – please be clear of the spelling with the additional ‘u’, which is correct in Japanese, otherwise you might have search engine issues) is that place, a multi-storey building dedicated to everything that is ramen. We naturally felt obliged to travel there and research our culinary favourites. We were not alone in this desire to get to know ramen because Brittany Murphy’s character Abby does exactly the same thing when she visits in the film The Ramen Girl.
Yokohama Ramen Museum
The Yokohama Ramen Museum is – unsurprisingly – located in Yokohama, the second largest city in Japan, which is easily accessible from Tokyo. If you have a Japan Rail Pass you can use the shinkansen (bullet train) to arrive at Shin Yokohama, which is the closest station, but there are plenty of other train services available too.
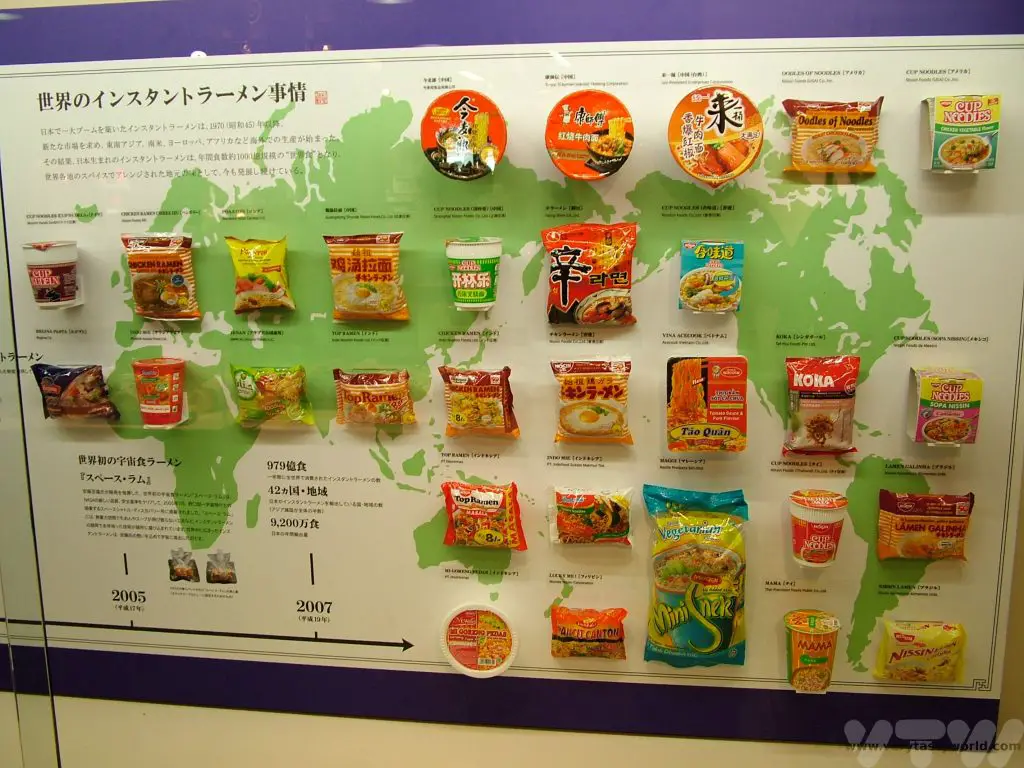
History of Ramen
The ground floor is the museum’s main area of knowledge, displaying a range of information about the history of ramen from traditional to instant. The displays include chronological timelines and also show the progression of instant noodle technology. So you can observe the pots, the packets and even a noodle unravelling.
But the proof of the pasta is in the eating. So you need to head downstairs in order to fulfil your craving. Pro tip – if you are planning to visit, make sure you do so on an empty stomach – don’t have too much for breakfast in the morning..
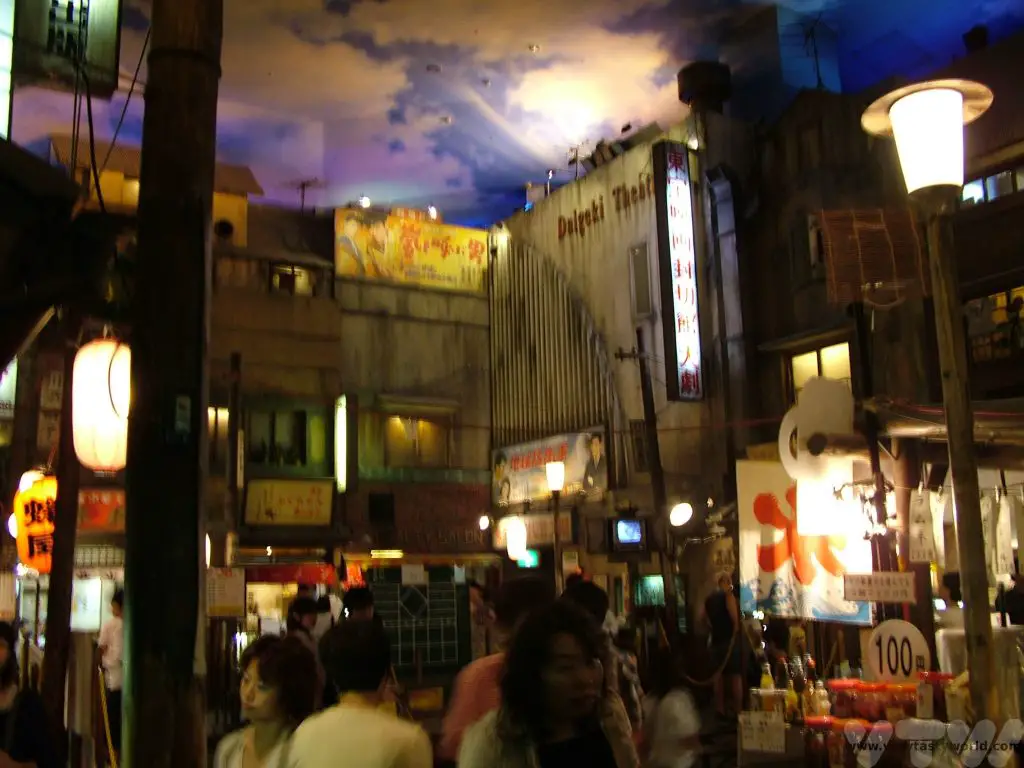
Sunset Shopping Street
The eating area, Sunset Shopping Street, is a recreation of a town in 1958, the year that instant ramen was invented. The whole environment has a sundowner setting with cloudy dark blue sky and street lighting which all adds to the ambience.
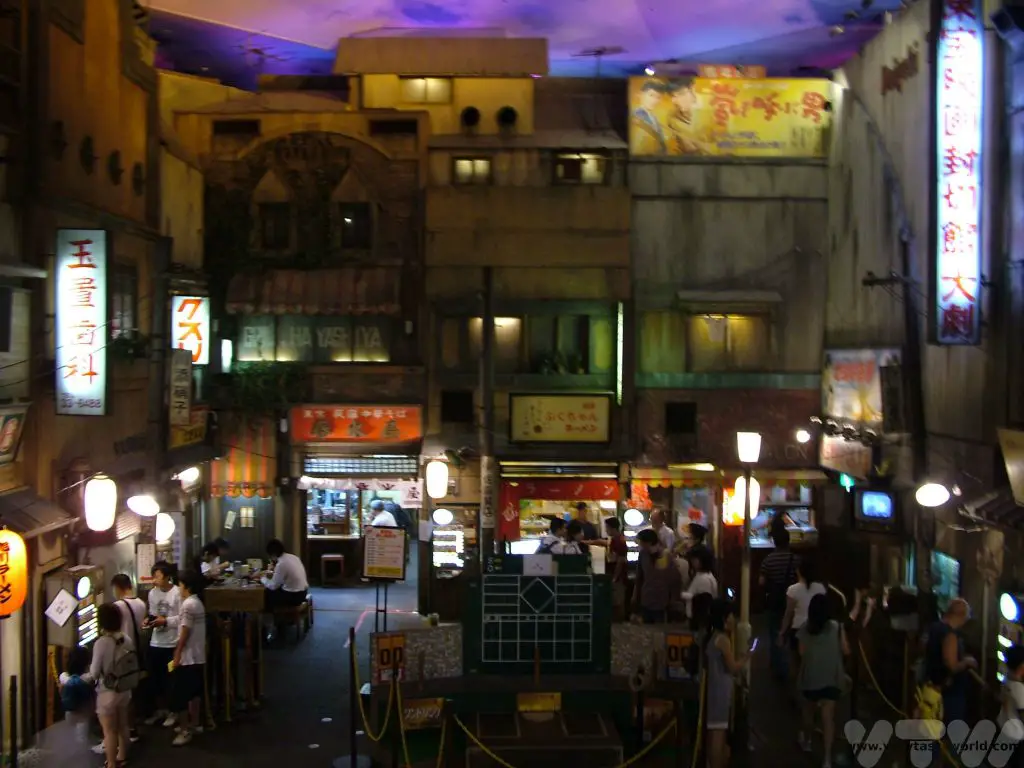
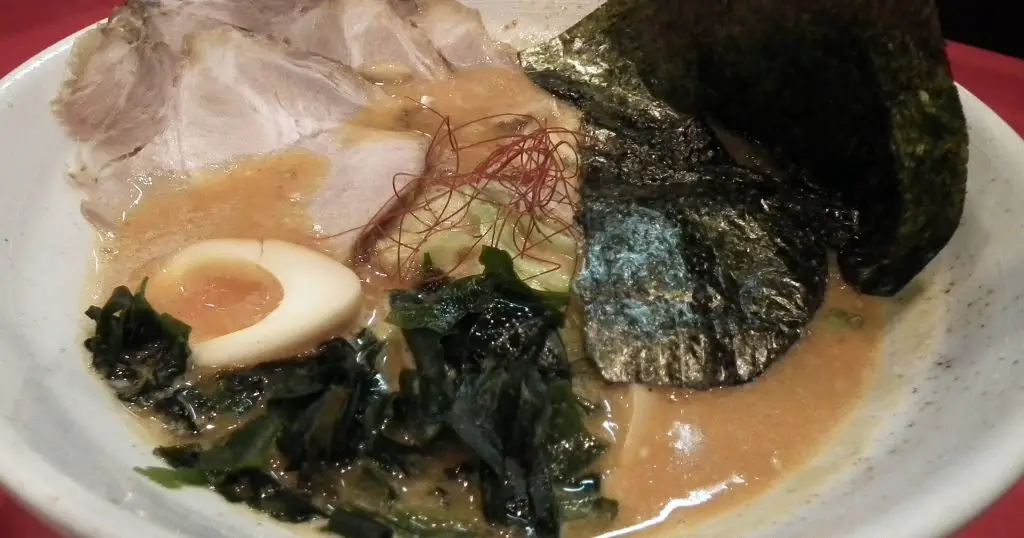
There are a number of restaurants where you can sample regional ramen, from miso ramen to salty soy sauce and rich, creamy tonkotsu where the broth is made by boiling pork bones for hours. The only problem is deciding which shop (or shops) to choose from, even though you know its ramen you want, the choices are far more complex than the expected ‘what flavour broth or meat/fish/vegetable combo,’ but the bigger ‘what region?’ question because each venue represents a different region of Japan’s quintessential local concoctions. Regional variations are prevalent in lots of Japanese foods such as udon (thick noodles) and okonomiyaki, so each ramen shop offering different options and all declaring their own as the very best, presents something of a conundrum to the casual noodle-slurper. We did see a number of visitors share a bowl of ramen before moving onto the next shop in order to taste as many different variations as possible. However, since our visit, the museum is clear that all adult visitors to each shop should purchase a bowl of ramen. This seems absolutely reasonable as it’s not fair to the restaurant owner to have table space taken up with multiple visitors sitting around a single bowl of noodles. Still, it’s a very pleasant choice to have to make. And these days you can order different sized portions, so if your appetite is big enough you may be able to sample many different types of smaller bowls. The street also has a traditional sweet shop, just in case you are still hungry!
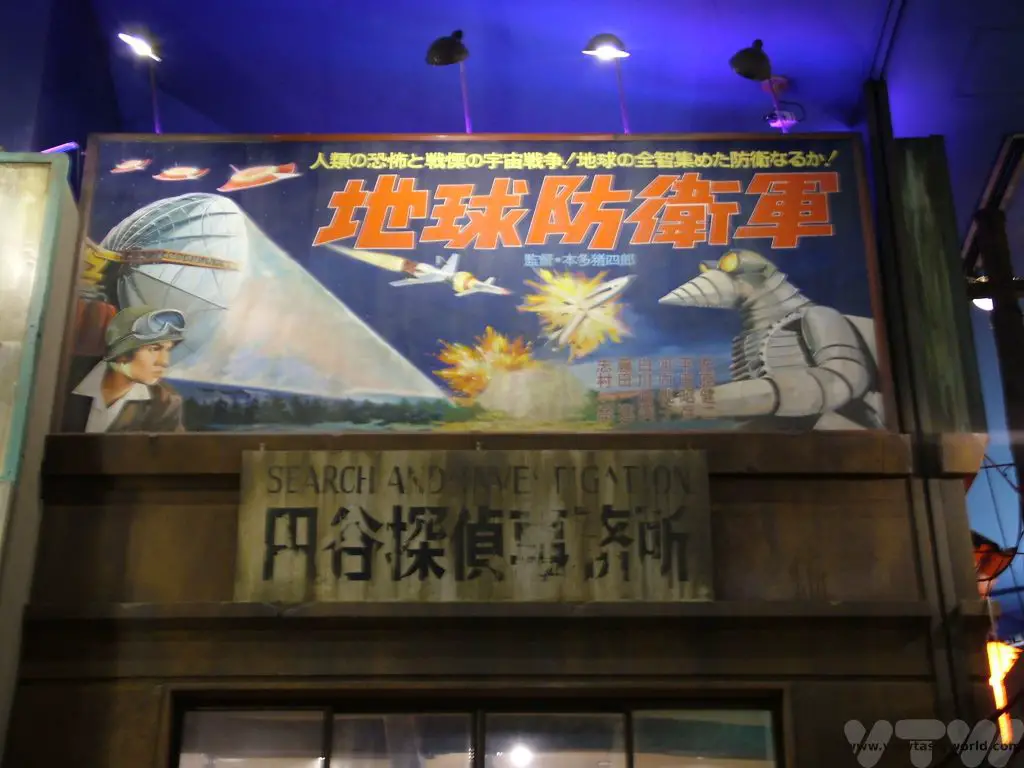
Oh, and there’s even a classic kaiju (monster) poster on one of the fake hoardings – what more could you want?
This really is an essential tourist trip for ravenous lovers of ramen. Great fun for foodies in terms of understanding history of the world’s most popular instant food and also getting to eat yummy ramen.


How To Make Miso Paste
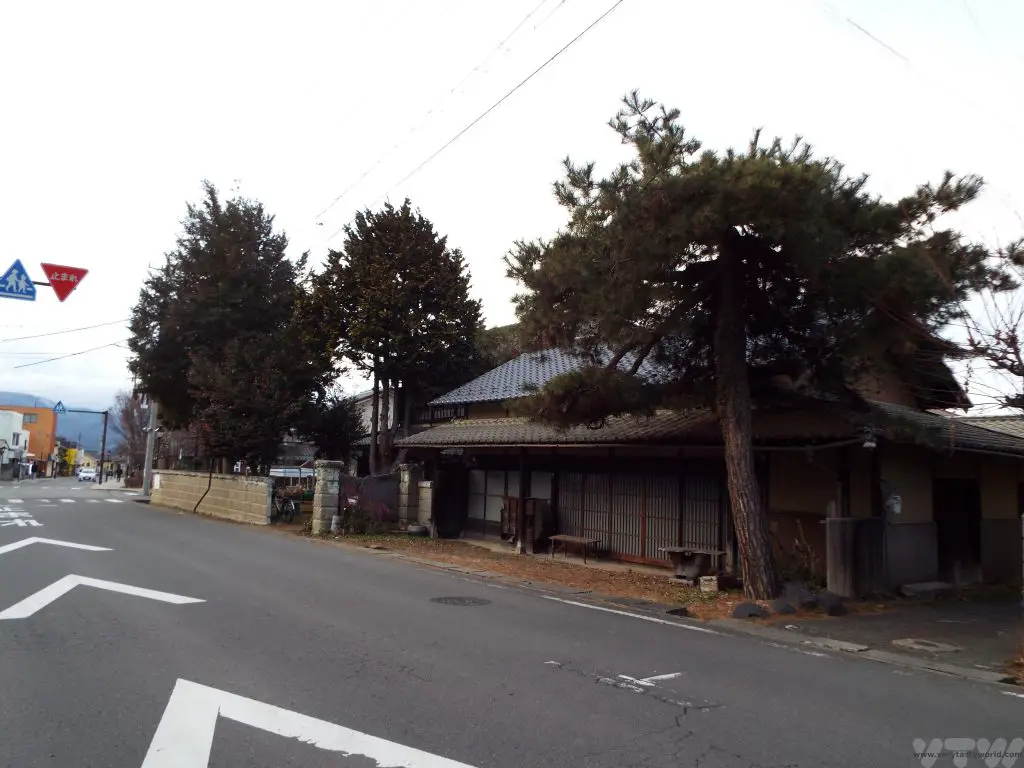
One of the great things about travelling around Japan is getting to sample the regional variations in the food. We had visited a miso/soy sauce factory in the western city of Kanazawa but, on our way, we had taken a detour to visit the snow monkeys at Yudanaka and also had the opportunity to visit the nearby town of Obuse in Nagano prefecture. And we also wanted to learn how to make miso paste.
Obuse is a pretty little town with some interesting museums – notably an exhibition space dedicated to artist and printmaker Hokusai who was famous for his ukiyo-e (floating world) pictures from the Edo period. His best known work is probably The Great Wave off Kanakawa, one of the 36 views of Mount Fuji series. When we visited, they had on an exhibition which contrasted the Thirty-six Views of Mount Fuji with the One Hundred Views of Mount Fuji series.
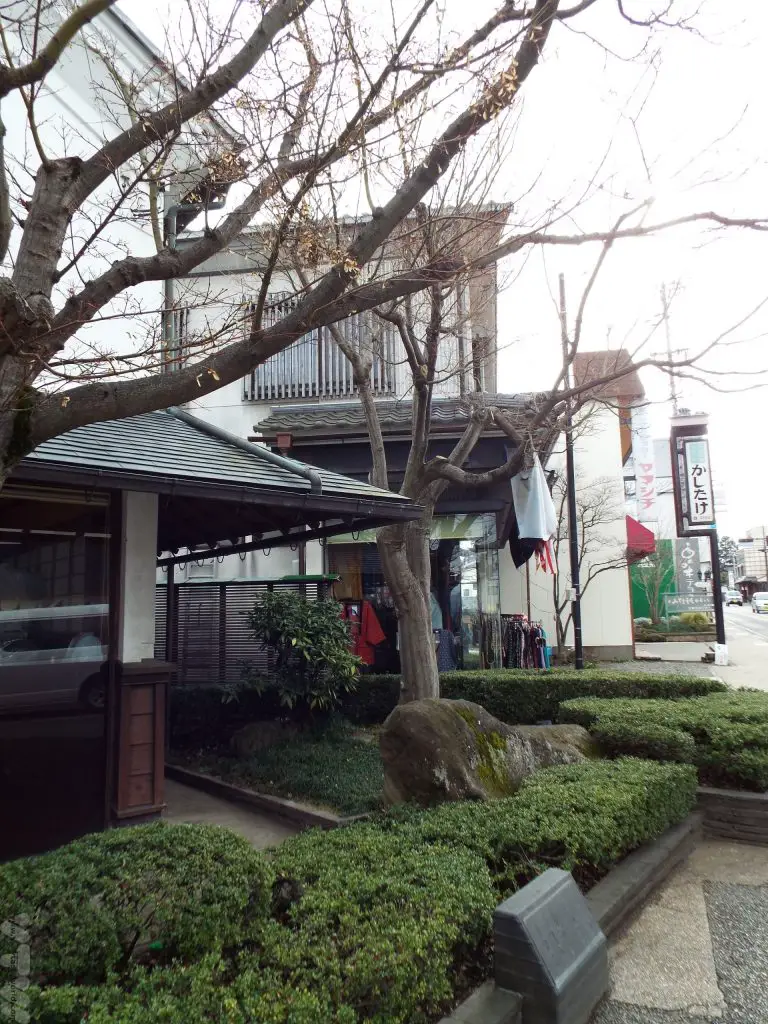
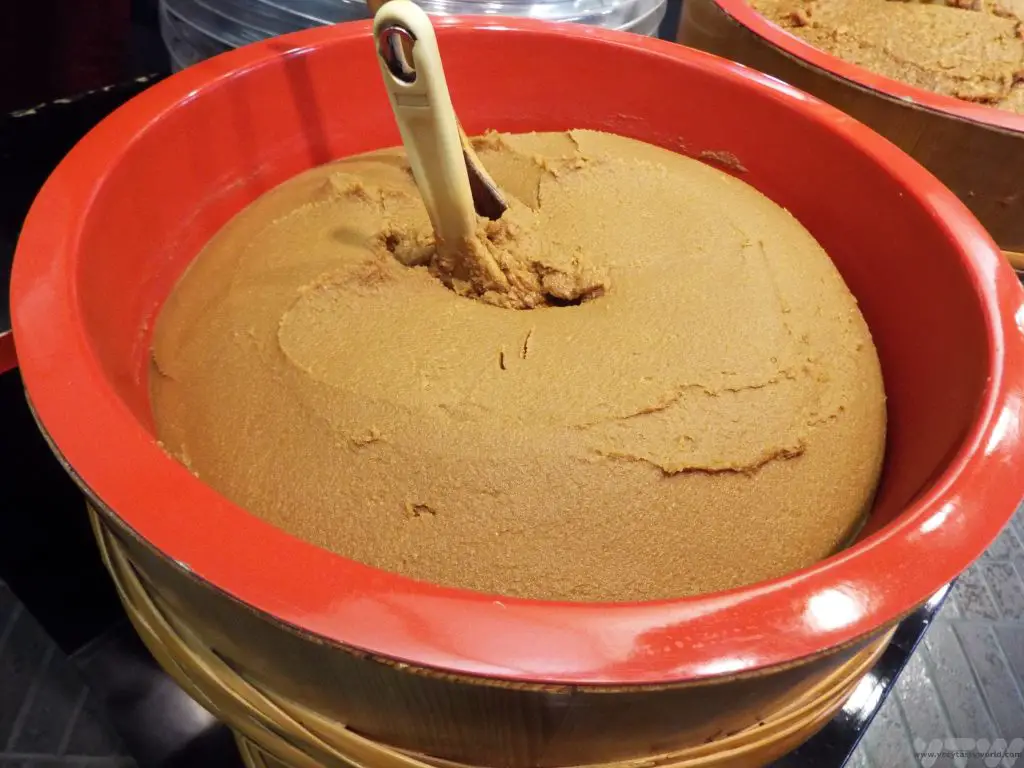
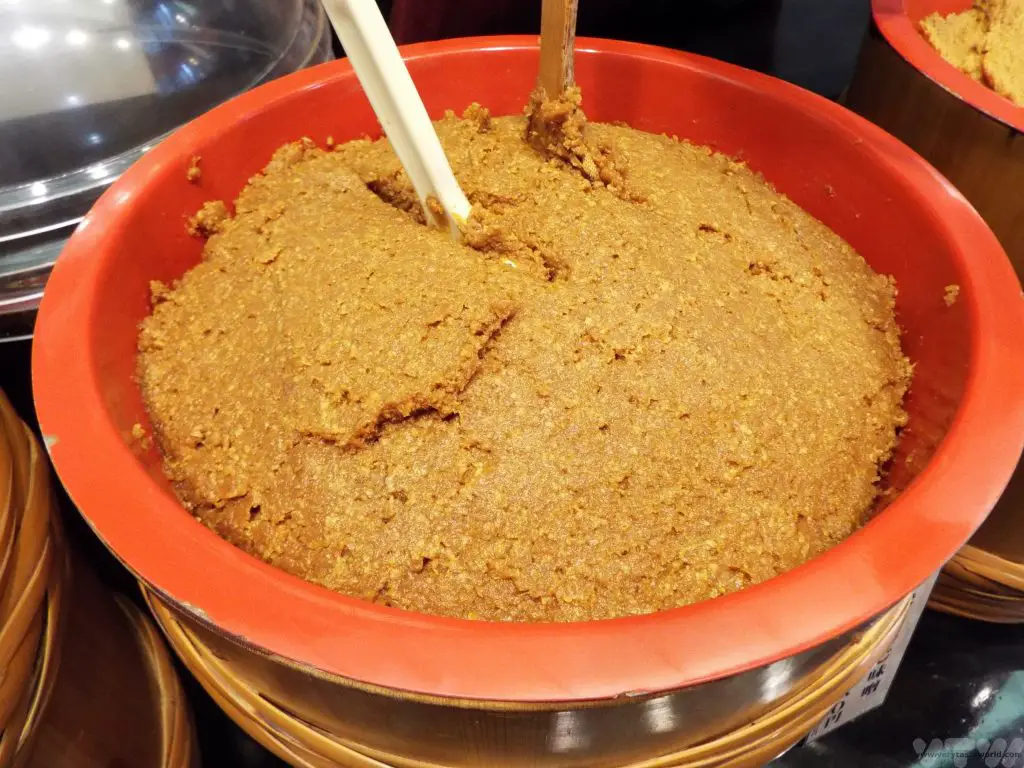
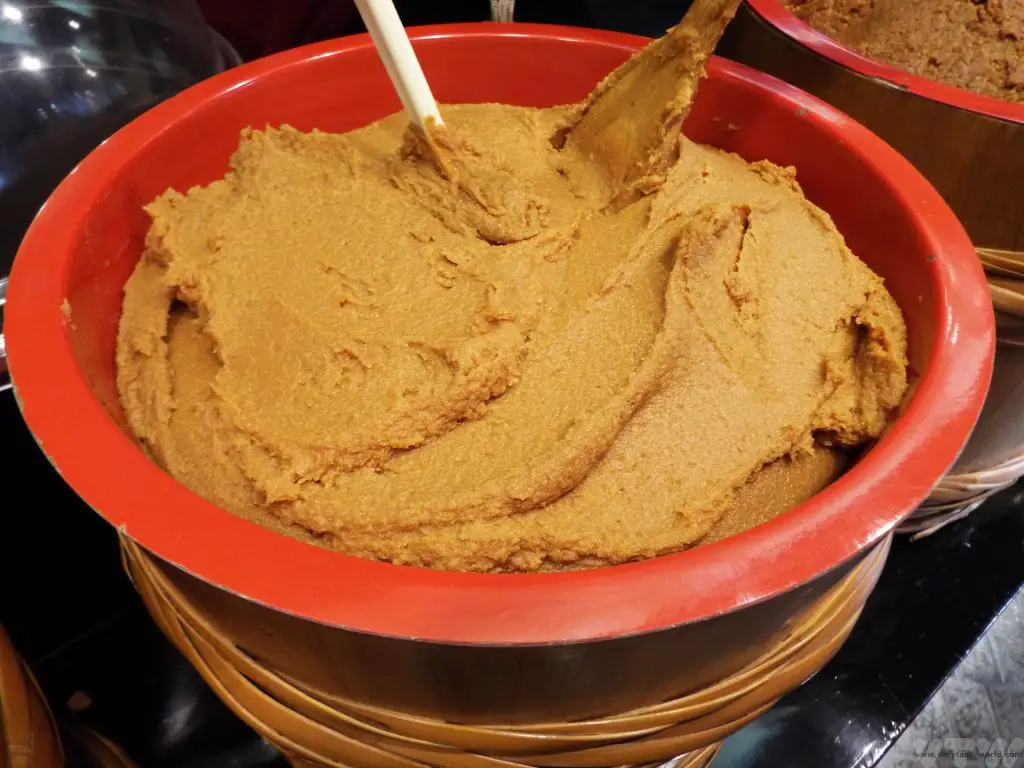
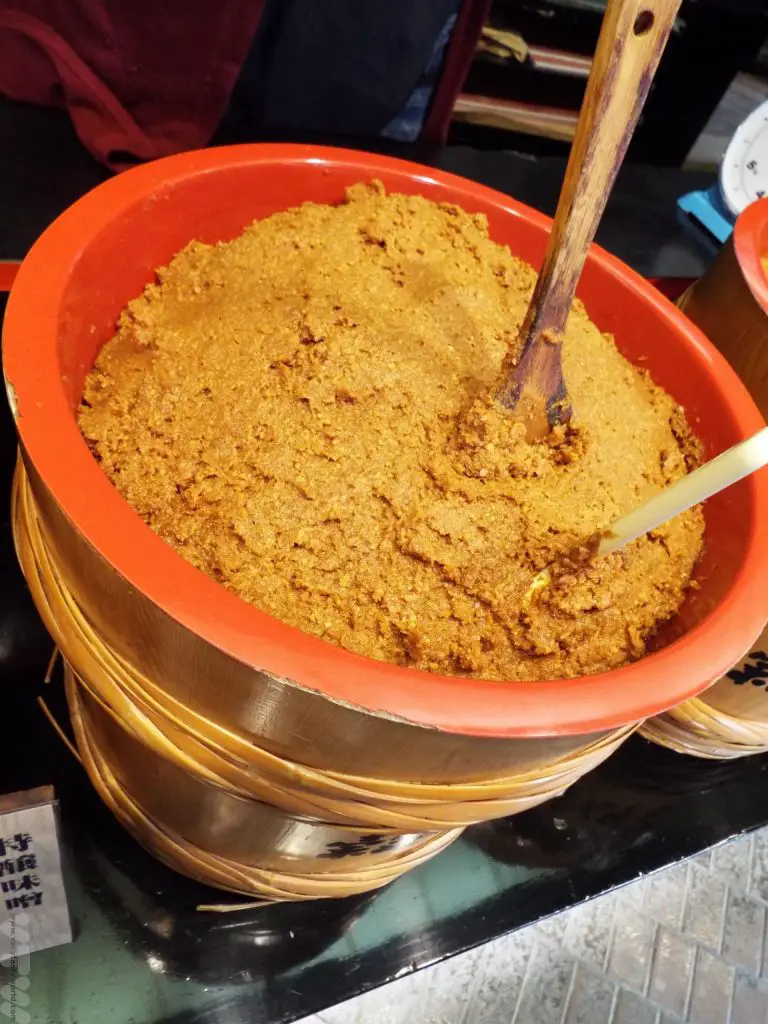
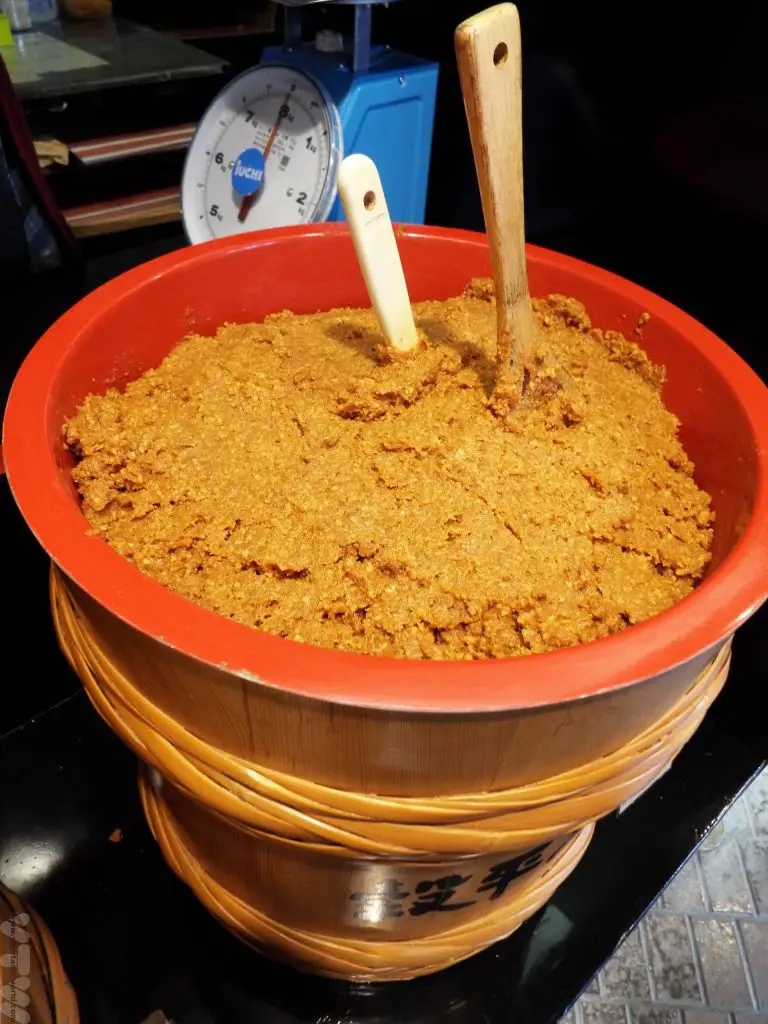
We were pleased to discover that the town also had a shop dedicated to miso.
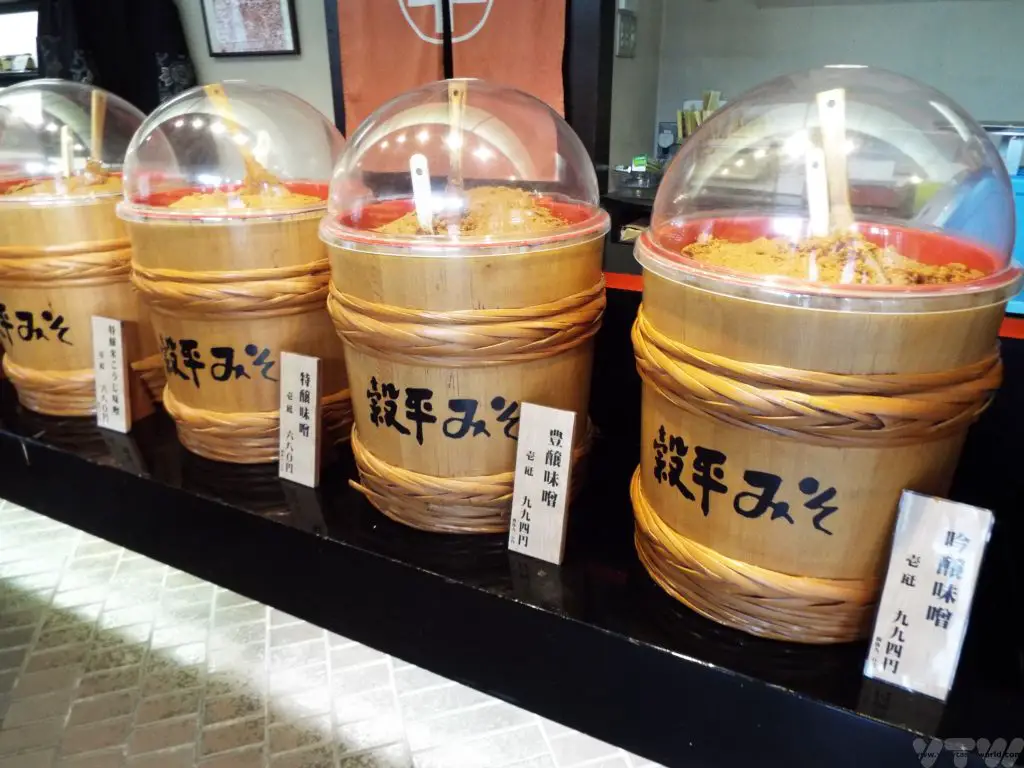
The delightful owners were very happy for us to sample their wares and it was great to be able to compare flavours of the different types on offer. We bought some packets of miso to take home with us.
How To Make Miso Paste
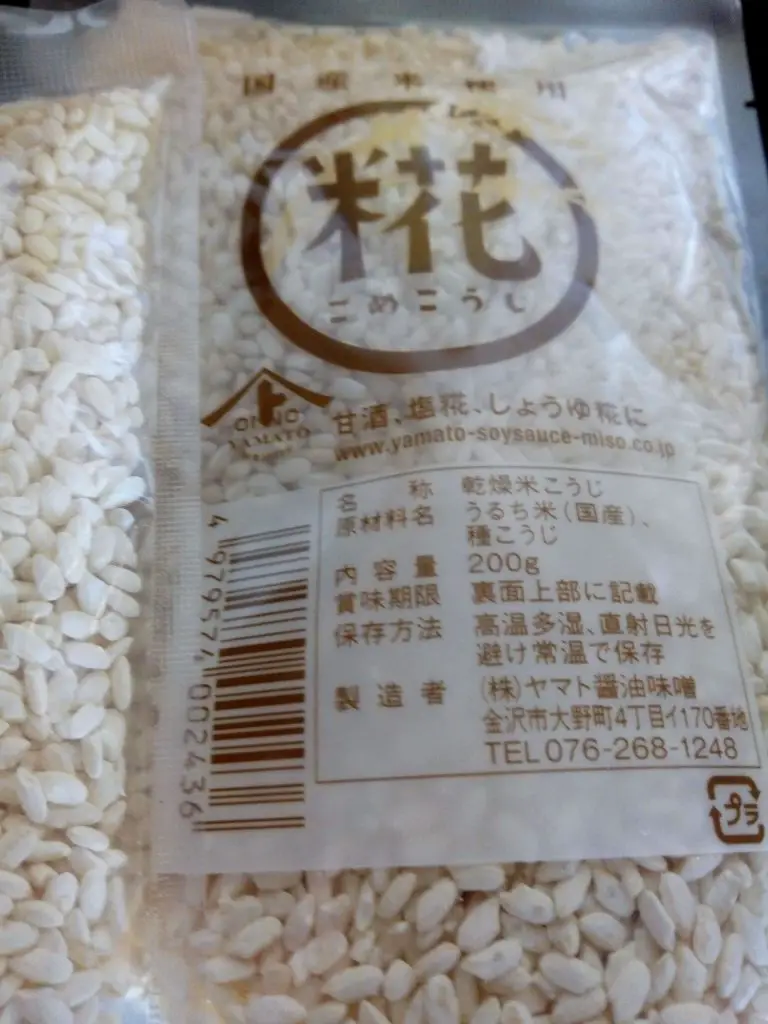
We had long wanted to experiment with making miso but, while it’s easy to get hold of soy beans, obtaining rice koji is more difficult in the UK. We were able to buy some inoculated koji in Japan and have later discovered a number of suppliers in the UK and EU from whom koji can be obtained. We used pre-inoculated koji. If you are really hardcore, you can obtain the spores, then steam the rice and let the mould grow on it to create your own koji.
That is for another time though. We started with the simple approach using koji that we had bought in Kanazawa…
The best book in the world for learning how to make Japanese preserves, pickles and ferments is Nancy Singleton Hachisu’s Preserving the Japanese Way: Traditions of Salting, Fermenting, and Pickling for the Modern Kitchen. We have tried and tested loads of recipes from this book and can wholeheartedly recommend it. We followed the miso recipe.
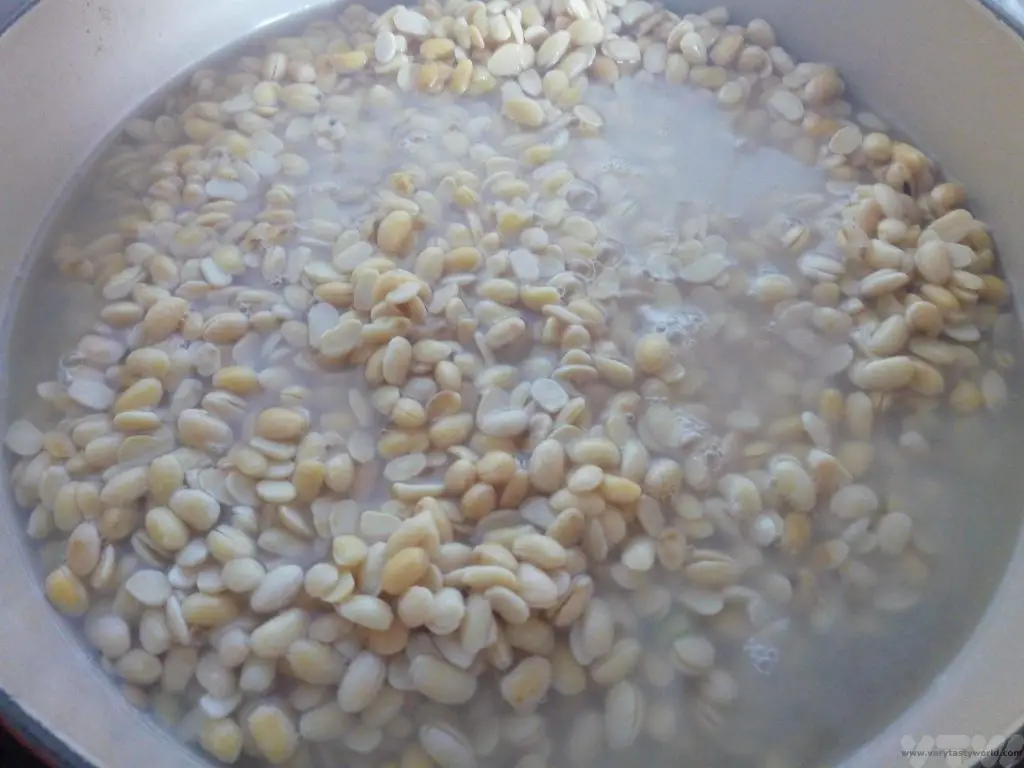
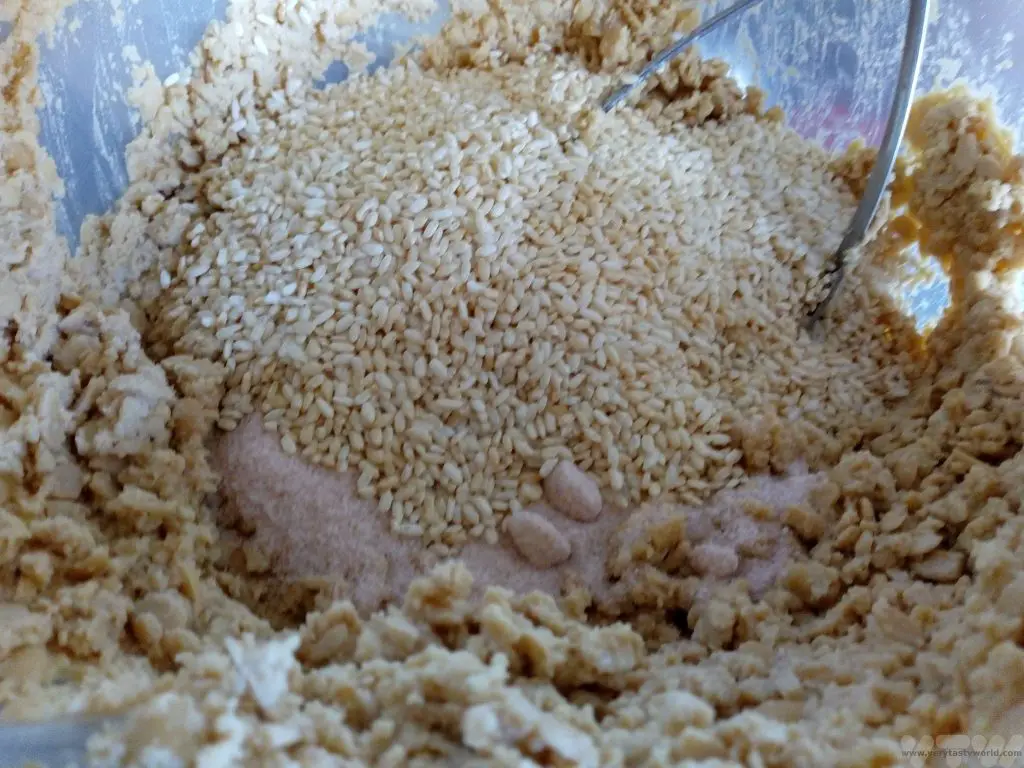
Organic soy beans were soaked overnight and then boiled for a couple of hours until soft.
One thing we realised that we needed to obtain – a bit too late at this stage – was a proper blender. The soy beans were mashed by any means necessary – in the end a combination of a potato masher and hand blender produced the best results from all the available gadgets in the kitchen but the beans were still a bit chunky – we didn’t achieve a really smooth paste. But that was okay, miso doesn’t have to be totally smooth. In fact, chunky miso has a very pleasant nutty texture. But a blender was duly ordered for future use.
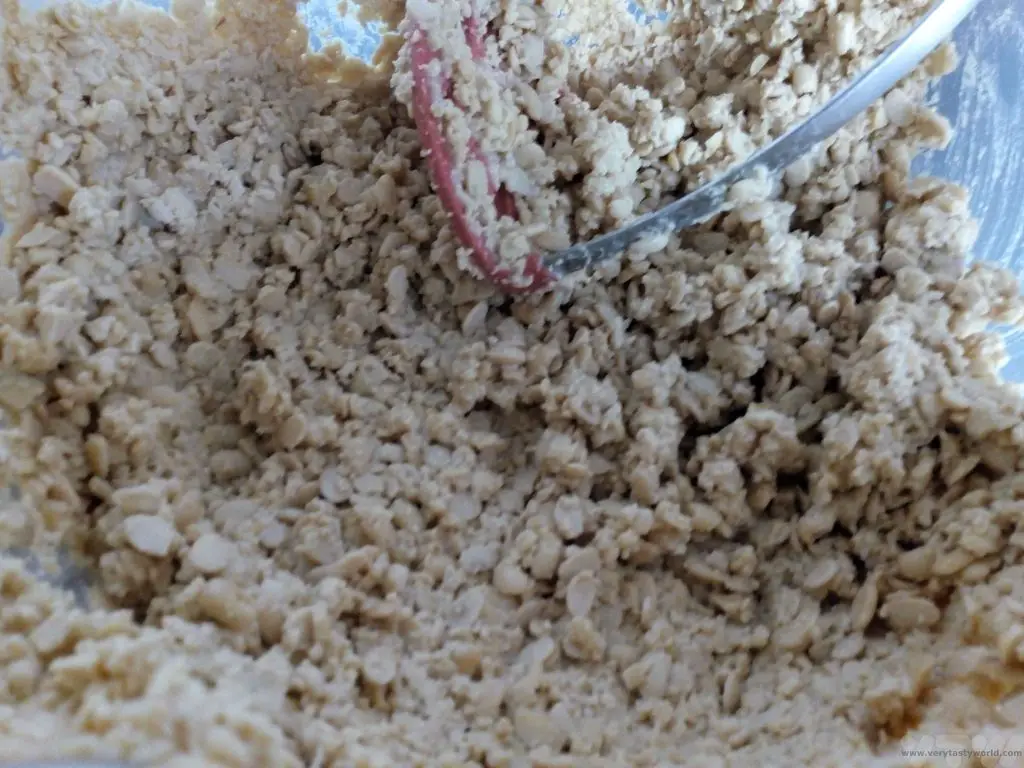
After the beans had cooled we mixed in the rice koji and salt – giving everything a really good squash together. It’s a very hands-on approach. (Make sure hands are clean, of course, a good way to do this is to spray them with white vinegar.)
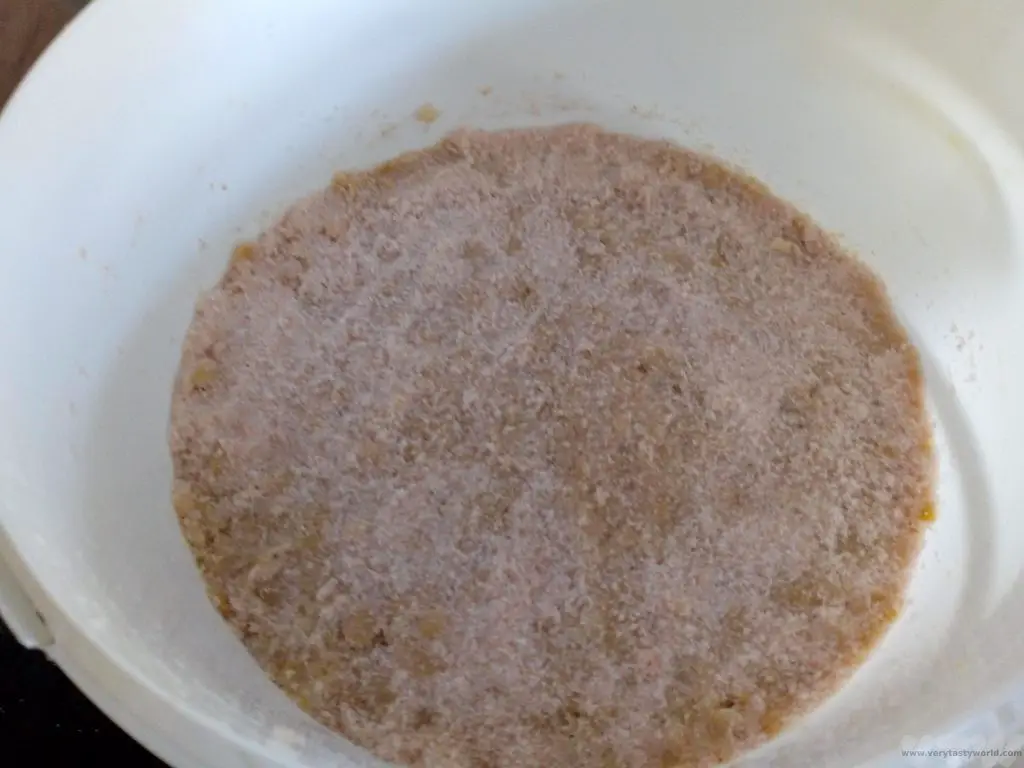
Then you get a big container, in this instance we found some food-grade plastic tubs, which we cleaned thoroughly and wiped with (cheap) vodka, grab a ball of mixture and throw it into the container. You need to have a good aim. The point of the throwing is that the mix splats together and doesn’t allow air bubbles. It’s really important that the mix is compact. If your splatting ability isn’t as accurate as it could be, make sure you really pack the miso together afterwards – a good squish with your fists will help.
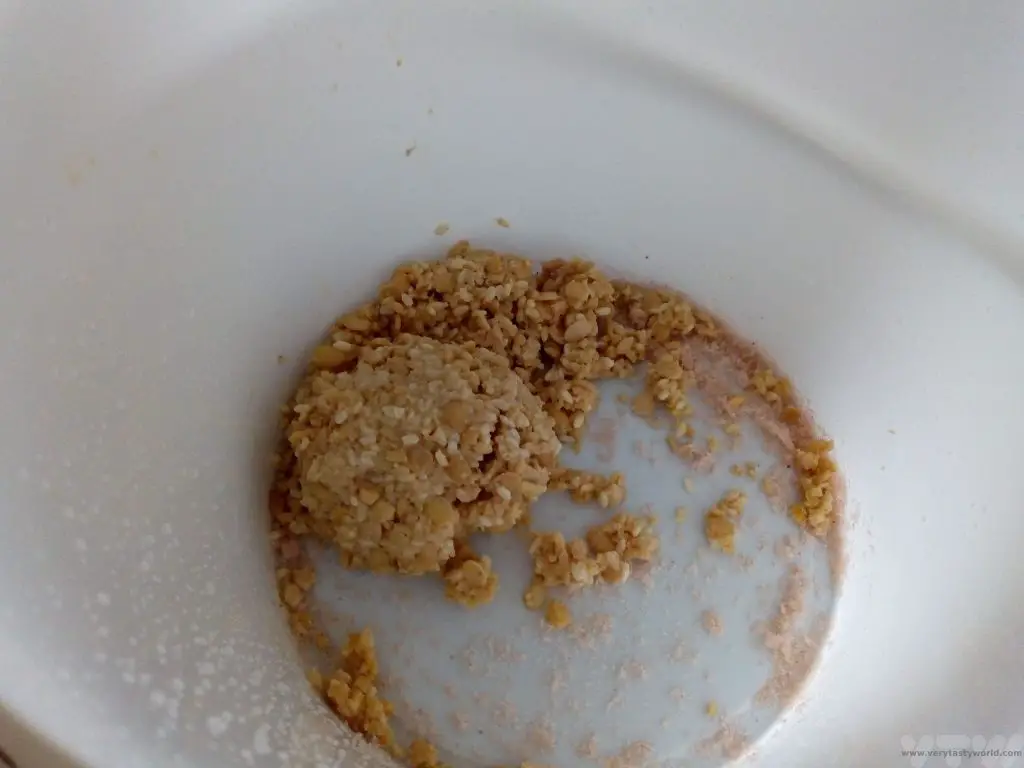
When the mixture is thoroughly squashed and compacted, sprinkle salt over the surface of the mixture, find some heavy weights and crush the miso to push it all together.
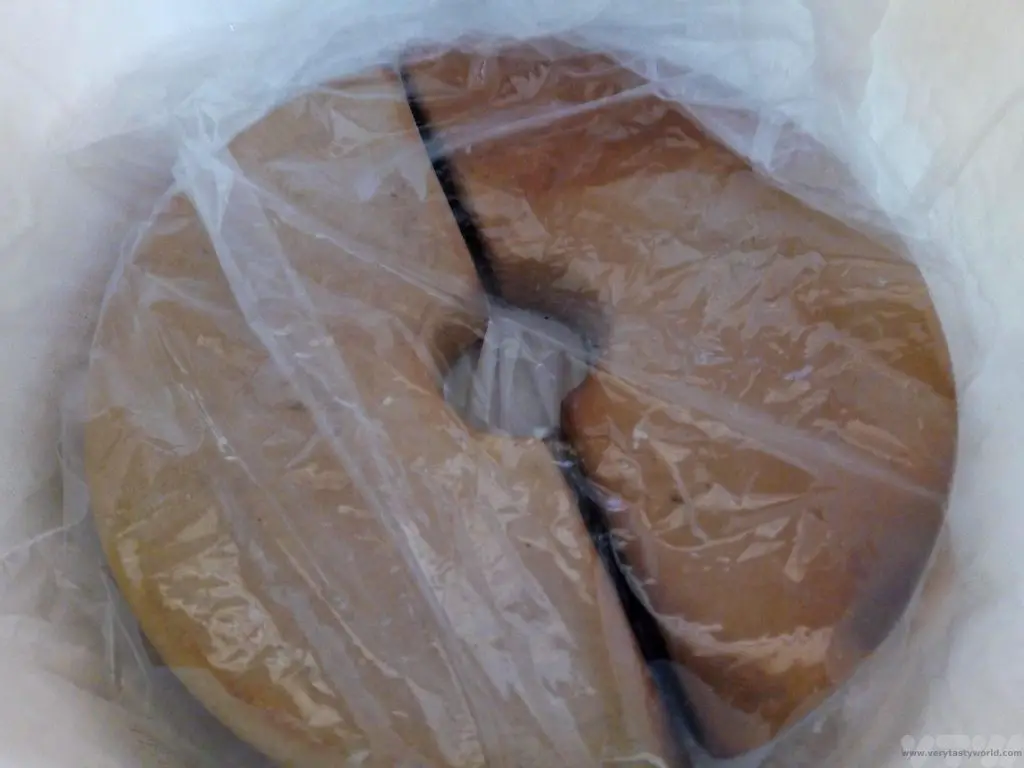
Then it’s simply a matter of time. Miso production in Japan is usually started in spring when temperatures are low. We started in April. The hot, humid summer is essential for the maturation of the miso and this is quite difficult to replicate in the UK, which has summers that can best be described as variable. However, we are lucky enough to have a greenhouse in our garden so our miso spent several days at a temperature that tried to emulate Japan’s summer heat although it didn’t get close to its oppressive humidity. It worked though – after the summer, on opening the lid we could definitely get that distinctive miso aroma. We knew we were on the right track.

We waited a few more months – until late October – and finally plucked up the courage to scrape the scary-looking surface of the miso and dive in.
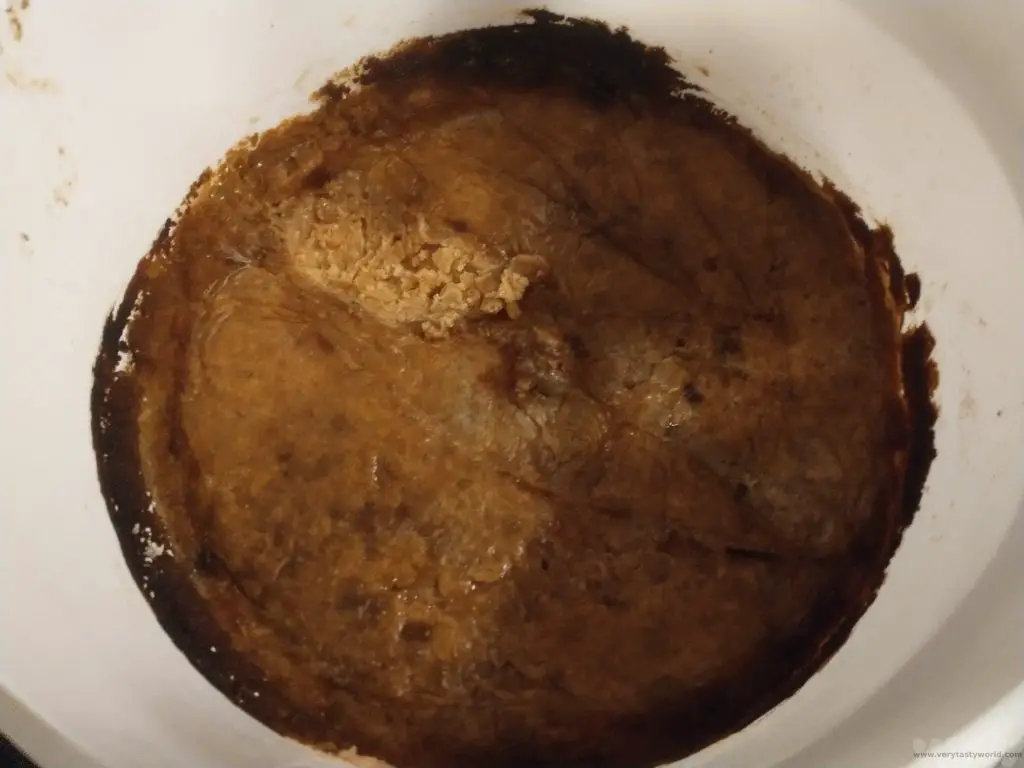
An initial taste revealed it to be really delicious – salty and savoury with a heady aroma. We do a lot of food preservation via a lacto-fermentation process and are generally a bit scared of mould which is considered to be a Bad Thing. If food goes mouldy, it is dangerous and should be chucked. With the miso, the covering of the weight did develop some mould so we were cautious. But it hadn’t affected the food, so all was well.
It turned out that we had managed to ferment about 3kg worth! That will keep us going for a while. We carefully washed some old plastic tubs from takeaway food – these are brilliant for storage – decanted the miso from the tub and put it into the fridge for future use. As a fermented food, it should have a very good shelf life.


The first thing we made with the miso was soup – the traditional accompaniment to many Japanese meals. Our miso was so delicious that it was possible to make a nice drink by simply pouring boiling water onto the paste, mixing and devouring, but that was too crude an approach.
The very best miso soup starts with a dashi, which is a soup stock. There are several types of dashi. You can get instant powdered dashi and just add water but it’s really easy to make your own using ingredients that are generally easy to find from Asian supermarkets. The process is very simple and much quicker than traditional stock making in European cuisines, which generally require ingredients such as meat, vegetables and spices to be boiled for several hours. And it’s definitely worth the not very considerable effort.
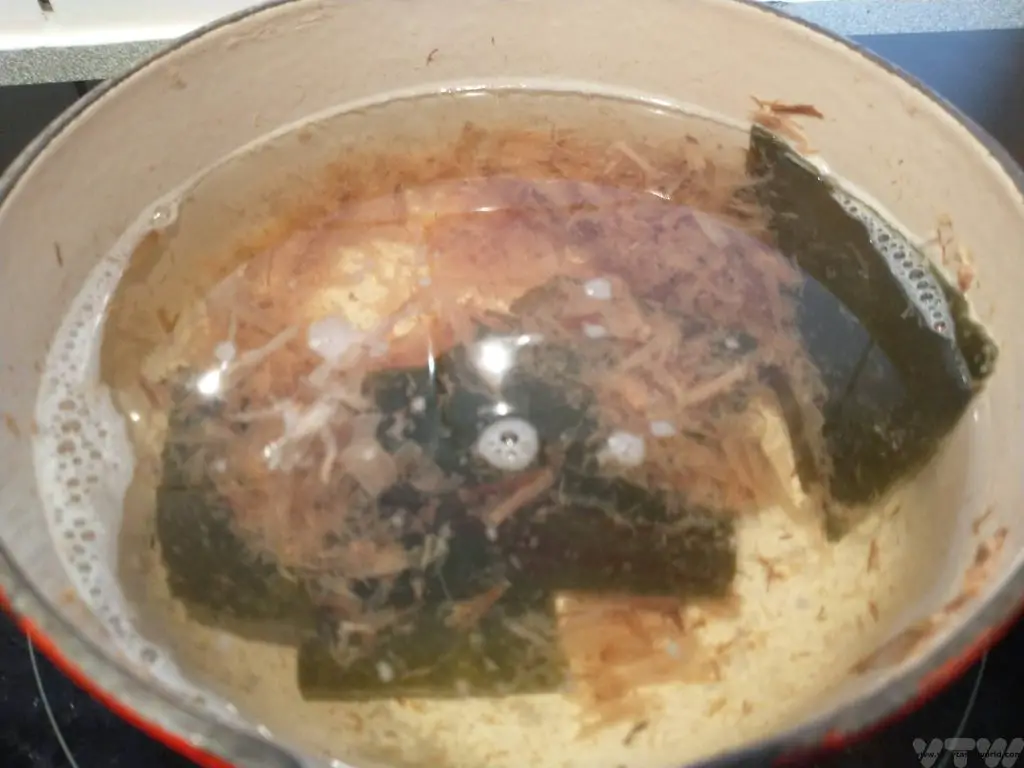
Dashi usually only uses a couple of ingredients. The dashi we made used kombu (kelp – a seaweed) and katsuobushi (bonito flakes, which are skipjack tuna flakes that have been simmered and smoked, then dried in the sun to ferment and finally shaved to wafer thin slices). Katsuobushi, like many fermented fish products (think Thai nam pla – fish sauce), smells somewhat stinky and rather unpleasant when you open the packet, but somehow it adds a magical quality to the finished stock. Other dashi ingredients could include dried shiitake mushrooms or dried anchovies. Dashi definitely puts the “mmm” into umami.
We simmered kombu and bonito for 20 minutes, skimming off any froth from the surface of the broth. Then we sieved the broth and kept the solid materials. A bit like olive oil, this was the primary dashi, but it’s possible to resuse the dried base ingredients to make another dashi.
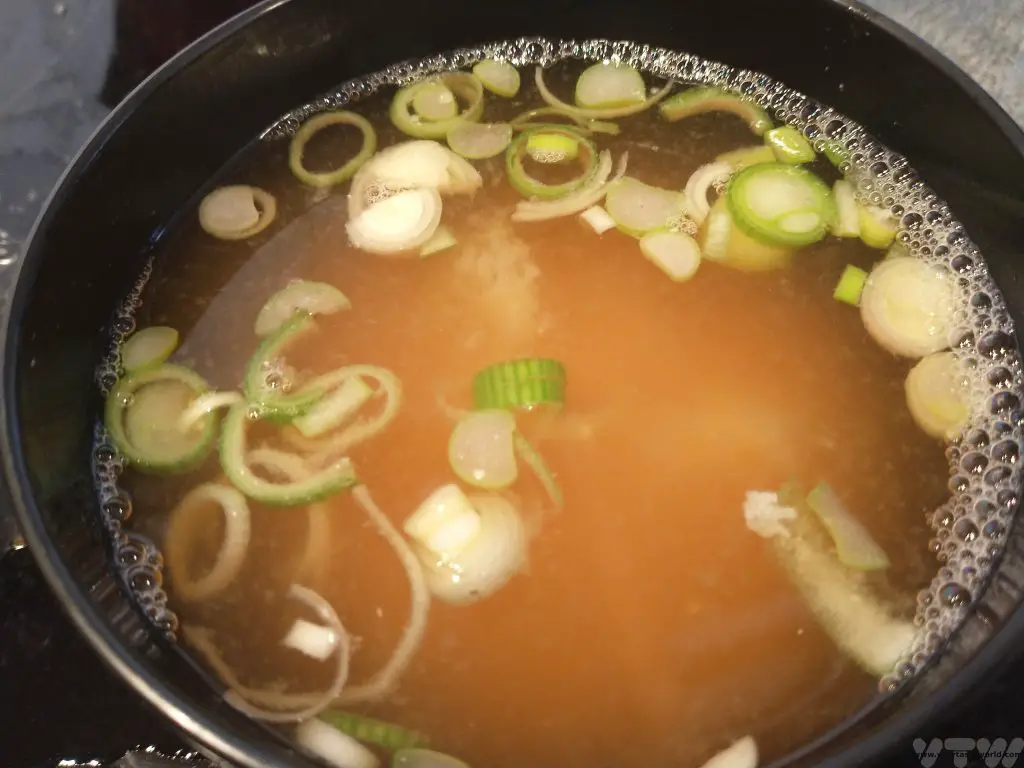
When the dashi is ready add a tablespoon of miso paste and bring to the simmer.
Miso soup usually has some additional ingredients such as negi (like spring onions), tofu, mushrooms or wakame seaweed.
You can find our detailed recipe for making miso soup here.
And here is a link to the highly recommended Preserving The Japanese Way book.
Please note that this post contains affiliate links. If you click the link and decide to make a purchase we will earn a small commission, at no cost to you, which helps towards running this site.
- Recipe: Simmered Shiitake Mushrooms
- How to Use Public Transport in Japan
- RECIPE Oyakodon Donburi
- Planning a Trip to Japan
- The Makanai: Cooking for the Maiko House
- Setsubun Food – Bean Throwing Day
- The Gassho Farmhouses of Rural Japan
- Recipe: Japanese Simmered Pork Belly – Buta no Kakuni
- RECIPE: How to Make Umeboshi
- RECIPE Oyakodon Donburi
- Zero Waste Recipes Before Your Holiday
- RECIPE: Vegetable Biryani Tamil Nadu Style
- RECIPE: Vegan Wild Garlic Pesto
- Recipe: Venetian Pasta Sauce
- RECIPE: Biryani Raita Recipe
- RECIPE: How to Make Costa Rica’s Gallo Pinto
- Recipe: Japanese Simmered Pork Belly – Buta no Kakuni
- RECIPE: How to Make Umeboshi