Home » Articles posted by Colin and Mitch (Page 2)
Author Archives: Colin and Mitch
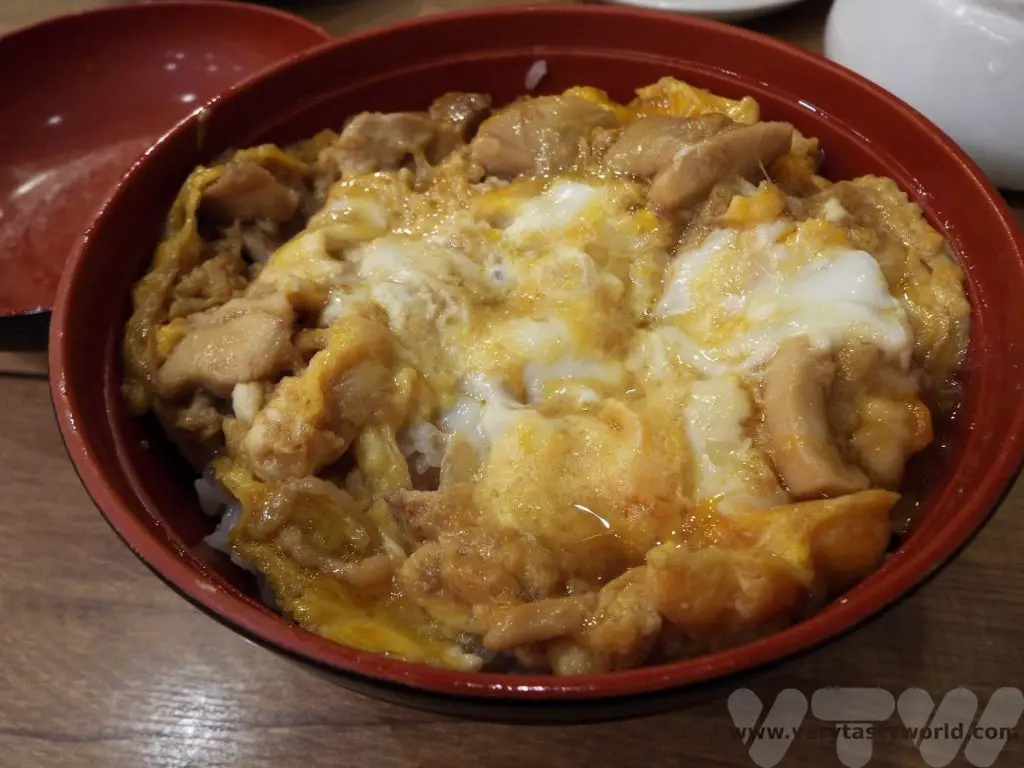
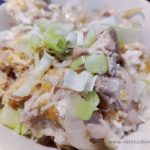
RECIPE Oyakodon Donburi
Oyakodon is a hug in a bowl – the ultimate in Japanese comfort food. Donburi are rice bowls topped with meat, fish, vegetables and other delicious ingredients. Oyakodon is a special type of donburi, which means ‘mother and child’. This is because the main components are chicken and egg! It’s an easy dish to make at home, so here is our recipe for oyakodon.
The great thing about oyakodon is that it is a simmered dish – no frying is needed. It’s also a one pot dish, where (apart from the rice) everything is cooked in the same pan. It has a lovely complex flavour – umami from the dashi (stock), salty from the soy sauce and sweet as well, a great combination.
There are specialist oyakodon restaurants in Japan – the dish is cheap and popular and, of course, delicious.

The base of okyakodon is dashi, a Japanese stock usually made from kombu (kelp seaweed), bonito flakes (shaved fish flakes) or shiitake mushrooms. The ingredients are simmered in water for several minutes and then removed leaving a clear stock full of umami flavour. Dashi forms the basis of many Japanese soups including its famous miso soup.
We have a recipe for dashi here. But if you don’t have time (or ingredients) to make dashi you can buy dashi powder online or at Asian supermarkets. It is possible to make oyakodon without dashi and still get bags of flavour. If you can’t find the powder or don’t want to use dashi, chicken stock or a stock cube will add excellent flavour.
We always use chicken thigh meat to make oyakodon as it has loads more flavour than chicken breast. Interestingly, while chicken breast meat is more expensive than thigh meat in the UK, it’s the other way round in Japan. Chicken thighs are considered to be the best meat for this dish. However, if you prefer chicken breast it’s absolutely fine to use that instead – the flavour of the broth is fantastic and because you are simmering the meat, it won’t go dry but will remain tender and juicy.
Oyakodon Equipment and Pans
If you go to an oyakodon restaurant in Japan they have special pots to cook the food in for individual portions which means that you get the omelette perfectly balanced atop the chicken.
But if you’re cooking at home for more than one person, and are serving different portions from the same pot it’s a bit more difficult to get the fluffy omelette on top. But however you present the food, it is still guaranteed to taste delicious! We tend to use as small a saucepan as we can get the ingredients into – that is with the smallest diameter – in order to get the egg to rest on top.
We have a rice cooker which is absolutely brilliant for cooking rice. Add rice and water (twice as much as the rice by volume), pop on the lid, press the switch and it will cook the rice perfectly, automatically switching itself to a keep warm function. If you don’t have a rice cooker you can cook the rice in a saucepan – same ratio, just let the rice simmer until all the water has absorbed.
Recipe Oyakodon: Ingredients
2 chicken thighs per person
1 onion
100ml dashi (if you can’t get dashi use chicken stock)
1 tbs soy sauce
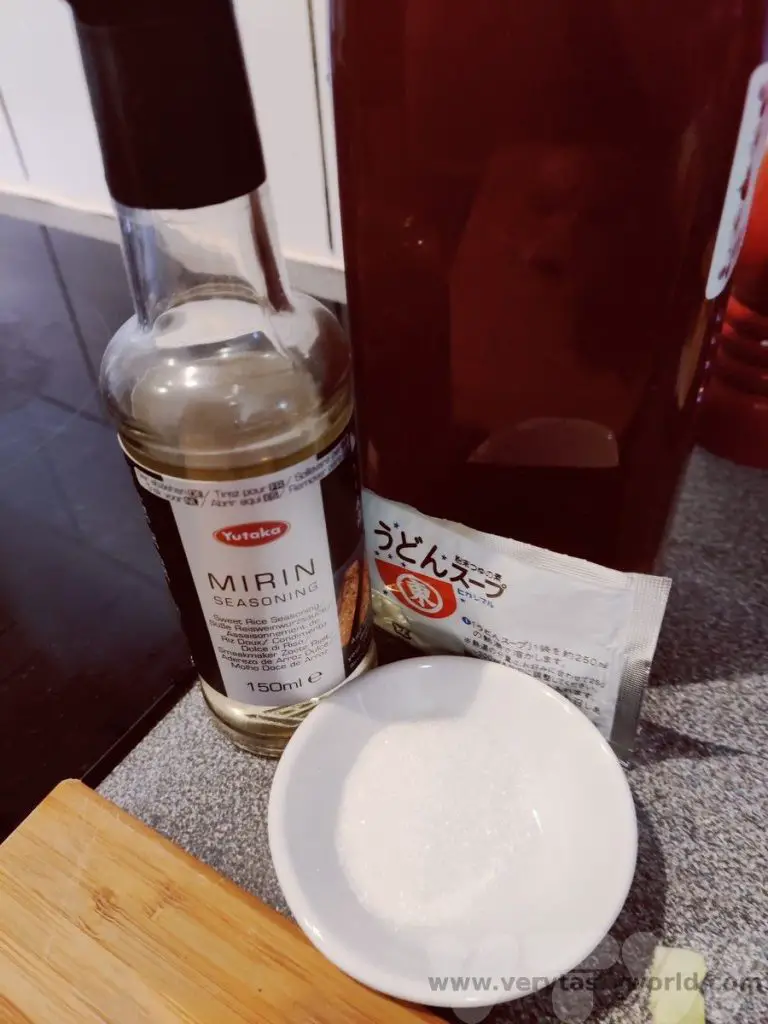
1 tbs mirin (If you can’t get mirin, use cooking sake. If you can’t get cooking sake use white wine. Whatever substitute you use, add an extra teaspoon of sugar.)
1 tsp sugar
2 eggs
Rice – about 100g per person
2 spring onions (green onions) to serve

Method
Start cooking your rice. We use sushi rice as it has a nice texture. We put it in a rice cooker but you can use a pan on the stove. The ratio for both methods to use is 1 cup of rice to 2 cups of water. Cook until all the water is absorbed.
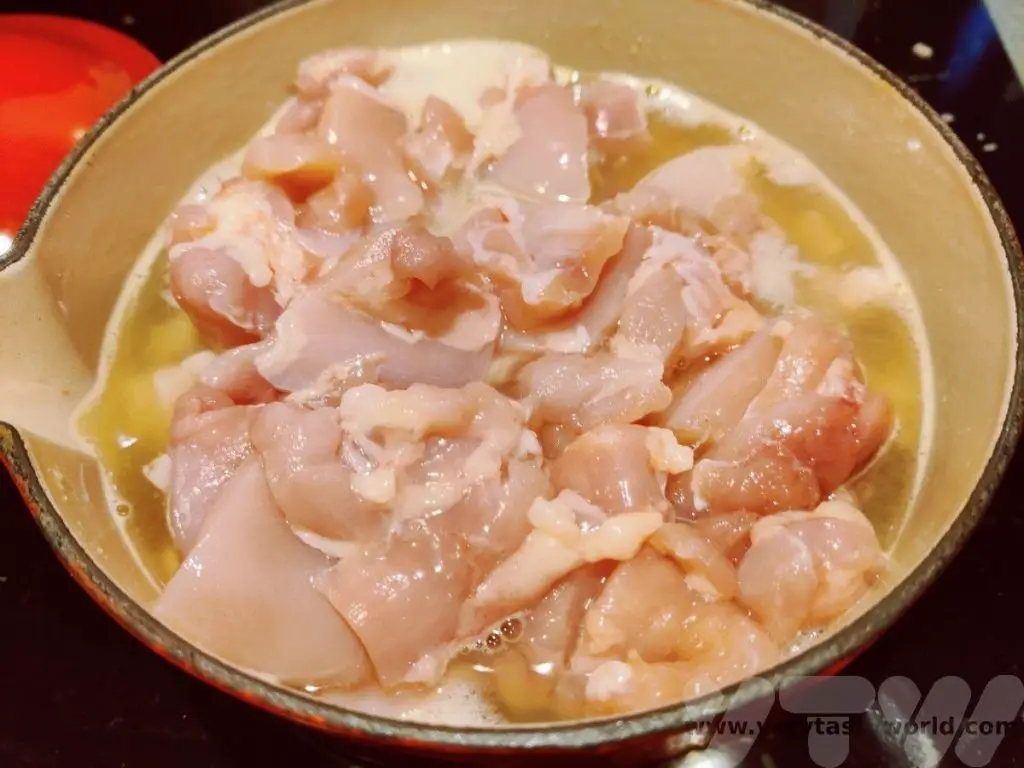
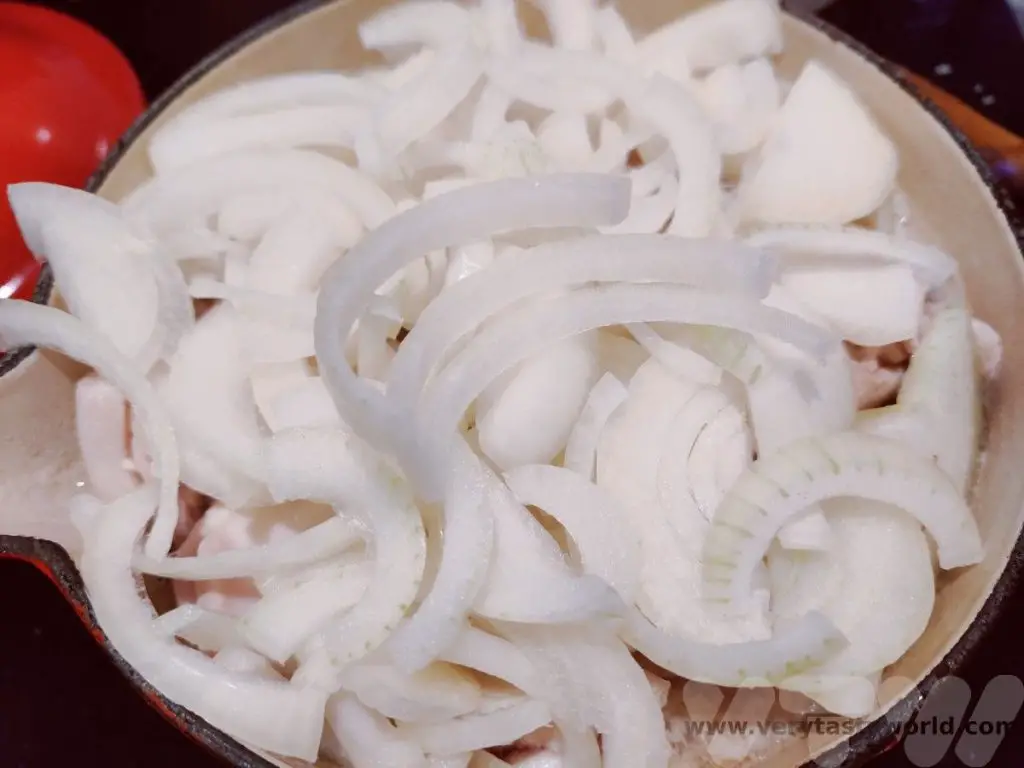
Chop up the chicken into bite-sized pieces. Slice the onion into thin slices.
Make the dashi or stock and add the soy sauce, mirin and sugar. Put into the smallest diameter pan you have (it needs to be deep enough to accommodate all the ingredients). Bring to a boil. When the liquid is simmering add the raw chicken. Stir it around to make sure each piece can cook.
Allow the chicken to simmer for about 5 minutes.
Add the onion on top and simmer further for about 10 minutes.
Let everything simmer until the rice is cooked.
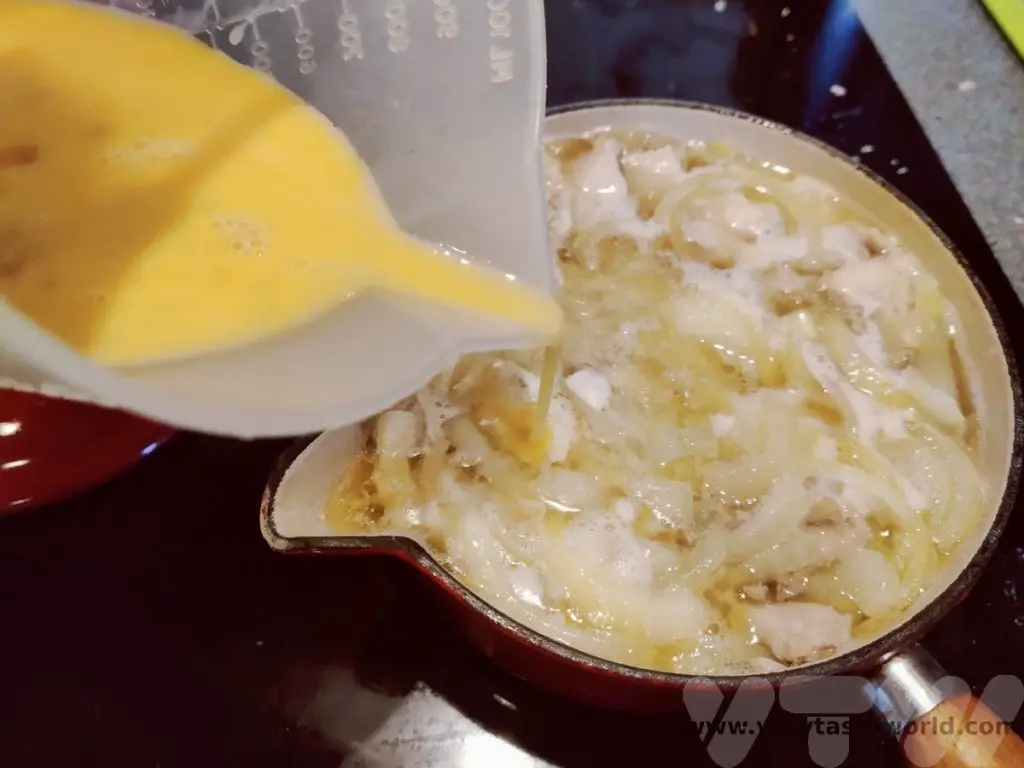
Beat the eggs gently in a bowl.
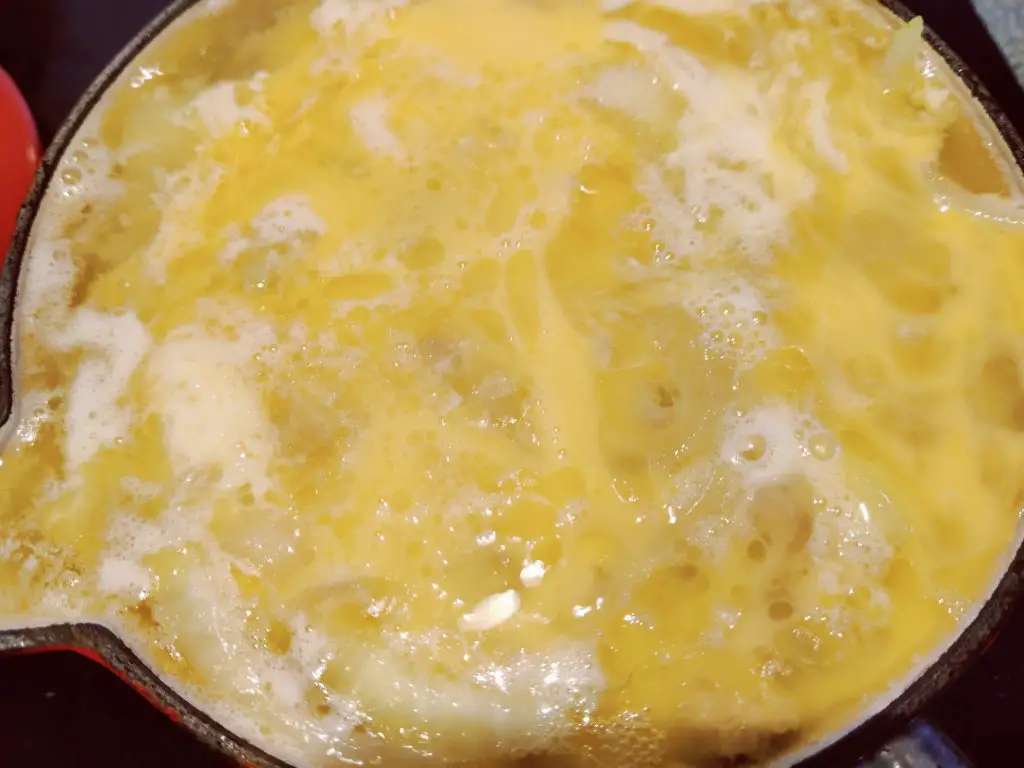
At last minute pour the egg slowly on top of the chicken and onions. Turn the heat off and let the eggs cook for a couple of minutes in the residual heat.
Place the rice in a bowl.

Then slide the chicken, egg and any broth on top. This is the tricky part. You can buy special donburi pans which can cook an individual portion that glides neatly onto the rice bowl. But in a practical kitchen, when you are cooking one dish for more than one person and using a standard saucepan, it’s a bit trickier to produce multiple portions without the egg breaking up. So, you may not be able to get the perfect presentation but the finished result will still taste utterly delicious.

Finely chop the spring (green) onions and use them for garnish. Enjoy!
Related Posts You May Enjoy


- RECIPE Oyakodon Donburi
- Zero Waste Recipes Before Your Holiday

- RECIPE: Vegetable Biryani Tamil Nadu Style

- RECIPE: Vegan Wild Garlic Pesto

- Recipe: Venetian Pasta Sauce
- RECIPE: Biryani Raita Recipe

- RECIPE: How to Make Costa Rica’s Gallo Pinto
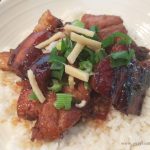
- Recipe: Japanese Simmered Pork Belly – Buta no Kakuni
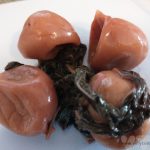
- RECIPE: How to Make Umeboshi

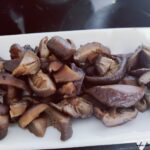
- Recipe: Simmered Shiitake Mushrooms
- How to Use Public Transport in Japan

- RECIPE Oyakodon Donburi
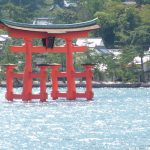
- Planning a Trip to Japan
- The Makanai: Cooking for the Maiko House

- Setsubun Food – Bean Throwing Day

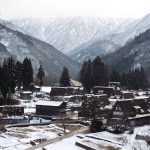
- The Gassho Farmhouses of Rural Japan
- Recipe: Japanese Simmered Pork Belly – Buta no Kakuni
- RECIPE: How to Make Umeboshi
Day of the Dead in Campeche
Our trip to Mexico was a long time coming. Originally planned for March 2020, we had to cancel the trip a week before we were due to fly, due to the pandemic, and rearranged for November 2020. And then cancelled that due to the pandemic. Finally, we managed to make the trip two and a half years later. But we decided to time the new journey to coincide with Mexico’s Day of the Dead – Dia de los Muertos – celebration which takes place in late October/early November and are very glad that we did. We were to spend Day of The Dead in Campeche.
We travelled on buses through Mexico, starting in Mexico City, visiting Puebla, Oaxaca, San Christobal, and Palenque before arriving in Campeche. The journey then proceeded to Merida, Chichen Itza and finally Cancun. Bus journeys are cheap and convenient but distances can be long.
Campeche is around six hours from Palenque or just a couple of hours from Merida if you are travelling on the bus.
Welcome to Campeche – Aaaarrrr!
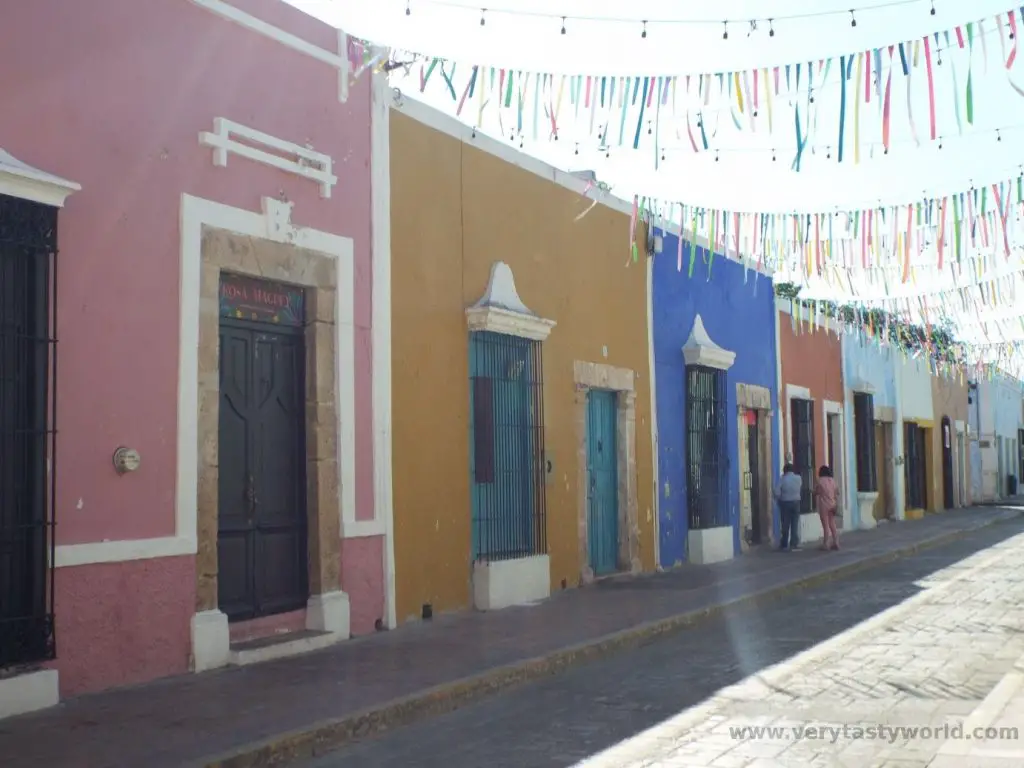
Campeche is the capital city of the state of Campeche and lies on the Gulf of Mexico looking out over the azure sea. It is known for its colourful city centre and history of piracy.

History of Campeche
Campeche’s name derives from the Mayan phrase, Ah-Kin-Pech, which apparently means ‘the place of snakes and ticks’, which doesn’t sound at all inviting. We can confirm that no snakes or ticks were encountered during our visit.
The Spanish landed at Campeche in 1517 on St Lazarus’s day – the 29th July – and named the location Lazarus. The conquistadors began their occupation of the Yucatan peninsula, consolidating it in 1541-2, when they founded the first enduring Spanish councils at Campeche and Merida. Due to its coastal location Campeche became an important port. Valuable goods such as gold and silver passed through the town but, because of this, it became a target for local pirates. In 1663 the Sack of Campeche, led by pirates Christophe Myngs and Edward Mansvelt, involved a mass of pirates from around the Caribbean who got together some 14 ships and 1400 men and plundered the port.
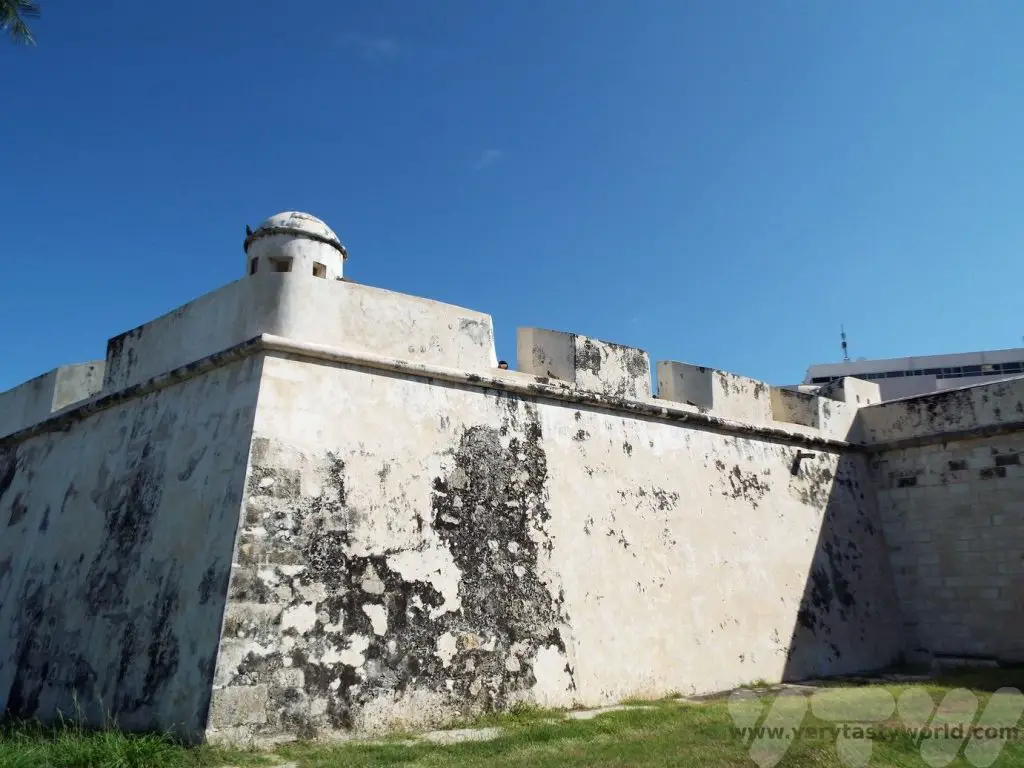
In 1685 Dutch pirate Laurens de Graaf launched an attack on the city and killed a significant proportion of the population. As a result of these horrific raids, the authorities decided to fortify the central zone and built an extensive wall around it.
Campeche became recognised as a city in 1744, the first in the region. The community developed something of a rivalry with those in nearby Merida, although both cities eventually worked together to try to form an independent state of Yucatan. However, they were integrated into Mexico in 1849.
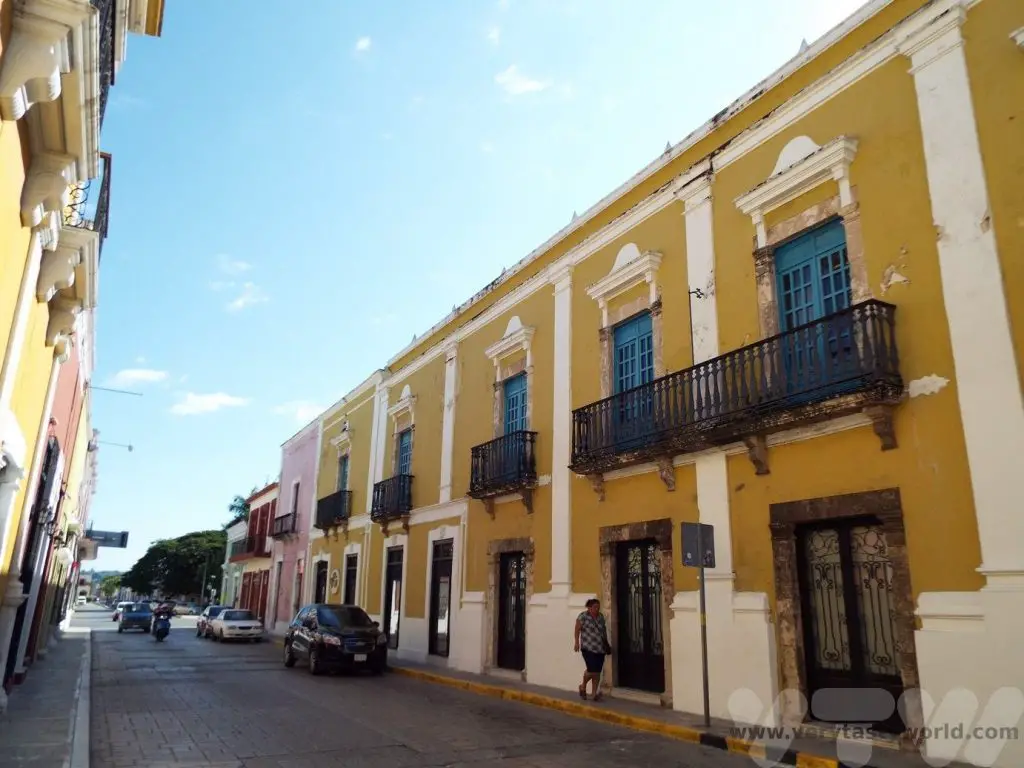
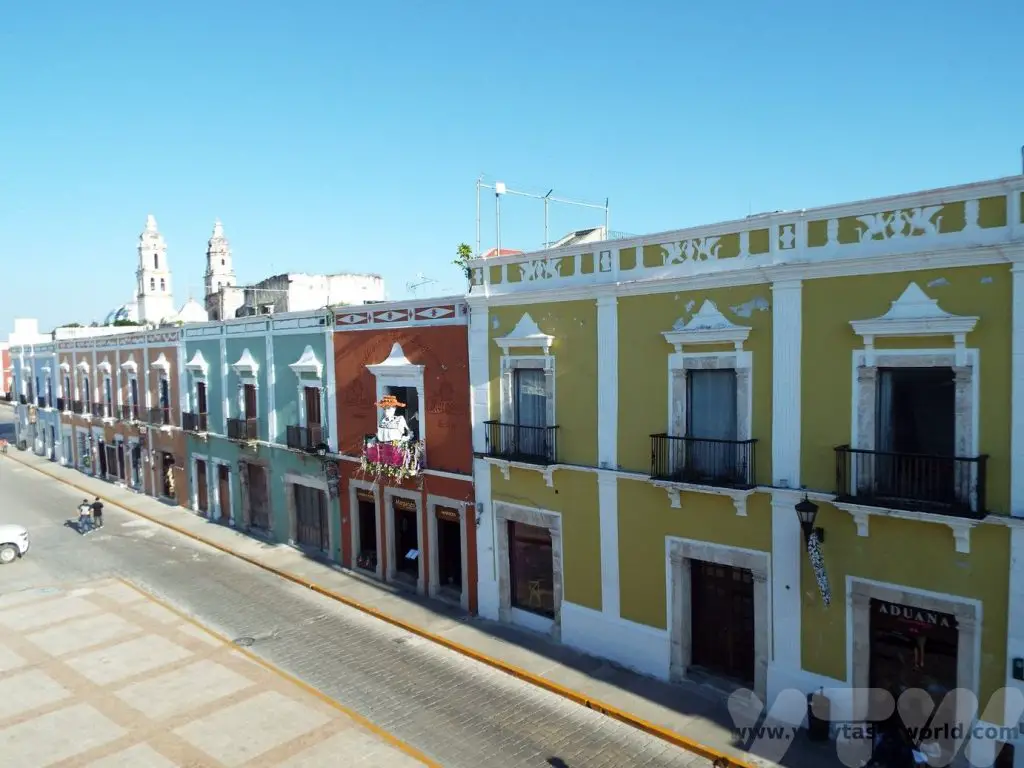
Campeche’s fortunes have waxed and waned over the years. The city is incredibly photogenic with its well-preserved colourful buildings and pirate legacy and as a result it has attained UNESCO status. It isn’t one of the most popular destinations for tourists, partly because there are many other places to visit on the Yucatan peninsular, but we recommend spending some time in Campeche if you get a chance.
Things to Do in Campeche
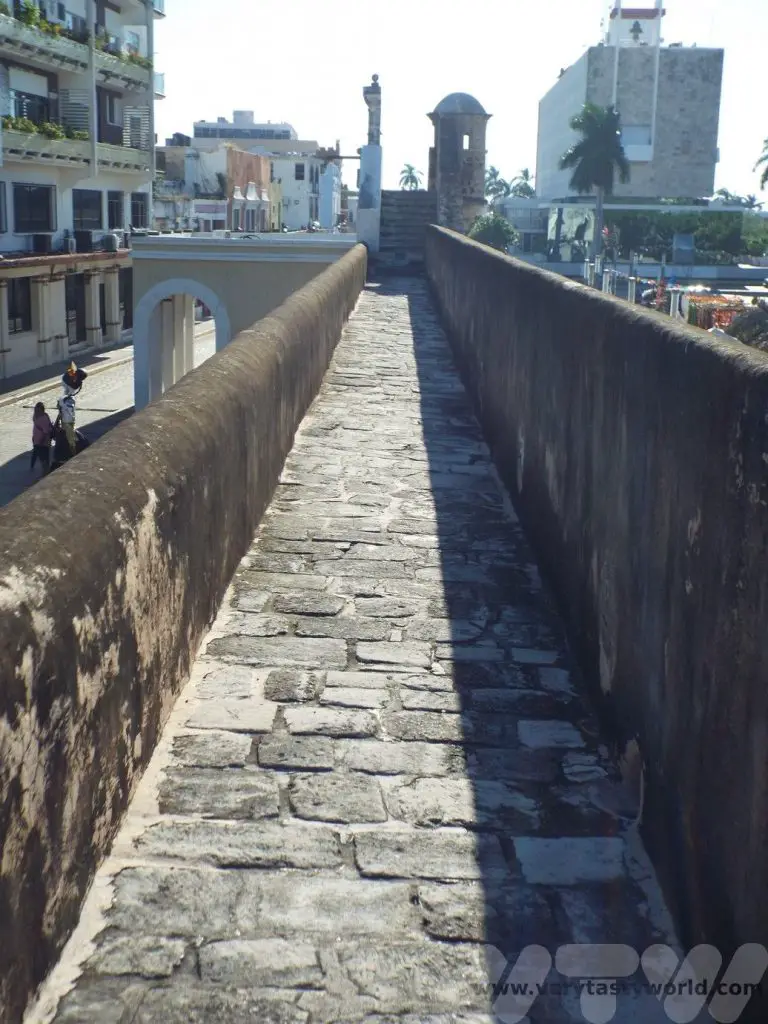
There are plenty of walking opportunities, whether strolling along the Malecon walkway, looking out to sea, taking in the sights from the top of the fortified walls, or wandering through the colourful streets.

As well as walking along the walls, there are a couple of museums located in two of the bastions which are located at opposite ends of the wall closest to the sea.
As with many cities, we find the tourist information centre to be a useful source to discover the local attractions. The friendly staff were happy to help us get acquainted with Campeche and suggested places to visit.
Pirate Museum
Documenting Campeche’s history as a port city, this small museum showcases information and artefacts with a focus on understanding its fortunes at the hands of the pirates over the years.
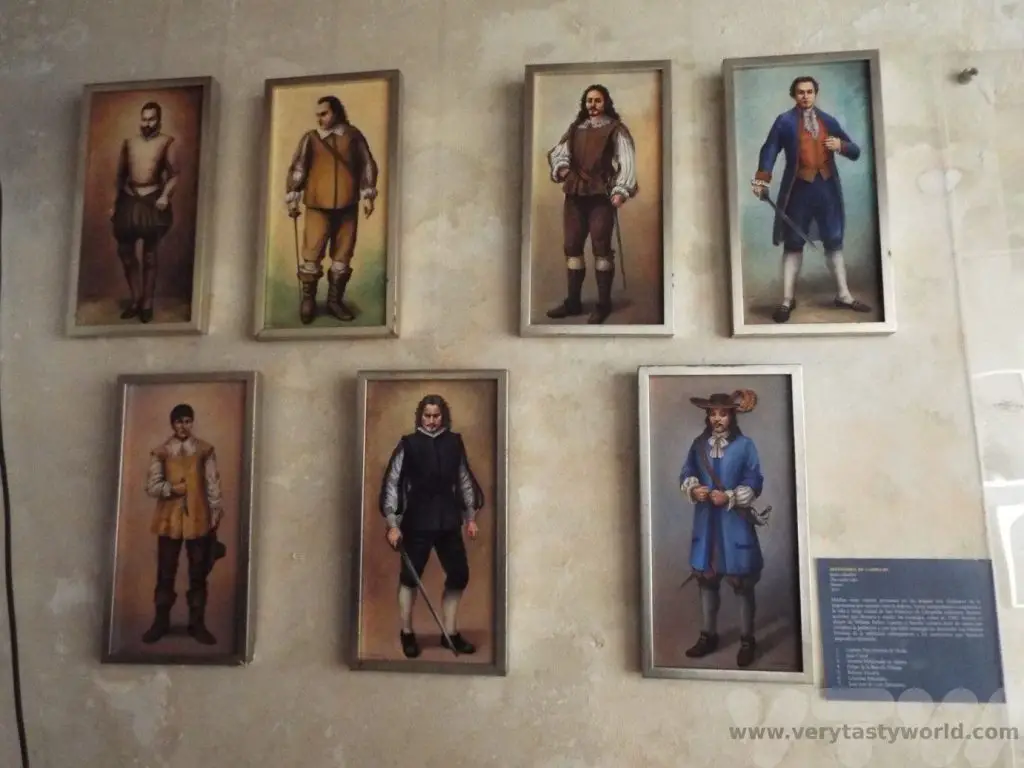
It is a very honest exhibition and dispels some of the romantic myths about pirates and piracy. Although films such as Pirates of the Caribbean have given us the impression of swashbuckling buccaneers, the real pirates who attacked Campeche were often society’s outcasts – marginalised and brutal.
Interestingly, Sir Francis Drake, viewed by the English as a heroic explorer who circumnavigated the globe, was despised by the Spanish as a ‘privateer’, a person who engaged in maritime conflict. Although perhaps it’s not really that surprising – the English and Spanish were fierce enemies at that time and many of the attacks by pirates were sanctioned by the state as ‘commerce raiders’ to undermine Spanish authority in this region.
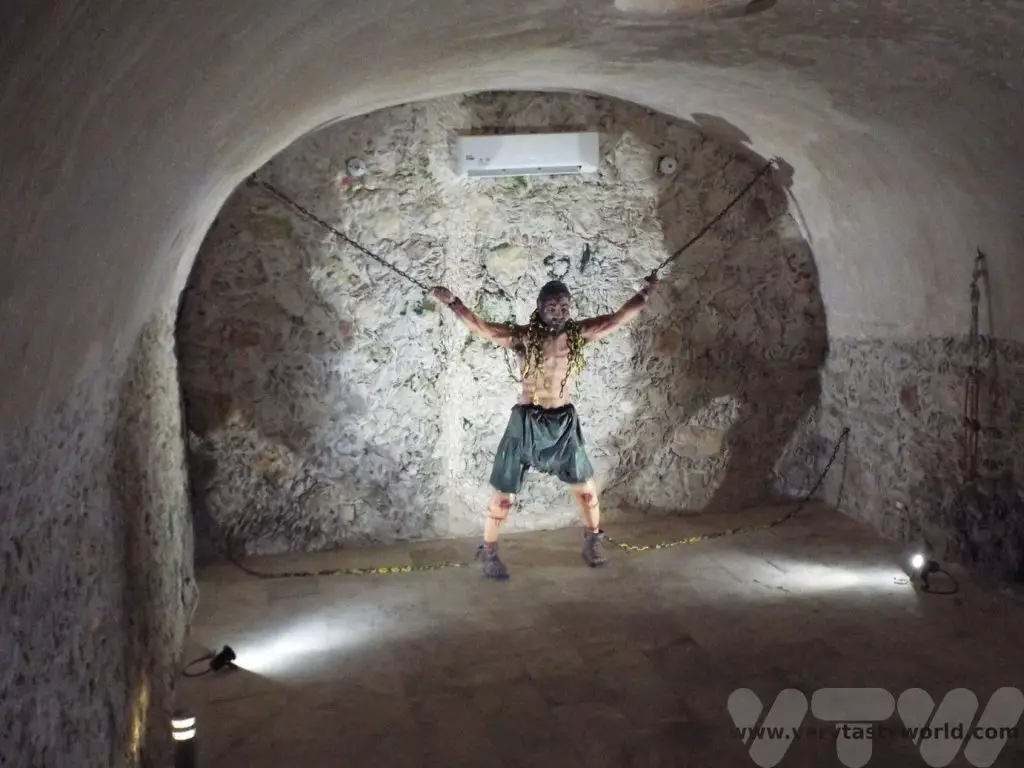
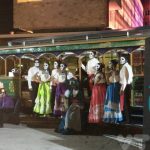
And, naturally, the museum has a bunch of creepy mannequins in the dungeon.
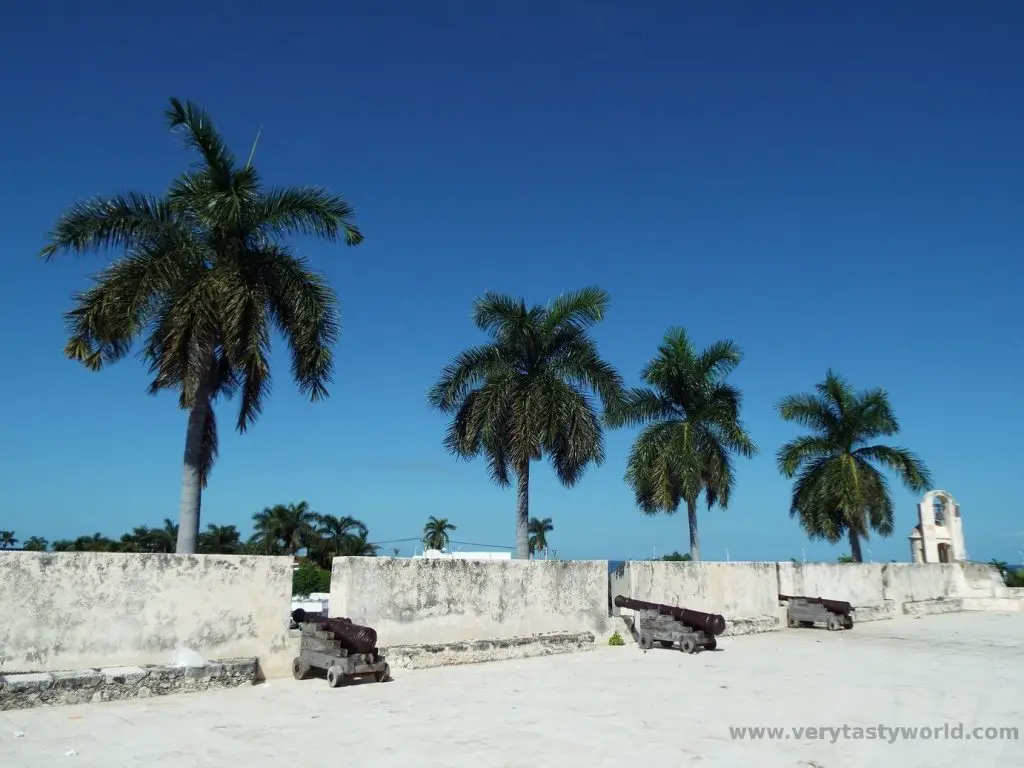
Don’t forget to head out to the city walls where you can see some of the cannon that defended Campeche.
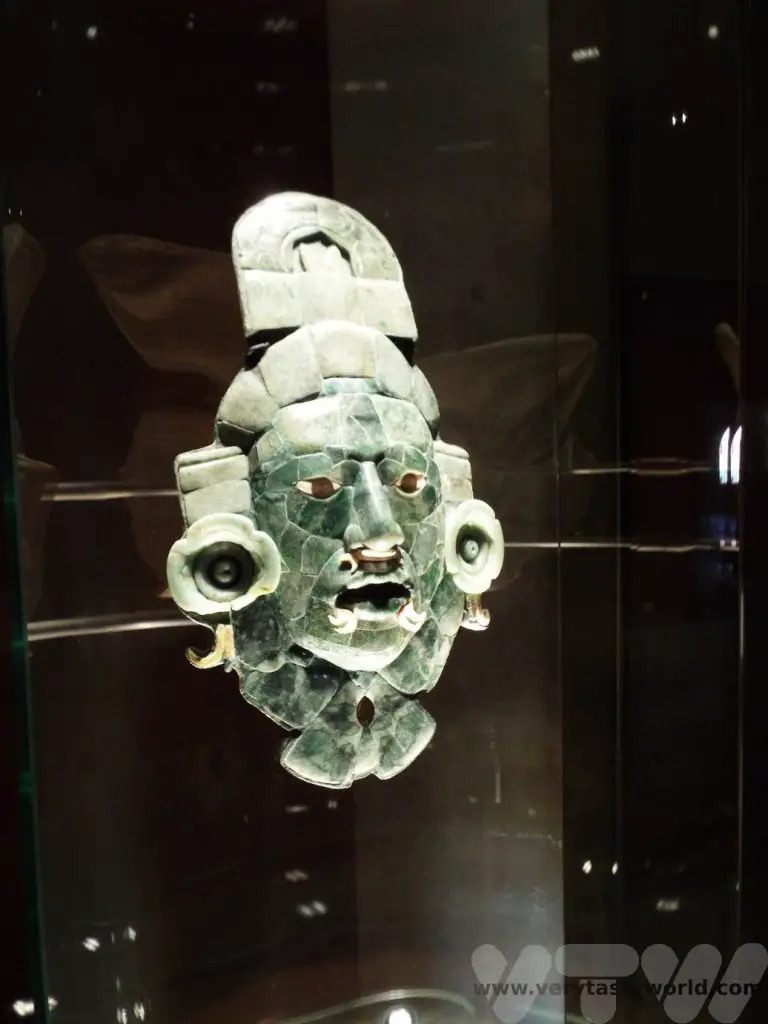
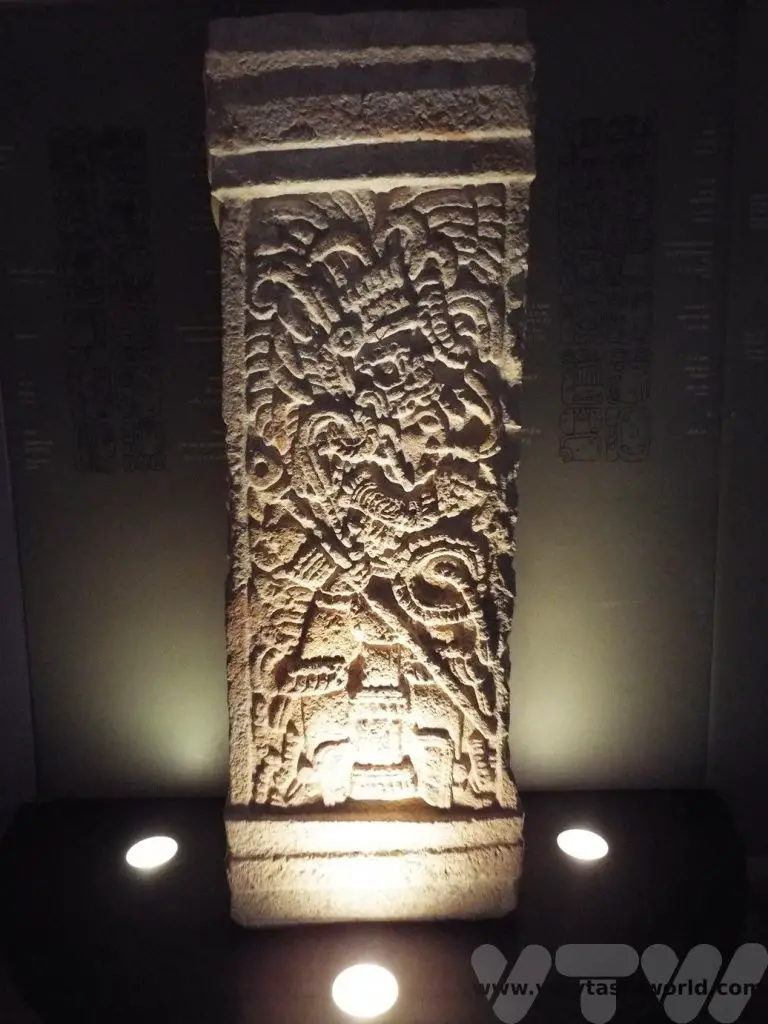
Museo de La Arquitectura Maya
This small but interesting museum on Baluarte de la Soledad houses a number of archaeological artefacts that have been found in the region. Exhibits are in English and Spanish. It was particularly interesting to learn about the writing systems of the Mayan people.
The highlight exhibit is the elaborate and beautiful mask of the God K’wiil.
Make sure you climb up onto the wall at the end of your visit to get some fantastic views of the city in one direction and the Gulf of Mexico in the other.
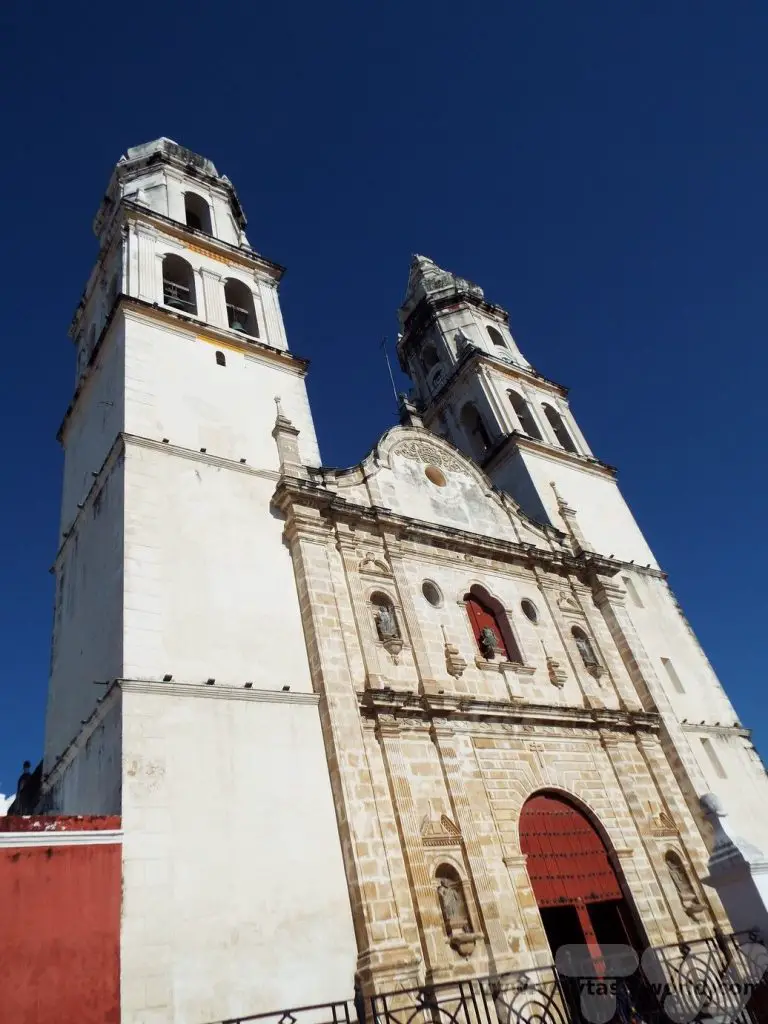
The Cathedral
The cathedral is located at the eastern end of the Plaza de la Independencia and is the most important church in the city. Construction started in the 16th century, soon after the Spanish settlers arrived. The cathedral has been expanded and embellished over the centuries. It has two impressive bell towers and a stone façade.
The Sea Promenade
With its location right on the Gulf of Mexico Campeche’s seafront doesn’t have pristine sandy beaches, so isn’t ideal as a seaside destination. But Malecon de Campeche offers a 7km waterfront path and makes for a lovely walk looking out to the deep blue sea.

Campeche Food
Being located right on the coast there is plenty of seafood to enjoy in Campeche. Prawns are very popular. There are plenty of restaurants in the zona centro to choose from.
We enjoyed battered prawns with coconut and mango salsa and prawns with x’catic sauce. X’catic are a type of chilli which are long and thin and a pale green colour when ripe. They are commonly used in the Yucatan area and one of the specialities is x’catic in a cream sauce. While the chillies have a kick, the cream sauce mitigates some of the heat. And the sauce has an unusual blue-green colour.

Day of the Dead in Campeche
We were lucky to be visiting Campeche during the Day of the Dead. This festival takes place on the 1st and 2nd November each year but preparations for the celebrations start much earlier and it is likely that the famous Day of the Dead parades will take place on the Saturday or Sunday before.
Day of the Dead is a celebration for families to remember and commemorate the lives of their ancestors. The origins are slightly unclear but it is thought that they are a combination of the indigenous commemorations of ancestors with Christian traditions; the timing of the celebration aligns with Halloween/All Saint’s Day. The Mayan people believe that death is simply another element of life.
In the time leading up to Day of the Dead relatives will visit the graves of their ancestors and will tidy them and prepare for the festival. Some may even exhume the skeletons of their relatives to clean their bones for up to three years after death. Food will be offered to invite their loved ones to visit. The dead will arrive on the 1st November and return the following day.
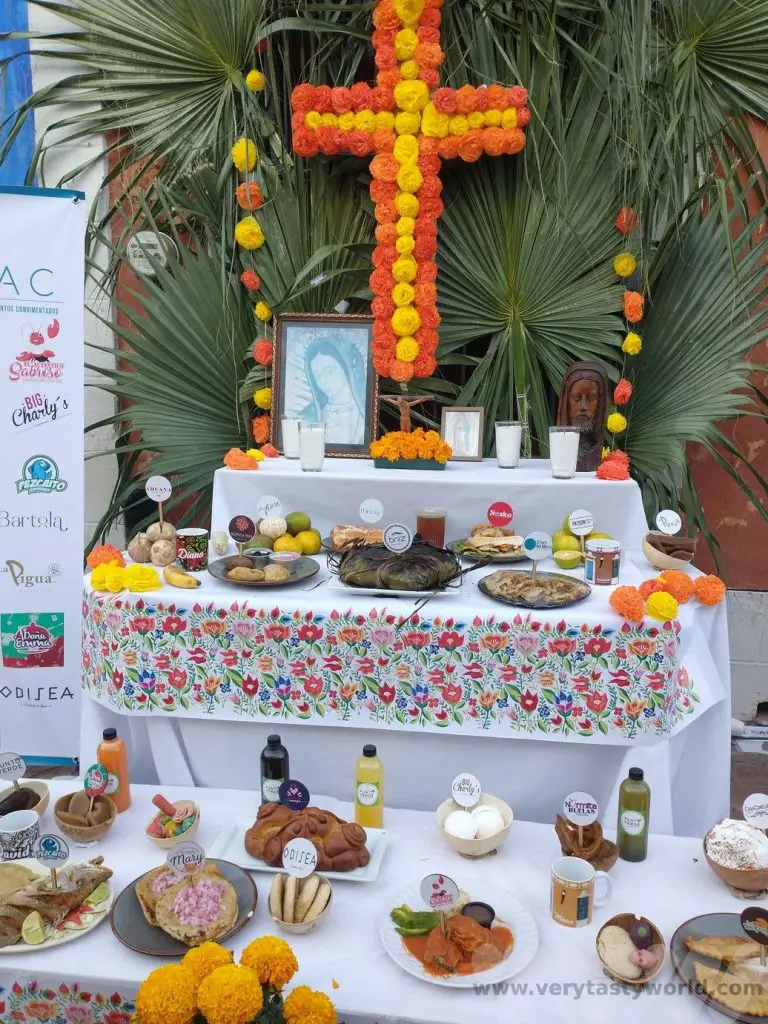
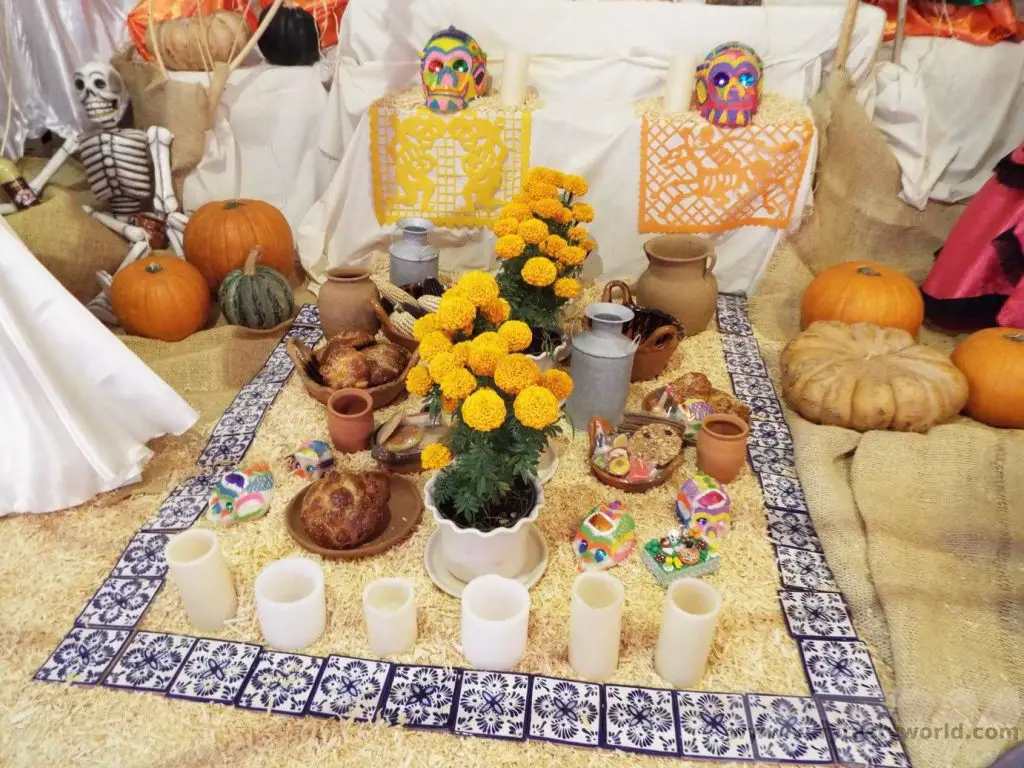
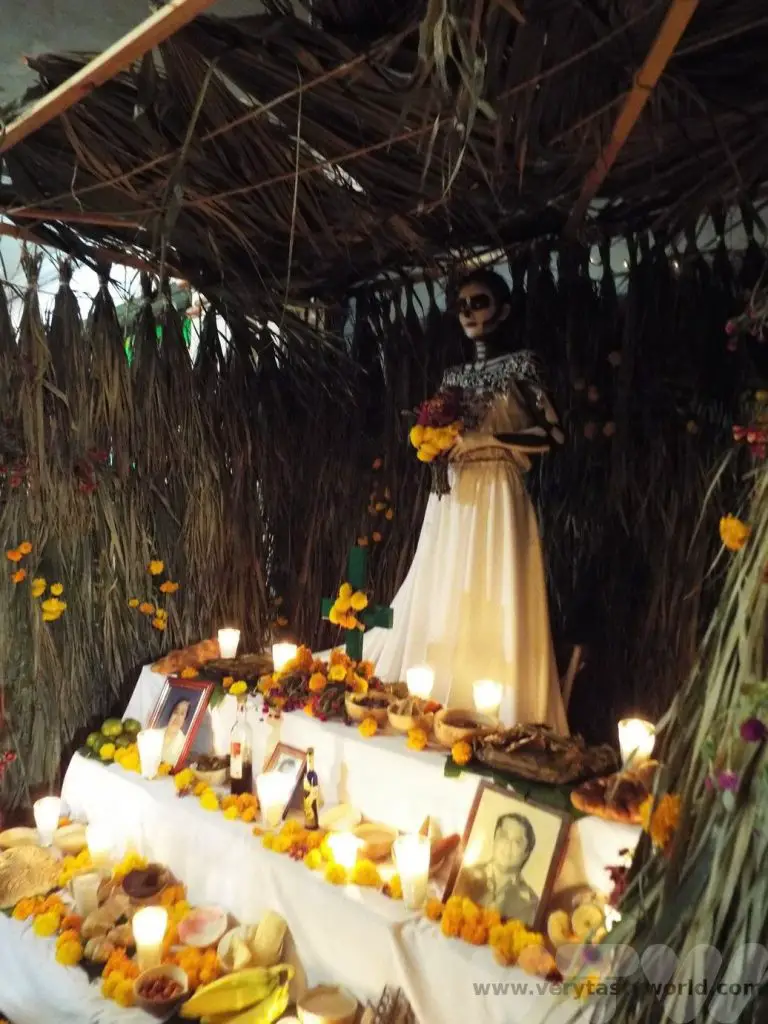
Day of The Dead Ofrenda
In the days leading up to the celebration, families and businesses will set up ofrenda. These are like alters which are highly decorated and lay out offerings to invite their deceased relatives to visit them.
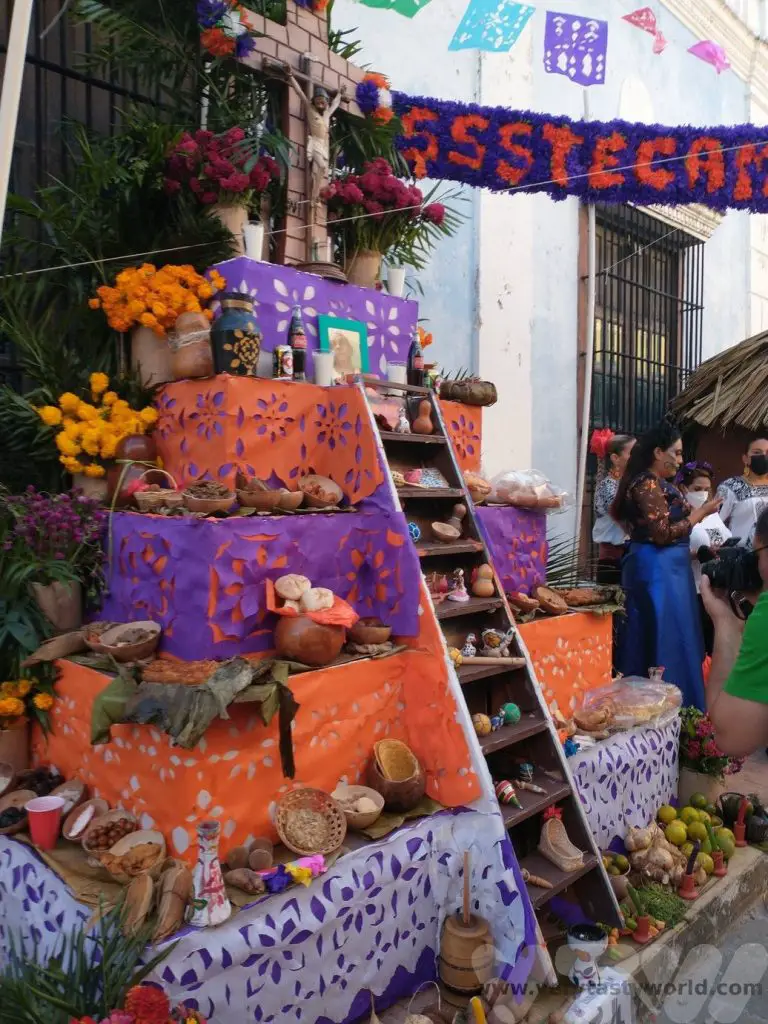
The food offered is real but it is rotated every day and replaced with new offerings. The previous day’s items are eaten by the family so as to ensure that food doesn’t go to waste.
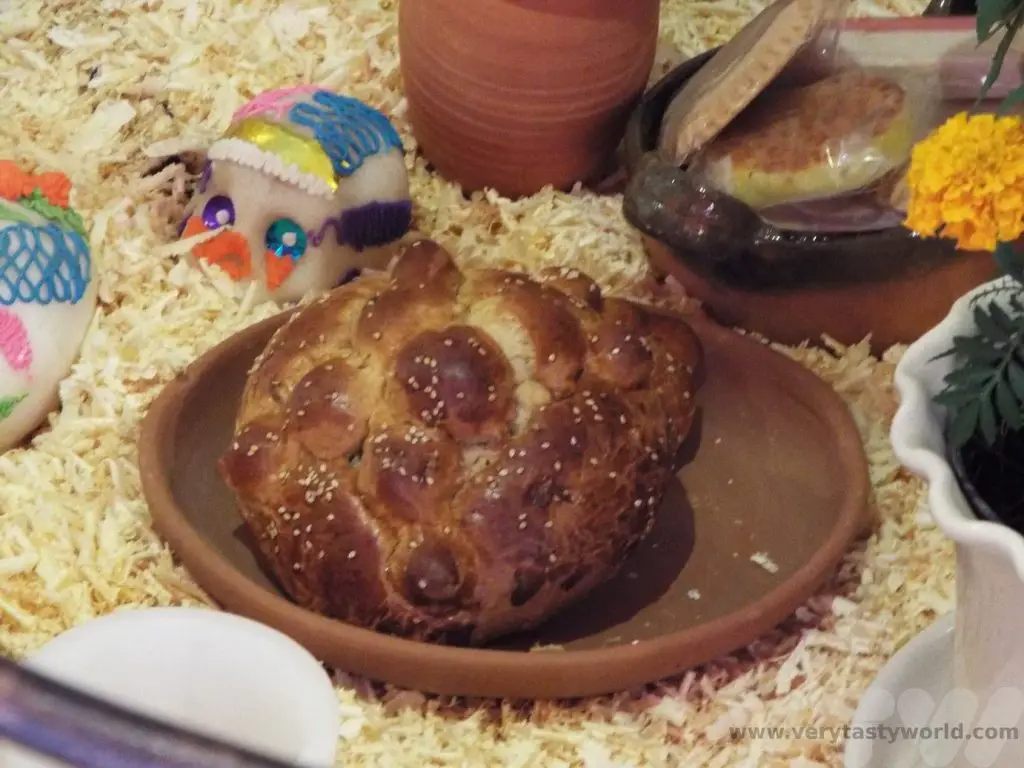
There is special Day of the Dead bread, known as Pan de Muertos. The central bread roll represents a skull and the surrounding sections of the bread symbolise the rest of the body.
Marigolds are an essential part of the ofrenda. We saw fields of marigolds as we travelled through Mexico. The flower represents the fragility of life and its orange hue provides a colourful addition to the ofrenda.
Additionally, photos of ancestors may well be on display. And ofrenda are not restricted to humans. People also remember their pets and offerings are made for those as well.
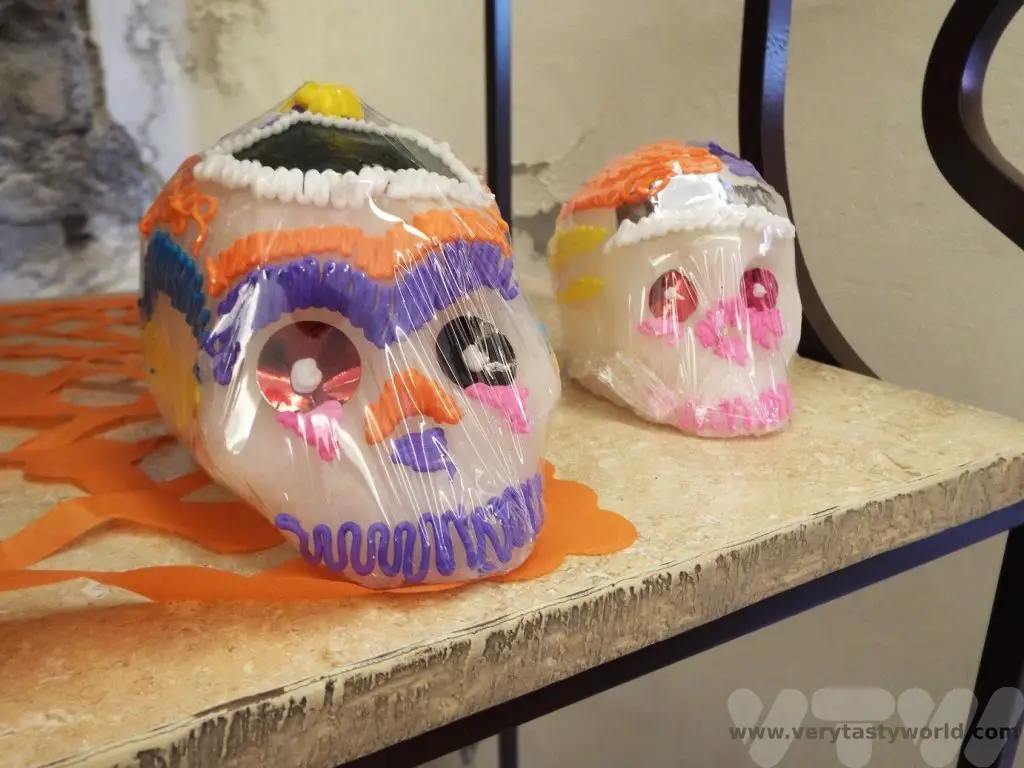
Sugar skulls are a traditional sweet eaten during the festival. These are pure sugar but it is possible to buy chocolate ones as well. They make lovely souvenirs.

Day of the Dead in Campeche – The Celebration
Throughout our journey across Mexico in the days leading up to Day of the Dead, we would see homes and businesses preparing for the celebration. Every hotel and restaurant had decorations and ofrenda set up.
The parades in the big cities such as Merida or Oaxaca are very famous and will generally draw large crowds. We were actually delighted that we were able to join the celebrations in a smaller city. Later on, in Merida, we were able to see further ofrenda and some more celebrations but the main parade was in Campeche.
We arrived on the bus in the late morning and made our way to Calle 59 to get our bearings. This is the main street that is usually buzzing with bars and restaurants but during the afternoon we were able to see the ofrenda being set up.
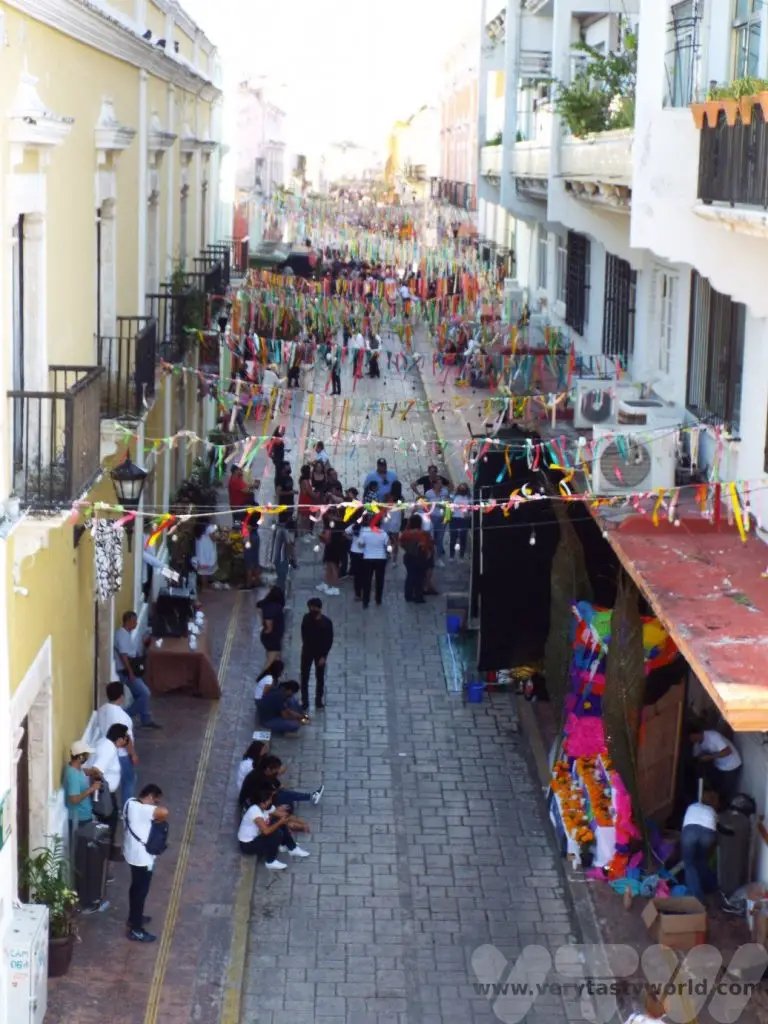
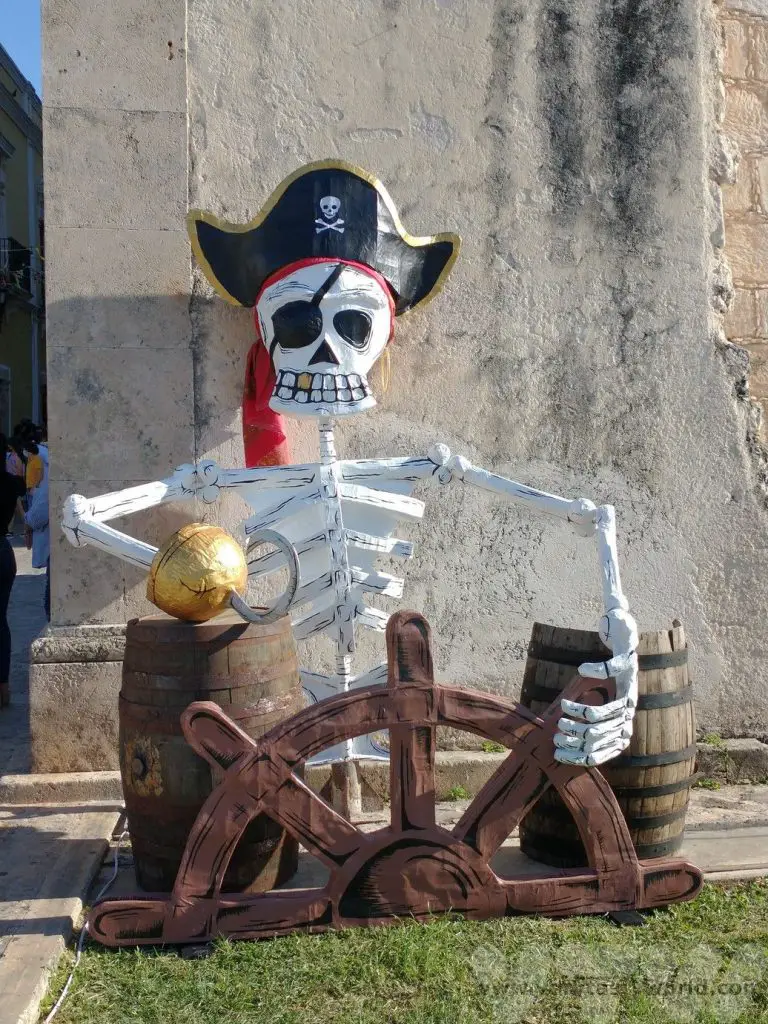
The city decorations reflected the pirate theme.
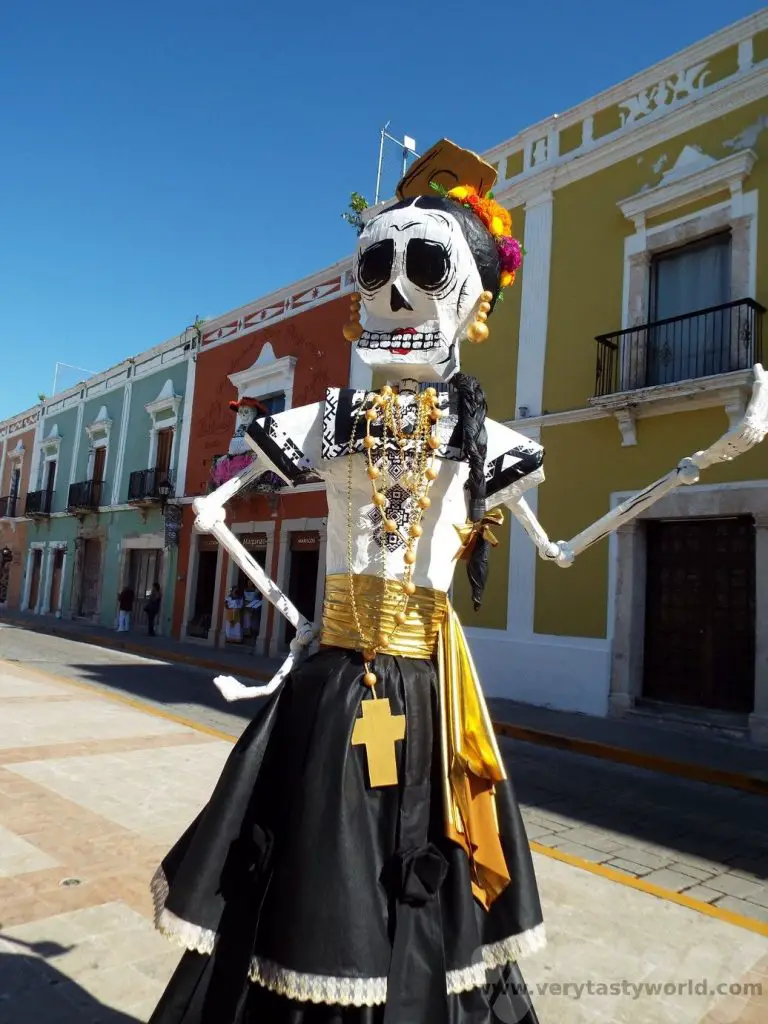
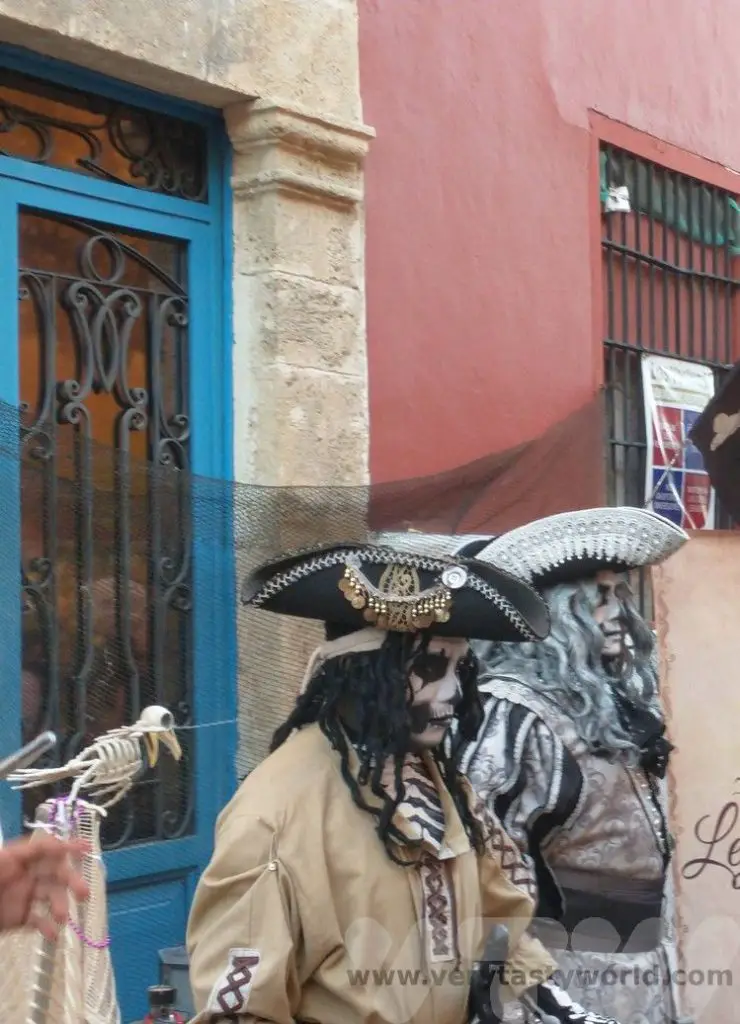
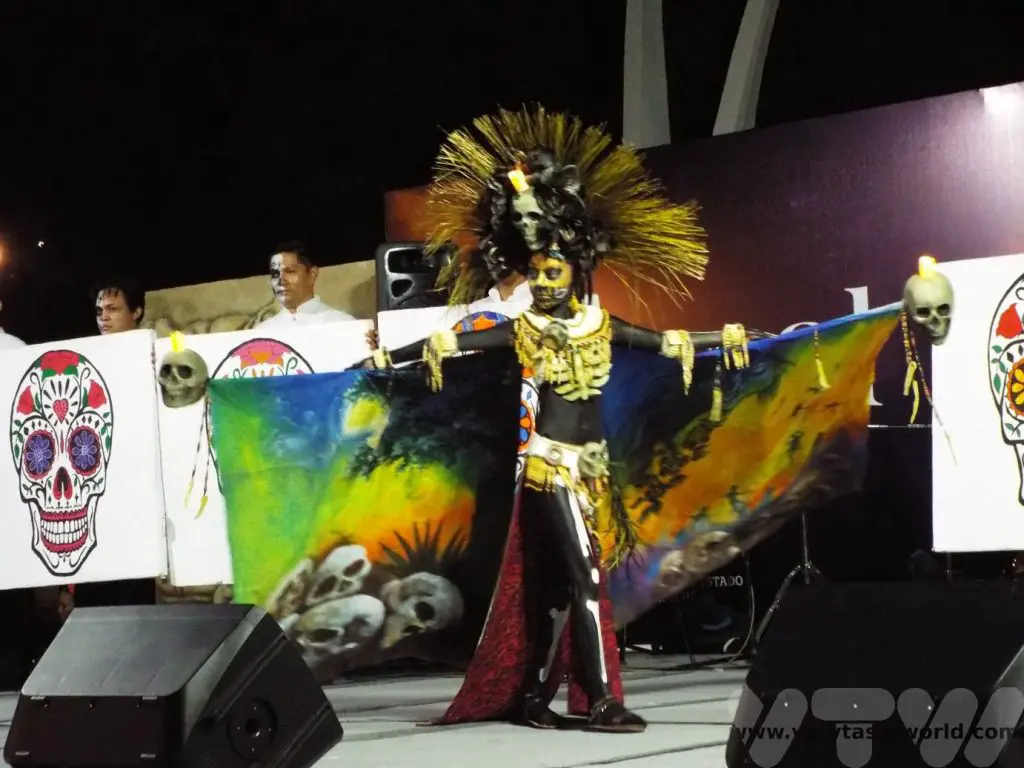
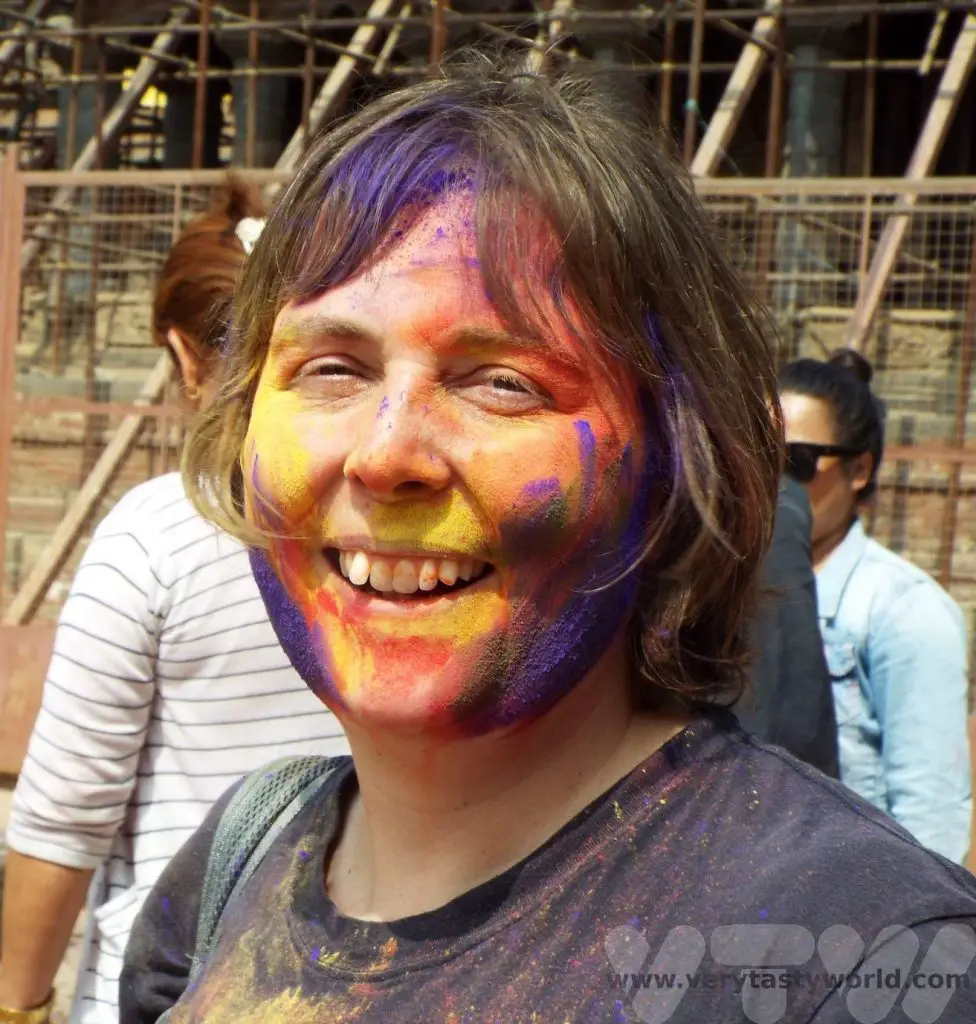
Costumes are an essential part of the celebration. Everyone was happy to pose for photos. It is also possible to get your face painted in full Day of the Dead make-up for a small fee.
Later in the evening the party started. We enjoyed watching the local children perform a dance with great enthusiasm.

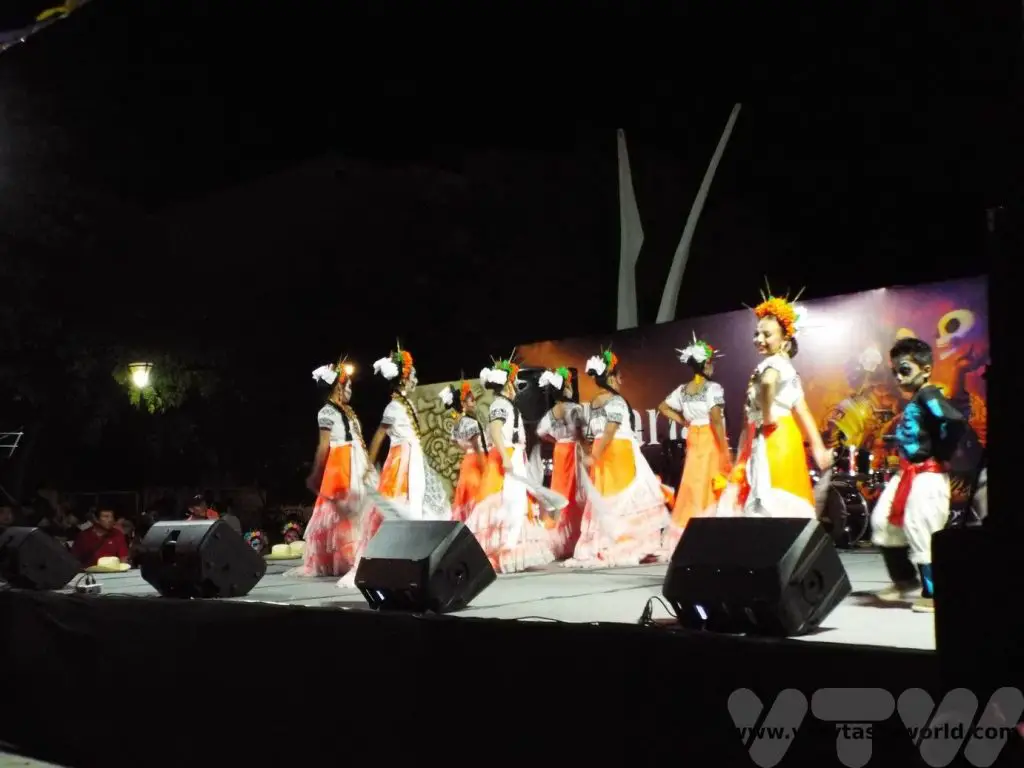
There was dancing…
…and, of course, the parade.
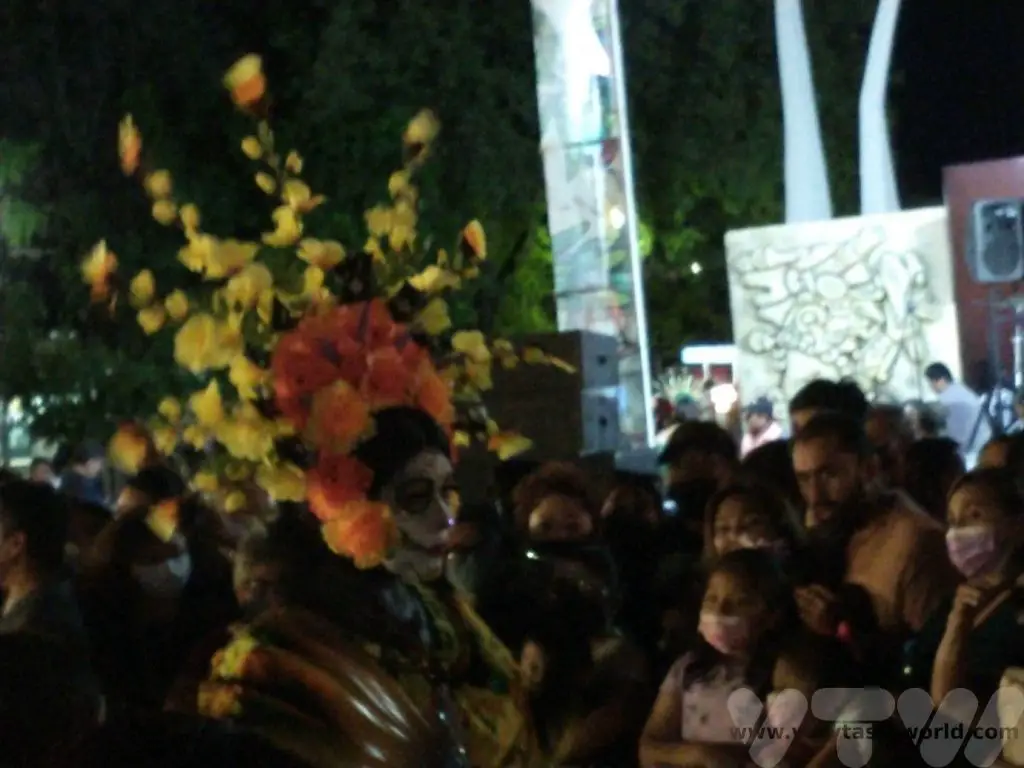
What was lovely about celebrating in Campeche was that it was a much smaller festival – it felt more intimate because it didn’t have large crowds. Above all else, it was such a happy occasion. Everyone was welcome and joining in the celebration was encouraged. We had lots of conversations with friendly locals, who were very pleased to see us.
Even the dogs took part – this little one had possibly the cutest costume ever!

Traditional Food of the Day of the Dead
Along with the food offered to ancestors at the Ofrenda, there are some dishes that are traditionally eaten during the festival.
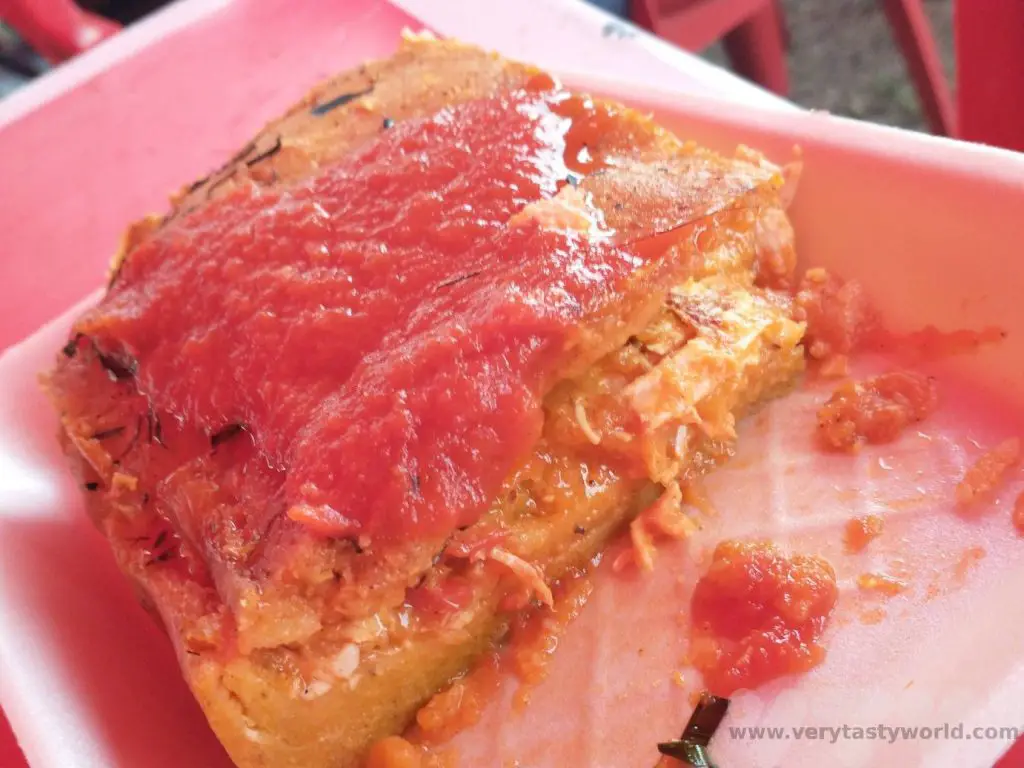
The most important Day of the Dead food in Yucatan is mucbipollo. It is made with corn bread and shredded chicken, wrapped in a banana leaf and cooked in an underground pit known as a pib. The Mayan word ‘muk’ from mucbipollo means ‘to bury’.
It has a crispy exterior and is delicious but is quite stodgy and very filling. The best street vendors will have queues of hungry punters waiting in line to enjoy a portion.
It is a great privilege to be able to join local festivals when travelling. Day of the Dead in Campeche was perfect for us as it was a much smaller, more intimate celebration than in the big cities and we were really welcomed.
And although the Day of the Dead imagery is macabre it is very much a day of joy.
Related Posts You May Enjoy

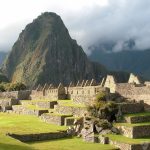
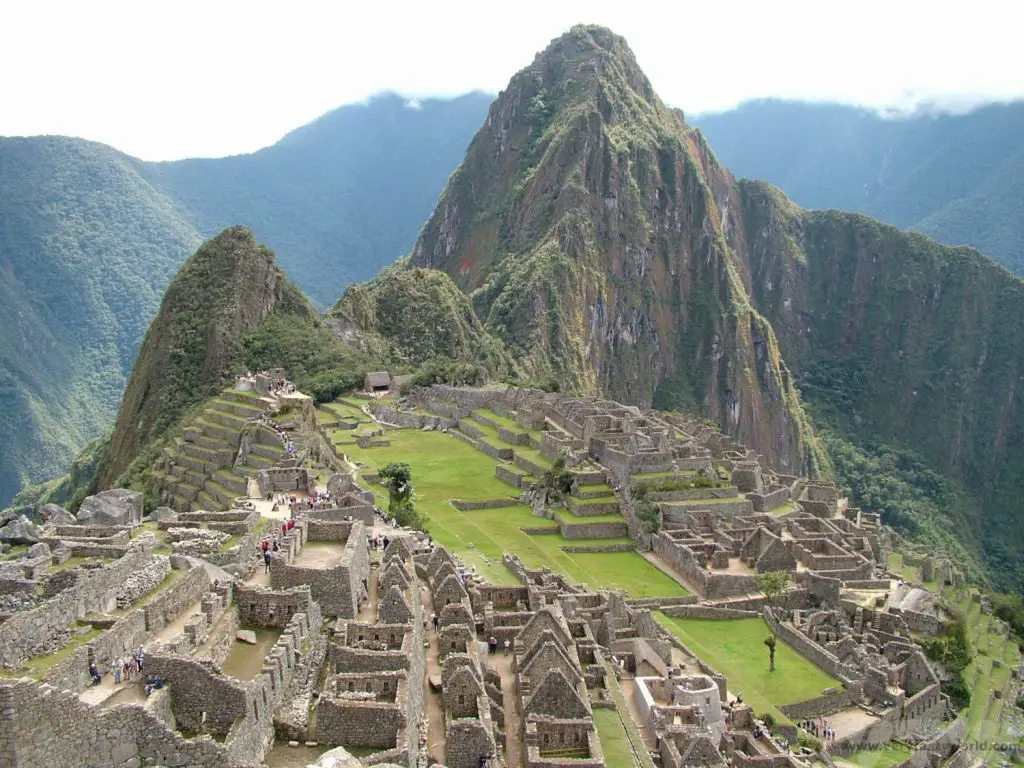
- Best Time To Visit Machu Picchu 2024 Update
- A 2 Week Patagonia Itinerary

- Day of the Dead in Campeche
- A Galapagos Land Based Itinerary

- RECIPE: How to Make Costa Rica’s Gallo Pinto
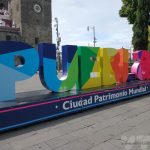
- A Tasty Puebla Food Tour
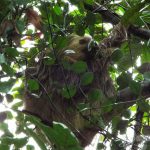
- Costa Rica Wildlife Sanctuary – Caño Negro
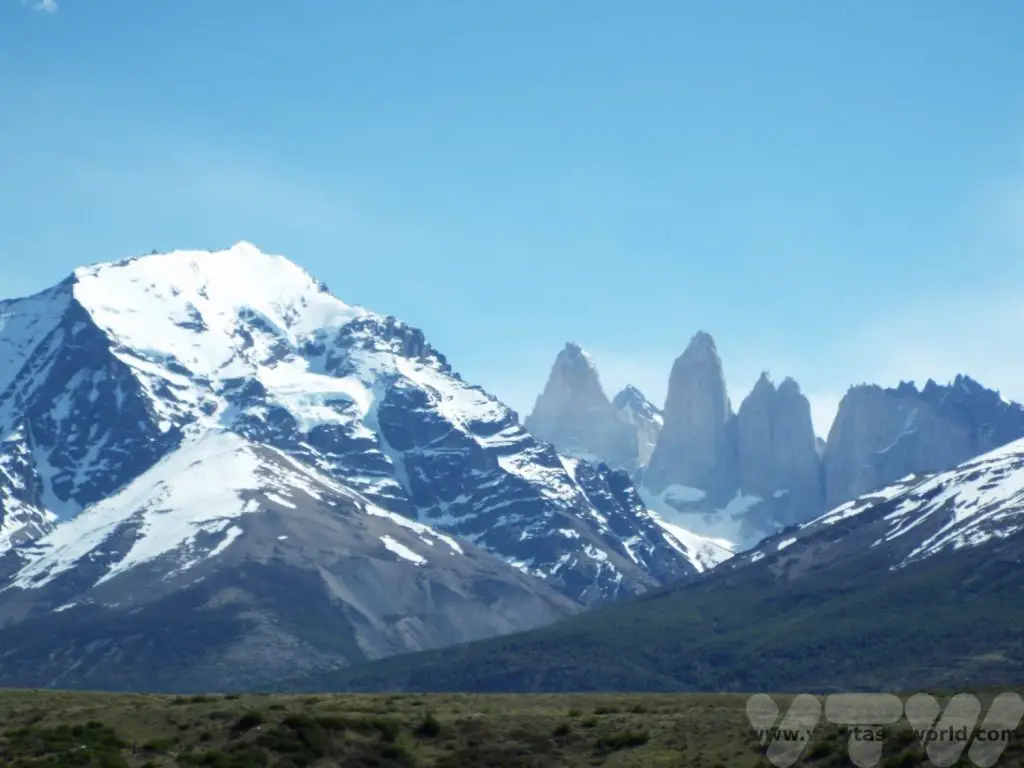
- Visit Torres del Paine National Park in Patagonia
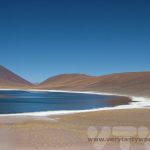
- Atacama Desert Itinerary
Five days in Copenhagen
When we were children there was a very popular vinyl record which was comprised of a whole bunch of songs, sung by Danny Kaye, based around Hans Christian Anderson’s fairy tales. One of these was the song, Wonderful, Wonderful Copenhagen. We’ve recently returned from a short trip to Denmark’s capital and the song, somehow recalled from many years ago, gave us a semi-permanent ear-worm as we explored the city. But is Copenhagen wonderful? We think so. We spent five days in Copenhagen, and around, discovering what the city had to offer.
Getting to Copenhagen Central from the Airport
We got chatting to a number of people during our trip, some of whom had very different experiences of getting into the city. An elderly couple from the USA were shocked to have paid around 55 Euros for the journey in a taxi. And at the other end of the travelling spectrum – we met a holidaymaker from the UK on his first ever visit abroad who decided to walk the 8km from the airport for free! We recommend the train.
The easiest and most cost-effective way is to take the train or the metro. On arrival at the airport, after exiting the baggage area, follow the signs to the train station. There will be a whole bunch of ticket machines just before the entrance to the platforms. The ticket machines are red.
You can choose the English language option. Just select the destination, number of passengers and time of travel. You will receive a zone 3 card, which covers both passengers, that can be used within an hour and a half time slot. Head down to the platform. Trains are very regular, there will be signs on the platform indicating the destinations and you want to make sure your train stops at København H. The journey takes around 15-20 minutes and costs 30DKK (August 2023).
Accommodation
Accommodation in Denmark is on the pricey side. We chose a small room at the Wake Up, which was just a 10 minute walk from the main station. We were delighted to be upgraded to a larger room on arrival, but it did rather make us wonder what the small room was like because the large room was pretty compact! Still, as with most accommodation, we don’t need anything more than basic facilities – a bed and a bathroom will do just fine.
Planning Your Visit
There are a fair few things that you can do in Copenhagen for free but many attractions have a charge and Denmark isn’t a cheap country to visit. So, prior to taking our trip, we looked into the Copenhagen Card. Depending on what you are planning to see you can make good savings by purchasing a card which offers admission to over 80 attractions and free public transportation within the Copenhagen area. You can select a card for 24, 48, 72, 96 or 120 hours. Download the app onto your phone and you can activate the card at the first attraction/transport option. It will then count down the time until it expires.
You can only visit each attraction once, with the exception of Tivoli where you can re-enter the park on the same day only, if you get a stamp.
For our five days in Copenhagen we chose to buy a 72 hour card.
Five Days in Copenhagen: Day 1
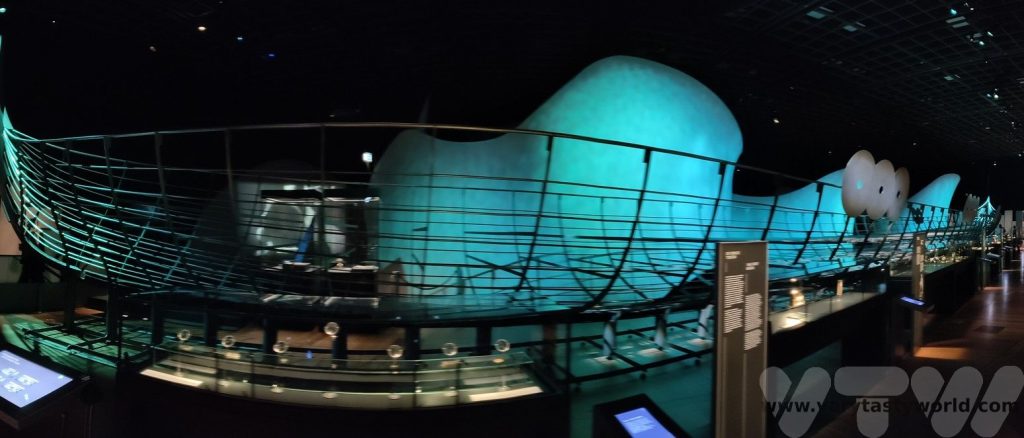
National Museum of Denmark
The National Museum is located on Ny Vestergade. It showcases Denmark’s long and fascinating history with both permanent and temporary exhibitions. Particular highlights include the Viking history exhibition, which feature wooden parts of an extraordinarily long longboat and include an audio-visual opportunity to join a Viking raid, and the modern collection which shows many aspects of Danish culture.
On our visit there was an interactive exhibit about money and finance around the world which was surprisingly fun.
Ride the Rollercoaster at Tivoli Gardens
One of the most delightful things about Copenhagen is that, rather than having a central business district full of corporate offices and commercial buildings, it has a park right in the middle of the city. Directly opposite the central station and just a 10 minute walk from the National Museum, this delightful amusement park is the third oldest in the world and dates from 1843. It is one of Denmark’s most visited attractions and is a lovely place to visit for both the young and young at heart. Set in a very pretty garden, it has a number of stages for performances and white-knuckle rides for intrepid thrill-seekers.
The Copenhagen card will provide entrance to the park but not the rides. If you plan to spend a lot of time in Tivoli and want to enjoy all the rides it’s worth buying a wristband for unlimited access. There are machines all over the park. If you just want to go on a ride or two you can queue as normal then pay for each with your credit card at the gate just before you get on.
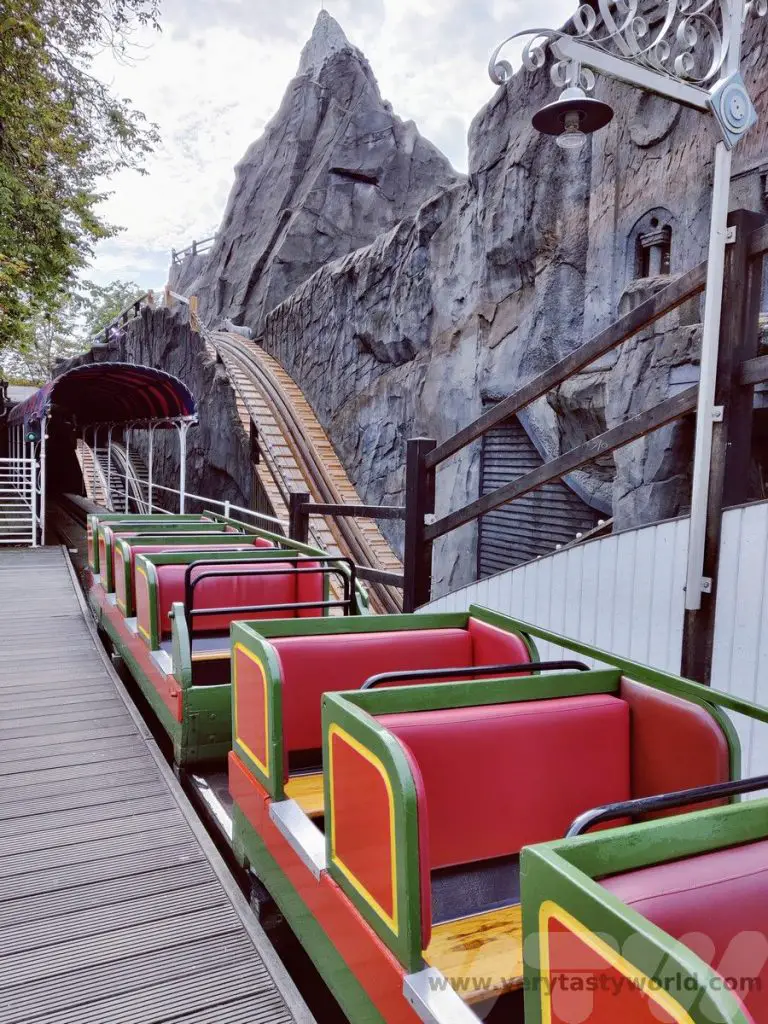
We didn’t plan to spend all day in the park but we did want to ride Rutschebanen, a wooden rollercoaster which dates from 1914 and is one of the oldest still operating. It is one of the few left in the world which has a brake operator in a car on each train, manually slowing the cars on the big slopes if needed.
It’s great fun to ride.
If you are visiting Tivoli you can get a stamp which allows you re-entry to the park on that day only. The security guards at the exits, armed with ink, will be able to provide one.
Tivoli food hall is adjacent to the park and has the same opening hours. You don’t need a ticket to Tivoli to visit the food hall. There are all sorts of Danish and international dishes on offer.
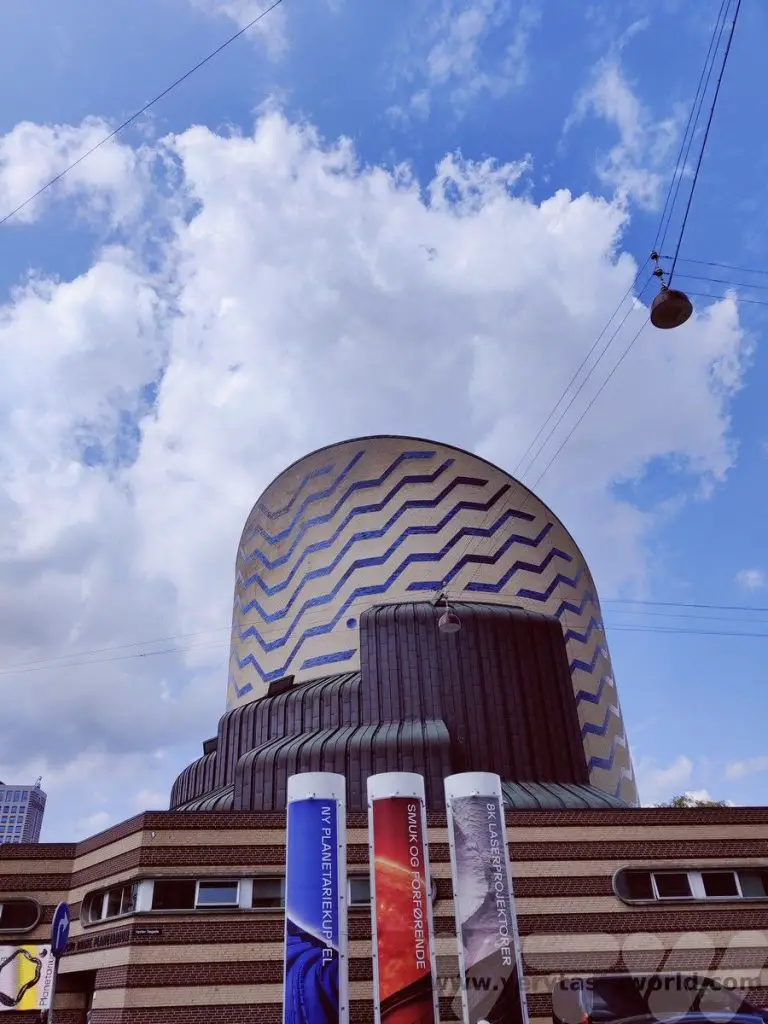
The Planetarium
The Planetarium, on Gammel Kongevej, is well worth a visit. It has a number of exhibitions on the ground floor and also runs a number of films in the largest tilted dome in Europe, a hugely impressive space. It offered a view of the current night sky and then ran a documentary about the probes that have been exploring our planets over the years. Headsets for an English translation of the commentary are available at reception.
Fredericksberg Area
We walked from the Planetarium to the Fredericksberg area. Bus 7A will go there from the city centre if you don’t fancy walking and the Copenhagen card will cover the cost – just show the card to the bus driver. You will need to get on at the front of the bus. There are lots of things to do here, including visiting the zoo. We had some cultural activities in mind.
Storm
This is the museum of humour and satire where we received a very friendly welcome.
The downstairs area showcases the history of Danish humour (only in Danish but you can use a QR code on your phone to get a translation) but also has a few rooms dedicated to humour for children – chock full of surreal objects and fart gags.
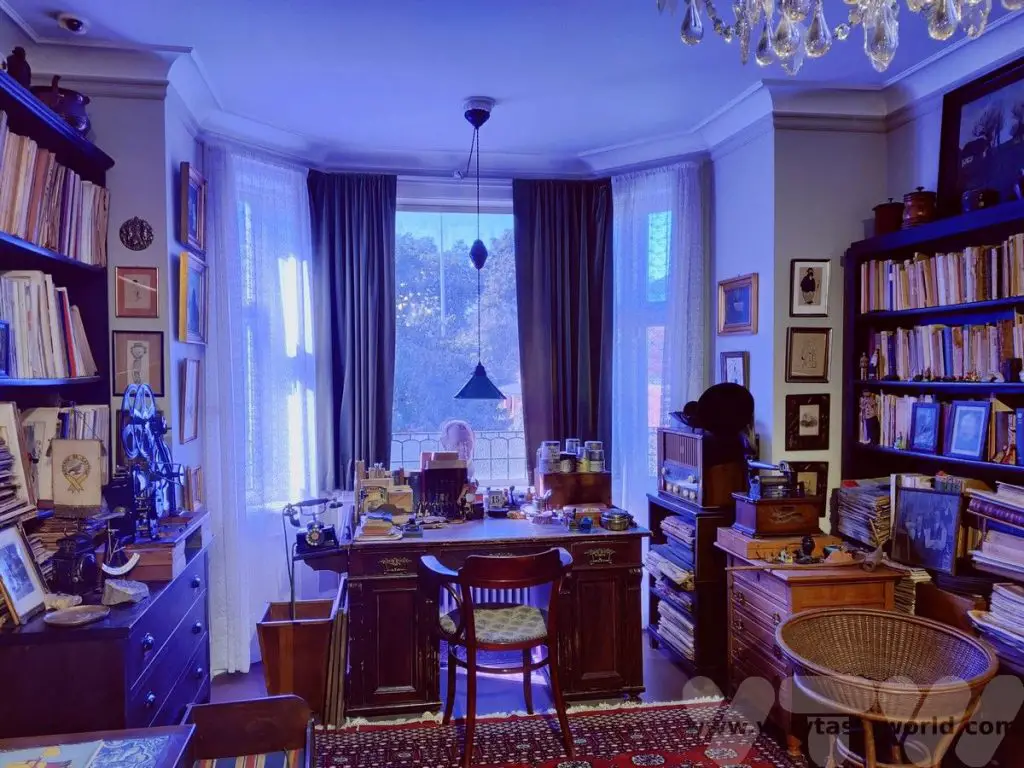
Upstairs is an exhibition dedicated to the work of Storm P, the cartoonist, illustrator and satirist Robert Storm Petersen. There is a large collection of his artwork with explanations in English as well as a set-up of his workspace.
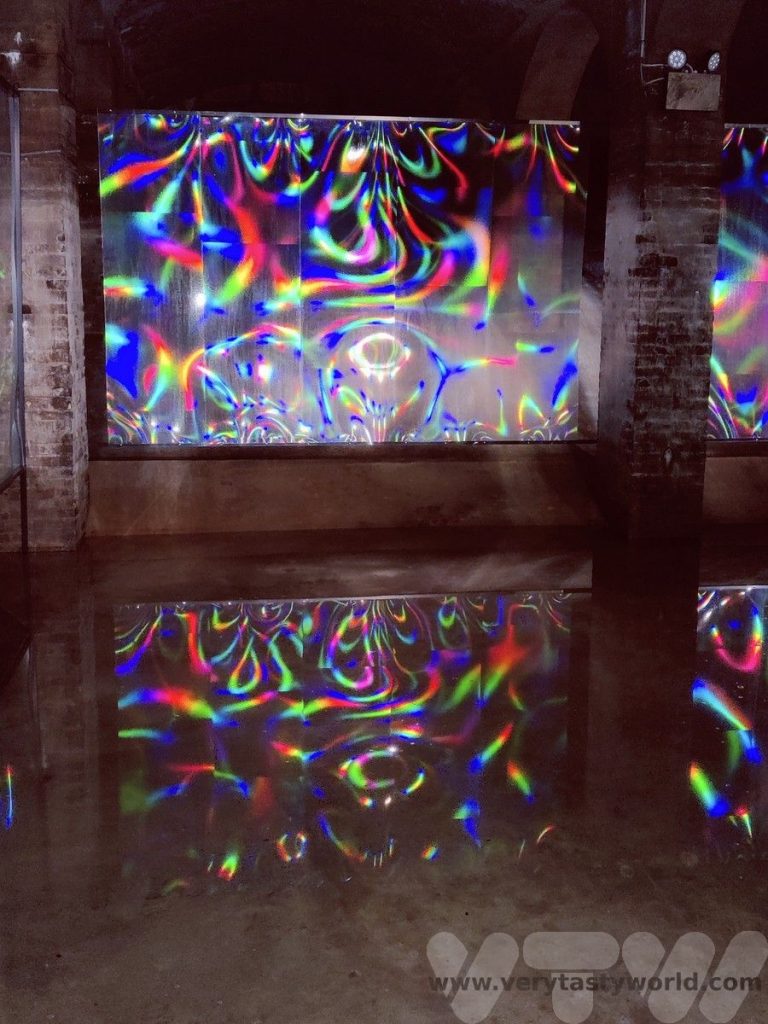
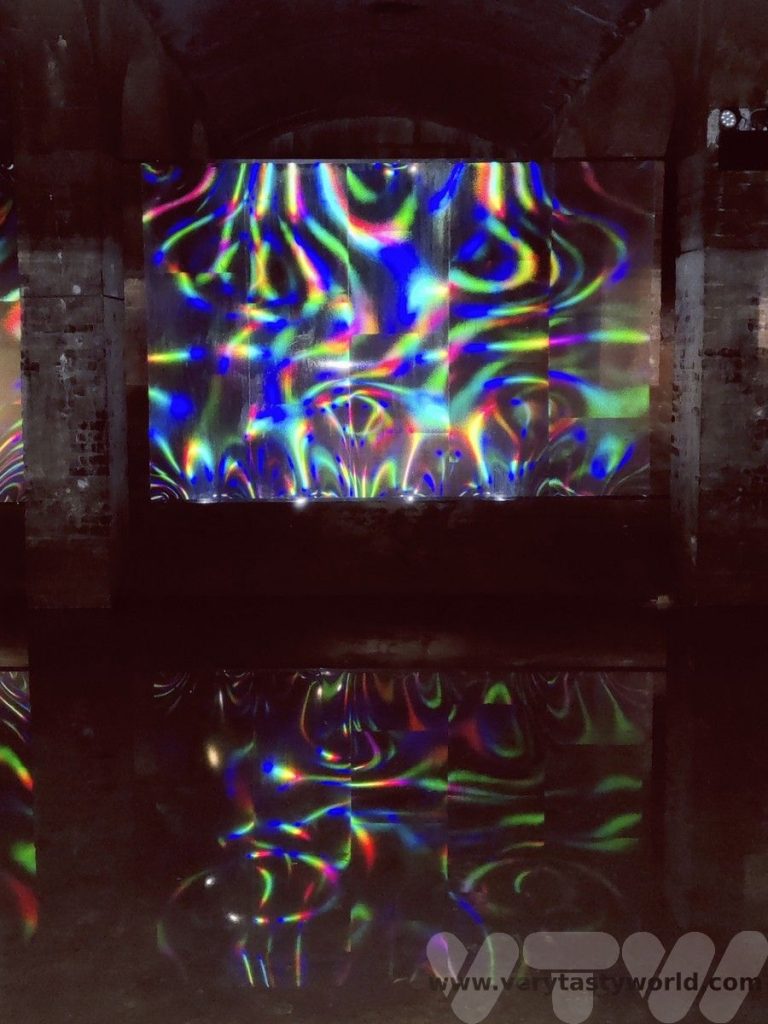
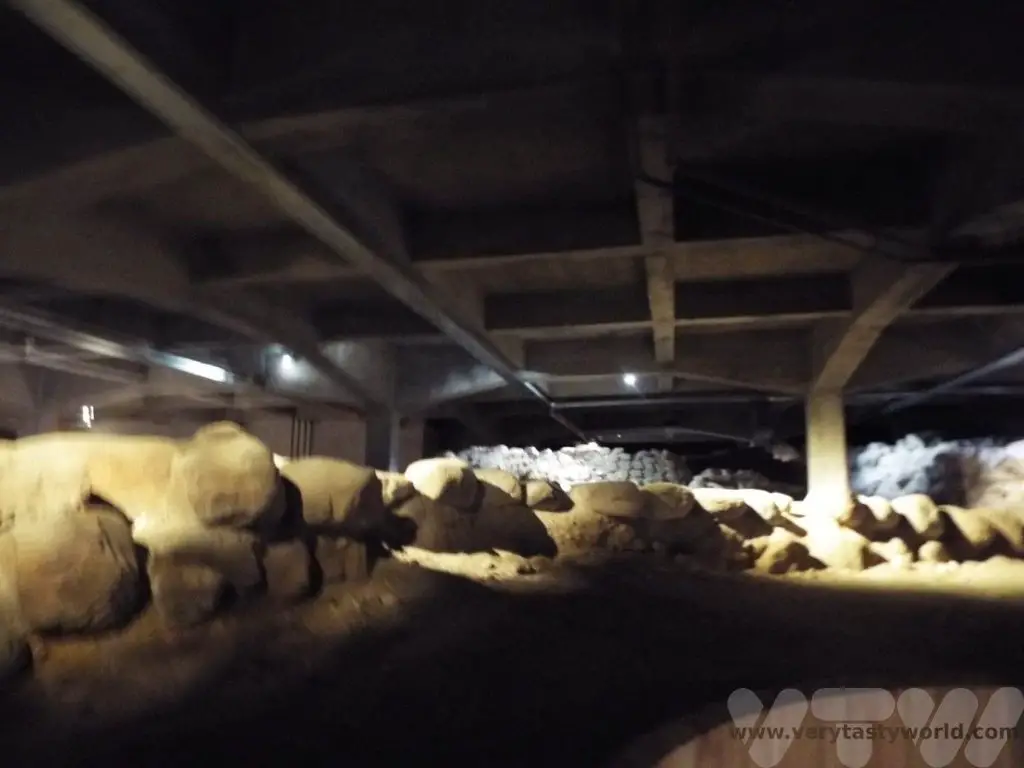
Cisternene
A fabulous idea for an art gallery, Cisternene used to be an underground reservoir! Beneath the green, green grass of Søndermarken Park this dark, cavernous space hosts an exhibition by a different artist each year. You need to be a bit walking careful inside – it’s dark and damp and you need to keep on the pathway or get wet feet – but it was one of the most delightful and unusual art galleries we have ever visited.
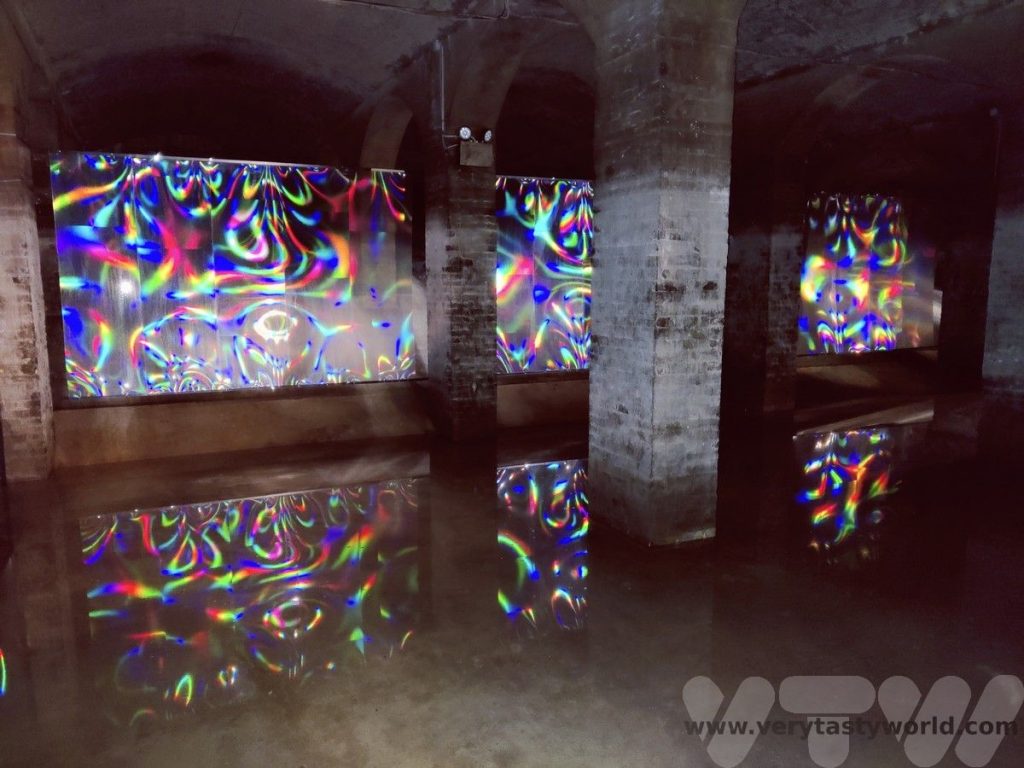
We saw the display from South Korean artist Kimsooja whose light installation was colourful, beautiful and otherworldly.
Evening at Tivoli
The 7A bus (the bus stop is just outside the zoo) will take you back to the city centre to enjoy dinner and a beer. Because the stamps on our arms were just about visible, we popped back to Tivoli. There were performances on some of the stages interspersed with squeals of delight as the white-knuckle rides simultaneously enthused and terrified.
Day 2
A Day Trip To Hamlet’s Castle and A Fabulous Art Gallery
The Copenhagen card also includes the opportunity to take some day trips outside of Copenhagen. You can take the train from Copenhagen Central to Helsingor to visit Kronborg castle. Just get on the train. If you are asked for a ticket, show the officer the card and they will scan it. If Helsingor sounds familiar, it is more commonly known as Elsinore in England and is, of course, the location of Shakespeare’s Hamlet’s Castle. Kronborg is a 15 minute walk from the station – you can see the castle from the station.
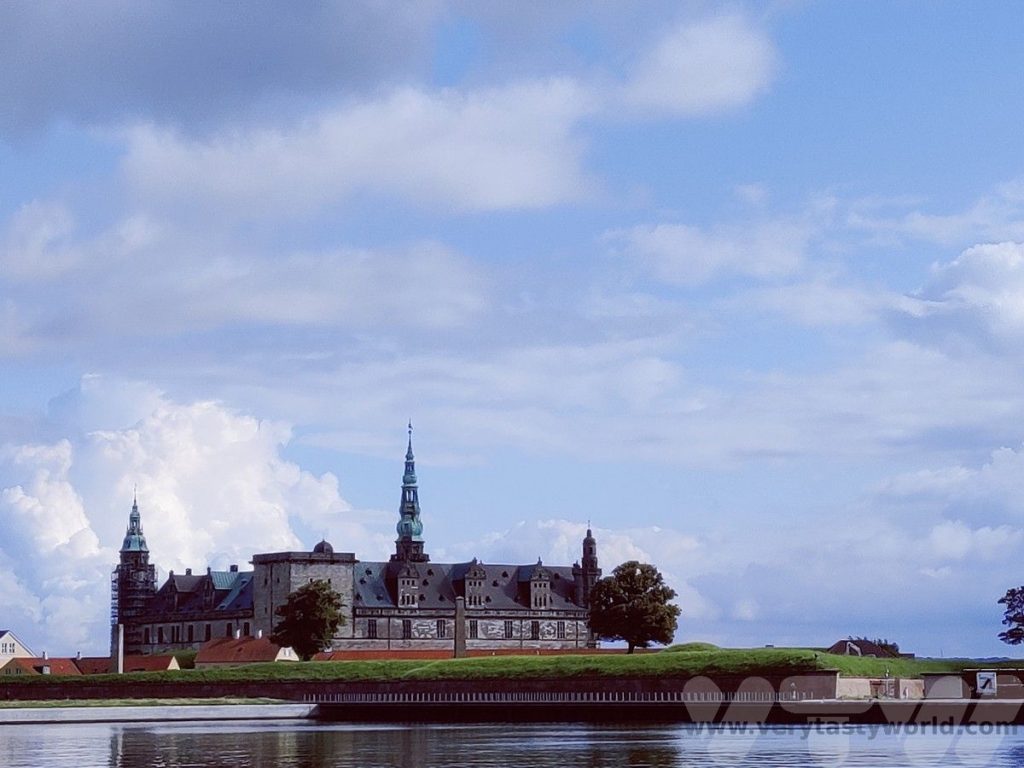
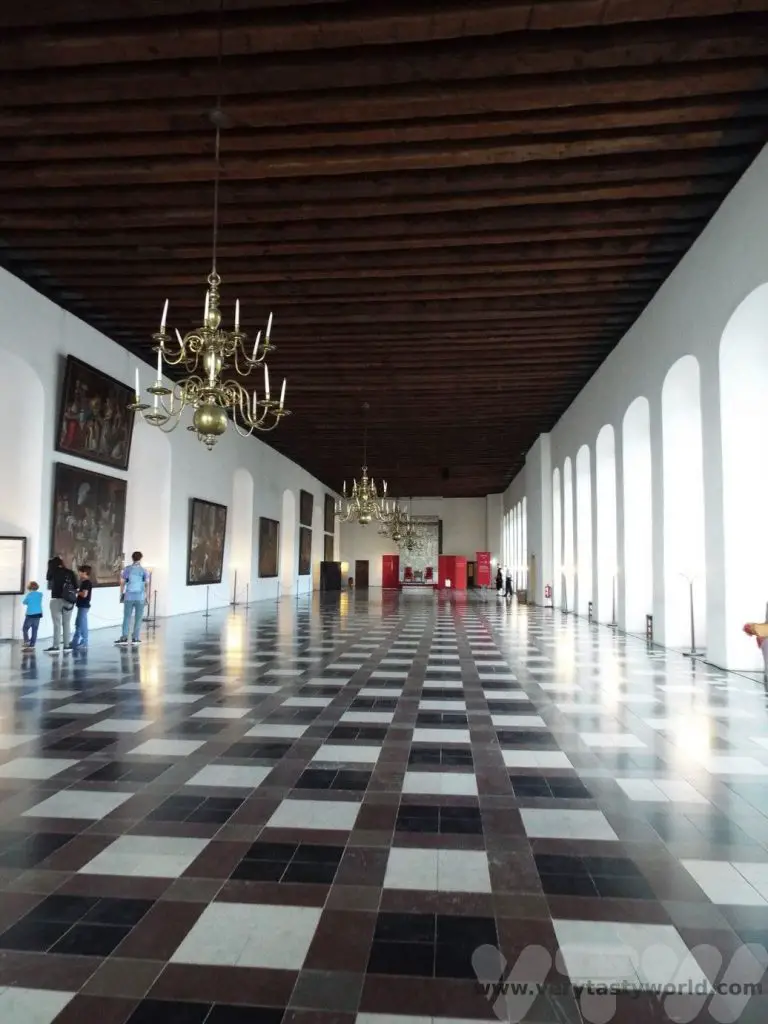
Originally built as a fortress in the 15th century, it was significantly upgraded by Frederick II between 1574-1585, and again by Christian IV following a fire. A UNESCO heritage site, it’s a highly interactive attraction with actors and jesters throughout the castle as well as guides who can offer information about the history of the castle. You can even meet ‘Hamlet’ and ‘Yorrick’ in the grand ballroom.
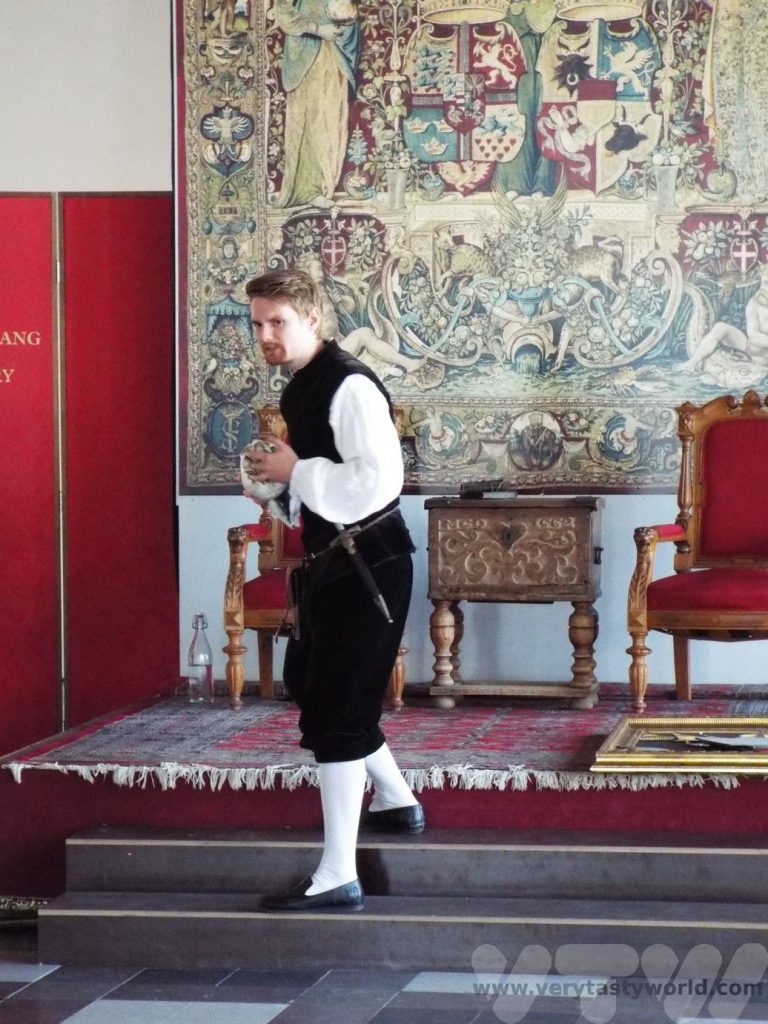
Yes, that’s Hamlet and Ophelia just outside Helsingor station.
Louisiana Museum of Modern Art
The return train stops at Humlaebek, just 10 minutes from Helsingor, and this is an essential stop for the Lousiana Museum of Modern Art. A 15 minute walk from the station this remarkable modern art gallery, also included on the Copenhagen Card, offers an amazing collection, including works by Warhol, Lichtenstein, Picasso, Bourgeois, Bacon, Hockney and Moore, amongst many, many others, as well as temporary exhibitions showing the work of local and international artists.
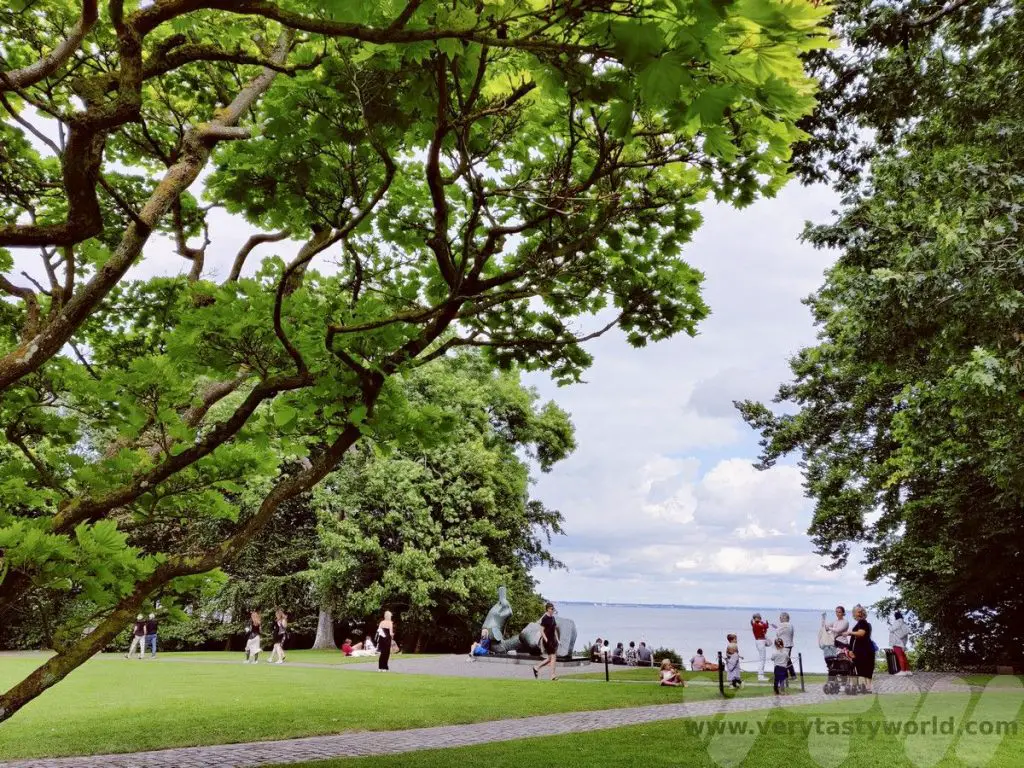
It has the most wonderful setting as well, a light, airy space for the network of galleries that all surround a sculpture park which looks out to the sea. Highly recommended.
Day 3
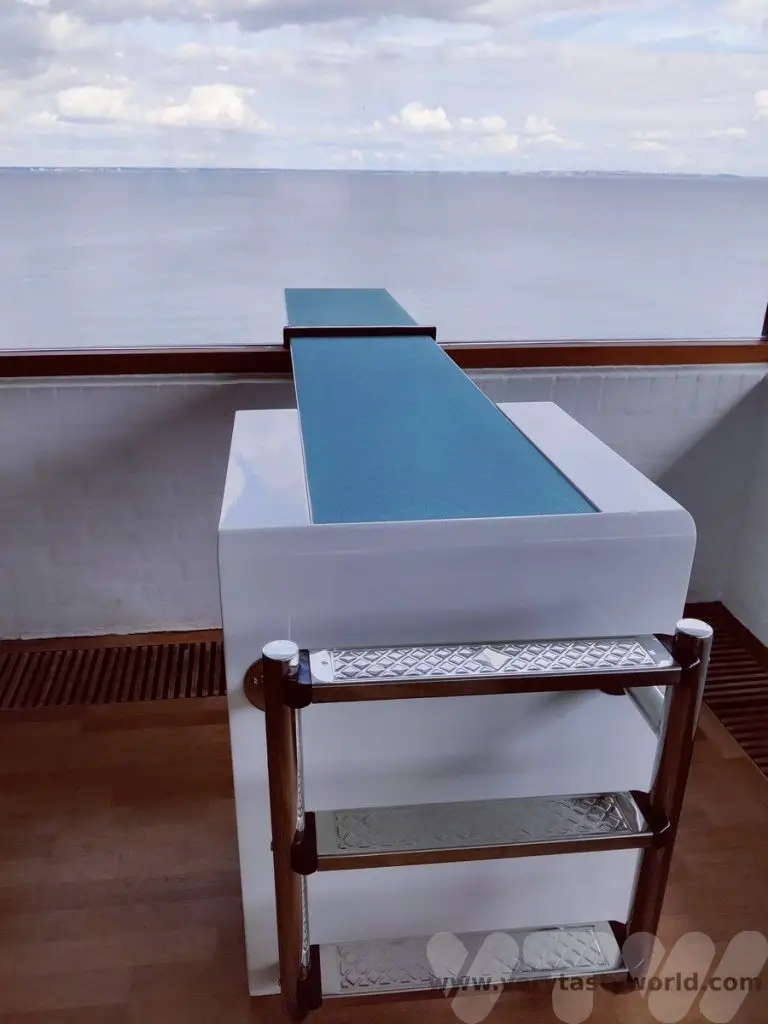
A Boat Trip
We got up early to be first in the queue for a boat trip around the canals of Copenhagen. These are included on the card if you are boarding at Stromma (but not at Nyhavn). You need to show your card at the ticket office then get a ticket to board the broad boat for a journey that takes around an hour. There will be a commentary in English and usually another European language.
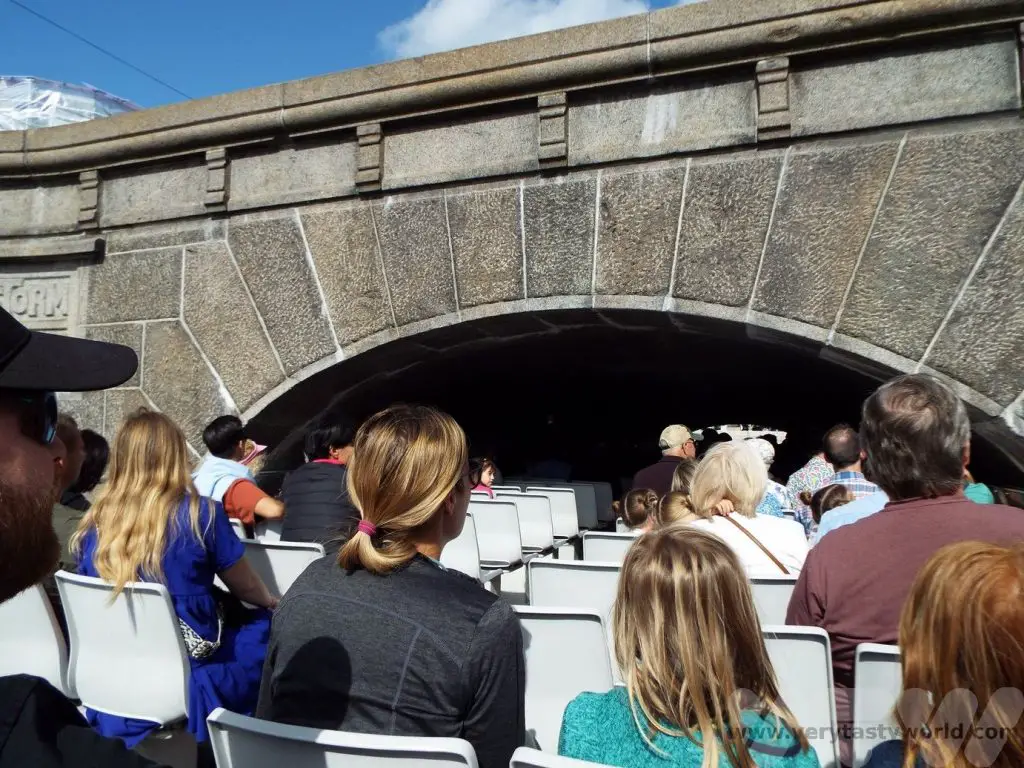
It’s a pleasant way to see Copenhagen from a very different perspective.
Visit Christiansborg Palace
Although Christiansborg Palace now houses the Danish Parliament it used to be the palace of the Danish kings and queens.
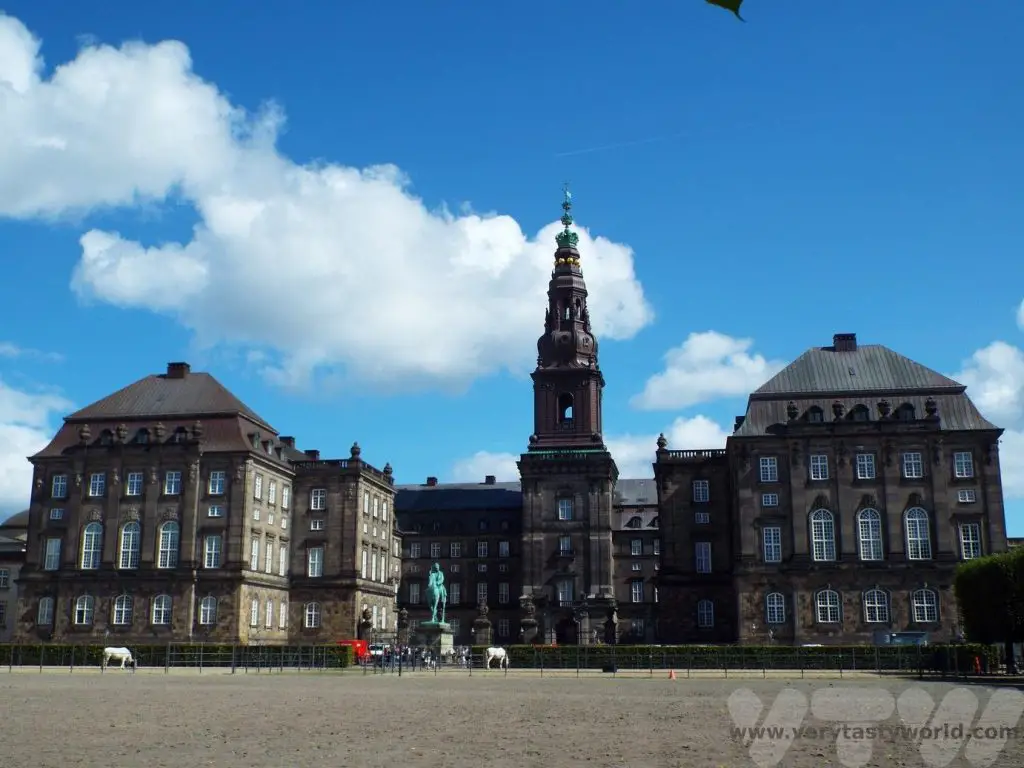
A visit to the ruins underneath the palace offers a fascinating history of the development and construction of the building and you can also visit the former kitchens and stables. The card covers entry to all these, but you need to show it at each location.

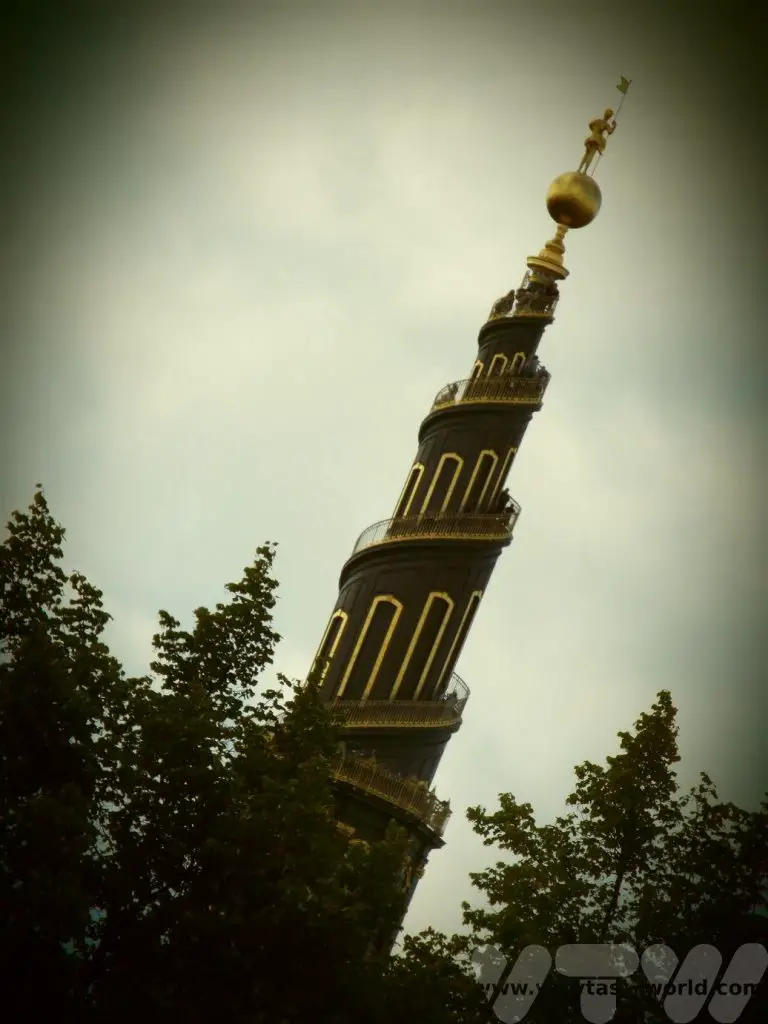
The Round Tower
We then headed to the northern part of the city. The Round Tower was constructed between 1637 and 1642 and is the oldest functioning observatory in Europe. Located adjacent to Trinity Church it was designed to be Denmark’s national observatory. You can climb the tower. One of the great things about this is that there are very few stairs. Like Seville’s Giralda tower, you ascend via a ramp with just a few steps at the top.
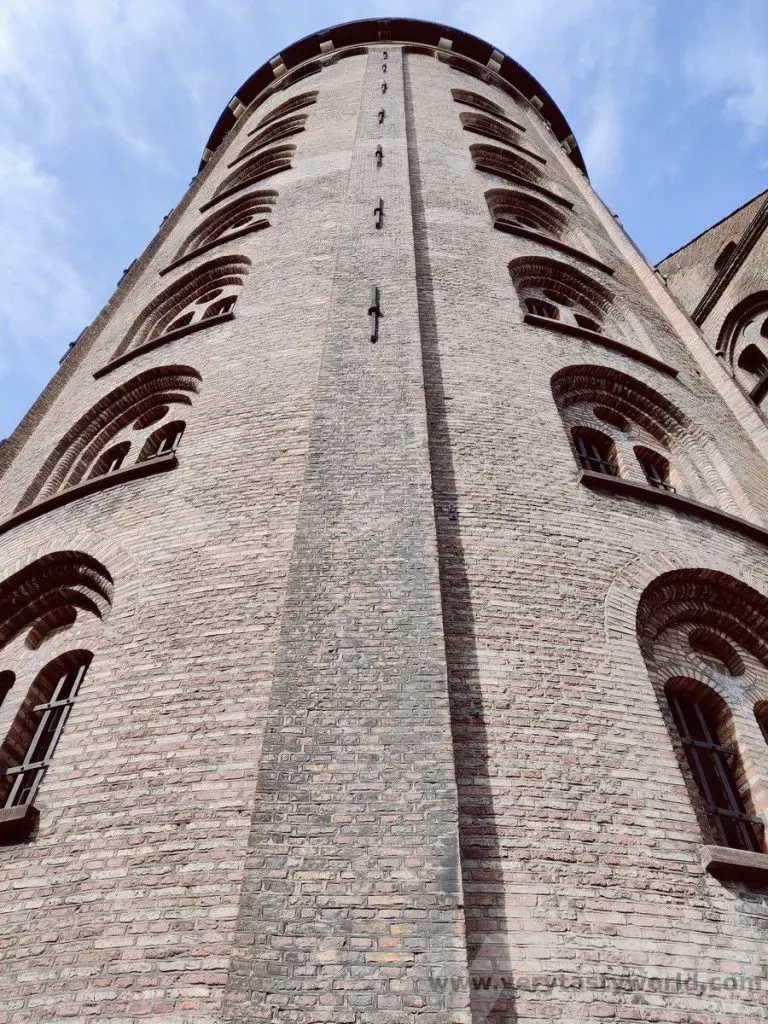
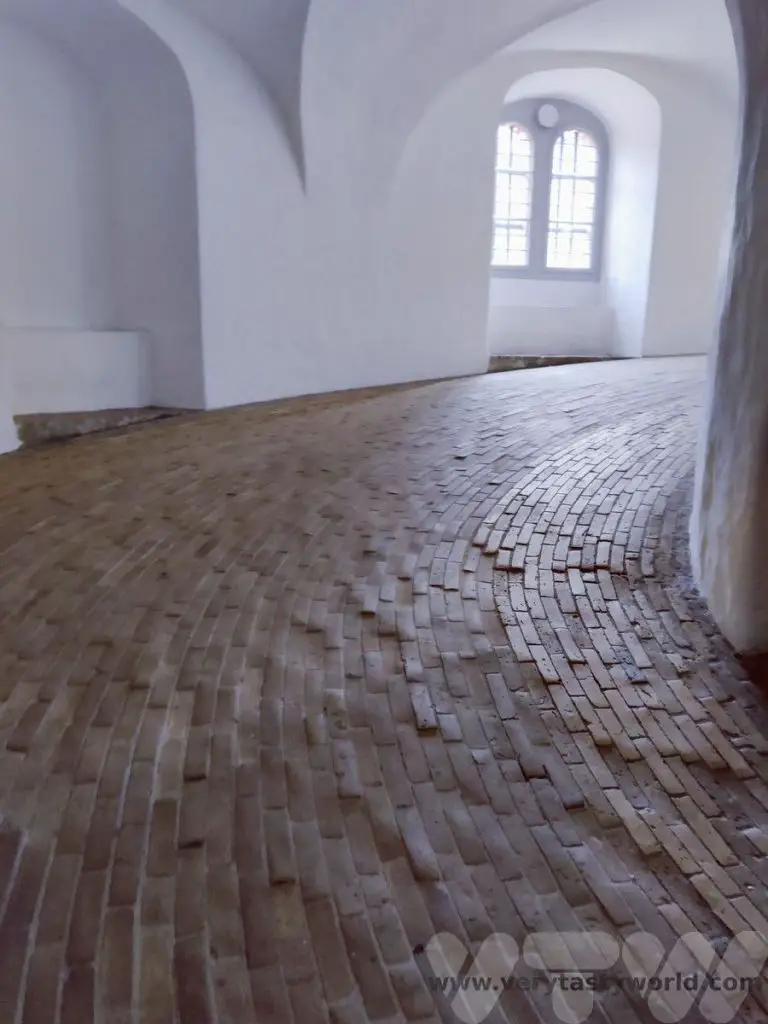
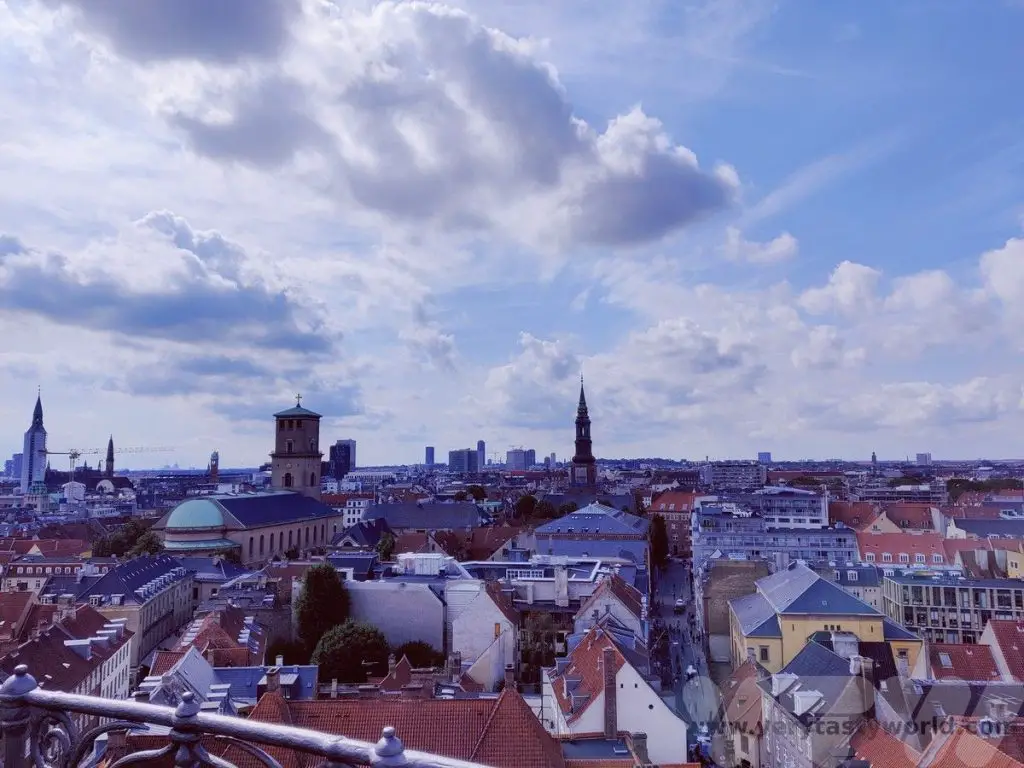
The Round Tower’s final staircase is quite narrow but, thanks to Danish efficiency, there is a red light/green light system to allow visitors to go up and down in turns. The view from the top is wonderful.
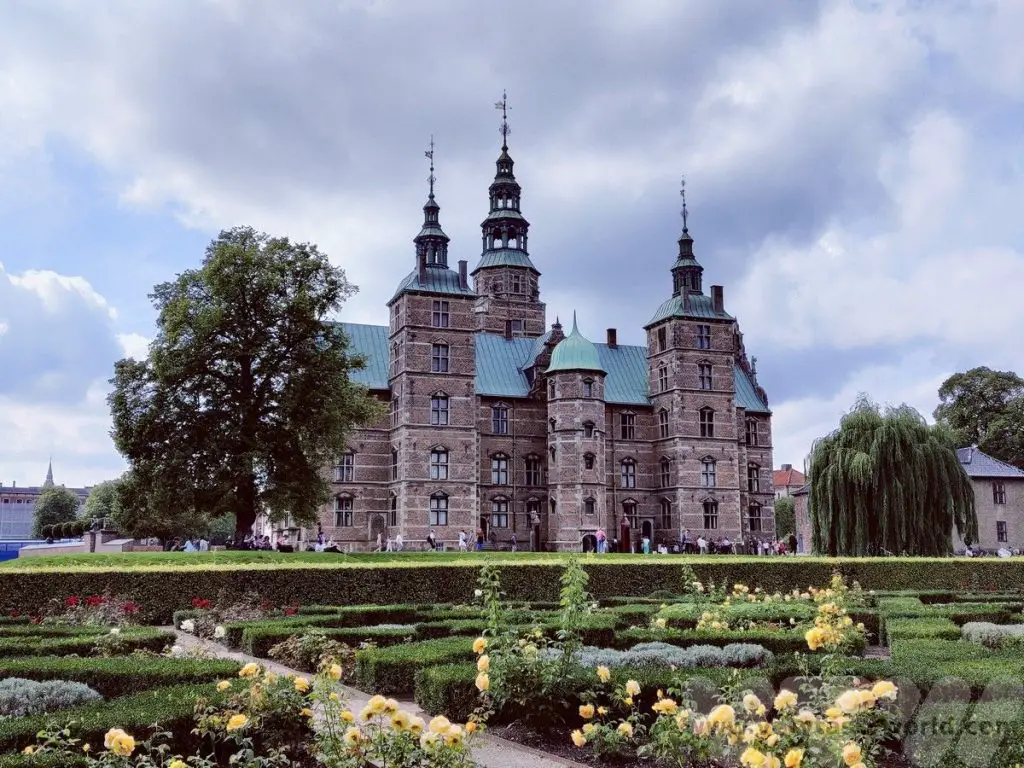
Rosenborg Castle
Another construction built by Christian IV, Rosenborg palace was apparently the revered king’s favourite. Set amidst a large park, this impressive castle is very popular as a tourist attraction, so tickets should be pre-booked (go to the website and select the Copenhagen card option). One of the top attractions are the crown jewels, and apparently the only jewels in the world that are on display and used by the Danish queen.
The Design Museum of Denmark
Highly recommended, the Design Museum of Denmark, on Bredgade, is a brilliant space showcasing art, crafts and design from a number of Danish and international designers. It explains the difference between art and design and also reinforces how important design is within our everyday lives. Thought-provoking and interesting, this was a highlight museum.


Day 4
On day 4 we sneaked in a visit to the Museum of Copenhagen, during the very last hour of our Copenhagen card. If the card expires during a visit, don’t worry, they won’t kick you out!
Museum of Copenhagen
This interesting museum takes you on a historical journey through the development of the city. It also has temporary exhibitions and we were lucky to catch one about commercial artist and designer Ib Antoni, known as The Great Dane, who created highly distinctive art, much of which was to promote Denmark and Copenhagen.
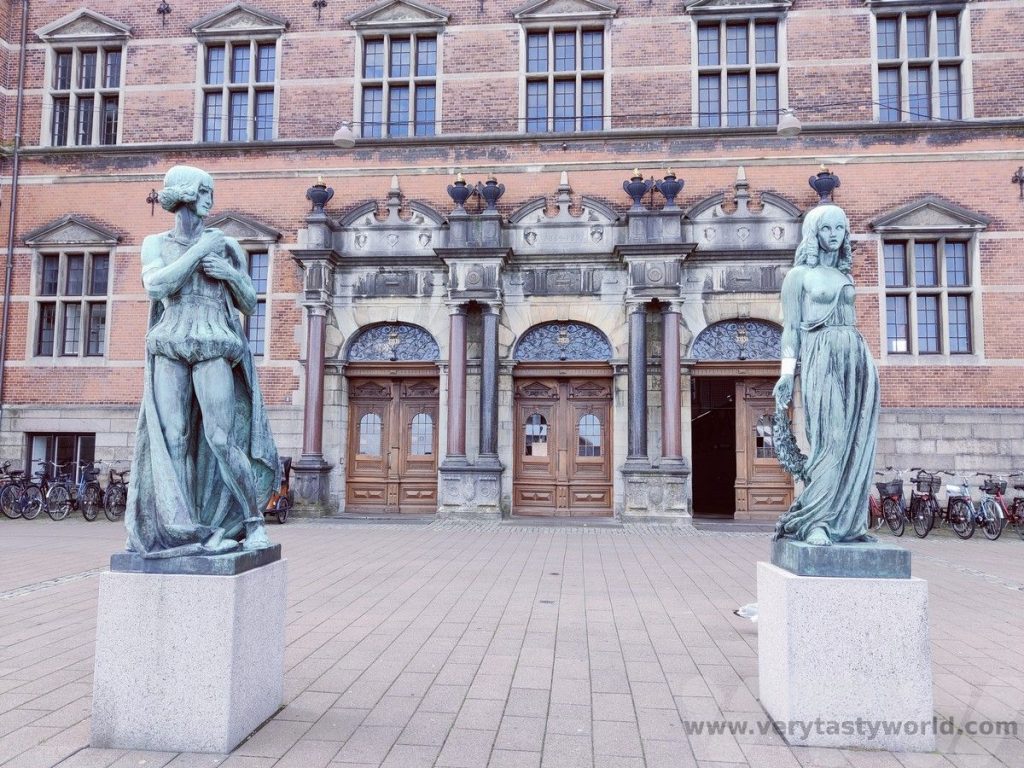
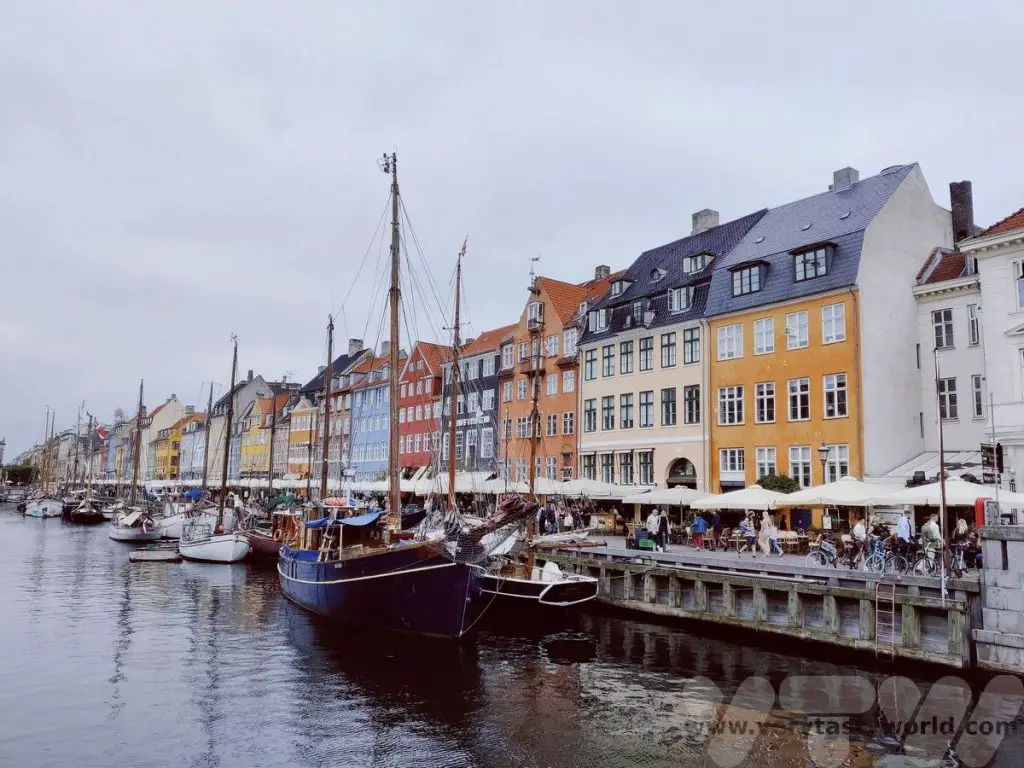
Nyhavn
No visit to Copenhagen would be complete without seeing Nyhavn, the gloriously colourful canal district. The canal was constructed between 1670 and 1675, intended to enable a passage from King’s Square in the city to the sea. It was notorious for being an area of ill-repute, where salty sailors and prostitutes hung out and much beer was consumed – the water not being very conducive to healthy living at the time.
Hans Christian Anderson lived at no 67 between 1845 and 1864. It became less important as ships became larger and these days there are loads of bars, restaurants and tourists. The area is undeniably pretty though.
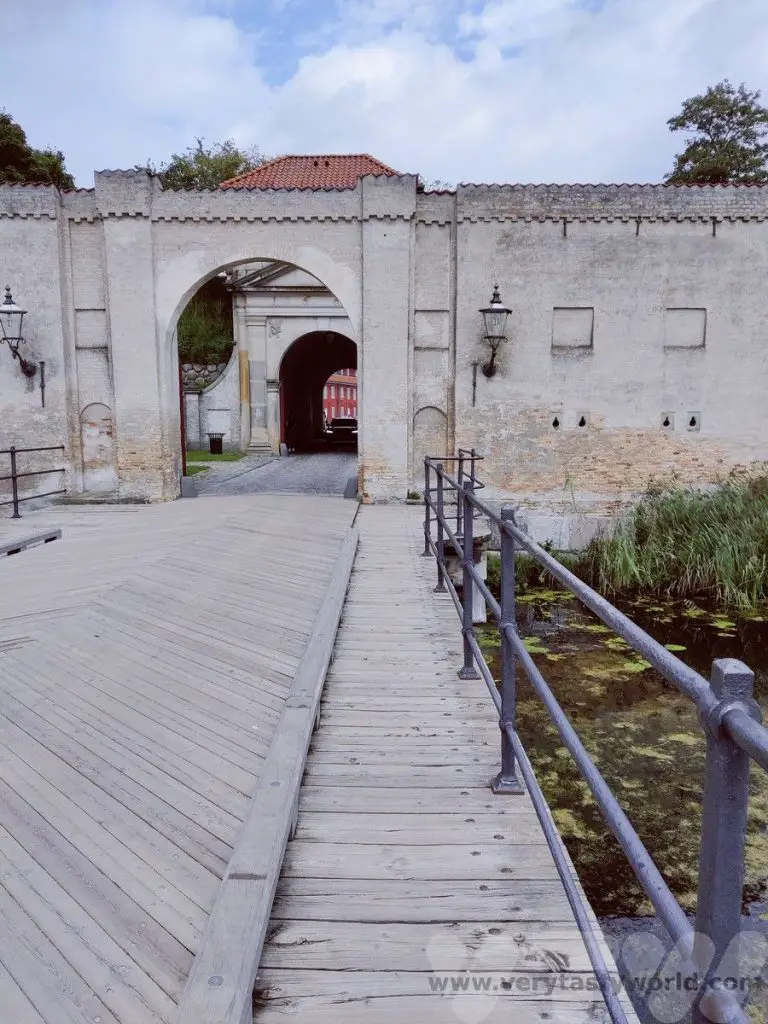
Visit the Kastellet Fort
Walking further north from Nyehavn is the Kastellet, also known as the citadel. It is a fort designed in the shape of a pentagon. Originally part of the wider ramparts that circled Copenhagen, this is all that remains. It was constructed by Christian IV in 1626 and is one of the best preserved fortresses of its type in Europe.
There is a lovely park to wander through and a number of buildings within the site’s grounds. It currently houses military barracks and offices but some of the buildings are open for visitors with exhibitions to explore.
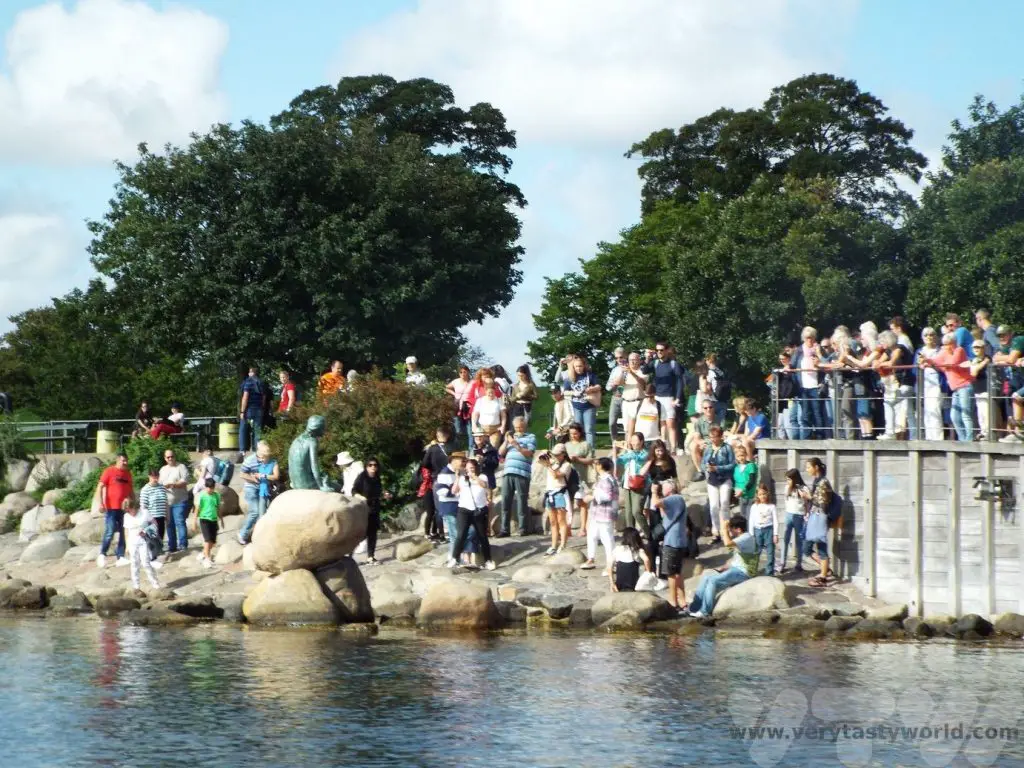
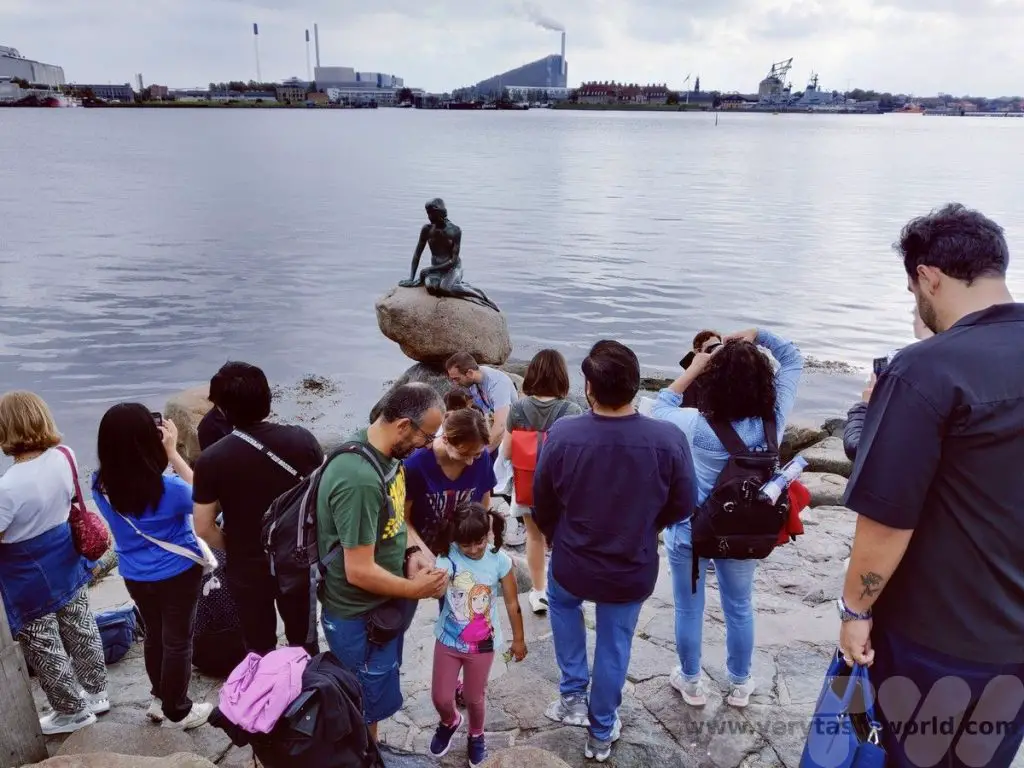
The Little Mermaid
Located on the shore on the far side of Kastellet is the city’s most photographed attraction. Based on Hans Christian Anderson’s fairytale, this bronze statue by Edvard Eriksen, depicts the mermaid as she transforms into human form.
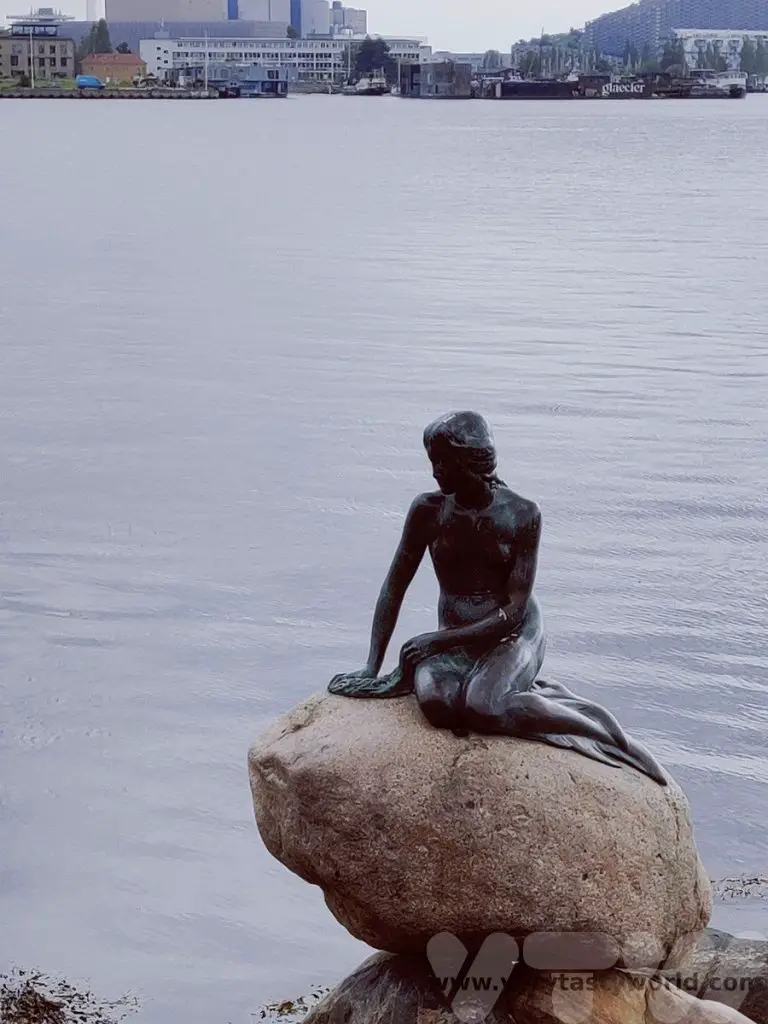
Be prepared for a plethora of tourists surrounding the mermaid, who is genuinely little at just 1.25m tall, climbing over the rocks to snap that perfect shot. A zoom on your camera and a bit of patience is a safer option.
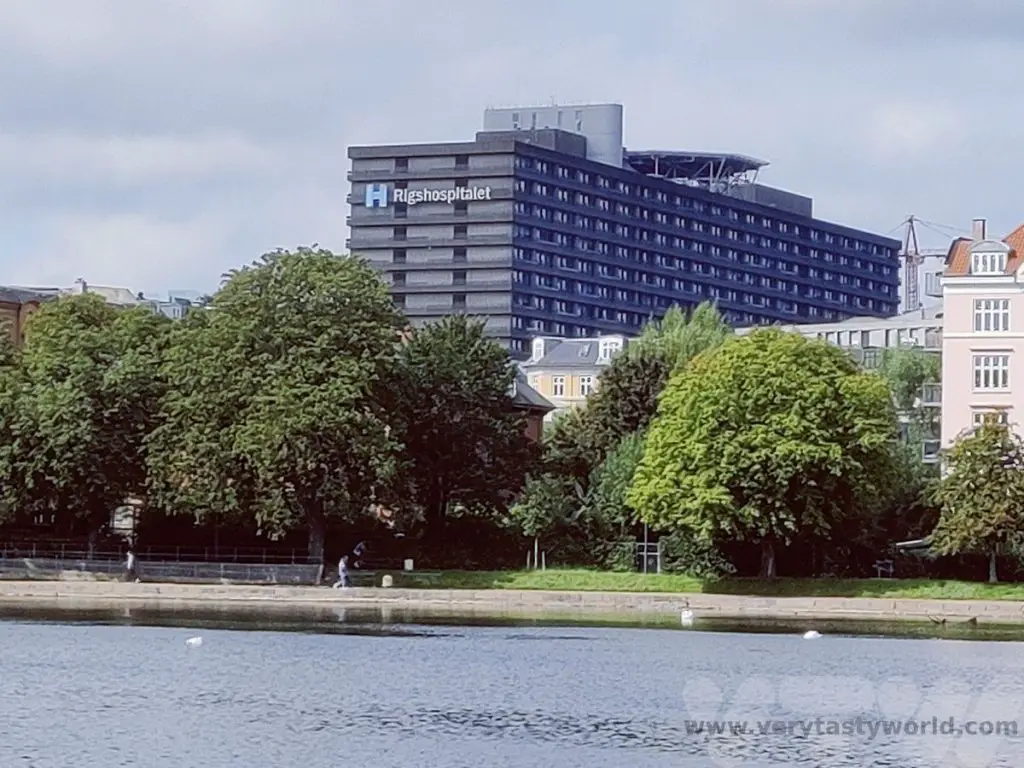
A Quick Trip to Hospital
Okay, so almost certainly not top of anyone’s list of places to visit (or indeed on anyone’s list at all) we just had to check out Rigshospitalet. As fans of Danish cinema and TV, we adored Lars Von Trier’s utterly bonkers and completely brilliant series, The Kingdom. Realising it was set in Copenhagen’s actual hospital, we just had to stop by to take a photo!
Day 5
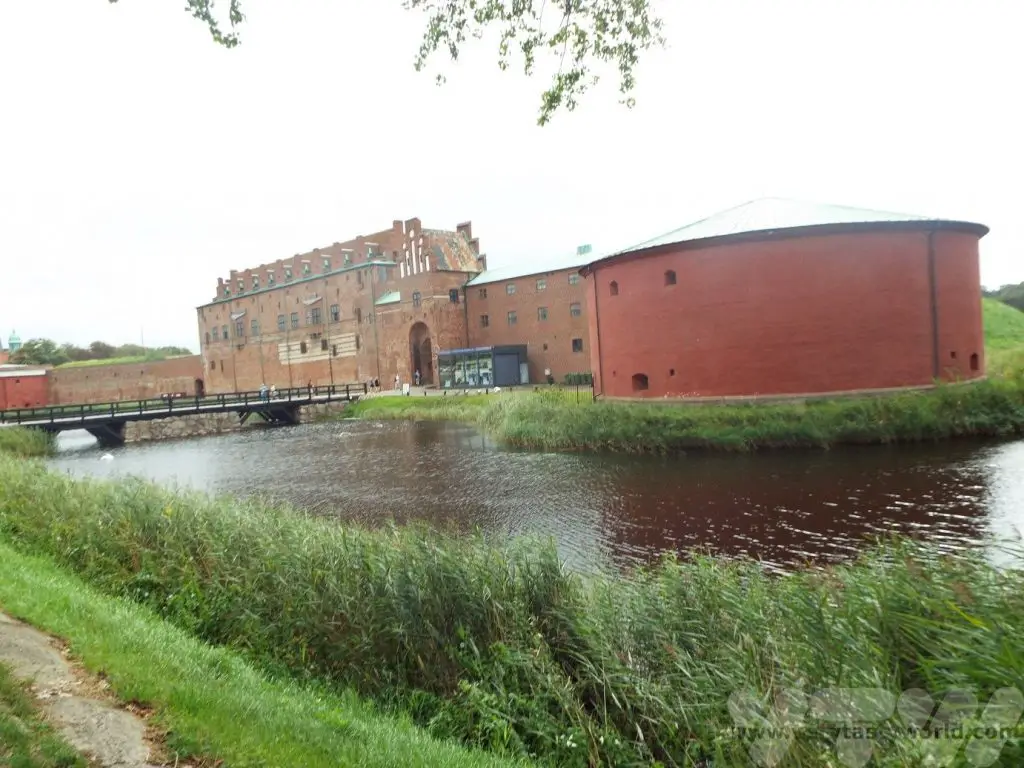
A Day Trip to Sweden
Another TV connection with Copenhagen is that of The Bridge, the popular Scandinavian-noir drama series. It was set on and around the Oresund Bridge, a remarkable construction that joins Denmark with Sweden.
There are loads of trains that leave from the central station to Sweden. You can reach the nearest city, Malmo, in around 45 minutes and it’s a nice place to spend the day. If you do take the train, pick up at ticket from the machine at the station and don’t forget to bring your passport. We weren’t asked to show ours but checks do happen.
Malmo is a pretty city with a cute canal, where you can take a boat trip. And there are plenty of squares filled with restaurants.

Lilla Torg is a popular – and very picturesque – square with plenty of restaurants.
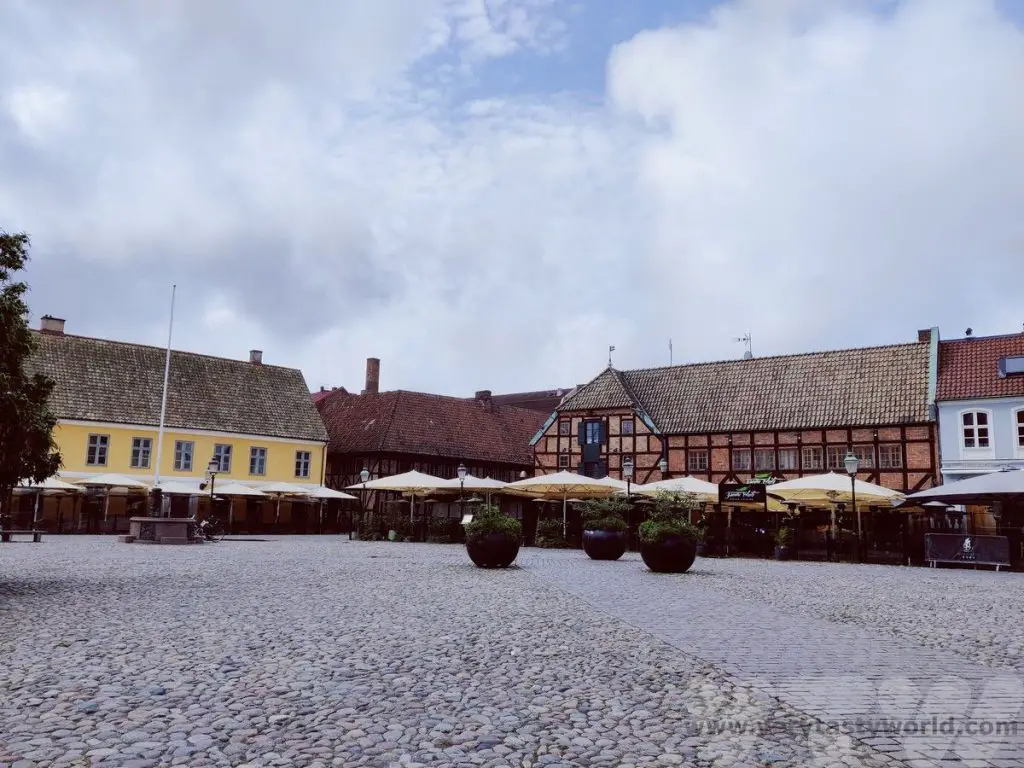
Disappointingly they were all serving international food and we really struggled to find a Swedish restaurant in Sweden!
Malmo castle is well worth a visit. Part castle, part museum, part art gallery, part natural history museum and part aquarium, there is something for everyone! A combined ticket for 100 SK will also ensure entry to the science and maritime museum across the road.
Five Days in Copenhagen – ‘Let Us Clink and Drink One Down!’
Copenhagen has a plethora of restaurants and drinking establishments. Chatting to some local people about Danish cuisine we were told that it wasn’t that exciting, largely in the realms of meat and potatoes.
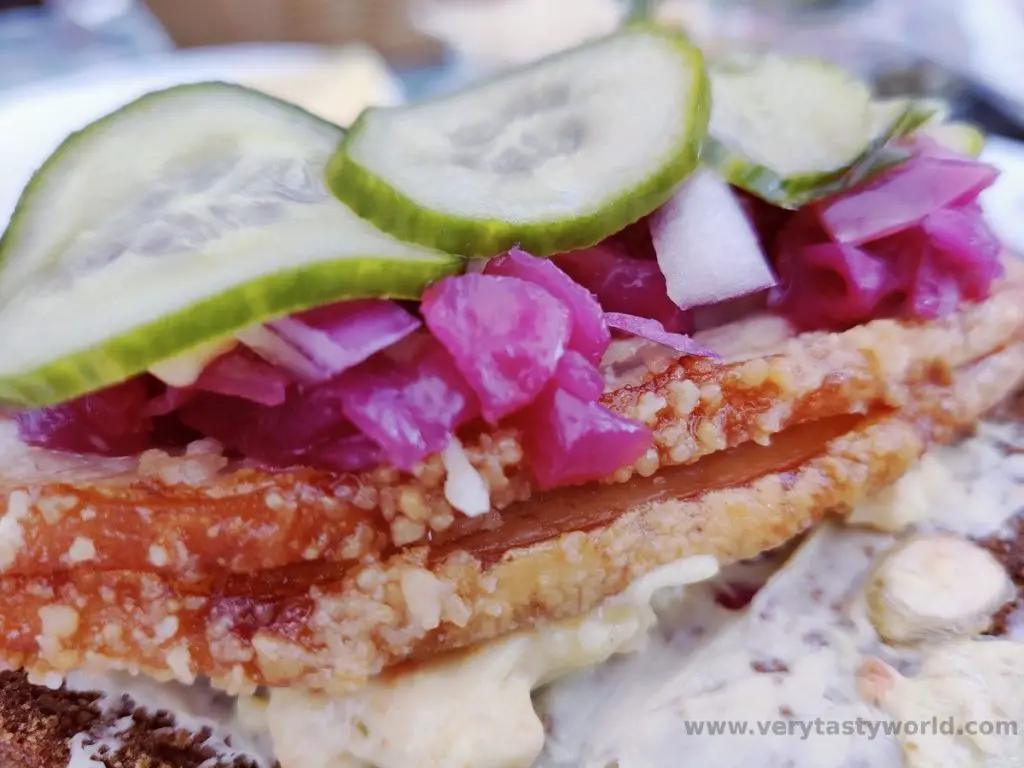
But it’s good, honest, filling grub – meat, potatoes and pickles. Pork is a popular menu item – and the best restaurants deliver crackin’ crackling!

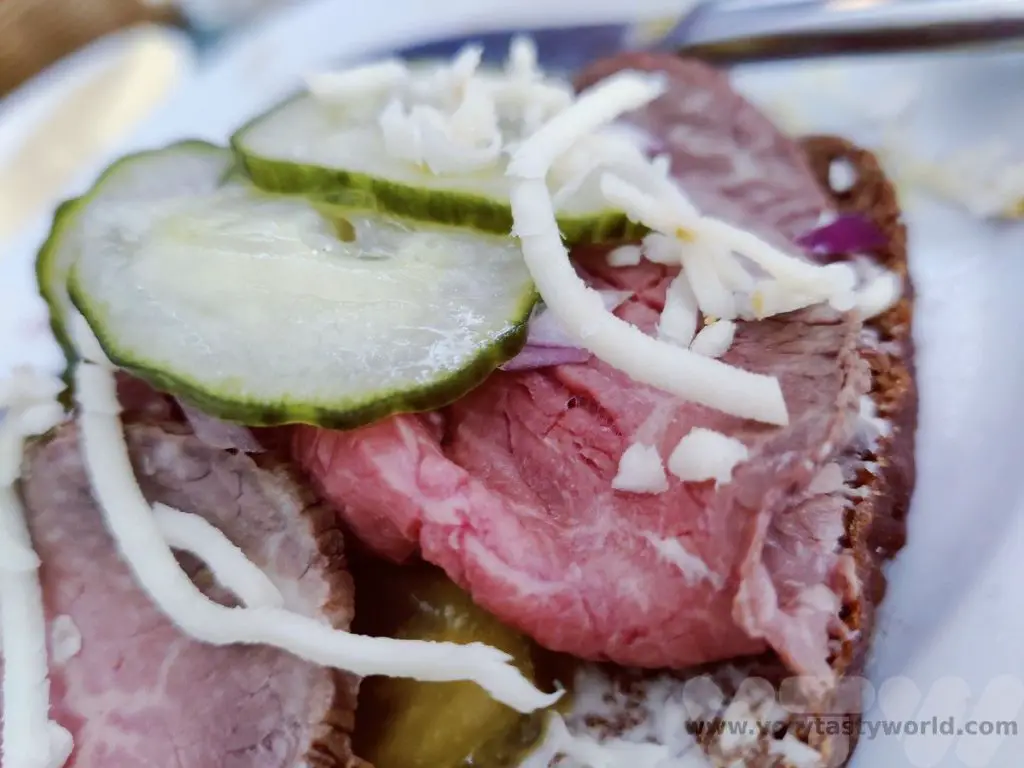
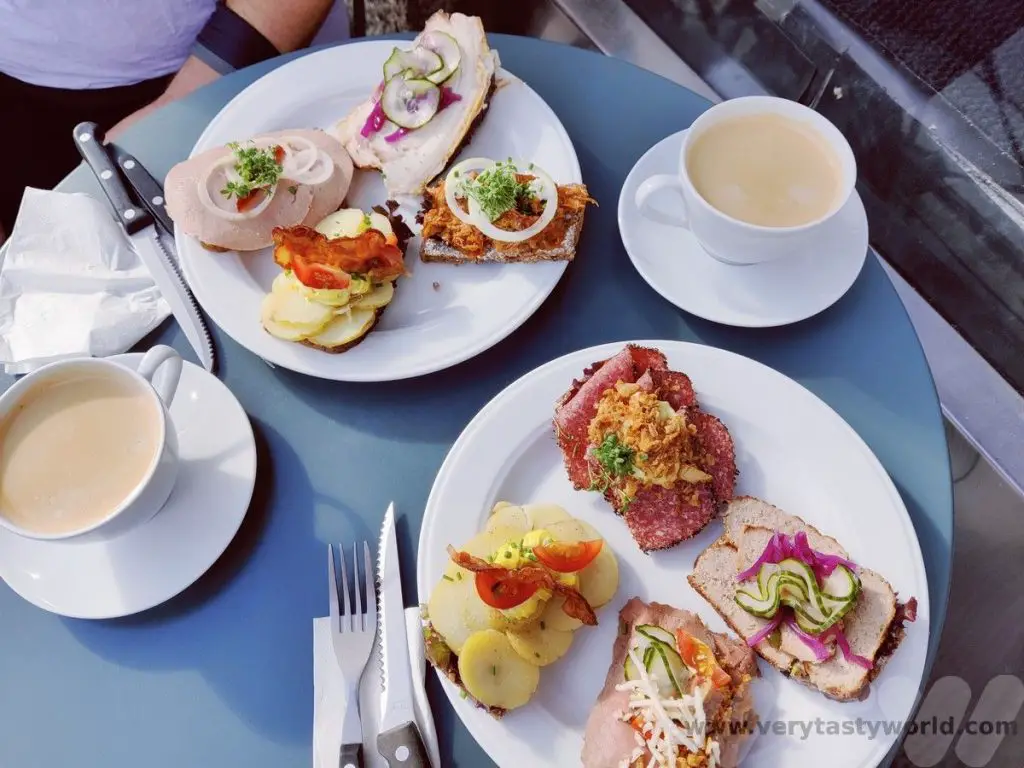
But Denmark is also the land of the smorrebrod – the open sandwich of great deliciousness and beauty!
We enjoyed a lunchtime special of a smorrebrod platter at the Canal Caffeen restaurant. You are provided with bread, butter and a platter of various ingredients. Then you butter the bread (smorrebrod literally means ‘buttered bread’) and combine the toppings to make your own smorrebrod. We were advised about traditional Danish combinations but also told it was perfectly okay to make our up own.

The platter comprised: fried fish fillet with remoulade, herring (to be eaten with the rye spread with lard instead of the usual butter), roast beef with onion, horseradish and remoulade, chicken with mayonnaise, roast pork with cabbage and pickles and brie with radish. It was a feast.
The meat packing district behind the central station (i.e. on the opposite side to Tivoli) is a former market trading area and now home to a large number of restaurants.
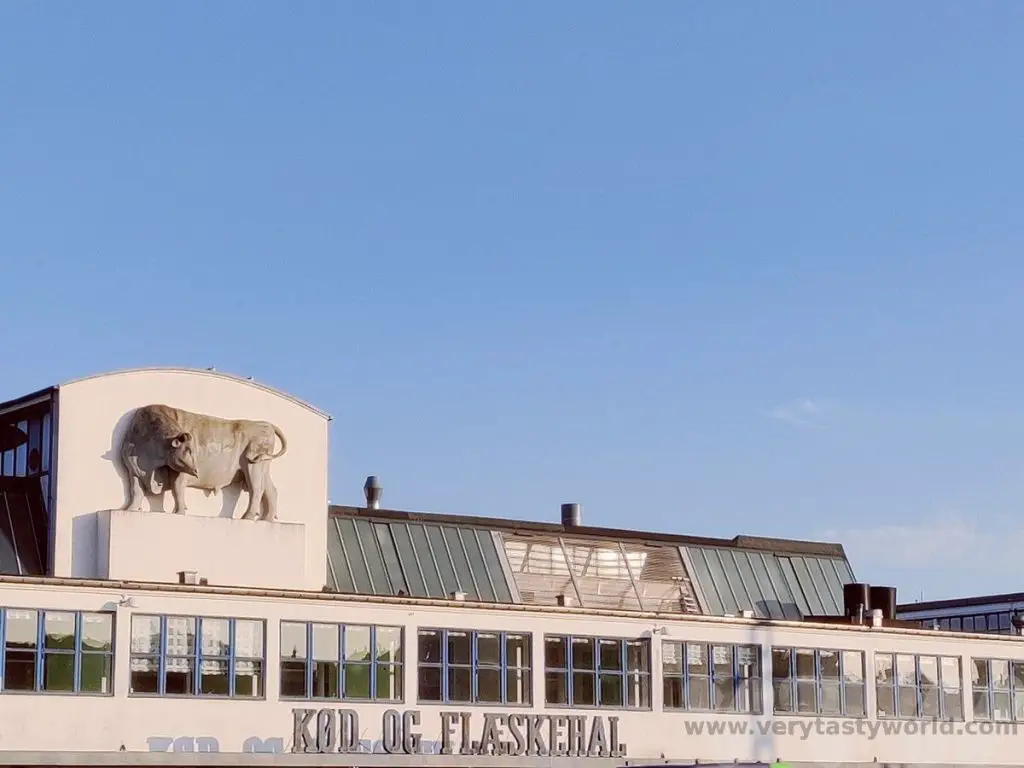
Brewpub War Pig not only offers a range of its own beers but the smokehouse has a variety of meaty dishes on offer.

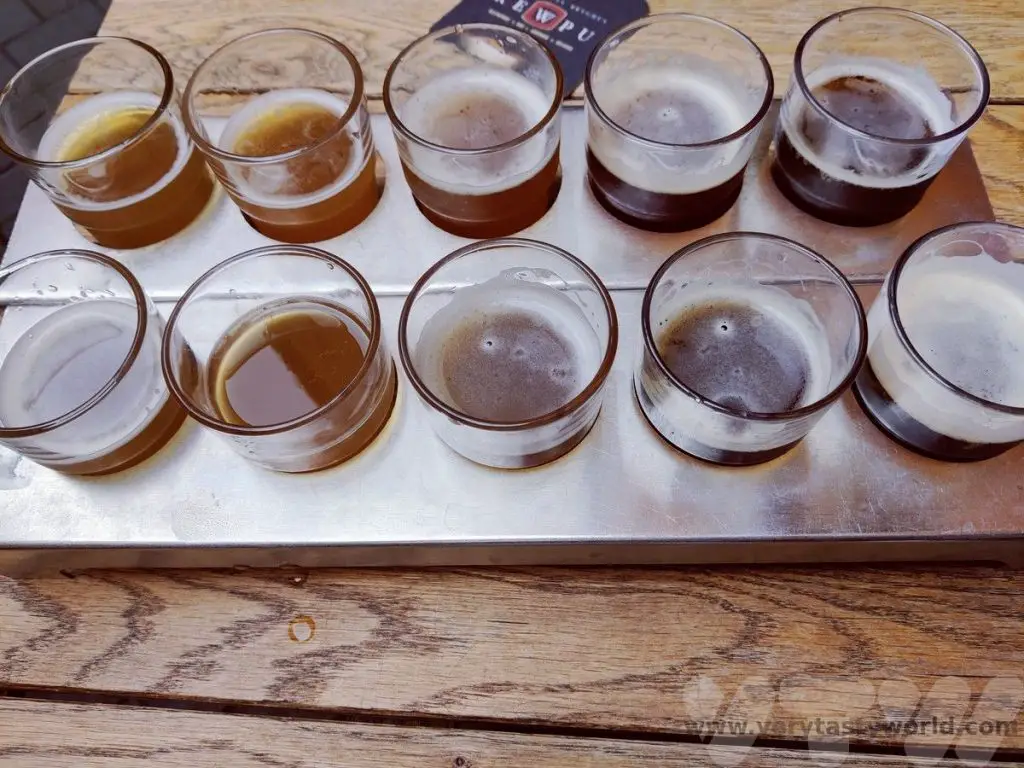
Copenhagen also has many varieties of beer on offer. In centuries past the water supply wasn’t as clean as it could have been so it was safer for the locals to drink beer than water. They developed a taste for it. Denmark may be the home of Carlsberg but there are also lots of (more) interesting craft beers to try. Brewpub on Vestergade offered a tasting flight featuring a variety of their own brews.
Cheap Eats and Drinks
There’s no getting away from the fact that Copenhagen, like many Scandinavian countries, is not a cheap place to visit if you are not from Scandinavia. We found Denmark to be cheaper than other countries we have visited in this region but still more pricey than home. However, we did find a few places to eat and drink that weren’t bank-breakingly expensive and offered good value.
Lilian’s Smorrebrod on Vester Voldgade was our top breakfast location. With a friendly welcome and huge variety of smorrebrod on offer from around 22-25DKK each, plus a cup of good coffee for the same price, we enjoyed breakfast/brunch at Lilian’s almost every day.
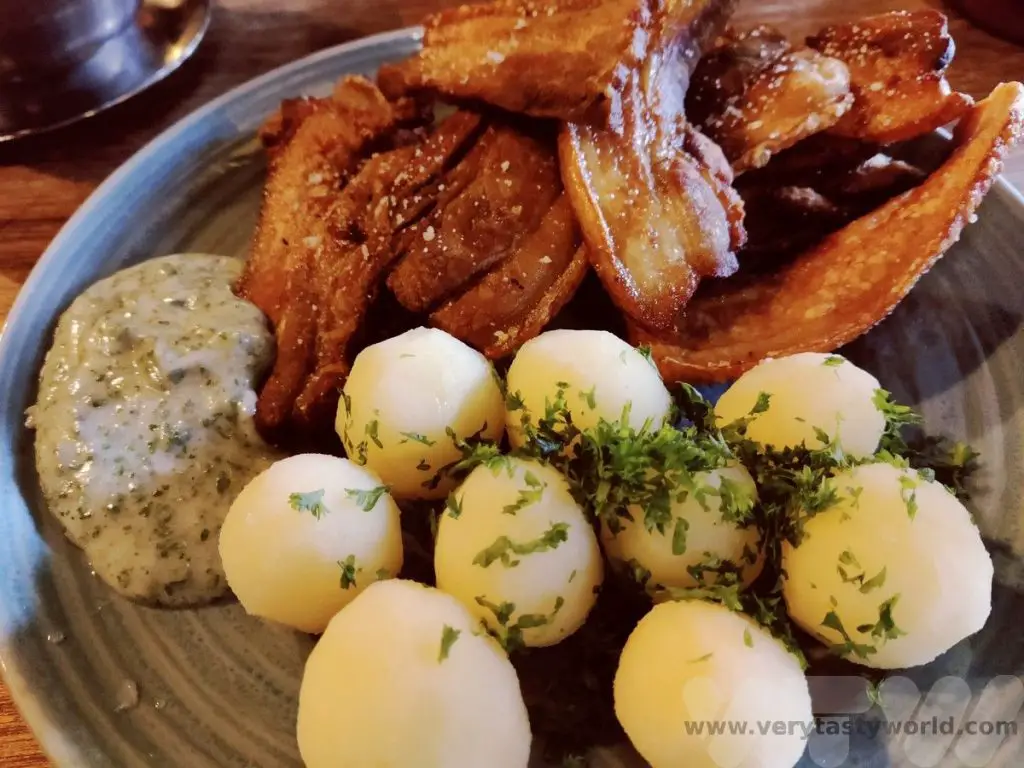
Rio Bravo on Vester Voldgade offered typical Danish fare including an all-you-can-eat pork, potato and parsley sauce dish if you’re feeling super-hungry. Well, you have to try Danish bacon in Denmark, right? The plate comes piled high and you are offered seconds – but we couldn’t manage them!
For cheap beer, Heidi’s on Vestergade offers a selection of good beers at what we would term UK prices (probably cheaper than London prices!).
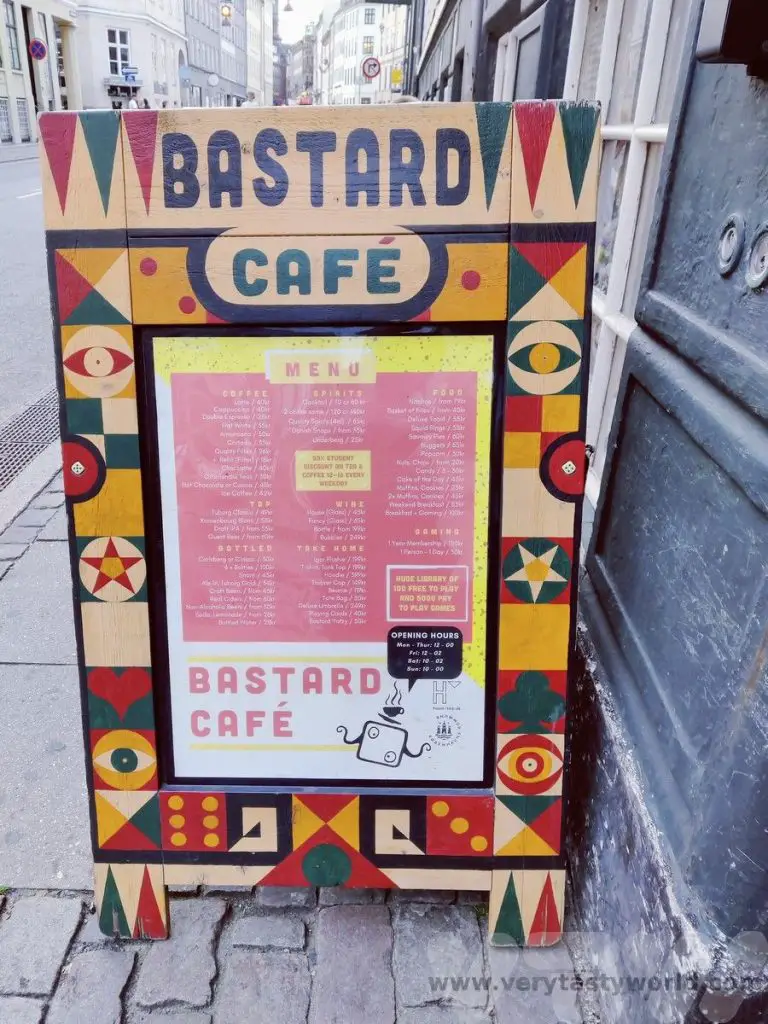
The amusingly named Bastard Café on Rådhusstræde also offered a decent selection of reasonably cheap beer. This sprawling café, sited across multiple rooms within a large building which also houses a deeply cool cinema, has a plethora of board games you can borrow. The beer is good but the food not that exciting – toasted sandwiches and fried things – but you’re not really there for fine dining.
Singing Copenhagen, wonderful, wonderful – Copenhagen for me!
Our five days in Copenhagen were pretty packed and that reflects the diversity of things to do in this vibrant and cosmopolitan city. It really does have something for everyone.
Danny Kaye was right all those years ago. Copenhagen is truly wonderful.
Related Posts You May Enjoy


A One Day Hanoi Itinerary
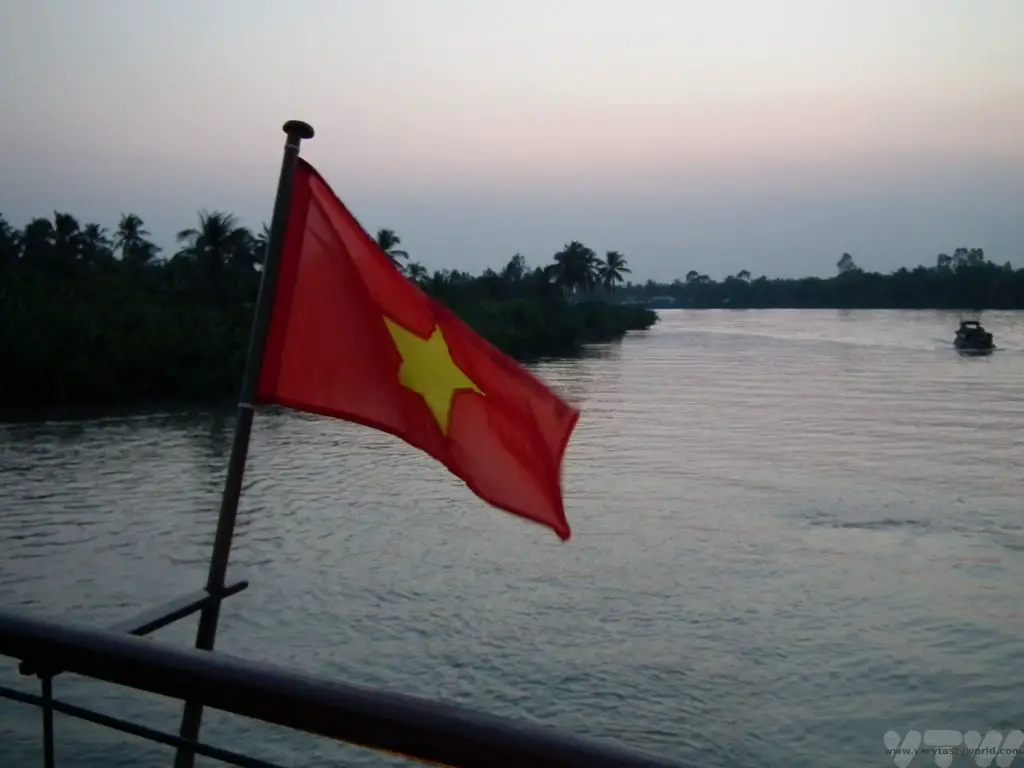
The northern city of Hanoi is an essential place to visit on a trip to Vietnam. It’s a city we would describe as ‘shabby chic’ compared with the ‘bling’ of Ho Chi Minh City (aka Saigon) in the south. Hanoi has a long and interesting history and lots of fascinating sights. Many are located within a reasonable distance of each other, close to the old part of the city. Here are our suggestions for a one day Hanoi itinerary.
A Brief History of Hanoi
The location where the city now stands has been populated for around 5000 years, and was the capital of the Au Lac, the Vietnamese nation during the 3rd century BCE, but the area was conquered by the Han Dynasty and ruled by China for hundreds of years. In 939 the Vietnamese Ngo dynasty was founded when Ngo Quyen conquered the Chinese in the Battle of Bach Dang River. The last king of this dynasty, the sadistic Le Long Dinh died in 1009.
Power transferred to a palace guard chief called Ly Cong Uan who became Emperor Ly Thau To, founding emperor of Ly dynasty. He established a political centre in the north of the country, naming it Thang Long which means ‘ascending dragon’. Highly revered, he was the emperor who established an era of prosperity for the city. Thang Long was the capital of Vietnam until 1802 when the Nguyen dynasty moved the administration to Hue. In 1831 Thang Long was renamed Hanoi, which means ‘inside the rivers.’ Vietnam was colonised by the French in 1873 and they designated Hanoi to be the capital of the whole of French Indochina. The French abandoned Vietnam during World War 2.
Ho Chi Minh, leader of the communist revolutionary party the Viet Minh, declared Vietnamese independence on the 2nd September 1945 and established Hanoi as the capital of the Democratic Republic of Vietnam, an independent country. The city endured turbulent times during the last half of the twentieth century – the French returned in 1946 so Ho Chi Minh led a guerilla war and defeated them in 1954 in the First Indochina War.
The Second Indochina War, better known as the Vietnam War (although in Vietnam, local people refer to it as the American War) followed immediately and was fought from 1955 to 1975, eventually leading to the reunification of Vietnam. Since 1976 Hanoi has been the capital of the Socialist Republic of Vietnam.
Getting Around Hanoi
There are plenty of options for getting to Hanoi’s attractions. We stayed very close to the Old Quarter which was perfect for exploring the area. Most of the attractions mentioned here are within walking distance. Although beware, the very first thing that will strike you about Vietnam is the sheer number of scooters and motorcycles. They are everywhere!

The next thing that will strike you is – how do you cross the road? We have a helpful video guide in this post. Wandering around Hanoi is a pleasure in itself – an undeniable assault on the senses perhaps, but walking in this city is a great way to discover its marvellous nooks and crannies.
Alternatively, there are buses and taxis available for transportation.
One Day Hanoi Itinerary – Morning in The Ba Dinh District
Ho Chi Minh – The Father of the People
The morning started with a visit to the Ho Chi Minh Mausoleum on Ba Dinh Square, the final resting place of the highly revered Vietnam revolutionary leader. Inspired by Lenin’s tomb and other communist leaders, the body of Ho Chi Minh has been embalmed and lies in state, guarded at all times. It is possible to visit the grand marble construction and file past the body.
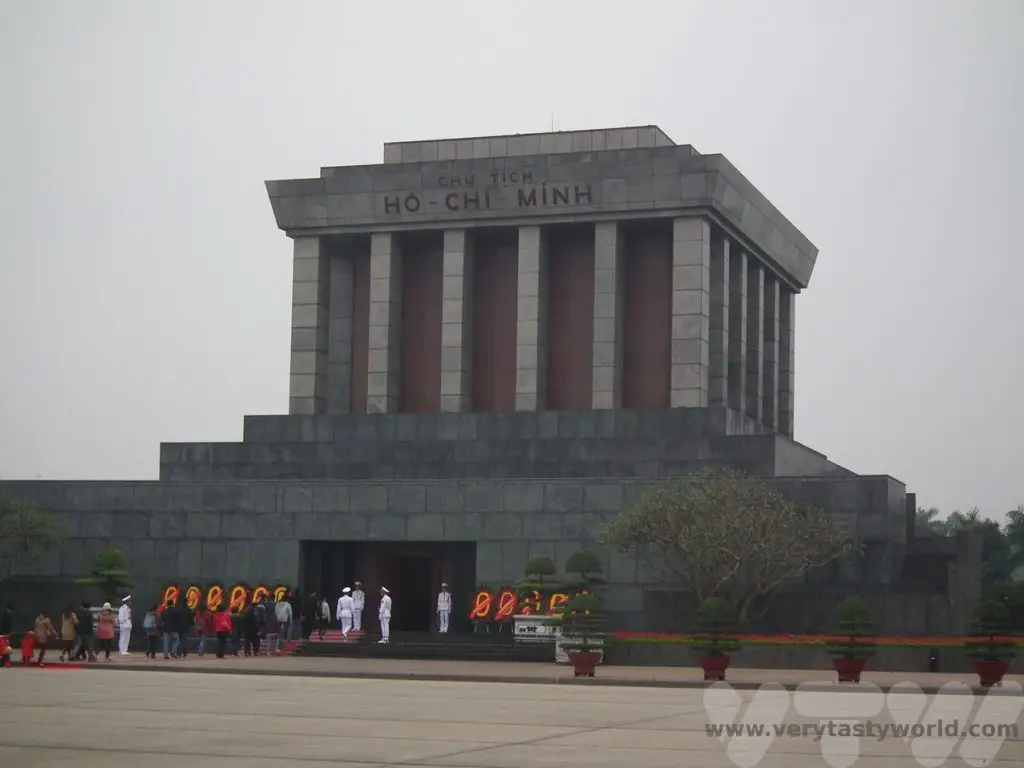
You will most likely need to queue to enter the mausoleum. Respectful dress is required (sleeveless shirts and shorts are not allowed) and you may need to leave your backpack in a locker. You are also expected to pass by the body in silence as a mark of respect. If you are visiting the mausoleum between the 4th of September and the 4th of November, the body will not be available for viewing because it goes to Russia for maintenance at this time.
Interestingly, Ho Chi Minh himself wanted to be cremated and have his ashes distributed through different regions of Vietnam. But the communist party wanted to celebrate and commemorate him, so the mausoleum was constructed in his honour. His wish seemed, to us, to be a much more humble approach.
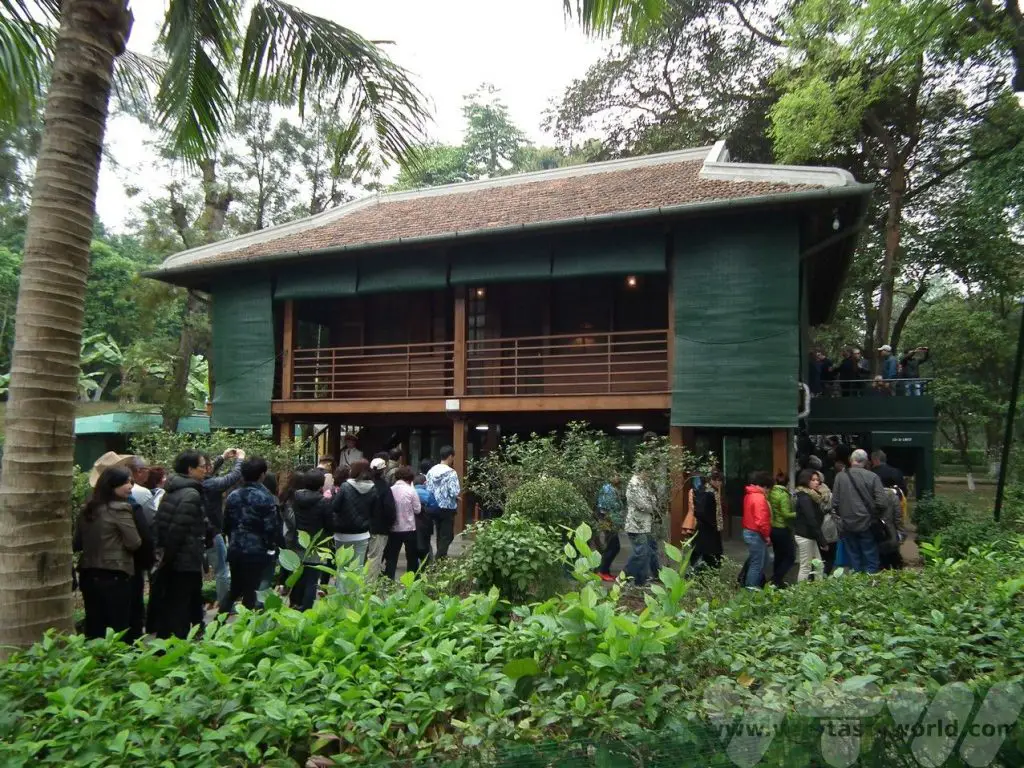
Our next stop was the presidential palace and former residence of Ho Chi Minh.
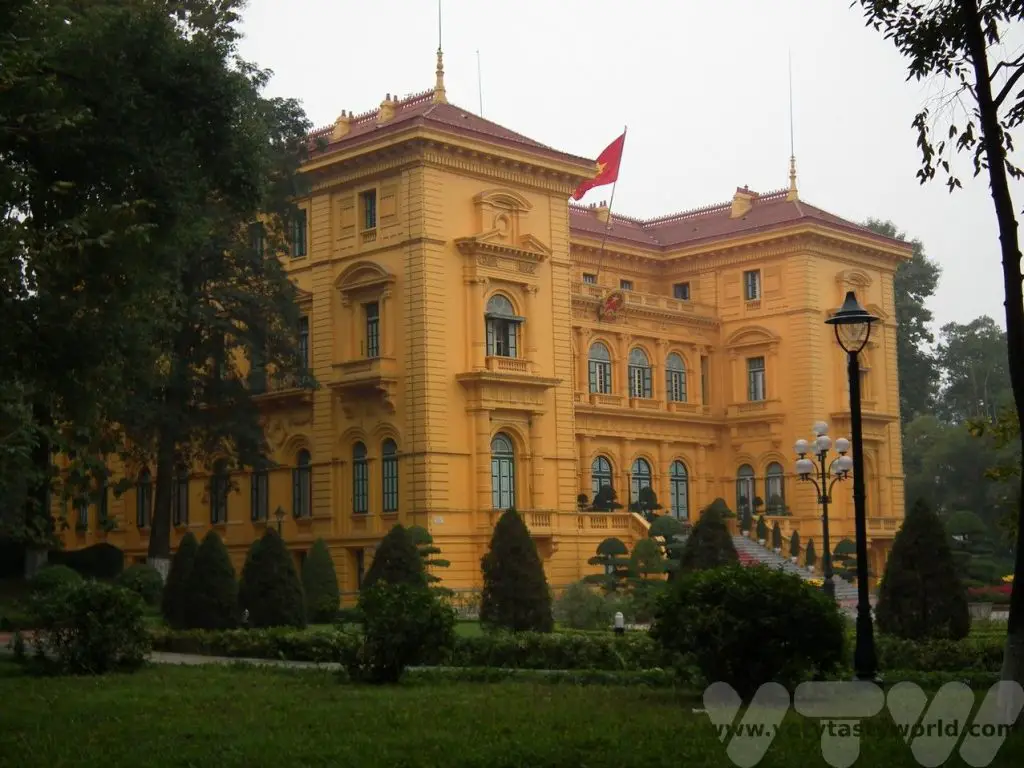
Although Ho could have used the opulent presidential palace as a residence he chose to live somewhere much less ostentatious. The two room stilt house, set amidst a pretty garden with a carp pond, was his ostensible home from 1958 to 1969. A simple traditional building with minimal facilities. It’s possible to look through the windows to see how Ho lived.

It was fascinating to learn about Ho and quite easy to understand how he was – and still is – revered by the Vietnamese people in Hanoi.
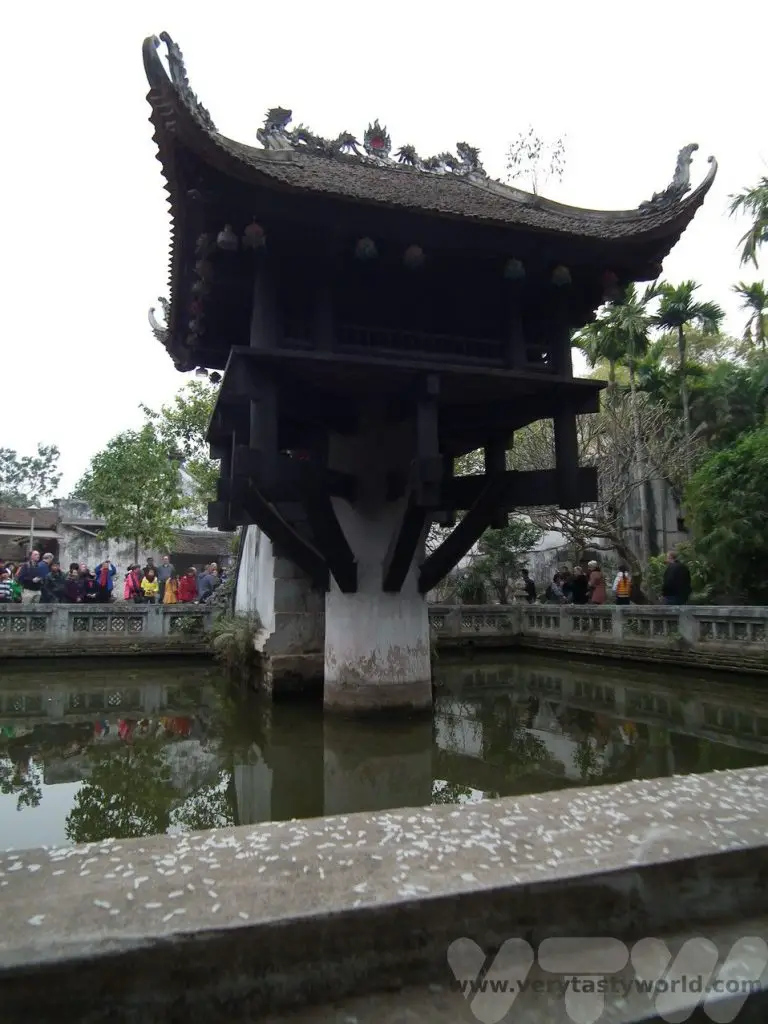
One Pillar Pagoda
Just to the south of the complex is the One Pillar Pagoda (note this is open every morning but closed on Monday and Friday afternoons). It is a wooden pagoda built on a single stone pillar that sits in the middle of a serene lotus pond that is designed to give the appearance of a lotus flower emerging from the water. It is a Buddhist pagoda and was constructed in 1049 by Emperor Ly Thai To apparently to celebrate the birth of a male heir.
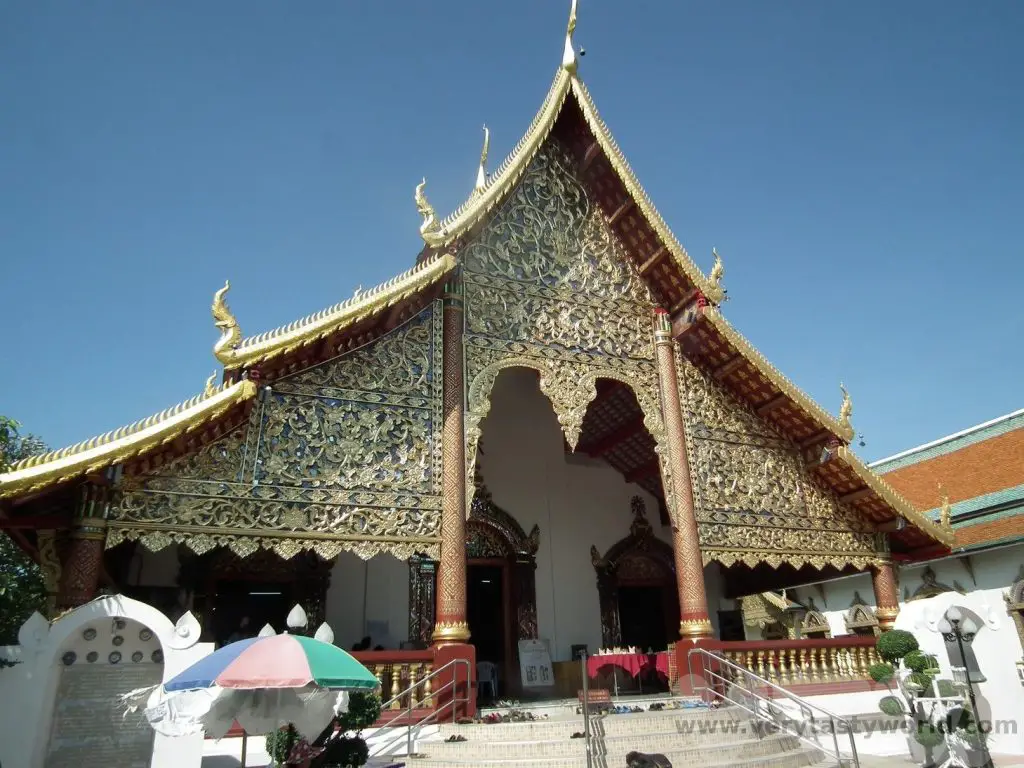
The Temple of Literature
Moving south again, the morning concludes with a visit to the remarkable Temple of Literature. It was constructed in 1070 to honour philosopher Confucious and went on to become Hanoi’s first university in 1076, a prestigious seat of learning. It is another legacy of the Ly dynasty. Students learned mathematics, literature and calligraphy. Although it is no longer a university (and hasn’t been since 1779) it is a monument to education. Even today, Vietnamese students often visit the temple to receive blessings for their own studies.
A beautiful site to visit it has five courtyards.
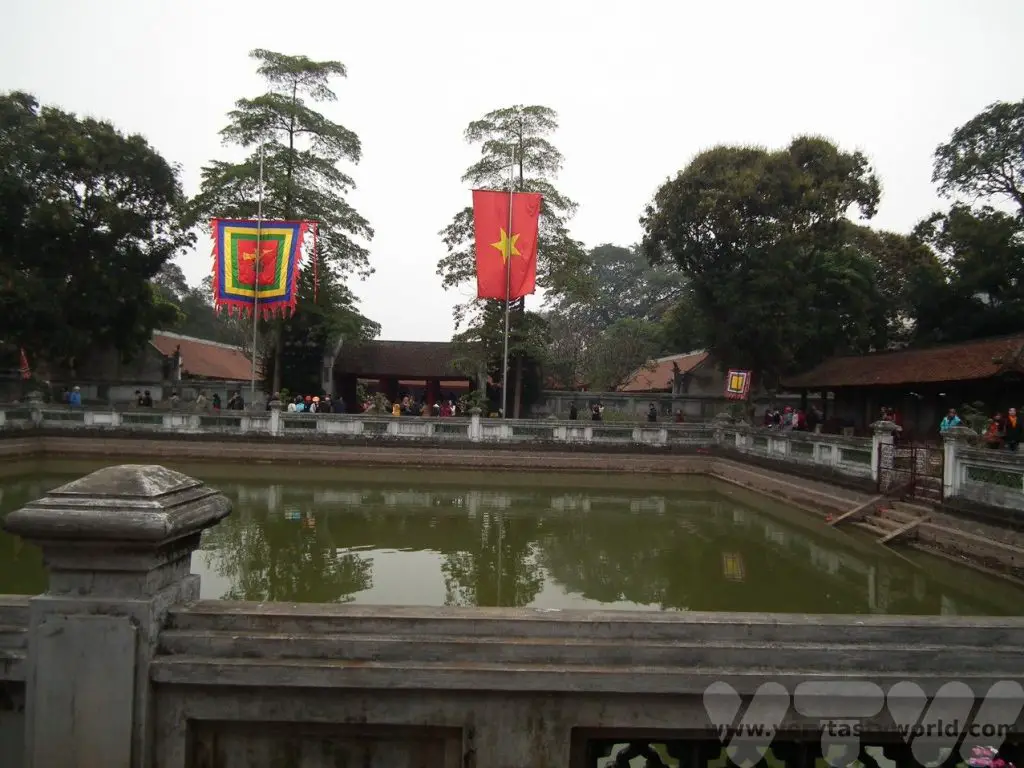
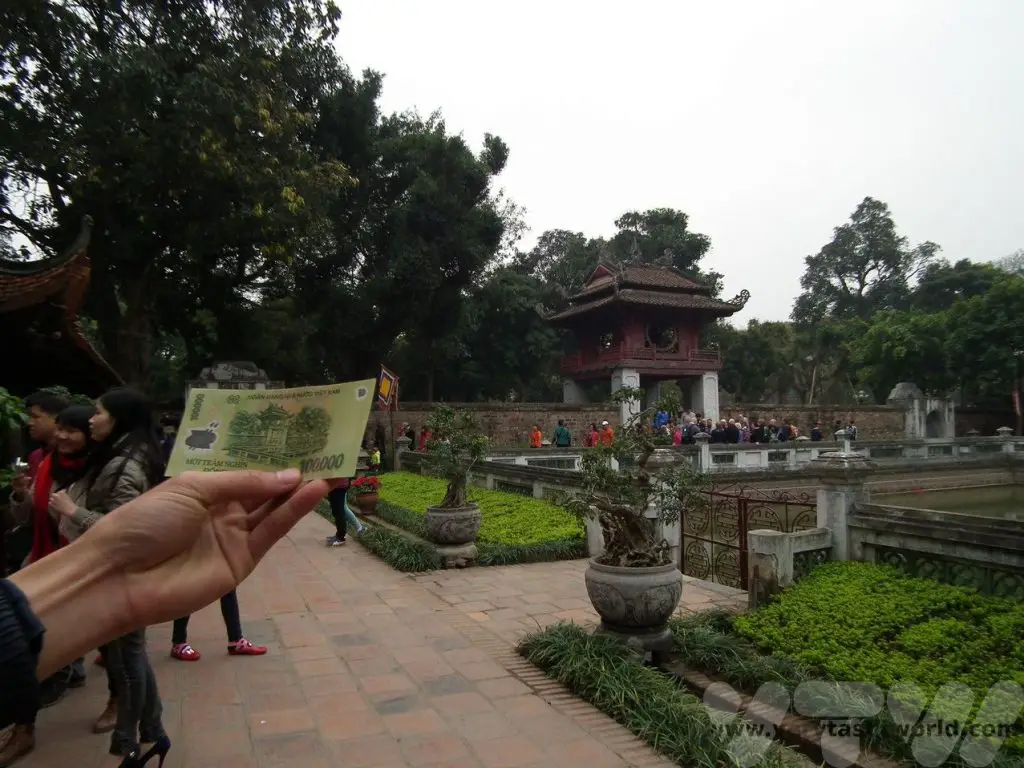
In the centre is a pool, the well of heavenly clarity. It can be seen on the 100,000 dong note.
You will see many tortoises throughout the temple – these represent wisdom. There are multiple stelae onto which the names and birthplaces of graduates of the university (renowned for its incredibly difficult exams) are carved. The crane standing on top of a tortoise is a symbol of longevity.
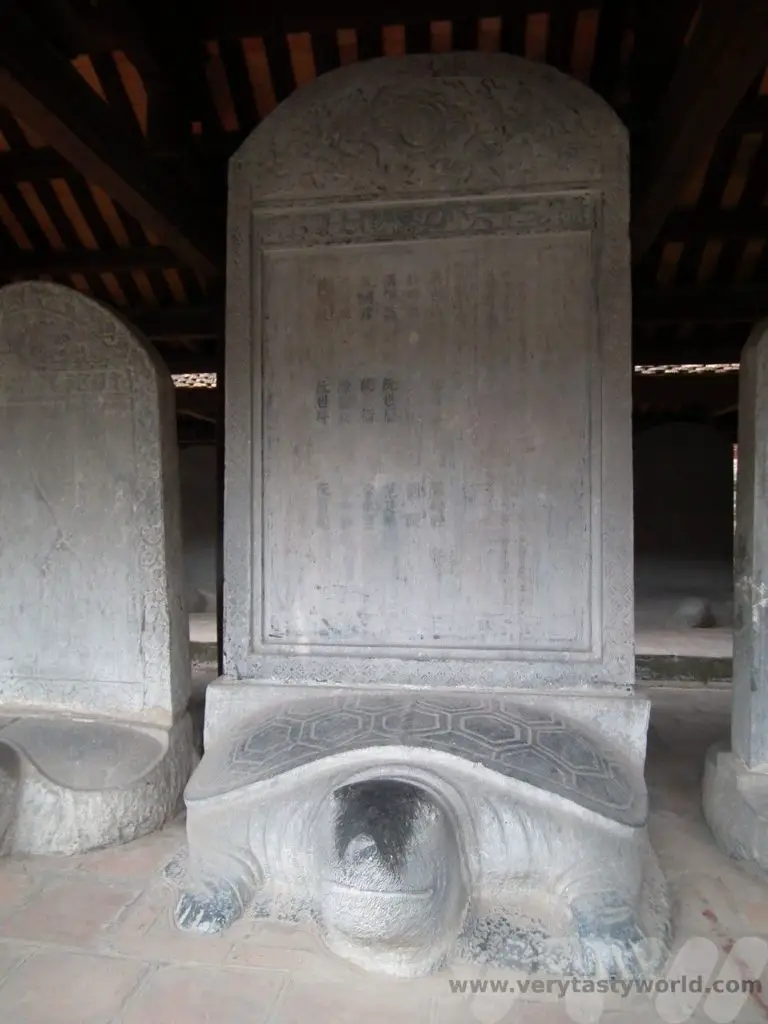

Again, this is a site that is considered hugely culturally important so it is important to behave respectfully. There are even rules about not stroking the tortoises’ heads (quite right too!).
The street on the eastern road adjacent to the Temple of Literature has a large number of restaurants. There’s a great variety of local food here, perfect for stopping for lunch.
One Day Hanoi Itinerary – Afternoon In The Old Quarter
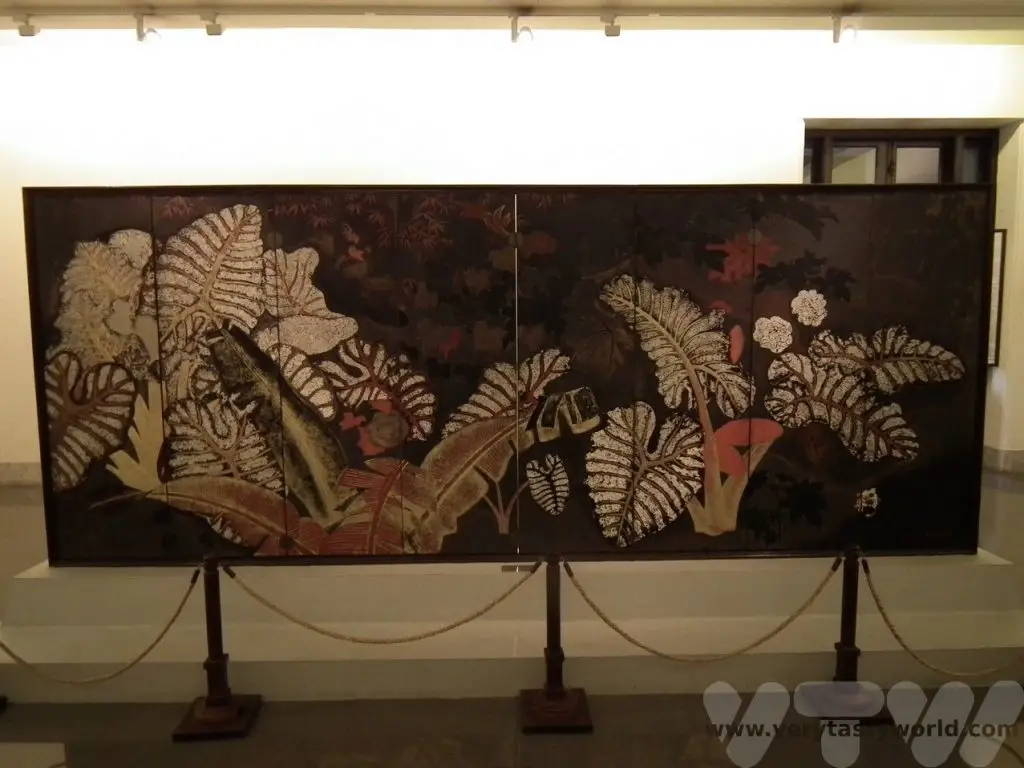
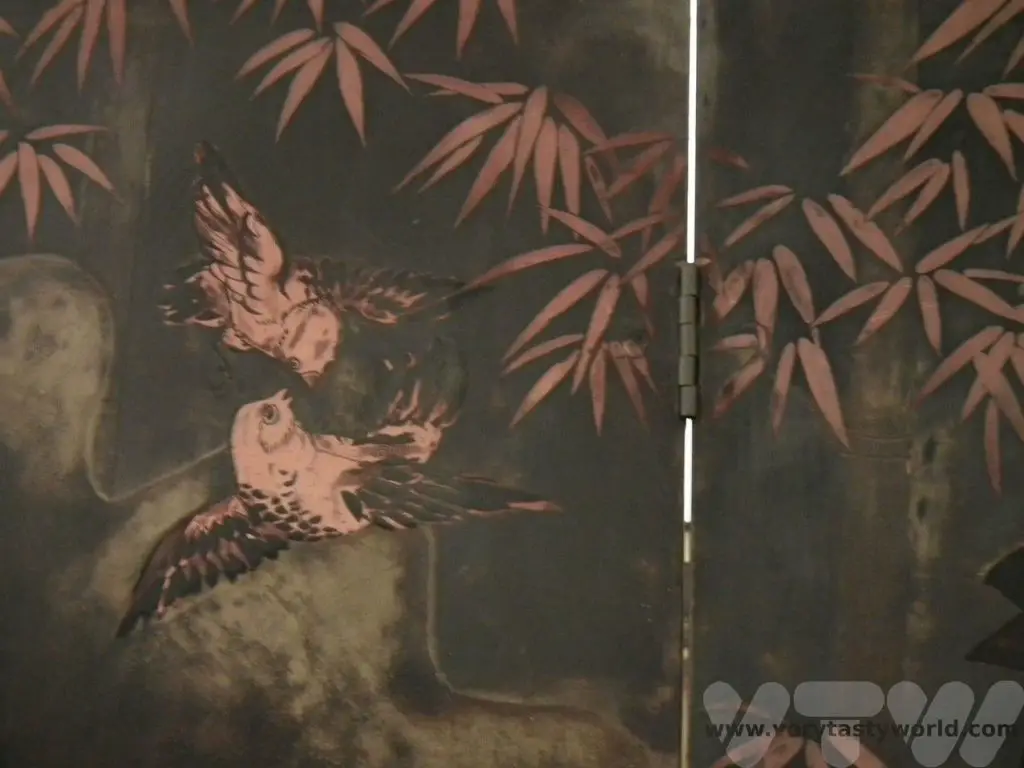
Just up the road from the Temple of Literature is the Vietnam Museum of Fine Arts. If you like art, especially discovering local art, this is definitely a must-see attraction. It’s perfect for a leisurely after-lunch visit.
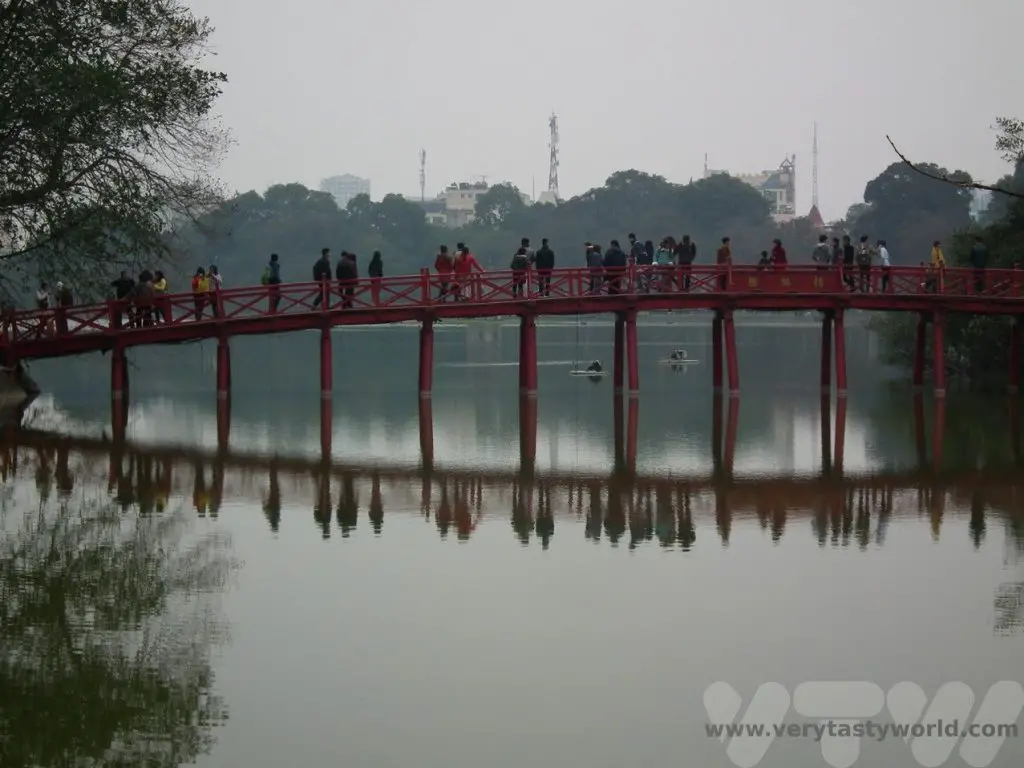
Hoan Kiem Lake
Visiting Hanoi’s old quarter, which lies around a kilometre to the east of the museum. Follow Trang Ti to reach Hoan Kiem Lake (also known as the Lake of the Restored Sword) and the Ngoc Son Temple.
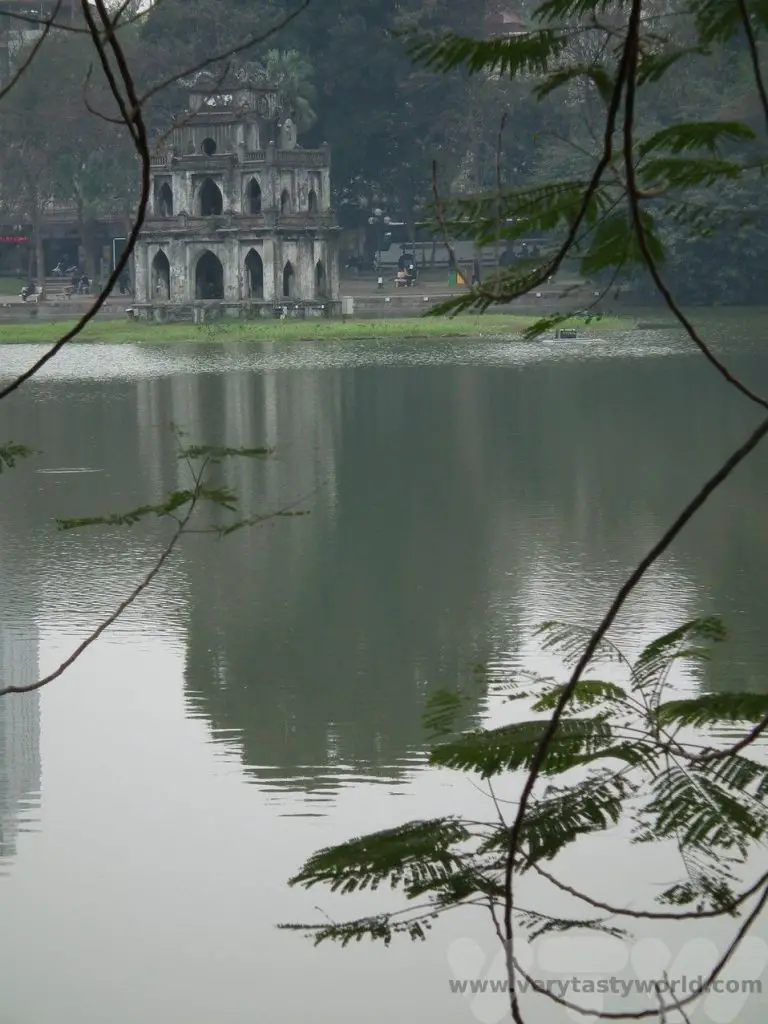
Again, this is a hugely important historic area with a legend that dates back to the founding of Hanoi (as Thăng Long) by Emperor Ly Thai To. A giant golden turtle lived in this lake and gave the Emperor a magical sword which he used to defeat the Chinese occupiers. As soon as he had won the battle, Ly Thai To respectfully returned the sword to the turtle, who dived back into the lake in order to give it back to the gods. It’s very pleasant to walk around the lake.

The lake has an island where the Ngoc Son Temple, also known as the Temple of the Jade Mountain, is situated. It is accessible via a vermillion bridge.
It celebrates Van Xuong who was a revered scholar, La To, and General Tran Hung Dao who defeated the Mongol invaders in the 13th century, a glorious victory.
A Cyclo Tour
An enjoyable way to explore the old town is via a cyclo tour. An hour’s tour takes in the atmosphere of Hanoi’s old quarter and is a relaxing way to end this busy day of sightseeing. You also get to experience the thrill of being on the road amidst all those scooters – an experience in itself.
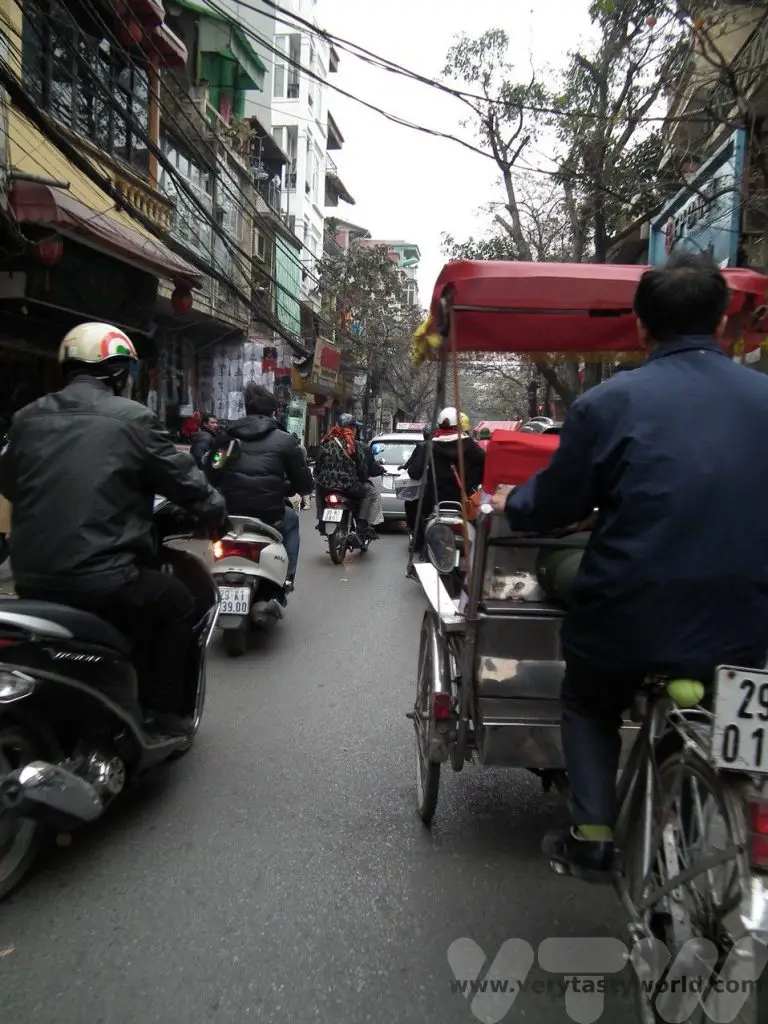
The old quarter is comprised of 36 streets located within a square kilometre just north and west of the lake. The streets have been named for the artisans and craftspeople who traded specific merchandise in that street: bamboo street, silver street, decoration street and silk street to name a few.

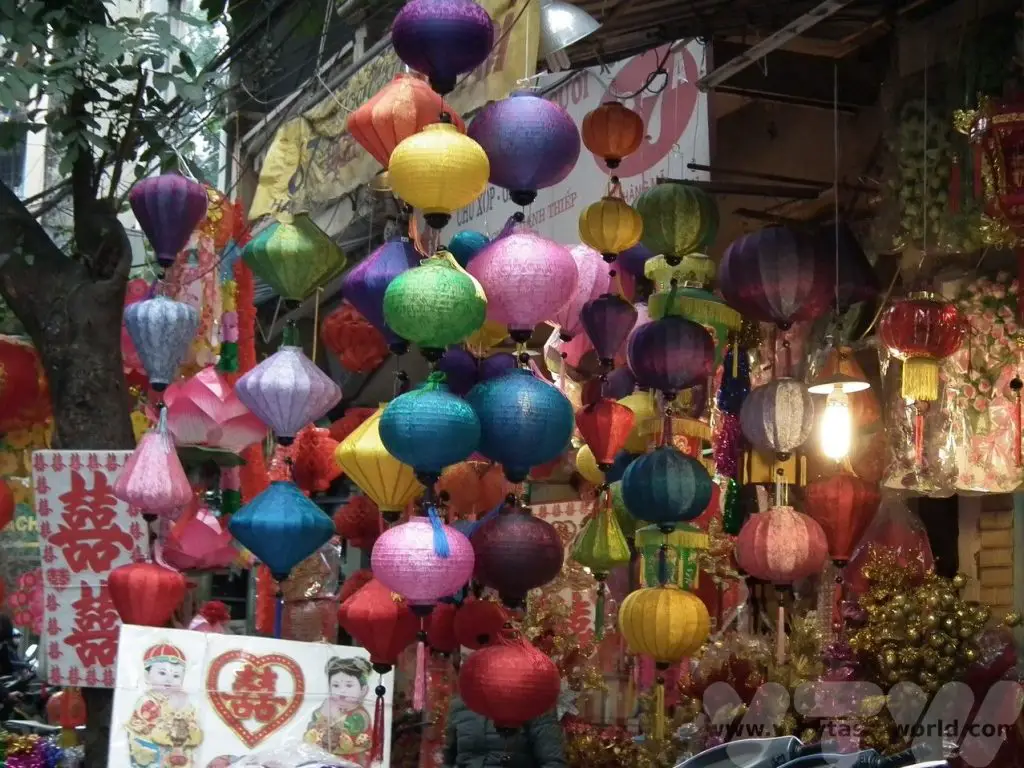
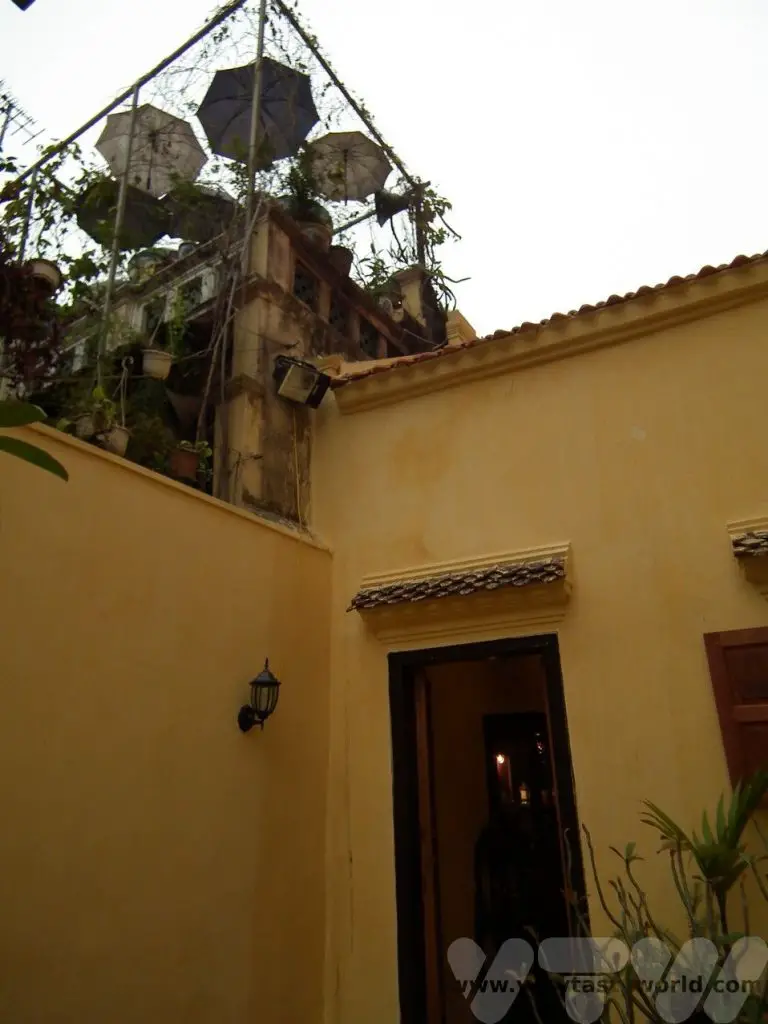
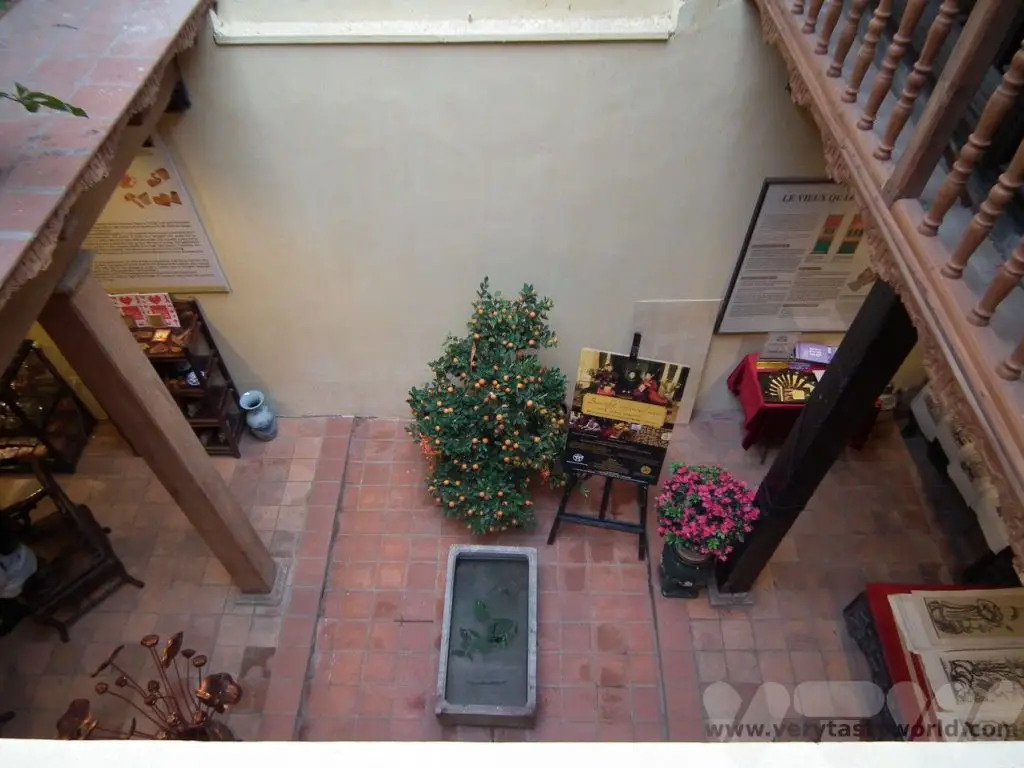
Part of the tour can include a visit an ancient Vietnamese ‘long house’. One of the characteristics of the architecture in Hanoi is that the houses are very thin and tall. The width can be as short as just 2.5m, sometimes up to 5m. However, when you go inside the houses seem to stretch forever. This is because properties used to be taxed according to the amount of façade on the street, so they were constructed this way to minimise costs. This house had a lovely open feel to it thanks to its open balconies, despite the narrow width.
Evening in Hanoi
There are lots of places to eat in Hanoi, ranging from posh dining to street food. The old quarter is a perfect place to hang out in the evening. There is a night market right in the heart of the area. Another popular place is the Bia Hoy Corner which is frequented by both tourists and locals. Be prepared for plastic seats, street snacks, cheap beer and a chance to get chatting with new friends.
The Water Puppet Theatre is a popular attraction, and it’s worth making a booking. It’s located by the north side of Hoan Kiem Lake.
While this is a pretty intense itinerary, it is possible to make the most of a single day in Hanoi.
Vietnamese Food
Just as there are differences between the culture of north and south Vietnam, the cuisine reflects this as well. Food from northern Vietnam is subtle with a balance of flavours, whereas southern dishes are often more spicy. And even though regional variations exist, pho can be found all over Vietnam and is the country’s national dish.
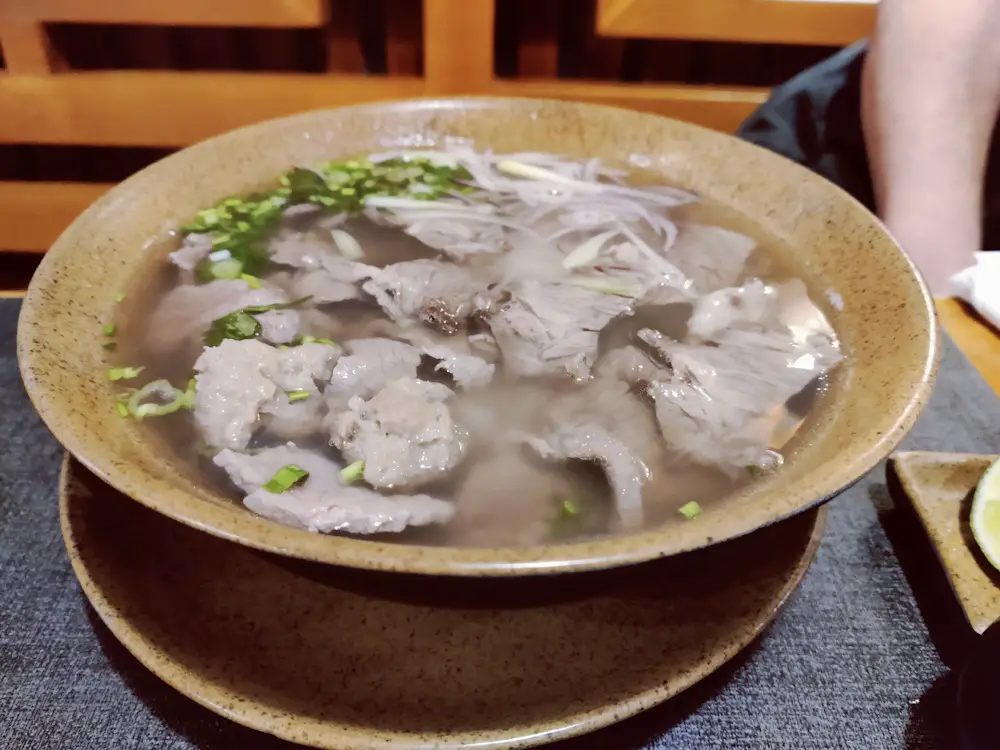
There’s No Business Like Pho Business
Pho is a noodle soup – soft rice noodles served in a warm, very slightly spicy, bone broth with thin slices of meat such as beef (pho bo) and chicken (pho ga). These are the traditional varieties of pho in Hanoi.
Pho is a staple of Vietnamese cuisine. Its pronunciation is like the French word, feu (fire), which is appropriate because it’s thought that the name derives from the term ‘pot au feu’, or French beef stew. It’s so good that you can have it for breakfast, lunch or dinner. Or indeed breakfast, lunch and dinner if you feel so inclined. Yes, we did. In Vietnam it is primarily a breakfast dish – healthy and hearty – it truly sets you up for the day ahead.
The soup is meant to be drunk. Like Japanese ramen, the broth is absolutely key to the flavour. The best broths will have been simmered for hours. A beef stock will use the bones, a chicken stock often uses an entire chicken. Spices such as cinnamon, ginger, cardamom and cloves may add a subtle heat in addition to flavour. The soup should be clear.
The noodles are soft but with a bit of bite. They are cooked separately inside a wire basket that is plunged into boiling water for a few minutes. These are then added to the serving bowl before the broth and meat are added.
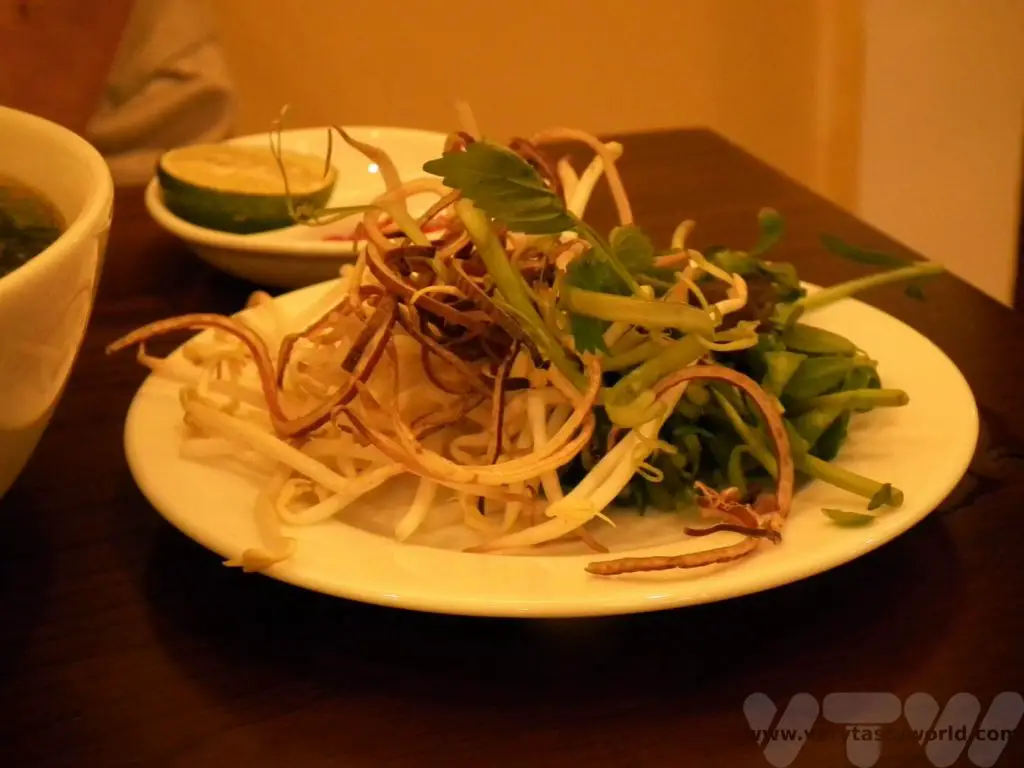
One of the best things about pho is that you can flavour it to your own taste. Alongside each nourishing bowl of pho a plate containing all sorts of potential flavours and textures will be served. Want heat? Add chilli (the smaller the chilli, the hotter the spice). Like sour flavours? Squeeze in some lime juice.
Texture and crunch? Add beansprouts or green onion. More flavour? You’ll be offered a variety of aromatic herbs, commonly coriander, holy basil and mint which can be added in whichever ratio you desire.
But the key is making sure that you taste the broth before you start wading in with additional garnishes. And, while Vietnamese pho restaurants in other countries often offer sauces such as hoisin or chilli to add to the soup, it is unlikely that you would ever see this in Vietnam. It would be a shame to add sauce which detracts from the delicate flavour of the broth.
You eat pho using chopsticks to pick up the meat and noodles. There is usually a spoon available to sip the broth. Actually, it’s okay to bring the bowl to your lips and drink directly from it. Slurping is fine. For British people who were brought up to believe that it’s rude to slurp your soup, it’s actually quite difficult to do this without spilling the broth or accidentally spluttering! A very positive side effect of consuming so much pho was that we were kept well hydrated in the warm, humid climate.
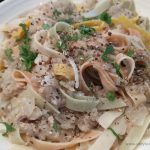
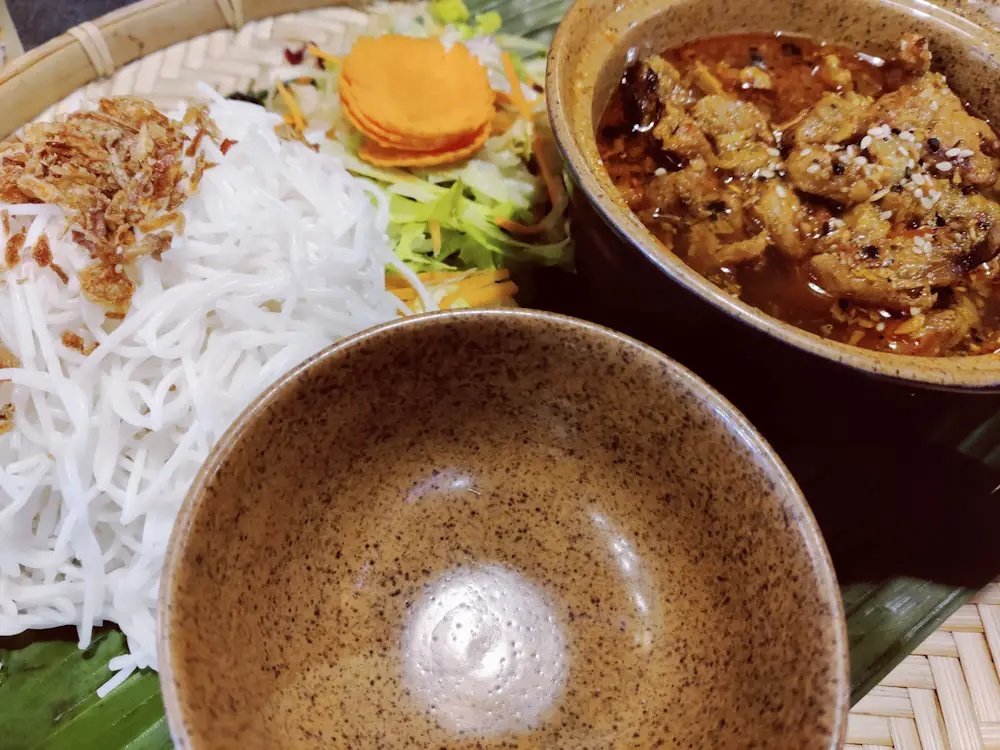
Bun Cha Ha Noi
Another typical dish from the northern region is Bun (noodles) Cha (grilled pork). It is a delicious combination of grilled pork slices and/or meatballs accompanied by rice noodles and herbs, in a spicy and flavoursome sauce. It is thought to have originated in Hanoi.
Bo La Lot
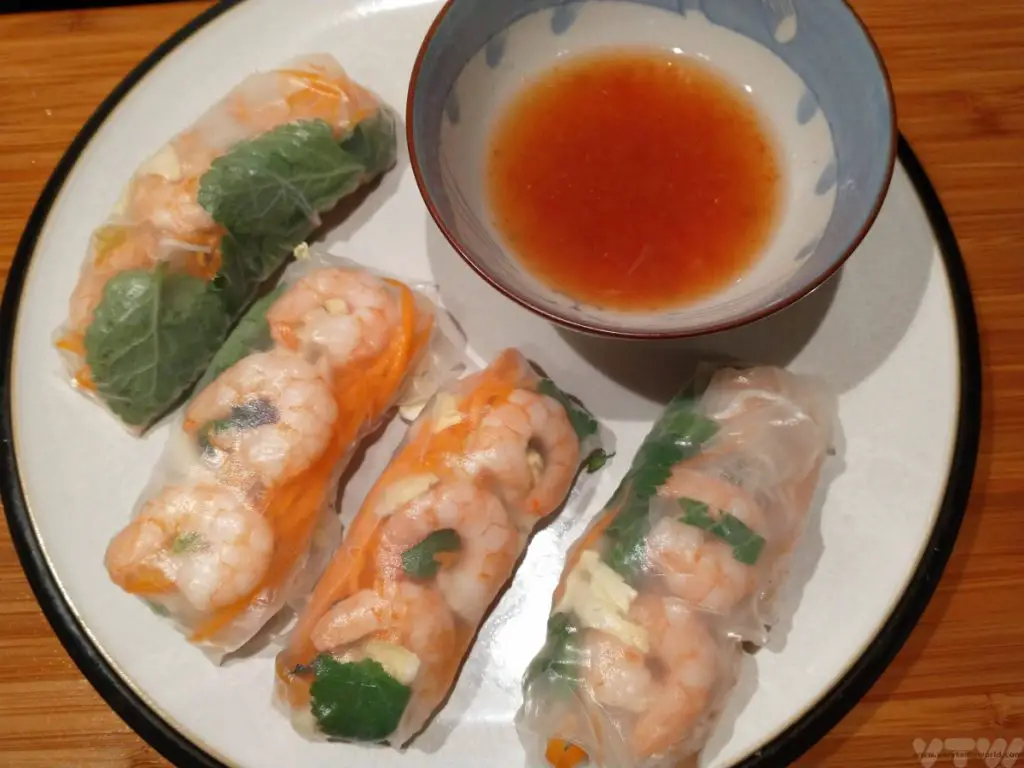
Another delicious dish is Bo La Lot – grilled beef balls wrapped in betel leaves. Served with a sweet and fragrant dipping sauce, these are juicy, full of flavour and make for a brilliant starter or snack.
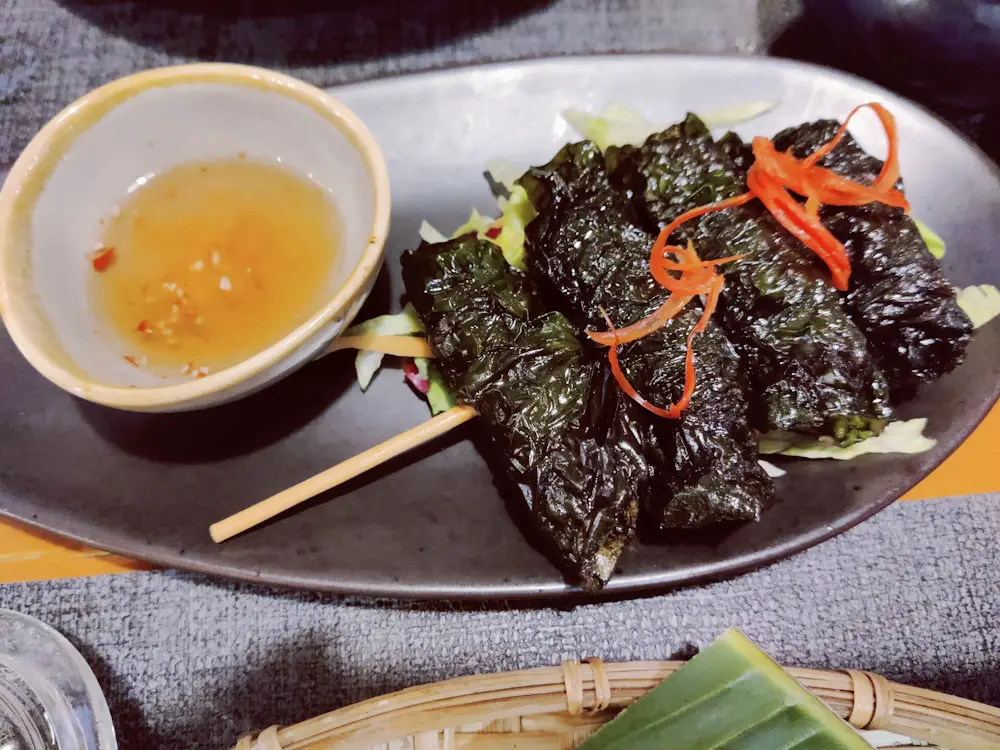
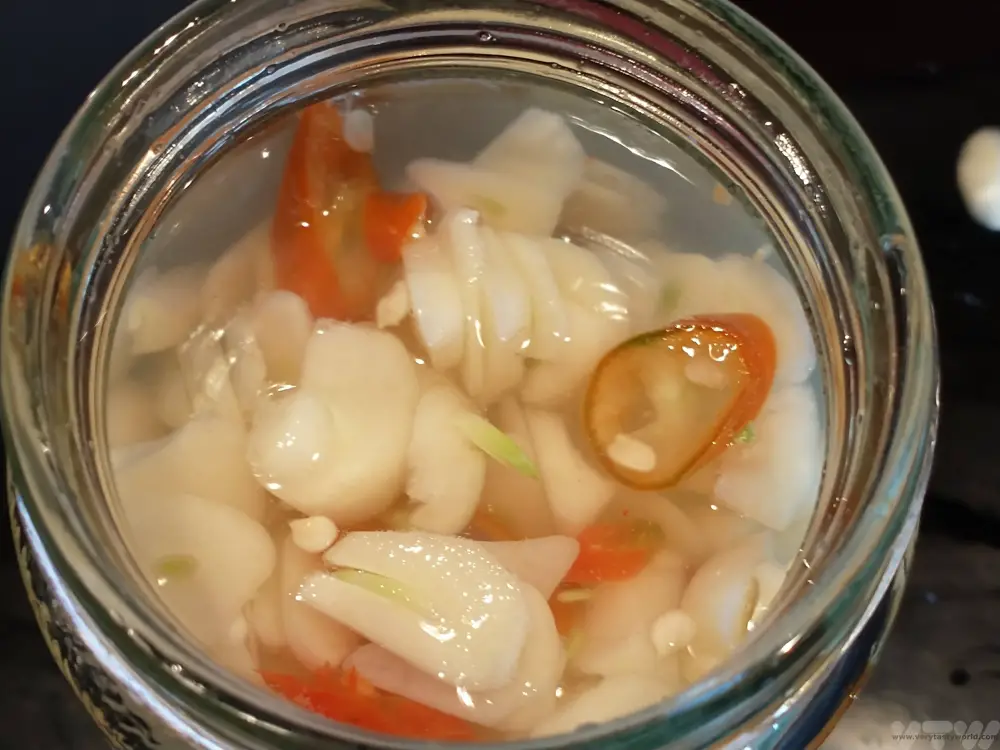
One of the best garnishes is Vietnamese pickled garlic, a zingy condiment. We have a recipe for this – it’s great for accompanying Vietnamese food but really versatile for other dishes as well.
Related Posts You May Enjoy


A Galapagos Land Based Itinerary
For many visitors, a cruise is a popular way to see the marvellous Galapagos islands. There are lots of options available, from bigger ships (up to around 100 passengers) to smaller motor yachts. But what if cruising isn’t for you? Mitch is a pathetic sailor and gets incredibly seasick, even on seas that aren’t very rough. We had long wanted to visit the Galapagos but were put off for a long time by the prospect of travelling in boats. Sleeping in a bed that didn’t move was a high priority! So we explored options for a Galapagos land based itinerary.
While it is possible to take a predominantly land based trip to the Galapagos we do recommend some boat excursions as there are many islands to visit and each has different characteristics and a diverse array of wildlife. There are quite a few that are reachable within a couple of hours’ boat journey from the large island of Santa Cruz so it is possible to do a number of day trips, which means you can explore some of the other islands without spending too much time on a boat. It is possible to fly between some of the islands (Baltra, which serves Santa Cruz, San Christobal and Isabela) but flight prices can be expensive, luggage size restrictive and the flight times aren’t always reliable.
Where Are The Galapagos?
The Galapagos are an archipelago in the Pacific Ocean and a province of Ecuador. Located around 1000km from the west coast of Ecuador, these volcanic islands are located in the Pacific Ring of Fire and formed over several millions of years due to the immense volcanic activity in the area. They are still geologically active, with some 13 active volcanoes.
Naturalist Charles Darwin visited the Galapagos islands in 1835 on the second voyage of the Beagle and his study of the local finches formed the basis of his work The Origin of the Species. He observed that the finches from each island had noticeable variations in the development of their beaks due to the different types of food available and variation in the living conditions. This led to him developing the theory of evolution.
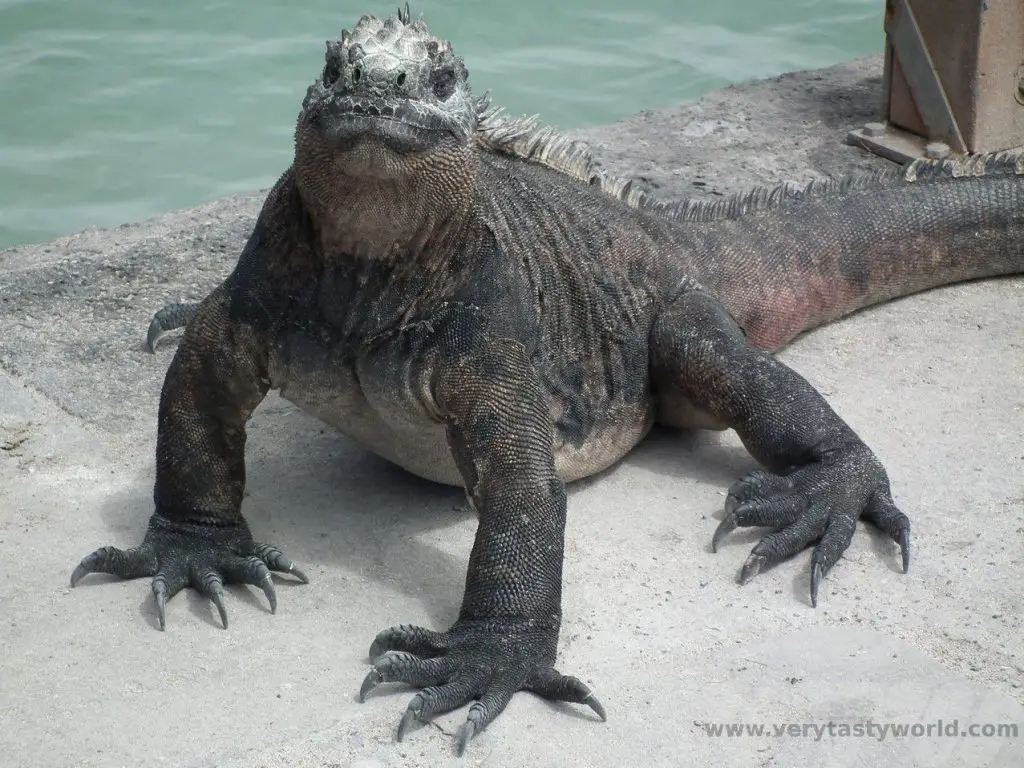
The islands are rightly famous for their unique wildlife. What is magical about visiting the Galapagos is that the animals haven’t learned to fear humans so you can get really close to them. In fact, you really have to look out to make sure you don’t accidentally step on an iguana! The Galapagos were established as a national park in 1959 and the wildlife and ecosystems are fiercely protected. They are a UNESCO world heritage site.
We made our own way to the Galapagos via Ecuador’s capital, Quito, but found a local company that could arrange excursions for us. We recommend booking hotels and day trips in advance of travel to be sure of getting a place on the tours.
Arrival
Most people fly into the Galapagos from mainland Ecuador, either Quito or Guayaquil. There are airports on Baltra and San Christobal. Before leaving the domestic terminal your luggage will be checked for restricted items by Tourist Control and Certification. This will cost $20 US.
The aim of this check is to protect the wildlife of the Galapagos. Therefore it is important to ensure that you aren’t carrying any animal products, plants or seeds into the islands. It’s inadvisable to bring food. Pre-wrapped snacks will probably be okay but don’t bring things like sandwiches with meat/cheese products.
We flew into Baltra airport. On arrival you will go through immigration and pay the $100 entrance fee.
Luggage usually isn’t collected straight away – when we arrived the whole plane’s worth of luggage was placed inside the terminal building and no one was allowed to pick up their bags until a sniffer dog had had a really good snuffle to smell for restricted items. After the security guards give the okay, it then turns into a bit of a scrum as everyone dives for their possessions. It’s definitely worth waiting for the chaos to subside.
Then everyone boards a coach which transports you across the stark island of Baltra to a ferry for a very short journey across the Itacaba channel to Santa Cruz. The crossing takes around 5-10 minutes. Then it’s a 45 minute bus ride to the main town of Puerto Ayora. After a quick lunch, we headed directly to the port to catch a boat to Isabela.
Galapagos Land Based Itinerary: A Couple of Days on Isabela
Isabela is the largest island and also the youngest, a mere one million years old. We had arranged a couple of nights there, travelling from Puerto Ayora on Santa Cruz. This was the worst boat journey and, frankly, it was an endurance. The total travel time is a couple of hours but it was the most bumpy we experienced. When the crew handed out sick bags to all the passengers we knew the trip was going to be rough. And indeed it was. Mitch became reacquainted with her lunch as we bounced across the relentless waves.
If you are prone to seasickness we recommend sitting at the back of the boat, outside where you can see the horizon, and where it is more stable and less susceptible to bouncing. Sit on the right-hand side on the way out and the left-hand side on the way back if you can. That way you’ll avoid getting wet – the waves are quite relentless and the spray regularly sloshes over the side of the boat. It does depend on where other passengers are sitting though – seats aren’t guaranteed, so you might want to arrive at the dock early and get to the front of the queue.
It was such a rough voyage that neither of us were having a fun time at all. (A couple of days later we bumped into some people who had been on that boat. They mentioned that it was good to see us enjoying a hearty meal and looking much happier!)
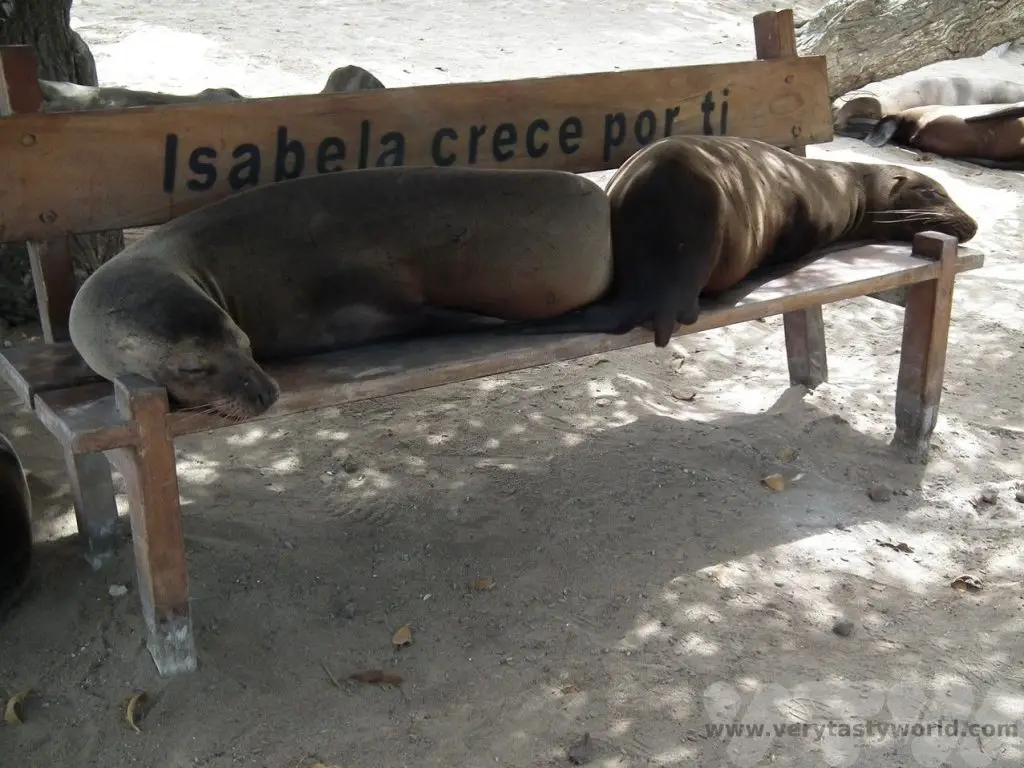
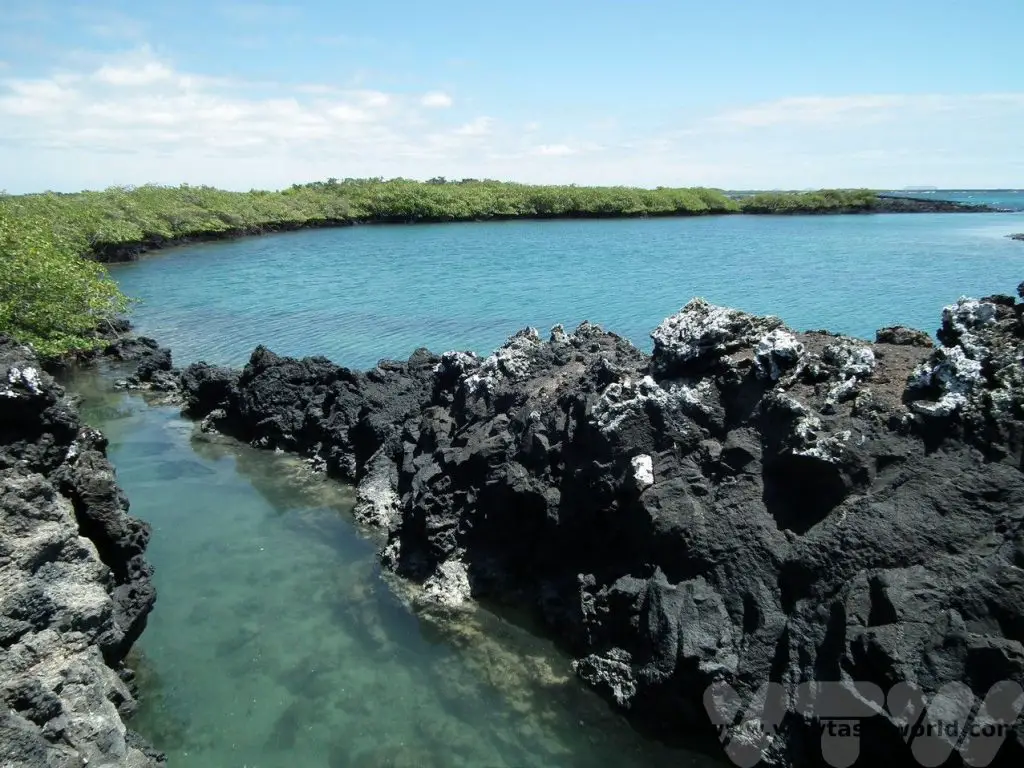
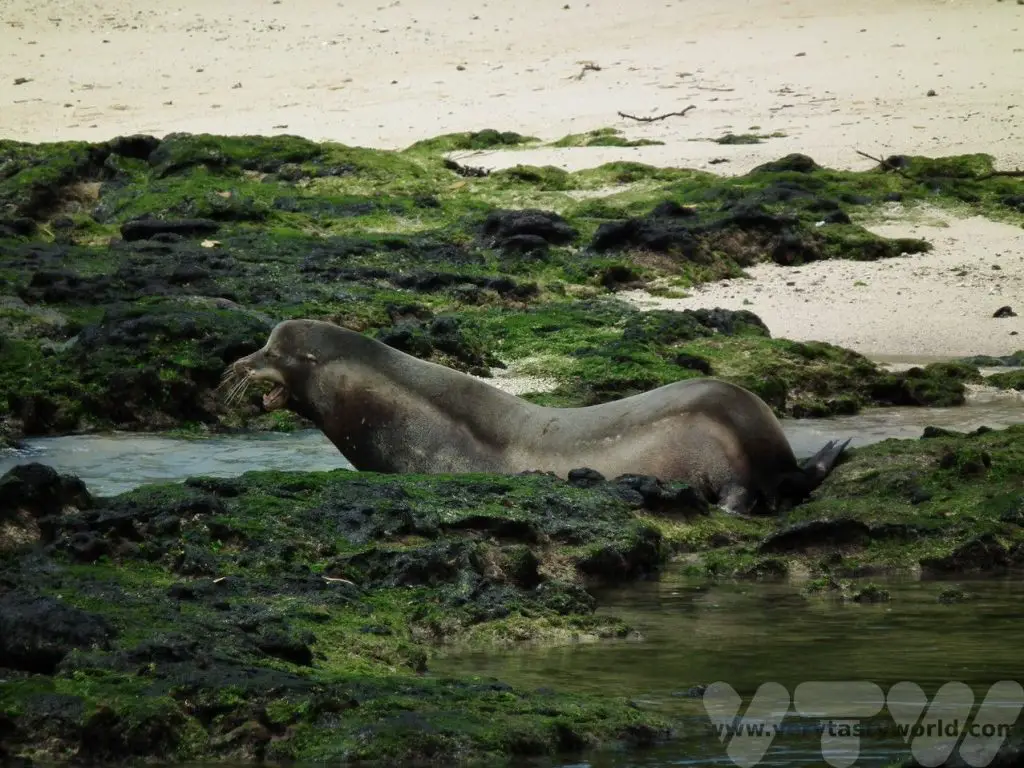
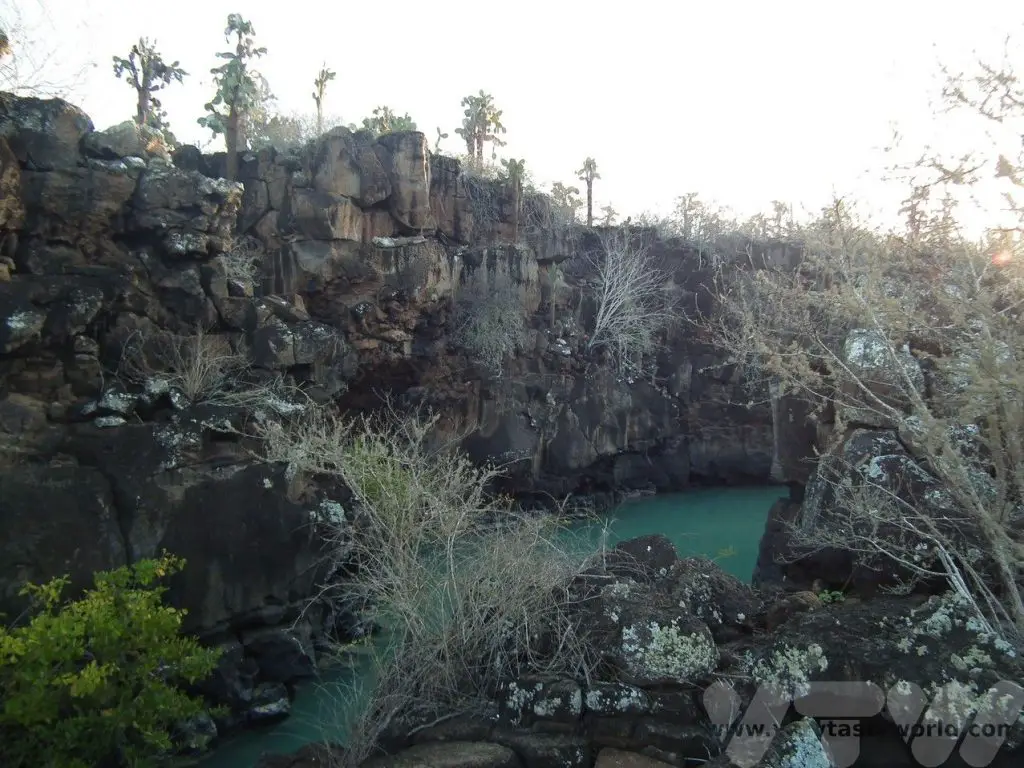
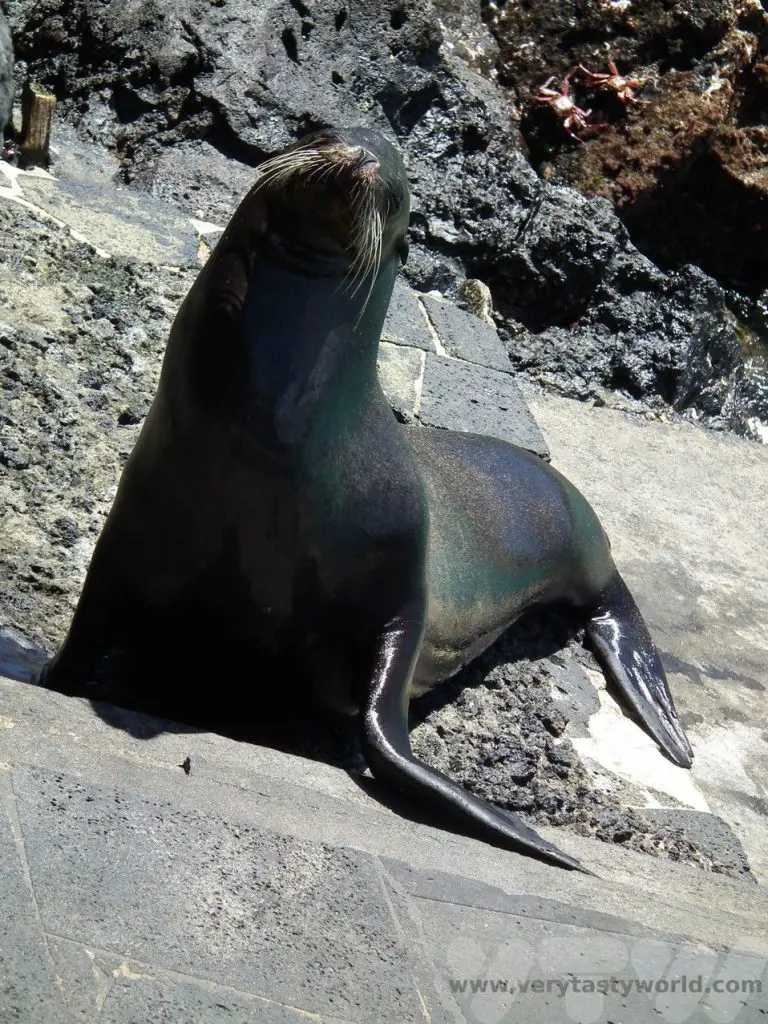
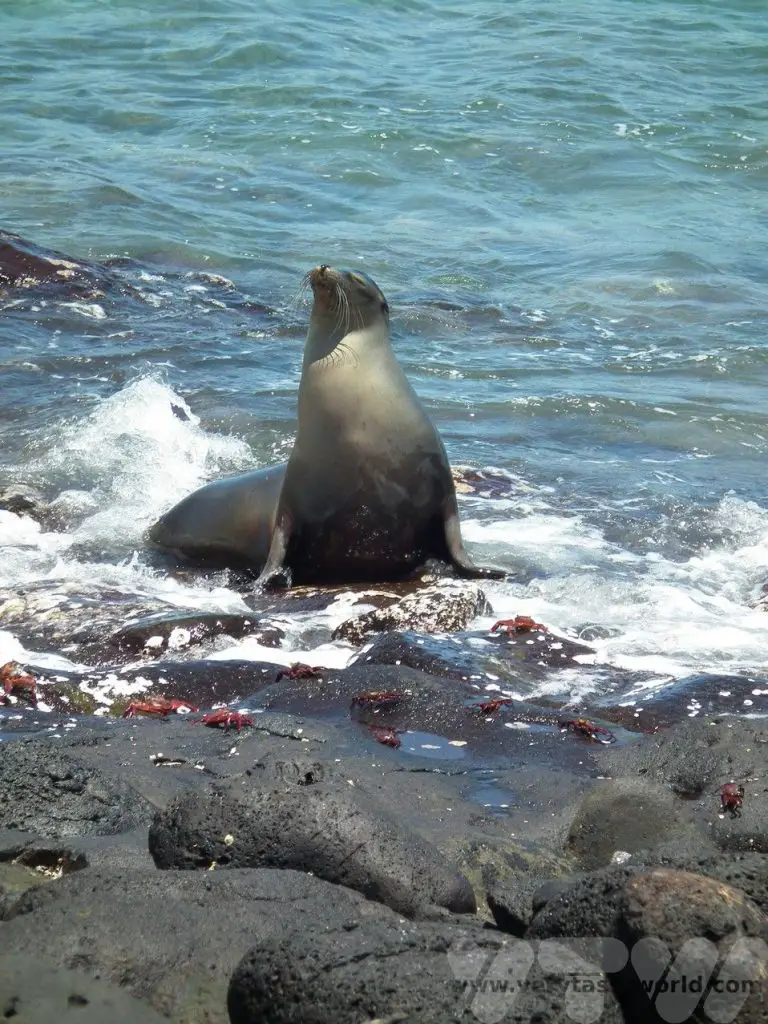
However, on arriving at Isabela, the seasickness vanished as we stepped onto the landing platform, carefully avoiding a couple of iguanas, before spotting some sea lions snoozing on a seashore bench.
Day 1 Isabela
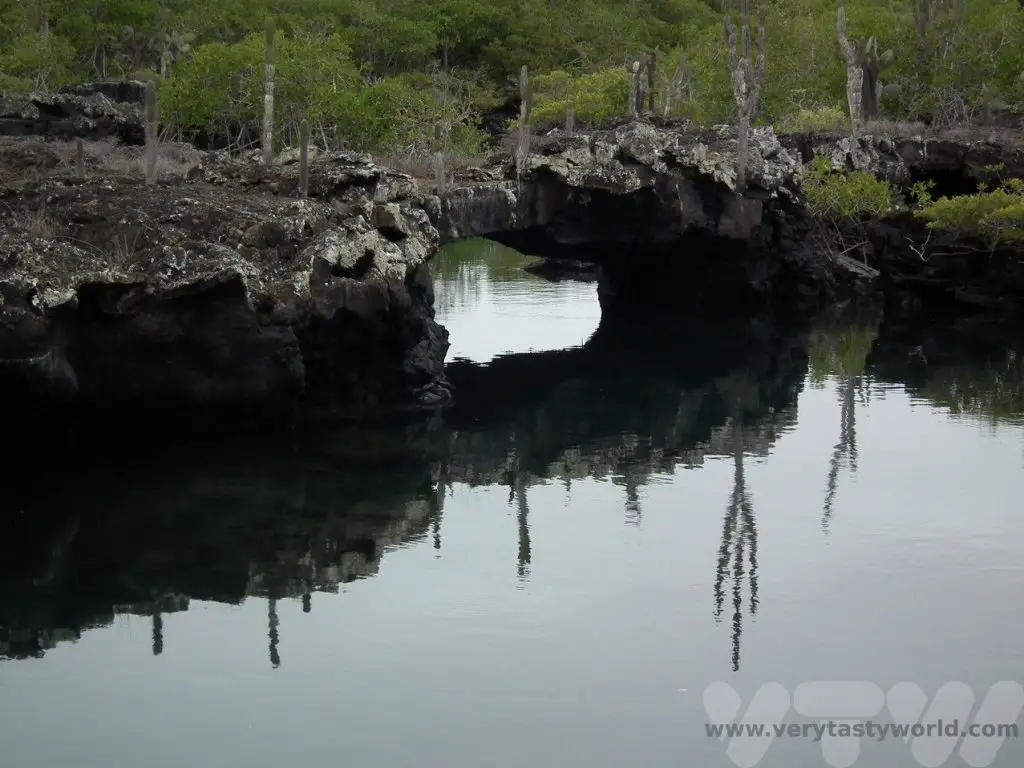
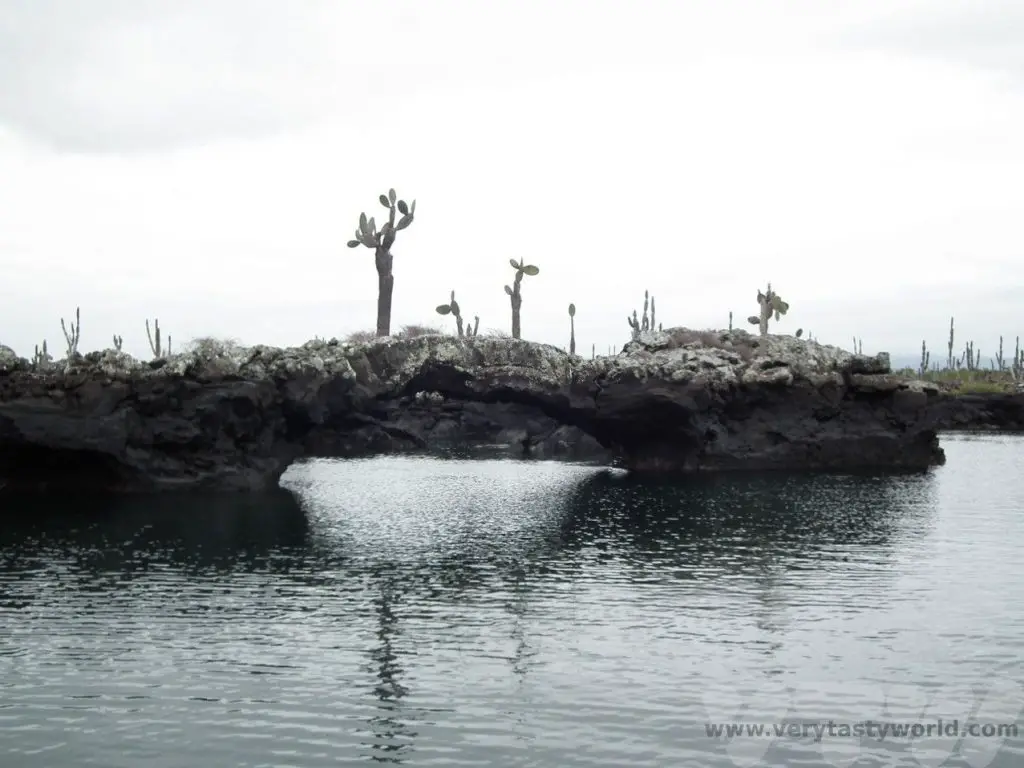
A full day trip to Los Tuneles is a perfect introduction to the island. This involved a short boat ride, in inshore waters, to the lava formations on the south coast of the island. The area looks mysterious as the lava has formed tunnels and arches along the shoreline. Cacti protrude defiantly from the stark rocky lava.
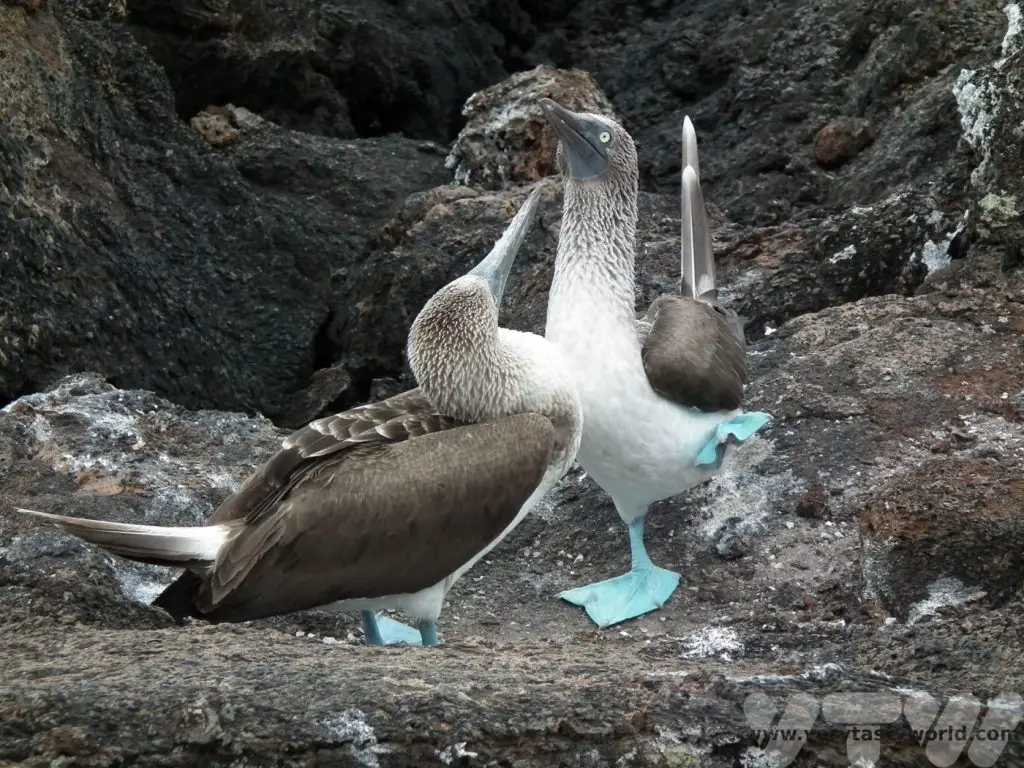
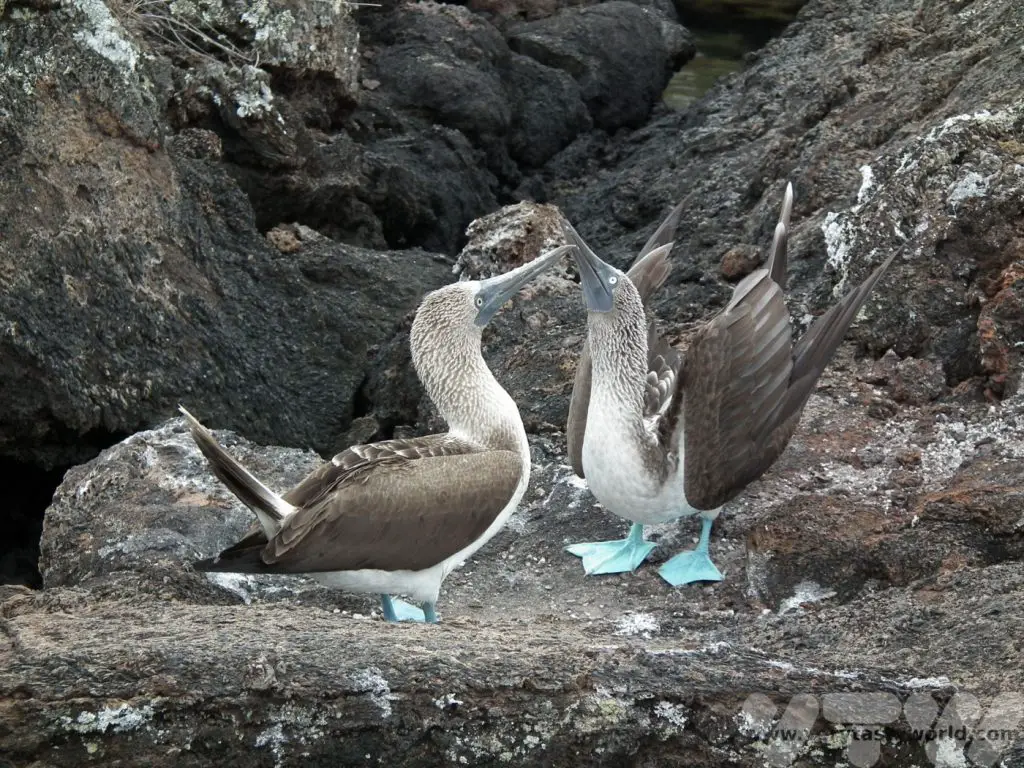
It’s possible to disembark and walk on the lava. We were delighted to encounter the famous blue boobies engaged in their courting ritual. So absorbed by each other, they were totally unperturbed by onlooking visitors.
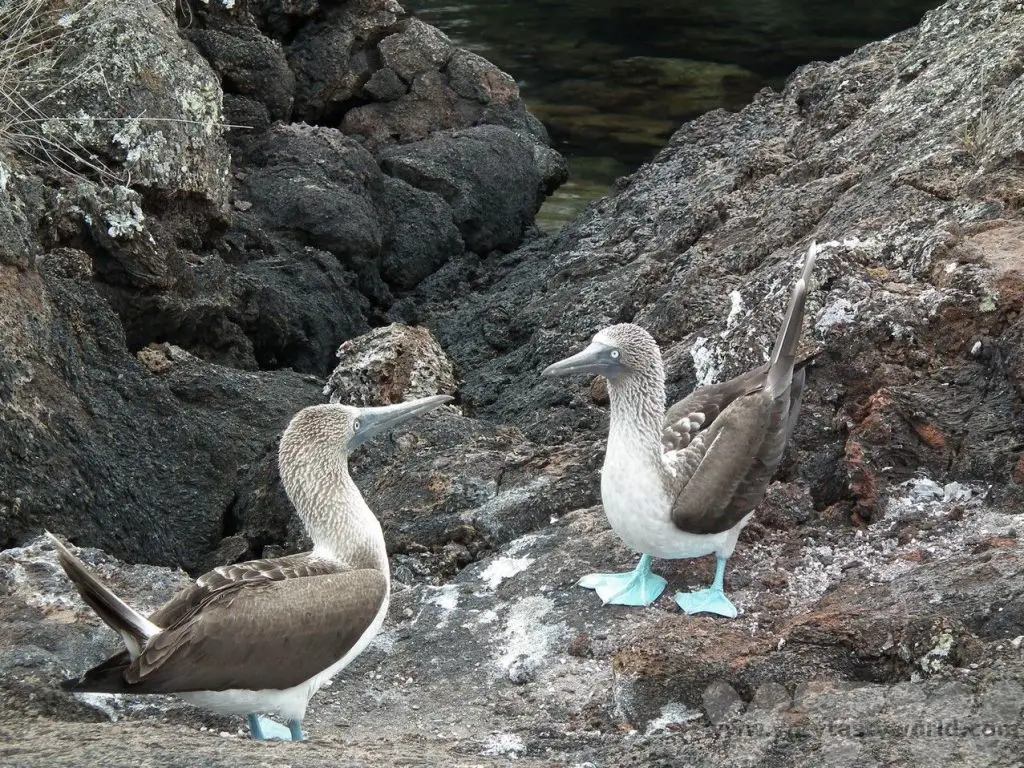
He shows her his blue feet and she admires them.
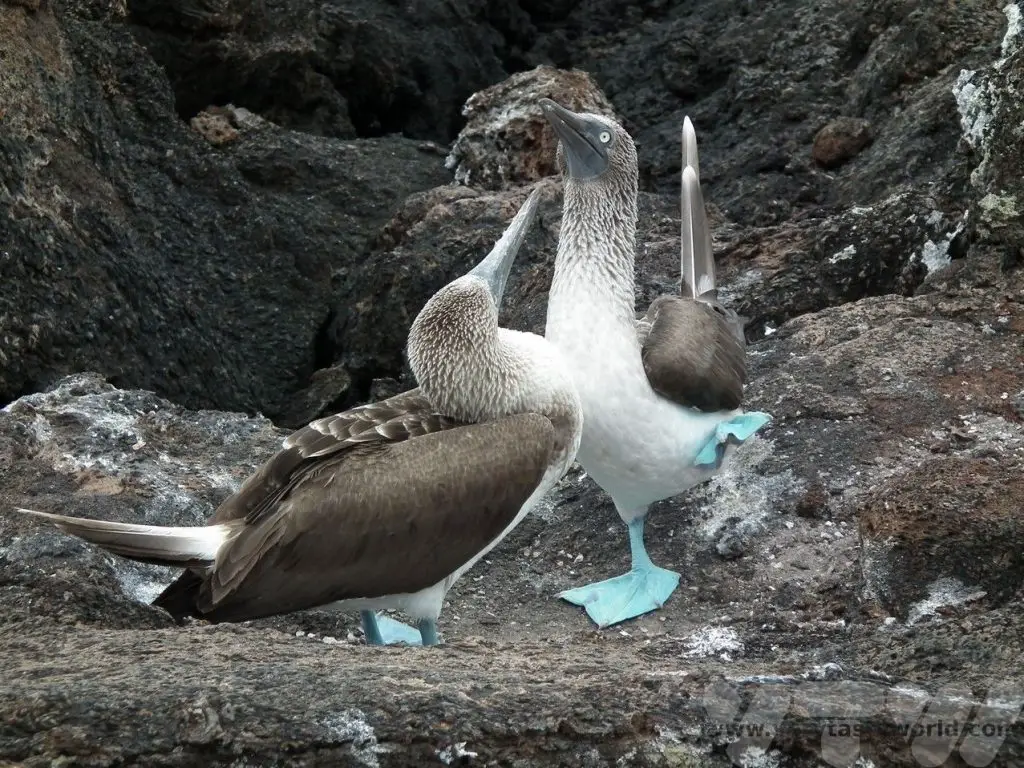
If she is satisfied with the blueness of his feet, she will honk her approval and they will form a pair. They are just adorable.

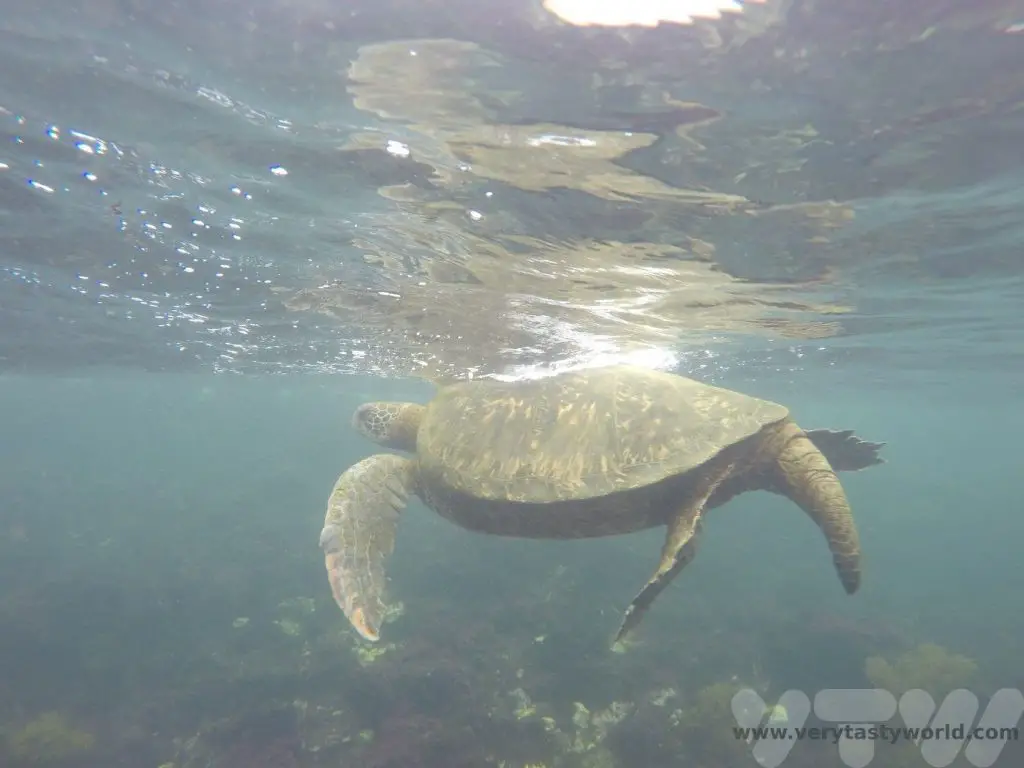
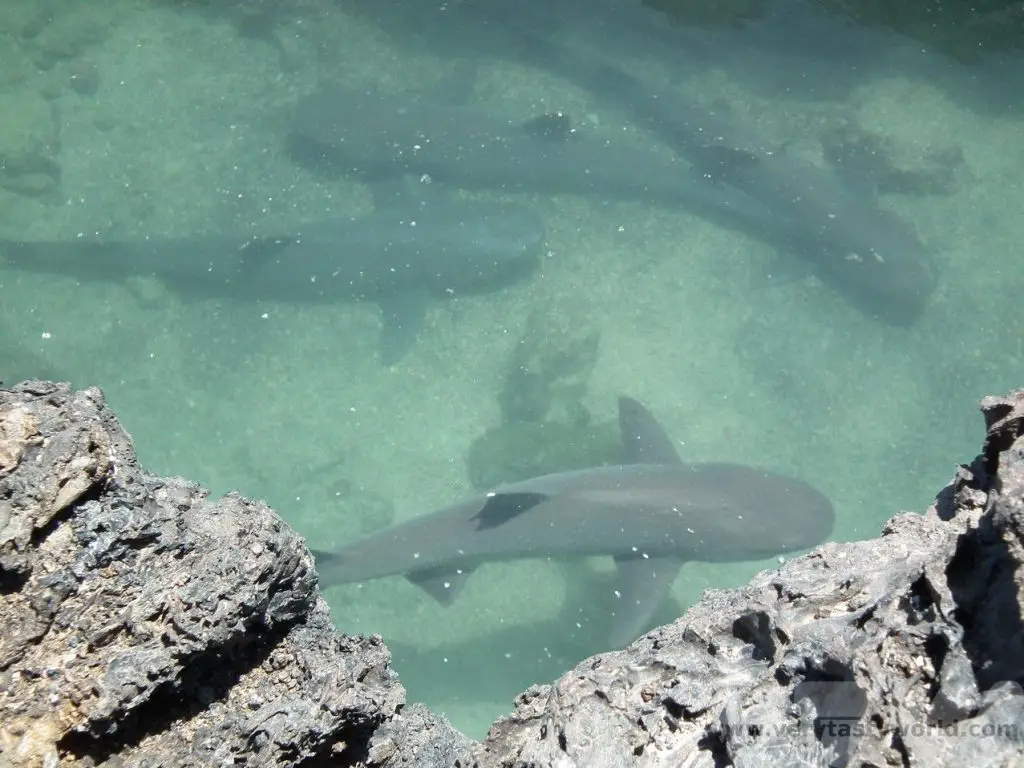
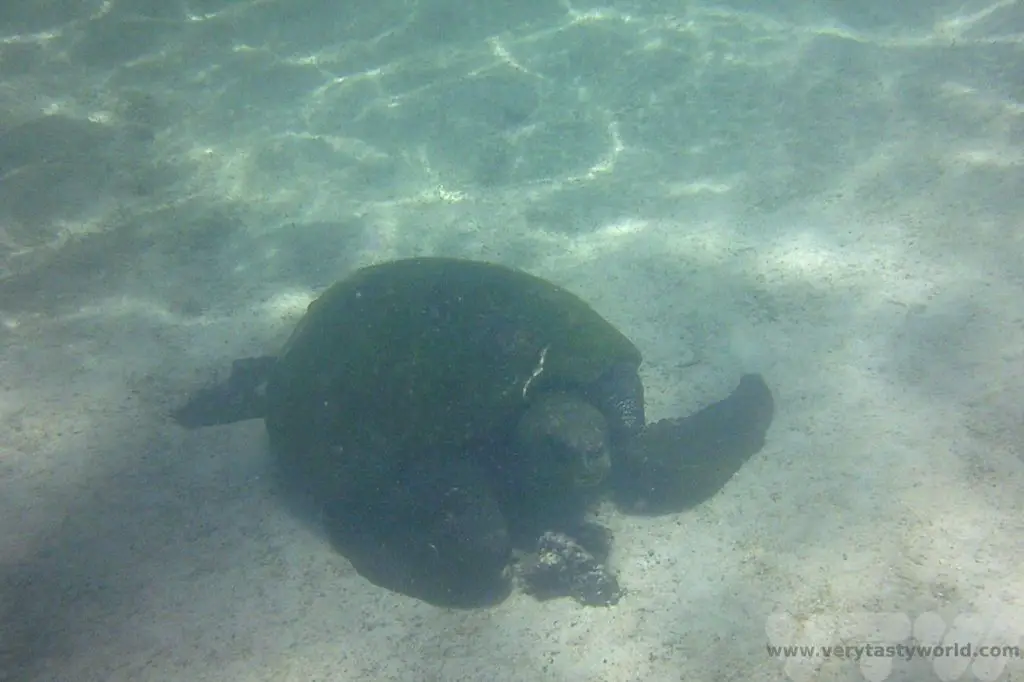
Then it was time to return to the boat, sail along the coastline and then jump into the sea to go snorkelling. Our first encounter with marine life was coming face to face with a turtle.
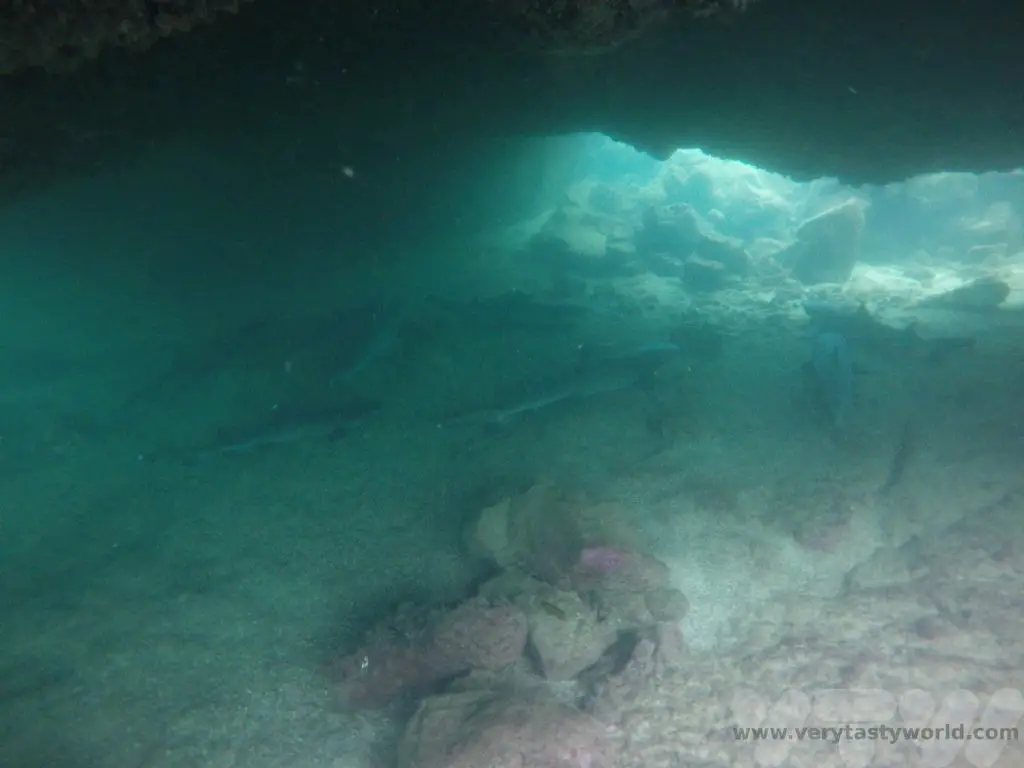
We also saw some sharks snoozing in an underwater cave.
Tip: If you are not confident jumping out of a boat and swimming in open water, the boat company will provide lifejackets which you can wear while snorkelling to give you buoyancy. They are really effective and mean that even those who aren’t strong swimmers can still enjoy wildlife encounters in the water.
You might want to hire a wetsuit for the snorkelling. We hired one on the first day but found the water to be really warm so just wore our swimsuits for all the other water-based activities.
Day 2 Isabela
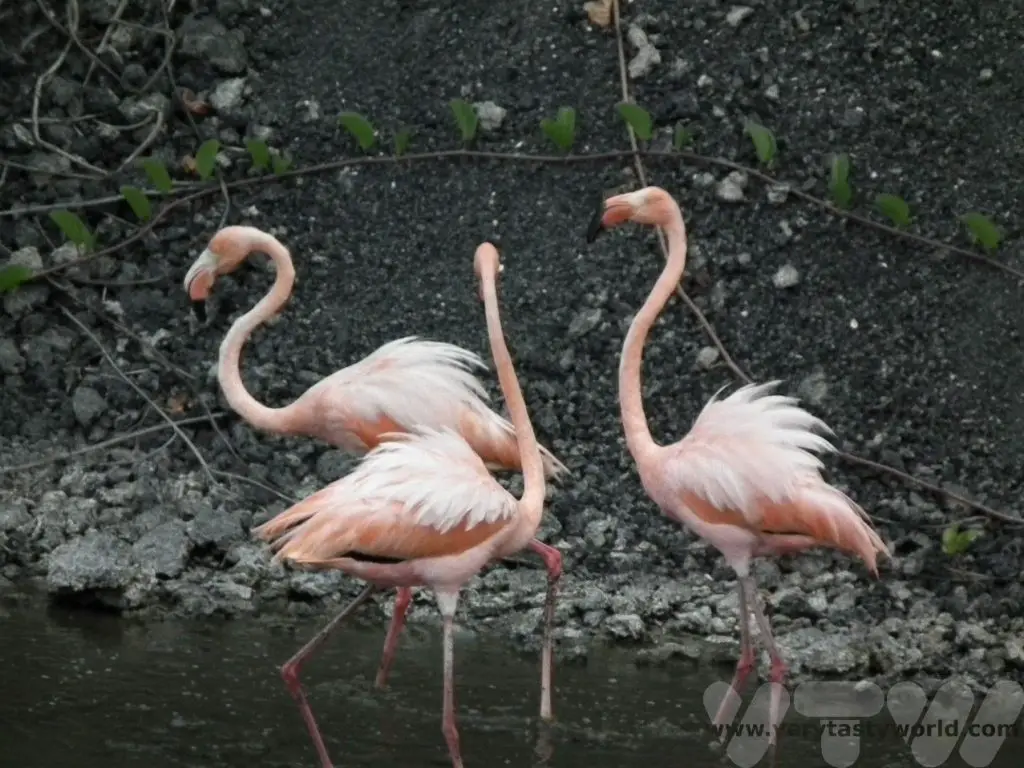
The day started with a quick trip to see the flamingos at the Puerto Villamil salt lagoons. These reminded us of the Three Graces.
Then it was onto Las Tintoreras, an islet located on the eastern side of the island, which was a very short boat ride across the bay. There is a path to follow around the island.
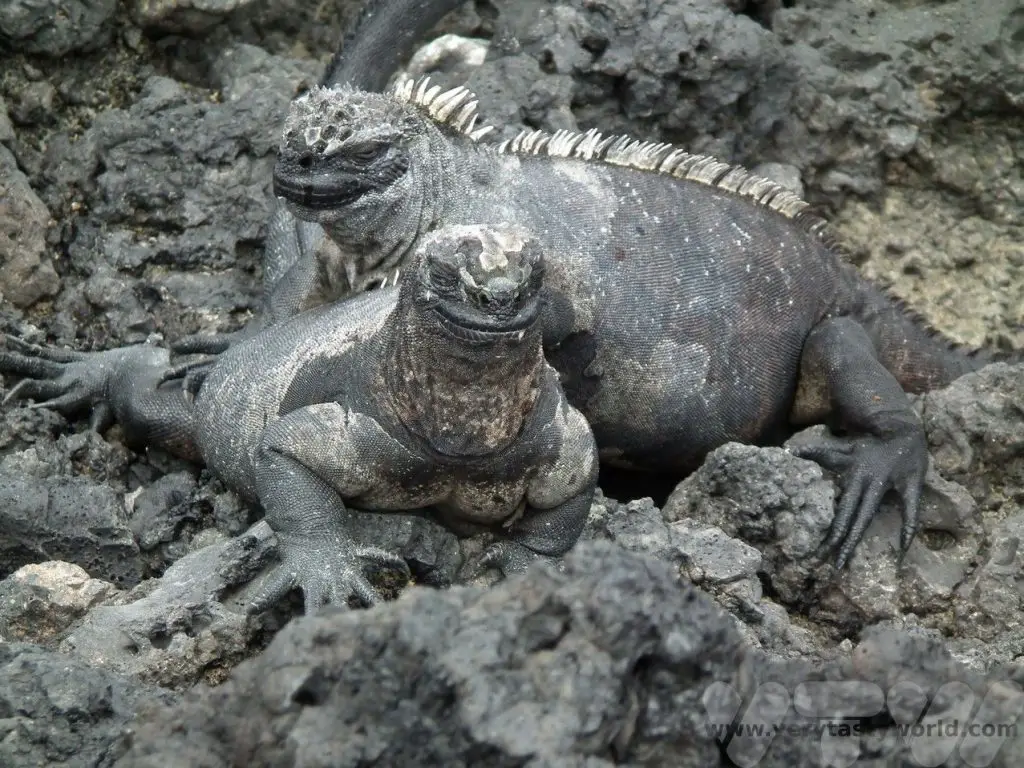
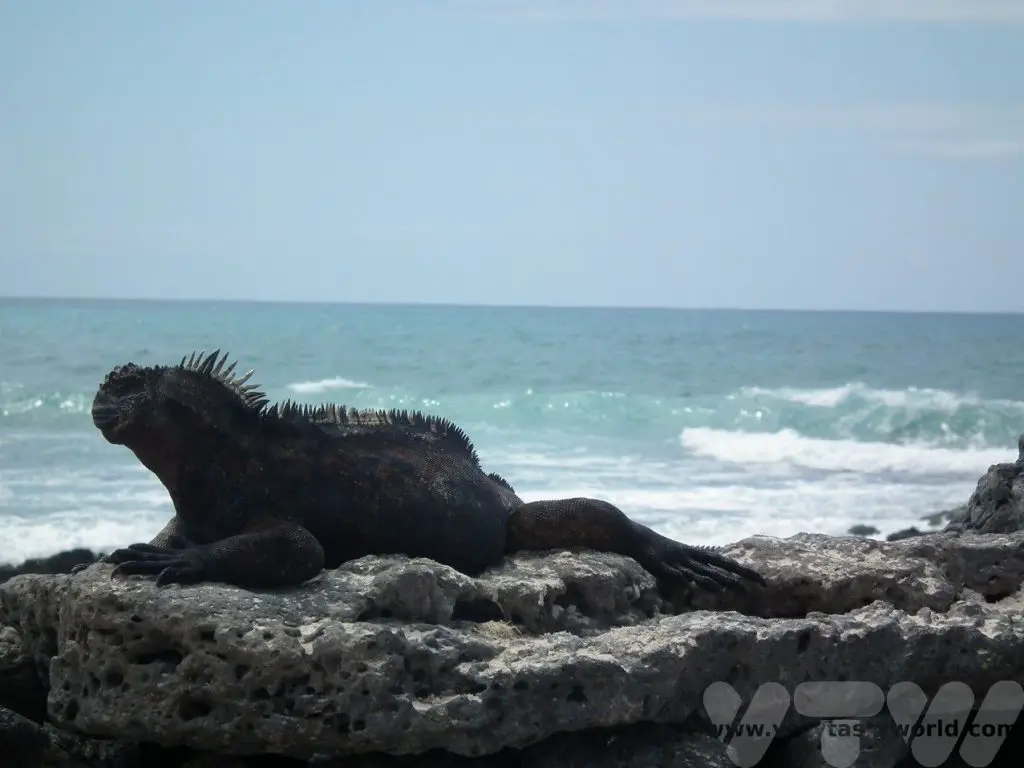
Lots of marine iguanas reside here. These are the only lizards that spend time in the water. They feed on algae at low tide and need to warm up in the sun. So they regulate their temperature by sunbathing.
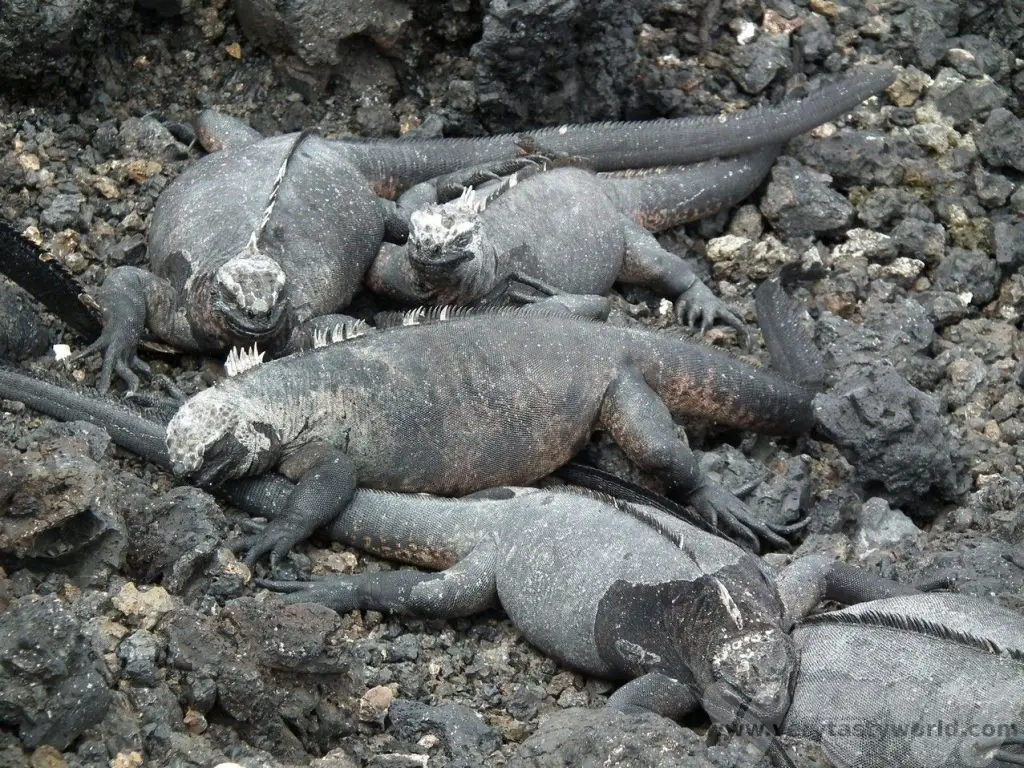
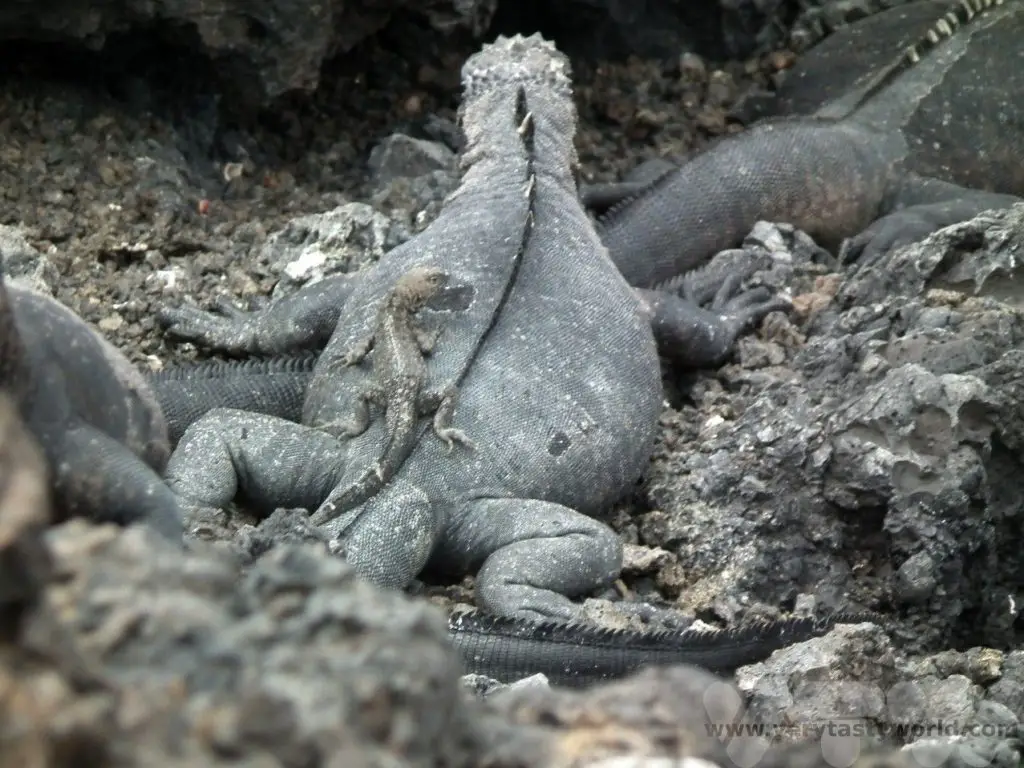
You can also watch them sneezing salt. Because they feed in the sea, they take in a huge amount of salt water, so they have special glands that remove it. They need to retain the water but expel the salt, so have developed this sneezing/spitting mechanism.
There is a bay where more tintoreras sharks hang out.
And some sea lions on the beach, some of which were feeling very vocal.

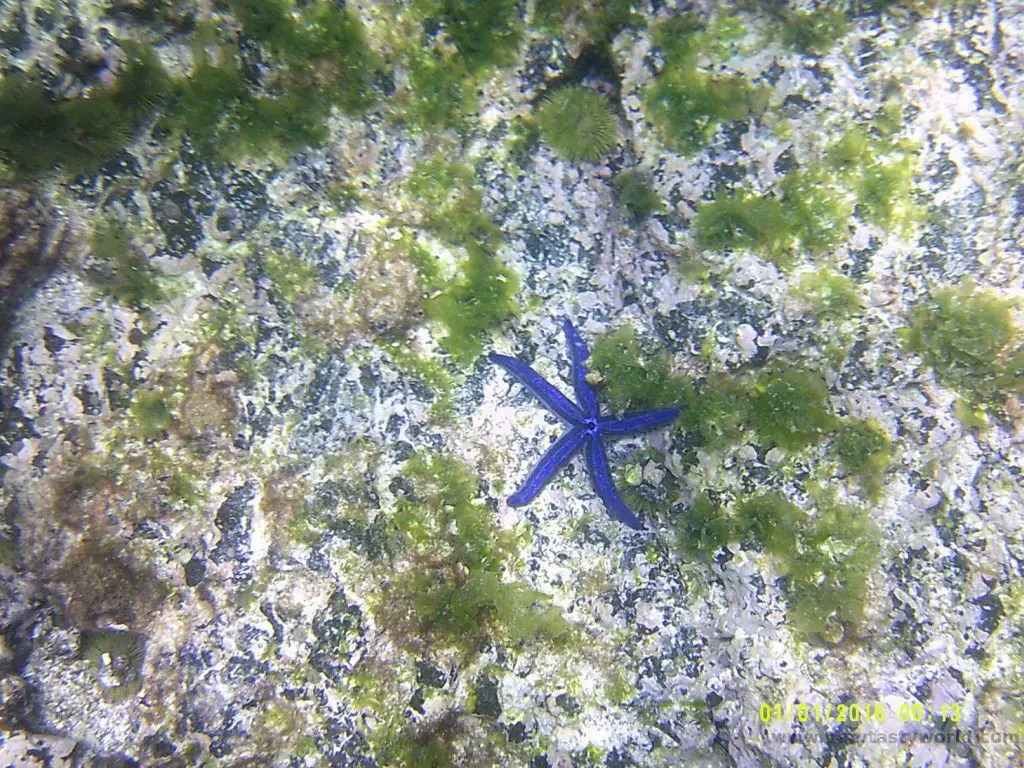
It’s possible to enjoy snorkelling in the shallow bay. If you’re lucky you’ll chance upon a turtle in addition to colourful fish and starfish.
Then in the afternoon, we hired some mountain bikes and enjoyed cycling around the Humedales complex. This comprises a series of trails that you can explore. Be careful not to cycle over an iguana, they don’t really care for observing the trails as they sunbathe.
Other Things to Do on Isabela
A popular activity is to hike the Sierra Negra volcano. The name translates to ‘black mountain’ and this is an active volcano. Apparently it has the second largest caldera in the world. It’s around a 10km walk through volcanic landscapes with some interesting plants to see along the way.
Galapagos Land Based Itinerary – Five Days Based on Santa Cruz
We caught an early morning bumpy boat back to Santa Cruz. We managed to get a seat at the back of the boat this time, but it was on the right hand side, so got a thorough soaking. Still, it was better than being sick. Our itinerary allowed for a couple of days to explore Santa Cruz island itself and then enjoy day trips to other islands over the next three days.
We were based in Puerto Ayora, a compact town with plenty of choices for hotels and restaurants.
Day 3 On Santa Cruz
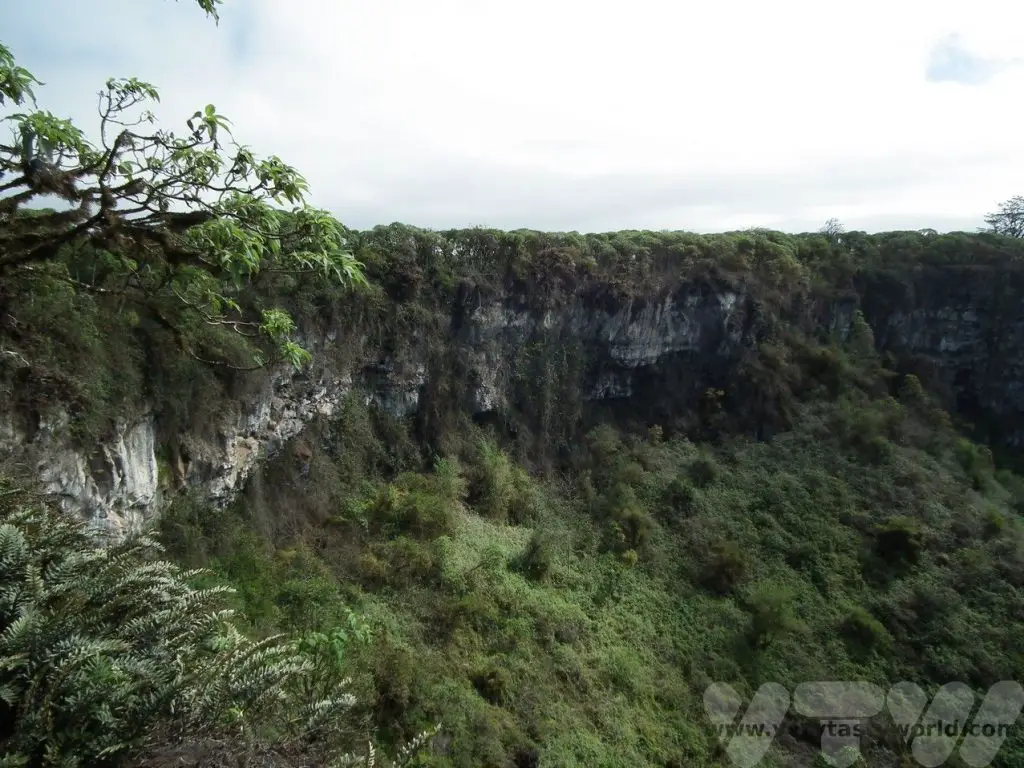
This trip took us to the centre of the island. First we stopped off at Los Gameles, twin volcanic craters that were once underground magma chambers following an eruption. Over the years they caved in, leaving these dramatic hollows.
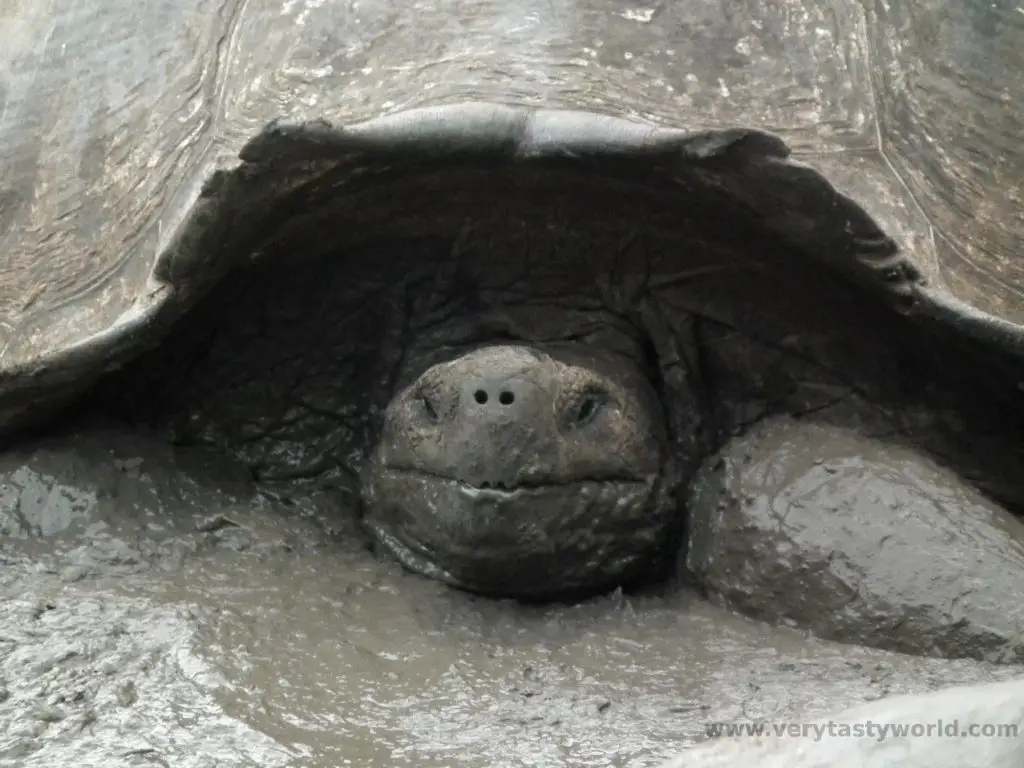
The interior of Santa Cruz is one of the locations where the famous Galapagos tortoises live. Indeed the archipelago was named for these remarkable creatures, ‘galapago’ meaning tortoise in Spanish. The tortoises are amongst the longest lived animals in the world; they can live for over 100 years in the wild and up to 177 years in captivity. There are tortoises to be found on seven of the islands and the differences in their observed shape and size contributed to the development of Darwin’s theory of evolution.
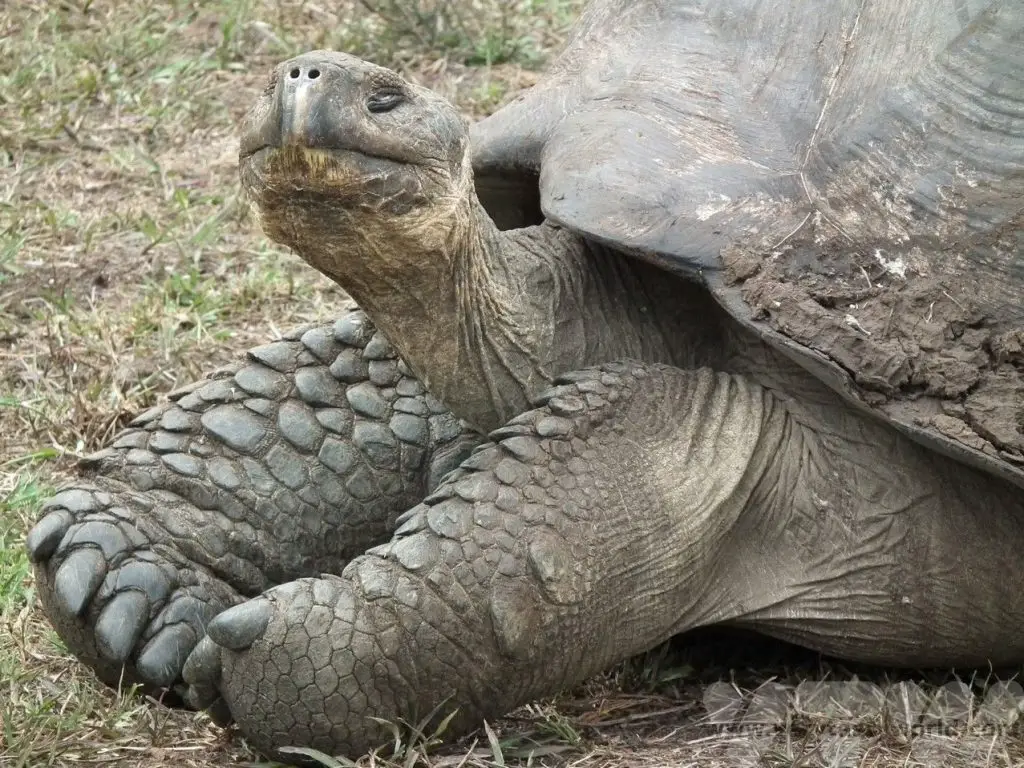
The tortoises are slow moving and spend much of their time grazing and also bathing in mud, clearly a very pleasurable life for them.
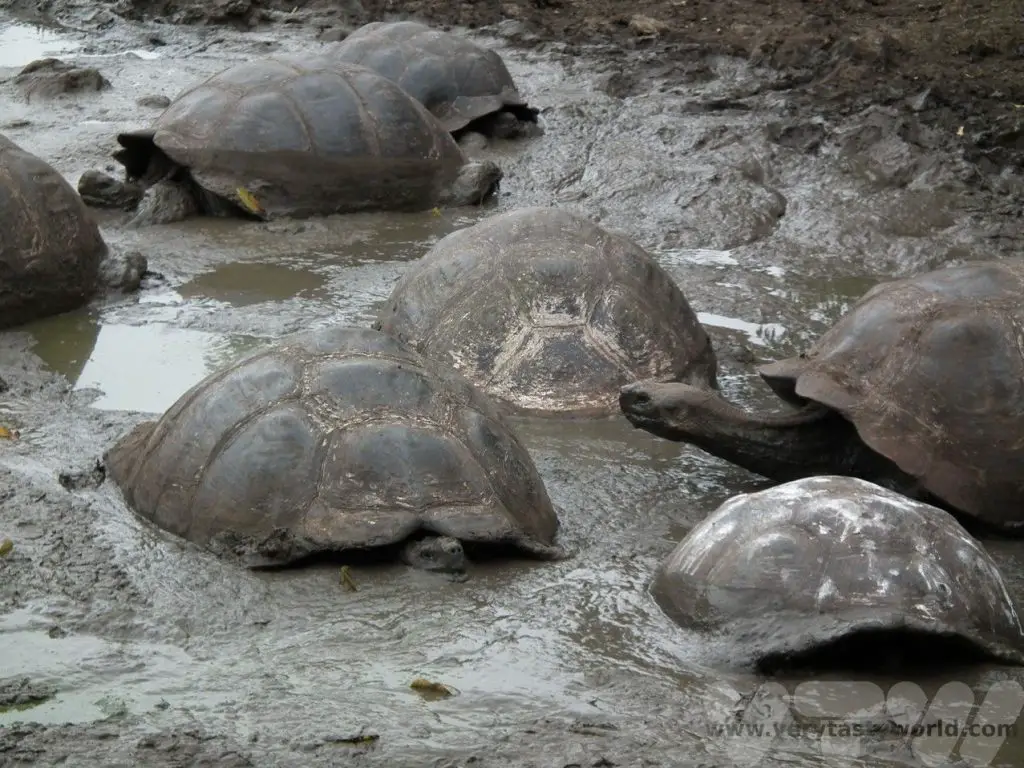
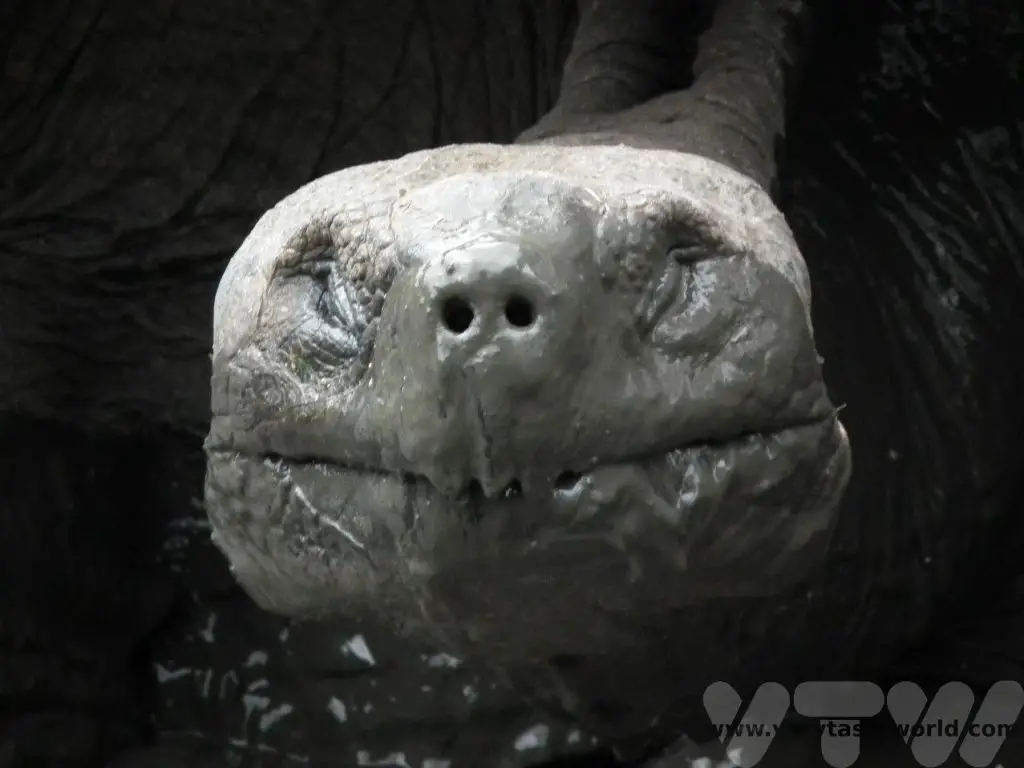
You are allowed to get within a couple of metres of the tortoise but no more. They are fascinating to watch.
Day 4 on Santa Cruz
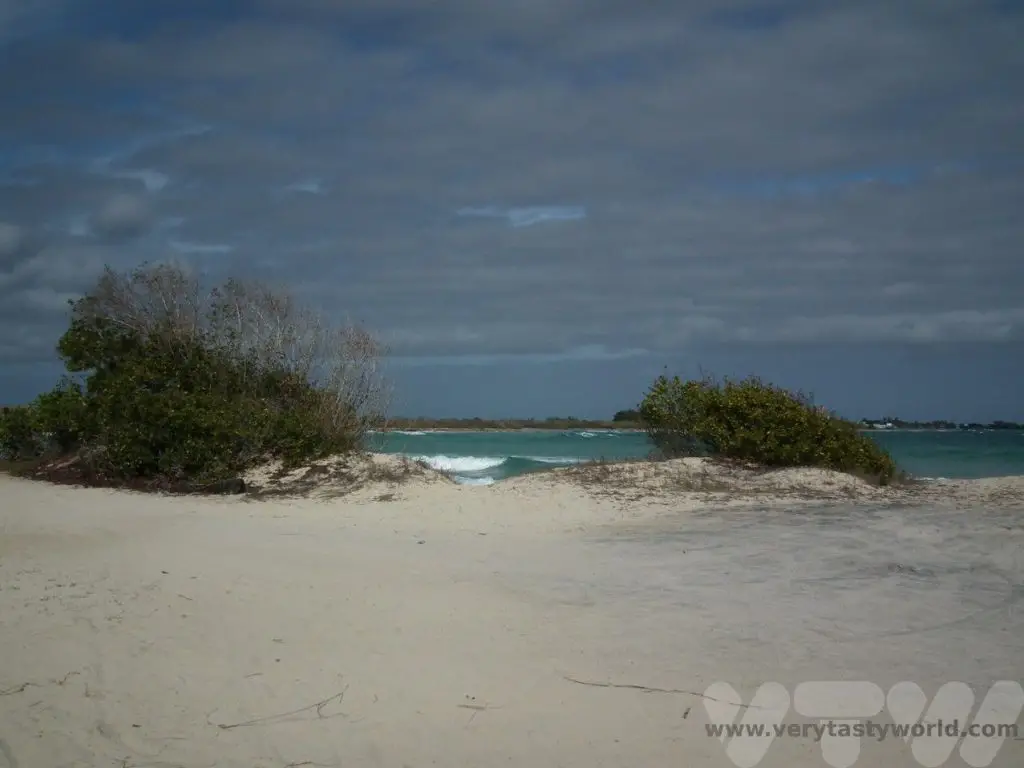
The morning involved enjoying a good walk and some beach time on the snowy white sands of Tortuga Bay Beach, just 45 minutes away from the centre of town.
Brava Beach has a wide beach to walk along where you can see marine iguana…
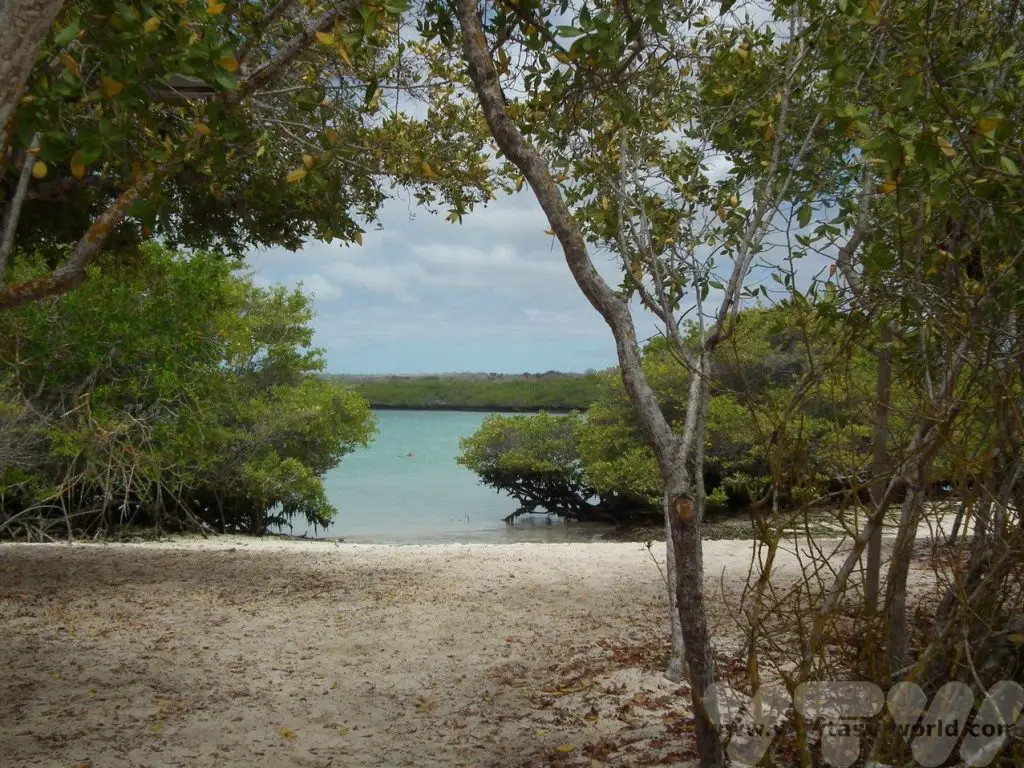
…and Playa Mansa has a natural pool surrounded by mangroves. It’s perfect for bathing.
Later, we enjoyed a short boat trip around the bay. Then we visited the Canal del Amor view point and onto Punta Estrada where we could view the wildlife at Playa de los Perros.
Three Islands to Explore From Santa Cruz
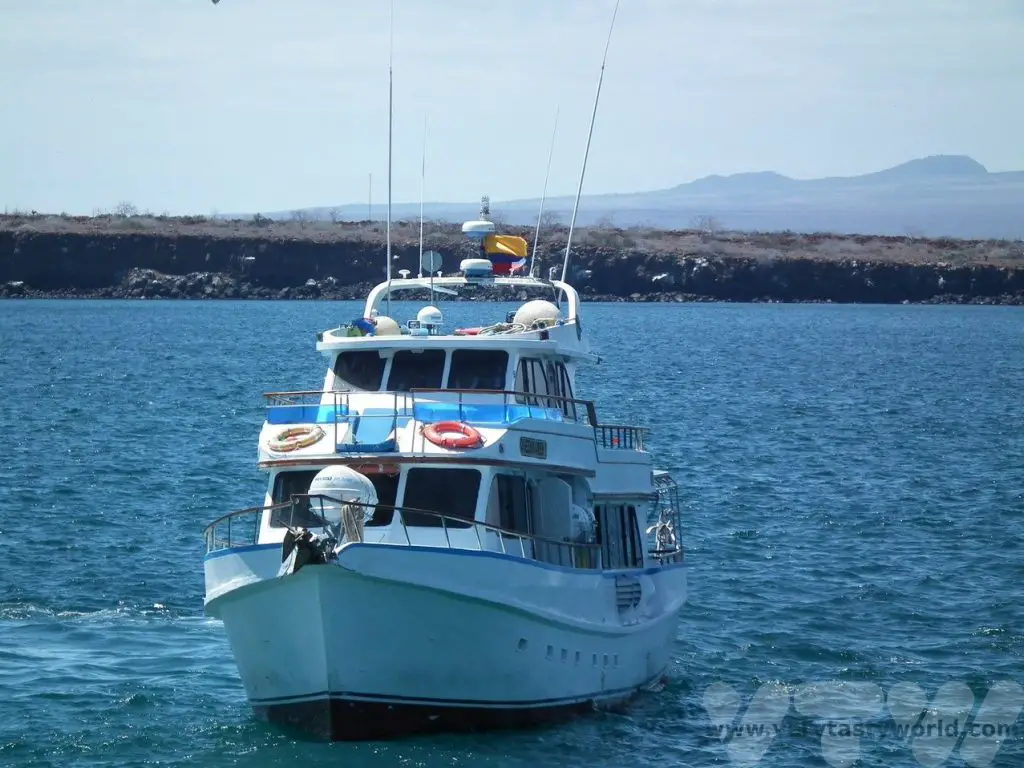
The next three days were dedicated to day trips to explore some of the islands closest to Santa Cruz. This involved a hotel pickup, and then a 45 minute drive to the Itabaca channel to our boat, the Queen Karen. This was a 16-seater boat which was perfect for the day trips – not too many people, just a nice group size for exploring the islands and enough to enjoy the company of other wildlife enthusiasts, for the day.
There are rules for visiting the islands in order to protect the wildlife and eco-system. You must stay with a registered guide and it is very important to remain on the paths, particularly during the breeding season because birds and other creatures may be nesting.
Day 5 North Seymour
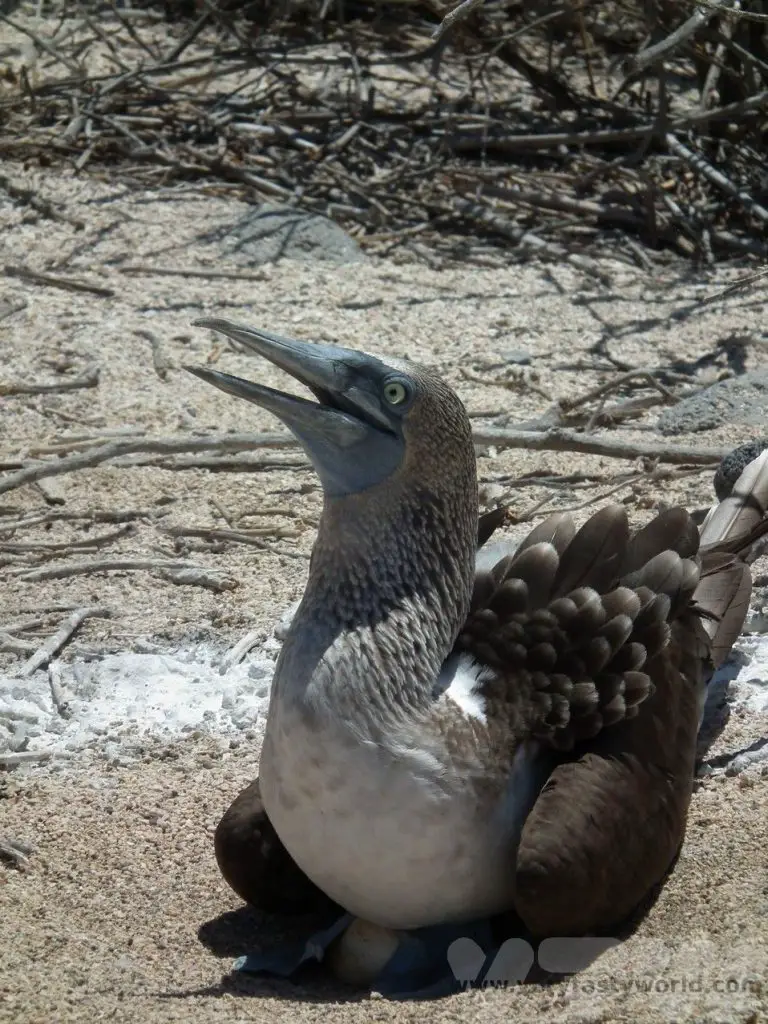
North Seymour is a very short boat ride from Santa Cruz, just beyond Baltra (where the airport is located). This fabulous little island was a great place to see blue-footed boobies nesting.
This lady was sitting on her egg, totally unperturbed by the plethora of people parading past.
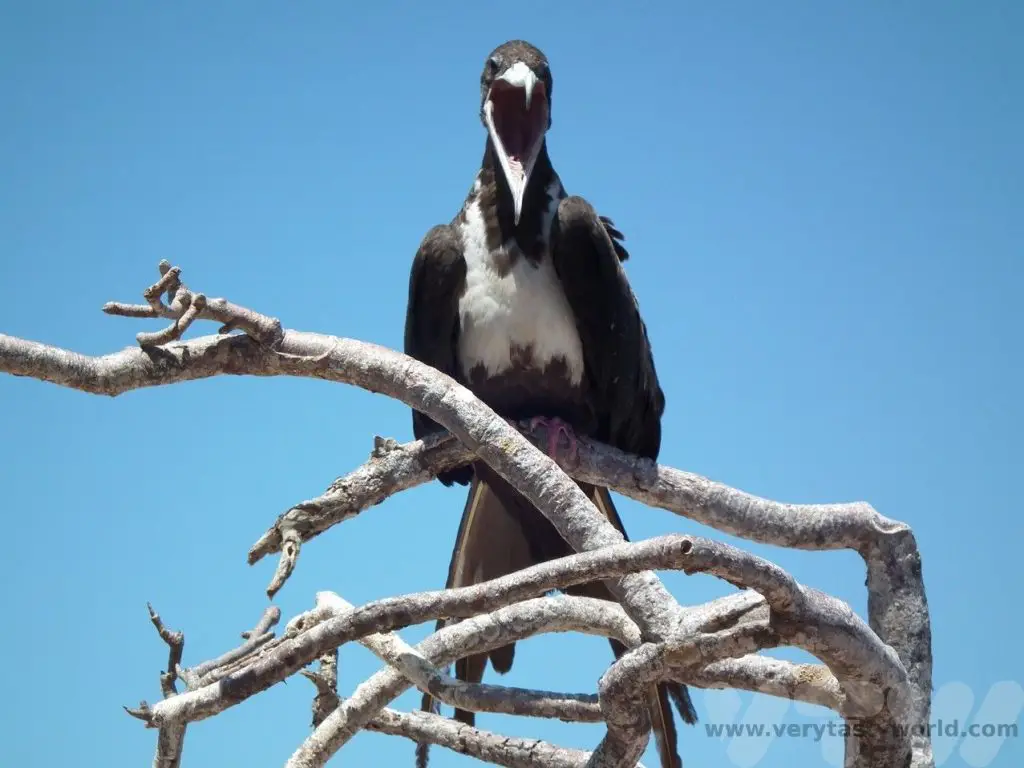
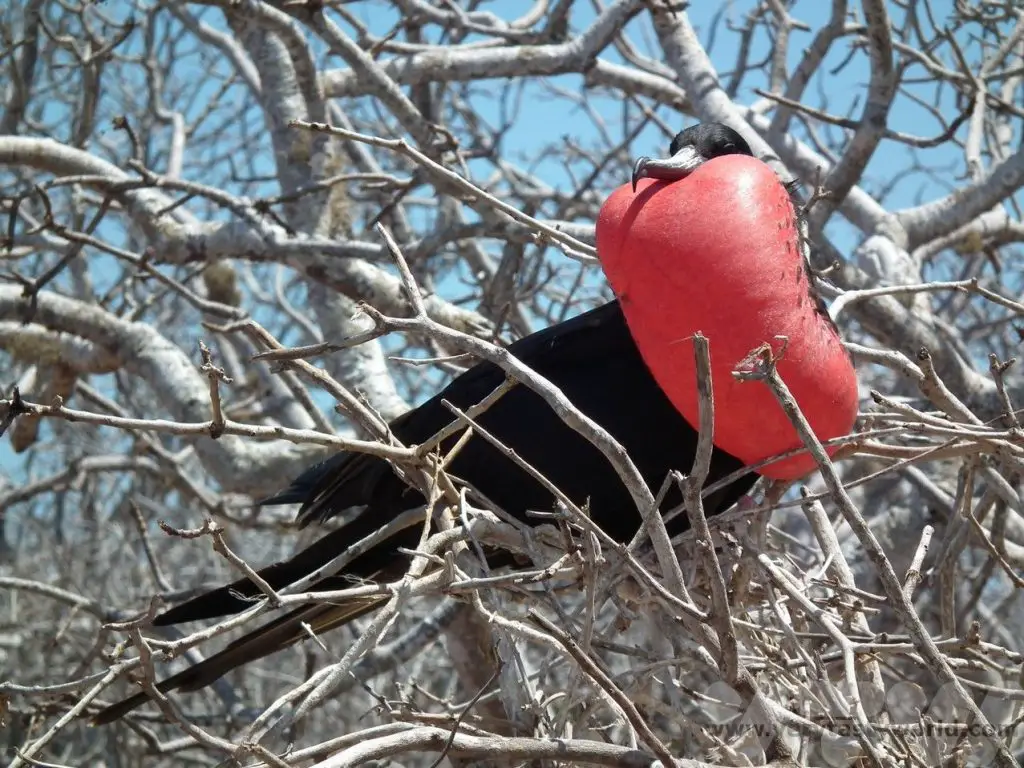
It was also the perfect time of year to see the Great and Magnificent Frigate Birds strutting their funky stuff. The males have a scarlet neck pouch which they inflate and parade about in the hope that the ladies will admire and choose to mate with them. One female was clearly enamoured!
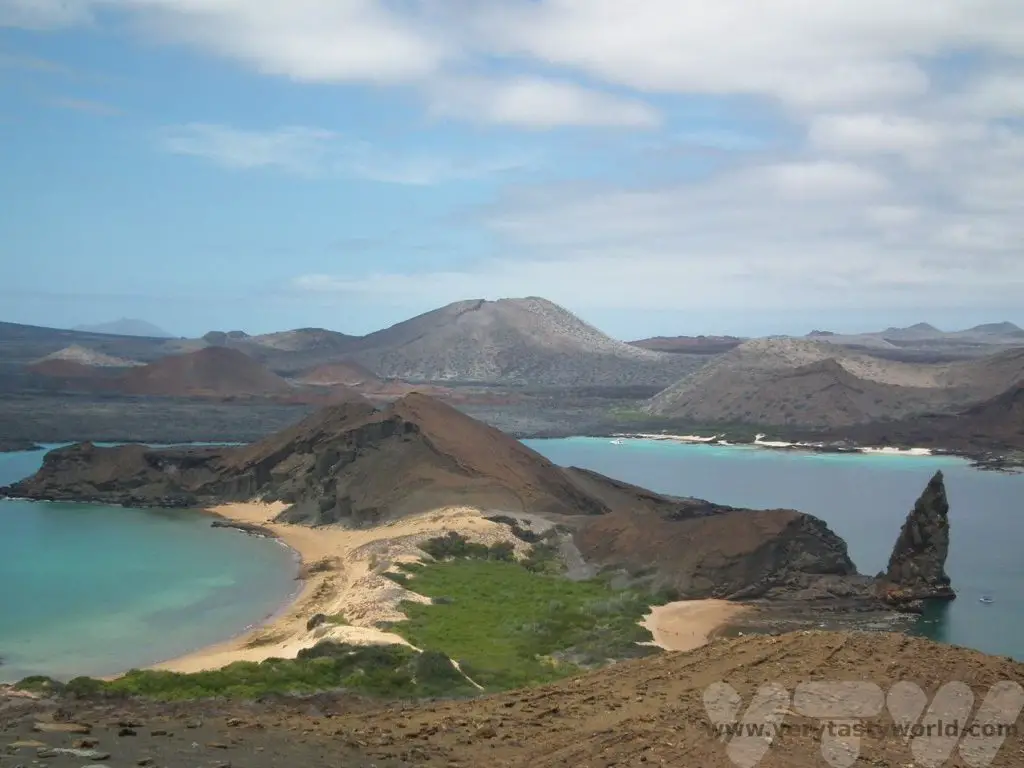
Day 6 Bartolome
Bartolome is a tiny island just off the coast of Santiago island. This was the longest day at sea – it took around two hours to reach this picturesque island from Santa Cruz. We were lucky that the sea was incredibly calm.
As we hopped off the boat to climb to the viewpoint we had to step over some Sally Lightfoot crabs and an obstinate but friendly sea lion.

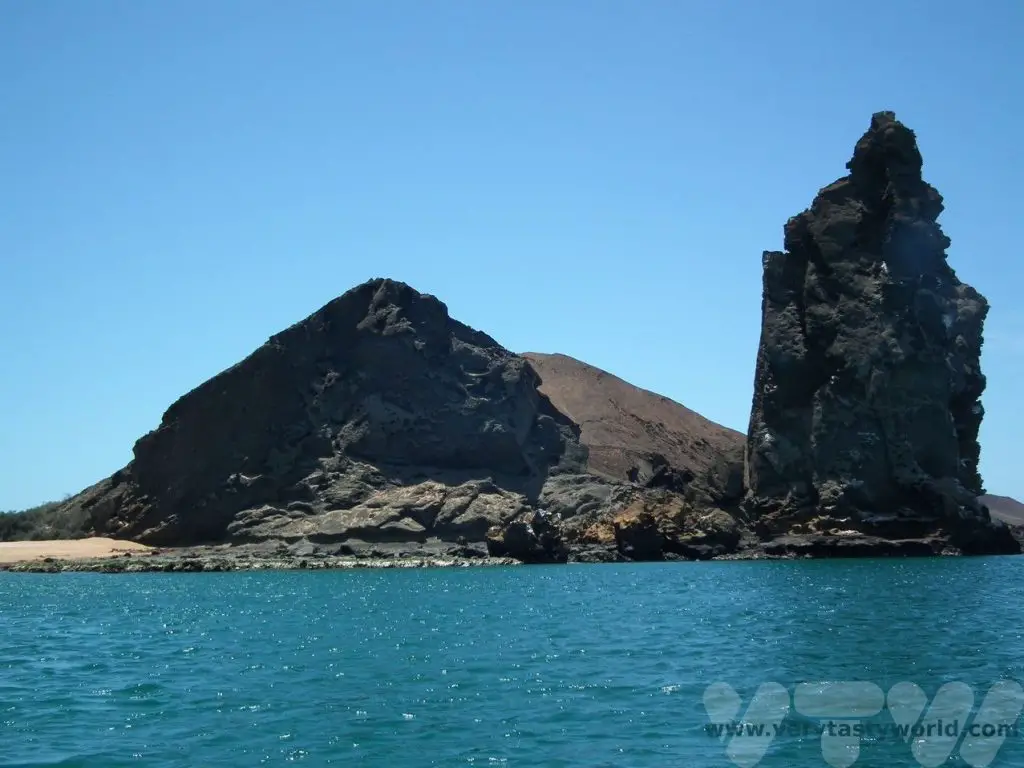
The climb to the top isn’t challenging and the view of Pinncale Rock from the top is lovely.
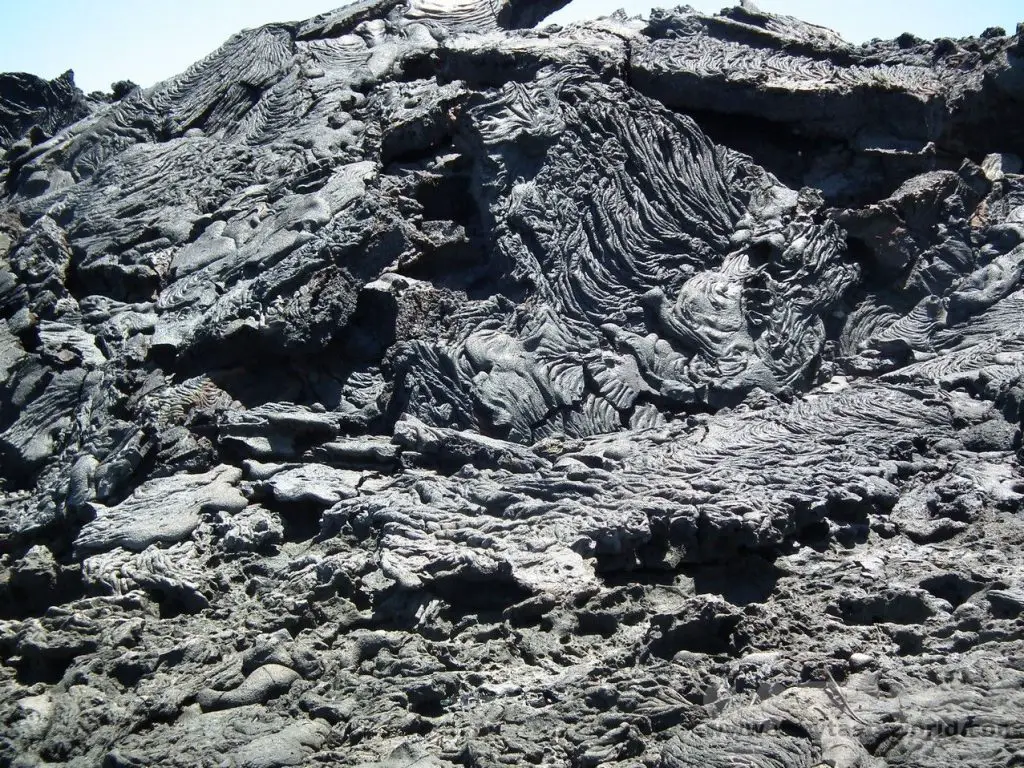
Then we hopped back on the boat to cross to Sullivan Bay to visit the lava fields on Santiago itself. You can really get a feel for the dynamic flow of the lava. This is relatively recent lava, believed to have flowed in the late-19th century. It appears frozen in time.
There was always an opportunity to go swimming/snorkelling and we enjoyed a couple of hours in the bay. The Galapagos are home to the world’s northernmost penguins, in fact, the only penguins that can be found in the northern hemisphere. The cold Humboldt and Cromwell sea currents mean that they are able to survive in the relatively warm temperatures. They are the second smallest penguin species.

It’s a terrible photo but we did manage to capture a shot of one having a swim in the clear blue water.
Day 7 South Plazas
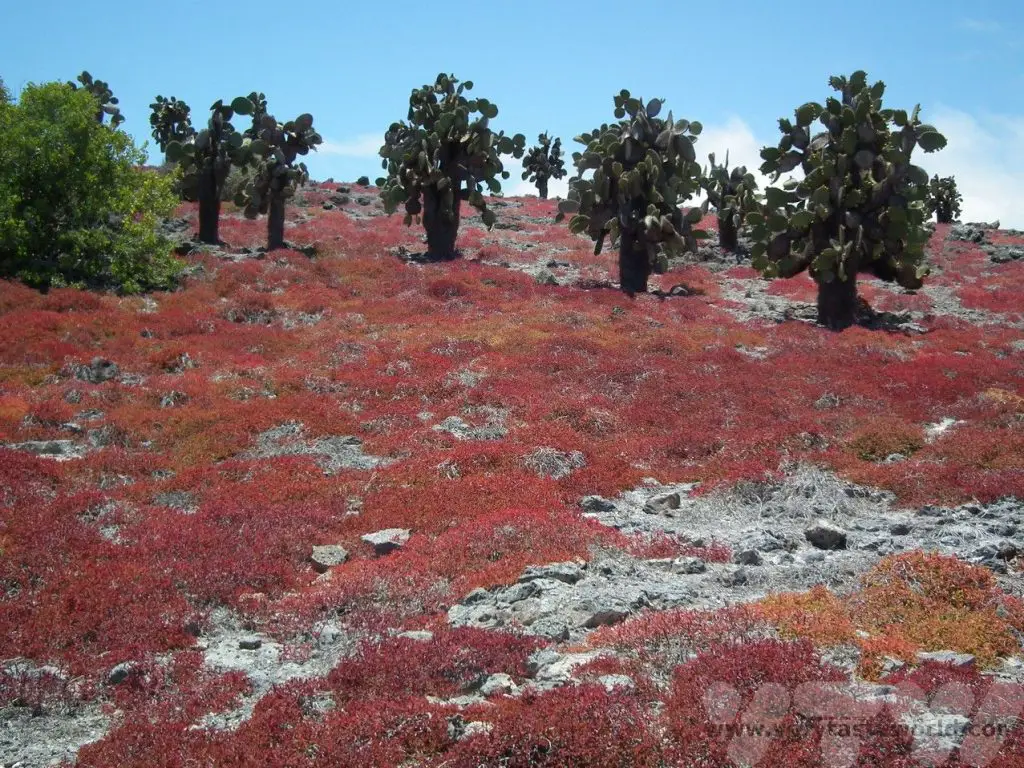
North and South Plazas are located to the east of Santa Cruz and we travelled along the Itabaca channel to reach them. The tide was perfect for us to land on South Plazas.
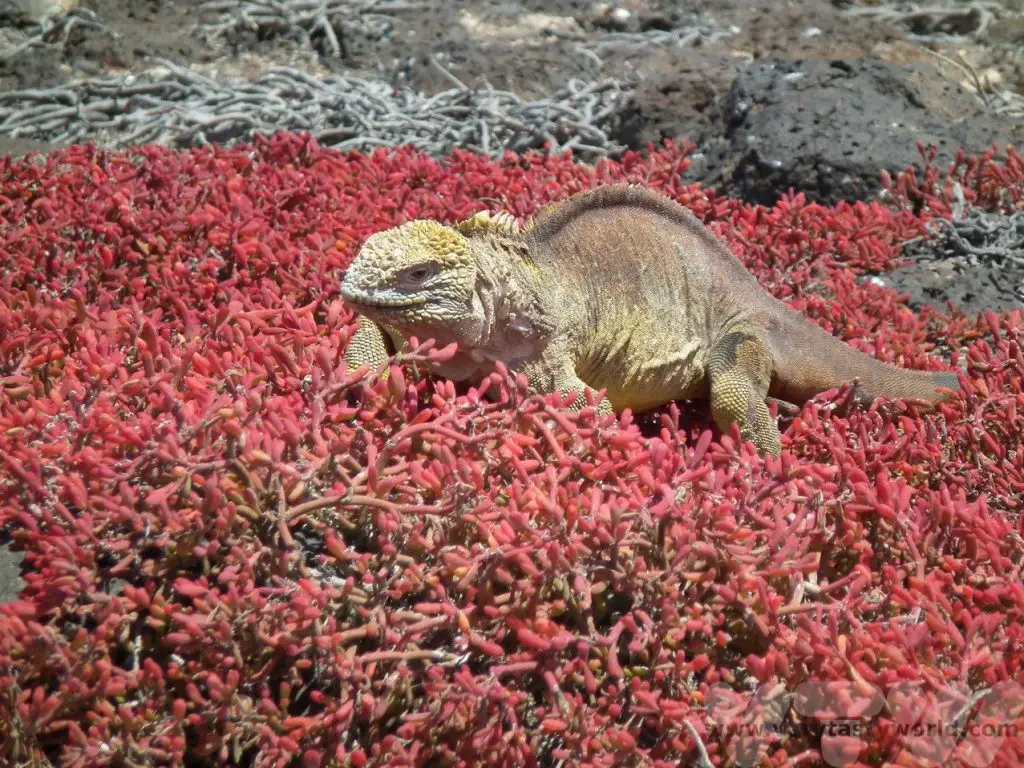
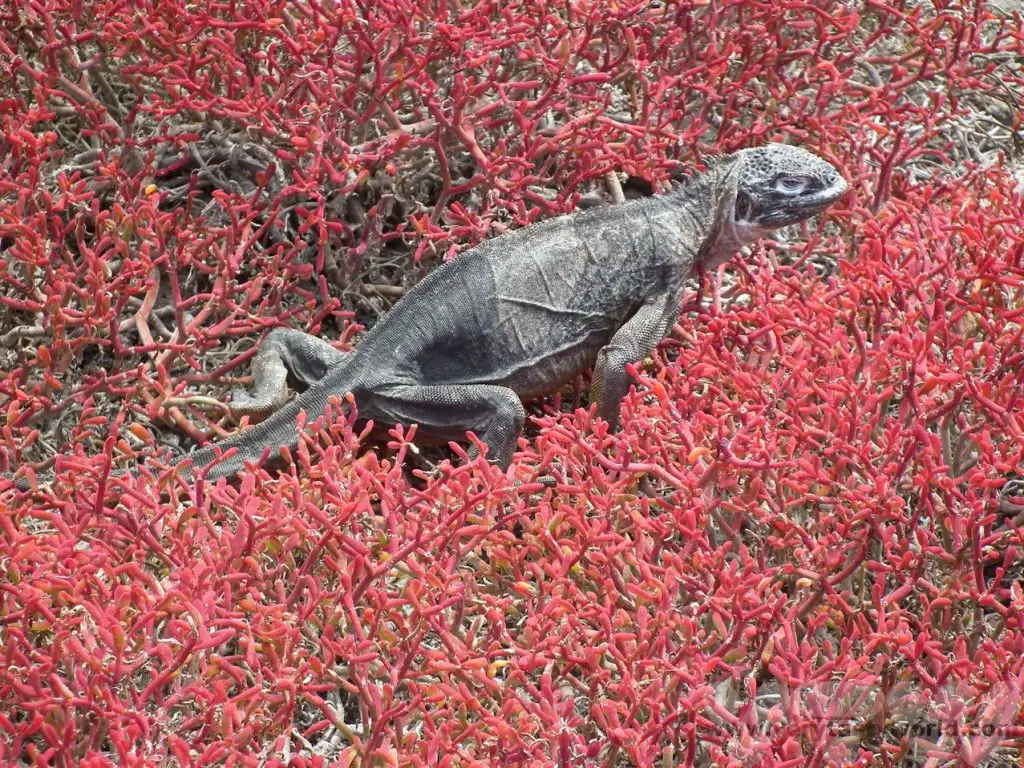
The landscape is gorgeous and the plant life here is very interesting. The ground is covered with the deep red of sesuvium and the prickly pear cacti provide a wonderful contrast.
We saw land iguanas…
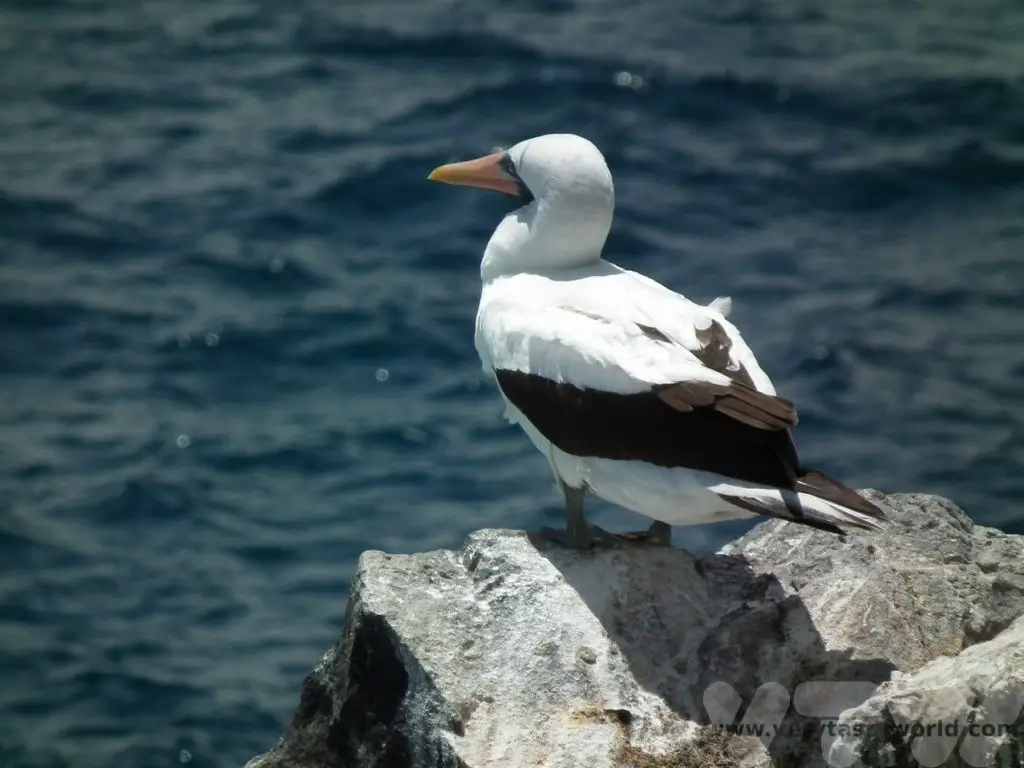
…Nazca boobies…
…and Swallow-tailed gulls making a nest. He is gathering stones as she looks on with approval.
Along the shoreline we saw some sealions, including a baby. They were all very conscious of the local sharks patrolling the area.
After the island visit we went snorkelling close to the Itabaca Channel to find some tintoreras sharks for ourselves. These sharks aren’t dangerous to humans and it was wonderful to bathe in the warm water and watch the sharks swim underneath us.
Galapagos Travelling Tips
Avoiding Boats Altogether
It’s impossible to avoid boats altogether if visting Santa Cruz as you need to cross the Itabaca Channel from Baltra island when you fly in. But that’s a very short and serene 10 minute journey. There are plenty of things to do on Santa Cruz – you will certainly see sea lions, iguanas, loads of birds and, of course, the giant tortoises. It is possible to fly between Santa Cruz, Isabela and San Christobal but costs are expensive.
Advantages of a Land Based Tour
If you can cope with going on a boat for a short time the day trips will ensure you get to experience the diversity of the islands as well as see lots of different species of wildlife. We managed to visit six islands whilst minimising our time on boats to a couple of hours at a time. The Santa Cruz to Isabela journey was definitely the worst trip but we were so pleased to have visited Isabela – it was amazing to see the wildlife there, especially the boobies.
Obviously budgets vary from person to person, but a land based tour can also be cheaper. We often find that local companies are able to offer good deals on accommodation and/or excursions. We do recommend booking excursions in advance though, especially if you are likely to be travelling in the busy season.
If you’re staying in Santa Cruz, there are lots of options for places to eat and plenty of hotels in Puerto Ayora. Enjoying excursions during the daytime means that there is time to explore the local area, dine out and enjoy a drink or two in the evenings.
Land-based tours are more flexible and you can change the itinerary if you wish (and there is availability). You can also schedule in some relaxation, especially if you wish to enjoy time on the beach.
Disadvantages of a Land Based Tour
The biggest disadvantage is that you won’t be able to reach the further islands. Cruises are pretty efficient in that you can sail during the night to arrive at an island in the morning and thus have more time to explore.
Another advantage is that, although cruises can be expensive, they are usually fully inclusive, so you know how much you will be expecting to pay for your trip, whereas with land based tours you will need to account for additional spending money.
When to Visit the Galapagos?
The Galapagos region has two main seasons: June to November are cool and dry whereas December to May are hot and rainy. High season runs from June to early September, then mid-December to mid-January.
There is not really a bad time to visit the Galapagos. The nature is simply spectacular all year round but if there is a particular animal or bird you wish to see it is worth checking when they are most likely to be observed.
If you are cruising, consider how rough the sea might be. August and September are likely to have the choppiest waters, although cruises will still be available at that time. (There might be discounts available.)
It’s also worth thinking about which creatures you might see at a particular time of year and what they are likely to be doing. We visited during the breeding season for many of the birds, so saw the males showing off to their mates – it was particularly lovely seeing the blue-footed booby courtship ritual. Other times of the year you will see young birds and animals. Different creatures will have different breeding seasons. And some migratory species will only visit at a particular time of year.
What Costs do I Need to Consider?
Aside from transport, accommodation, food/drink and excursions, there are a number of compulsory fees. Current costs per person are:
Galapagos Entry Fee (payable on arrival) $100 US
Isabela Docking Fee – $10 US
Migratory Control Card – $20 US
Transportation Baltra Airport – Itabaca Channel – $5 US
Transportation Itabaca Channel – Baltra Airport – $5 US
Water taxi from dock to boat (depending on the tide) – $ 1 US per person per ride
Money
Ecuador’s currency is the US dollar, so no need to worry about exchanging currency if you are travelling from the USA.
There are cash machines on Santa Cruz but they are not always reliable, so we suggest taking cash. There are no cash machines on Isabela.
What to Bring
Aside from your usual clothes and toiletries we recommend:
Swimming gear as there were a lot of excursions where we jumped off a boat into the clear blue sea. We didn’t need wetsuits as we found the water to be delightfully warm, but then we are used to swimming in the cold English Channel. If you think you are likely to feel the cold you can usually hire a wetsuit from the tour company. But we did wear a t-shirt over our conventional swimwear so as to protect our backs and shoulders from the sun. (We tended to wear the previous day’s smelly old t-shirt in the sea then rinse it out in the hotel bathroom.)
If you wear glasses it’s worth considering getting prescription goggles for snorkelling. Colin was massively disappointed, not that a 2m long shark swam beneath him, but because he was too short-sighted to see it!
Sun protection – sunscreen (we recommend at least Factor 30+ and also consider using waterproof sunscreen that is kind to the marine environment) and a sun hat. The sun is strong in this part of the world and you can get burned easily, even on a cloudy day.
Waterproof/beach shoes/flip-flops. There are a lot of opportunities to spend time on beaches or rocky outcrops. Waterproof shoes are also useful when you are changing into and out of swimming gear when snorkelling.
Travel towels are useful, although some tour companies can provide towels.
Camera with a decent zoom. If you have a waterproof camera bring that along. If you don’t have a waterproof camera we reckon it’s worth investing in one, even if it’s a cheap one. We enjoyed snorkelling on most of the excursions and coming face to face with a turtle or a shark is such a magical experience you’ll want to capture that moment. A phone camera may well be just fine for you, we appreciated having a wrist strap as we were on boats a lot and didn’t want to drop the phone into the water.
If you are prone to seasickness, consider whether there might be remedies that might help. There are all sorts of options, from pills to wristbands to patches. These will likely be personal for you.
Bring your regular medication including some spares. You may find that the medical facilities on the islands are more limited than in your country. Also consider whether you have suitable travel insurance for your needs.
Internet
It is possible to access the internet on Santa Cruz but it’s not great on Isabela. Enjoy being offline for a while!
Dining on the Galapagos
You’re most definitely visiting the Galapagos for the wildlife and not the food! But the main towns of Puerto Ayora on Santa Cruz and Villamil on Isabela have a variety of restaurants which offer menus to suit varying budgets. Seafood was plentiful and we found a few places that offered good value meals.
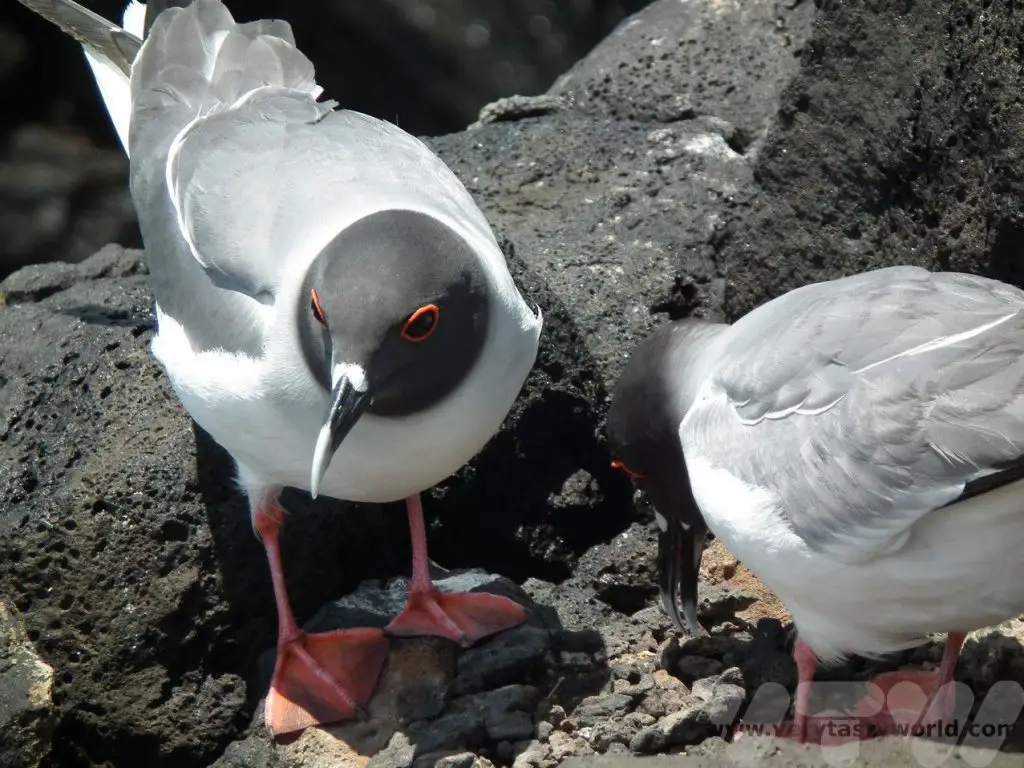
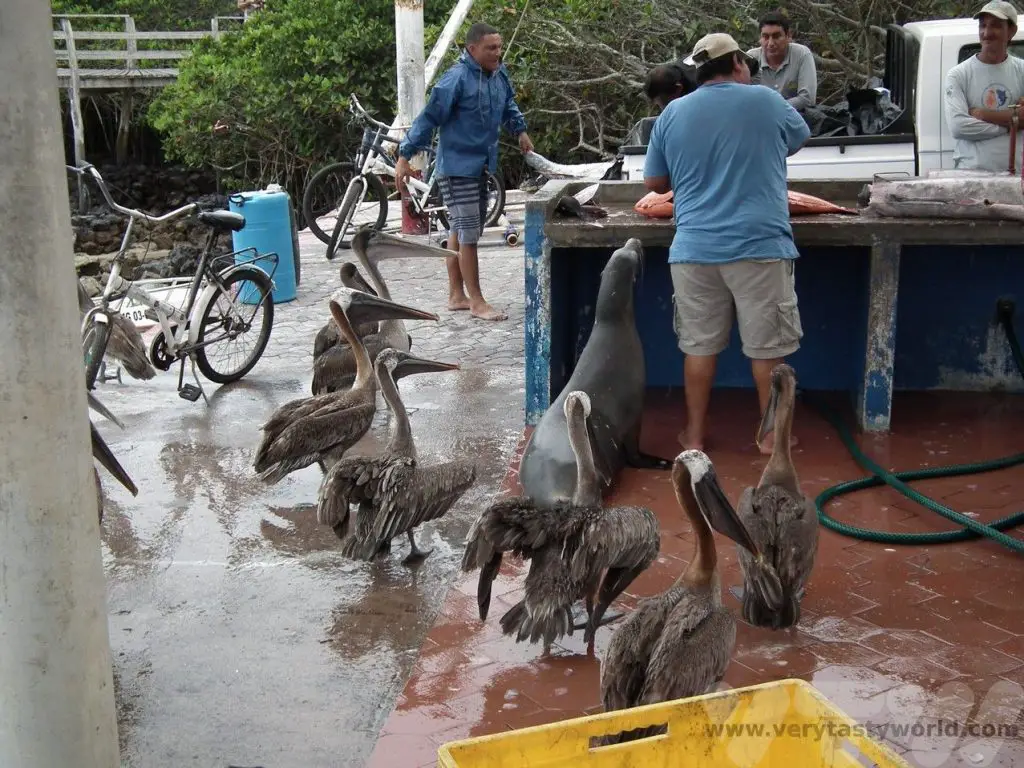
It’s fun watching the fishing boats come in to land their catch at the seafood market in Puerto Ayora. There will always be plenty of birds – and sometimes a sea lion – waiting for any random tidbits that might come their way.
Related Posts You May Enjoy


- Best Time To Visit Machu Picchu 2024 Update
- A 2 Week Patagonia Itinerary
- Day of the Dead in Campeche
- A Galapagos Land Based Itinerary
- RECIPE: How to Make Costa Rica’s Gallo Pinto
- A Tasty Puebla Food Tour
- Costa Rica Wildlife Sanctuary – Caño Negro
- Visit Torres del Paine National Park in Patagonia
- Atacama Desert Itinerary
Zero Waste Recipes Before Your Holiday
We absolutely hate food waste so whenever are off on a trip we try to make sure we have used up all the perishable food before we leave. But there are usually loads of things to do with all the packing and preparation for the trip. So we want some simple recipes that not only use up food but are easy to make and, above all, quick. Here are some ideas for zero waste recipes that will use up food before you hit the road.
None of these recipes take more than ten minutes’ preparation time. They may need a bit of cooking but you should be okay to abandon them in the oven or on the hob while you finish packing for your trip.
Fruit and Vegetables
If you are travelling for more than a few day, most vegetables will perish before you return, so it’s good to use them all up.
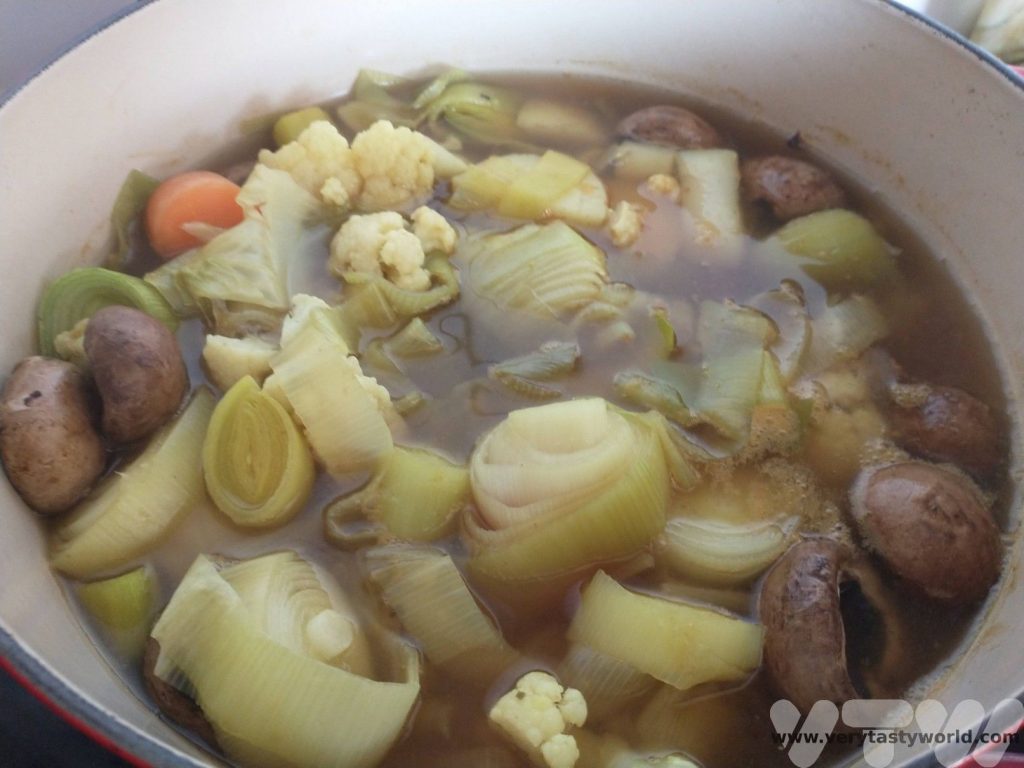
A great way to use up random leftover vegetables is to make soup. We often make an ‘end of the week’ soup even if we aren’t travelling imminently, to use all the spare vegetables. There is no fixed recipe.
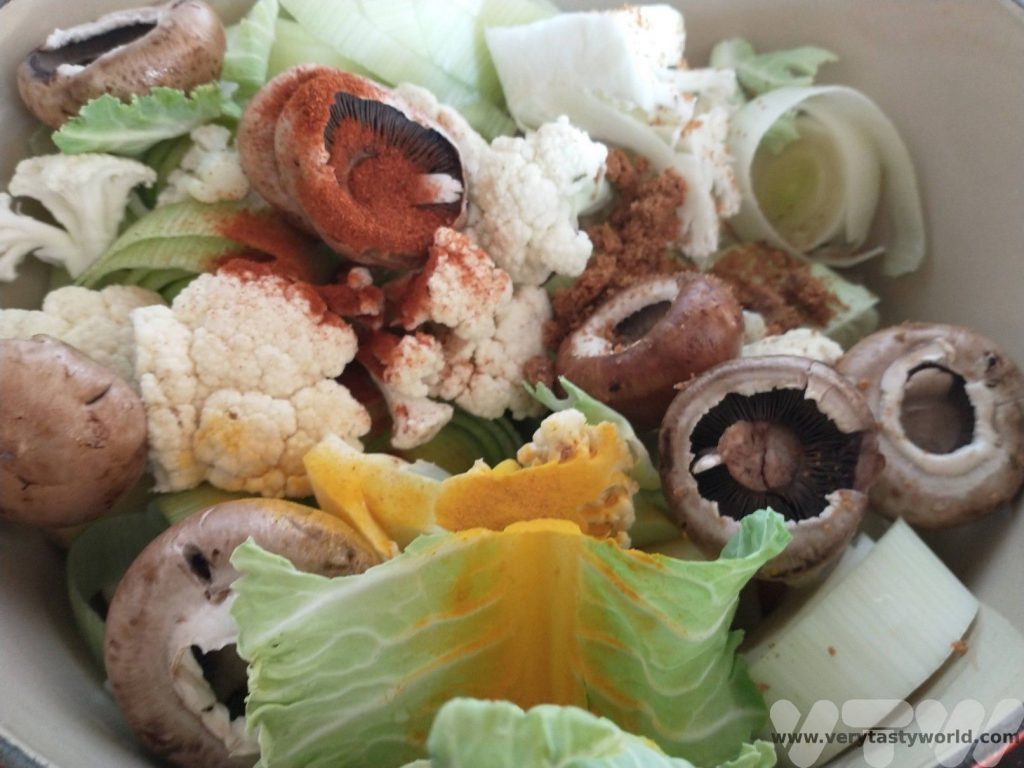
Multi Vegetable Soup Recipe
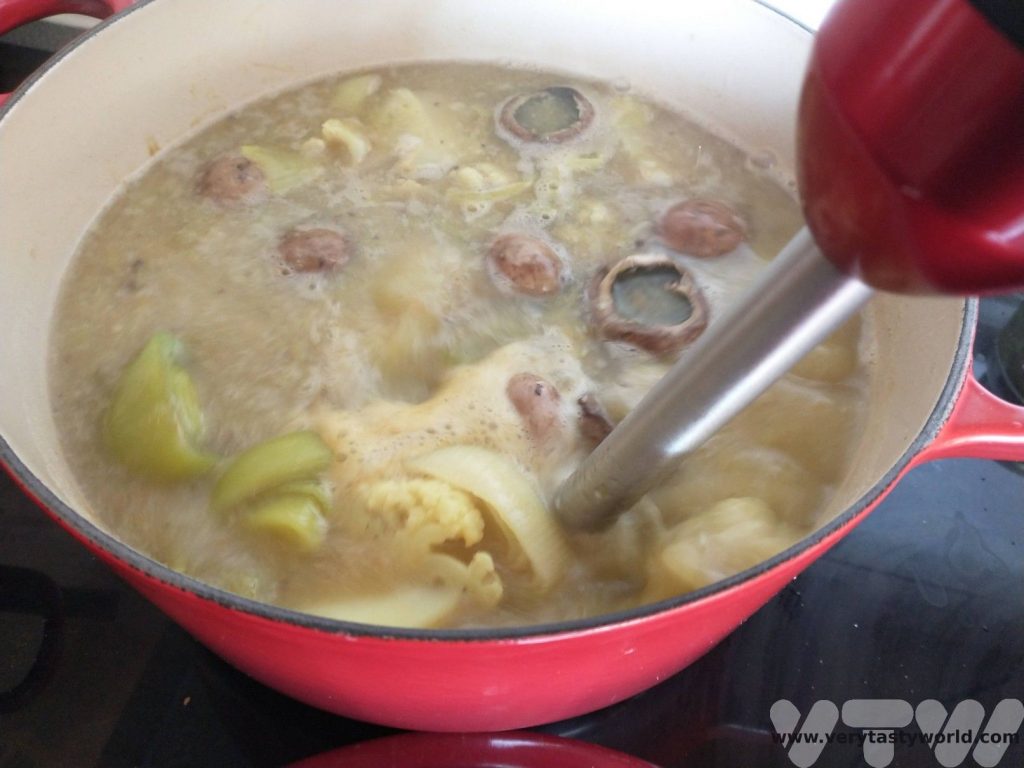
Chop up all your spare vegetables into cubes that are roughly the same size. Place in a pan, top up with water to just about cover the veg, add a couple of stock cubes and bring to the boil. We tend to add any herbs and spices that we have in the cupboard. Favourites are smoked paprika, turmeric and cumin but add any combination you like. Cayenne pepper adds a touch of spice, Worcestershire sauce a bit of umami. Salt and pepper are essential. As soon as the vegetables are soft, whiz everything together with a hand blender to get a consistency you like – chunky or smooth, both are fine. Add a bit more water/stock if the soup’s too thick. If you have a block of cheese that won’t last until you get back, grate that and chuck it in. You can make the soup any time of the day and just reheat when you want to eat it -don’t let it boil, just warm it through. And you can be sure that you will have consumed at least ten of your ‘five a day’ portions of veg and can feel thoroughly virtuous before you hit the road.
Any soup you don’t manage to eat (and we often end up making a lot of soup) you can just pop into the freezer. Perfect for a light meal when you return home.
Random Roast Vegetable Salad
A roasted vegetable salad is another great way of using up leftovers, especially if you have root veg hanging around. Chop up your vegetables. Cut harder root vegetables like parsnip and carrot or squash into smaller chunks than softer veg such as onions, mushrooms, tomatoes and bell pepper, so that they will cook in roughly the same length of time. Chuck them in a baking dish, slosh some vegetable oil over them, give them a shake and pop into the oven for 35-40 minutes until they are cooked and tender. Let them cool.

Then you can dress them with a standard vinaigrette – 2 parts olive oil to 1 part vinegar, a teaspoon of mustard and salt/pepper. We like another dressing – finely chopped preserved lemons and pomegranate molasses, with a sprinkle of sumac and black pepper. (The preserved lemons are very salty so we don’t add salt. If you don’t have preserved lemons, squeeze in the juice of a lemon and salt to taste.)

You could also add any leftover cheese. Feta and mozzarella work well. If you have any spare chunks of bread, you could toast them, tear them up into small pieces and add to the salad. They soak up the dressing beautifully.
Preserving Fruit and Vegetables
Freeze citrus fruits. Lemons and limes freeze pretty well. We quite often quarter the citrus fruits before we put them into the freezer. When we get home they are perfect for adding directly to a G&T– the frozen fruit will keep the drink cold (without diluting it) too.
Fruit – Many soft fruits, such as berries, freeze very well. Just pop them into the freezer. Or you can make fruity smoothie. Chuck them all together in a blender, add a dollop of yoghurt if you have some, and a teaspoon of honey if you like some added sweetness, and enjoy.
Salad – it’s often possible to make a pesto with salad leaves. We have a wild garlic pesto recipe where you could substitute salad leaves and any herbs for the wild garlic leaves. Add a clove of garlic or two to add some garlicky warmth. You could use the pesto to eat with pasta or to dress a roast vegetable salad.
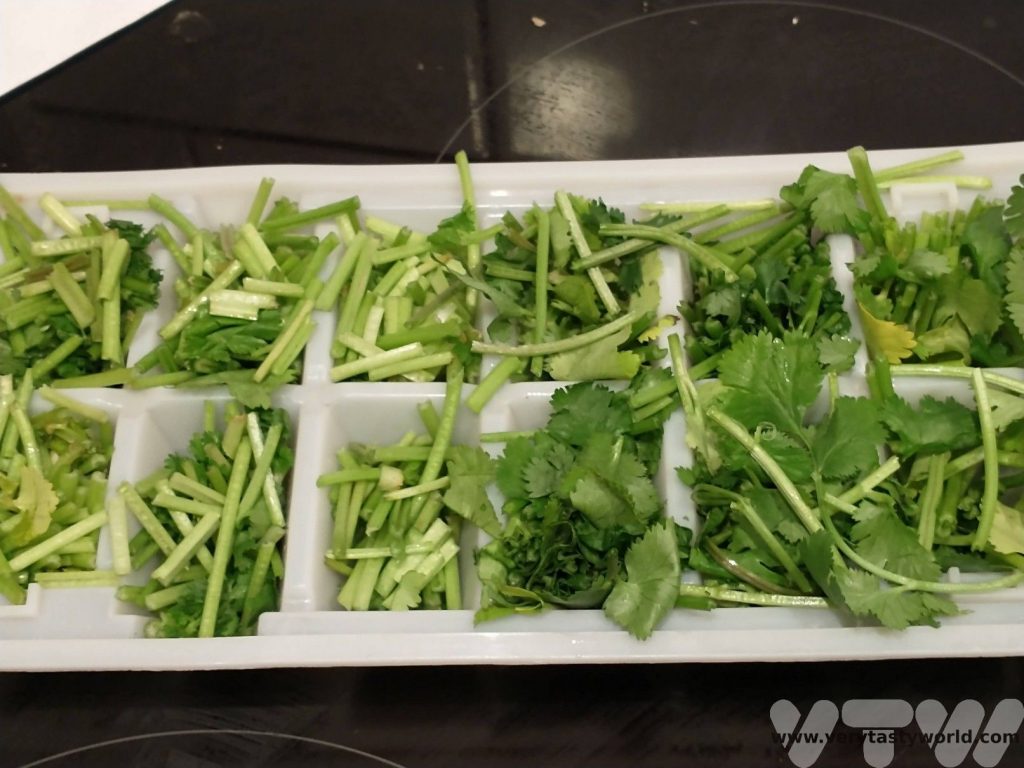
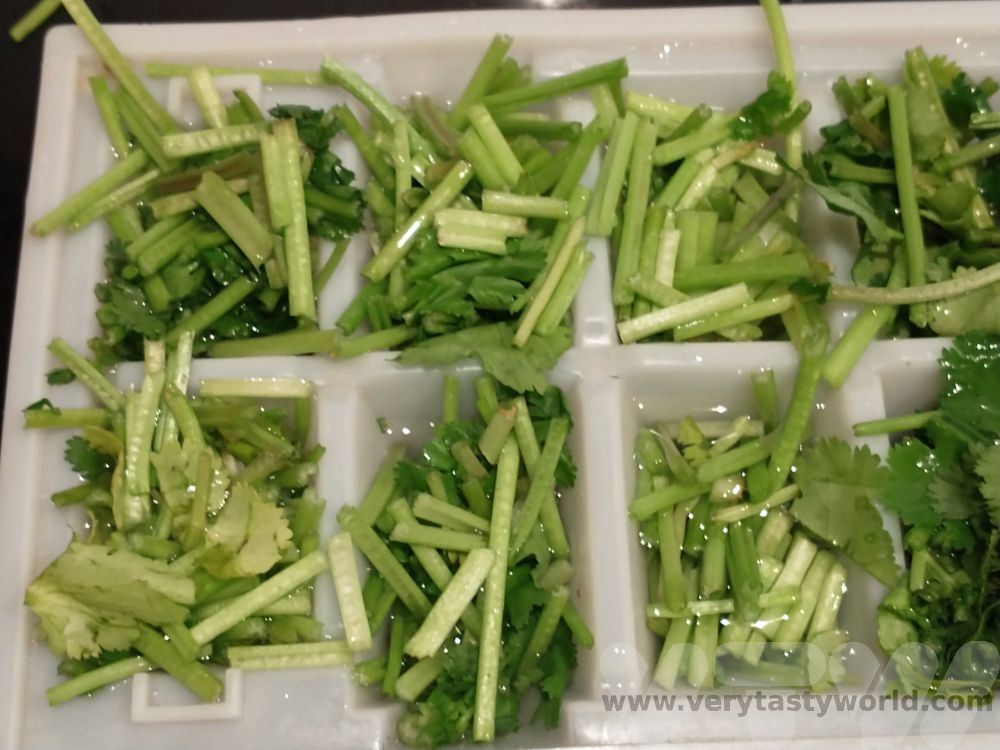
Herbs – many herbs can be frozen. You can chop them up and freeze them in ice cube trays with a little water in each section. Once frozen, you can pop out the ice cubes and store them in a bag together. You can use them any time when you get home. And don’t forget that with some soft herbs, like coriander, the stalks have loads of flavour, so don’t forget to freeze those too.
It’s also possible to make flavoured oils using herbs. Mix 100g of a herb (soft herbs such as parsley, coriander, wild garlic, sorrel, oregano/marjoram) with 100ml oil (any variety as long as it’s not expensive extra virgin olive oil as the herbs will mask its subtle flavour) and blend together. We don’t like storing oils for any length of time, even in the fridge, because there is a small risk of botulism. So we freeze them, again in ice-cube trays.
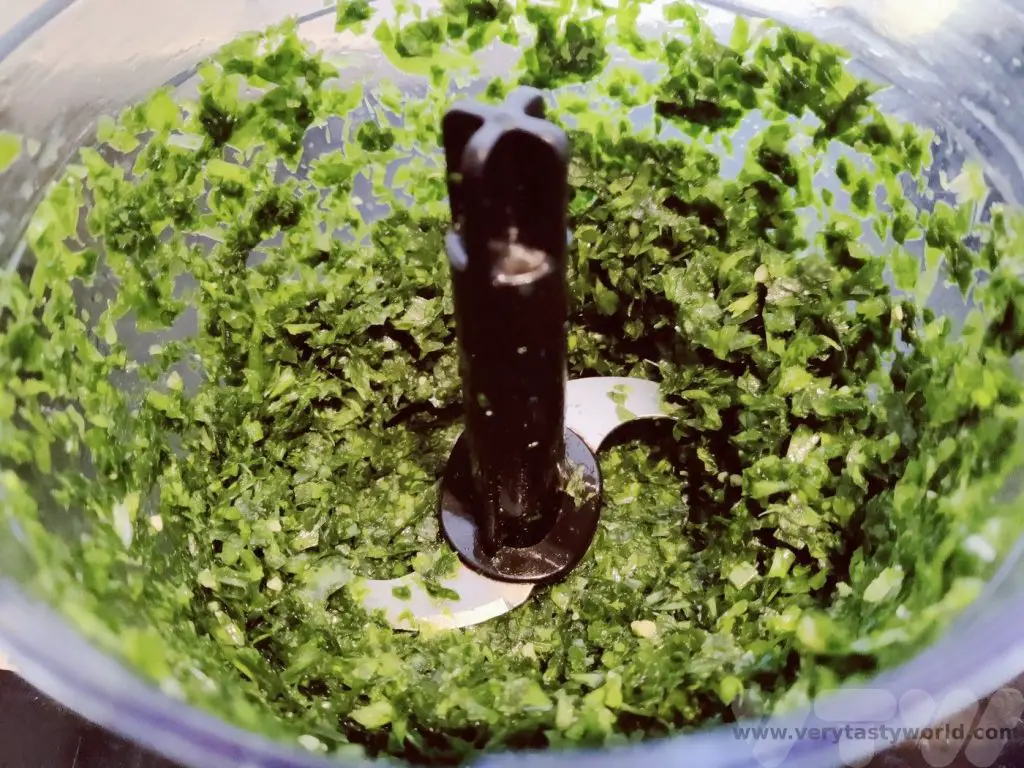
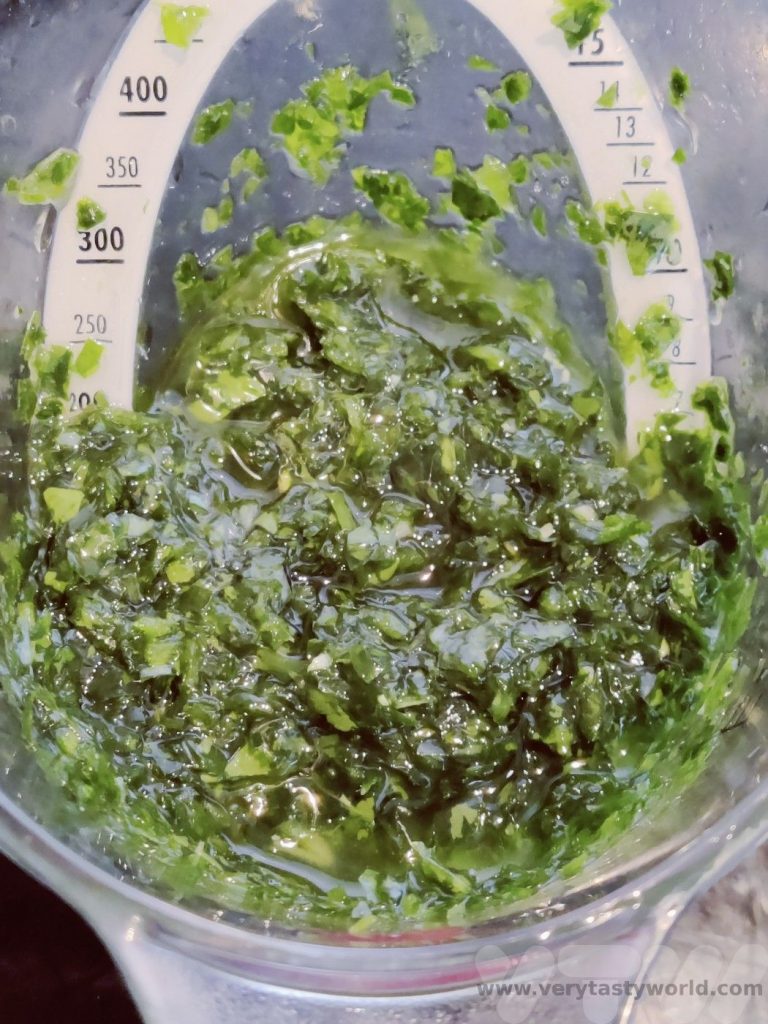
Next time you make a soup you can just take out a cube and melt it in as the soup cooks, splitting the soup with a lovely hit of herby flavour.
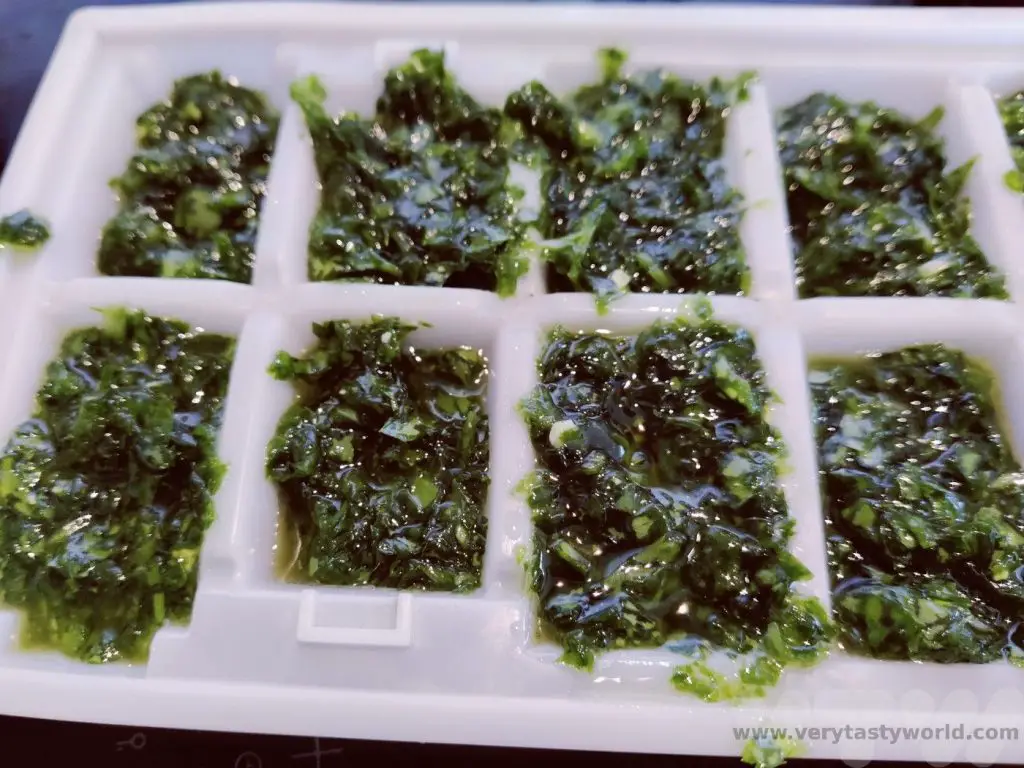
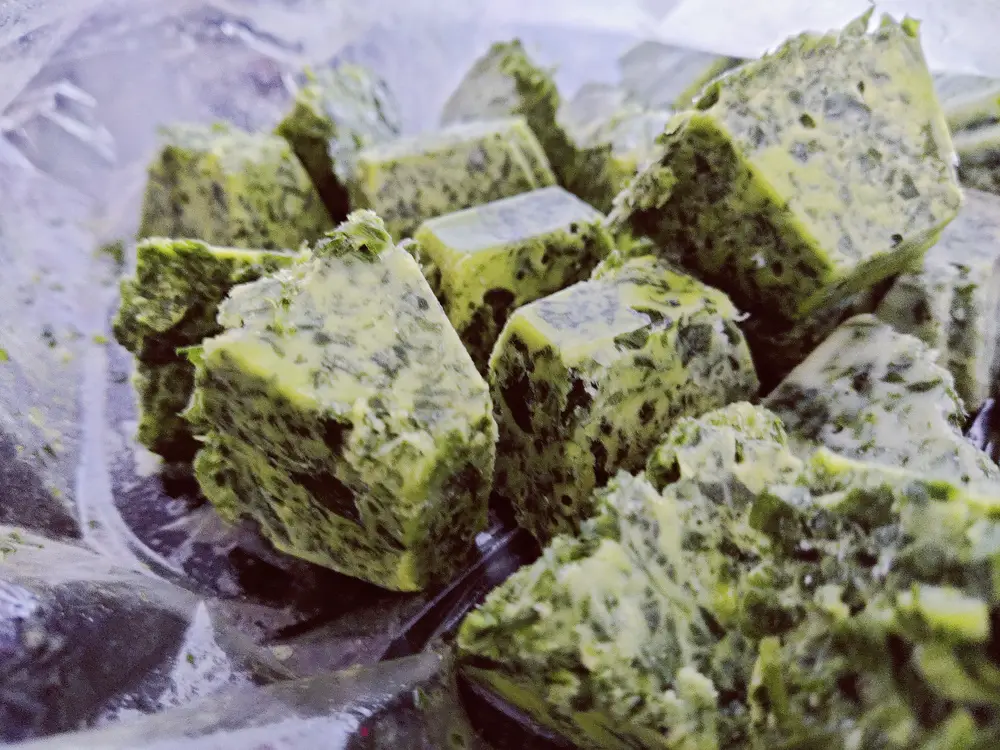
Chillies freeze pretty well, particularly the smaller ones. You can chop or micrograte frozen chillies directly into any dish you are making at a later date after you have returned home.
Getting in A Pickle
Some vegetables don’t freeze at all well – they turn into a mush on thawing. But you can pickle lots of vegetables.
Pickled Cucumber Recipe
Cucumbers are easy to pickle:

Slice them up, pop them in a clean jar. Warm up some vinegar (rice vinegar, white wine vinegar or cider vinegar work well) along with a teaspoon each of sugar and salt. Add a spare garlic clove, some peppercorns or mustard seeds if you like. Heat until the sugar and salt have dissolved and then pour over the cucumbers. Make sure they are submerged in the vinegar before you go away.
This will preserve them until you return home. They’ll be great on top of a burger as a pickle or as a sour side dish accompaniment to any meal.
Pickled Ginger Recipe
Ginger doesn’t freeze very well at all, we’ve found it goes squishy. However, it pickles beautifully. Just peel the ginger (scraping the skin off with a teaspoon is often easier than using a vegetable peeler, which can get a bit clogged up) and slice, then chop into small juliennes about half the length of a matchstick. Then put them into a container – a clean, empty jar – and top up with vinegar. We tend to use white vinegar or rice vinegar rather than a stronger vinegar such as malt or wine. For a 300ml jar, largely full of ginger and topped up with vinegar we add around 2 tsp sugar and 1 tsp salt. Shake to let the salt and sugar dissolve and let the flavours infuse. It will taste brilliant when you get home.
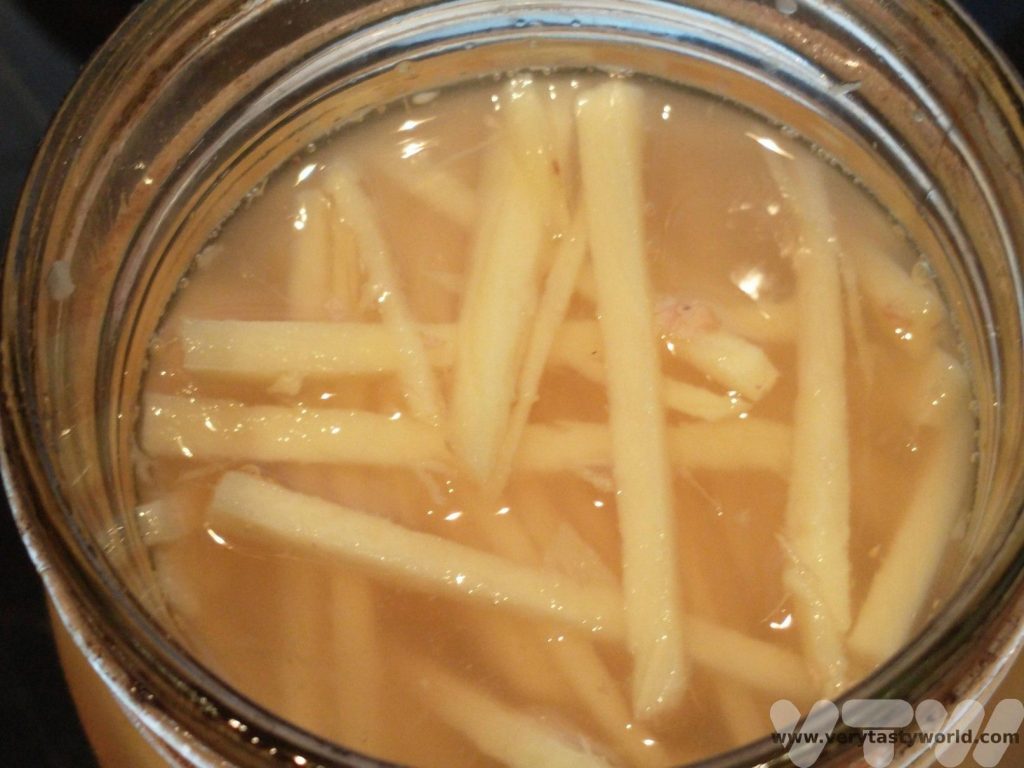
Perfect atop rice dishes or in stir-fries to give an extra zing. We have a recipe for Vietnamese pickled garlic, which isn’t too much trouble to make but needs a bit more work finely slicing the garlic, and is utterly delicious. If you want to pickled whole cloves of garlic to save yourself some time, just don’t bother to slice them.
Dairy
Some dairy products will last for the duration of a short trip. Butter and cheese should be fine in the fridge for a couple of weeks. For longer trips, butter will freeze well, in fact salted butter will last up to a year in the freezer (unsalted will be okay for six months). Hard cheeses are generally fine to put into the freezer and shouldn’t lose flavour when you defrost them naturally. Freezing soft cheese isn’t a great idea as it tends to go a bit watery on thawing. We have a very easy recipe for using up cream cheese.
Cream Cheese And Tinned Fish Dip Recipe
You can make an easy dip using soft cheese by combining a packet of soft cheese with a can of tuna fish or mackerel, a dollop of mayonnaise and some flavouring, depending on what you have in the cupboard. We particularly like a couple of teaspoons of creamed horseradish, but celery salt, cayenne, paprika and/or a squeeze of lemon juice work well. We used smoked fish here, but it works really well with tinned fish.
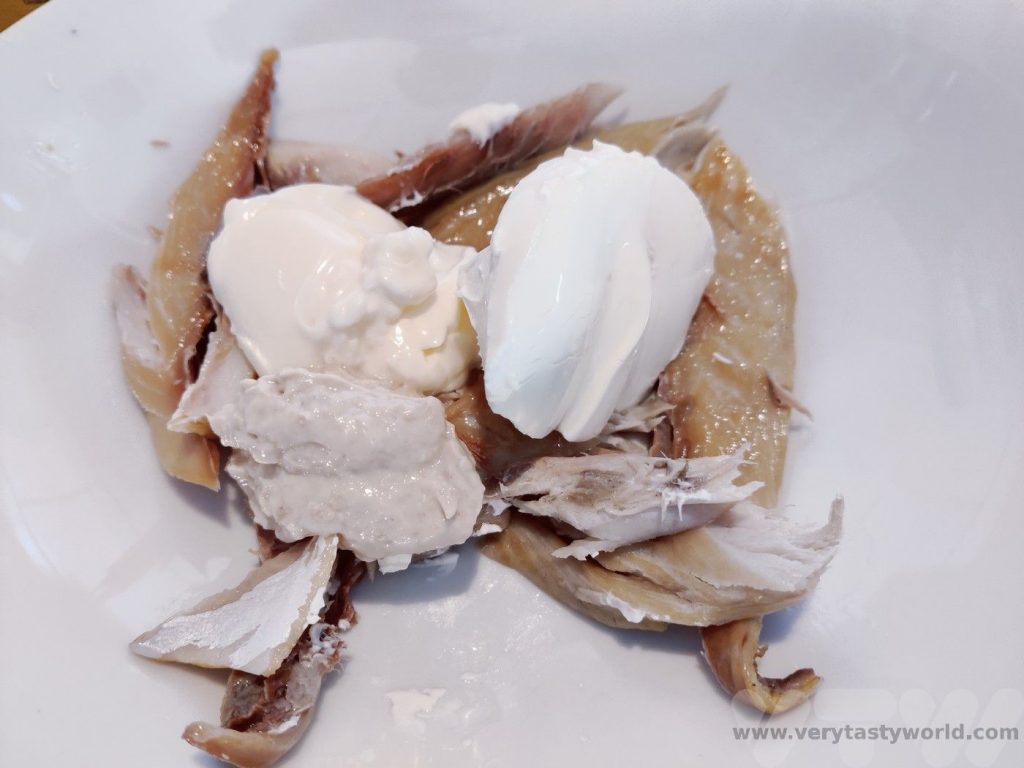
Sprinkle in salt and pepper and mix it all together. You can serve it as a dip with raw vegetables such as leftover carrots, celery, cauliflower or cucumber, cut into juliennes.

It’s great on toast too, especially if you need to use up some bread.
Yoghurt – can be stirred into your soup to add a bit of tang. If you have a load of fruit that you need to eat, chop it up, bung it in a blender with the yoghurt and create a lovely smoothie. Yoghurt is also used in overnight oats – a really great breakfast for travellers (see below).
Your Daily Bread
Make sure the bread bin is empty – you don’t want to come back to the remnants of a mouldy loaf which you’ve forgotten to eat! If you have some sliced bread left over you can toast the slices, cut them into cubes and add them to your vegetable soup or salad as croutons. If you have some garlic kicking about, peel a clove and rub it onto the (whole) toasted slice of bread before cubing. Or you can just toss them in olive oil and bung the cubed bread into the oven or air fryer for a few minutes until they are golden brown.
Breakfast of Champions for the Day of Travel
Overnight oats is a really easy breakfast that uses up fruit and dairy and can be fully prepared the night before. Again, it’s a really flexible recipe that you can make with any leftover fruit. We always have dried oats in our store cupboard, as they last for ages, and we usually have some dried fruit as well.
Overnight Oats Recipe
Dollop 3 dessertspoons of yoghurt into a bowl (or split whatever you have evenly between the number of people wanting breakfast). Sprinkle 2 dessertspoons of oats over the top. Add chopped fruit. Fresh fruit and dried fruit work well, just use what you have. Mix it all together and pop it in the fridge overnight. It is ready to eat the following morning.
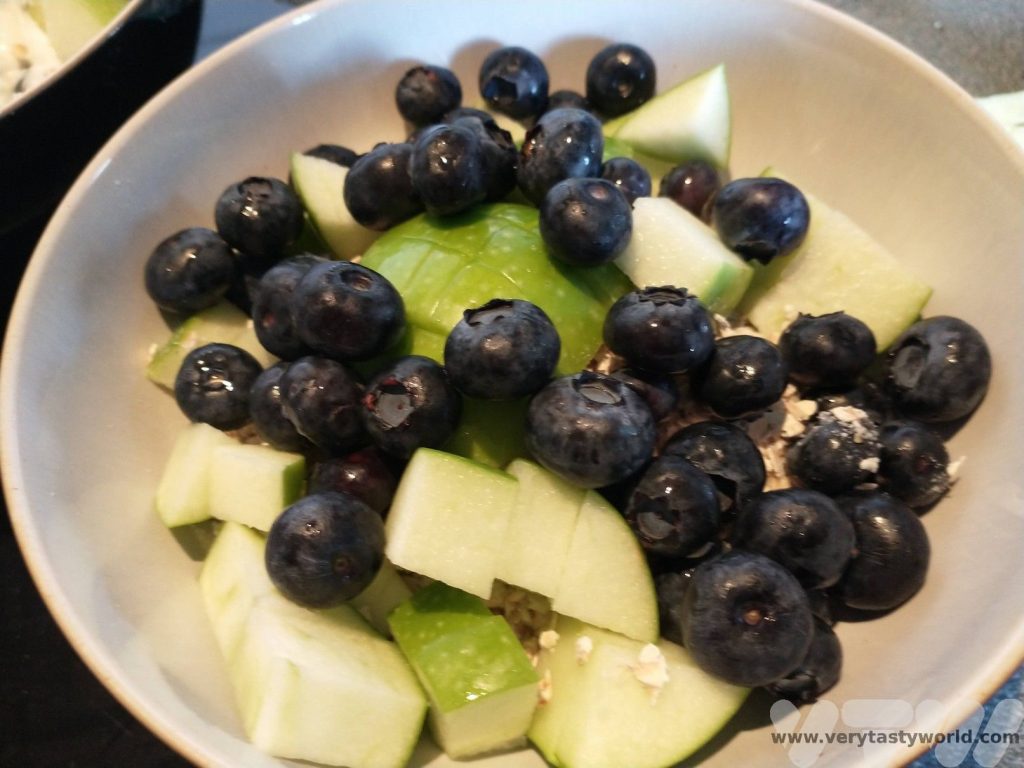
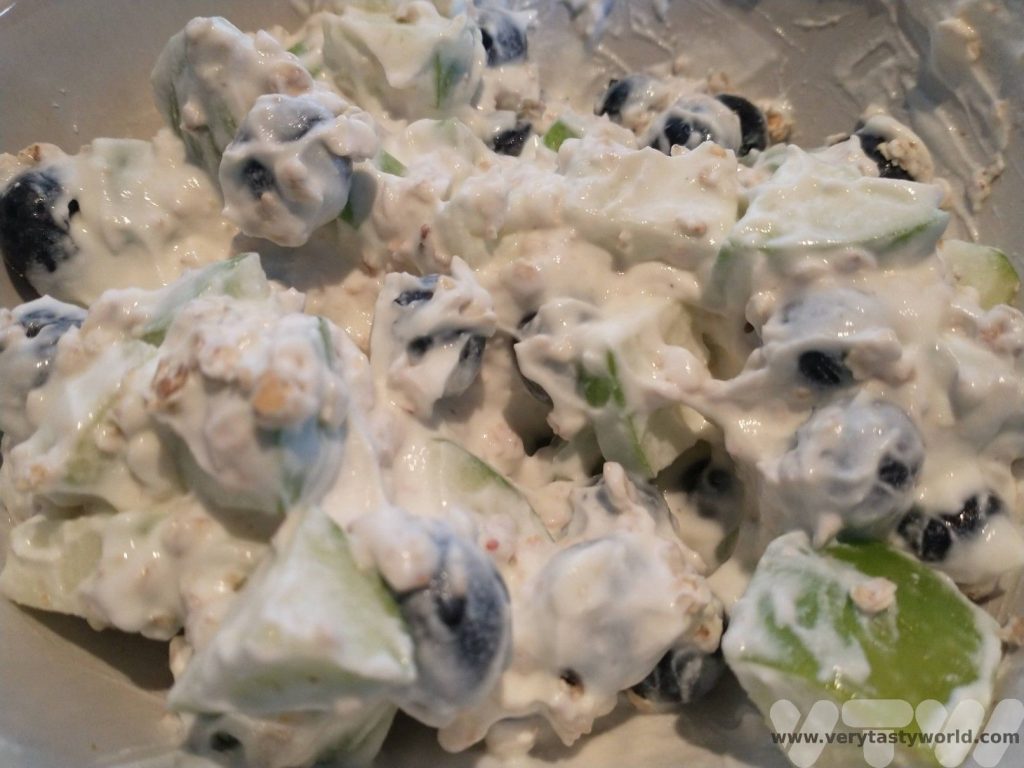
It looks a right mess (you could prettify it in the bowl if you want, but we plan just to scoff it) but it tastes great and will definitely ensure that you don’t go hungry as you embark on your journey.
Happy travels!
- RECIPE Oyakodon Donburi
- Zero Waste Recipes Before Your Holiday
- RECIPE: Vegetable Biryani Tamil Nadu Style
- RECIPE: Vegan Wild Garlic Pesto
- Recipe: Venetian Pasta Sauce
- RECIPE: Biryani Raita Recipe
- RECIPE: How to Make Costa Rica’s Gallo Pinto
- Recipe: Japanese Simmered Pork Belly – Buta no Kakuni
- RECIPE: How to Make Umeboshi
Is Sarajevo Worth Visiting?
Sarajevo is the capital of Bosnia and Herzegovina. It is situated inland and lies in the valley of the Miljacka River in the Dinaric Alps. We visited this lively and cosmopolitan city as part of a road trip though Bosnia and Croatia.It takes a couple of hours to reach there from Mostar and an hour or so from Travnik and Konjic. So is Sarajevo worth visiting? The answer is an emphatic yes! It’s a lovely city with a fascinating history as well as plenty of things to see and do.
Driving in Bosnia is generally a pleasure, but is quite slow in the countryside. The closer you get to Sarajevo the wider and faster the roads become. Driving in the city itself isn’t too difficult either, the traffic was busy but not overwhelming, but make sure you have practiced your hill starts if you’re driving a manual transmission car – the suburbs are very hilly and some of roads are quite narrow.
Welcome to Sarajevo
A walking tour is a really good way to discover a new city, it’s a great means of finding your bearings and discovering places to explore in more depth. Local guides are also a useful resource for getting recommendations for places to eat and drink. We spent our first morning on a walking tour with a small group of international visitors who were also keen to discover what Sarajevo had to offer.
When we first met the guide he asked us, “can you tell me anything about Sarajevo?” Sadly, the only things we could think of were negative – the siege of Sarajevo during the Bosnian War in the 1990s and the shooting of Archduke Franz Ferdinand which led to the commencement of the First World War. Our guide acknowledged that Sarajevo has had more than its fair share of world history, but also that it hosted the Winter Olympics in 1984, which was a positive thing. And he also pointed out that Sarajevo is a hugely multicultural city with a rich history.
Our walking tour started in the old town. On the pavement of Ferhadija there is a plate bearing an inscription:
This represents the boundary between the old (Ottoman) and new (Austro-Hungarian) parts of the city. The walk conveniently followed the history of Sarajevo.
Sarajevo’s Ottoman Old Town
Although there had been settlements in the area, Sarajevo as we know it was founded during the Ottoman empire in 1461 by Isa-Beg Ishaković, who constructed a number of buildings including mosques, a market and bath houses.
It was Gazi Husrev-beg, governor of the Sanjak of Bosnia in the mid 16th century, who developed the city and enabled it to thrive. Importantly, he recognised Sarajevo’s strategic importance along trade routes and set up free accommodation for traders passing through the city. It reflected the hospitality of the time but also ensured that the area flourished. The old city has a large covered marketplace and several mosques.
The city’s clock tower was an important building. It tells the time in an unconventional way – when the hands are at midnight this denotes the time of sunset. This would have been an important way for Muslims observing Ramadan to know when they could start eating.
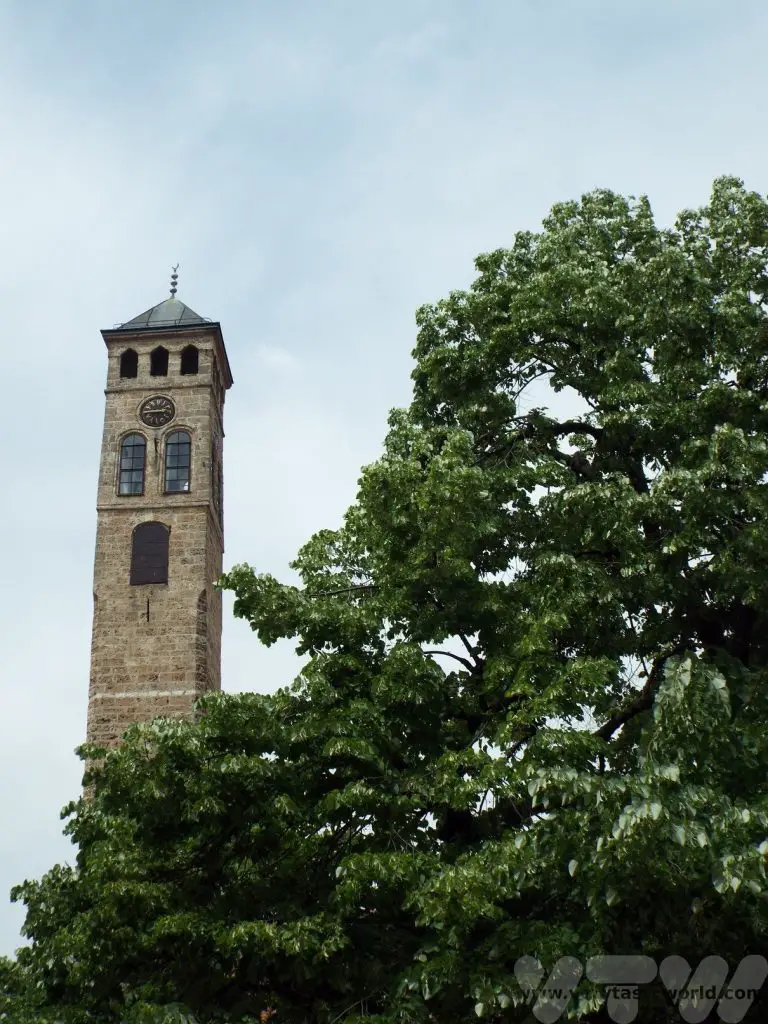
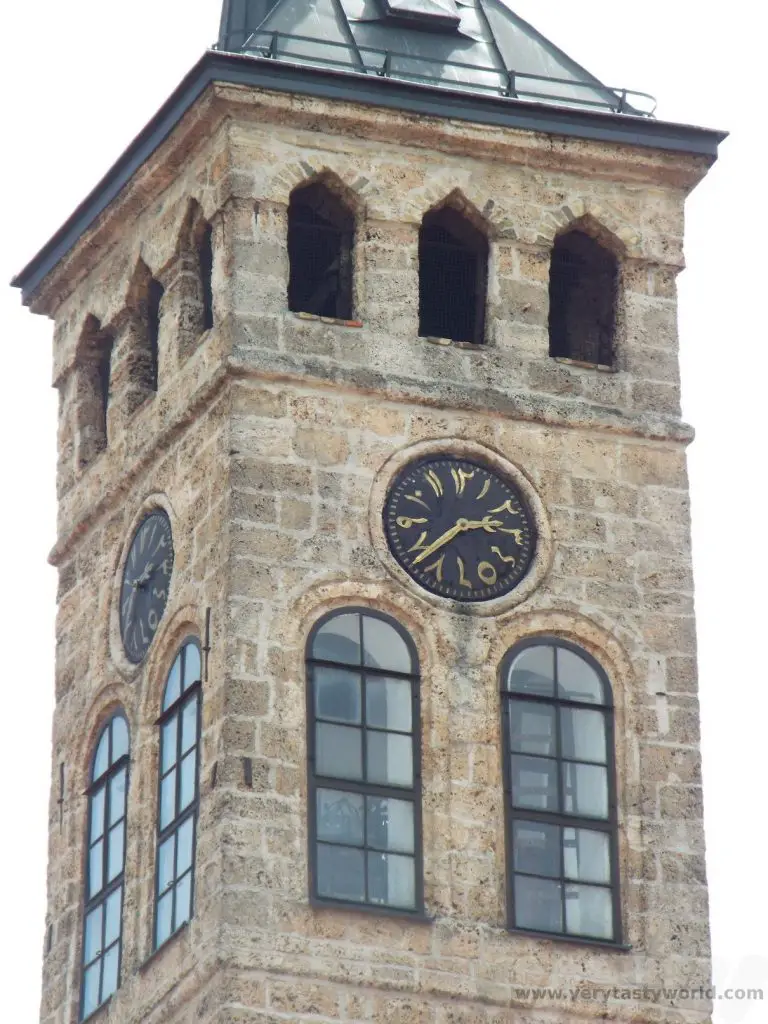
Of course, sunset occurs at a slightly different time every day, so the clock would have had to be changed manually. In addition, Sarajevo is a located in a steep valley, surrounded by mountains and the city has outgrown the clock. These days, a cannon is fired from the Yellow Fortress to mark an audible sunset alert for all Muslims.
Gazi Husrev-beg Mosque is dedicated to the city’s benefactor and was built in 1530. It is an impressive structure, highly decorated.
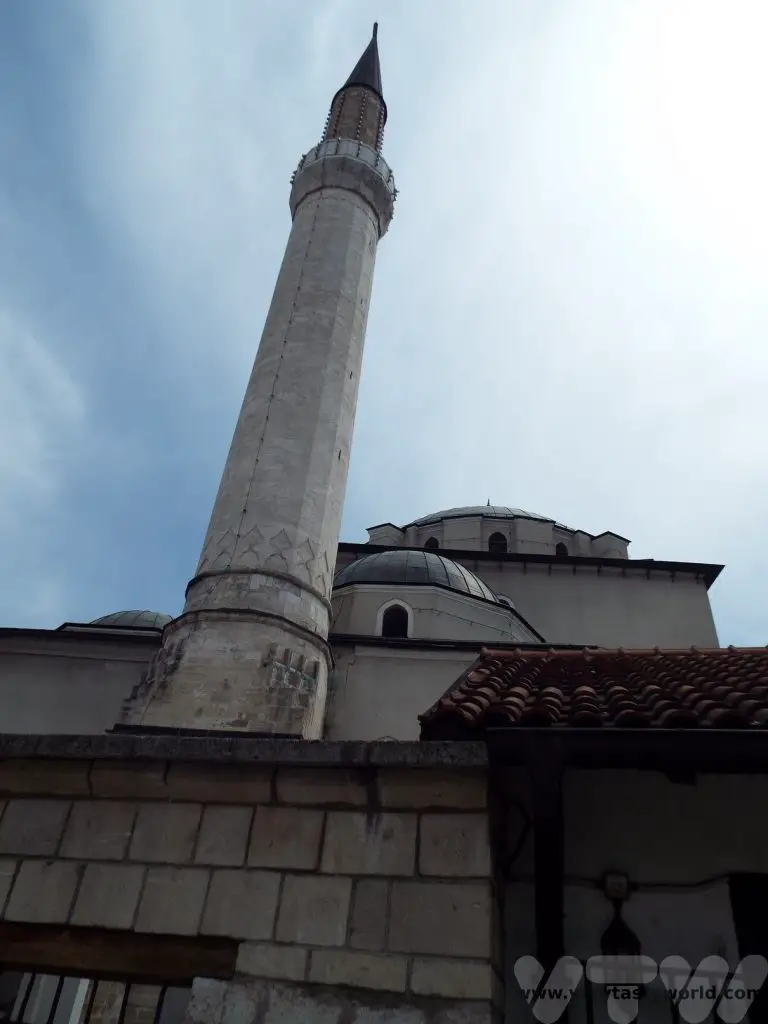
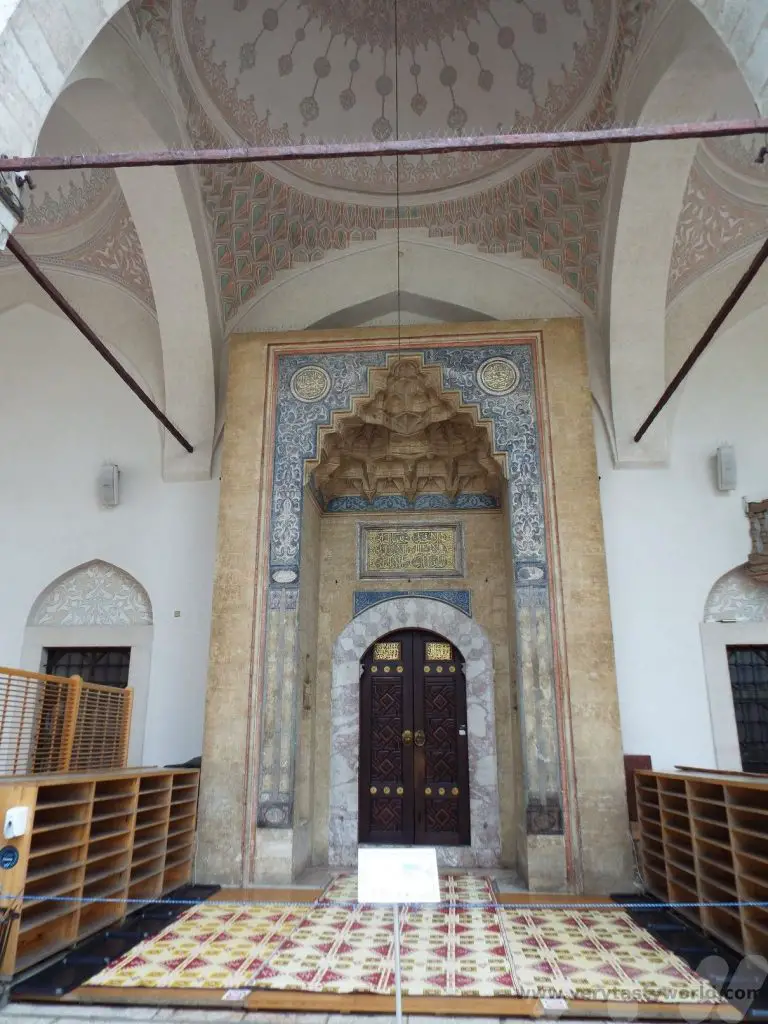
It is located next to the covered market, which still operates as a market, albeit with more touristy goods on offer these days.
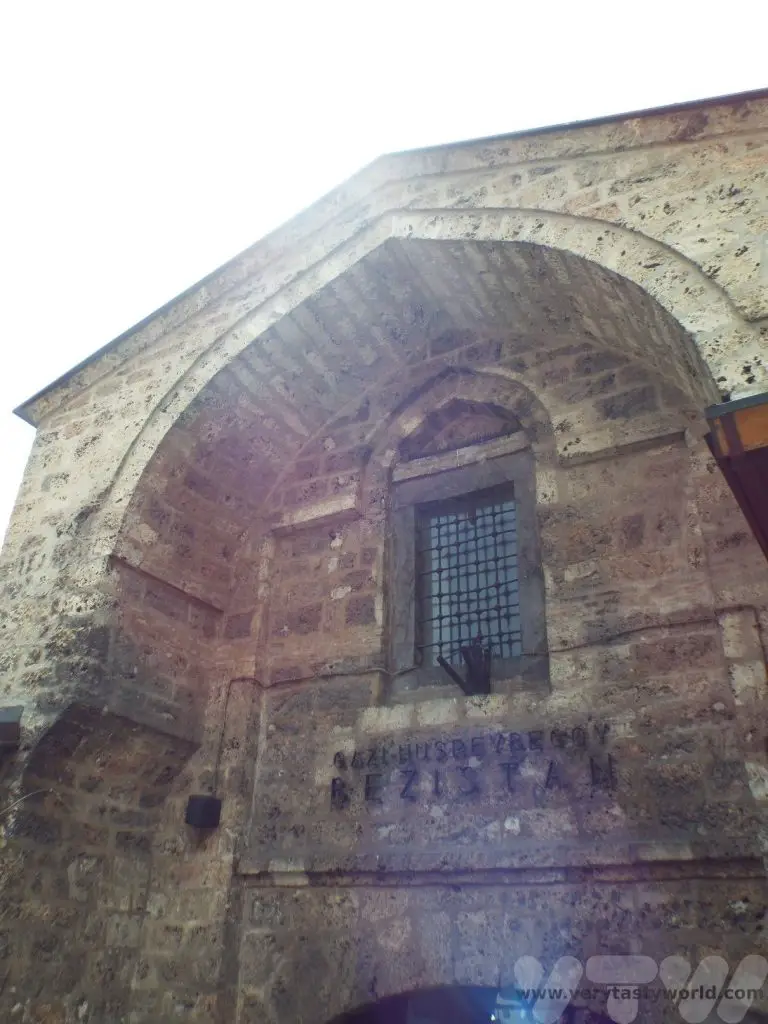
The complexity of the water system that was developed during Ottoman times can be seen in the ornate fountains.
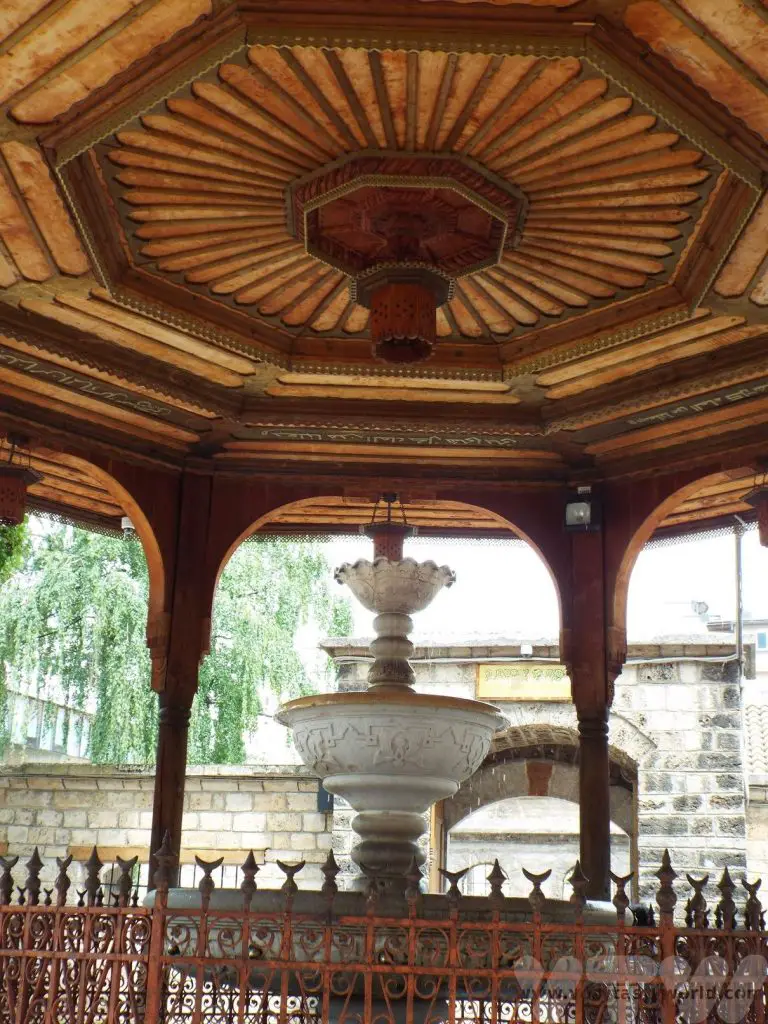
With a clock tower, library, religious schools, bathhouses and a sophisticated water system, Sarajevo was one of the most important and enlightened cities of the Ottoman empire, second only to Istanbul.
It is a delight wandering through the old town. There are lots of streets with all sorts of goods to buy and craftspeople making and selling their wares. Lots of foodie shops and restaurants too! If you want to buy a coffee set or indeed some delicious coffee there are plenty of emporia in the area to choose from.
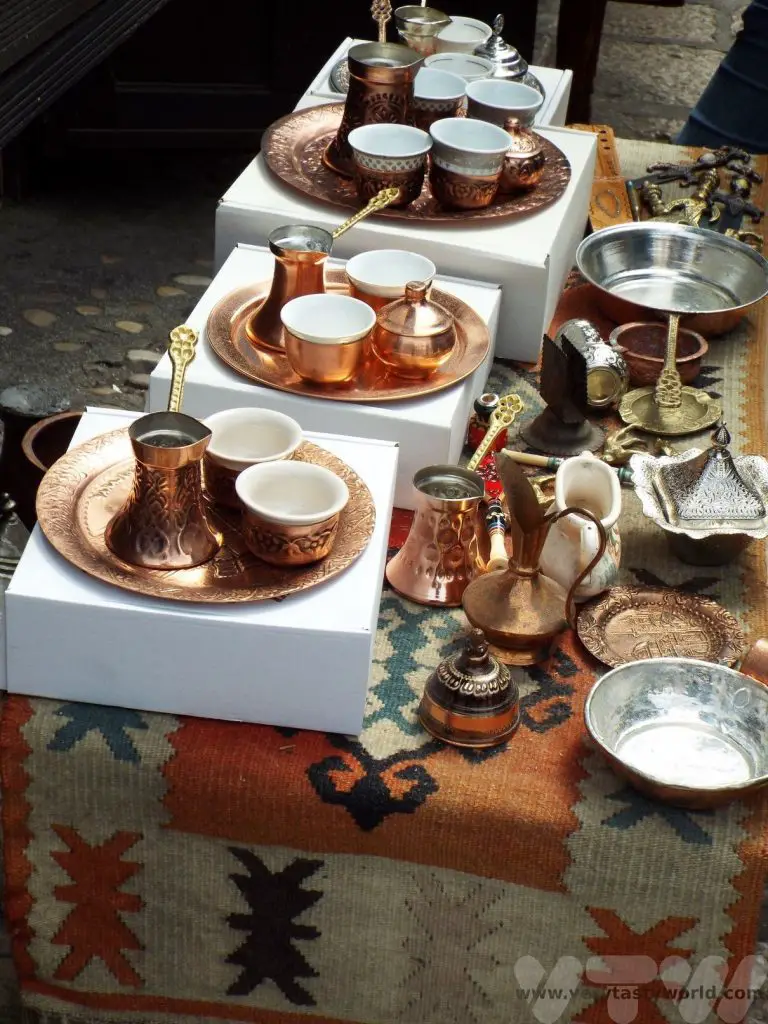
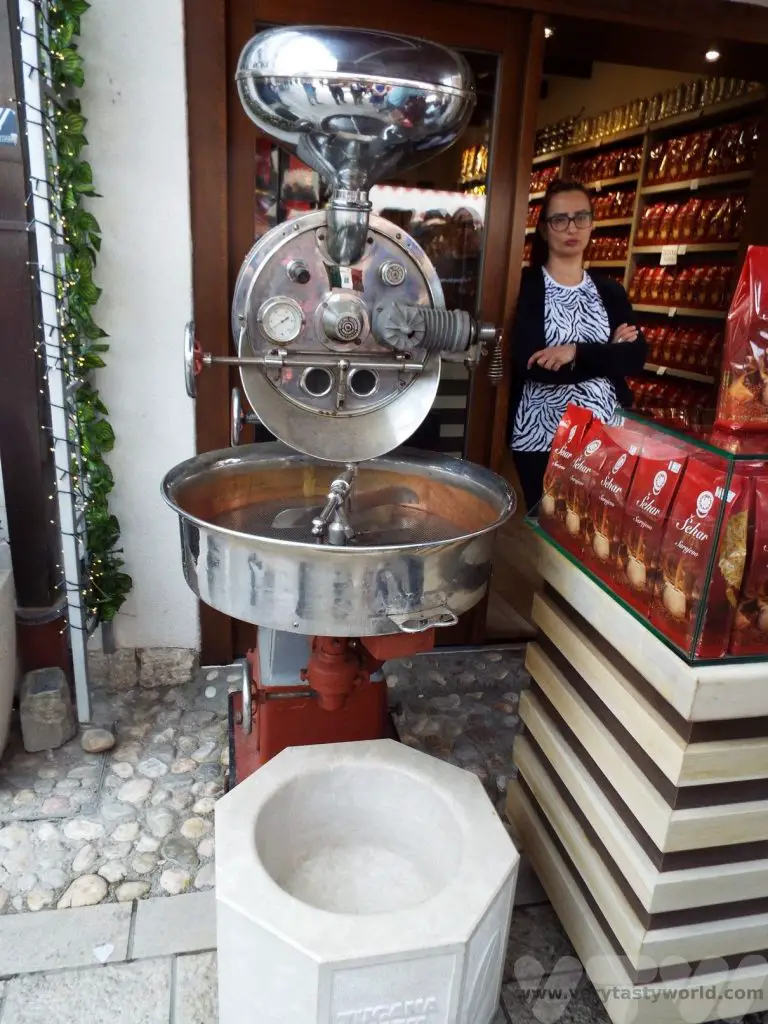
Like many places it can get crowded, so we were advised to beware of pickpockets, be alert and keep valuables safe.
In the 16th century Christians and Sephardic Jews, who were fleeing persecution, moved to the city and established places of worship. Sarajevo remains a places where people of multiple religions live together.
Austro-Hungarian Sarajevo
After walking through the old town we reached the river Miljacka which has carved its way through the mountains over the millennia. By 1878 Bosnia Herzegovina had been annexed to the Austro-Hungarian Empire. A series of modern buildings were constructed along the river’s banks. One of these was the town hall. Designed in 1891 it bears Moorish influences.
This impressive building had many functions over the years, including as a parliament building and national library.
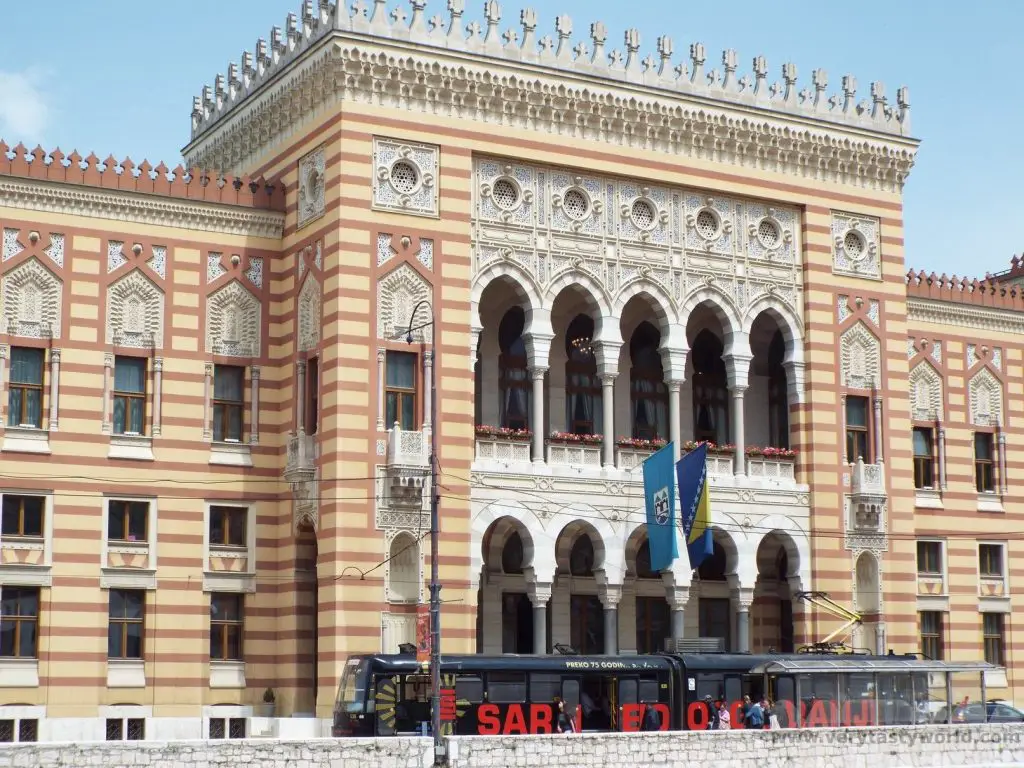
It was hit by incendiary bombs in 1992 during the Bosnian War and the library, along with most of the books, was lost in a fire which destroyed the building. However, it was rebuilt and opened again in 2014.
On the other side of the river is a building known as the spite house, which was located on the site where the main building was to be constructed. Despite many financial incentives, the owner refused to sell his house and so the authorities eventually relocated it on the other side of the river. Known as Inat Kuca, it is now a restaurant.
It’s a pleasant walk along the river banks, although the muddy river was very much a contrast to the crystal clear waters of Mostar and other rivers in the region.
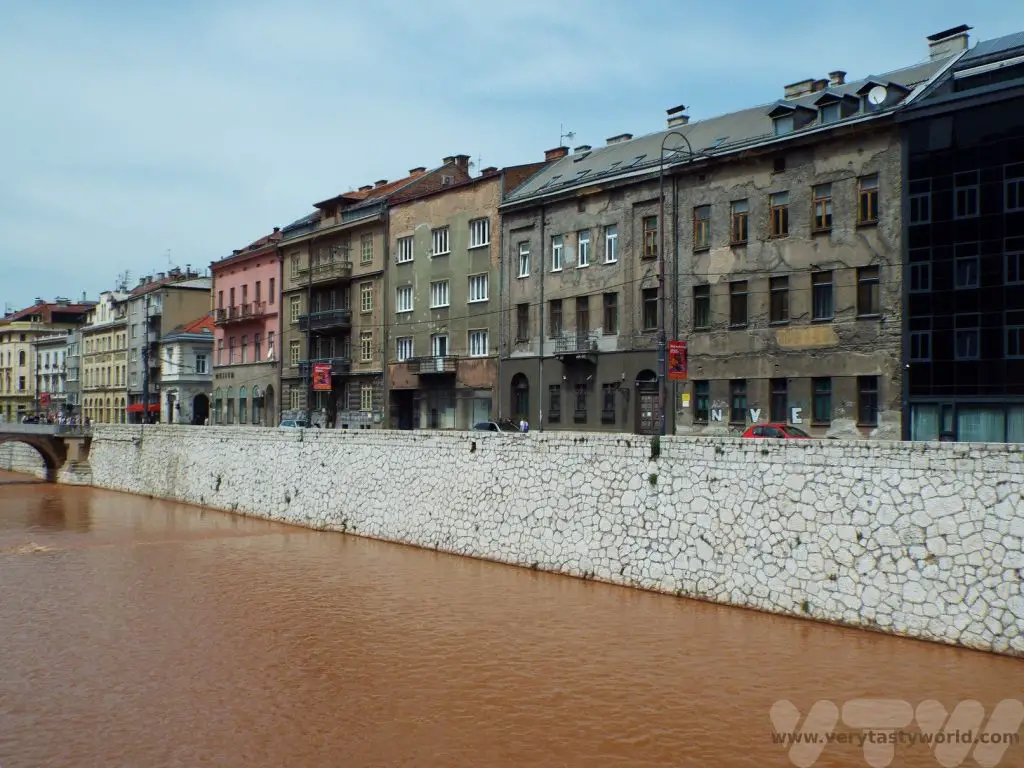
Crossing back over the river via the Latinska Ćuprija bridge we reached another location that placed Sarajevo in the history books.
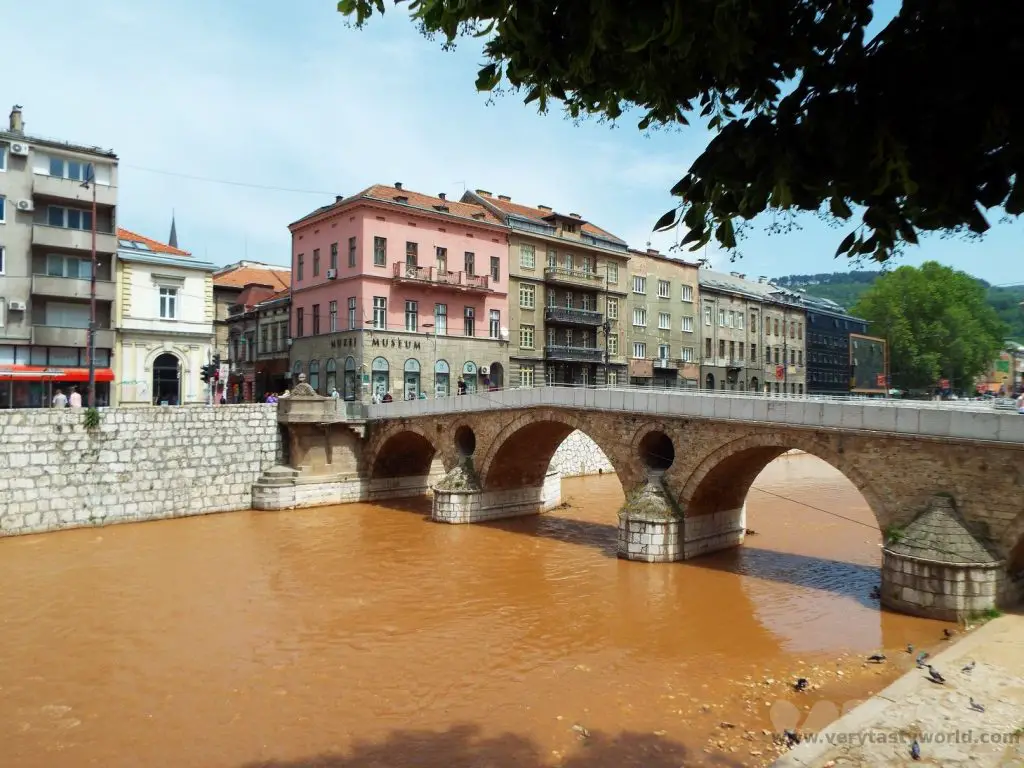
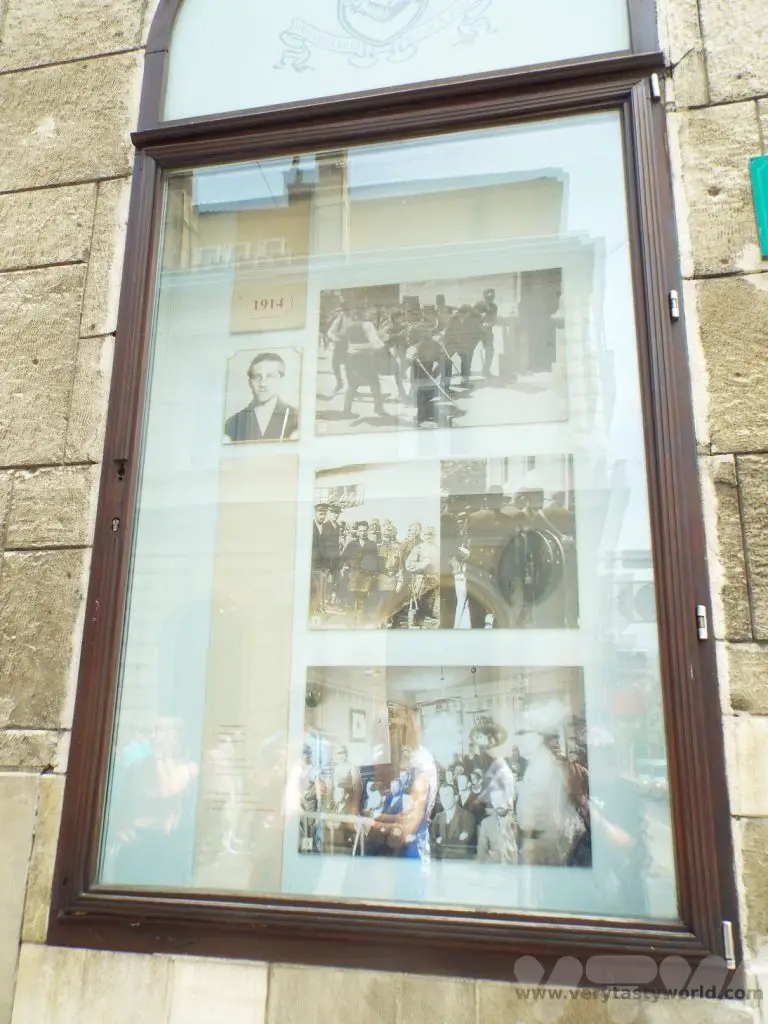
It was on the corner of the street leading onto this bridge where Archduke Franz Ferdinand of Austria, who was heir presumptive to the Austro-Hungarian throne, and his wife, Sophie, were shot at close range on 28 June 1914 by nationalist Bosnian Serb student Gavrilo Princip. This event led to the start of World War One.
Following the end of the war, the Austro-Hungarian Empire collapsed and Bosnia and Herzegovina was absorbed into Yugoslavia. During World War Two the city was invaded by the Nazis. Of the 12,000 Jewish people living in Bosnia and Herzegovina 10,000 lived in a thriving community in Sarajevo. It is estimated that 8,000 lost their lives in the Holocaust.
Learning About The Siege of Sarajevo
1992 saw the break up of Yugoslavia and, tragically, the commencement of the Bosnian War. Bosnia and Herzegovina declared independence from Yugoslavia but following a referendum, which Bosnian Serbs refused to participate in, the Serbs encircled Sarajevo and blocked all routes to and from the city. Sarajevo remained besieged for 1425 days, the longest siege in modern history.
During our Sarajevo walking tour we learned about how the local people coped during this horrific time. The city was constantly shelled by forces located in the surrounding hills. Our guide told us that when the water and electricity supplies were halted, people would have to risk their lives crossing the river carrying containers so that they could get access to water from the Sarajevo brewery. It is estimated that nearly 14,000 people were killed, over a third of them civilians.
The film Welcome to Sarajevo (1997) by Michael Winterbottom tells a powerful story, which includes real footage of the war. It makes for difficult viewing but offers a compelling insight into a horrible war.
The siege ended on the 29th February 1996. In the years following the war a number of perpetrators and their superiors were convicted for Crimes Against Humanity.
Further Exploration of Sarajevo
We thoroughly enjoyed the small Sarajevo brewery museum. The delightful guide showed us around and told us about the history of the brewery.
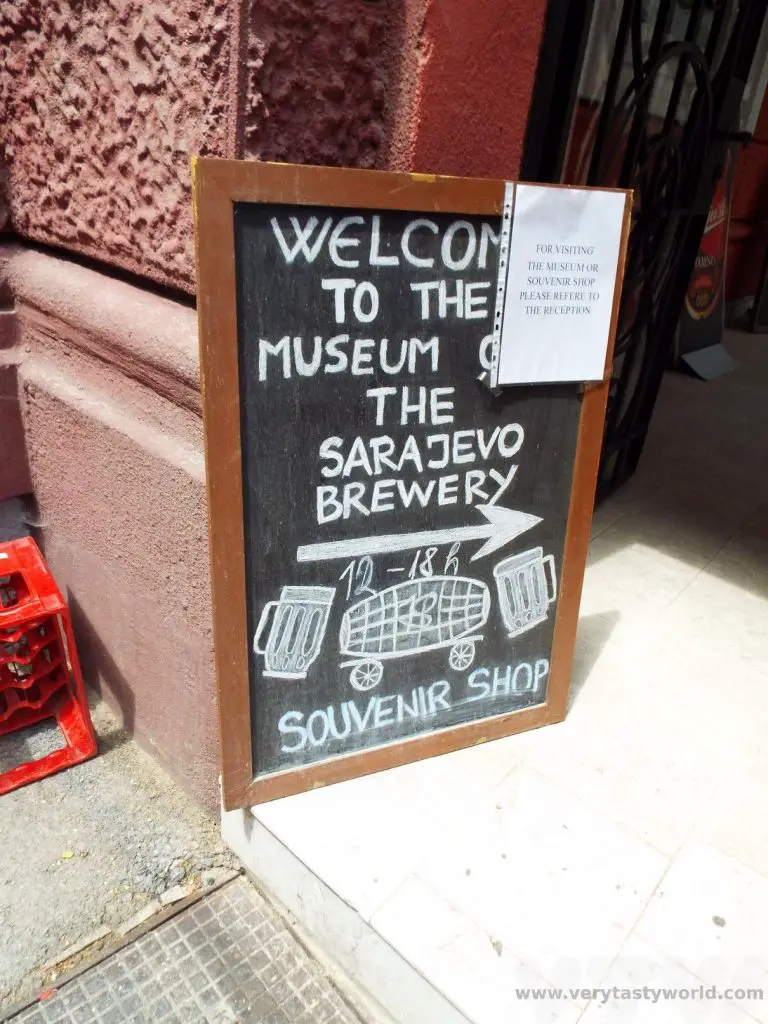
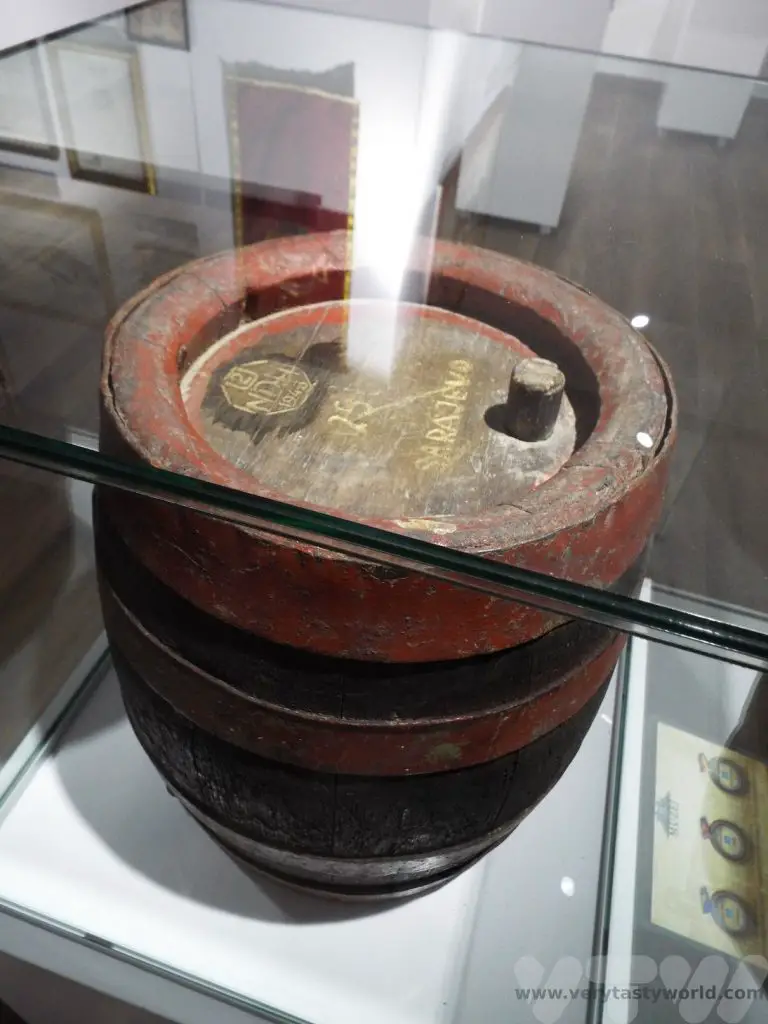
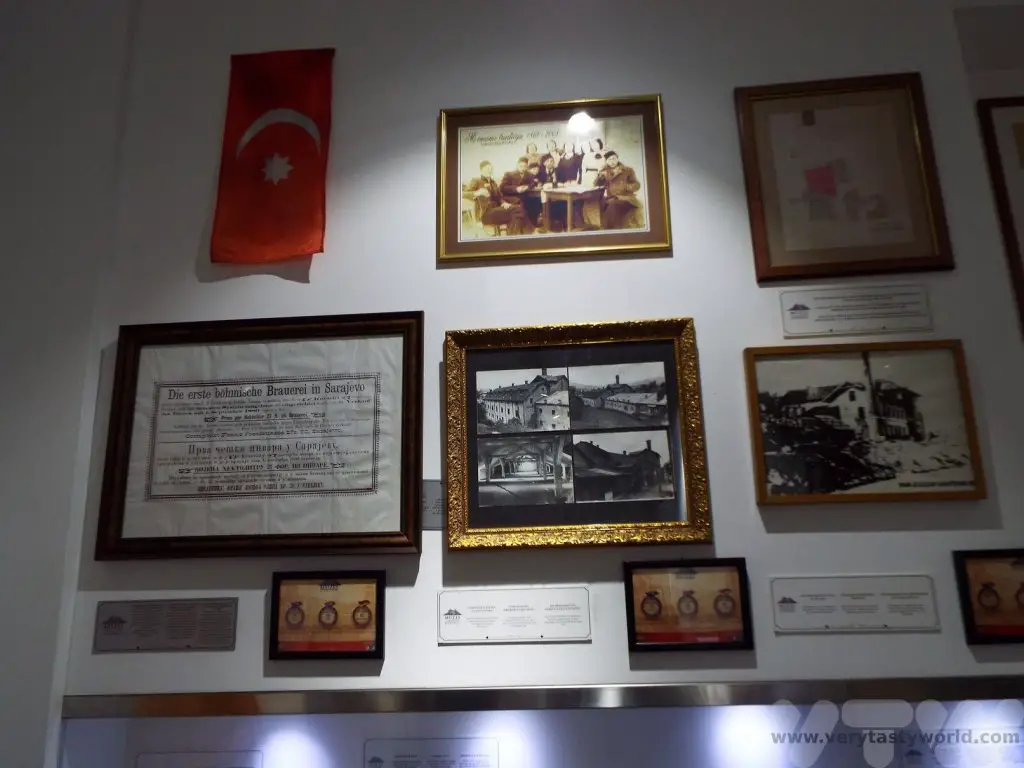
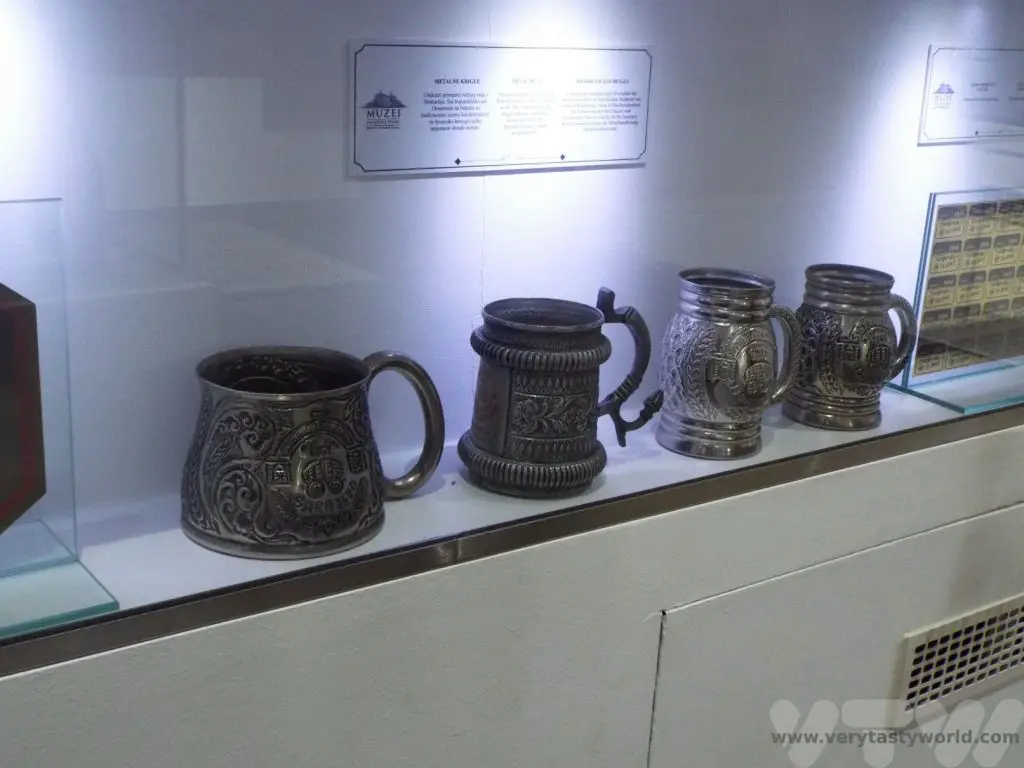
However, when we went to the adjoining bar to enjoy some of their beers, we were turned away because apparently we didn’t comply with their dress code. We were wearing t-shirts, long trousers and walking shoes, not tracksuits, trainers and baseball caps. We checked the requirements and confirmed that we were not in contravention. The manager, dressed in a t-shirt and shorts, eventually accepted that we were dressed correctly. To be honest, though, we didn’t want to drink where we weren’t welcome. Their loss.
We also visited some of the churches. Sacred Heart Cathedral is a catholic church and the largest cathedral in the country. It was completed in 1887. It was damaged during the siege of Sarajevo but has since been restored.
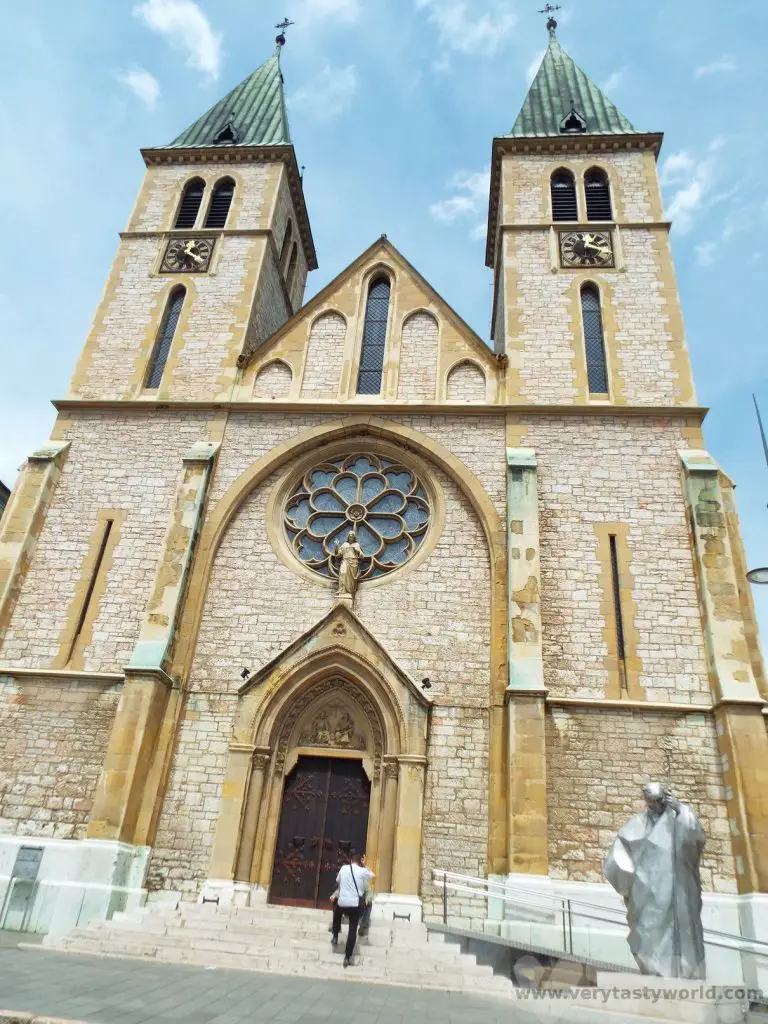
In the pavement in front of the church there is a square which has a mortar shell crater filled with red concrete, creating a pattern. It’s there to remind people of the war.
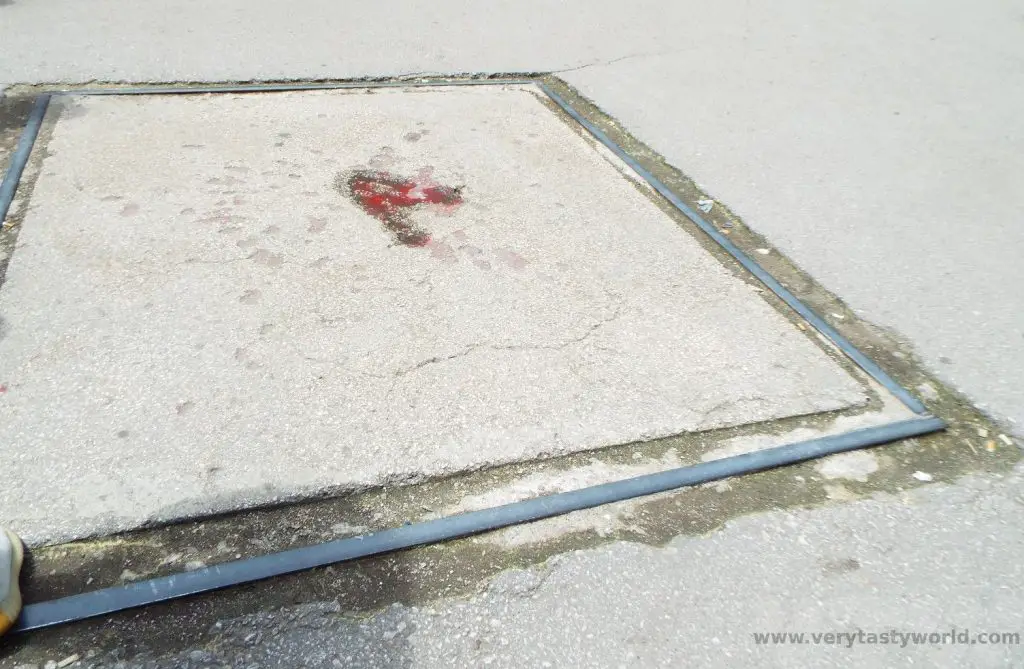
Constructed in 1863, the Cathedral Church of the Nativity of the Theotokos is Sarajevo’s largest Orthodox church.
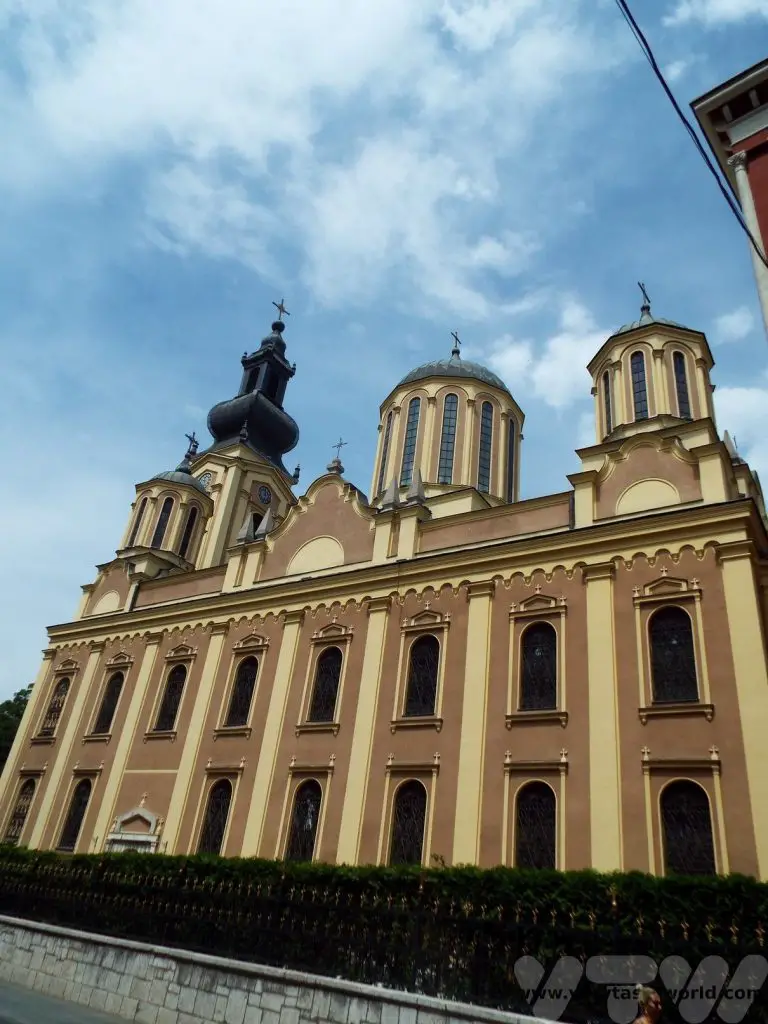
Beside the Europa Hotel it is possible to see the remains of a caravanserai, known as Taslihan, which was originally constructed in the mid-16th century. It was only discovered when the hotel was being renovated but now the former walls are a part of the garden. In its day it was a large market which also offered accommodation for merchants.
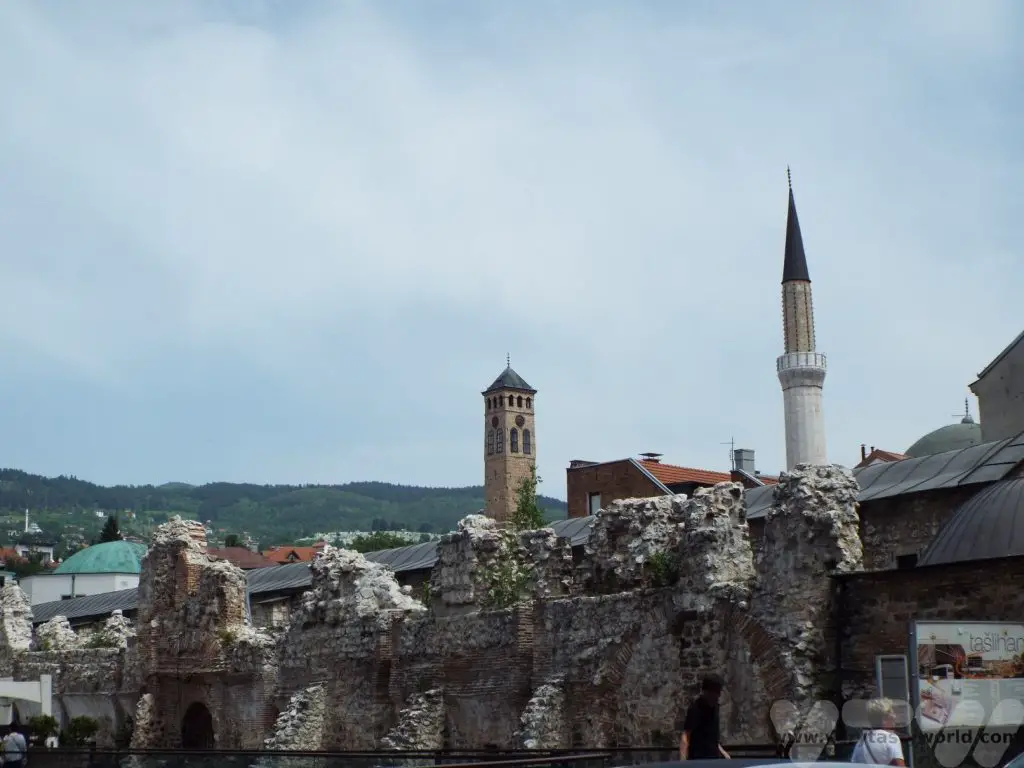
A Bosnian Cookery Course
Aside from city walking tours we also love taking cookery lessons whenever we visit a new country. We were delighted to join Mersiha and Mustapha from Bosnian Cooking Lessons at their home to learn how to cook traditional Bosnian cuisine. There were five dishes on the menu:
Sogan dolma – Onions filled with minced meat, rice and spices
Japrak mangel/spinach leaves rolled and filled with minced meat, rice and spices
Dolma paprika filled with minced meat, rice and spices
Bosnian pita – Phyllo dough rolled with cheese and phyllo rolled with peppery potatoes
We arrived at Mersiha and Mustafa’s home located high in the hills surrounding Sarajevo. It had a lovely view of the city. Mersiha and Mustafa grow a lot of vegetables in their garden and we enjoyed chatting with them about growing food. We were offered some traditional Bosnian snacks and a nice cool beer.
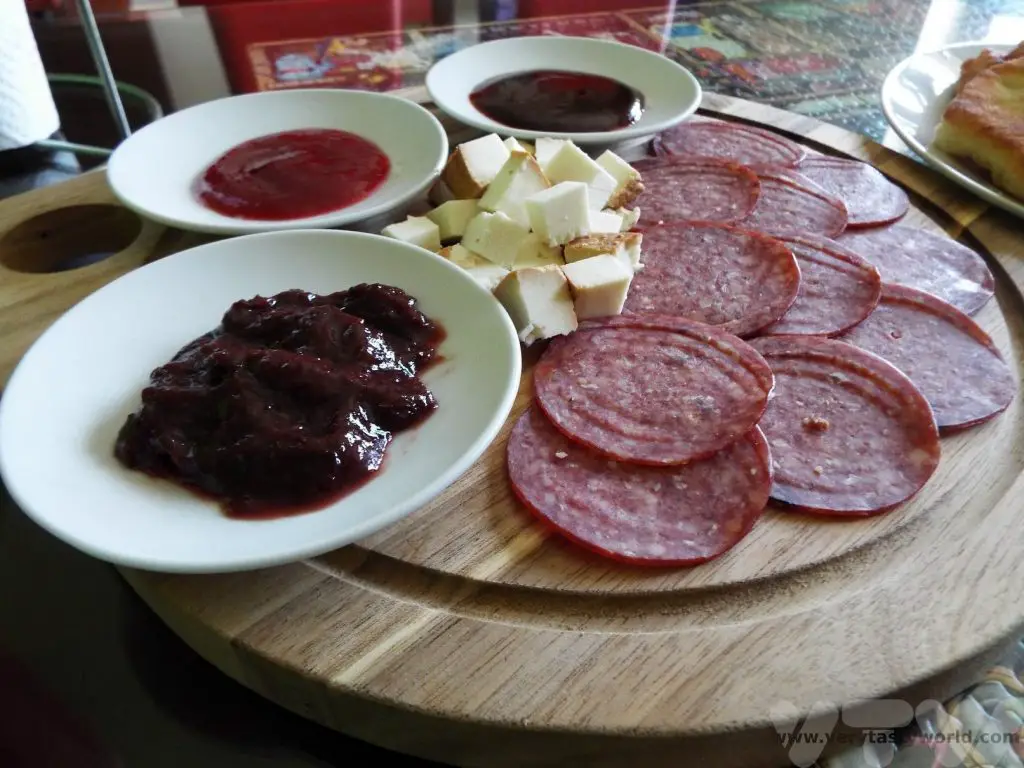
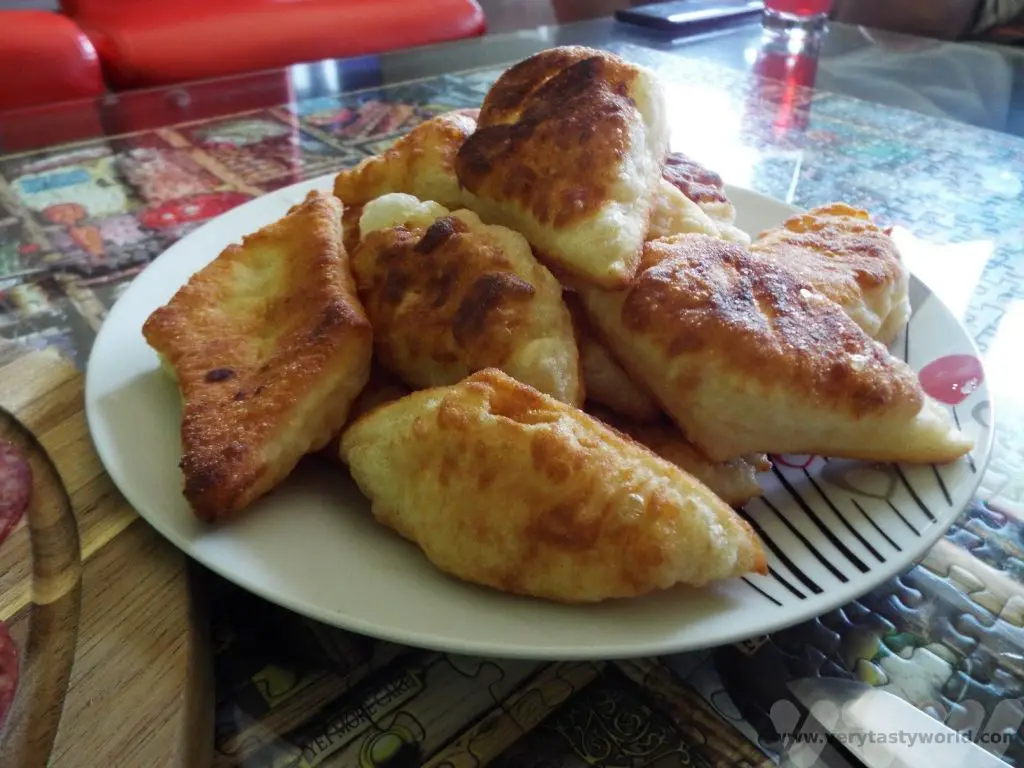
Then it was into the kitchen. Firstly we made the stuffing preparing the minced meat with rice and spices.
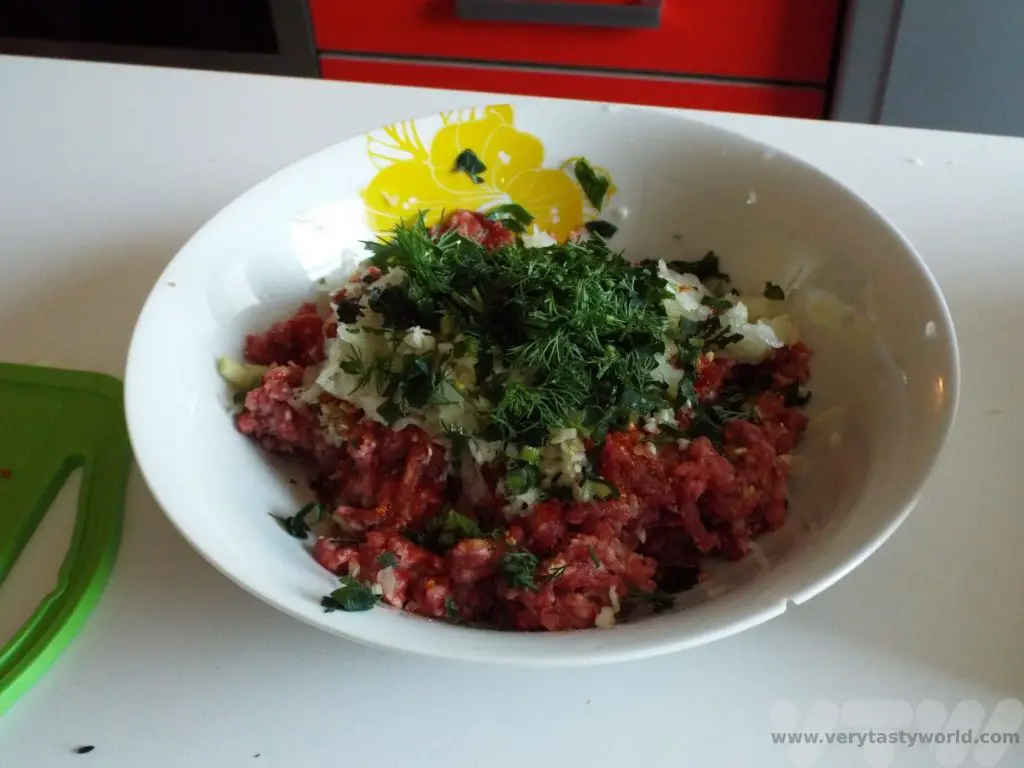
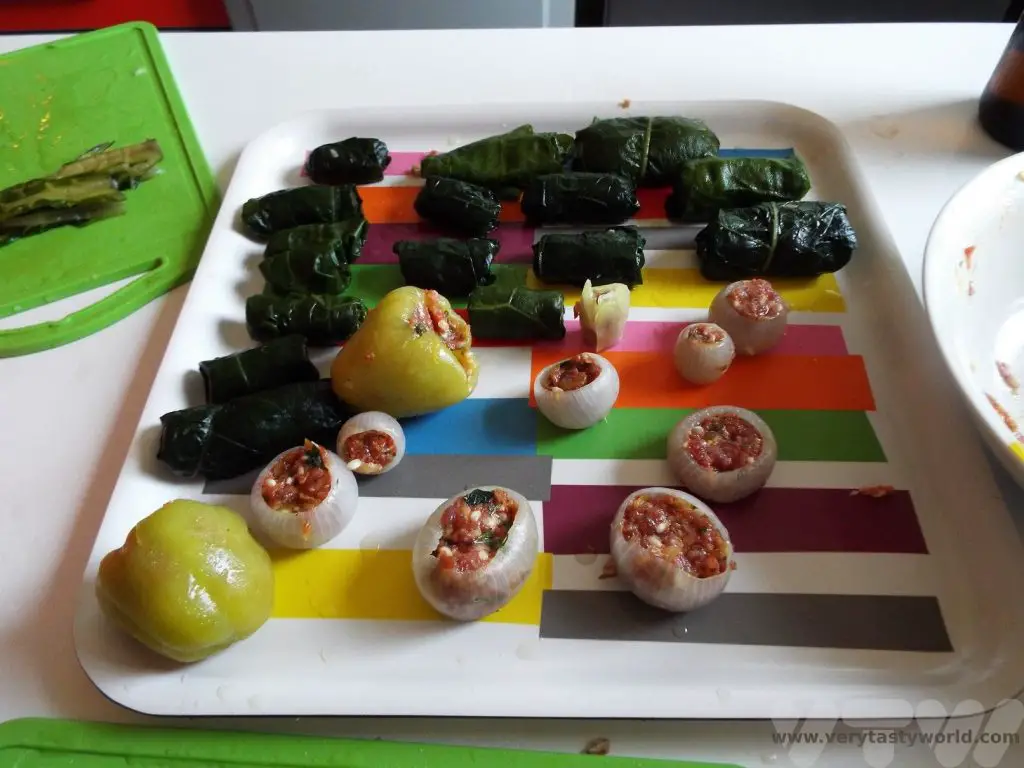
We learned how to stuff onions, layer by layer, as well as paprika. We also learned a technique for preparing and filling the mangel leaves. The folding technique was brilliant and we have used it since. These would all be cooked together in a lovely, lightly spiced, tomato sauce. We were impressed that Mersiha made sure that nothing went to waste. Any leftover bits of vegetable went into the sauce to add to its richness.
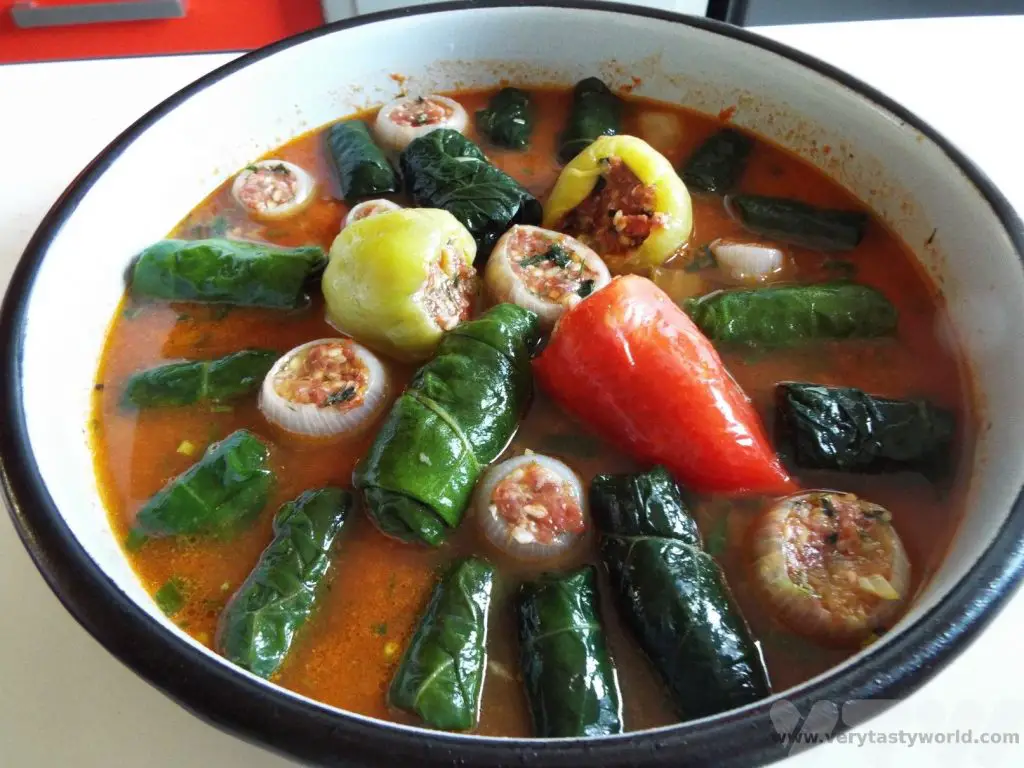
Next step was preparing phyllo. Mersiha expertly prepared a dough to exactly the right consistency and let it rest. When it was ready it was rolled onto the tablecloth and had another rest while we prepared two fillings: one of soft cheese and egg, and another of grated potato with lots of black pepper. Then we pulled the dough, by hand, so that it covered the entire table! It was so very thin – paper thin – but yet elastic and strong enough to take a filling. Mersiha was an excellent teacher and guided us really well.
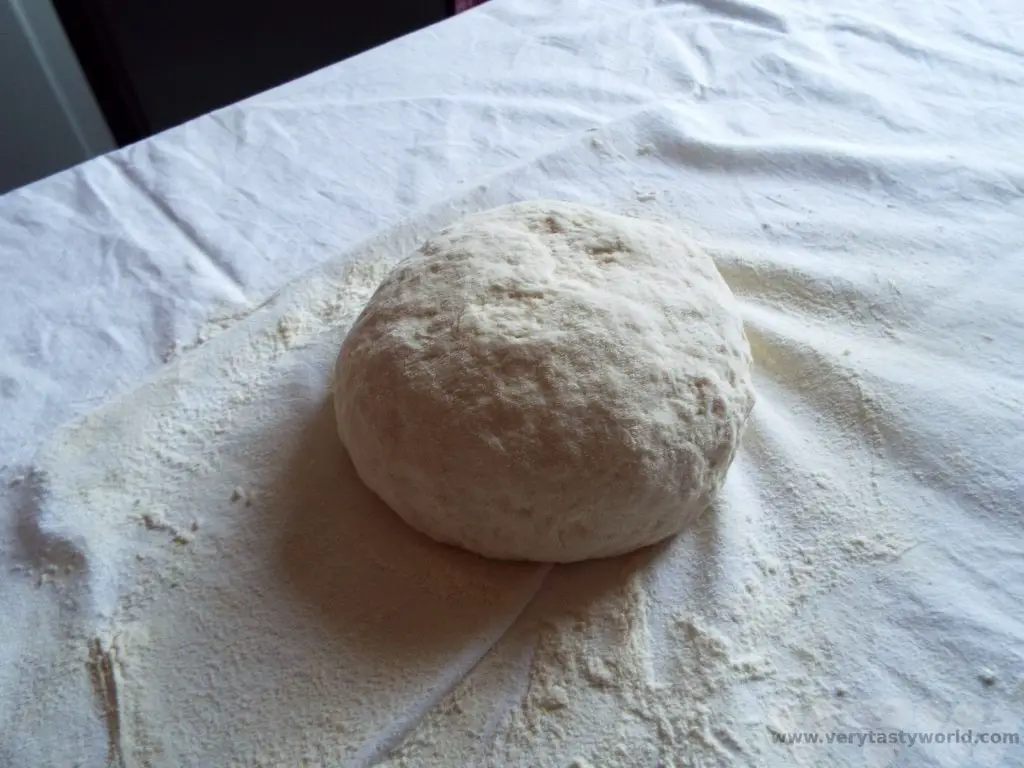
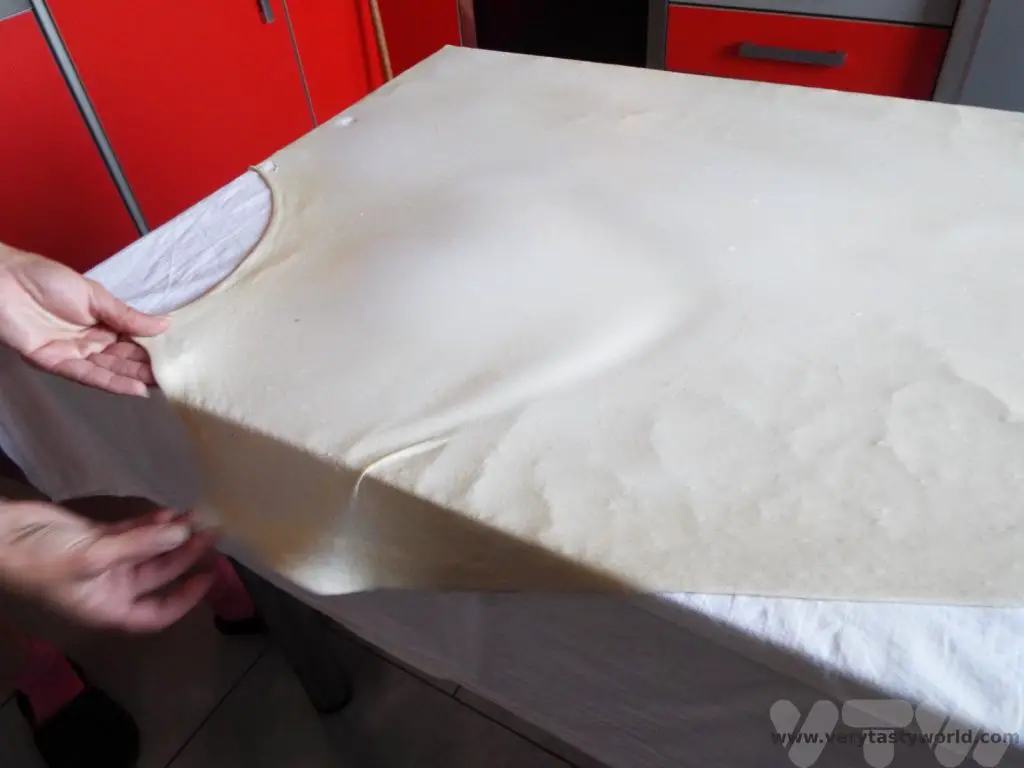
After adding the filling in a long line, the phyllo was rolled up to create a sausage shape, then cut into pieces and rolled into swirls before baking.
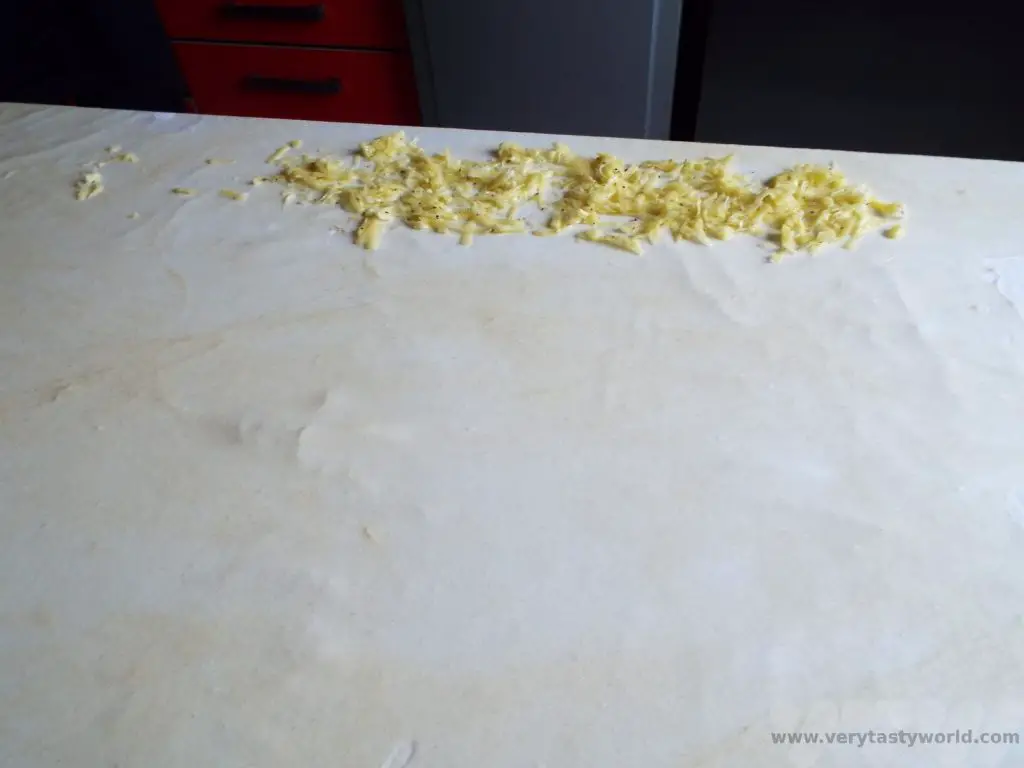
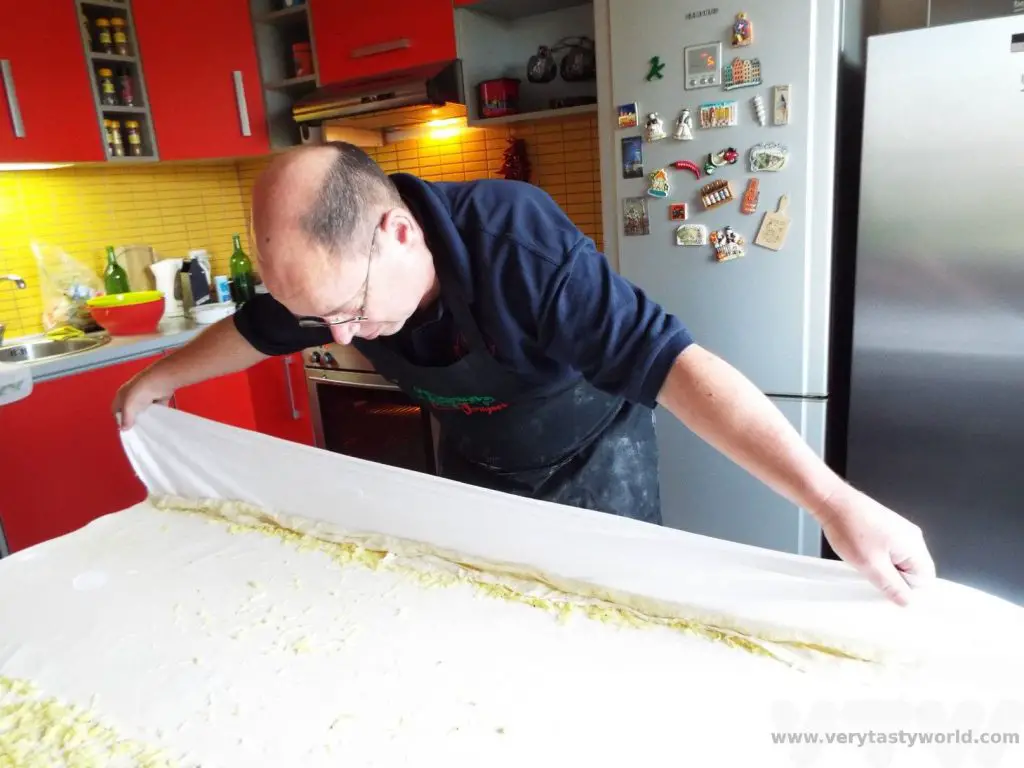
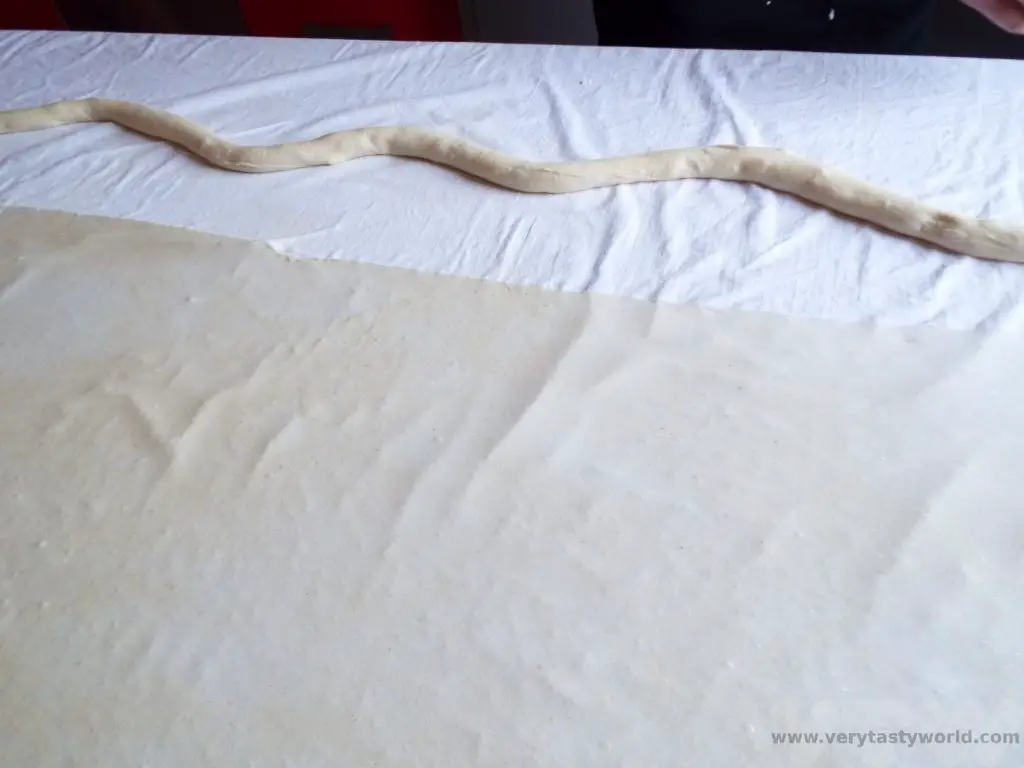

Both dishes came together at the same time. It was a really fun afternoon which culminated in us all enjoying a delicious dinner together.
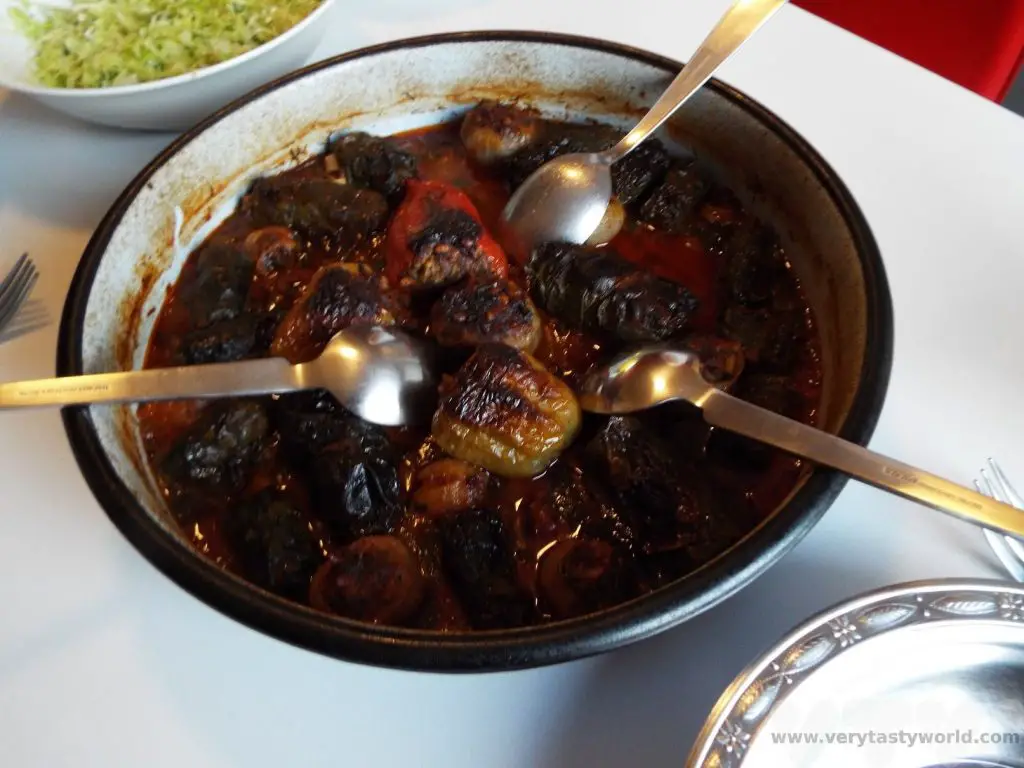
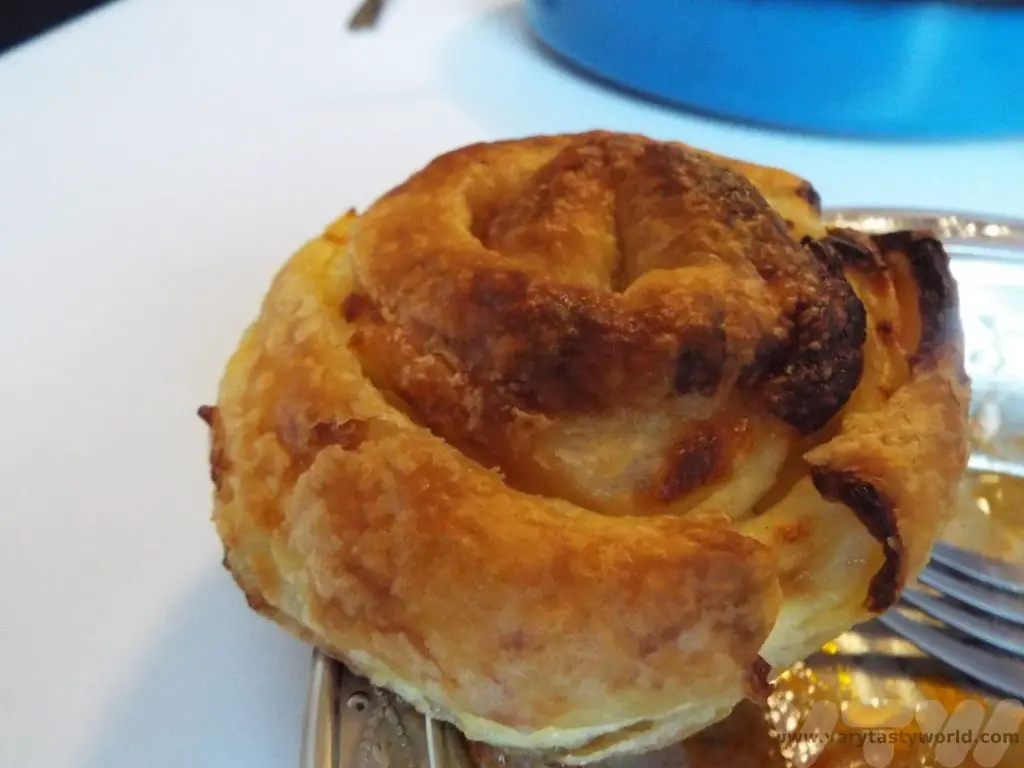
Mustapha and Mersiha were delightful hosts and excellent teachers. We thoroughly enjoyed not only cooking and dining with them, but also chatting with them about life in Sarajevo.
Sarajevo for Foodies
We stayed at the Hotel Aziza, which was close to the Yellow Fortress and a short downhill walk from the old town. You quickly find that you get a good workout walking anywhere in the city, especially in the suburbs, and it was a robust walk back up the steep hill every time we wandered into the old town. The Aziza offered a buffet breakfast with all sorts of interesting goodies, while not necessarily typical Bosnian, definitely the best brekkie we enjoyed in Bosnia.

There are loads of restaurants in Sarajevo offering typical Bosnian fare. Bosanski sahan is a dish comprising meat with mixed vegetables in a sauce and sitni cevap is veal meat in sauce. These were served with delicious fluffy Bosnian bread and salad.
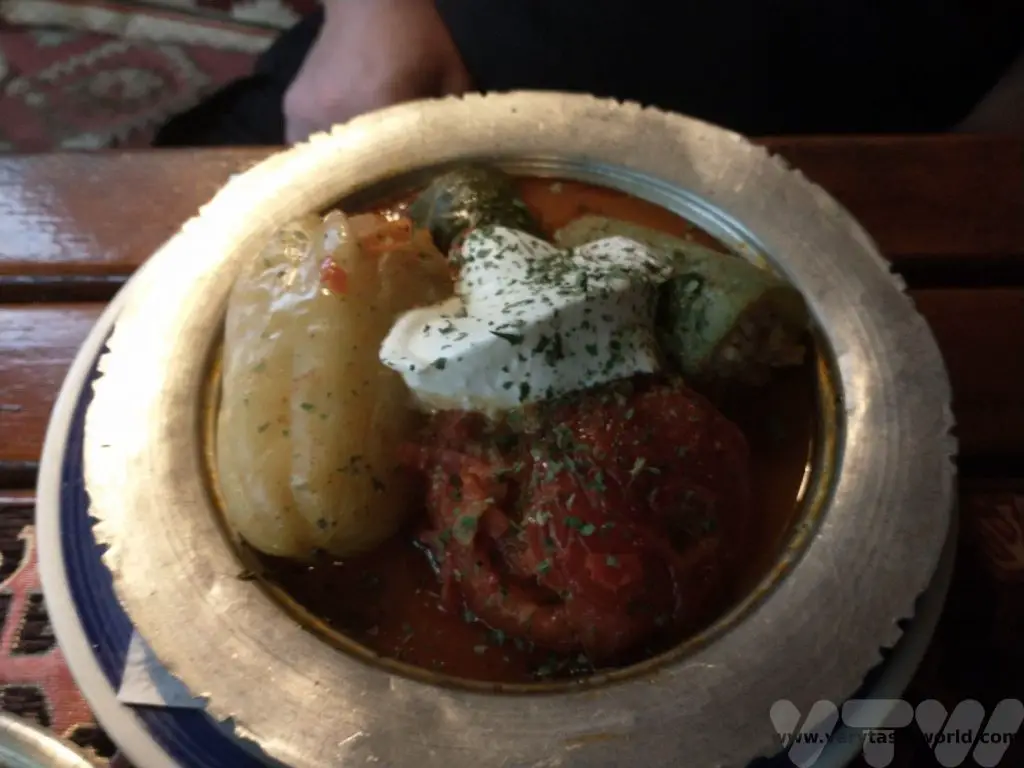
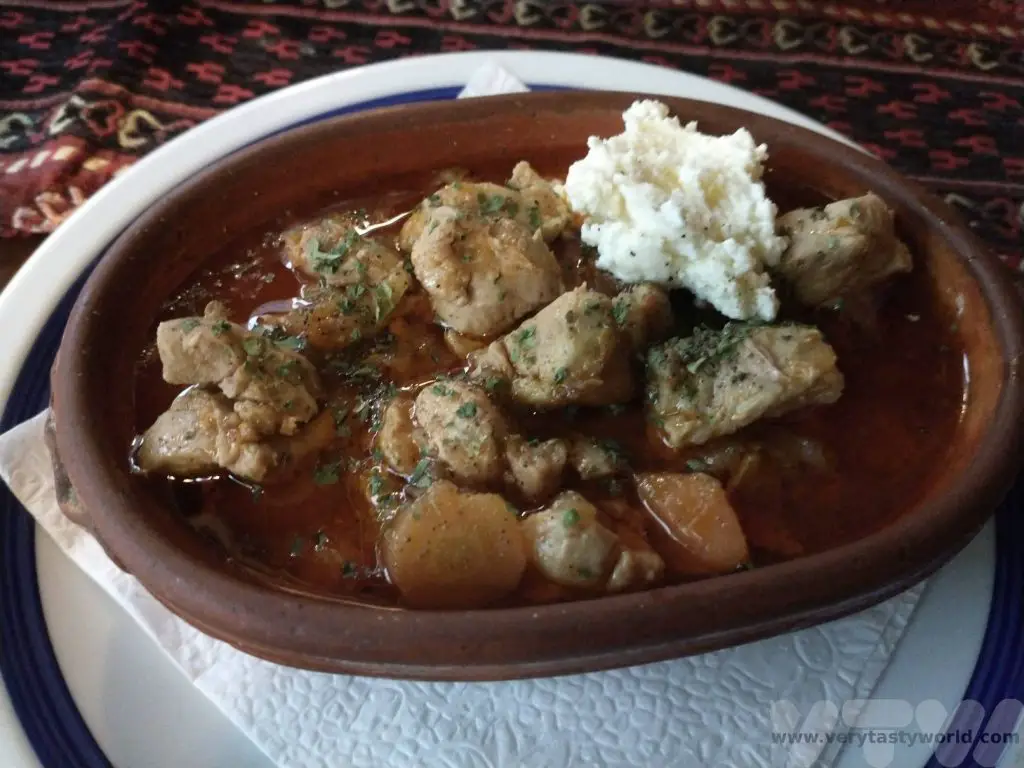
It’s essential to try cevapi – little meat sausages inside soft pillowy bread, accompanied with finely sliced onion. Make sure you order a large portion, they are so delicious.
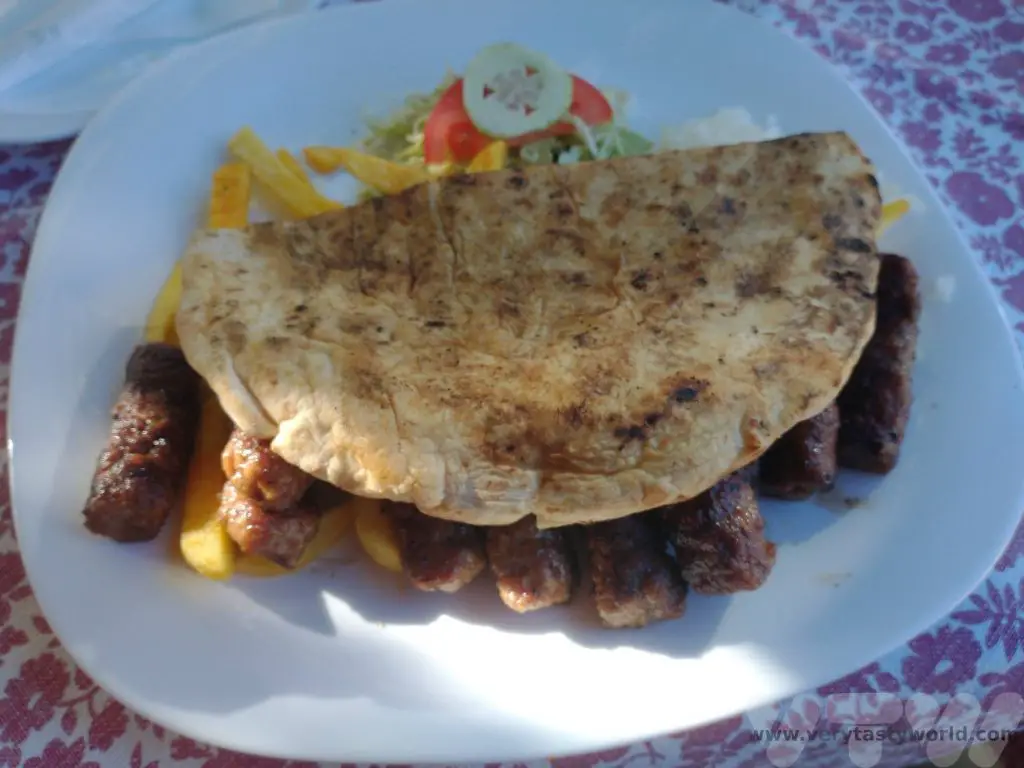
Desserts are luscious and sweet. We particularly enjoyed hurmasica, a gooey, syrupy cake. Coffee culture is also very important and the sweetness of the desserts is beautifully offset by the bitterness of the strong coffee.

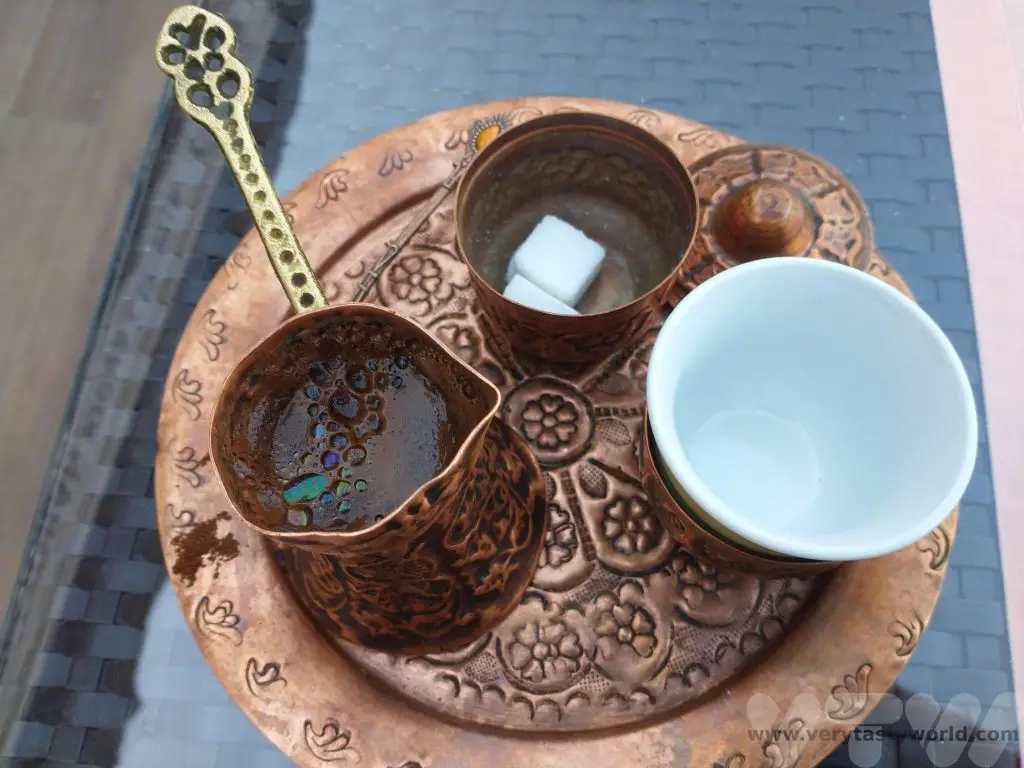
If you enjoy a tipple, it’s impossible to visit Bosnia without tying domace rakija – homemade brandy. It is made from fermented fruits which are distilled. The more common fruits that form the base of the rakija are grapes and plums but other fruits such as pears, cherries and raspberries are used as well. Some of the more unusual flavours are honey, quince and walnut.
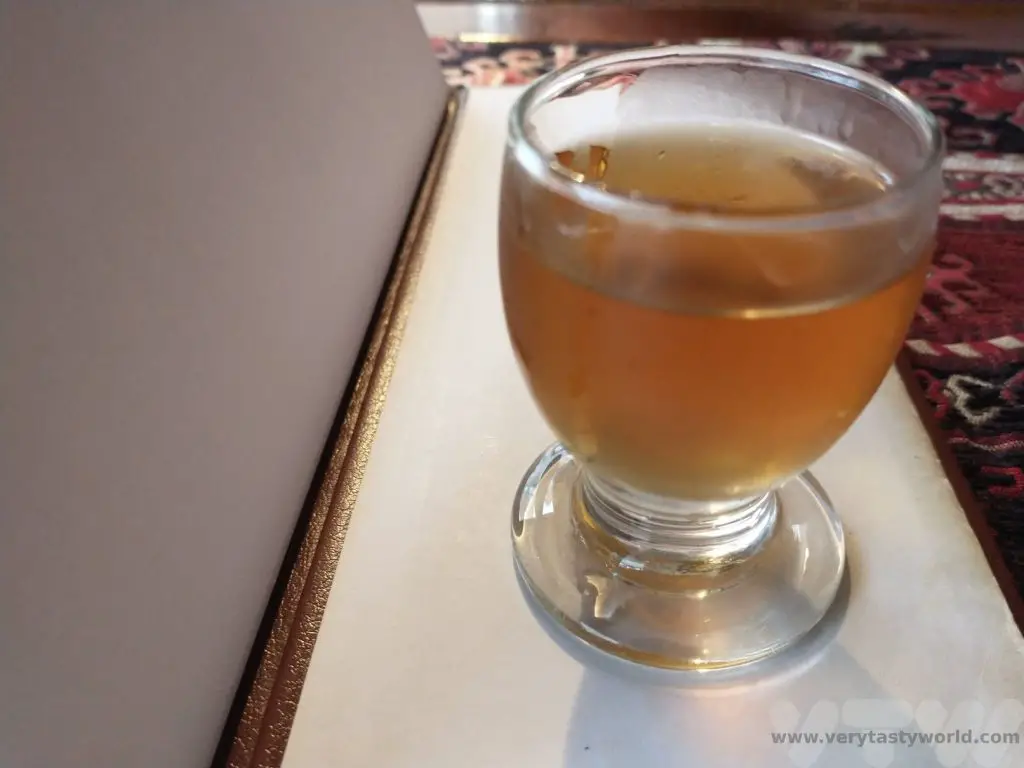
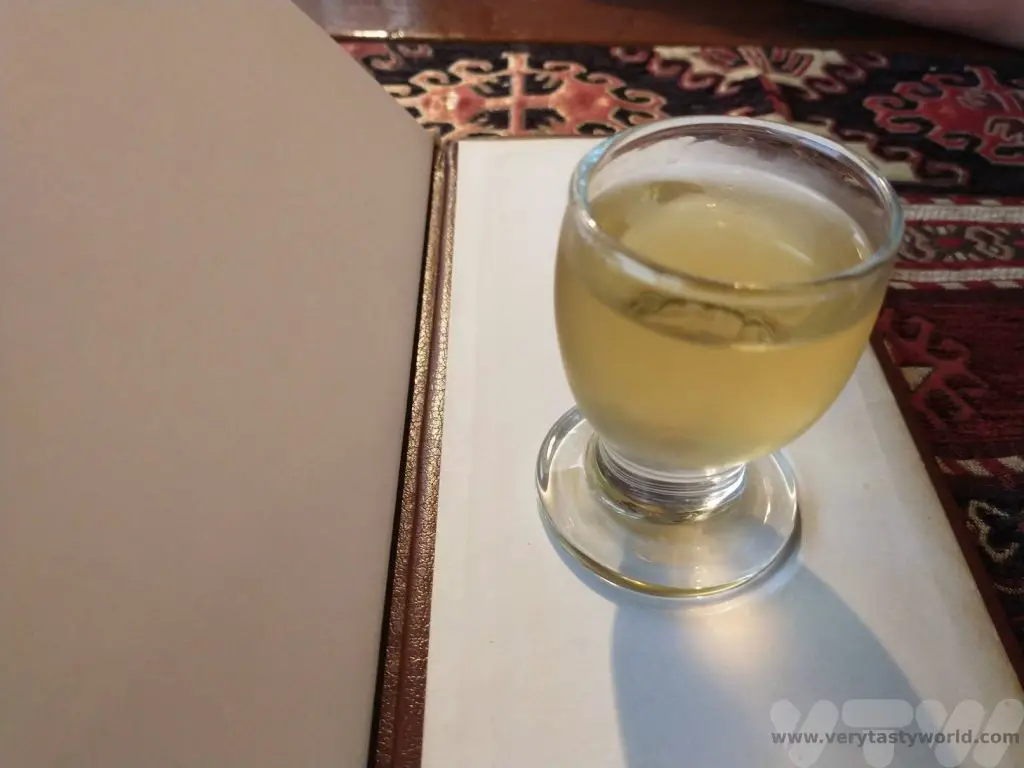
Related Posts You May Enjoy
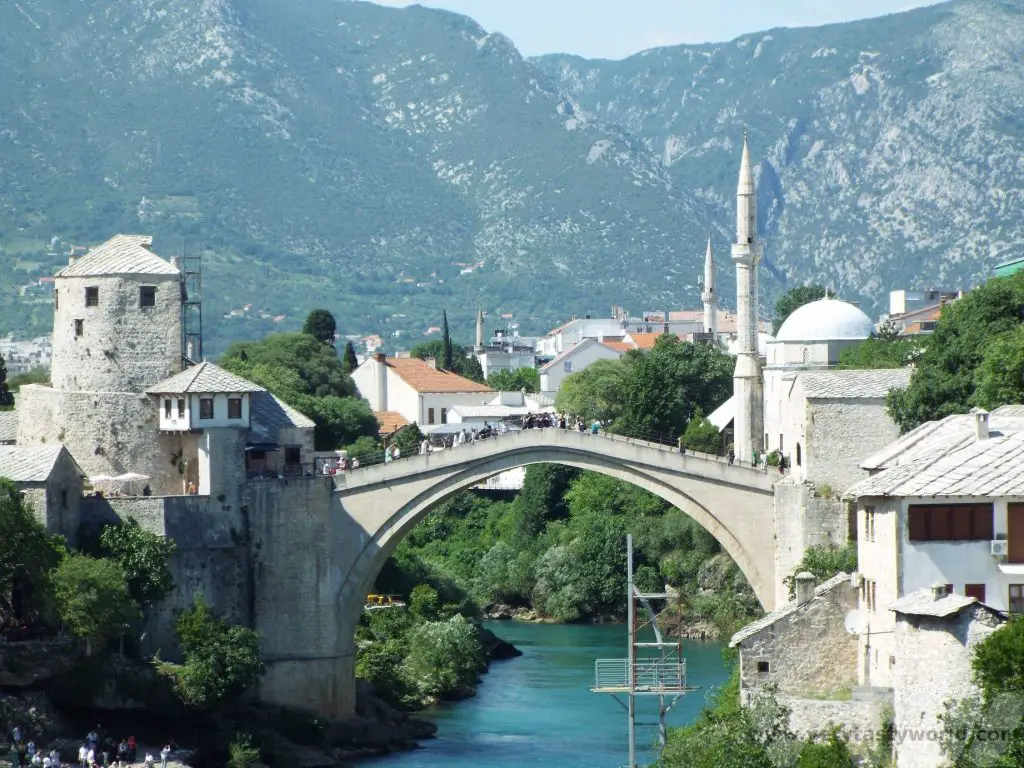
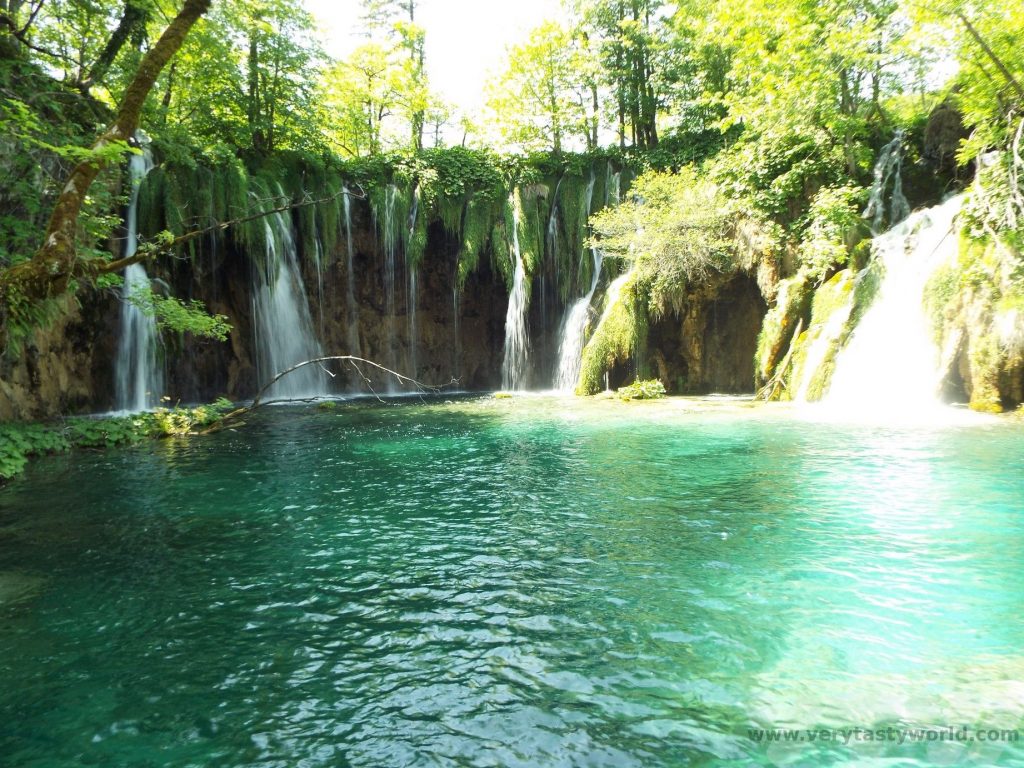
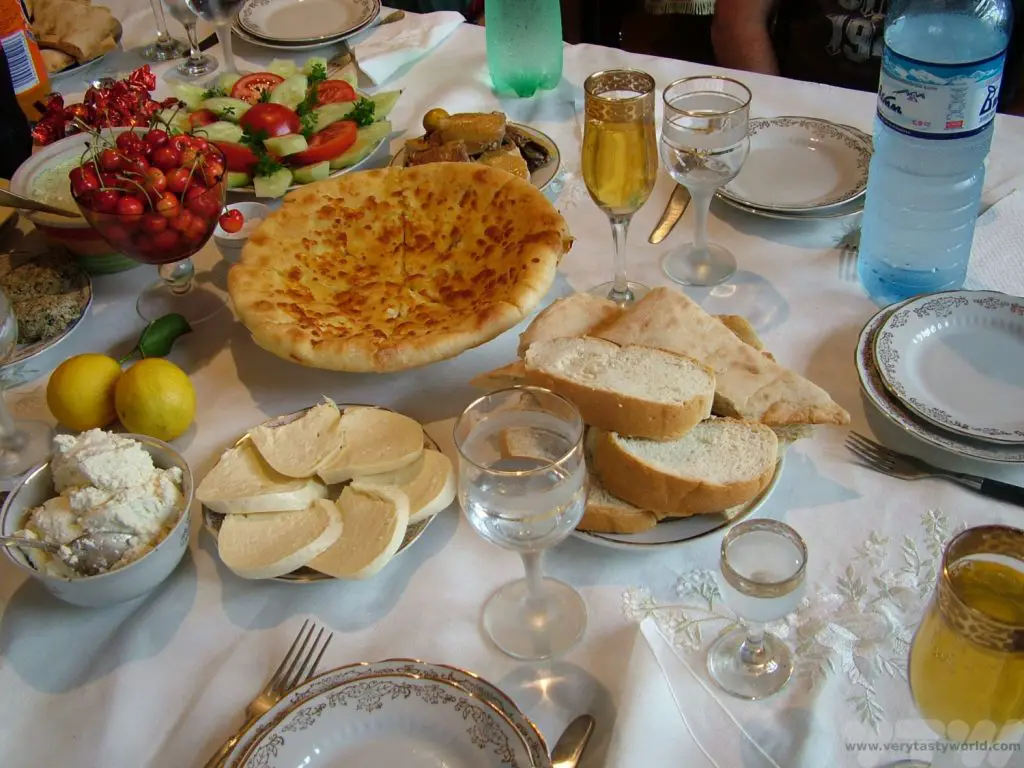
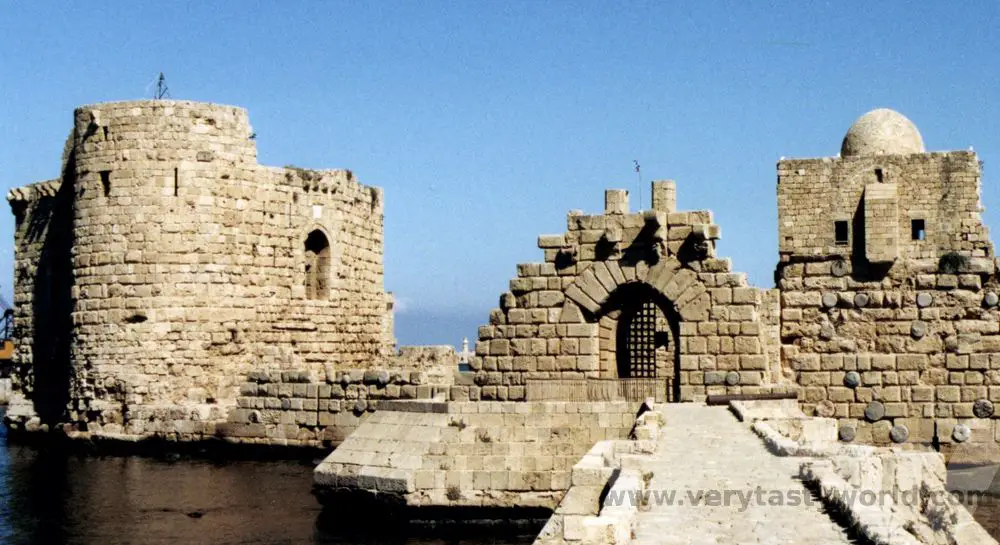
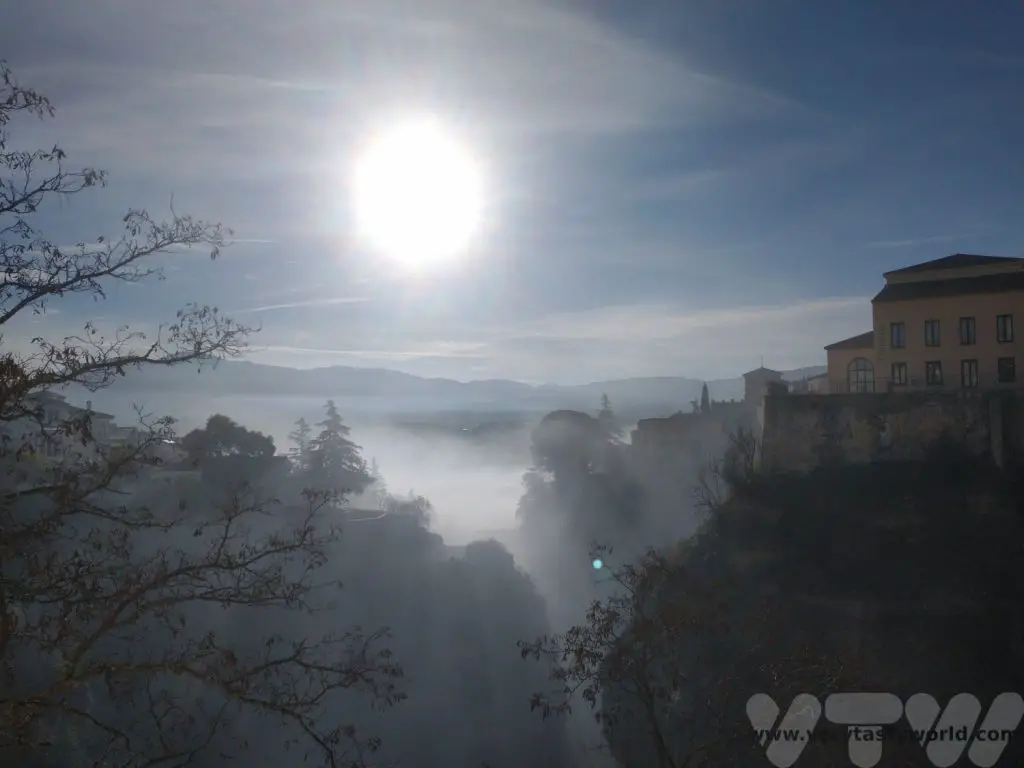
- Things To Do In Rovaniemi In Winter

- Avebury Stone Circle vs Stonehenge
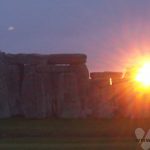
- Five days in Copenhagen
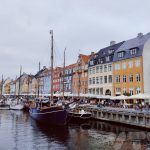
- Is Sarajevo Worth Visiting?
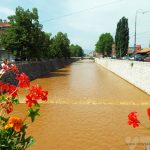
- A Svalbard Holiday – Land of the Midday Moon
- Afternoon Tea in Coventry
- RECIPE Oyakodon Donburi
- Zero Waste Recipes Before Your Holiday
- RECIPE: Vegetable Biryani Tamil Nadu Style
- RECIPE: Vegan Wild Garlic Pesto
- Recipe: Venetian Pasta Sauce
- RECIPE: Biryani Raita Recipe
- RECIPE: How to Make Costa Rica’s Gallo Pinto
- Recipe: Japanese Simmered Pork Belly – Buta no Kakuni
- RECIPE: How to Make Umeboshi
RECIPE: Vegetable Biryani Tamil Nadu Style
Biryani is a delicious aromatic spicy rice dish that is a meal in itself. Eaten all over India, it is also very popular in Tamil Nadu, the south eastern state which runs from Chennai in the north, all along the Bay of Bengal to Kanyakumari in the south. We visited this brilliant state a couple of years ago and were not only inspired by wonderful places to visit but also the deliciousness of south Indian cuisine. And we have a recipe for vegetable biryani Tamil Nadu style.
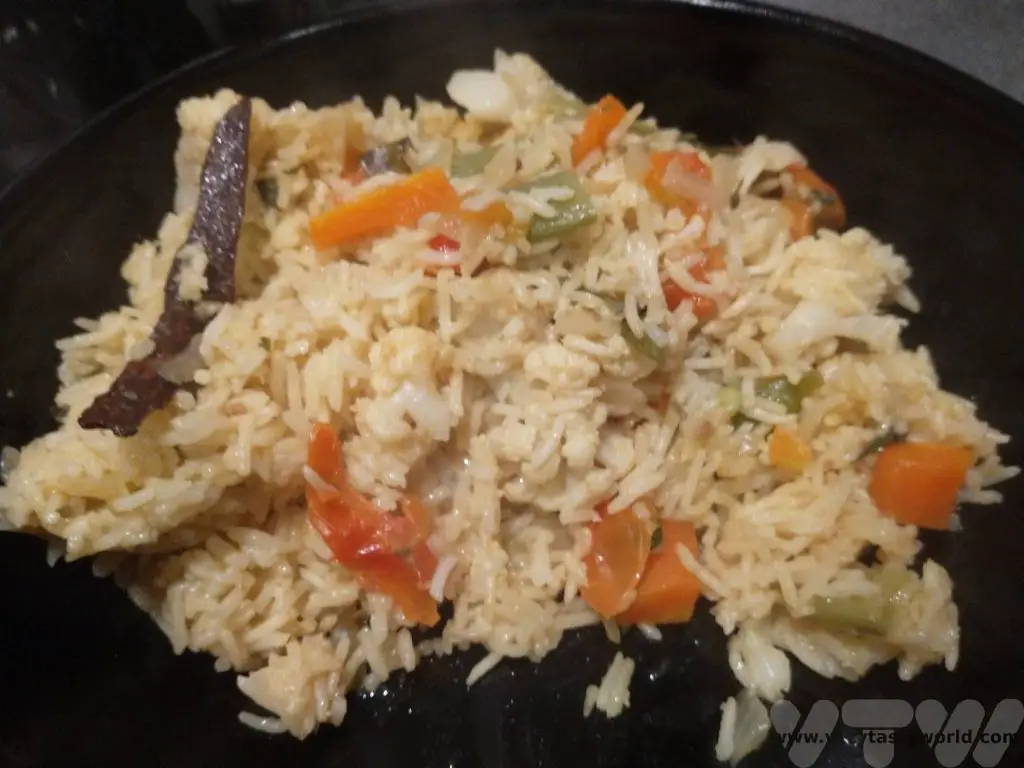
Although biryani is best known as a dish from India it is thought that it probably originated in the Middle East. The Persian word ‘birinj biriyan’ means ‘fried rice’. The cuisine of the Mughals, who ruled much of South Asia between the 16th and 19th centuries, had a significant influence on Indian food. The Mughals also introduced ingredients, such yoghurt, and also the ‘dum’ technique of cooking the dish over a low heat in a sealed pot which helps retain all the flavours as the food cooks.
This recipe comes from Tamil Nadu courtesy of our dear friend, Shankari. We were lucky to be gifted a traditional Indian pressure cooker which is absolutely perfect for cooking this delicious biryani but we have adapted and tested the recipe for a standard hob top pan as well. We often use a rice cooker to cook rice but we find it really doesn’t work very well with biryani because you are sautéing spices and vegetables beforehand and the rice is layered on top of these. A rice cooker can do this to some extent but not really enough to properly cook the spices.
Many people in Tamil Nadu are vegetarian so this dish contains no meat. When we visited this region every restaurant offered both a veg and non-veg meal option. This biryani could easily be adapted to include lamb or chicken but we love the simplicity of the vegetables and it is so tasty, you really don’t miss the meat. The spice combinations are warming and aromatic. If you wish to make the dish vegan, fry the ingredients in oil and omit the yoghurt.
The process involves cooking whole spices first to release their oils and to maximise the flavour. We leave the whole spices in the finished biryani but they aren’t really designed to be eaten – they won’t harm you if you do but you might get an overly intense hit of flavour if you chomp on a clove!
The quantities here will serve 2 hungry people but you can double up to feed more people, or you can use these quantities if you are accompanying the biryani with other dishes. We use a cup that is around 200ml in volume.
How To Make Vegetable Biryani from Tamil Nadu
Ingredients:
1 bay leaf
1 stick of cinnamon
3 green cardomom pods
3 cloves
2 tbs mint leaves
2 tbs coriander leaves
½ teaspoon red chilli powder
½ teaspoon coriander powder
1/8 teaspoon turmeric powder
½ teaspoon garam masala
1 cup of Basmati rice
2 tbs ghee or butter (use vegetable oil for a vegan biryani)
Small, finely chopped tomato
2 tbs natural yogurt
1 tsp ginger garlic paste (you can buy this frozen or in jars, or you can crush 2 cloves of garlic and a thumb of ginger in pestle and mortar)
1 green chilli (add another if you like spice)
Chopped vegetables (anything you like but beans, carrot, peas and cauliflower work really well)
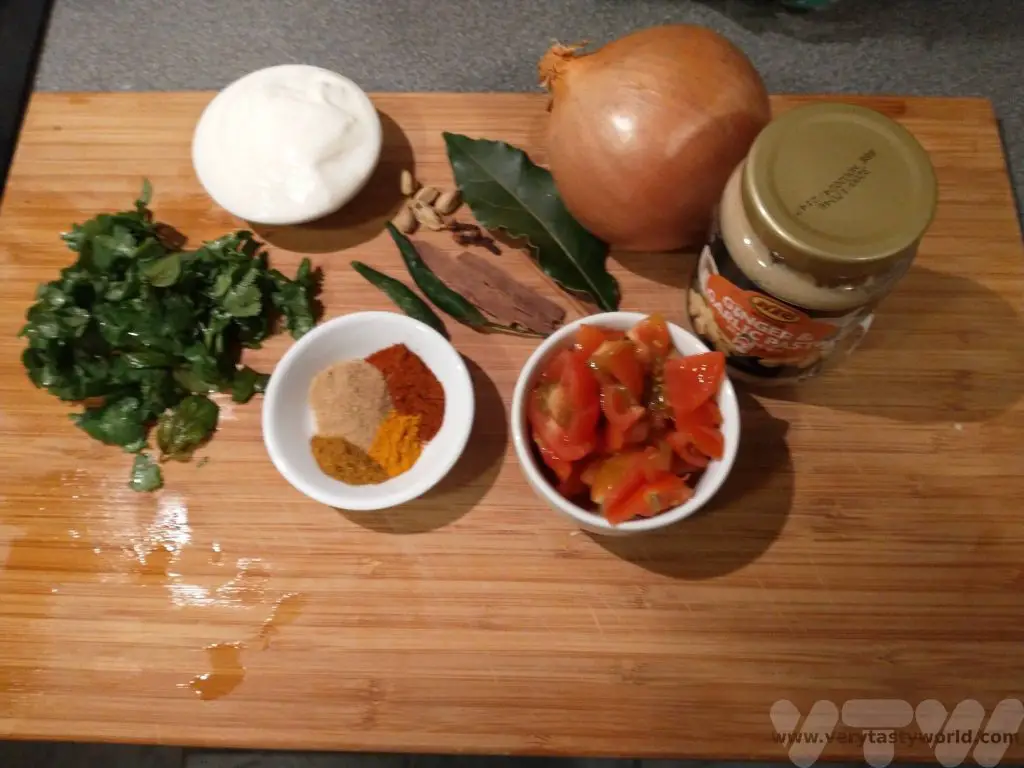

Method:
Add 1 cup basmati rice to a bowl and soak it in water for 30 minutes.
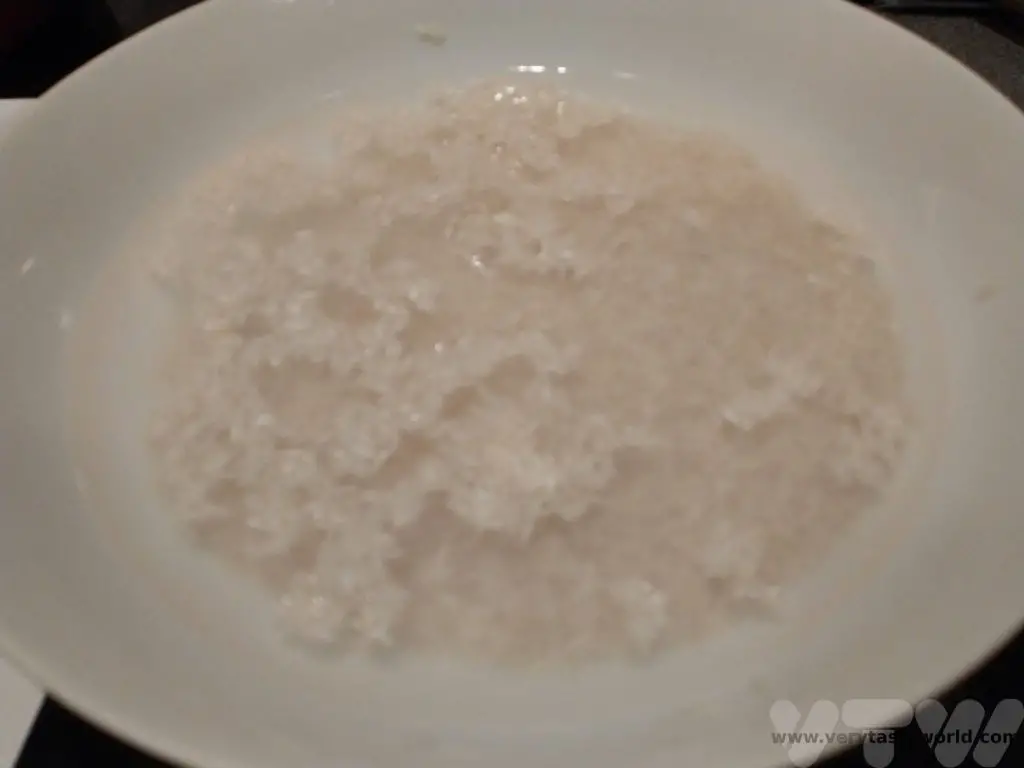
Heat 2 tablespoons oil or ghee or butter in a pot or pressure cooker.
Add whole spices:
1 bay leaf
1 inch cinnamon
3 green cardomom
3 cloves
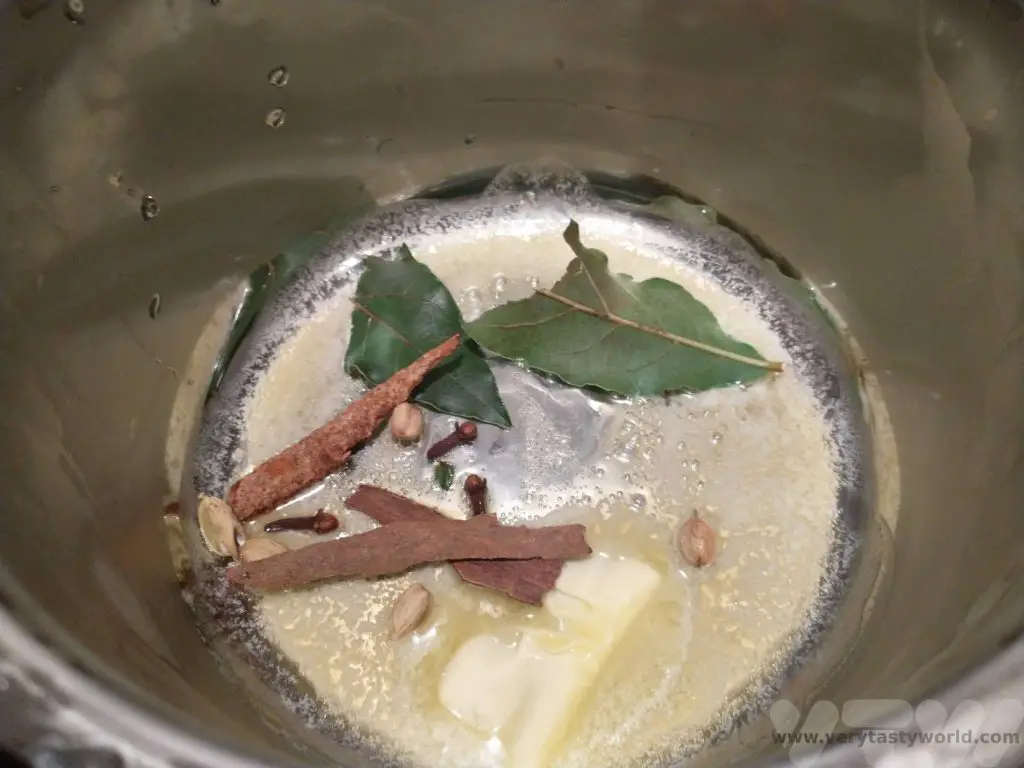
When the spices, begin to crackle, add 1 sliced onion and 1 chopped green chilli. On a medium heat, sauté until the onions turn golden.
Add 1 teaspoon ginger garlic paste. Sauté this for a couple of minutes until the raw smell goes away.
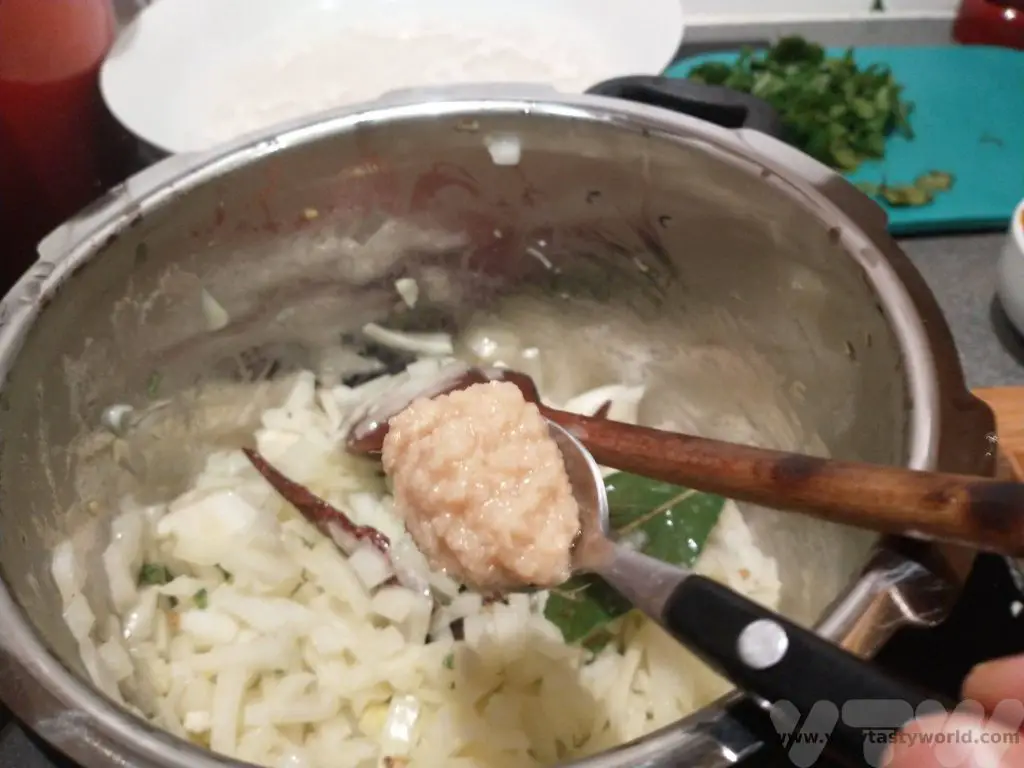
Add 1 cup chopped mix veggies and sauté on a medium heat for 2 -3 minutes.
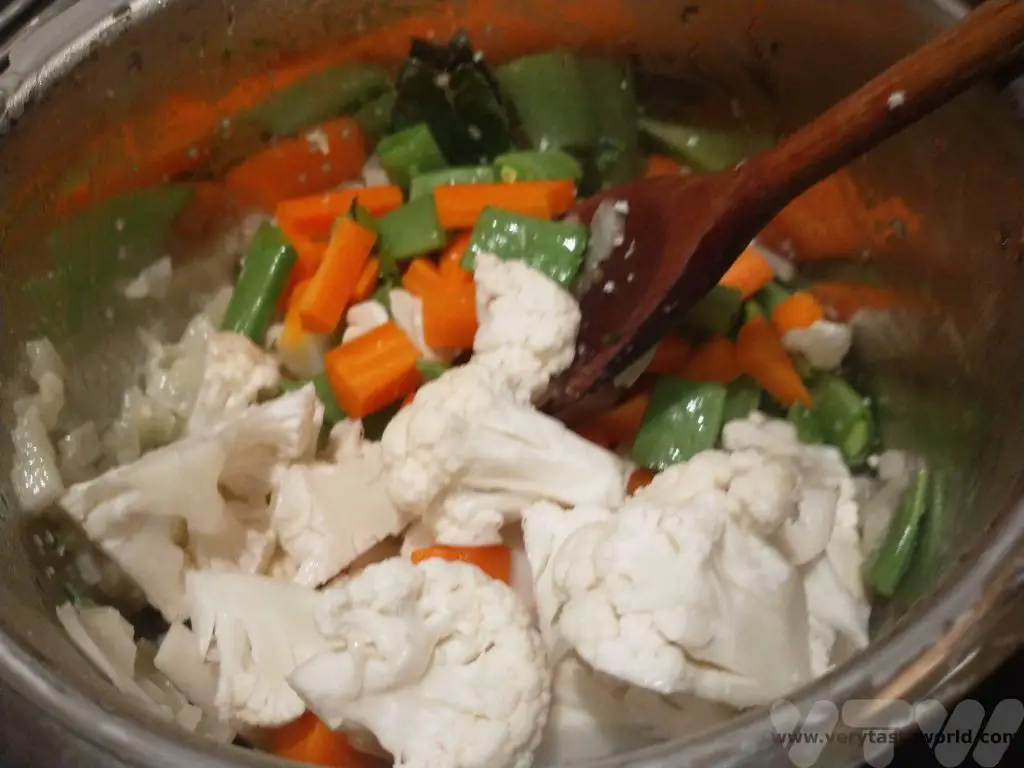
Add the following:
2 tablespoons mint leaves
2 tablespoons coriander leaves
½ teaspoon red chilli powder
1/2 teaspoon coriander powder
1/8 teaspoon turmeric powder
½ teaspoon garam masala
1 small finely chopped tomato
2 tablespoons of yogurt
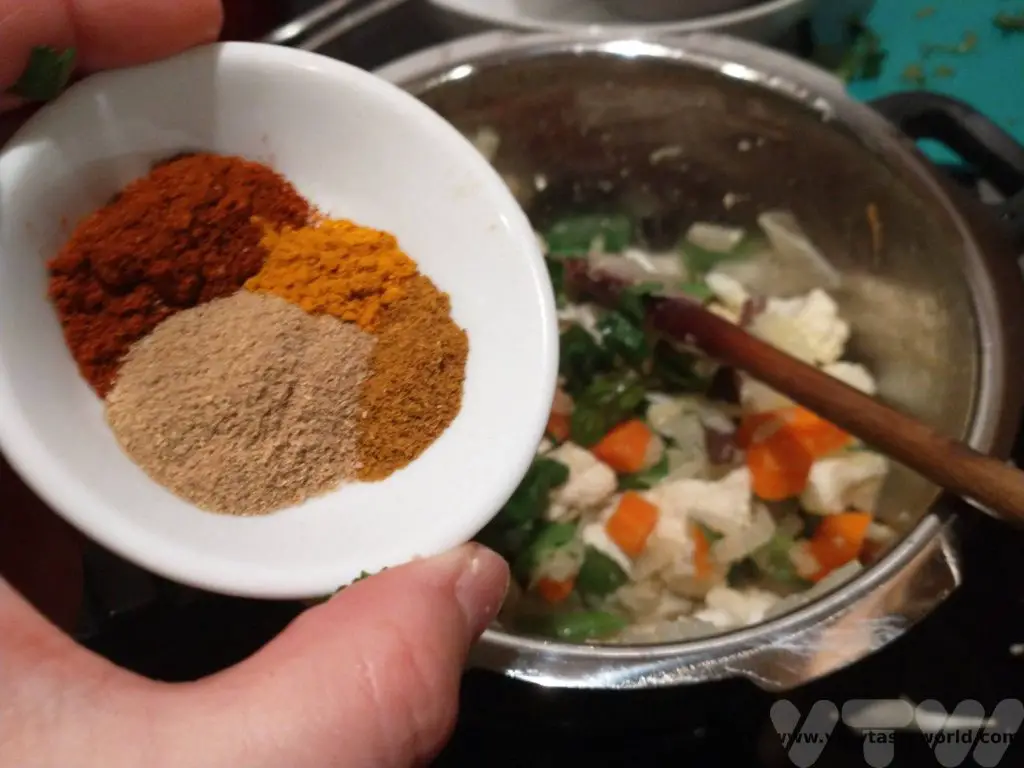

Mix and fry again for 5 minutes on a medium heat until the tomatoes break down. The mixture turns aromatic after frying.

Add the drained rice and spread it evenly across the top of the mixture.
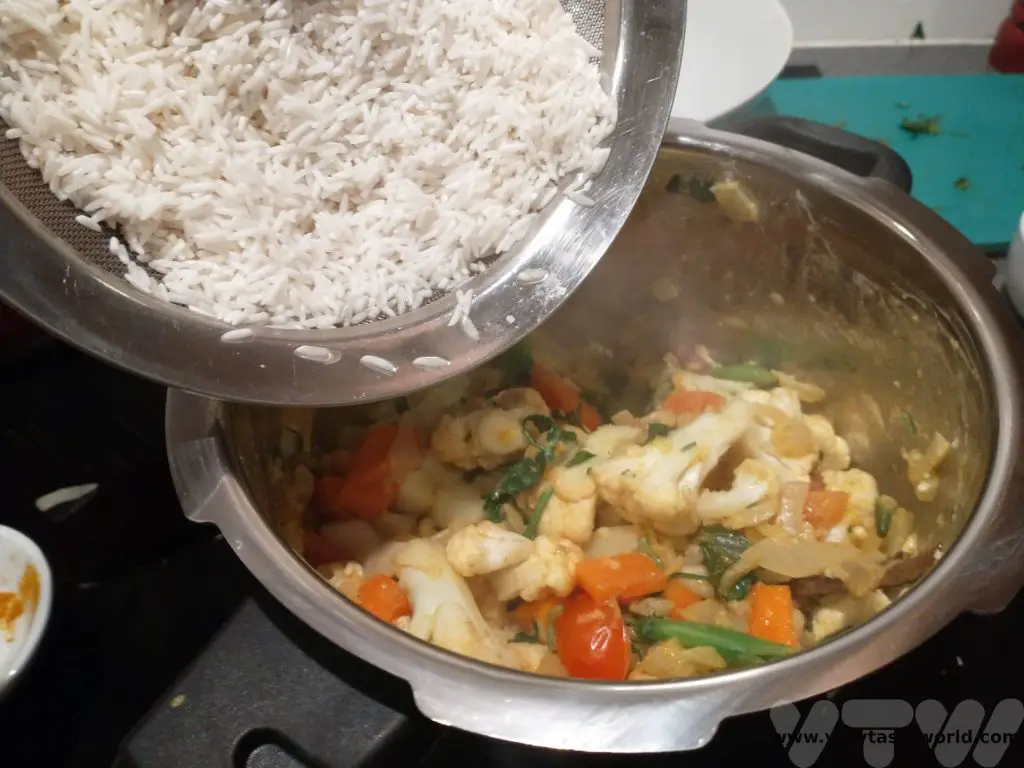
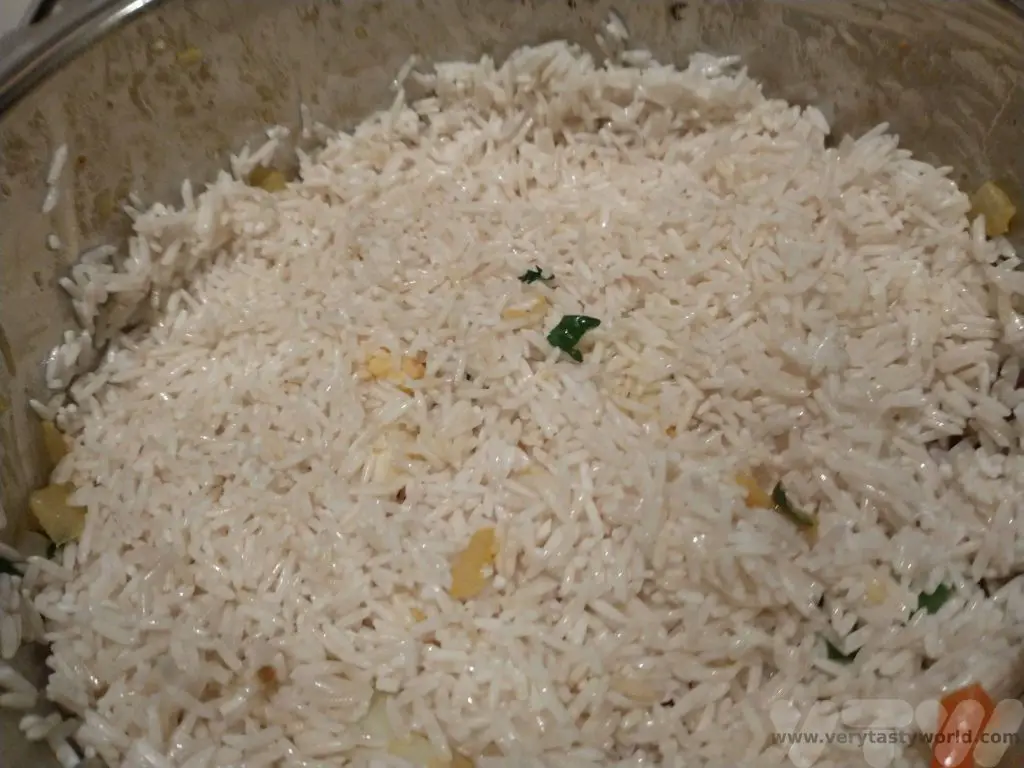
If you are using a pressure cooker: add 1 cup of water and salt to taste.
If you are using a pot: add 1.5 cups of water (this is because some steam will escape) and salt to taste.

Cover the pot or pressure cooker with the lid.
Pressure cooker – cook on a medium-high flame for one whistle
Pot – cook on low heat until all of the water is absorbed and rice cooked is nicely.
Once the rice is cooked, take the biryani off the heat and let it rest for 15 minutes.
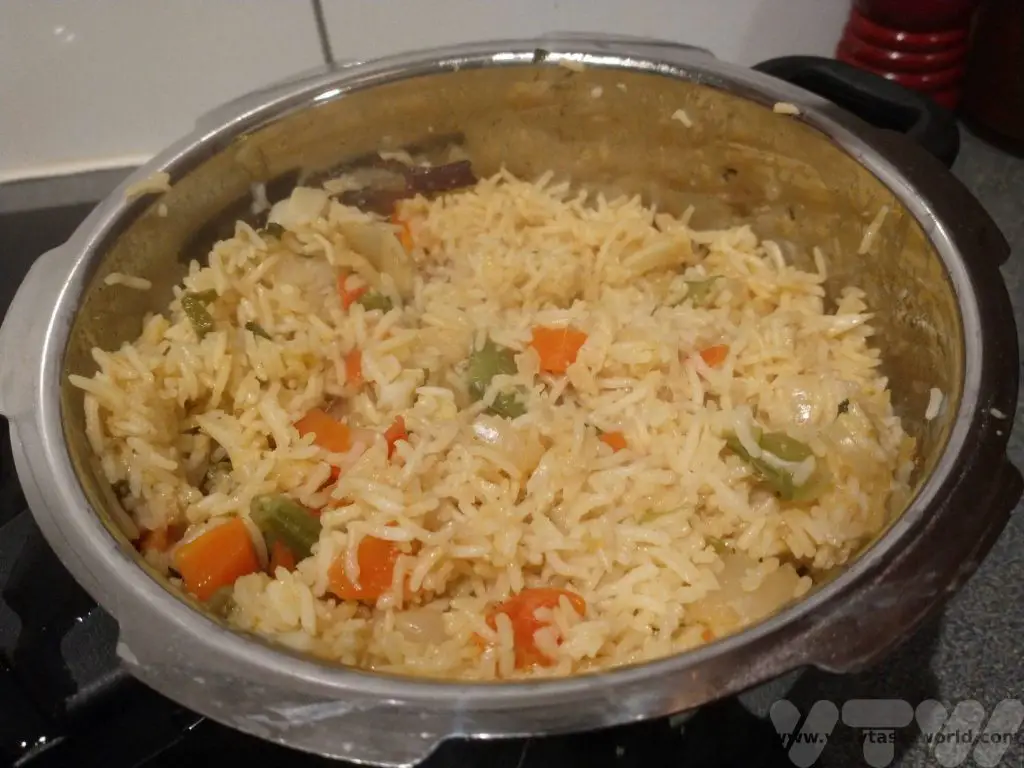
Serve on its own as a main meal, with a biryani raita, or it also makes a great accompaniment to other dishes.
We often enjoy it as an accompaniment to palak paneer – a paneer cheese and spinach curry – for a really delicious veggie meal.
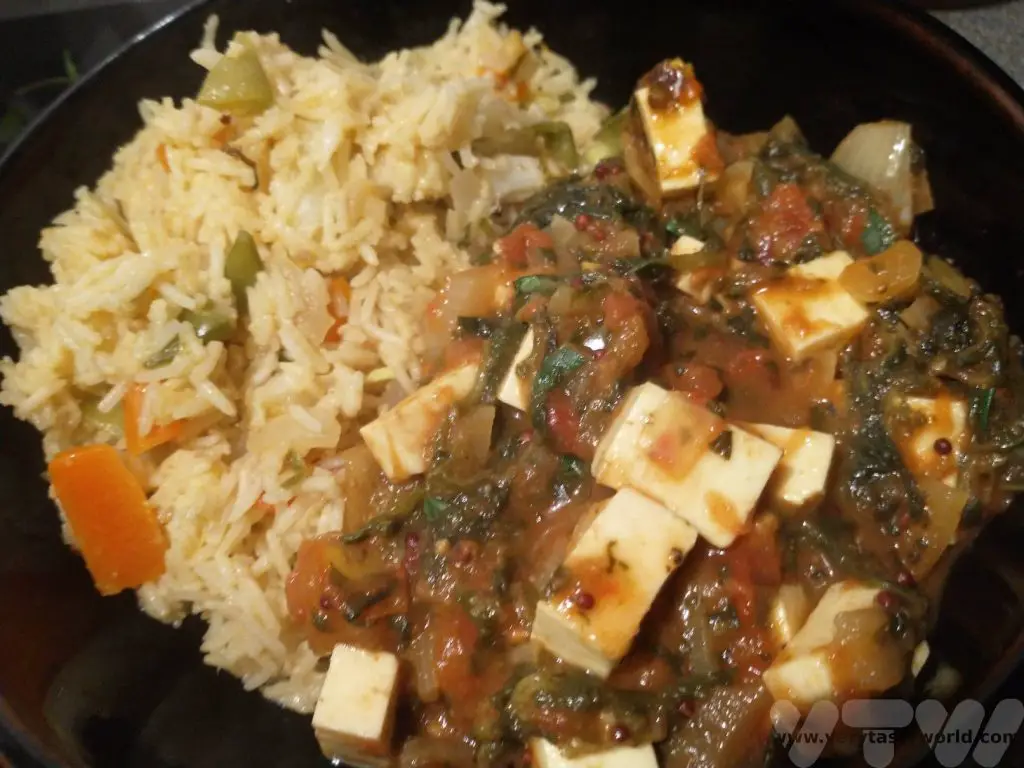
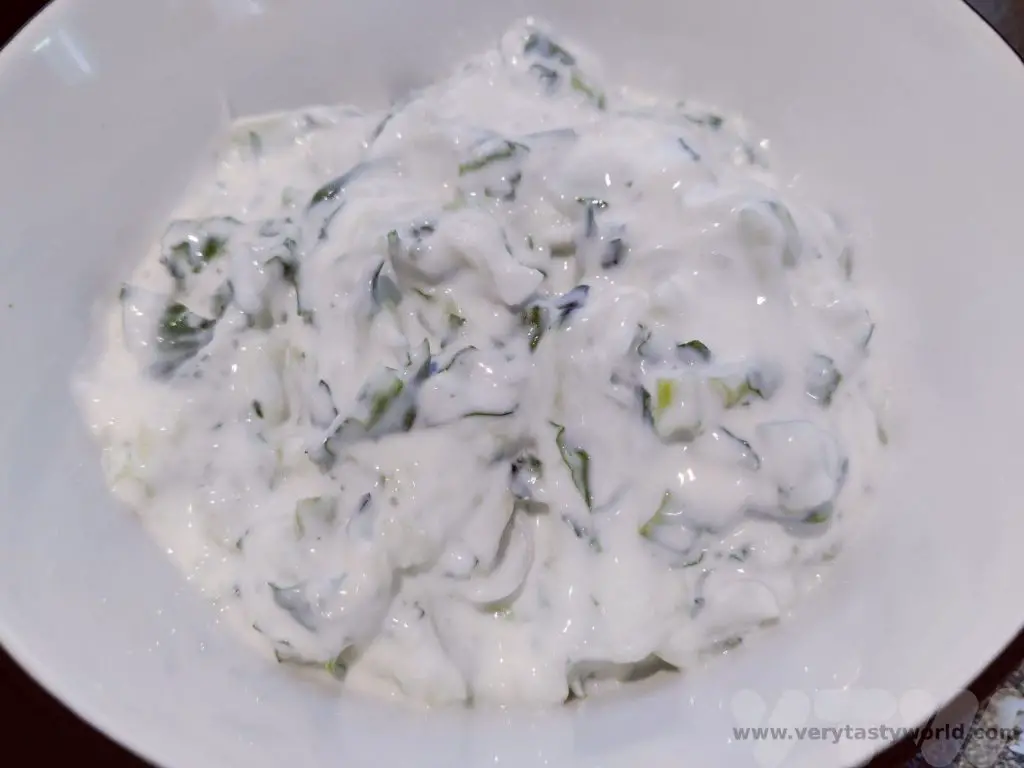


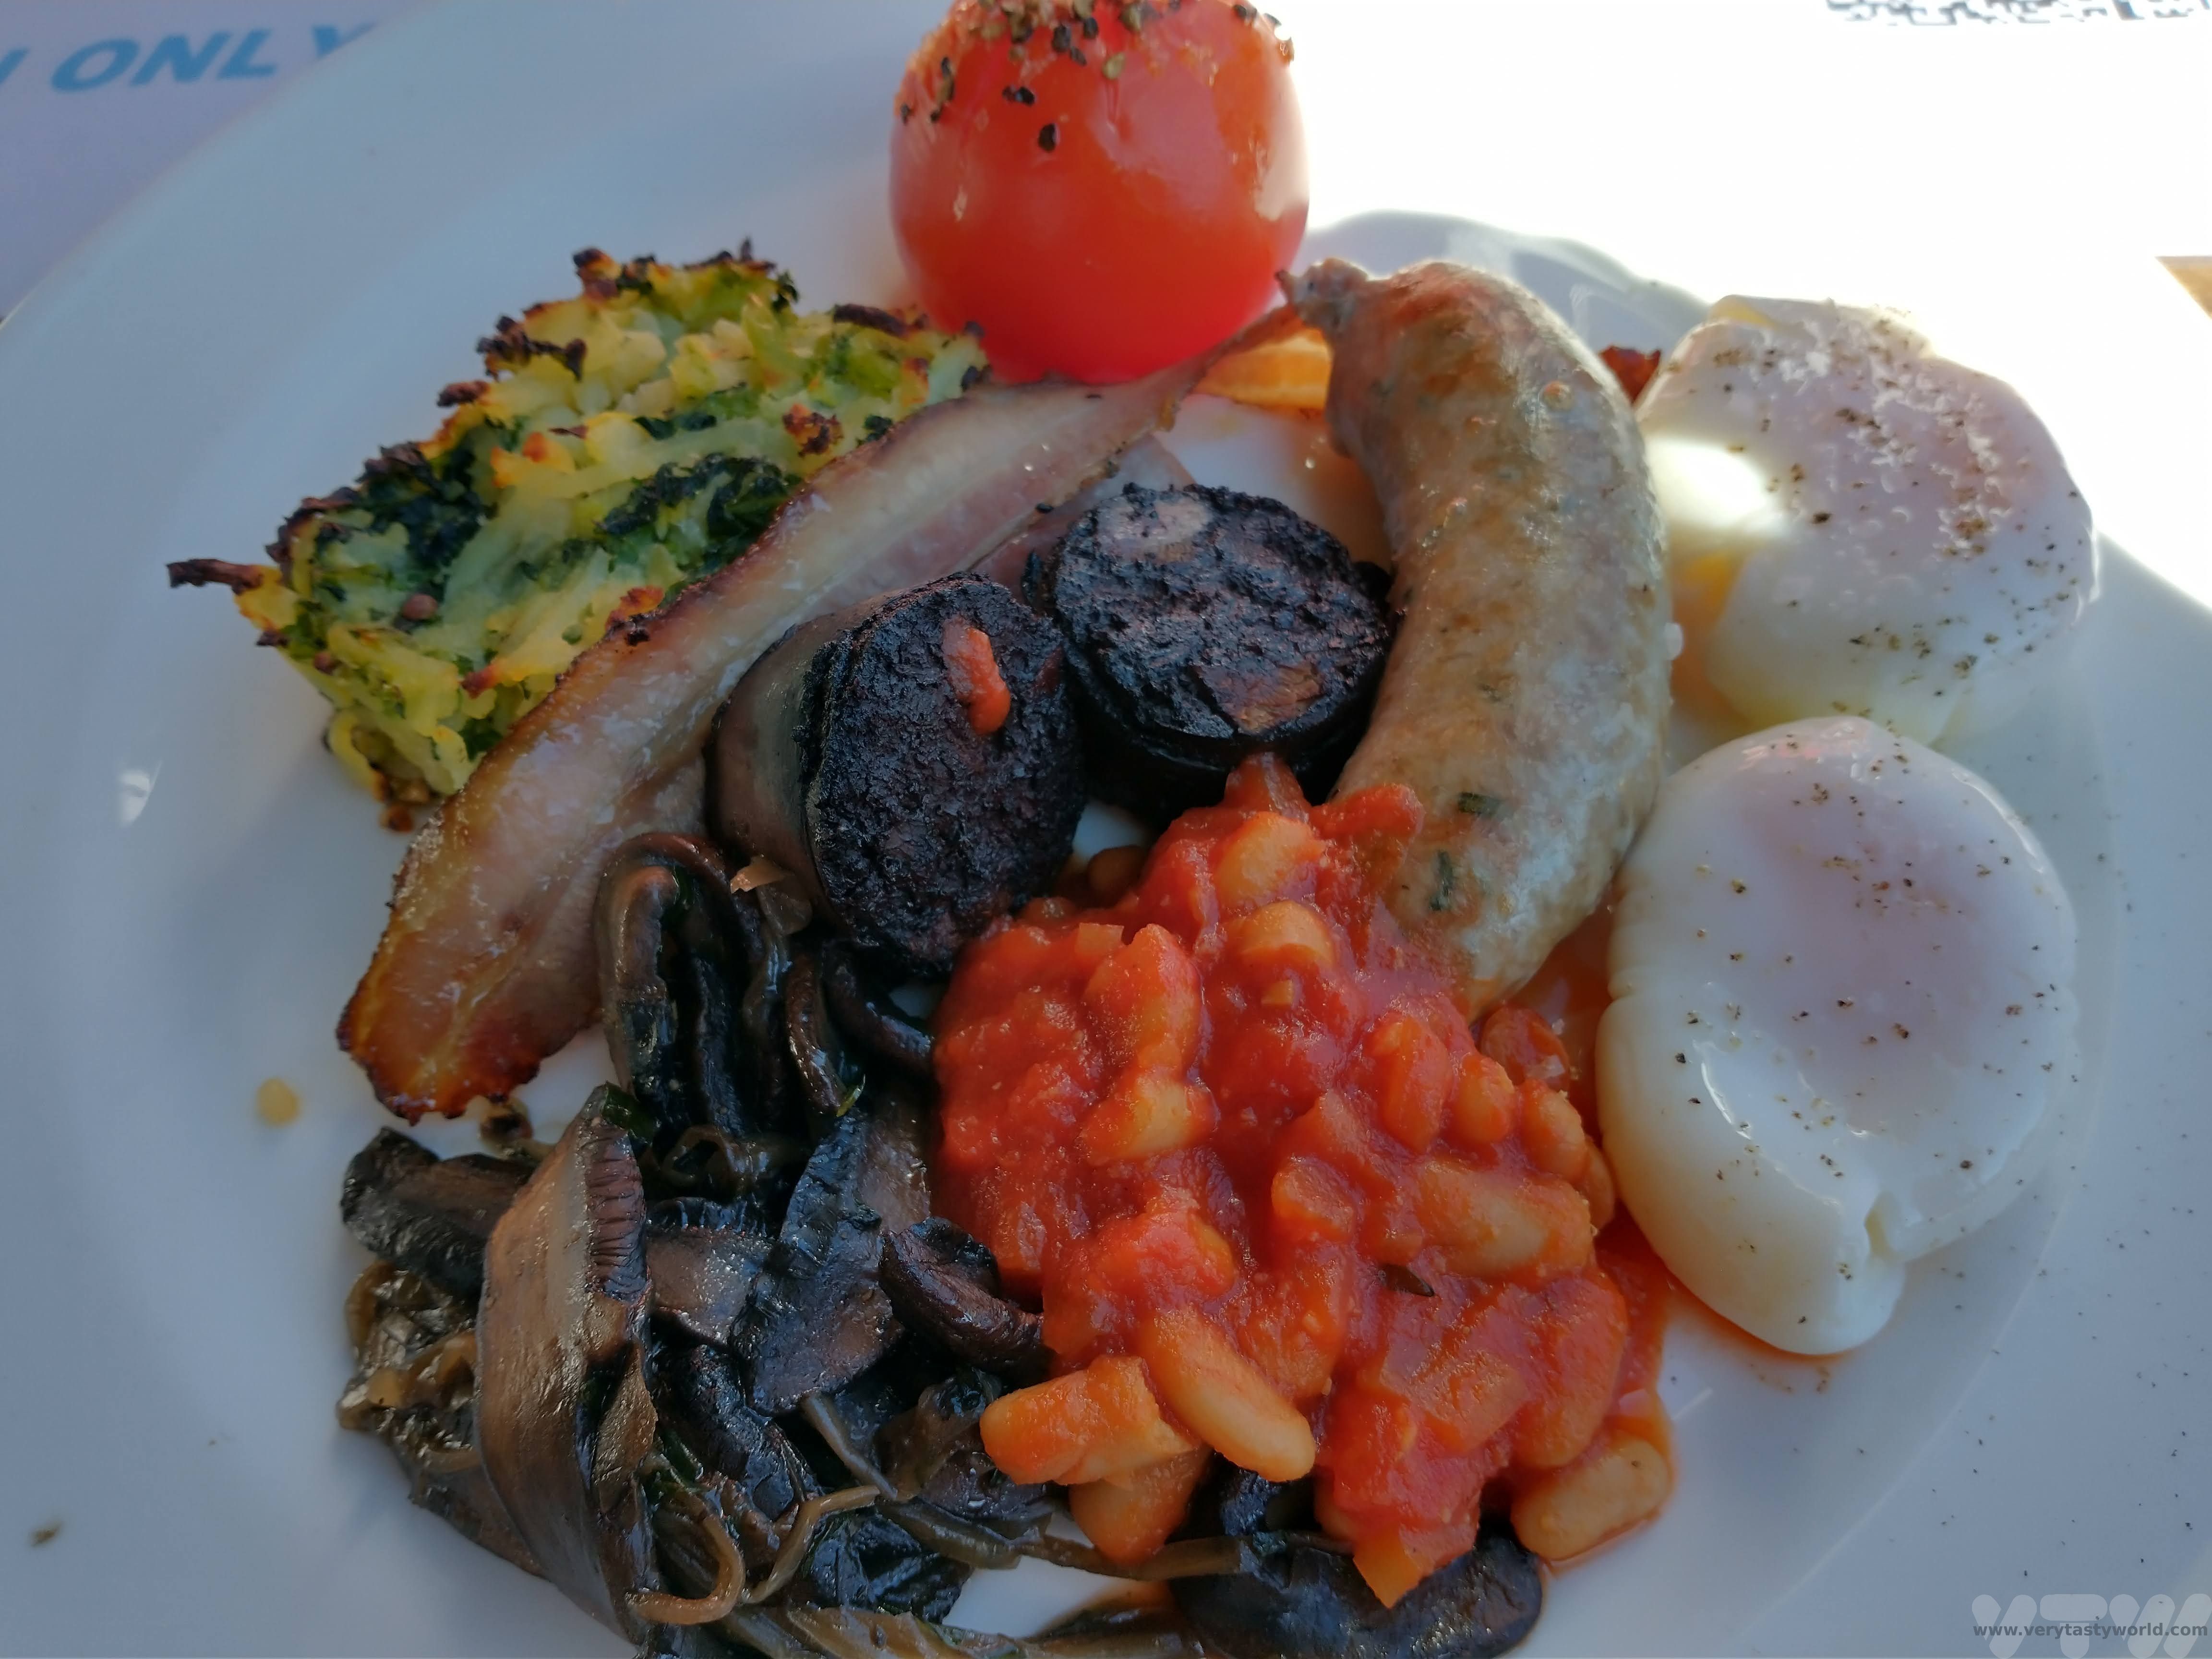
Mora Mora on the RN7 Madagascar – A Road Trip
Route Nationale Sept – the RN7 Madagascar – is one of the primary roads in the magical island that lies off the southeast coast of Africa. The road stretches from Madagascar’s capital city Antananarivo (also known by its more pronounceable name, Tana) to Toliara in the southwest of the country.
Madagascar is a very special place. The island separated from the mainland African continent 150 million years ago and, as a result, much of the wildlife evolved in a very different way. For example, the primates found in Madagascar are lemurs, not apes and monkeys. You won’t see any of the Big Five animals here but a lot of the flora and fauna is unique to the island and is absolutely fascinating.
The great thing about RN7 is that it covers a long distance – nearly 1000km – and winds its way through a variety of beautiful and diverse landscapes. There are several national parks located within a few kilometres of the road and these offer plenty of wildlife viewing as well as opportunities to explore the local culture.
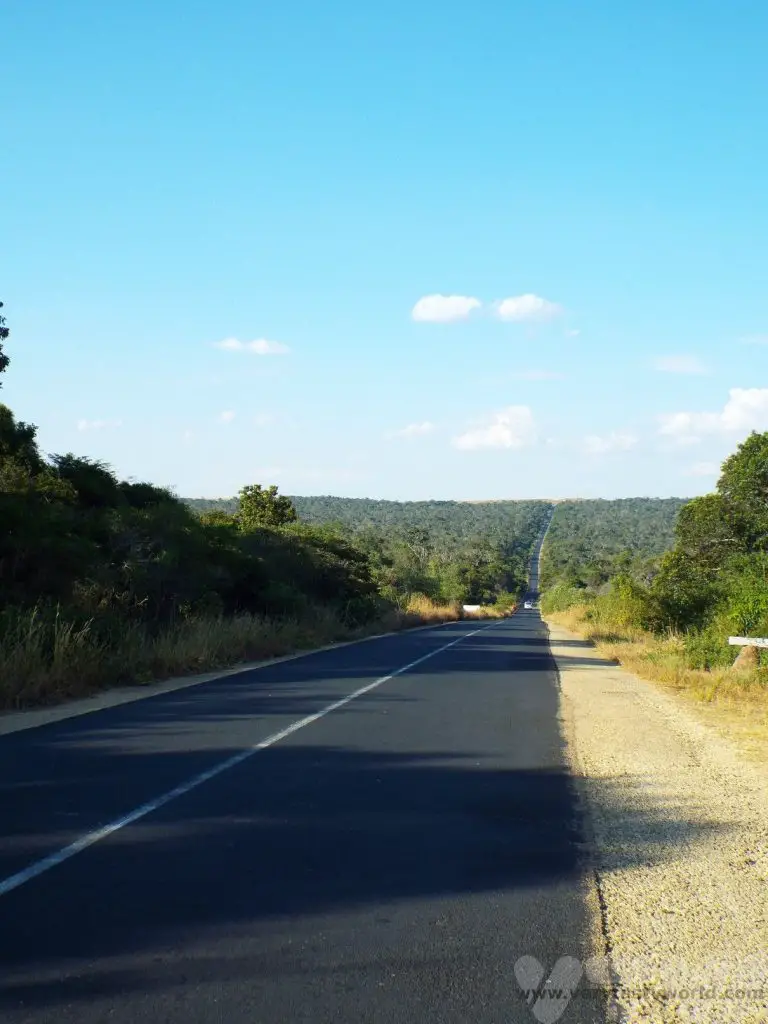
We travelled Madagascar’s RN7 from Toliara to Tana, having caught a flight with Air Madagascar to Toliara after our arrival in Madagascar, but it’s perfectly possible to do this trip in reverse. This journey took seven days to complete but can easily be adapted to spend more or less time at particular locations depending on your interests. We recommend a ‘mora mora’ approach to the trip. ‘Mora mora’ means ‘slowly, slowly’ in Malagasy – take time to travel and time to explore – it’s a very rewarding journey.
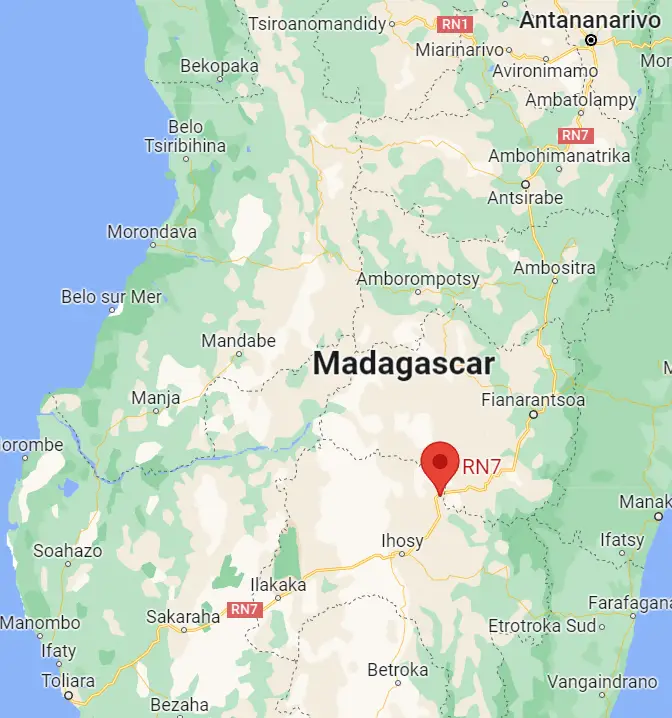
The travel times quoted here are the driving times and do not include the stops taken to enjoy activities along the way.
Toliara
Toliara is the major city in the Southwest of Madagascar. Located on the coast, Ifaty beach is perfect if you are after some seaside time.
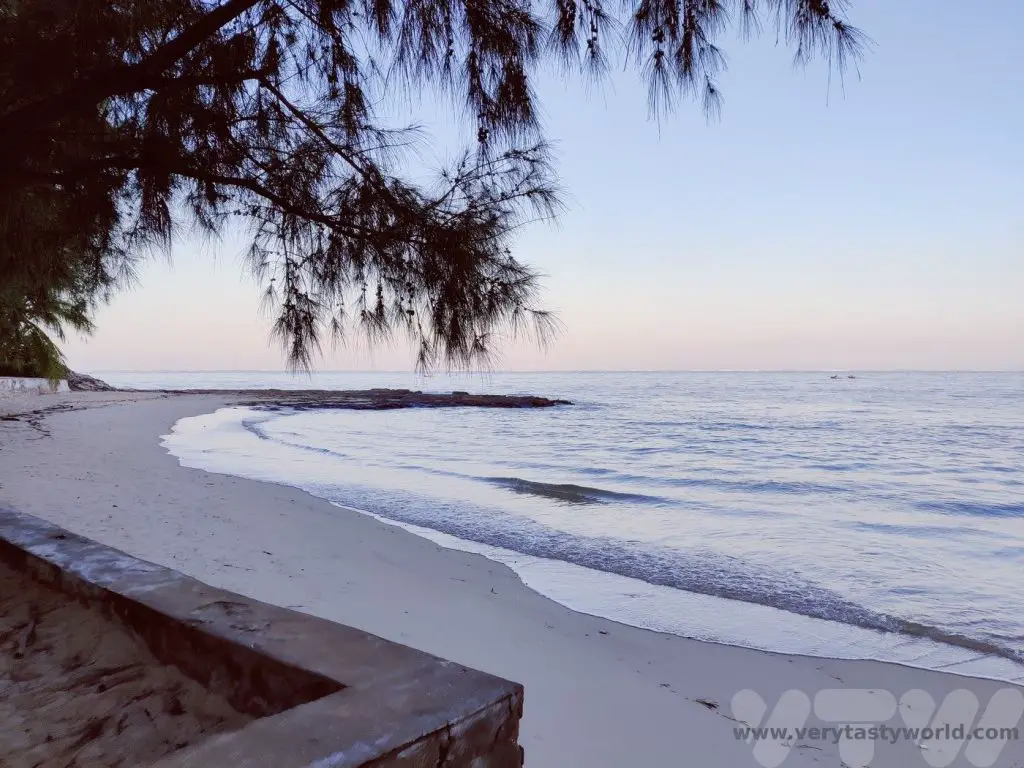
Toliara to Isalo
240 km (~4 hours)
We started our long journey at Toliara and enjoyed our first stop at the Antsokay Arboretum. This arboretum contains over 900 plant species, largely categorised as spiny forest, due to the hot and dry climate of the region. These plants are characterised by their ability to survive harsh conditions.
Following the short botanical trail we saw numerous different types of plant.
These included a number of species of fascinating elongated octopus trees which have small leaves and spikes. Some of them can be relied upon as a compass – they grow facing south to try to get moisture from any fog in the region.
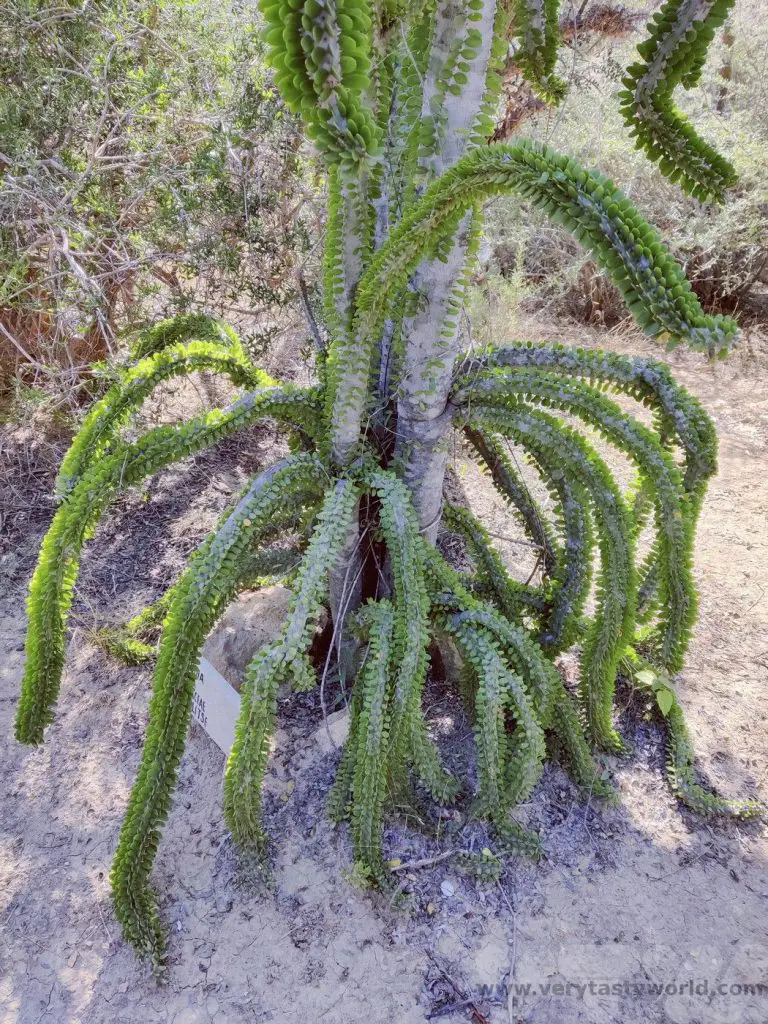
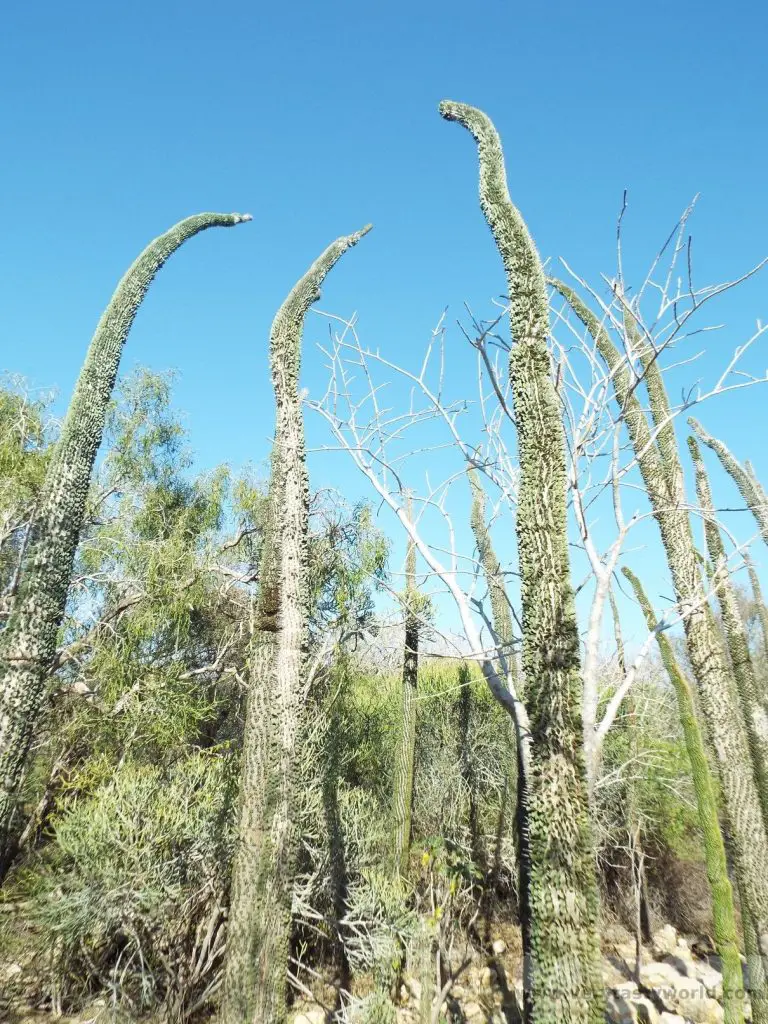
One of the best known species of tree in the region is the baobab, characterised by its huge trunk. This baobab was a teenager – only around 100 years old.

Some trees look like baobab but are fake. This one is known as an elephant’s foot.
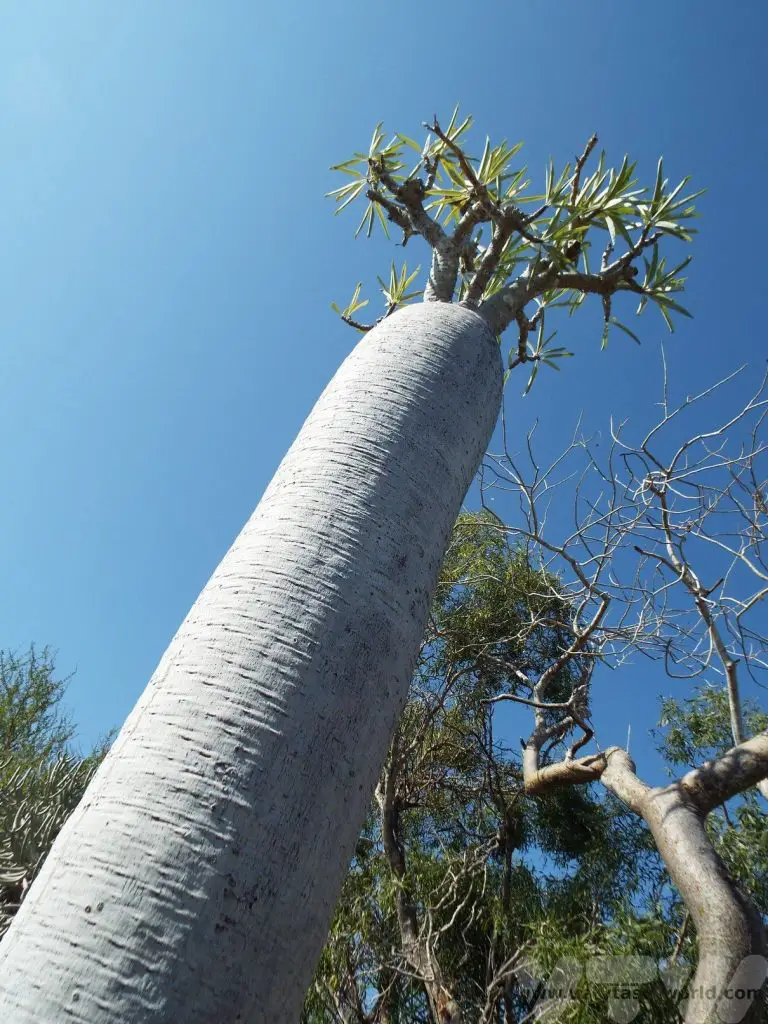
Malagasy people have an amusing approach to their mothers-in-law. The plant on the left, with its sharp points is colloquially known as mother-in-law’s tongue. And this cactus is called a mother-in-law’s cushion.

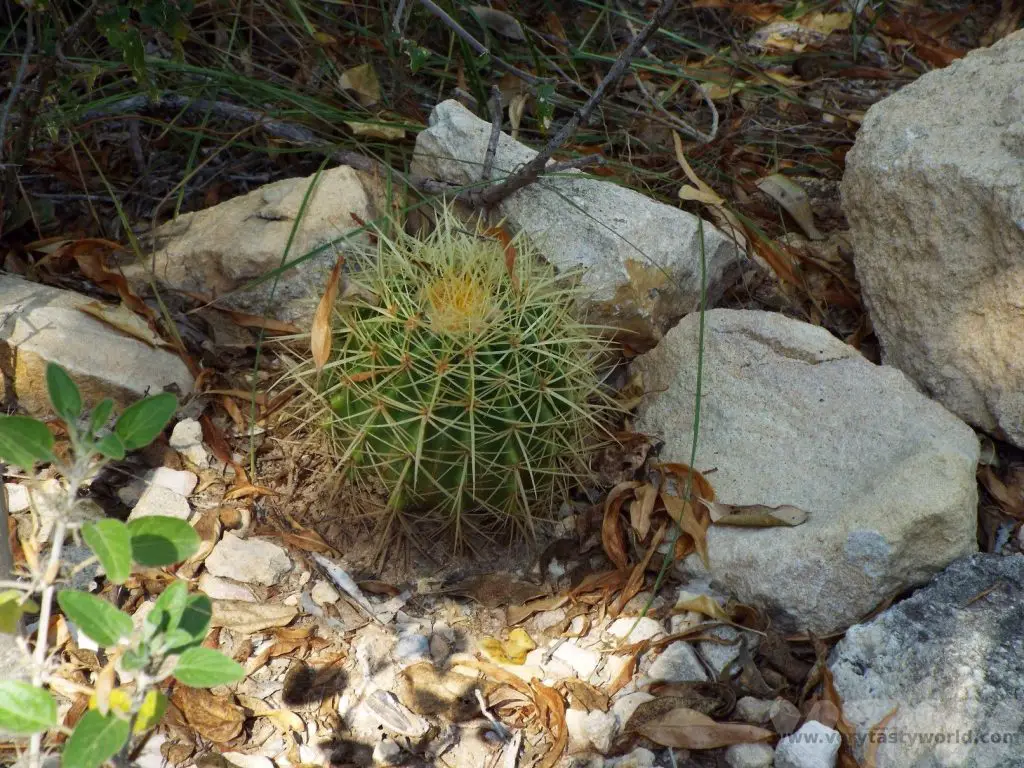
And we met our first chameleon. This was a male. He can change colour within a minute.
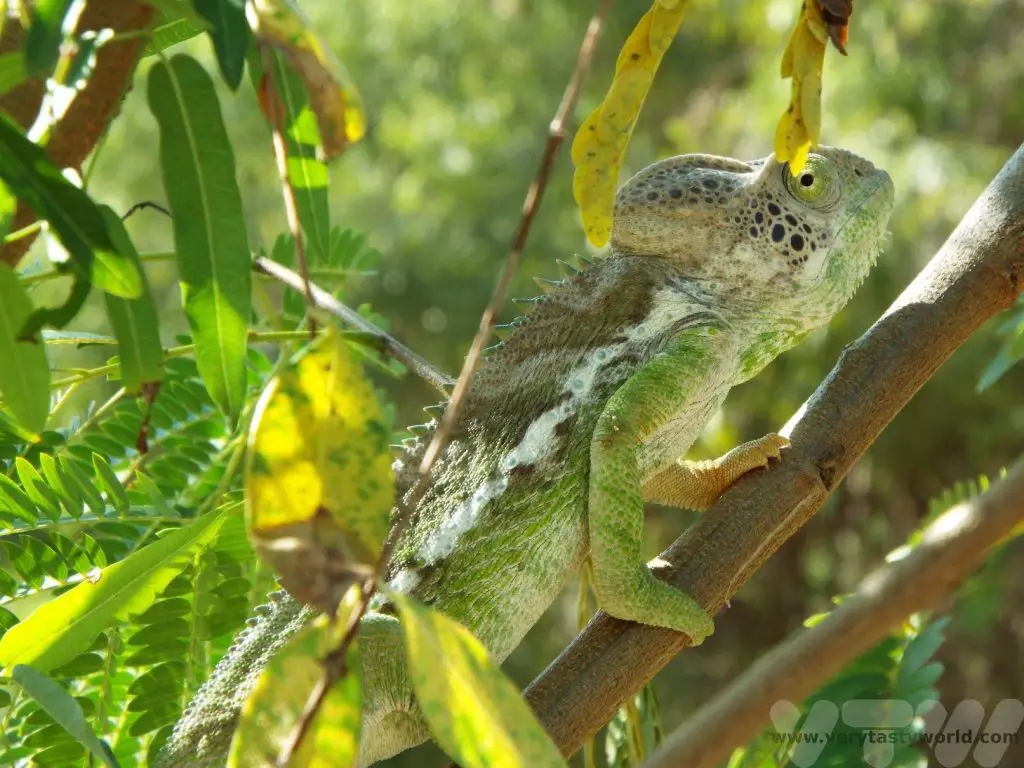
Then it was back on the RN7 for a couple more hours. Our next stop was Zombitse-Vohibasia National Park which is located around 150 km from Toliara. This is a dry deciduous forest – a transition area between the dry forests and more humid regions of Madagascar.
We particularly enjoyed viewing the baobab trees in this park. These remarkable trees predate human beings and can live for up to 5000 years. Their ability to store water in the bulbous trunk means that they can survive dry seasons as well as forest fires. They can grow up to 30m high and the biggest can be 50m in circumference. They have branches that look like roots. There is a legend that the baobab told god that it was the most beautiful of all the trees. Its arrogance angered the deity so much that he picked it up, flipped it over and planted it back in the earth upside down.
At Zombitse-Vohibasia there is a twin female tree which was 800 years old and a male that was 900 years old. Their roots are relatively shallow but can extend up to 50m horizontally underground in order to provide support for the tree.
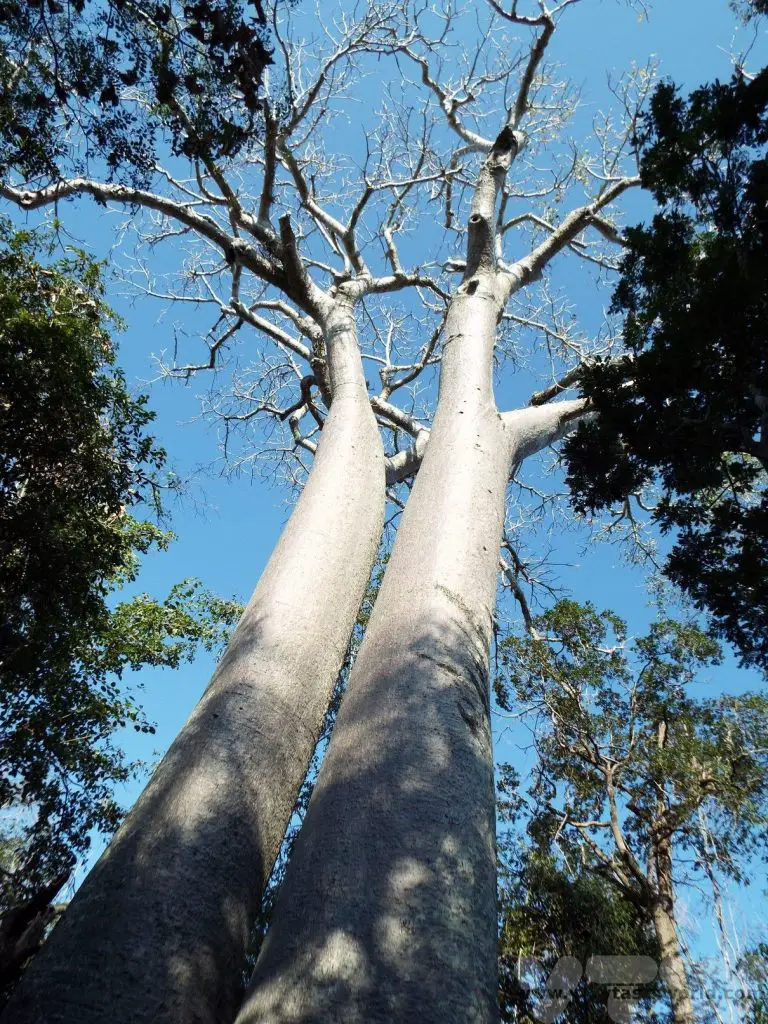

We also met our first lemurs. A nocturnal brown lemur who glared at us because he should have been asleep and a white sifaka.
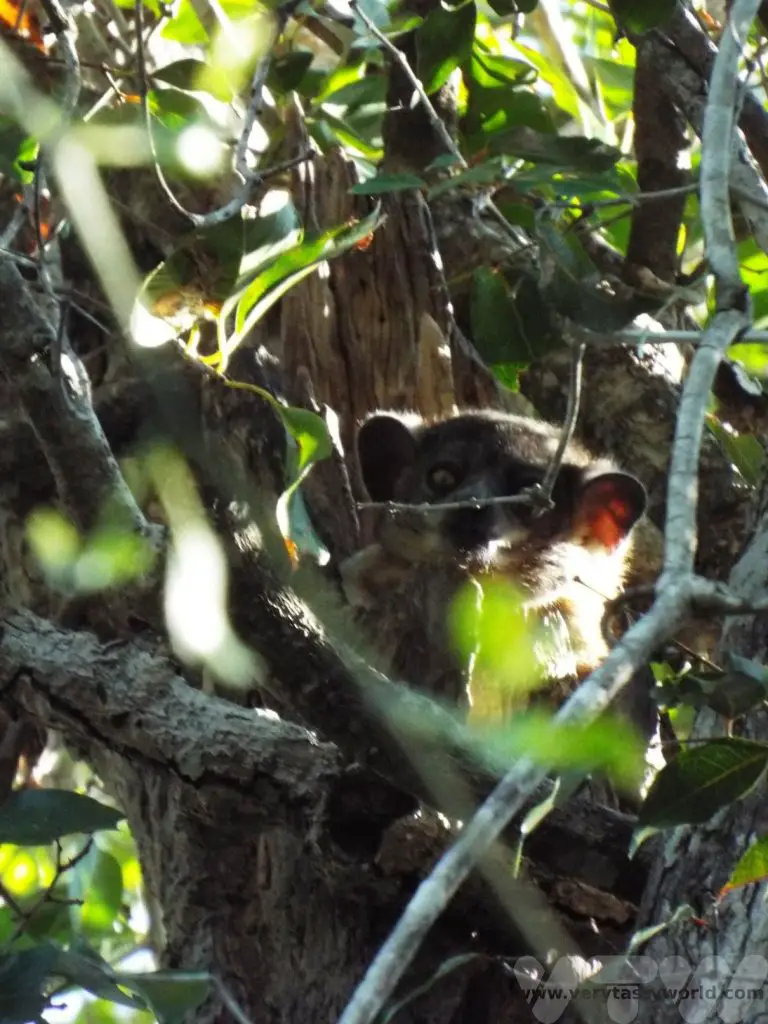
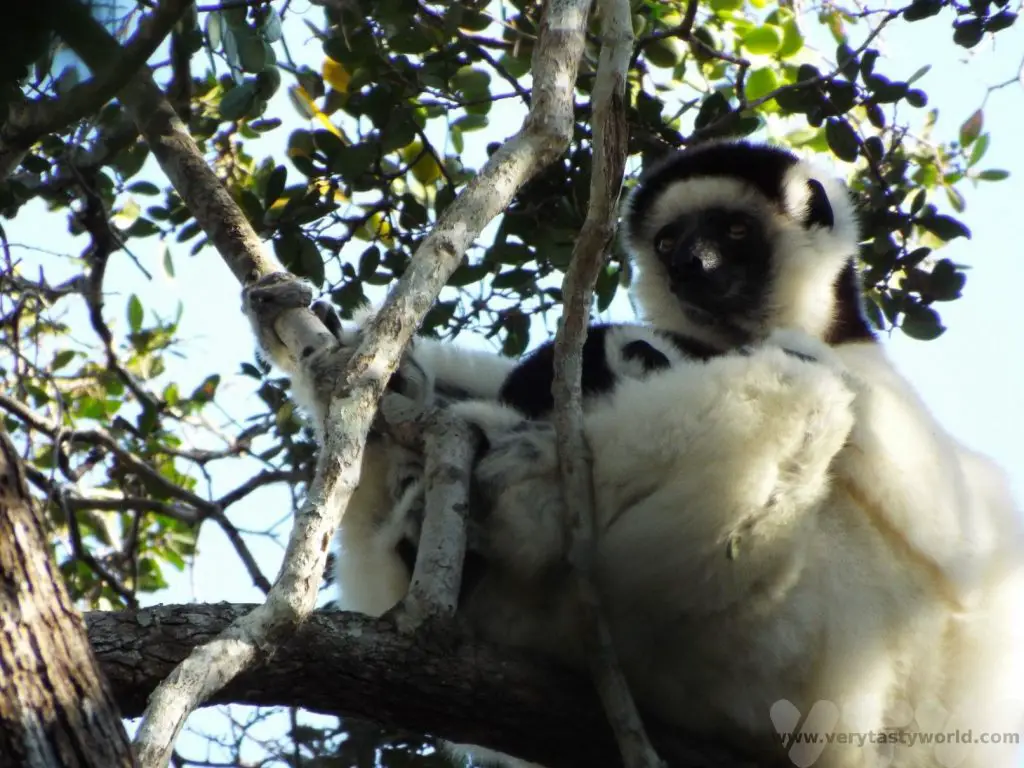
Travelling further along the RN7 as we approached Isalo the scenery changed from flat, extensive plains to a more rocky landscape. No visit to the area would be complete without visiting the Isalo window at sunset and our timing was just perfect. The window is a rock formation with a convenient hole that faces west, perfect for viewing the beautiful sunset. The window is just off RN7 and very easy to reach from the road.
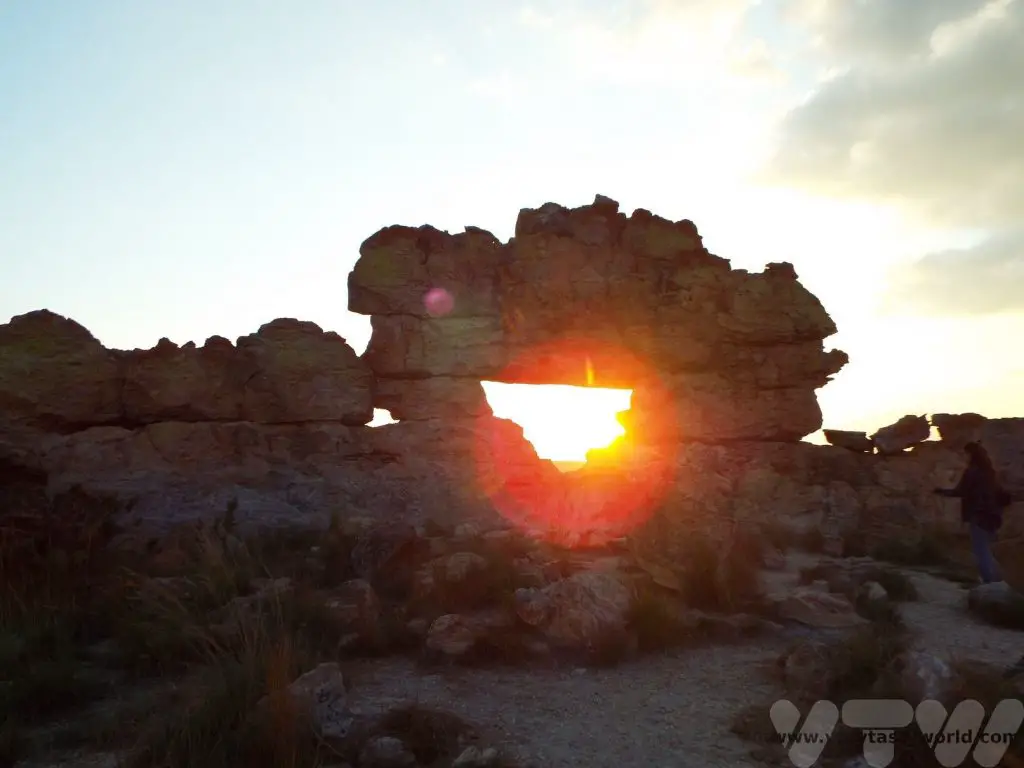
Isalo National Park
We spent the following day exploring Isalo national park. There are plenty of trails in the area, ranging from short hikes to a seven day trek. We chose the 14km trail. We met with our park ranger and drove to the start point.
The walk involved climbing up steps to view some dramatic ridges.
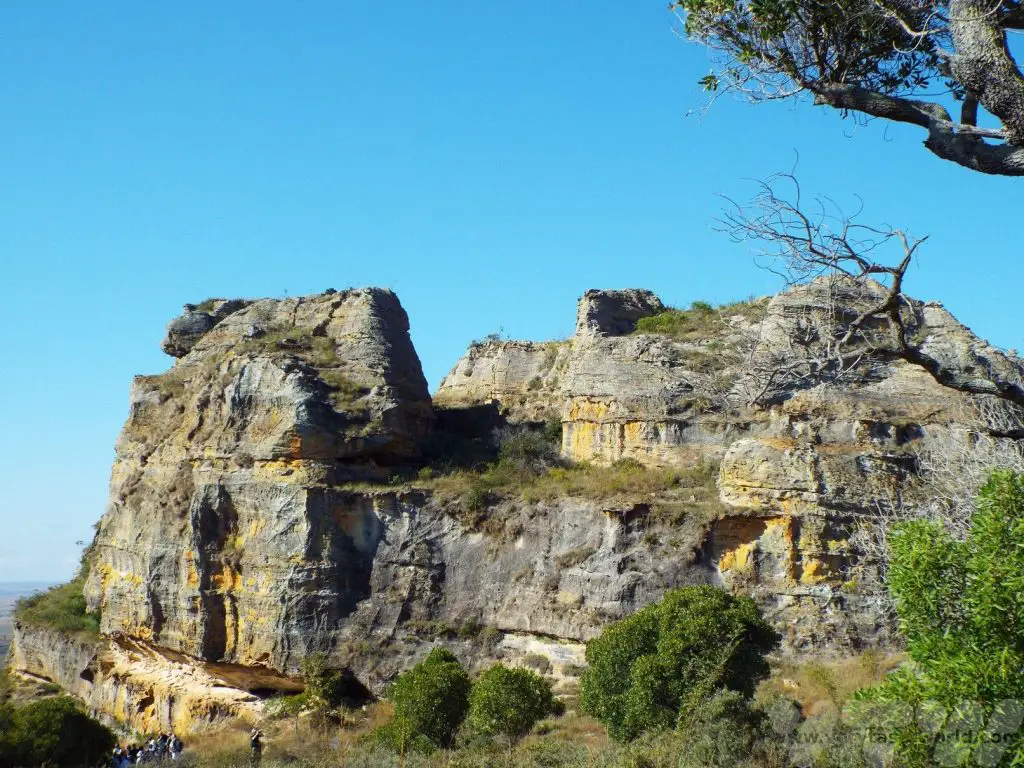
We saw tapia trees which had survived a catastrophic forest fire in the area. The views from the ridge were magnificent.
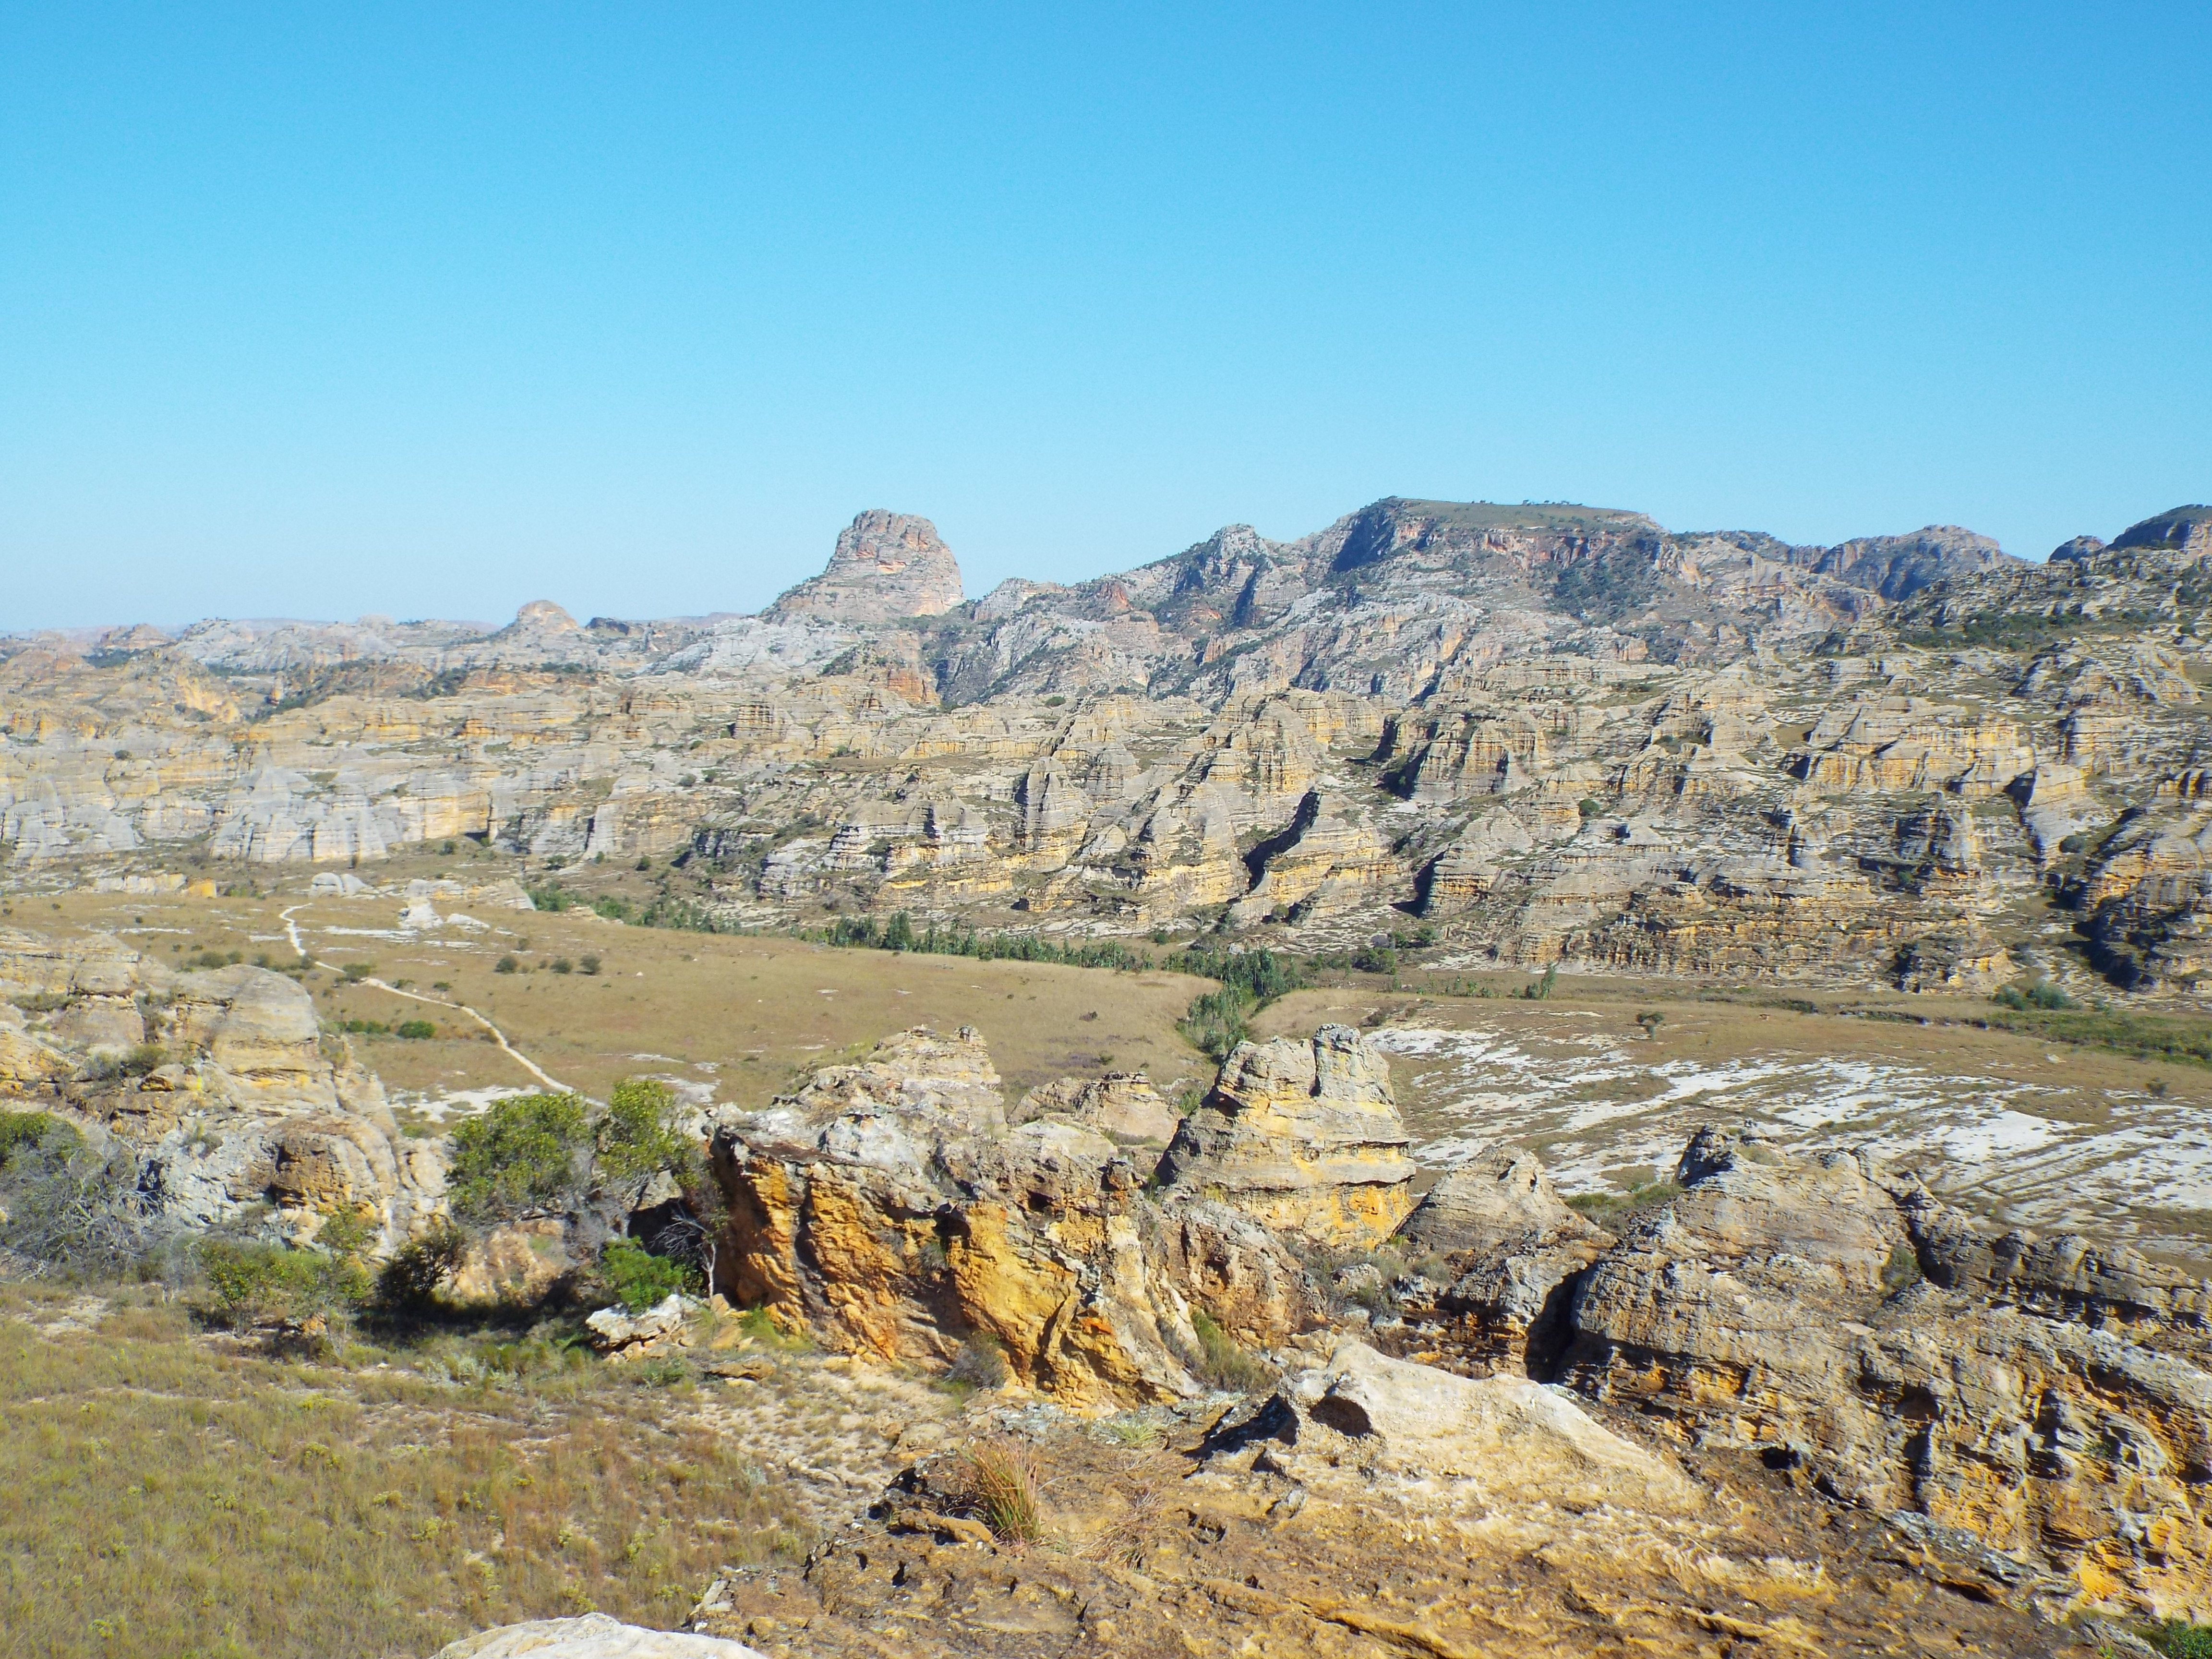
A walk along the relatively flat ridge led to a small waterfall with a pool where it was possible to enjoy a quick swim.
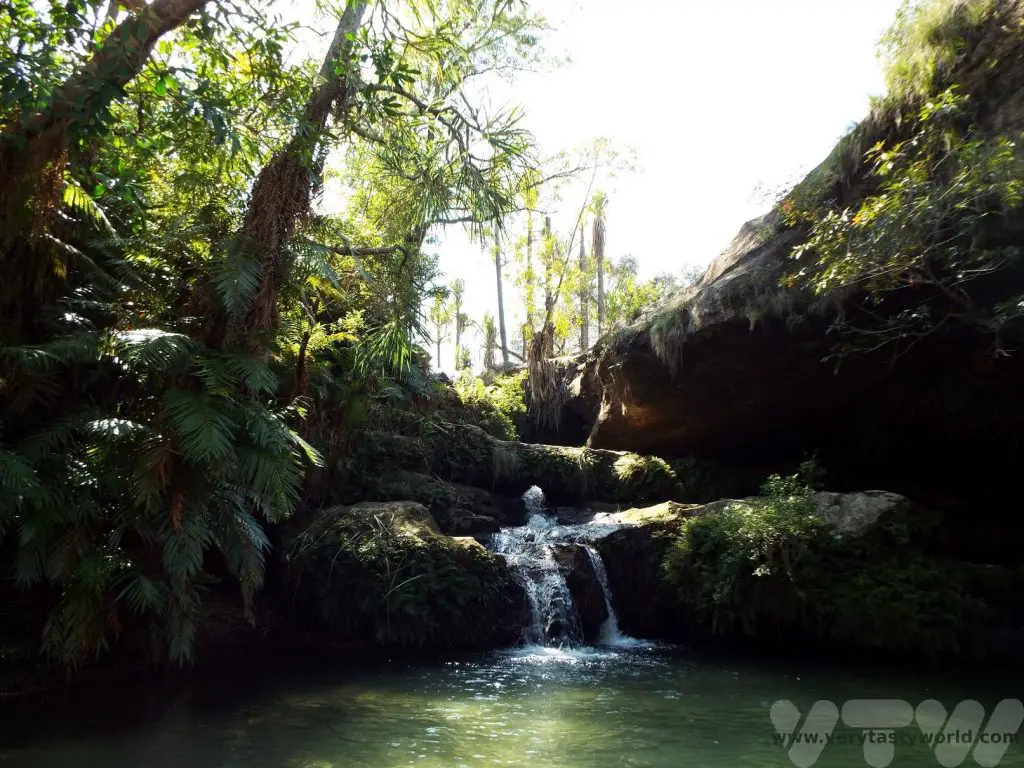
After a very pleasant dip in the pool, we walked along another flat section before climbing down the ridges. At the bottom, by the river, we discovered some white sifaka lemurs and ring-tailed lemurs.
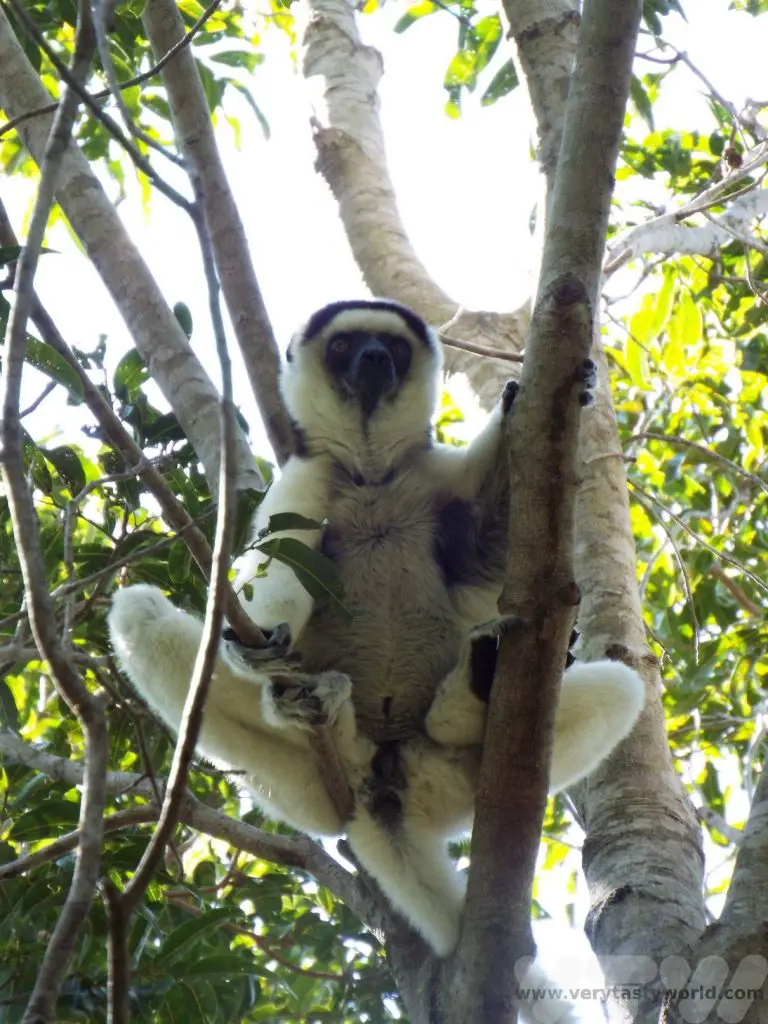
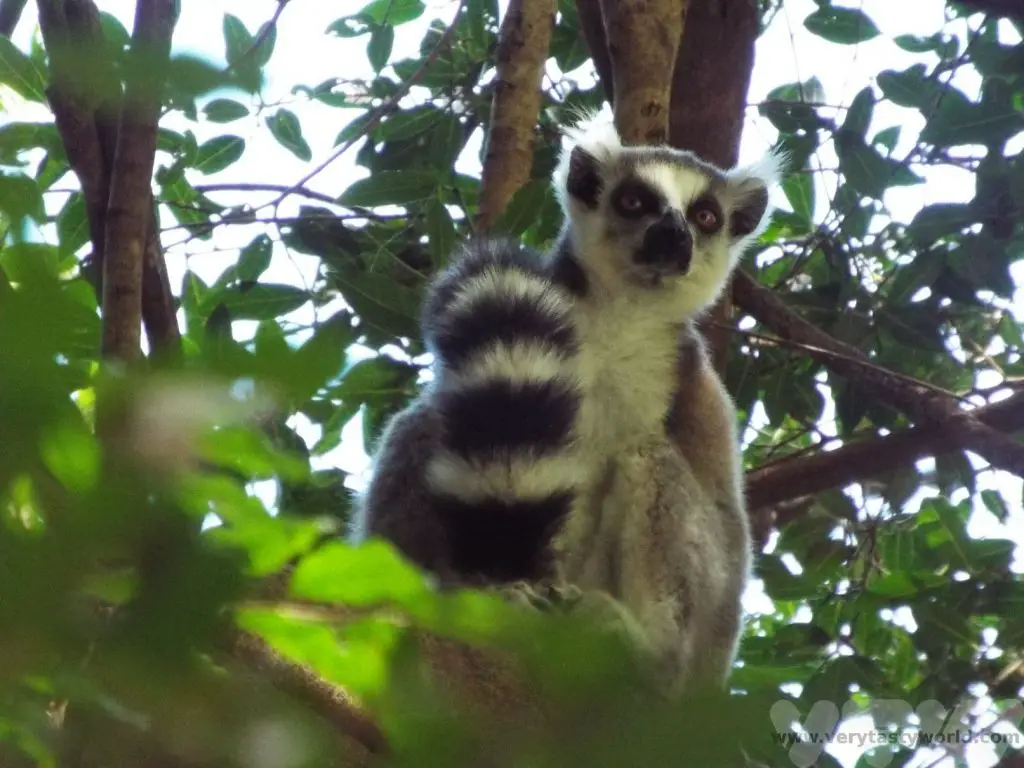
One of the most wonderful things about Madagascar is the night sky. Don’t forget to look up at night. It is possible to see the most brilliant views of the Milky Way. If you’re from the northern hemisphere, the stars are very different. The photo below was taken with a cheap phone camera. We would never have been able to capture these stars in the light-polluted skies at home.

Isalo to Andringitra
210km (~2 hours on RN7 then ~1 hour for 20km on a very bumpy dirt road)
Another day on the road, we departed Isalo early in the morning. The RN7 has a landmark by the side of the road, a rock called the Lady Queen of Isalo. It is so distinctive that it appears on the 1000 Ariary banknote.
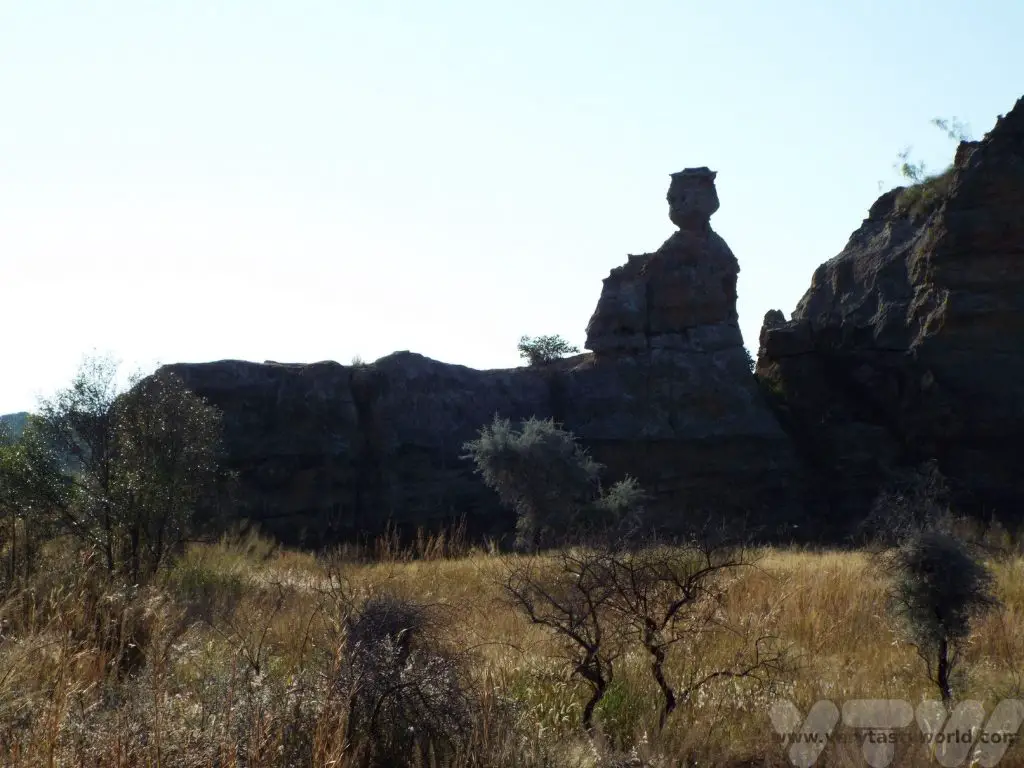
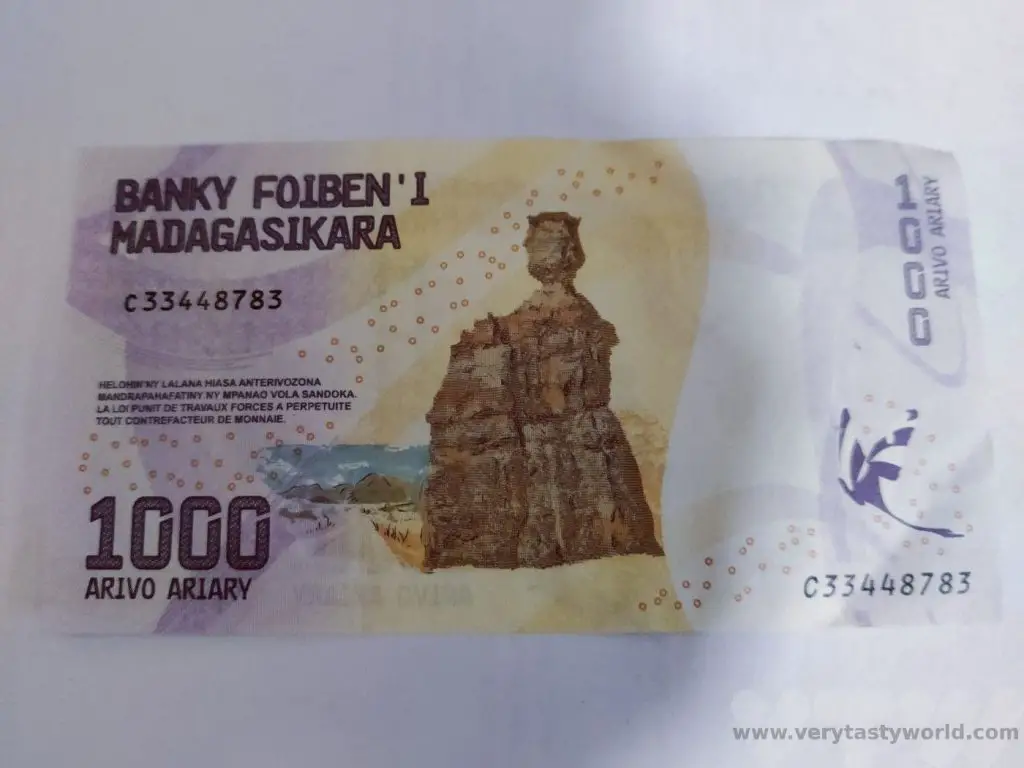
Andringitra
A little out of the way but definitely worth enjoying/enduring a ‘Madagascar massage’ along the extremely bumpy, rumbly dirt track, this area of outstanding beauty is a climbers’ paradise. Many professionals come to the area to climb the dramatic granite rock faces.
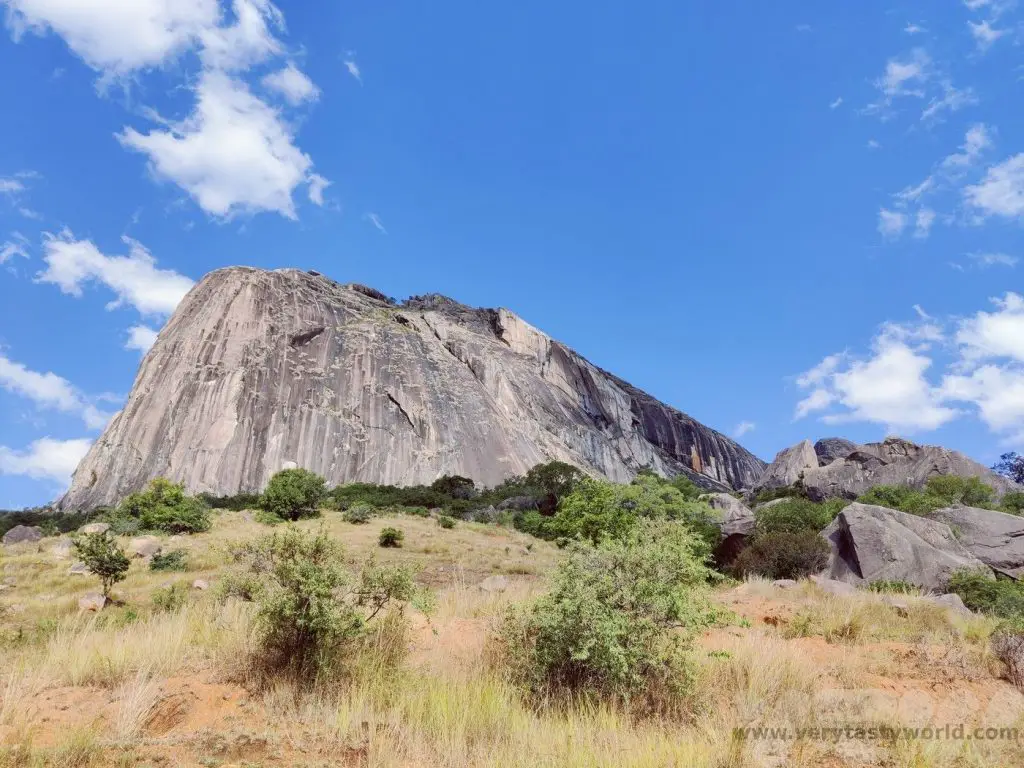
There are a couple of walks available for the less intrepid and we enjoyed both of these. A hike to the base of the ‘chameleon rock’ affords amazing views of the surrounding area when you reach the summit.
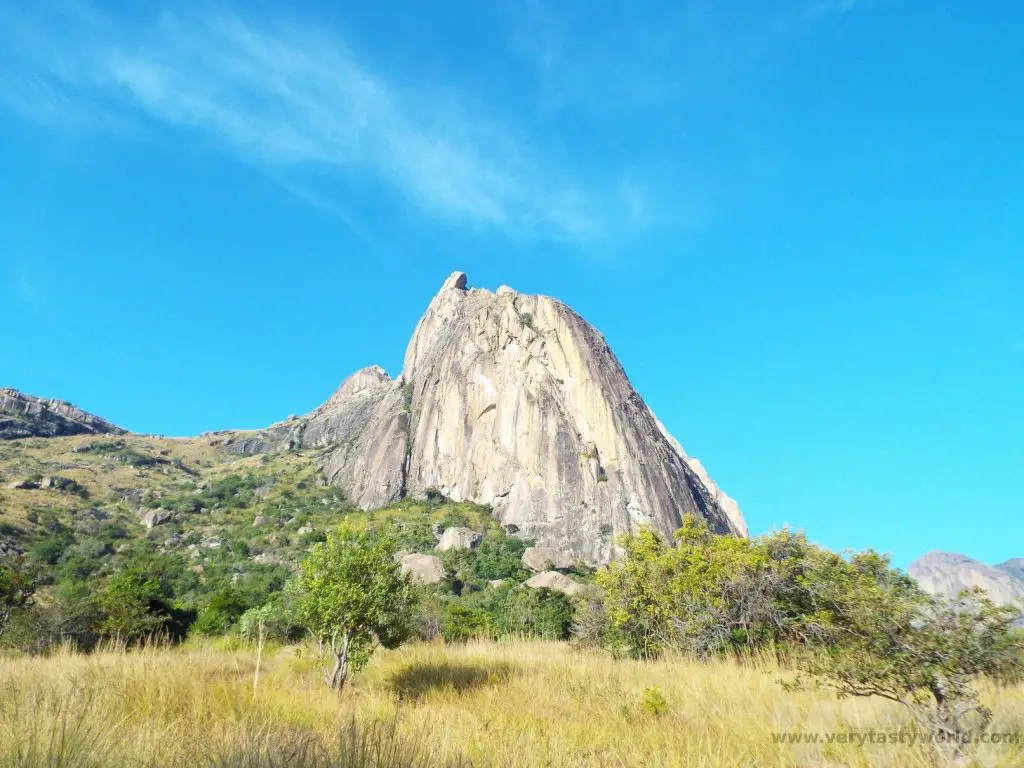
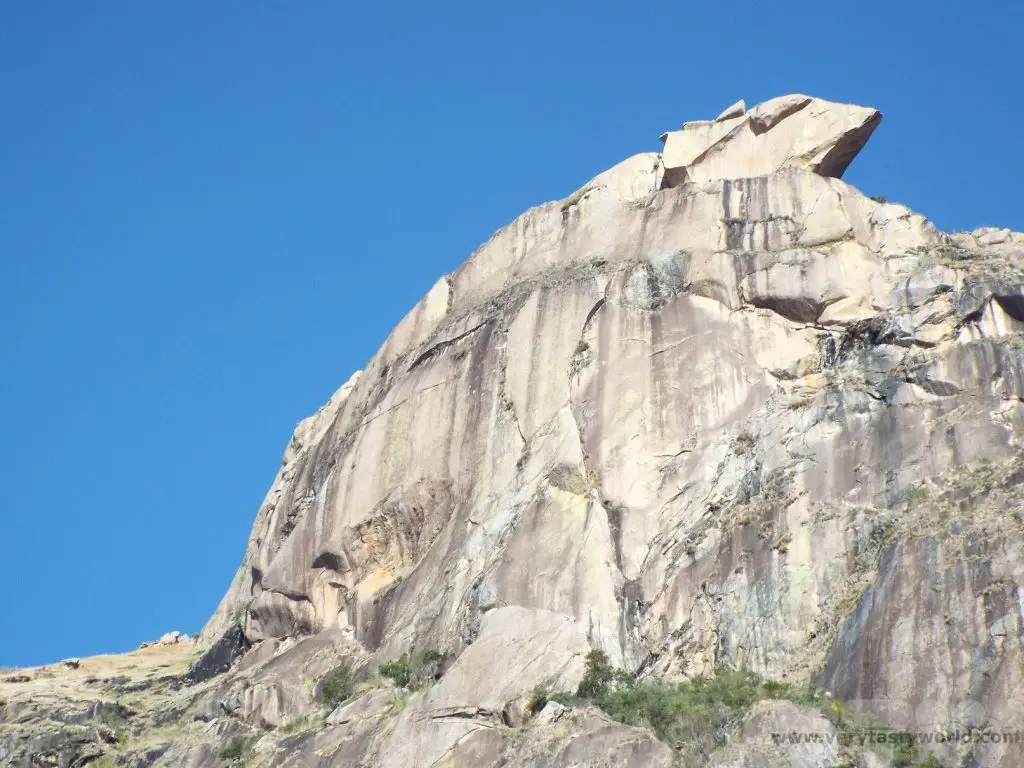
It’s about a 600m ascent and the view from the top of the ridge is spectacular.
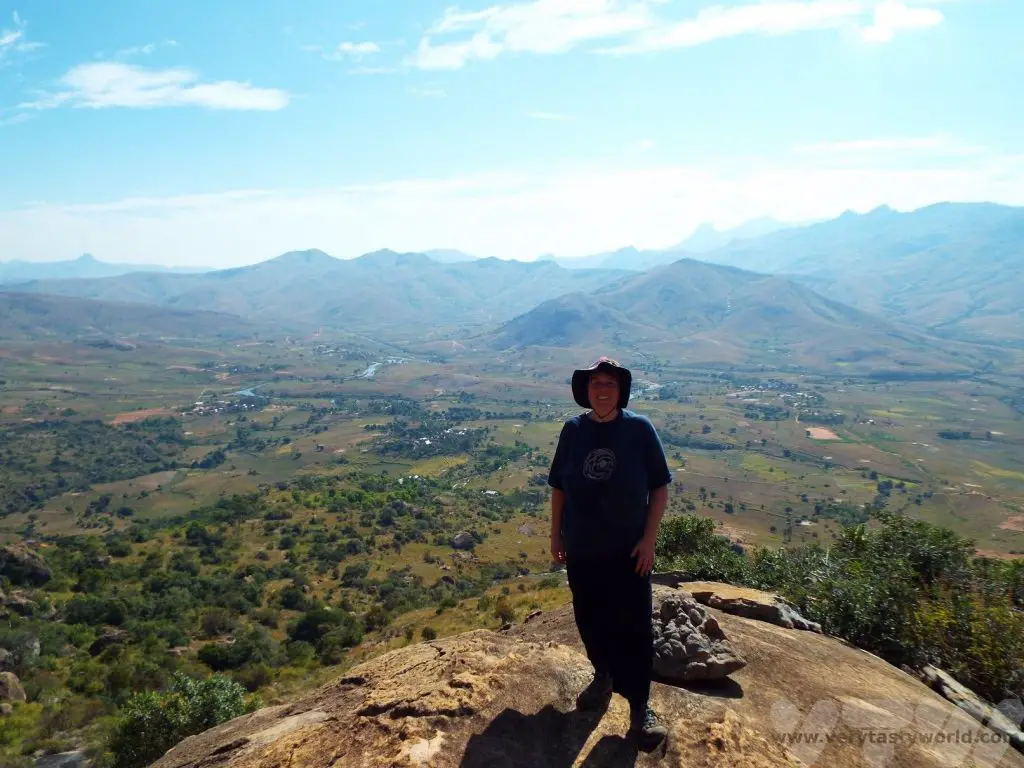
And there’s also a lovely easy stroll through the fields and paddy fields to a natural swimming pool…
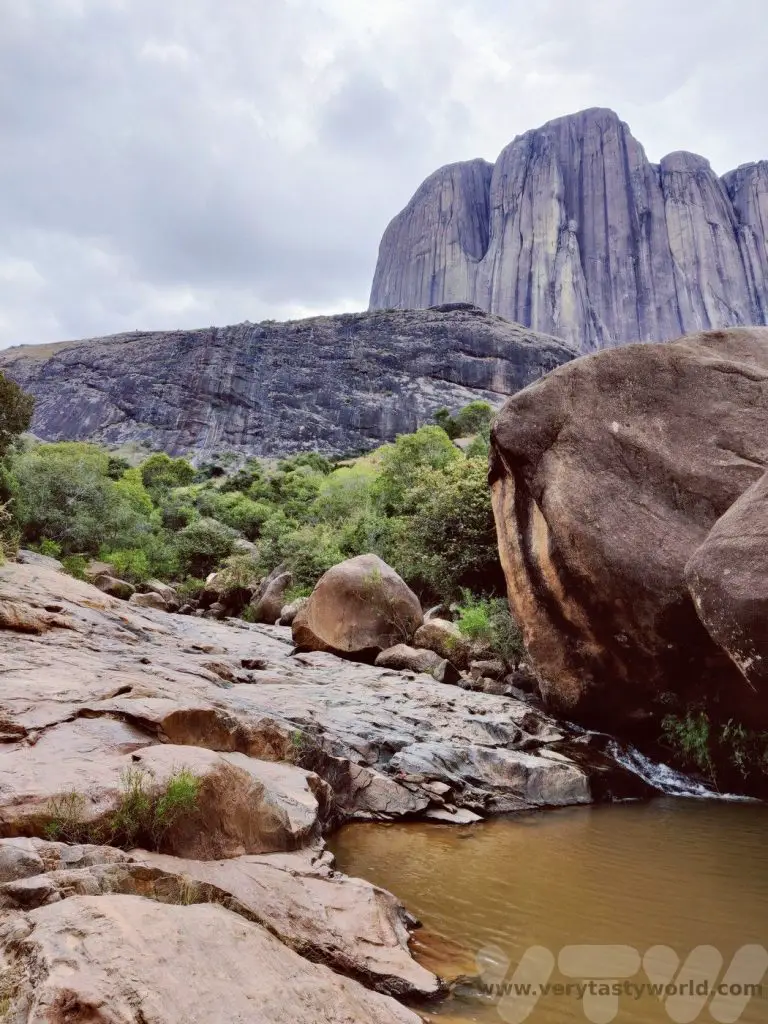
… and then through the forest, where you can see ring-tailed lemurs, and on to the local village. It was interesting to learn about the crops grown in the area and how the plants of the forest were used for medicinal and other practical purposes.
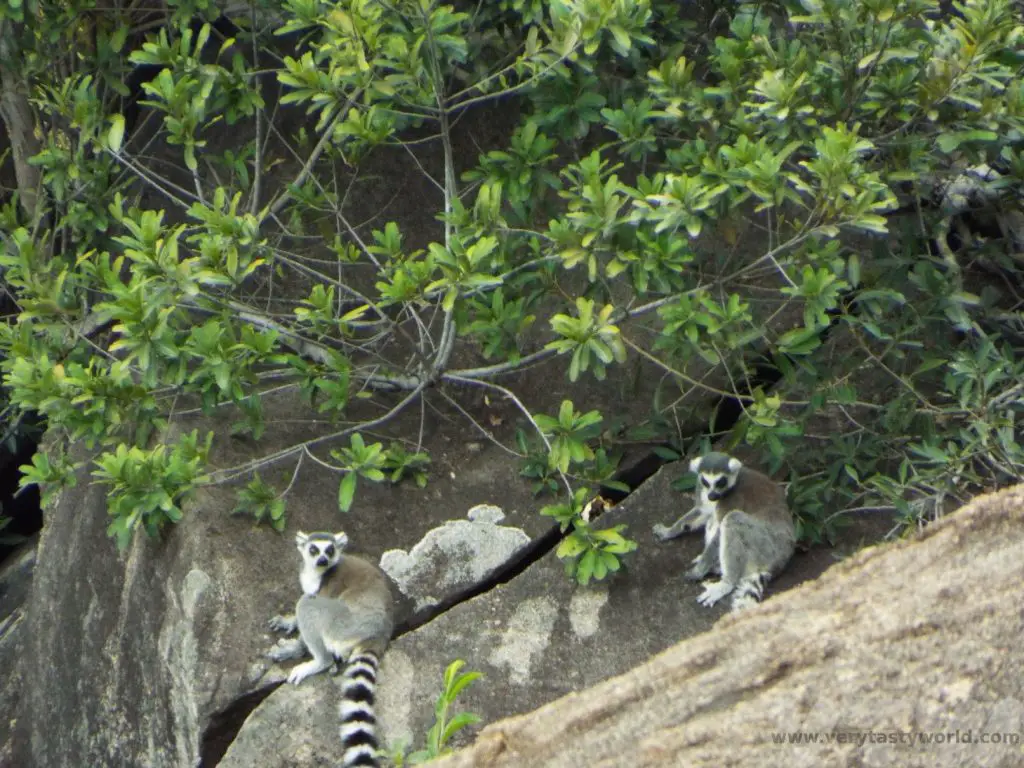
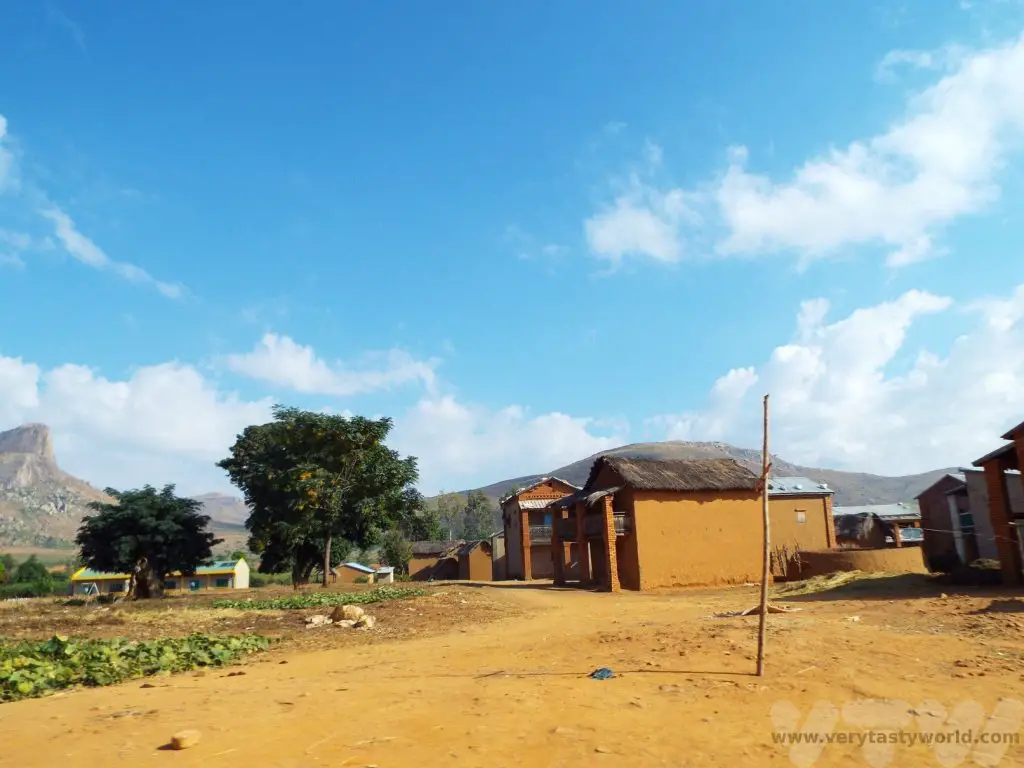
Andringitra to Ranomafana
350km (~5-6 hours)
This was another long drive day but we had a few stops on the way. The Anja Community Reserve, south of the district capital city of Ambalavao, is a community-run forest where local people were able to guide us and we could spot some of the local ring-tailed lemurs.
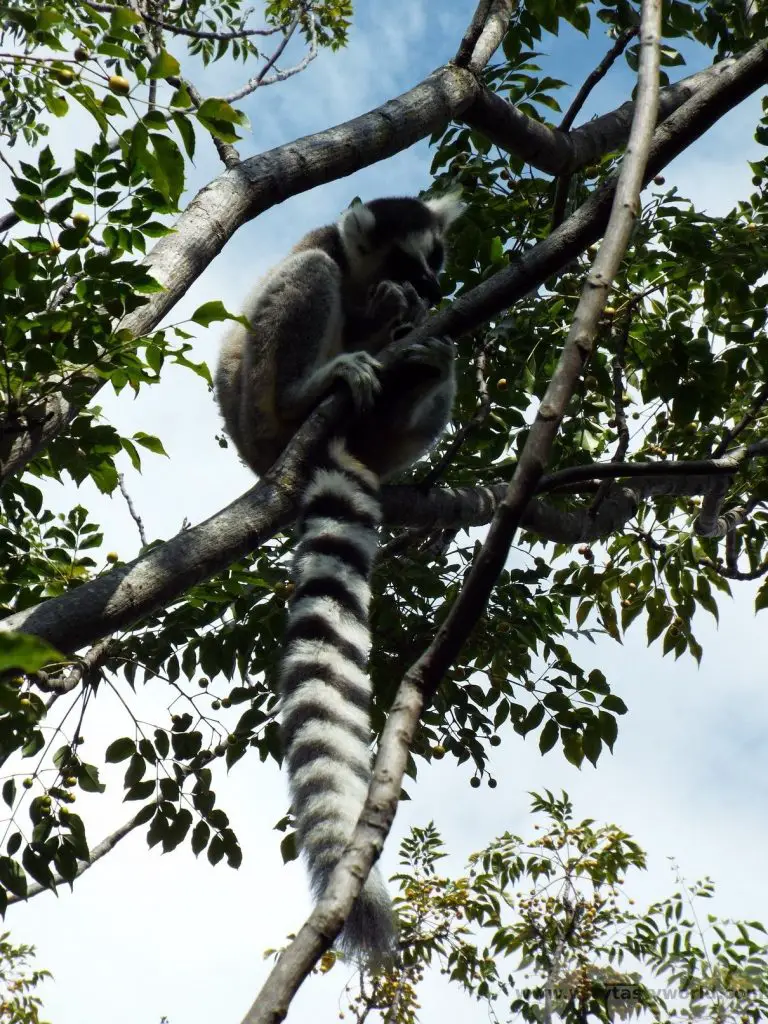
This would be the last place we would see the ring-tailed lemurs. Different species of lemur tend to live in specific parts of Madagascar. The ring-tailed lemurs have 14 black stripes and 14 white on their tails. They are fascinating to watch – lively and agile as they leap through the trees.
After a short drive to Ambalavao, the major city in the area, we arrived on zebu market day. Zebu are the livestock of the Bara tribe. They are cattle which have a distinctive hump, related to the species farmed by the Maasai in Kenya and Tanzania. Zebu is a common meat eaten in Madagascar and the hump is considered to be a delicacy. People travel from miles around to buy zebu at the market. The bull in the picture on the right (below) was worth about 2.5million Arairy (about $500 US).

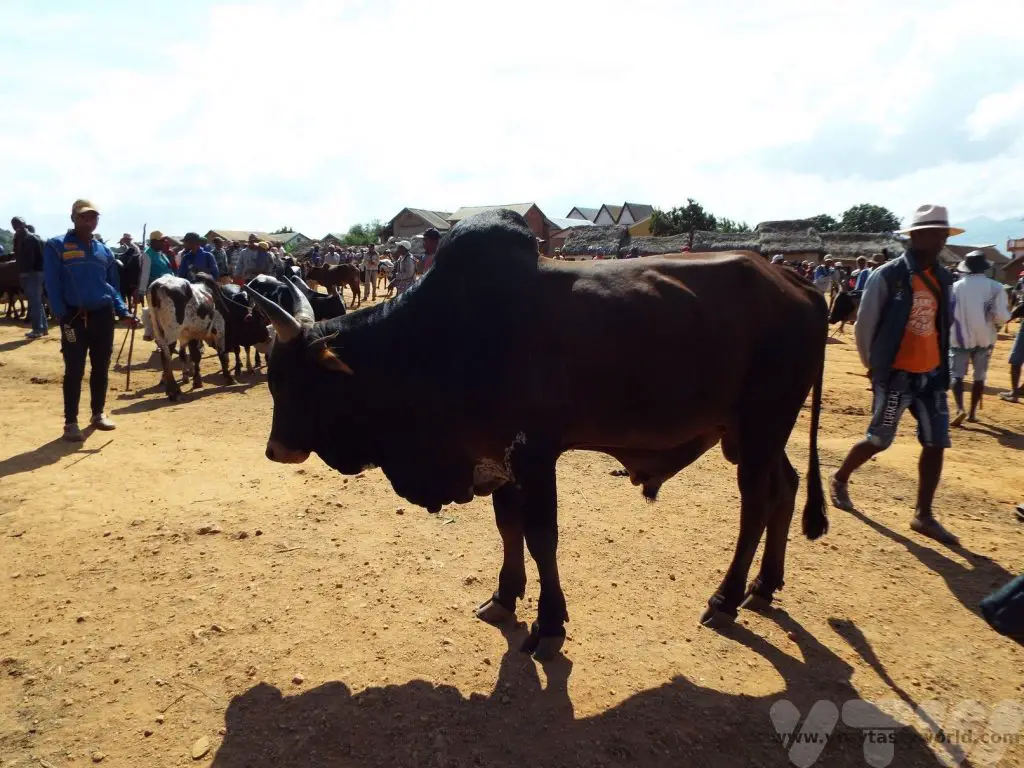
We also visited a paper-making facility of the Antemoro people. It’s very pretty flower-embedded paper.
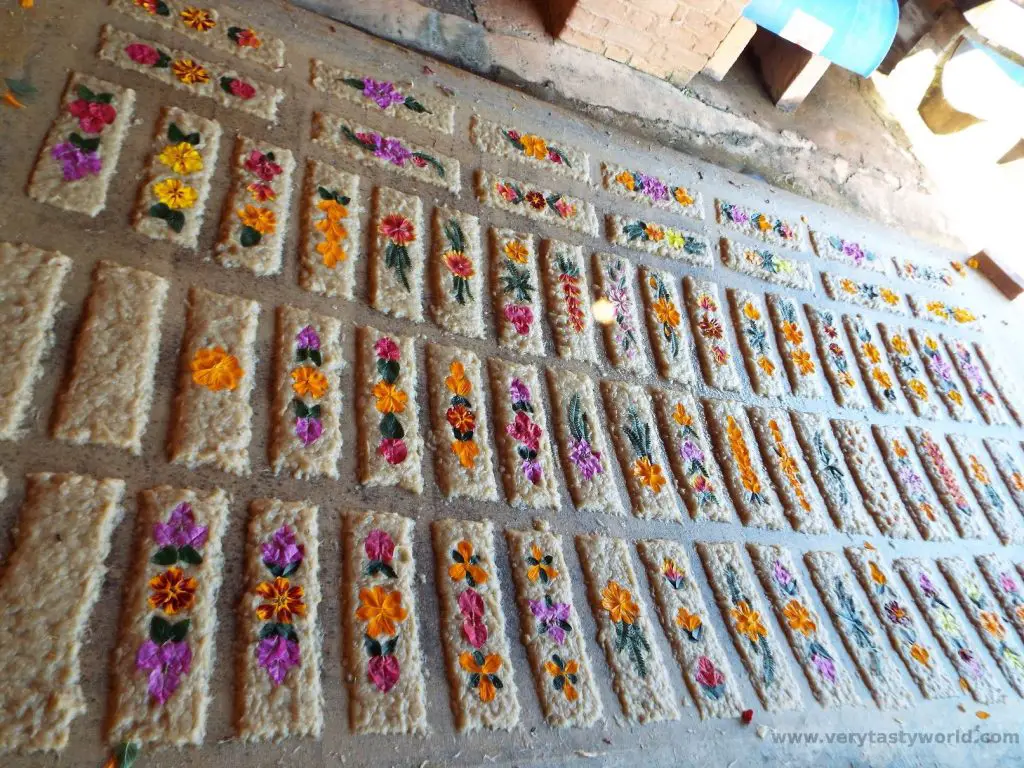
Ranomafana National Park
The deciduous rainforest of Ranomafana marked another transition in geography.
It was dark when we arrived at Ranomafana but we had a night walk planned. Walking along the road (you are no longer allowed to walk inside the rainforest because it is really dark and people have fallen over tree roots in the past) it is possible to spot many different creatures, including chameleons (which don’t change colour at night), frogs and, if you are lucky, the shy nocturnal mouse lemur, the smallest of all the lemurs. (We didn’t get lucky here but we did later in our trip.) The chameleons were fascinating.
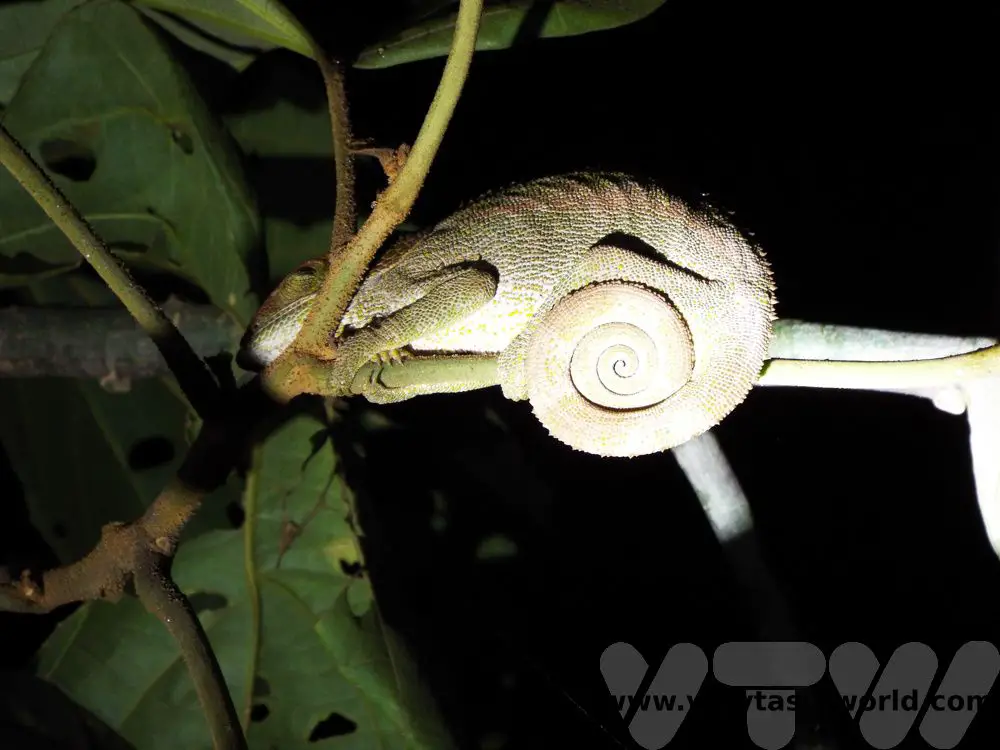
The blue-legged chameleon was particularly colourful.
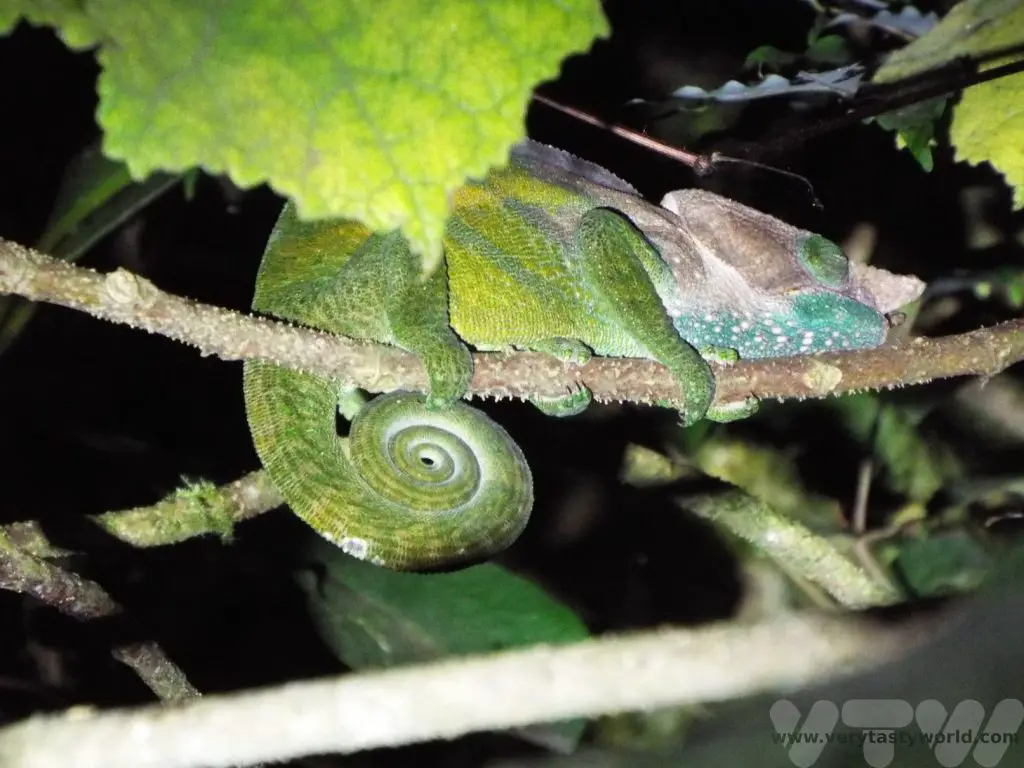
The following day we visited the rainforest. The Ranomafana forest is huge, covering more than 41,600 hectares (161 square miles). It was established as a national park in 1991 and has a research centre. Scientists travel from all over the world to discover and learn about its flora and fauna.
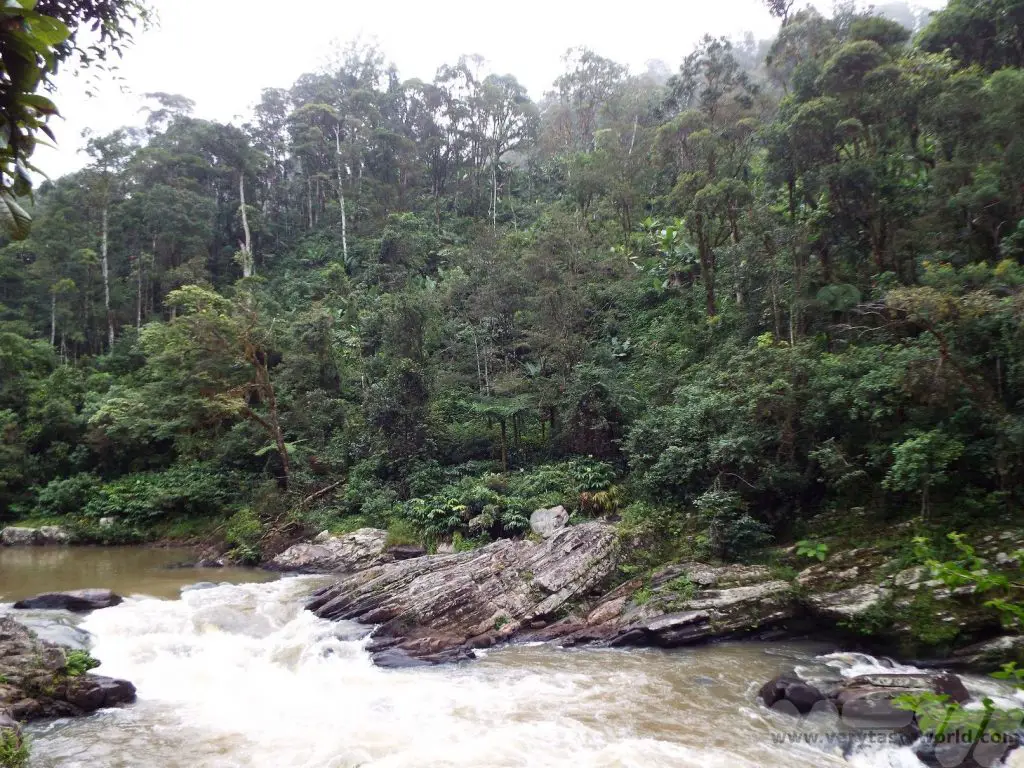
It has seven diurnal species of lemur and four nocturnal. With our excellent guide, Chantal, aided by expert spotters, we were able to see four species of lemur, including the critically endangered greater bamboo lemur.
We also saw the golden bamboo lemur.

Red-fronted brown lemurs have incredibly expressive faces.
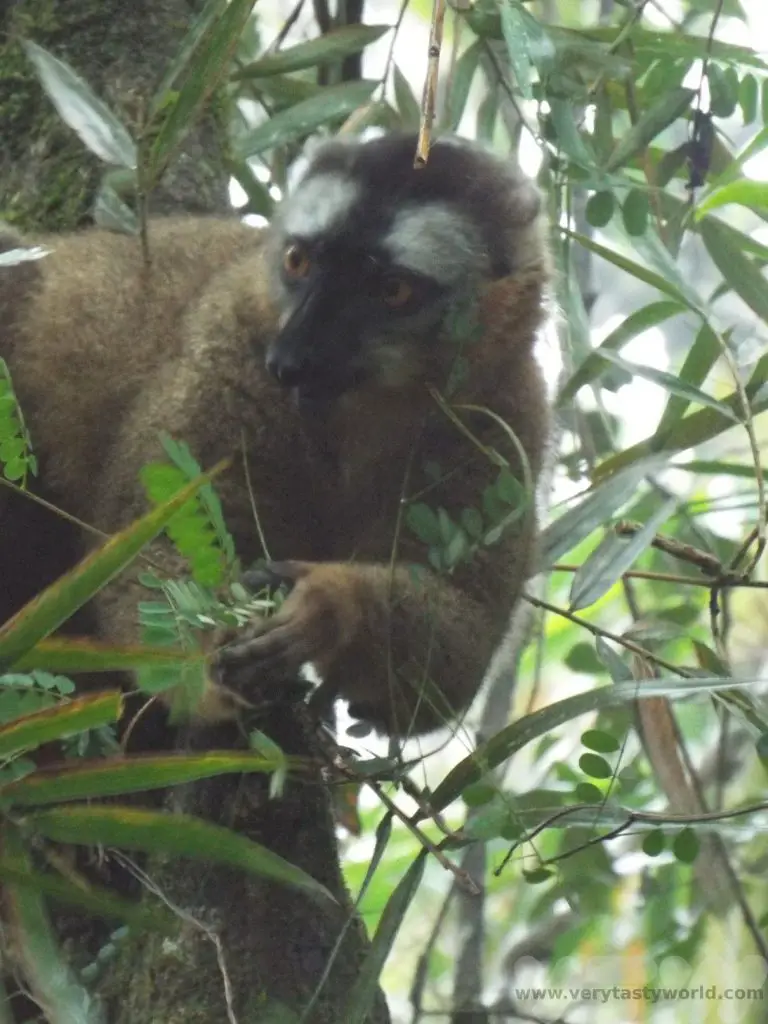
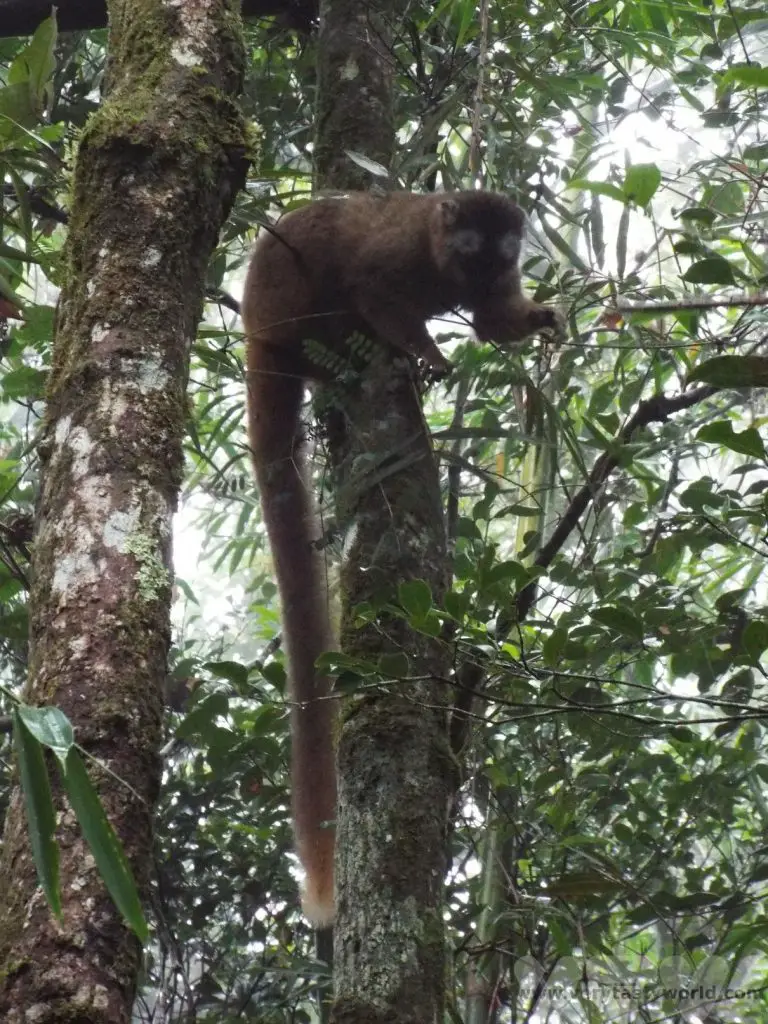
The red bellied lemurs were wonderful to watch, leaping through the trees.
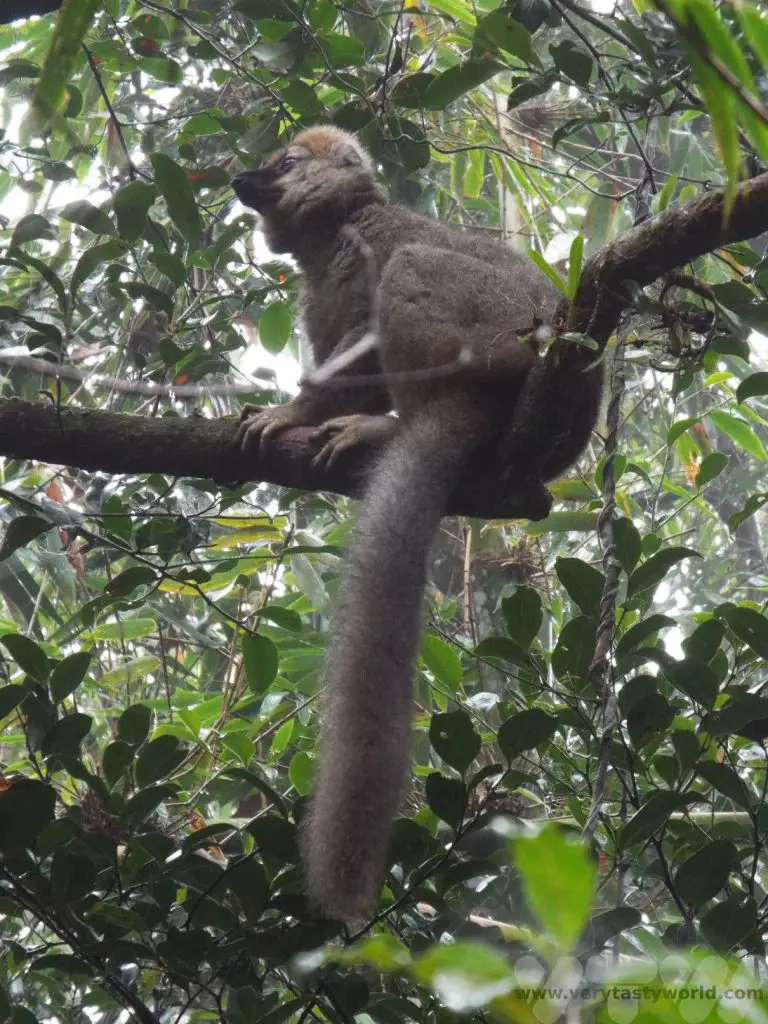
Another creature that totally befuddled us was the brilliantly named satanic leaf-tailed gecko. Our spotter told us there was a gecko on a tree – could we see it? The answer, despite looking really carefully, was an emphatic “no, but there is a dead leaf.” We had to move around the tree to get a picture that actually looked like a gecko.
In the afternoon we visited a local vanilla plantation. Vanilla is not indigenous to Madagascar but originated in Mexico. However it is widely acknowledged by many chefs that Madagascan vanilla is amongst the best in the world. A huge amount of work goes into producing this sought after spice. The plants are hand-pollinated because the bee that pollinates vanilla in Mexico doesn’t exist in Madagascar. The temperature and humidity are important factors in growing the plant.

There are strict regulations on the production and harvesting of vanilla. Plants are marked so that each plant is assigned to its farmer and pods can only be harvested at a particular time of year. The Government monitors production. The pods are harvested then blanched in hot water for three minutes. They are then sun-dried over 10 days – the heat and humidity levels need to be just right.
We couldn’t visit and not buy some vanilla pods – and other spices such as cinnamon, wild pepper and wild ginger – to bring home as foodie souvenirs. We were advised to keep them in an airtight glass jar, although the pods apparently can also be frozen.
Ranomafana – Antsirabe
250km (~6-7 hours on bumpy road)
Another long drive day of driving with a couple of cultural stops.
We passed through the Betsileo region which is known for the wood carvings of the Zafimaniry people, acknowledged as a UNESCO Intangible Cultural Heritage.
The Zafimaniry community have a woodcraft heritage. Foresters and craftworkers have a highly skilled knowledge of the local wood and how to craft it. We visited a workshop where we could meet craftsmen who not only carved intricate and beautiful pieces from mahogany and rosewood, we also saw them make their own tools. Even to the extent of making the blade for a hand-pulled bandsaw.
The quality of the products is exceptional. There is a large shop and, while we sometimes get a bit annoyed by visiting a small workshop followed by a big shop, we couldn’t resist buying a number of these top-quality pieces.
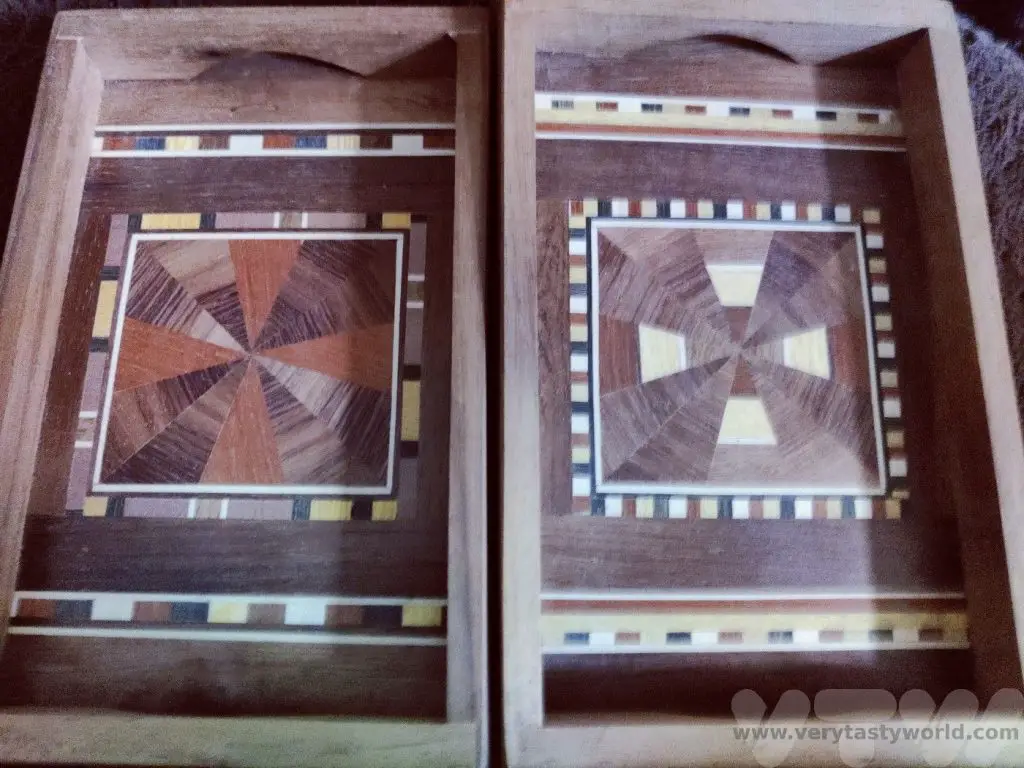
We also enjoyed a Malagasy lunch with traditional dance and music.
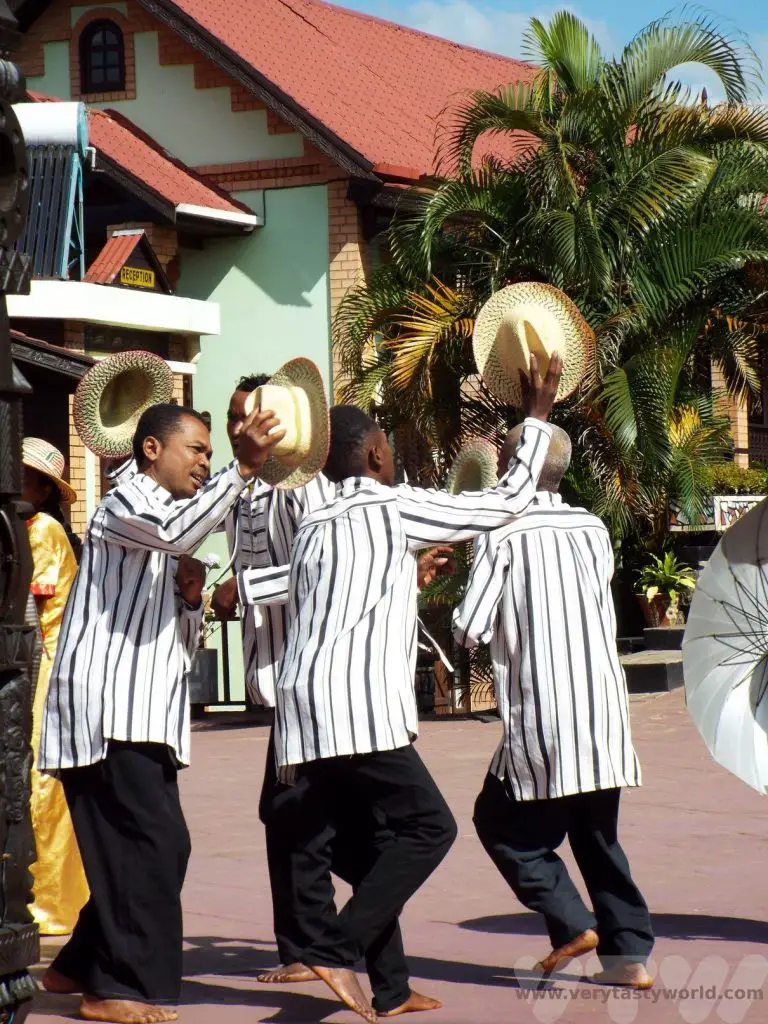
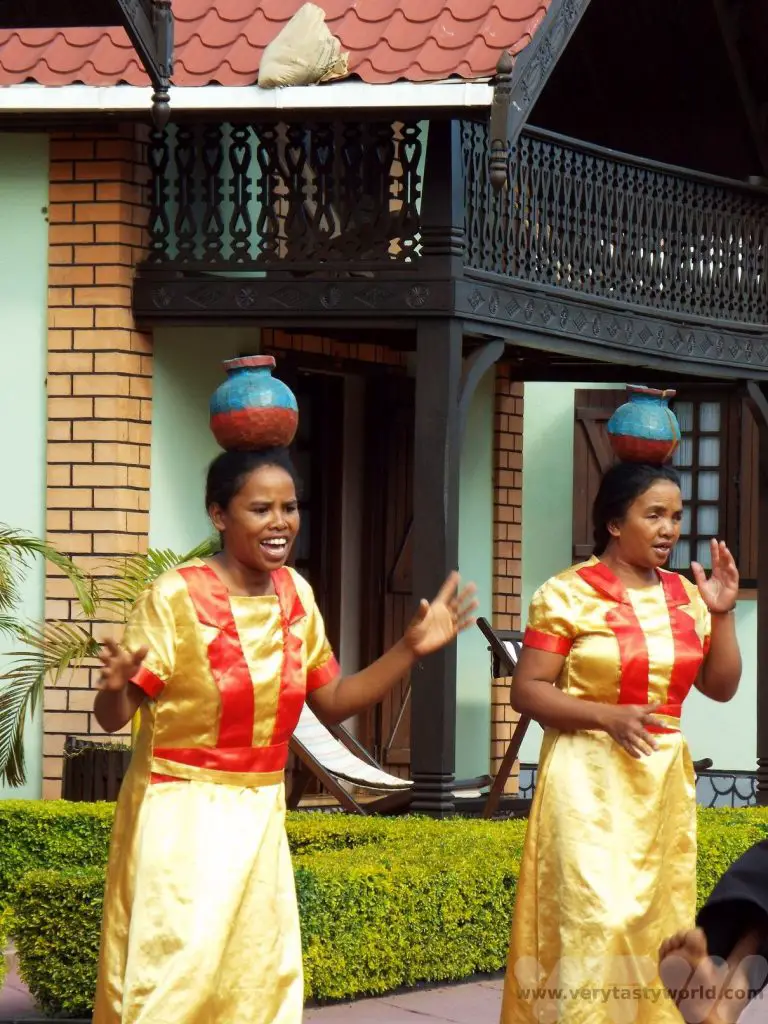
Rice is a staple in Madagascar. We saw paddy fields all over the country. The Betsileo are farmers and are one of the wealthiest tribes in the country due to their impressive cultivation techniques.
We enjoyed red and white rice with zebu steak, tilapia fish with chilli and ginger spices, beans and belly pork cooked with cassava leaves.

Antsirabe – Antanananviro
150km (4-5 hours drive)
Antsirabe is the third largest city in Madagascar and is an important commercial centre. It’s also home to the brewery which makes the national brew Three Horses Beer or THB as it is affectionately known. It’s a light, refreshing pilsner and we enjoyed it many times during our trip.
We had a long drive ahead so only had a short time to explore Antsirabe. We visited a famous precious stones facility and learned about the minerals that can be found in Madagascar. It is famous for its sapphires. We bought a lovely piece of crystalline, a stone that can only be found in this country.
We also visited Independence Square, a long avenue which contains a park. It commemorates Madagascar’s independence from French colonialism. The monument represents every tribe within the country.
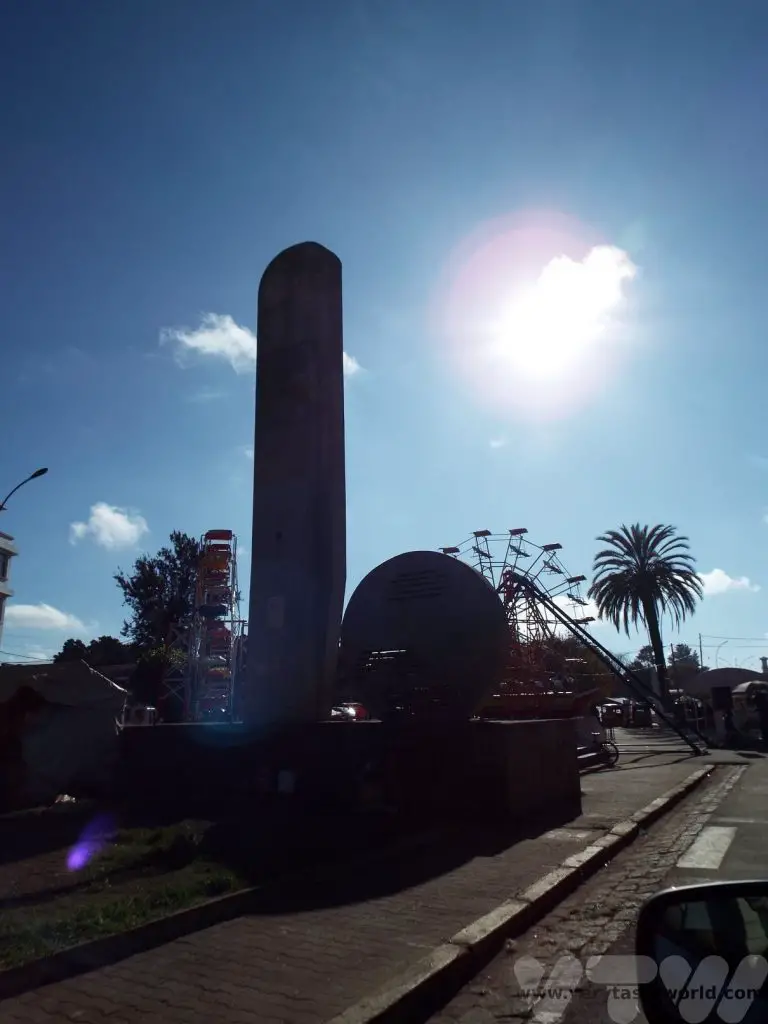
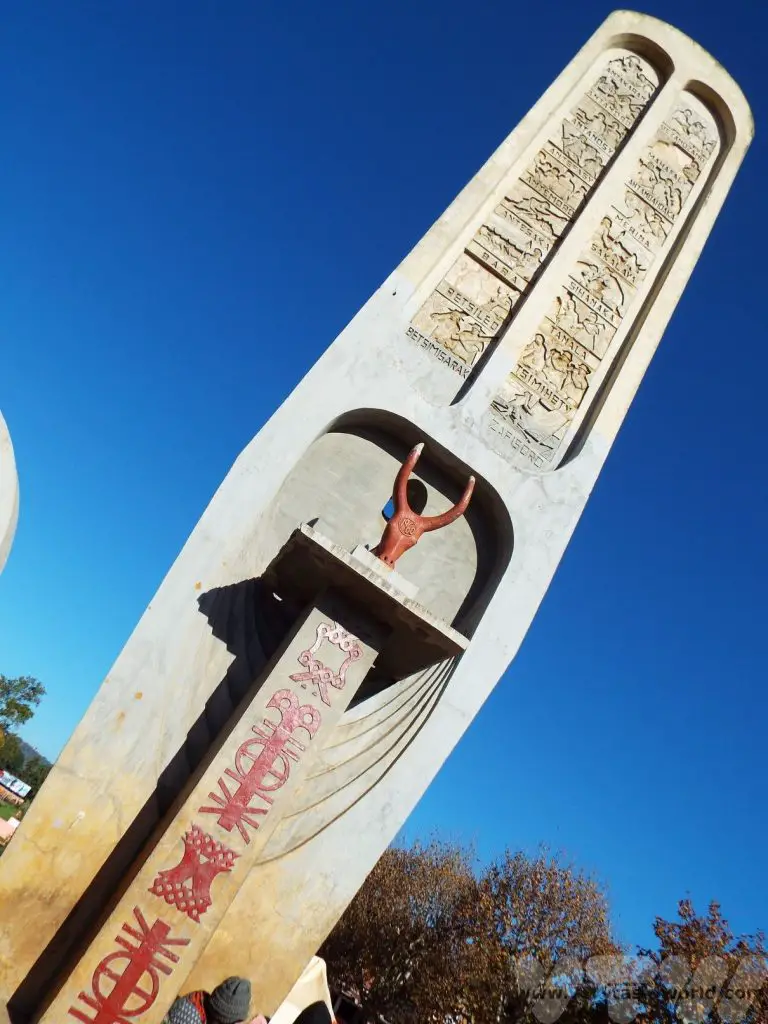
The RN7 then takes us to Madagascar’s sprawling capital, Antananarivo.
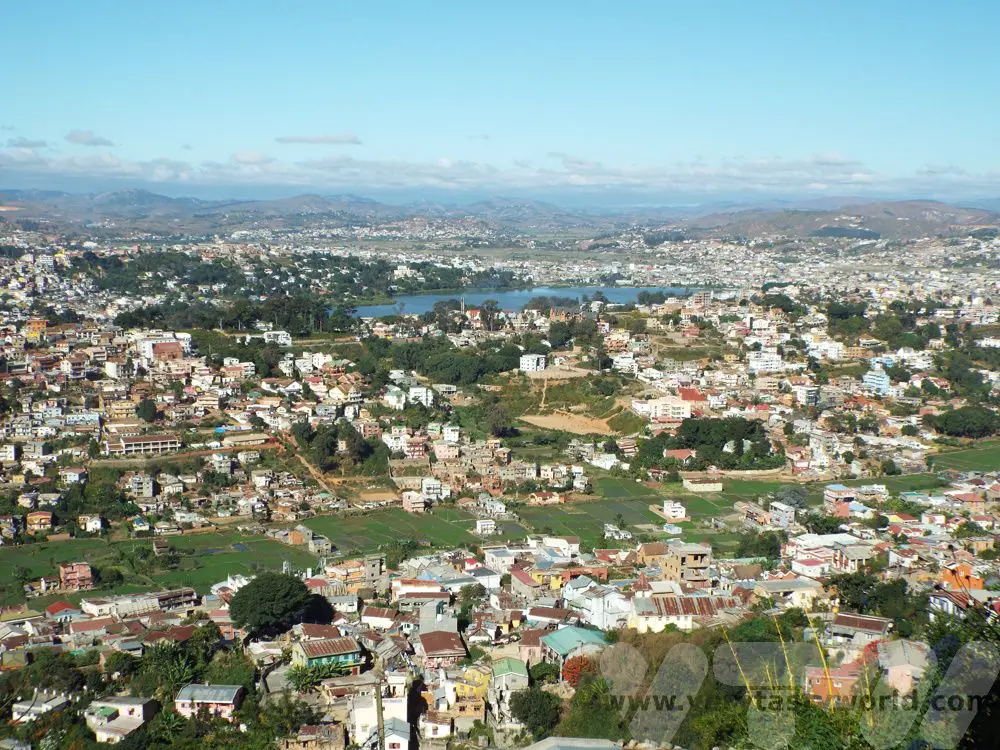
This trip along Madagascar’s RN7 took a week to complete. While we were in the country we also spent some days in the east, driving along RN2 to explore the rainforests in the highland regions. We’ll write about that another time…
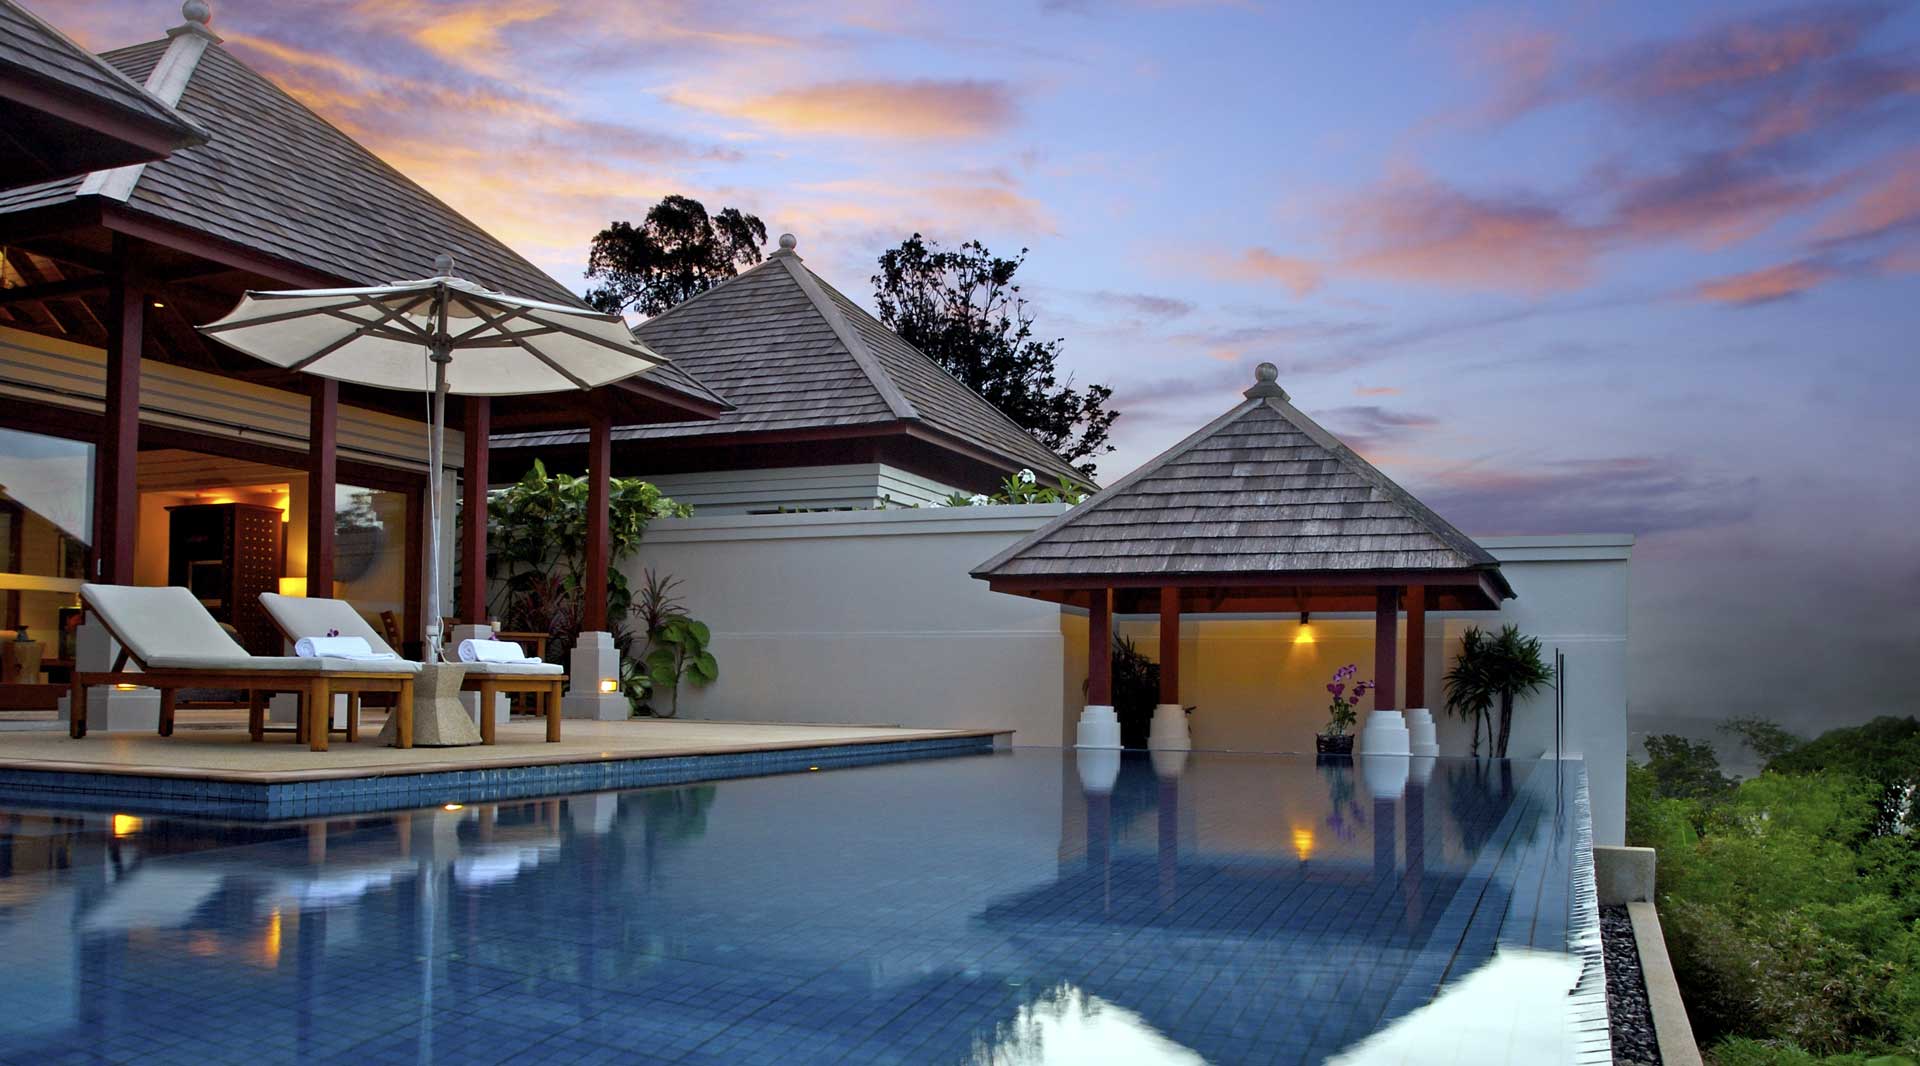

Traveller Tips For Madagascar
What Is The Food Like?
We plan a much longer post on Malagasy food in the future but here’s a brief overview.
Firstly, most of the hotels we stayed in offered European food. We found this to be really disappointing as we always want to try the local fare. That said, many hotels were very happy for us to go off-menu at breakfast provided we ordered a Malagasy breakfast the night before. So we often enjoyed rice porridge with zebu steak or meatballs – a delicious, filling start to the day.

Malagasy people love rice. It is eaten for breakfast, lunch and dinner and in enormous portions. We have big appetites but had a standard portion of rice was too much for us, so we generally shared it between us.
Zebu is a popular meat. It tastes just like steak. Zebu hump is a delicacy – it’s meaty and slightly fatty but very soft. Zebu skewers with a nice cold THB beer are a perfect snack food.
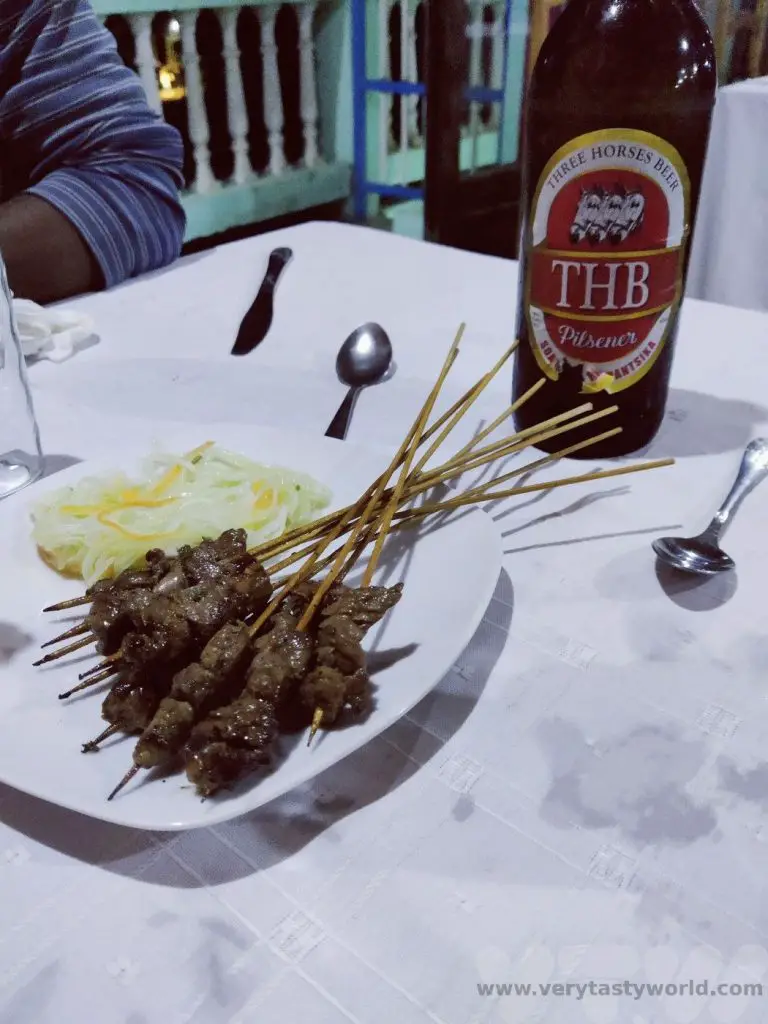
The local tipple is rum. We would see distilleries along with RN7. Rhum Arrangé is a wonderful way of drinking it. This is a great jar of rum infused with different flavours – vanilla, coconut, lychee, tamarind, ginger, mixed fruit, local fruit such as tapia amongst many, many more. We did our best to try as many variations as possible.
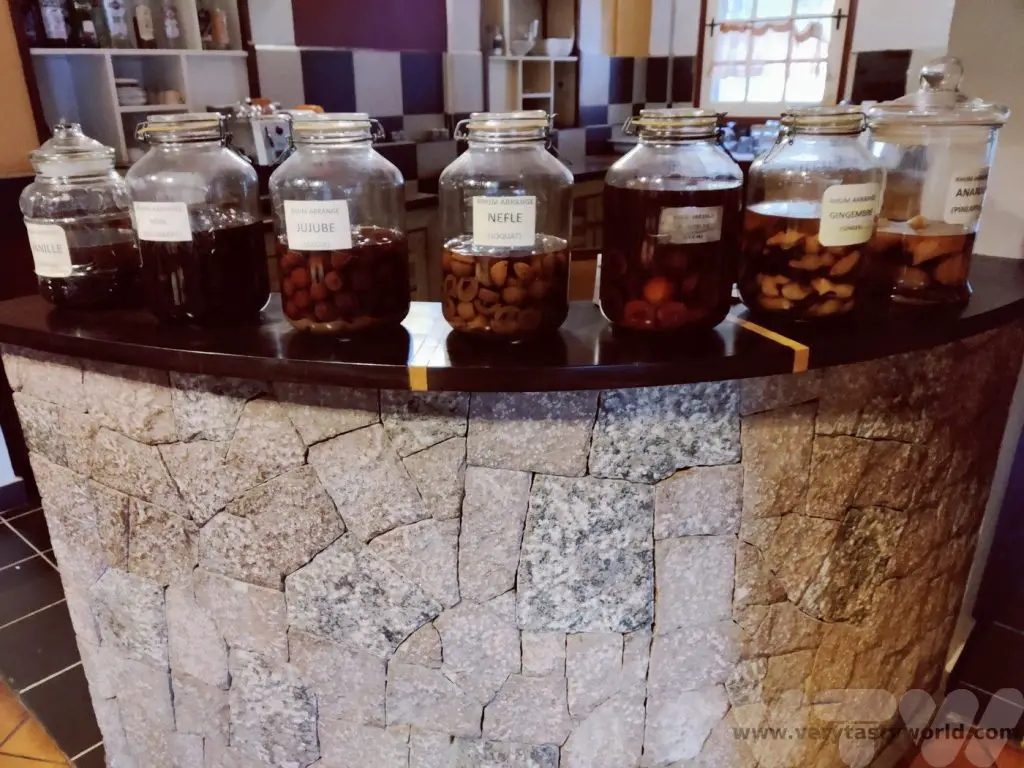
How Do You Get Around?
We booked a tour with a local company who were excellent. They provided a 4WD and a wonderful driver-guide, Farley, who knew his way around the country. The roads in Madagascar can generally be described as awful. Think of the biggest pothole in your local street? That’s nothing compared with Madagascar – some of the potholes in the roads are like craters. This makes driving very slow and occasionally extremely bumpy. To make up for this scenery is wonderful. If the government could do one thing to make the country more accessible it would be to fix the roads.
It is possible to hire cars and the RN7 is probably the best road for a fly-drive trip if you want to drive yourself. That said, some of the national parks were located several kilometres from the main road and towns were extremely busy with all sorts of vehicles to drive around. We often love driving ourselves when we travel, but were very glad that we had a driver, who knew the roads well, on this trip.
Public transport is available if you are feeling hardcore. The buses are generally mini-buses that are usually bursting at the seams – luggage goes on top and people fit into the vehicle. The buses will be a lot slower than private cars.
The national airline Air Madagascar can transport you between major cities. It doesn’t have a great reputation for timeliness but it has a good safety record and we found the service to be fine. We recommend giving yourself a bit of leeway in terms of arranging connecting flights. We were extremely lucky that, when our international flight arrived 14 hours late, we managed to get an internal connection thanks to receiving lots of help from our tour company.
What is the Language of Madagascar?
Local people speak Malagasy, which is derived from a number of languages, and French, the language taught in schools. Most hotels and tourist attractions will have someone who can speak English.
Any attempt to speak Malagasy will be appreciated. These are the words we picked up.
Hello – salaam (salaama, salaame also work but don’t say salami!)
Thank you – misaotra
Slowly, slowly – mora mora (be careful, mola mola means crazy!)
Delicious – matsiro
Can I drink the water?
No, you will need to use bottled water. It is cheap to buy – around £3/$4US for 8 x 1.5L bottles and all towns will have a store that sells water. Some hotels do provide water. And the tour company we travelled with supplied us with 1.5L each per day. We also recommend brushing your teeth using bottled water.
How Do I Get Money?
Money was a bit of an issue in Madagascar. The unit of currency is the Malagasy Ariary. Cash is king and there were only a very few places where we could use credit cards. Even gift shops at tourist attractions are largely cash only. ATMs are available but only in large towns, so make sure you get enough cash to get by between towns.
There is a cashpoint at the airport and we recommend getting a reasonable amount of money on arrival, although even then there was a restriction on how much you can withdraw – it wasn’t enough for the entire trip. The notes dispensed will be 20,000 Ariary (around £3.50/$4.50 at May 2023). These are actually large denominations and we found it difficult to get change from a large notes when spending them in shops or restaurants. Hotels were quite helpful at changing these for smaller notes, but bear in mind that it’s worth getting hold of those smaller denomination notes if possible.
Is Tipping Expected?
We were expected to tip our guides and this was fine, we incorporated it into the cost of the trip. The going rate at the time of travel (May 2023) was 20,000 Ariary per person per day. What we didn’t quite expect was that, along with guides who took us through the national parks, spotters were also employed. These lovely people would run through the rainforests and national parks looking out for interesting wildlife and then phoning our guides to let us know where to find them. They were brilliant and thanks to these spotters we saw a lot of wildlife. So it’s worth planning extra cash for tipping the spotters as well.
Are There Any Health Considerations?
There aren’t many dangerous creatures in Madagascar but undoubtedly the mosquito is one of the most hazardous. Malaria is prevalent throughout the country. We used DEET jungle spray and slept under mosquito nets. Unfortunately we did get bitten because we are strawberry-flavoured to mosquitos who just love munching on us. Like Achilles’ vulnerable heel, just a little bit of flesh exposed to the elements and they were feasting on us – so we also took anti-malarial pills. We recommend speaking with your healthcare professional before travelling. And, obviously, take any prescription medicines you need.
Packing Essentials For A Madagascar Trip (aside from your usual clothes and things)
Good walking shoes or boots. We recommend wearing these on your flight just in case your main luggage doesn’t arrive.
Waterproofs – rainforests are called rainforests for a reason!
Swimming gear – there are hot springs and natural pools to go swimming in. (You could also bring a travel towel but our hotels were happy to lend us additional towels.)
Torch for night walks. A head torch is often useful as well. The power did go out briefly a couple of times in some of more remote regions.
Binoculars for viewing wildlife, especially if you are interested in birdwatching.
Camera with a good zoom lens and quick shutter speed to captures those leaping lemurs.
Sun protection – sun hat and suncream.
Usual medication and talk to your doctor about anti-malarial protection.
Jungle insect spray which contains at least 50% DEET.
Will I See Penguins in Madagascar?
No! While the Hollywood movie raised a lot of awareness about this magical country, you won’t find penguins in Madagascar. Neither will you find any of the Big Five game animals of Africa. But Madagascar’s wildlife is unique and emphatically worth travelling to see.

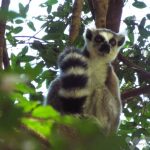

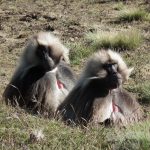
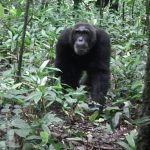
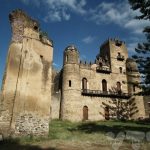

Tree Climbing Lions, Hippo Hordes and Safari Shenanigans in Uganda
Queen Elizabeth National Park is one of the best places to go on safari in Uganda. As well as the Big Five game animals, it also has one of the biggest concentrations of hippos on the planet and one of world’s only two prides of tree climbing lions.
About the Queen Elizabeth National Park
Queen Elizabeth National Park is conveniently located between Kibale to the north, where you can trek with chimpanzees and Bwindi Impenetrable to the south, where you can trek to see the critically endangered mountain gorillas. On our way we stopped at the equator. It is possible to reach QENP from Kampala – it is located around 400km west of Uganda’s capital and it would take around 8 hours to drive there.
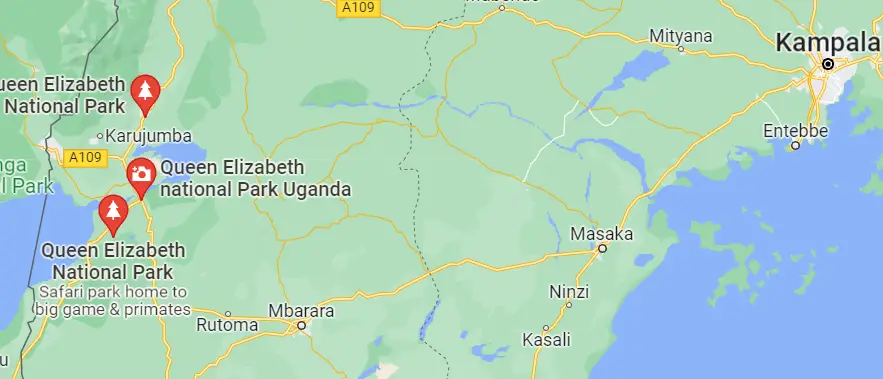
QENP was founded as a National Park in 1952 and is nearly 2000 square kilometres in size. It was originally named the Kazinga park but renamed after Queen Elizabeth II visited in 1954. QENP’s range extends from Lake Edward in the southwest to Lake George in the northeast. Both lakes are connected via the Kazinga channel. The park largely comprises savannah and grassland.
The best time to visit is during the dry season (January – February and June – September) but we visited in late October. The reason for this is that we were on a budget and timed our visit to take advantage of cheaper gorilla trekking passes later in our trip. October is officially rainy season but it doesn’t rain all the time and usually not all day. In fact we got really lucky with the weather for most of our trip and managed to see a huge variety of wildlife.
Entering Queen Elizabeth National Park
We enjoyed a couple of days on safari in this incredible park. We arrived from Kibale in the afternoon, crossing the equator. As with all national parks, you need a permit to enter and you are signed in and out. The Uganda Wildlife Authority website has information about the park, including entrance fees. We toured Uganda with a local company and they had pre-arranged the permits for us.
There is a small visitor’s centre which has some info about the park as well as a café which serves locally produced food and has a good wi-fi connection. It’s also possible to buy gorilla coffee there – the profits go towards the conservation of these marvellous and critically endangered primates, which share around 98% of our DNA.
En route to our camp at QENP we received notification of a sighting. A pair of lions which had been, ahem, mating in the afternoon and, if you’ll forgive the expression, were all shagged out.
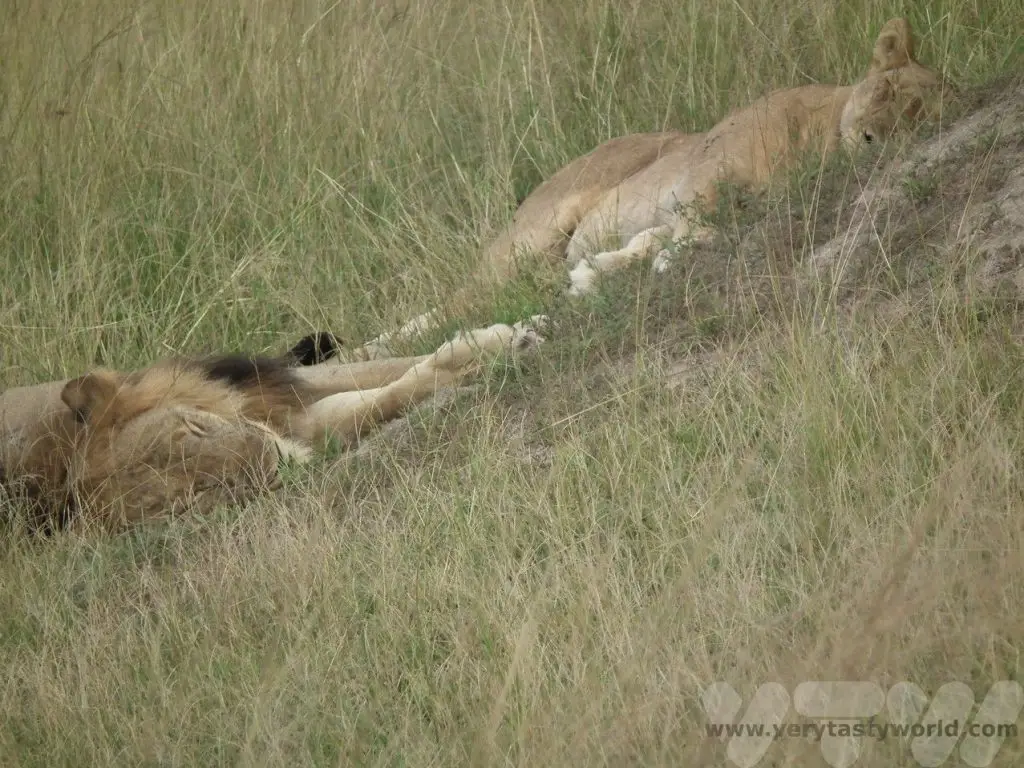
We stayed at the Kasenyi Safari Camp, located near Lake Bunyampaka. We had a large, tented room on a platform with a private bathroom. It was surprisingly luxurious and really didn’t feel as though we were under canvas. The lodge has a large, thatched communal area where everyone comes together to dine in the evening.
Because the camp is located right within the park the animals frequent the area, so we had to be accompanied by a gun-bearing ranger every time we wanted to walk between the main camp and our tent so that we didn’t end up being a very tasty snack for the lions. We could go out safely onto the tent’s decks to view the animals at night.
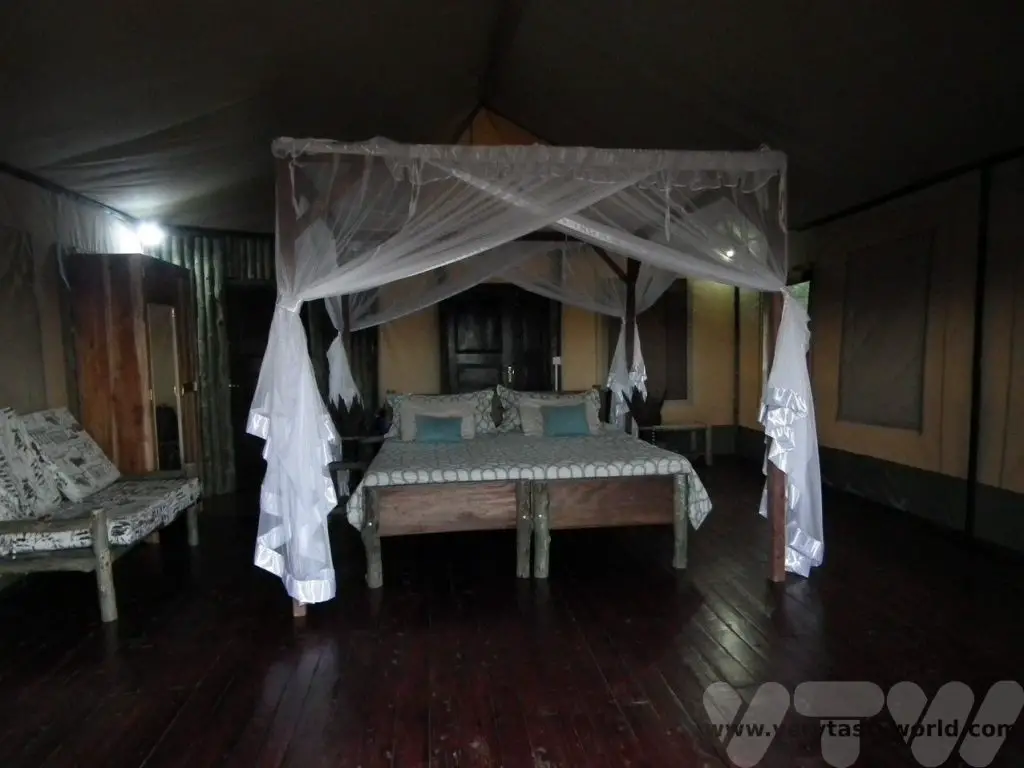
And catch the sunset over the lake.
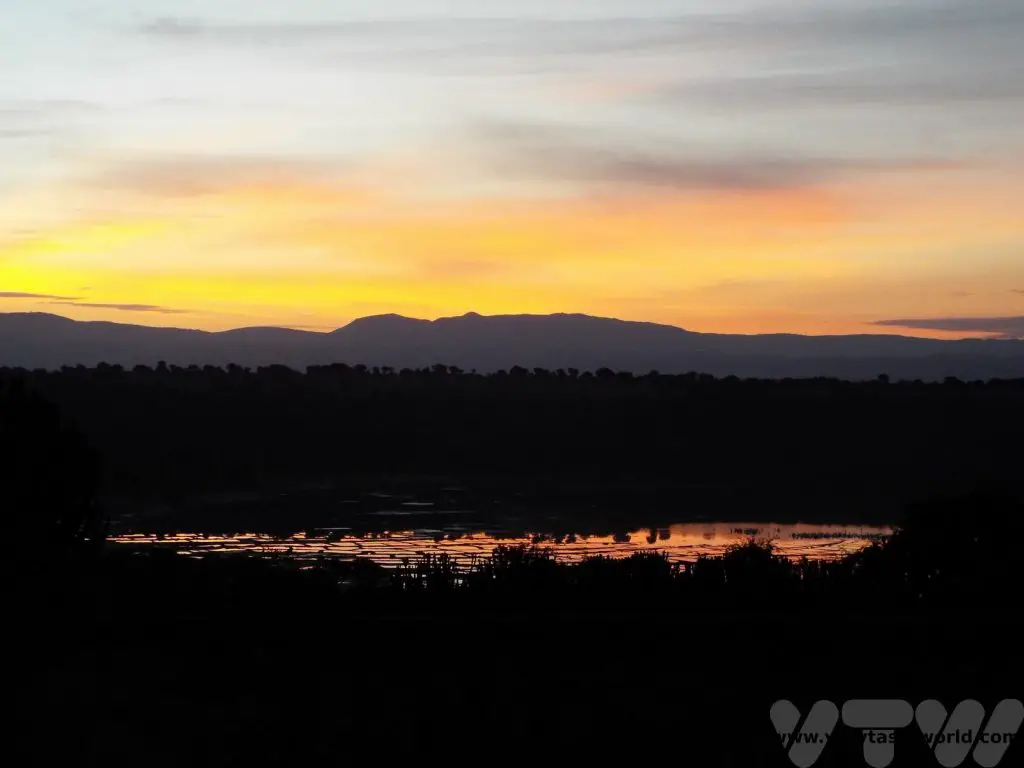
On Safari in QENP
It was an early start to get out into the park on the game drive. These drives tend to take place in the early morning and late afternoon as the wildlife is more active at those times. The animals tend to take a nap during the heat of the day. So for a morning drive before breakfast, take a couple of snacks to keep you going until you get back to camp.
Our first encounter was with an elephant strolling majestically in the morning sunlight.

Another elephant decided that what he really needed was an early morning scratch on a rock.
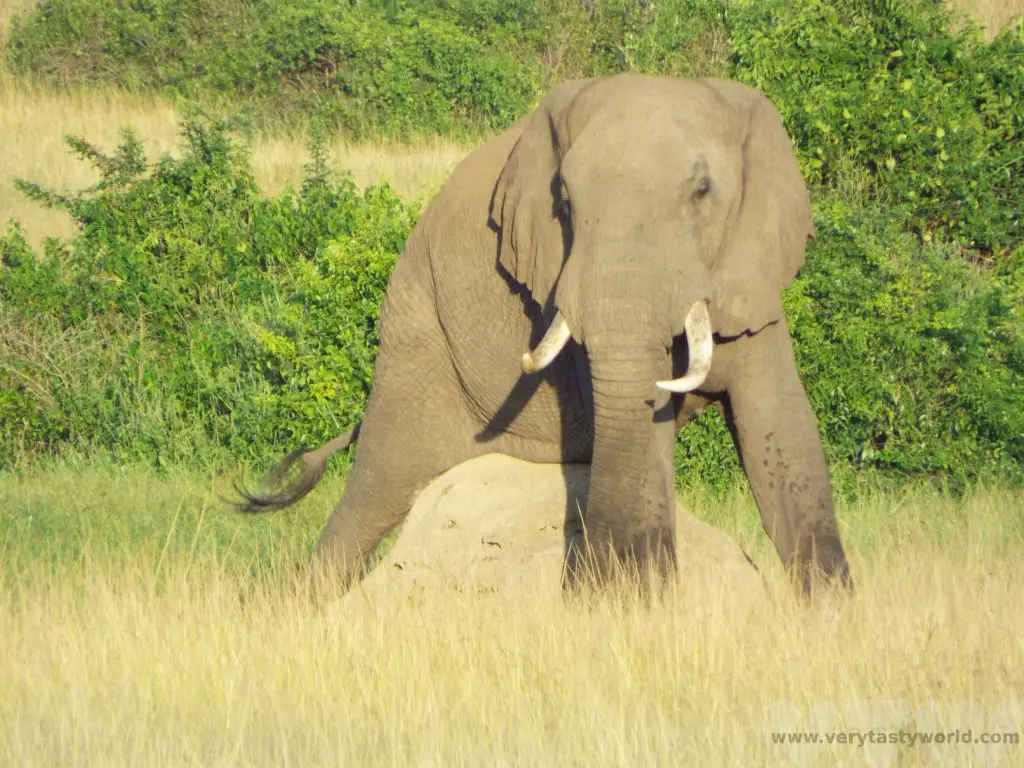
We also encountered buffalo…
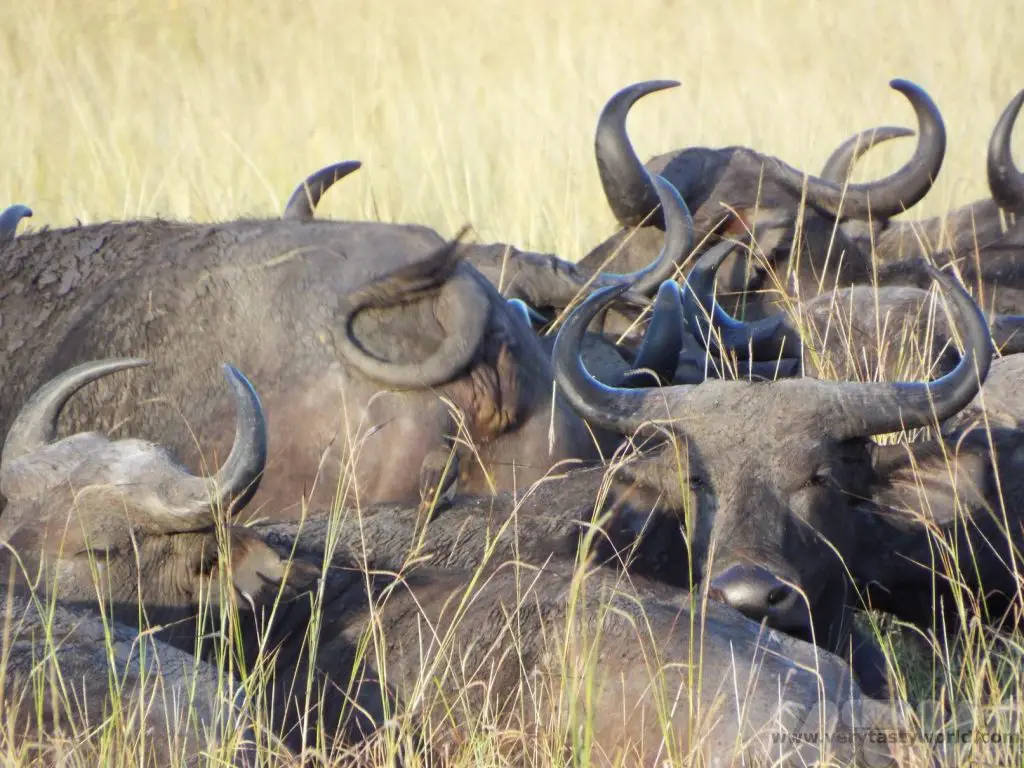
…a defassa waterbuck…
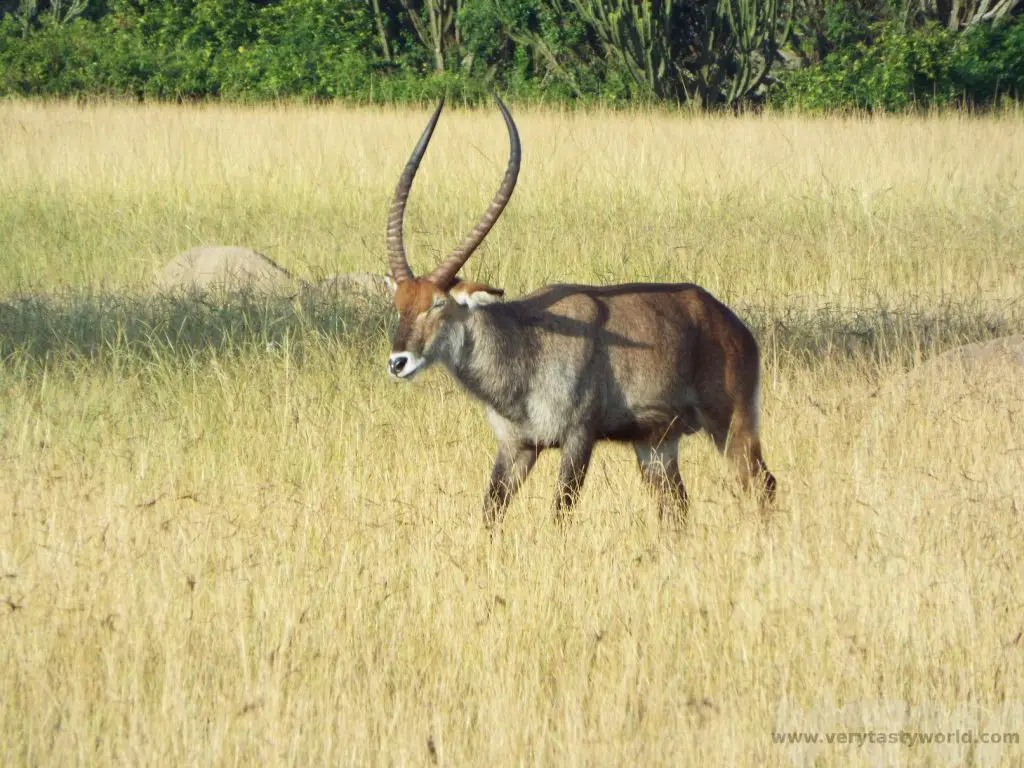
… and a couple of common duikers having a bit of a battle.
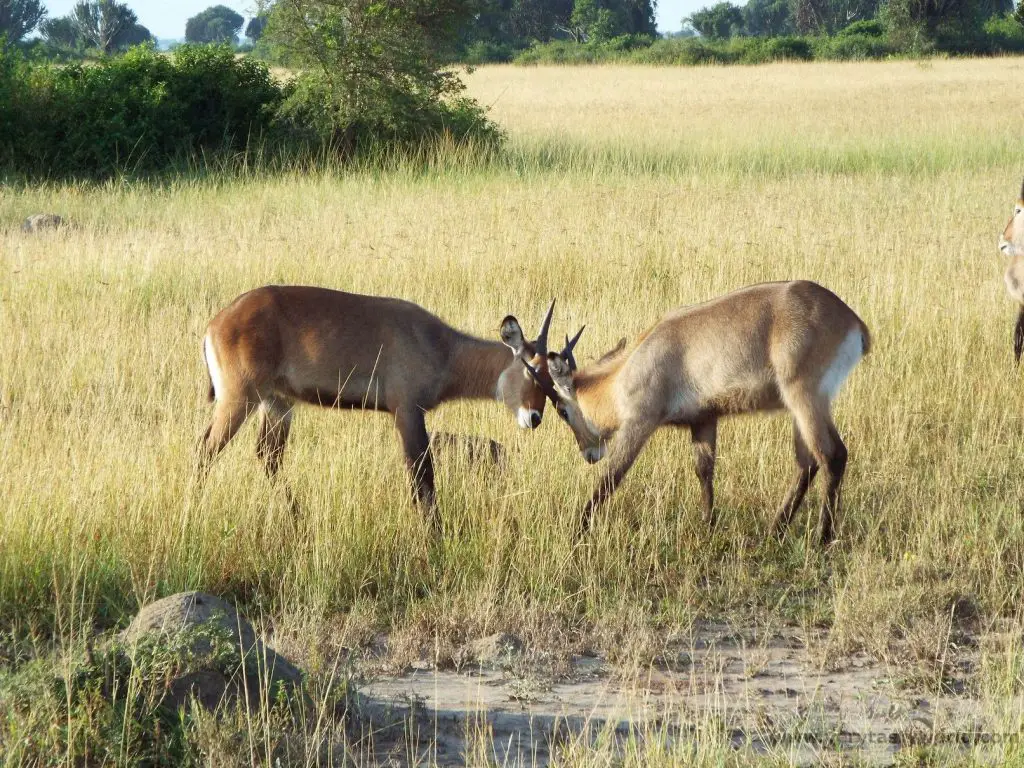
Many of the safari guides know each other, even if they work for different companies, and they all co-operate to let everyone know about animal sightings. If you are lucky, you will get there first and have the prime position for taking photos from your vehicle, at other times you may have to wait a while as vehicles wait for others to move on.
Then it was back to camp for breakfast. It was here that we discovered that we could go off-menu and ask for a local breakfast, and discovered the joys of a Ugandan rolex – an omelette rolled up inside a chapati. Delicious!

Kazinga Channel Boat Trip
Our afternoon didn’t involve hanging around the lodge waiting for all the wildlife to come out and play in the evening, we had a boat trip planned.
The Kazinga Channel is a waterway that links Lake Edward and Lake George in the park. It has one of the highest concentrations of hippos in the world. A boat trip along the channel is a fantastic way to spend a couple of hours.
Top tip: When boarding the boat, ask which side to sit on – the boat will travel a set route and the ideal position for optimum wildlife viewing is that side that skirts the shoreline. We sat on the left side, but the route may have changed in the intervening time since our visit. That said, it’s okay to move around the boat, in order to take photos, during the trip. We saw many, many hippos.
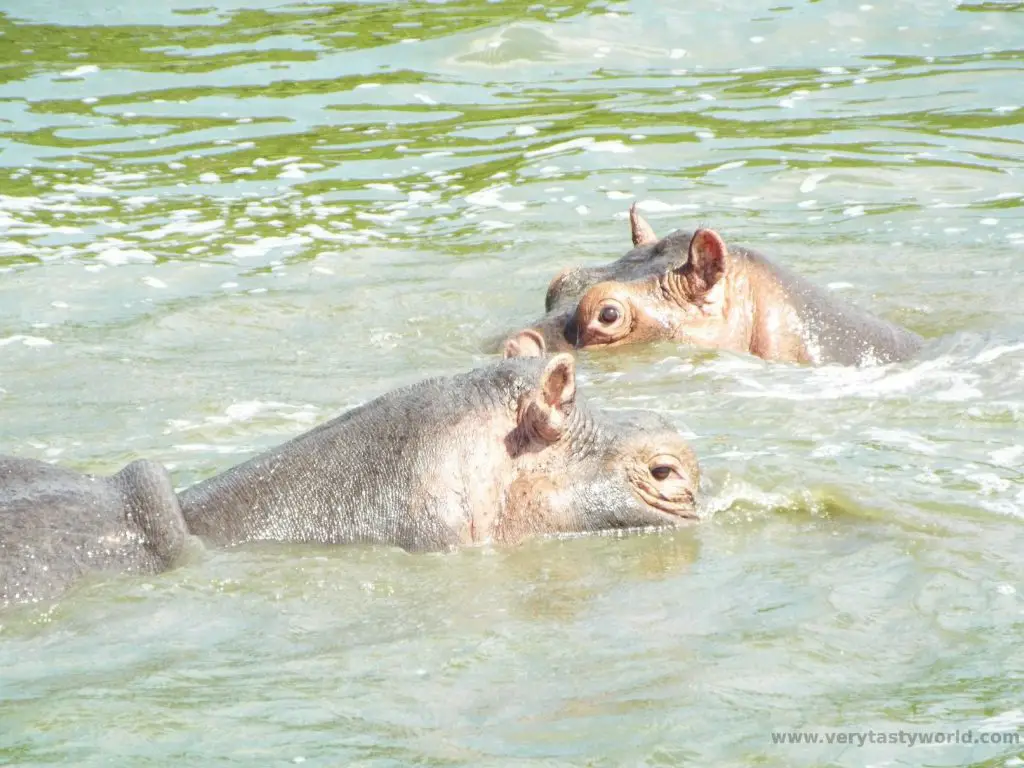
The bird life was fascinating as well.
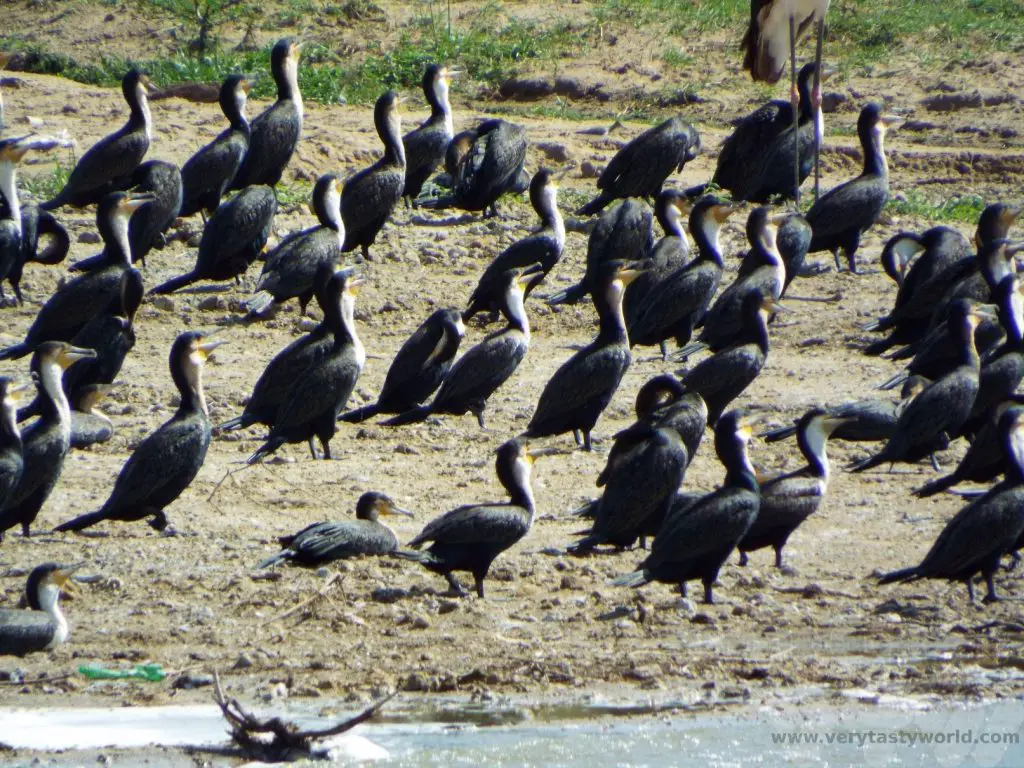

Beautiful kingfishers, so different to the turquoise kingfishers from home, were waiting patiently or hovering in the air looking for fish in the water below.
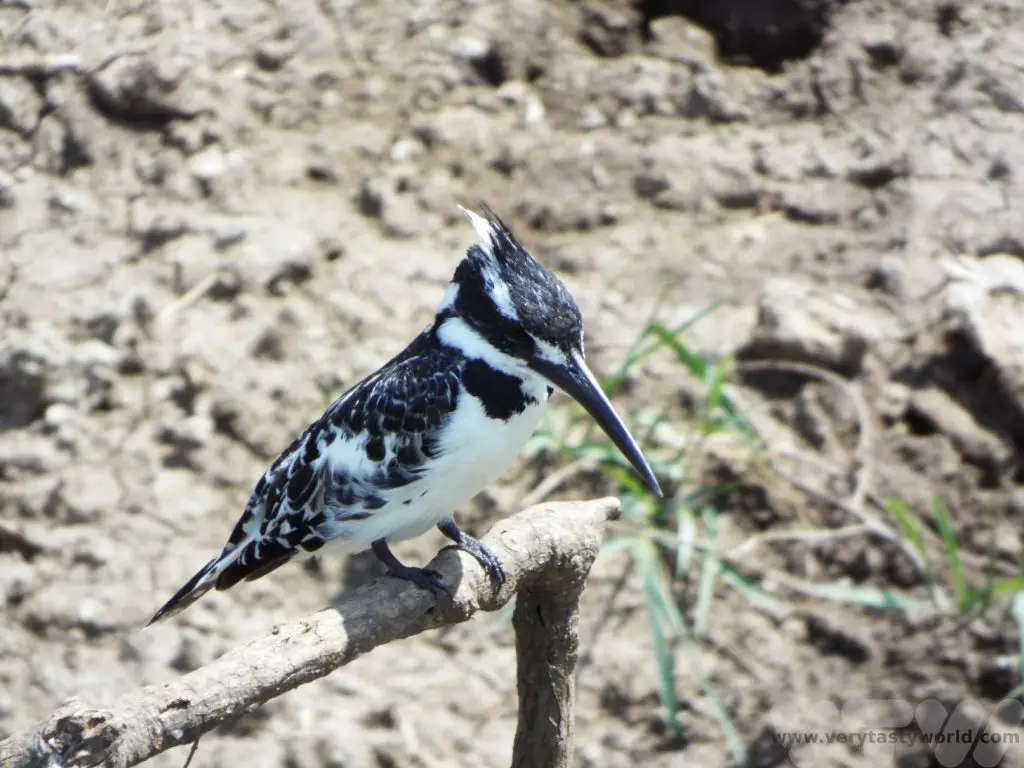
And, just as we headed back to the dock, we saw a baby hippo. Altogether now, aaah.

The Tree Climbing Lions of Ishasha
The following day we headed out towards the Ishasha sector located to the south of the QENP. This is a very special place. It is one of only two locations in Africa where the local lions climb trees! (The other place is Lake Manyara Park in Tanzania.)
We headed directly to our lodge and stopped to see some lions on the way.
Can you see them?
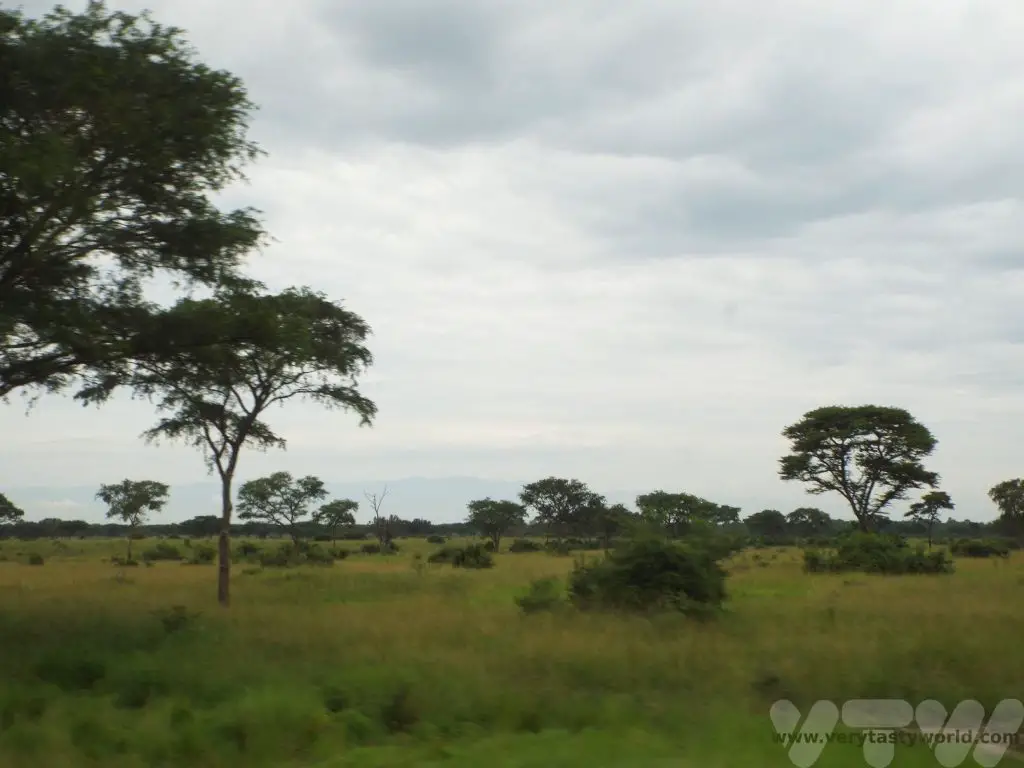
Fortunately, our cheap little bridge camera had a pretty good zoom.
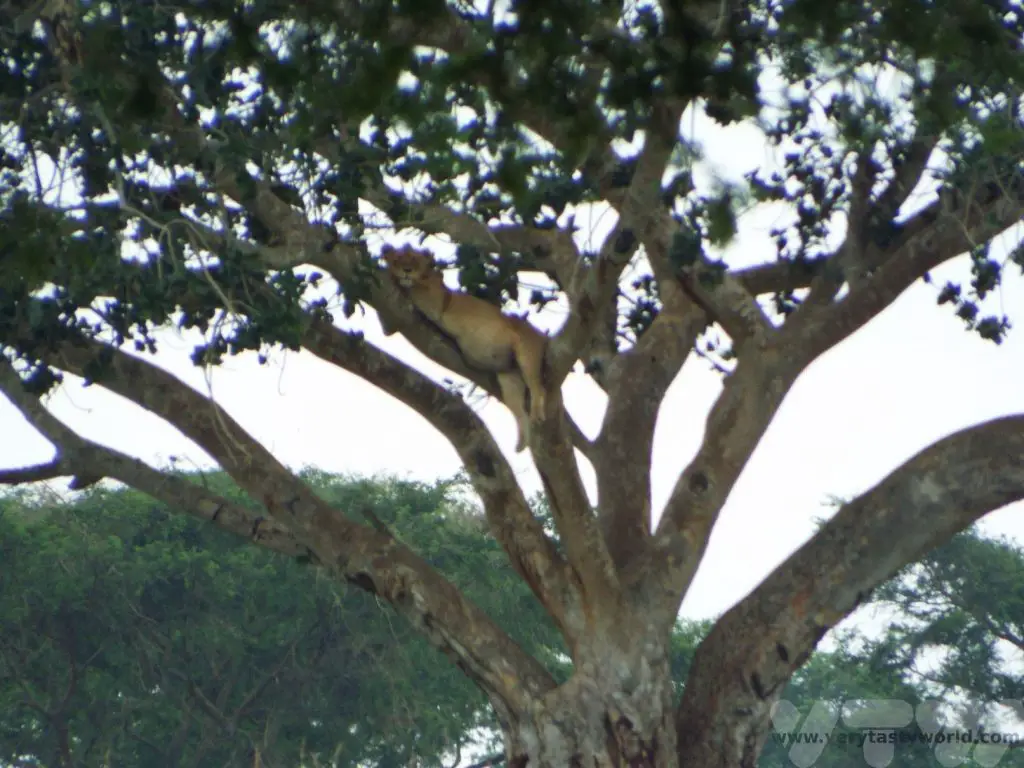
Unlike some big cats (and some little cats) lions aren’t natural climbers. It is thought that they have learned this behaviour in this very localised area. No one is really sure why – there are some theories that the lions climb off the ground to avoid insects or to enjoy a cool breeze during the heat of the day. Apparently it takes some time for them to master the art of climbing and they have to teach their cubs how to do it.
We were thrilled that we had seen the lions and trundled off to our lodge, the Ishasha Jungle Lodge, to have an afternoon rest before the evening game drive.
The lodge was lovely. Outside the entrance was a tree frequented by little yellow weaver birds. We spent ages watching these fascinating creatures. The males try to impress their mates by building the best possible nest in the tree. They spend a long time making them as structurally sound and cosy as possible. But if the female doesn’t consider it to meet her high standards she tears it apart. There’s nothing quite so disconsolate as a male weaver bird whose hard labour has been destroyed.
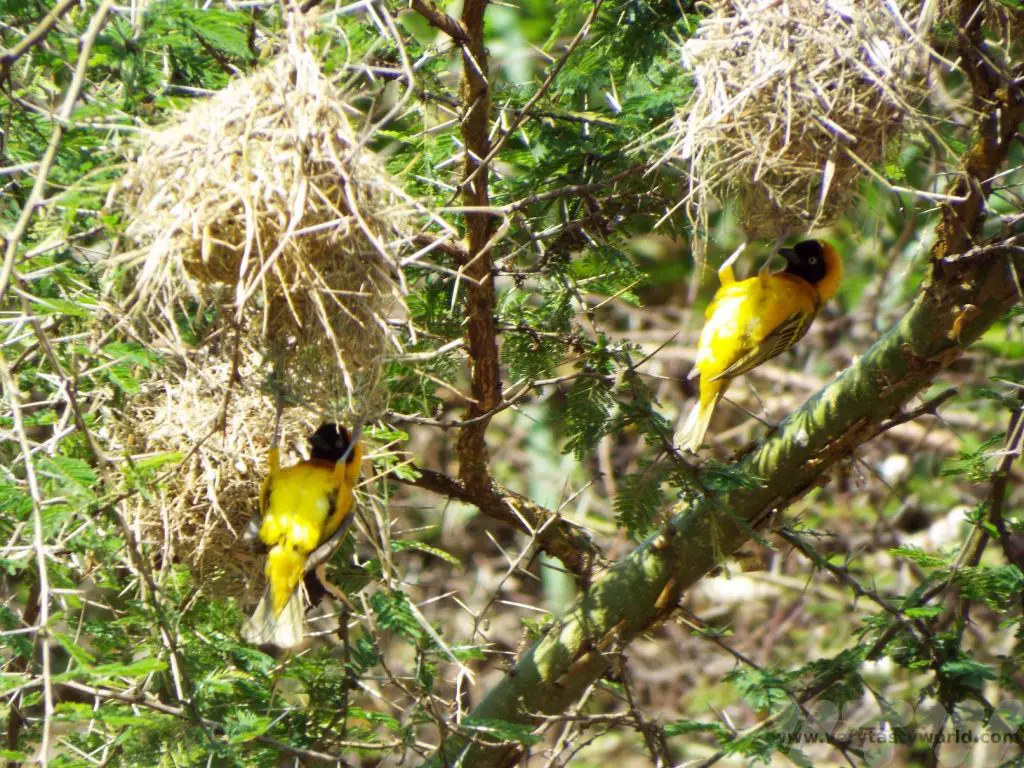
Just as we were about to have a little snooze, our guide got in touch and said that we should go out immediately. He’d received notification of a tree where some lionesses were having an afternoon nap themselves.
We rushed out and, sure enough, there were four tree climbing lions, lazing in the branches.
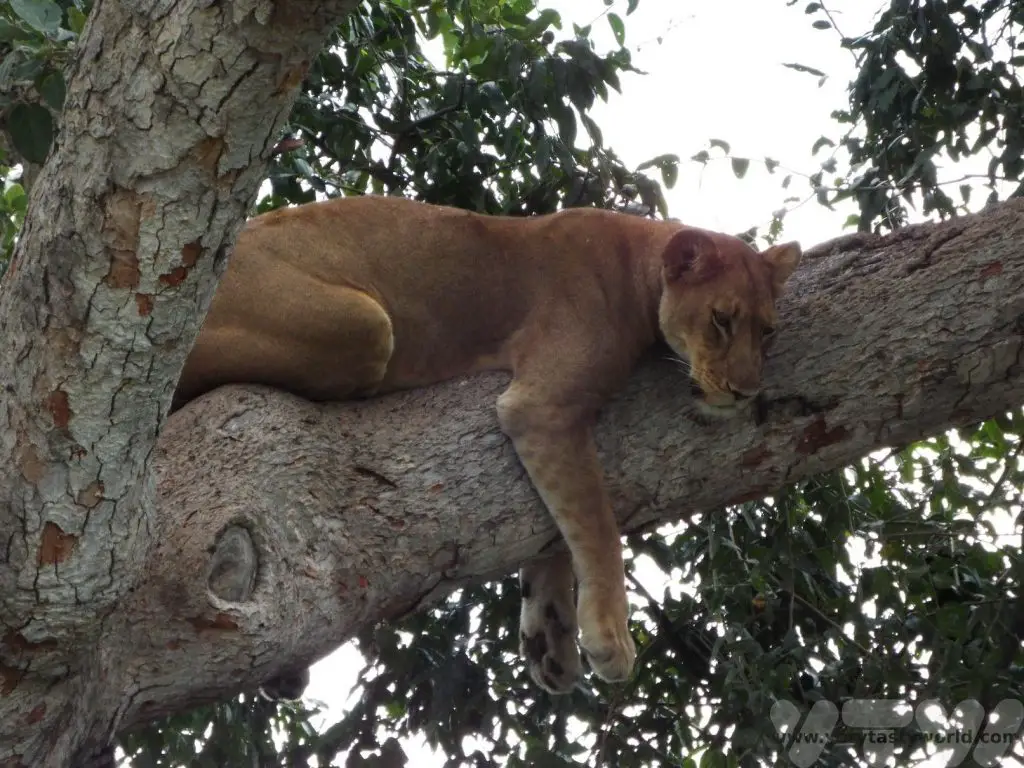
It was so exciting to get so close – just a few metres away from the tree. (Safely within our vehicle, I might add. We were excited but not stupid.)
One of the lionesses was looking extremely pregnant. It wouldn’t be long before some more cubs appear.
They looked so peaceful, they deserved their own simile: As relaxed as a lion in a tree, right?
We spent ages just watching them. A really magical encounter. We were extremely lucky – they are not always there, sometimes they are a touch elusive, doing more typical lion activities like hunting.
It is easy to understand why QENP is one of the most popular parks in Uganda. While sightings can’t be guaranteed there is a good chance of seeing some remarkable wildlife.
Related Posts You May Enjoy