Kimchi is a fundamental part of society in Korea. It is Korea’s national dish and is usually eaten with most meals there. In fact, kimchi making has been assigned as a UNESCO cultural heritage and even has its own day – 22nd November. Kimchi is great fun to make and we have a recipe for how to make kimchi. It isn’t a traditional Korean style but it’s easy to make, is ready very quickly and we reckon it’s much more delicious than shop-bought.
We first tried kimchi over 20 years ago and it was love at first bite – sour, spicy and crunchy, it has a unique flavour. Being a fermented food it is also purported to have properties that are beneficial for your gut health but, far more importantly, it’s delicious.
It’s surprisingly easy to make but it does take a while to ferment and you do have to watch out for potential explosions but that is what makes it so exciting! (Don’t worry, we’ve been making it for years and have never had an explosion – we have some advice on the best equipment to use at the end of this post.) We have tried fermenting lots different foods over the years, including miso, and it’s a very satisfactory process.
Kimchi is made via a lacto fermentation process whereby good bacteria, known as lactic acid bacteria, convert the sugars in vegetables into lactic acid. The joy of fermentation is that it isn’t a precise art. You need a bit of patience while the bacteria do their thing but once fermentation is complete, the finished product will last for many months, if not years – that is, if you don’t eat it straight away!
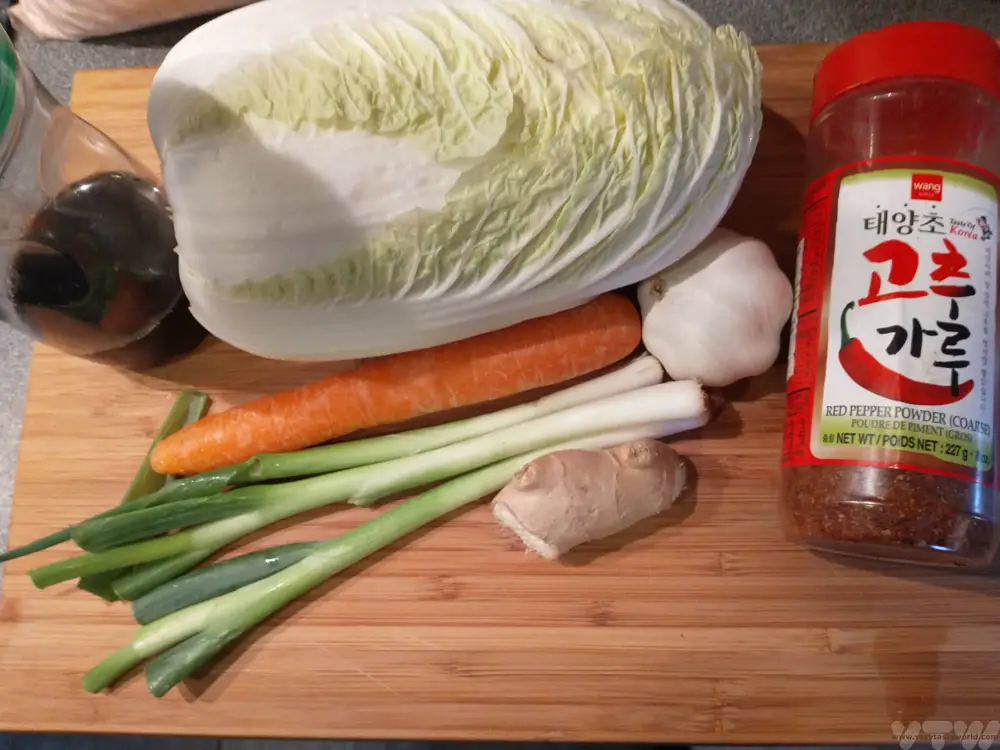
Ingredients For Making Kimchi
1 Chinese leaf cabbage (also known as Napa cabbage)
1 carrot
2 spring onions (green onions)
A carrot’s length of daikon white radish, also known as mooli (optional)
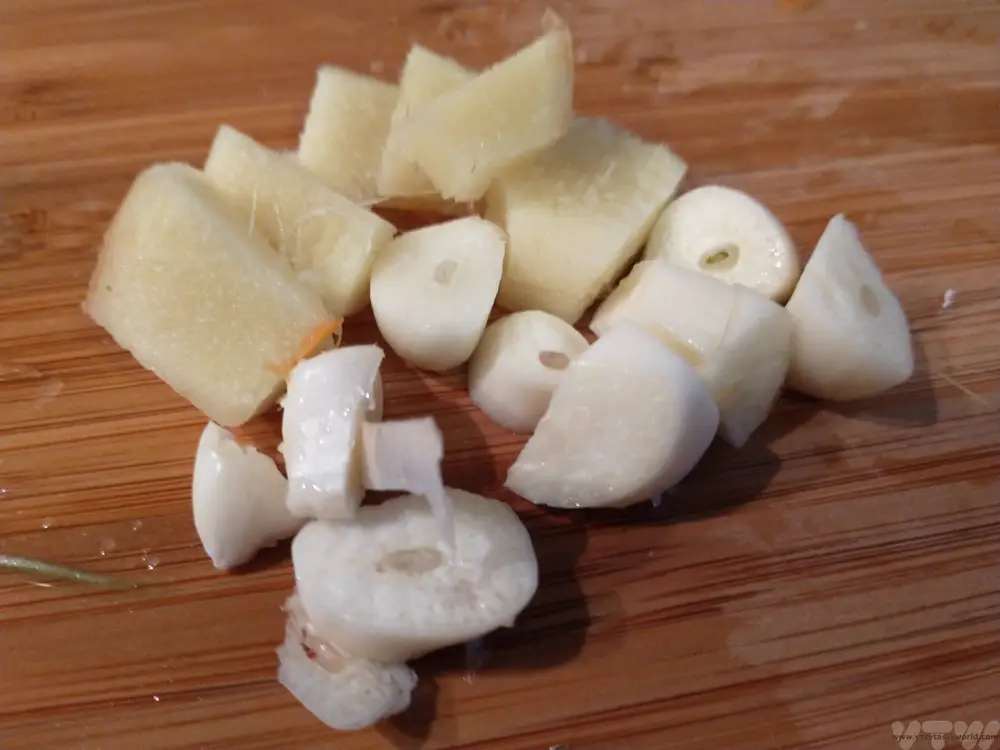
2 fat cloves of garlic (3 if your garlic isn’t portly enough)
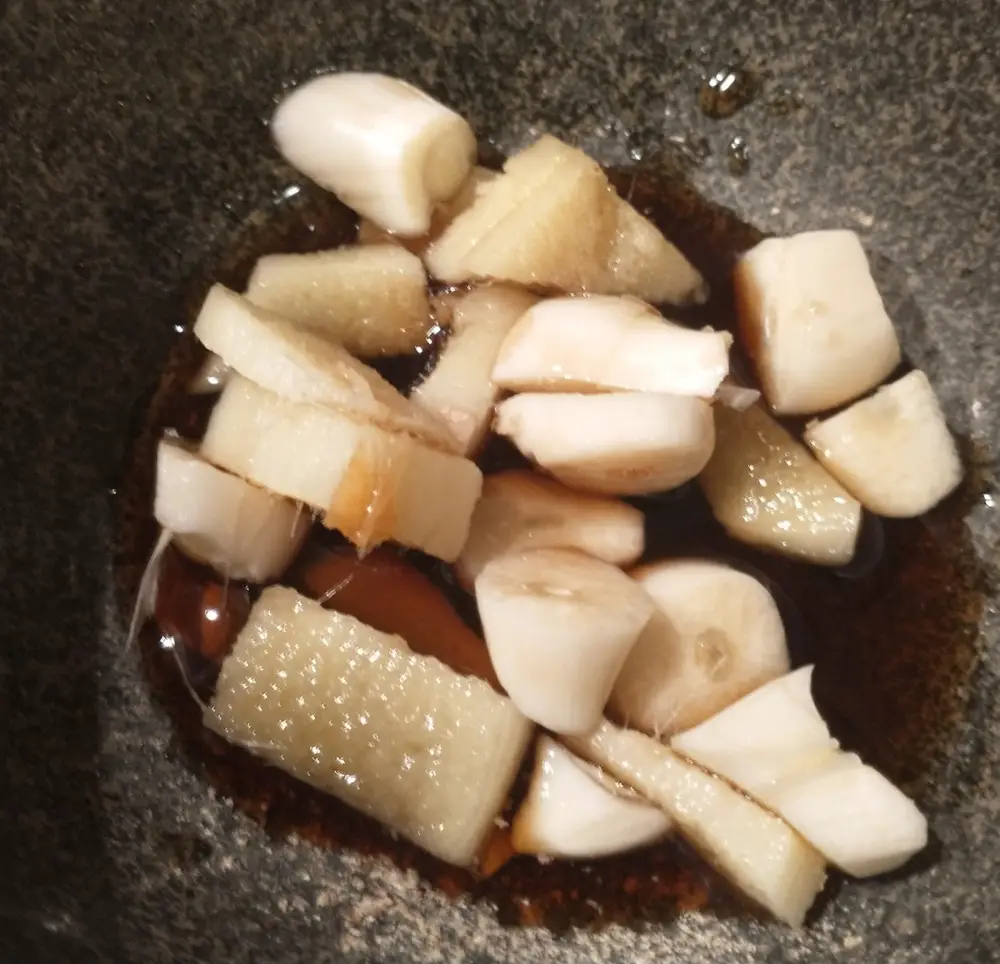
1 tbs fish sauce (vegetarians can use soy sauce, but use less – 1/2 tbs)
1 thumb-sized piece of ginger
1 tbs Korean chilli red pepper powder known as Gochugaru (you should be able to find this in Asian stores and even supermarkets these days). A variation is to use Korean chilli paste, known as Gochujang. Gochujang is traditional but we prefer the chilli powder for this kimchi.
3 tbs salt. You want to use a salt that doesn’t have anti-caking additives. Table salt isn’t recommended. Equally you don’t really want to use really posh salt. We tend to use Himalayan pink salt.
How To Make Kimchi: Method
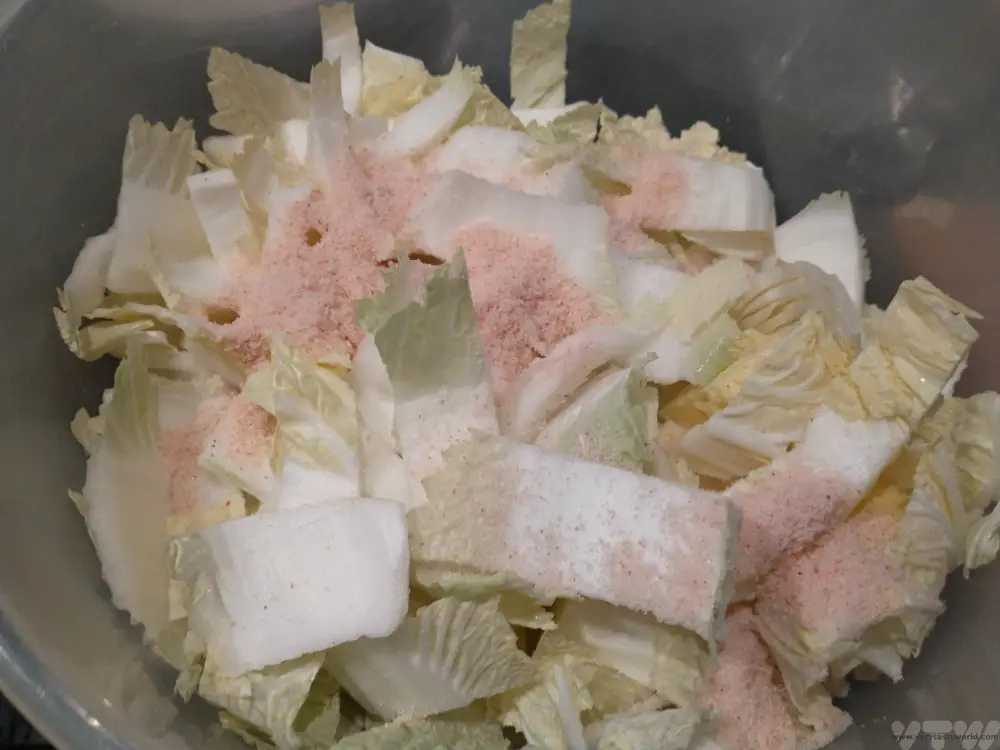
Slice the cabbage into chunks. You want to have easily pick-upable bite-sized pieces. One of the nice things about the Chinese leaf is that it has a lovely broad ribs which retain their crunch when the kimchi is finished which makes a nice contrast with the softer leaves.
Place cabbage into a bowl and sprinkle with the salt. Massage the salt into the cabbage and wait a couple of hours. It is a lot of salt but you will be washing it through later.
Prepare your fermentation jar. The size of the jar is important. You want to fill the jar up as much as possible and not have too much headspace. The jar size that suited our cabbage was 1.4 litre capacity. We recommend clip top Kilner jars as they have a good seal to keep air out but also let the liquid escape. There are some types of jar specifically designed for fermentation. We’ve had greater success with some than others.
The jar needs to be clean. We find the best way to clean the jar is to wash it in warm, soapy water and rinse. Then we boil a kettle and fill the jar (not forgetting the lid) with boiling water. After 10 minutes, drain and let the jar cool down. Some people put the jar into the oven on a low heat for 20 minutes but we haven’t found this step to be necessary for this type of fermentation.
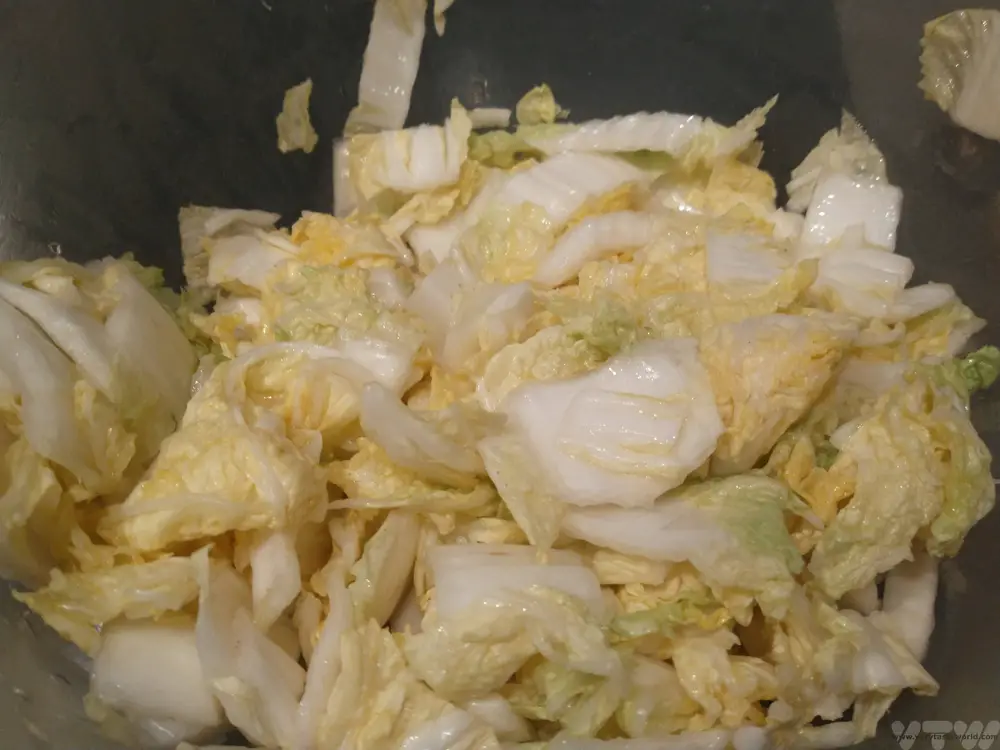
After some time has passed, give the cabbage a quick rinse with water. Have a taste – it should taste salty but not overpoweringly salty. You don’t need to pat the cabbage dry.
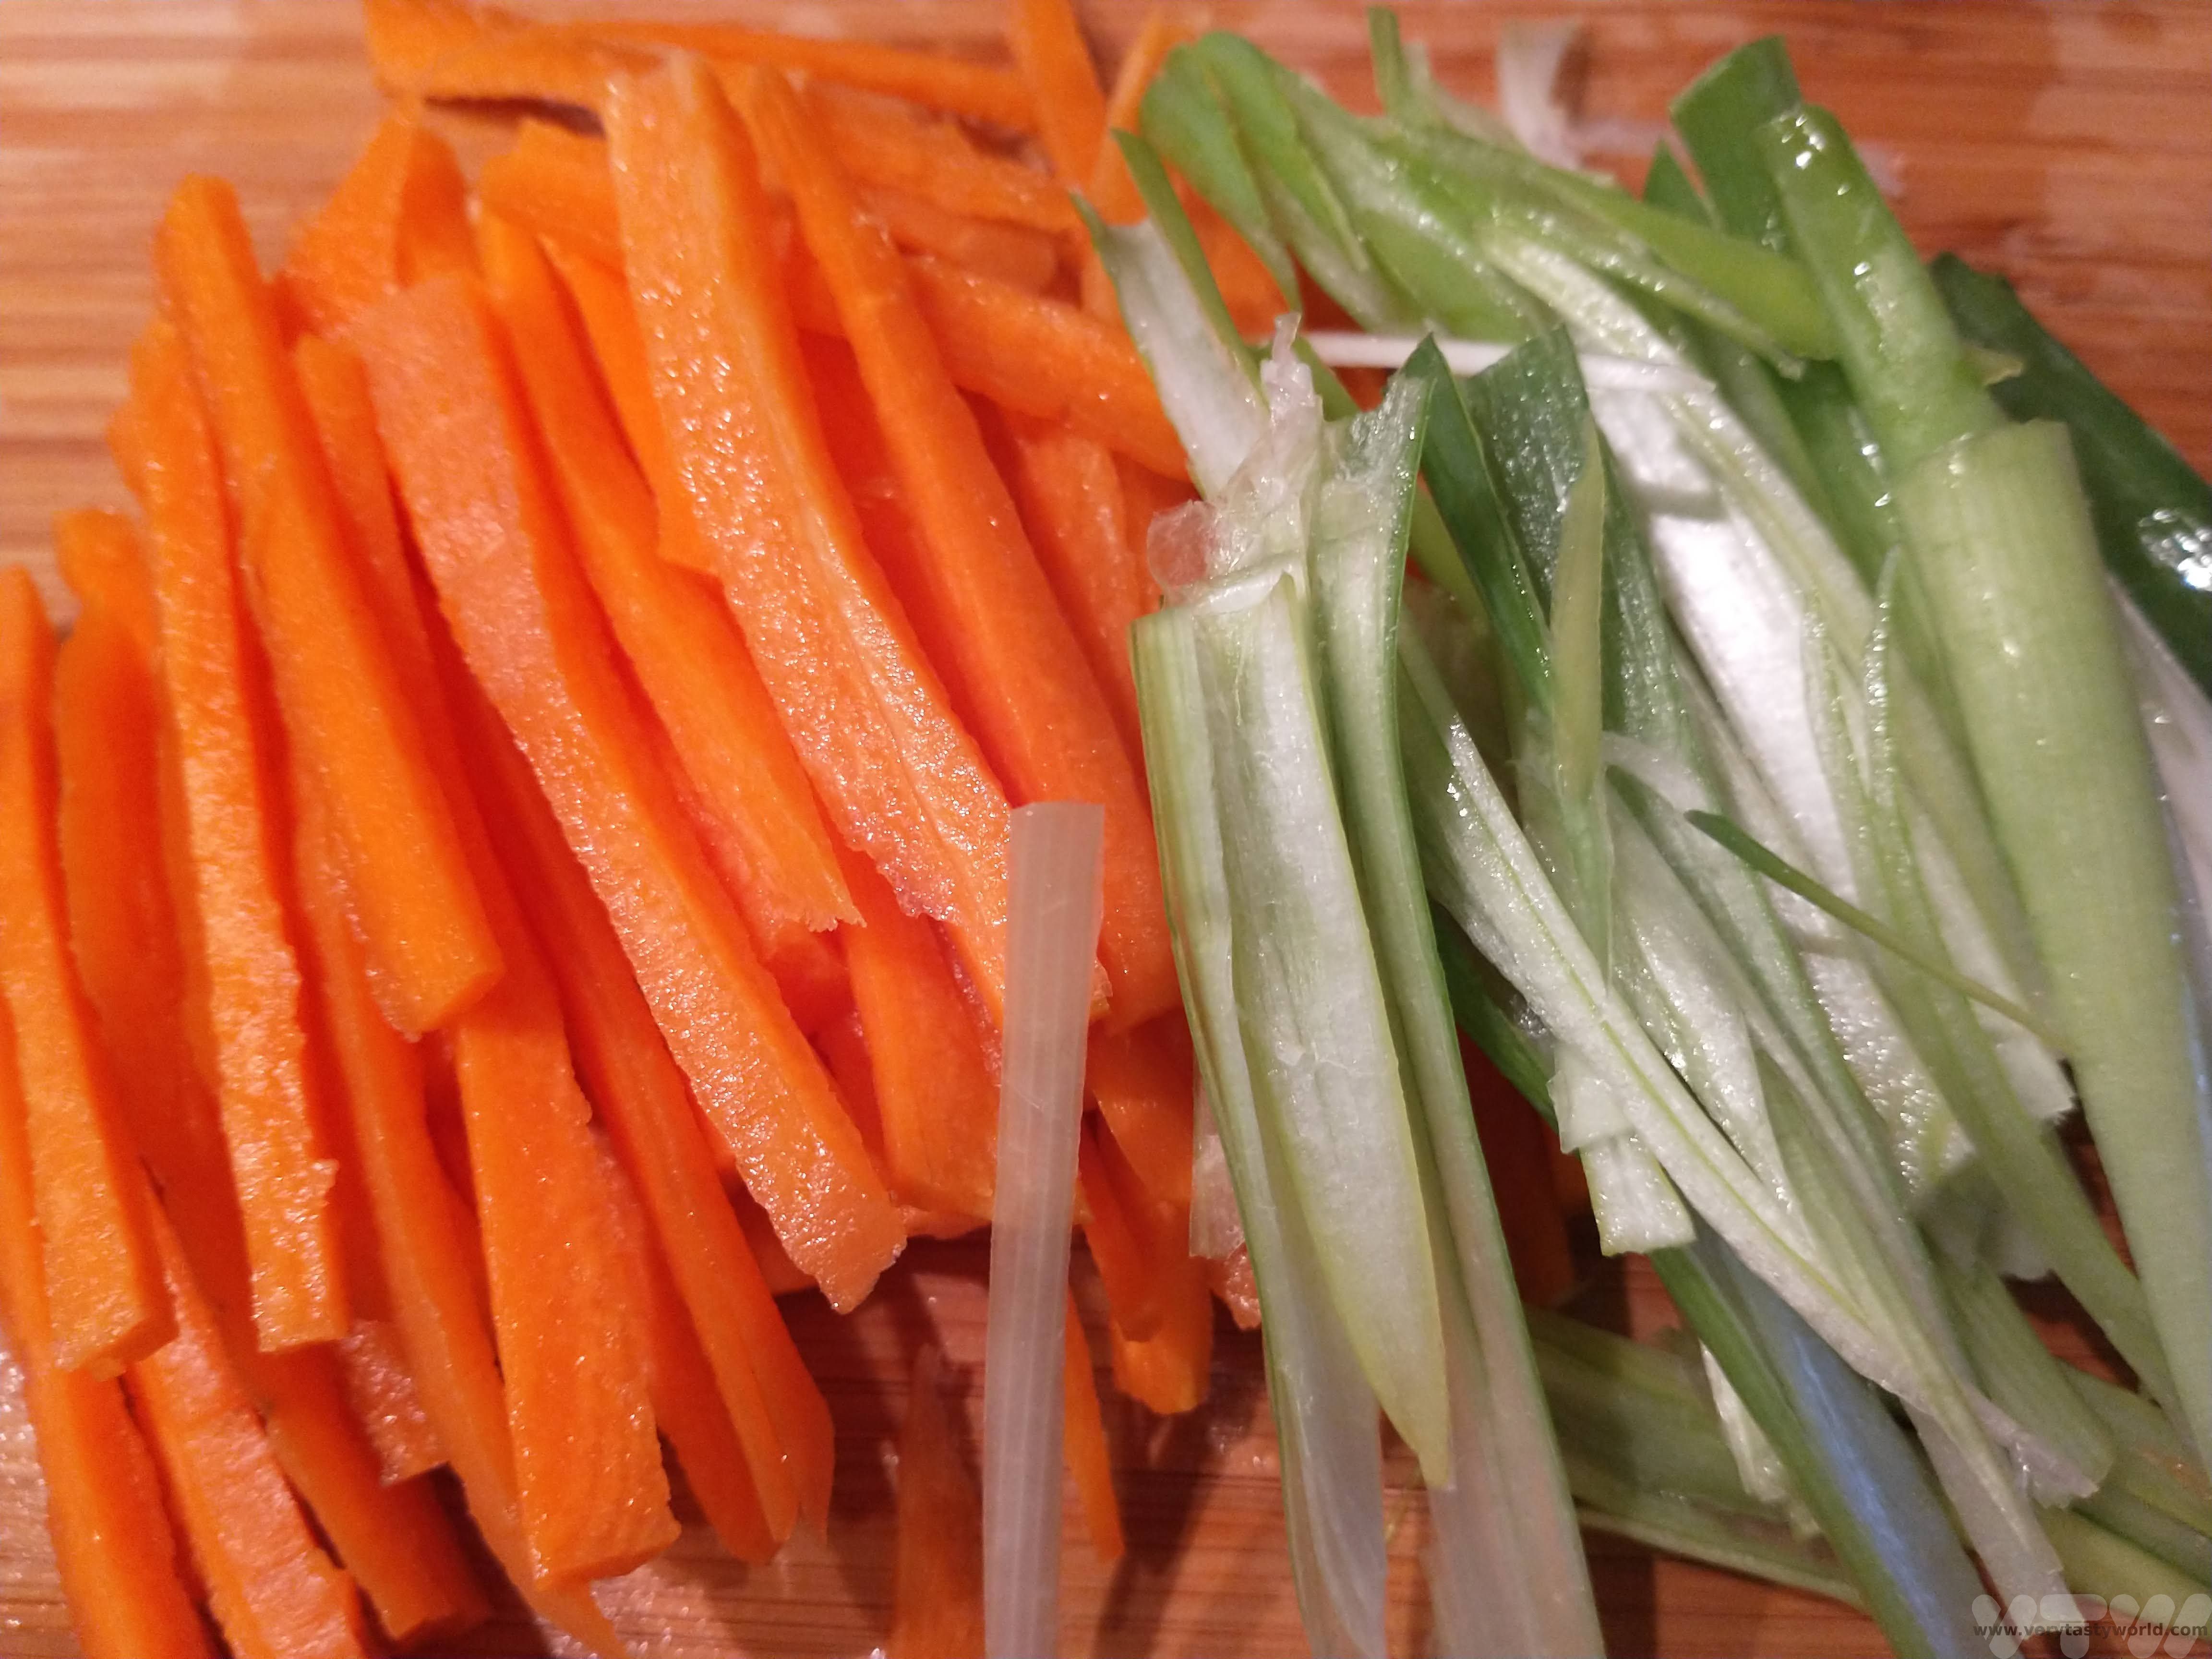
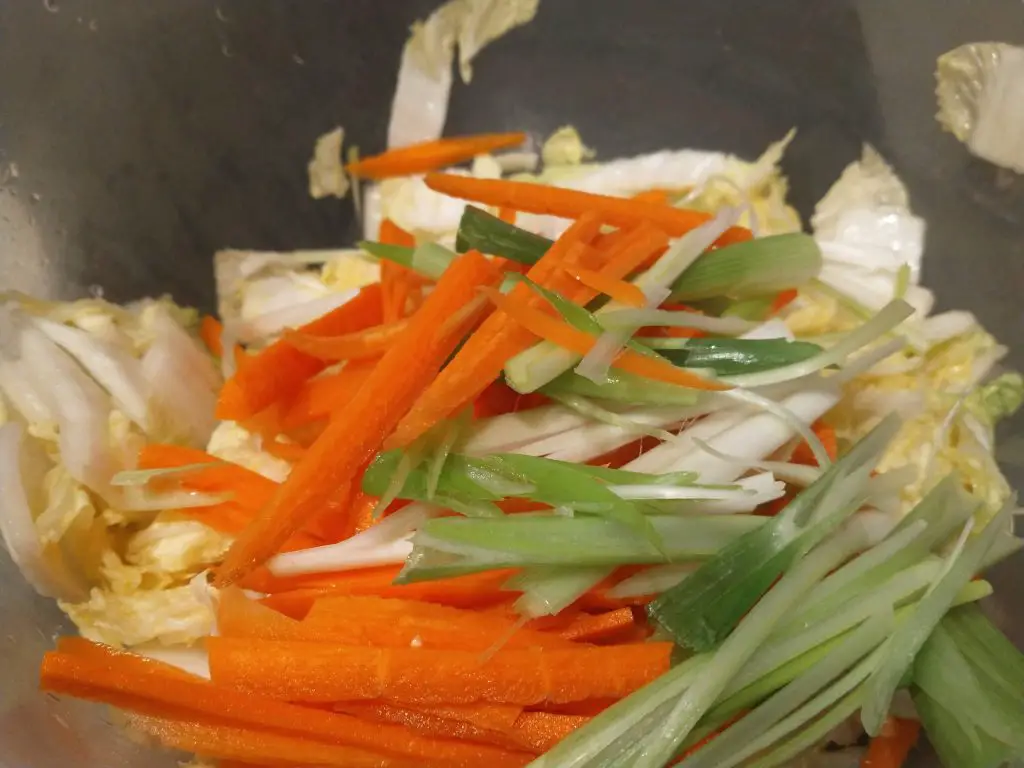
Julienne the carrot and daikon, if you are using it, slice the spring onions lengthways.
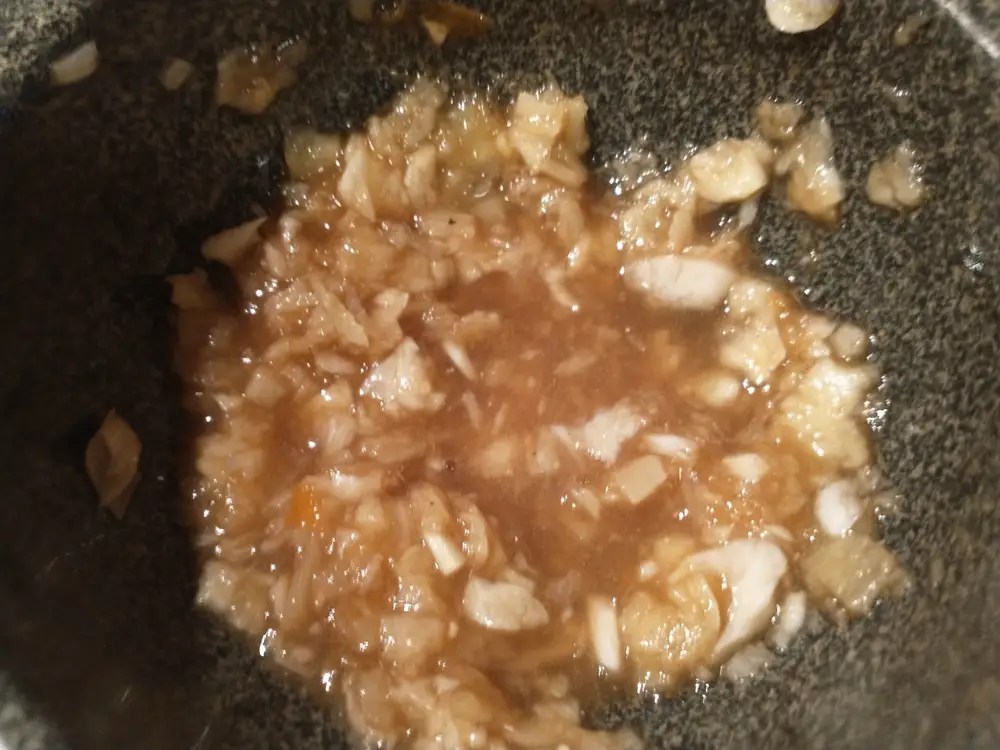
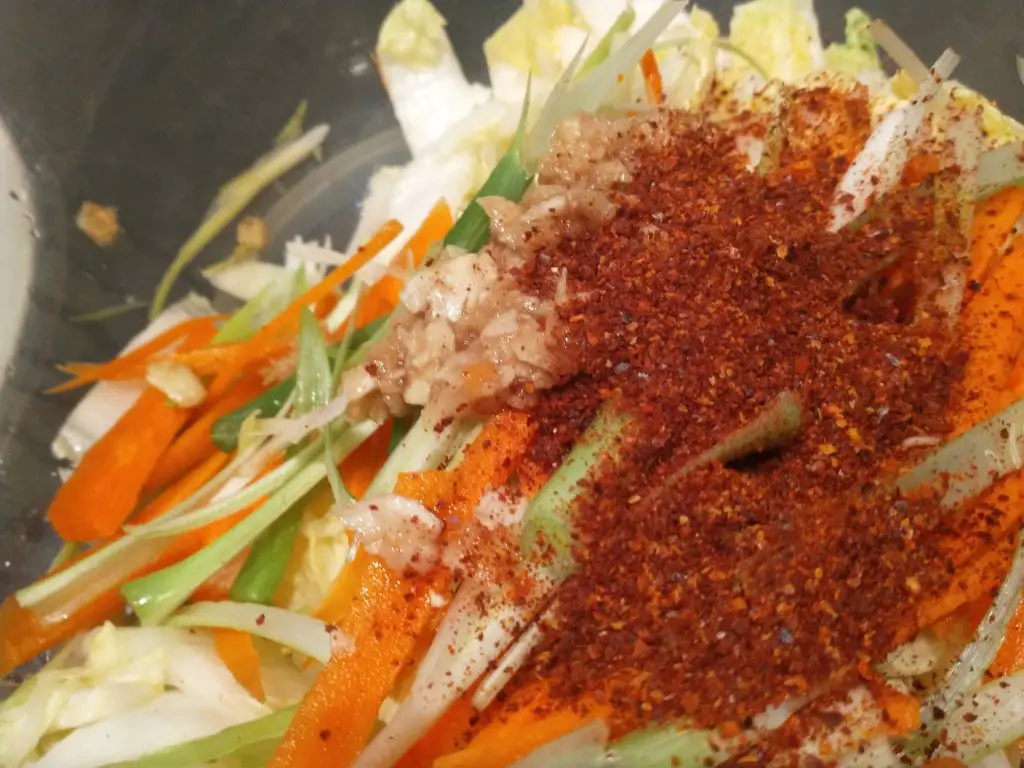
Put the garlic, ginger and fish sauce into a pestle and mortar and grind them together to create a paste. It will have quite a liquid consistency.
Add the vegetables to the cabbage.
Pour over the garlic-ginger-fish sauce paste and sprinkle the chilli powder over the cabbage and veg. Mix well. We find it’s easiest to do this with our bare (clean) hands.
Then you need to pack the jar. Pick up handfuls of the cabbage mix and place into the jar, pushing down to squish it in – really pressing hard to make sure there aren’t any air gaps.
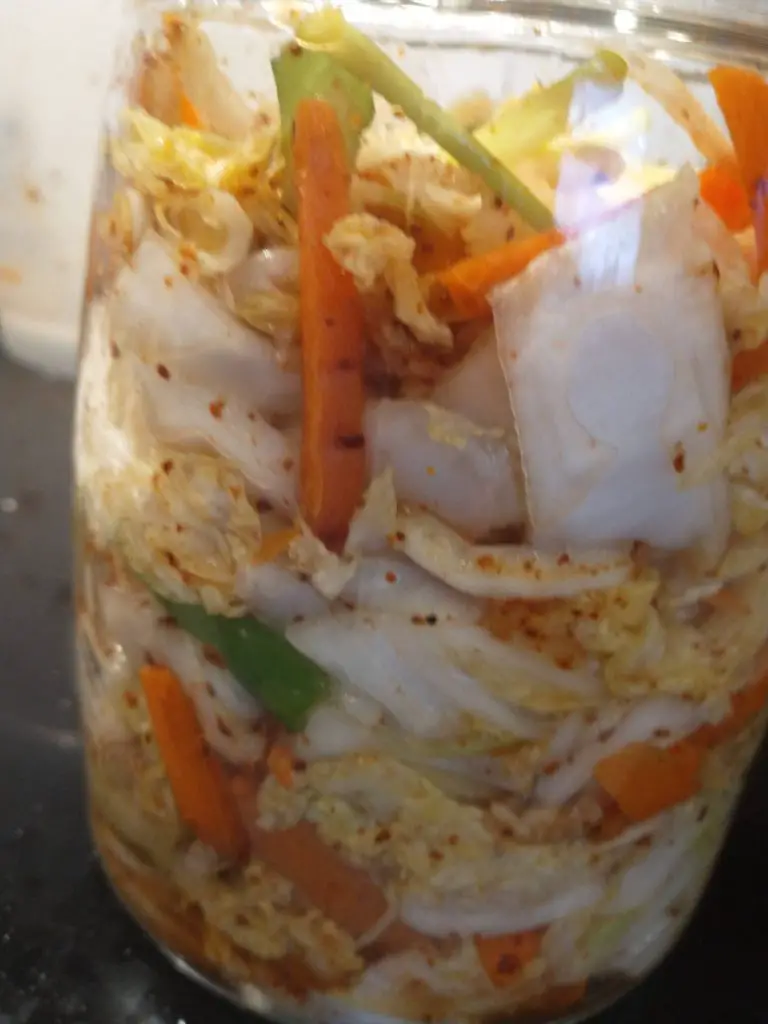
You should try and aim for minimum headroom at the top of the jar to reduce the air space. You also want to make sure the cabbage mixture remains pressed down. You can get all sorts of weights but a glass dessert ramekin type container (e.g. Gu) works well or, cheaper and less calorific than eating a chocolate dessert, fill a small plastic bag with water, tie at the end and squish into the top of the jar.

Close the jar and place the jar on a deep plate or in a bowl to catch any liquid escaping.
Check The Ferment Over Several Days
Over the next few days the cabbage will begin to ferment. The time it takes will depend on how warm the ambient temperature is. You’ll see a liquid start to form in the jar and cover the cabbage and the lactic acid bacteria will start to form lactic acid and C02. It is because of the C02 that you need to keep an eye on your ferment. If you are using a specific fermentation jar you should be fine. If you are using a conventional jar you will need to ‘burp’ your ferment, at least once a day. Open the lid – very briefly – and close immediately, just to let the C02 out. This will ensure that the pressure doesn’t build up. If you don’t burp there is a risk of the jar exploding. We’ve never had a glass jar break but there have been numerous occasions when I’ve burped the jar and ended up with a brine shower!
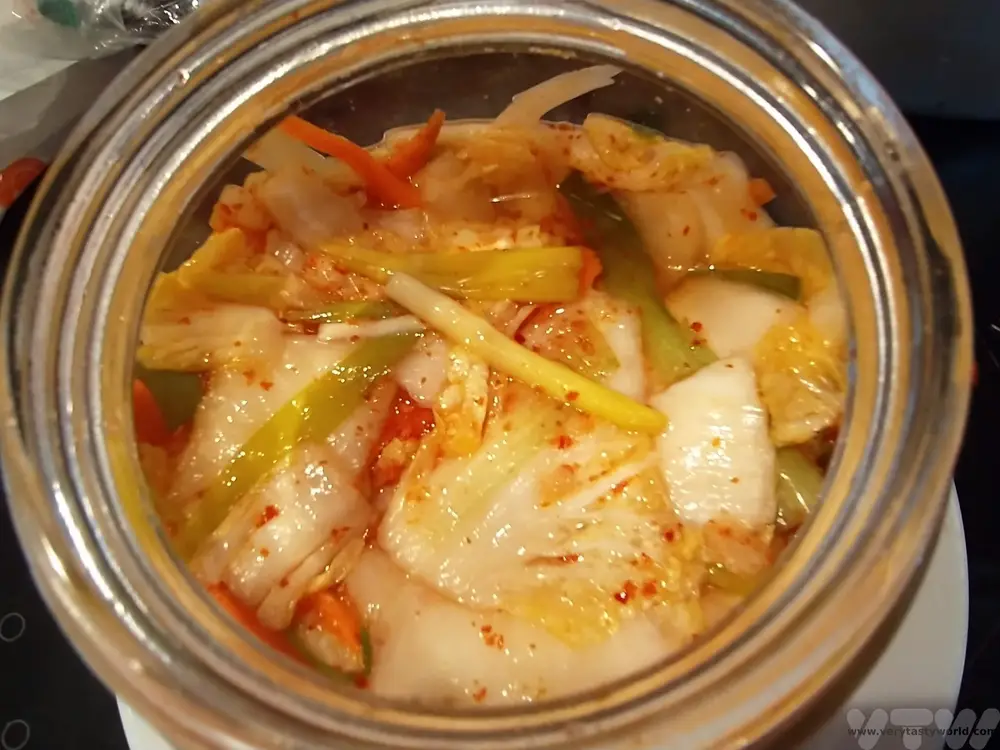
The kimchi should be ready within a week to 10 days. You can leave it longer if you wish and this will ensure further development of the flavours.
When the kimchi is ready you can store the jar in the fridge or decant it into smaller jars (just go through the process of cleaning them, then adding boiling water and letting them dry). The kimchi will store in the fridge for months as long as it is airtight.

Beware
The two greatest issues with fermenting food is risk of explosion (which can be reduced/eliminated if you use the right equipment) and mould. When the ferment is exposed to air there is the potential for mould to develop. If you open your jar and see fuzzy mould of any colour you should discard the ferment. It’s heart-breaking but the safest thing to do as the mould could make you very ill. (It’s not advisable to scrape off the mouldy bits – by the time the fuzz has appeared the spores will have permeated the whole jar.) Obviously this creates something of a dilemma – you need to open the jar to burp but don’t want to let the air in. So, the key is to open the jar very quickly to release pressure then close immediately. With some types of fermentation jar you don’t need to worry.
Some Notes On Fermentation Equipment
You don’t need too much specialist equipment to ferment food. A kilner jar with a metal clip lid ‘self-burps’ – it allows CO2 to escape whilst not letting air (which can contain mould spores) in. You can get various fermentation vessels in varying sizes.
Salt should not have anti-caking properties.
You can get chilli flakes or gochujang in Asian supermarkets.

- RECIPE Oyakodon Donburi

- Zero Waste Recipes Before Your Holiday
- RECIPE: Vegetable Biryani Tamil Nadu Style

- RECIPE: Vegan Wild Garlic Pesto
- Recipe: Venetian Pasta Sauce

- RECIPE: Biryani Raita Recipe

- RECIPE: How to Make Costa Rica’s Gallo Pinto

- Recipe: Japanese Simmered Pork Belly – Buta no Kakuni

- RECIPE: How to Make Umeboshi
Please note that this post contains affiliate links. If you click the link and decide to make a purchase we will earn a small commission, at no cost to you, which helps towards running this site.


[…] RECIPE: How To Make Kimchi […]
[…] RECIPE: How To Make Kimchi […]