Home » Recipes (Page 3)
Category Archives: Recipes
RECIPE: How to Make Japanese Dashi stock
Dashi is a Japanese soup stock which is really easy to make and very delicious indeed. It is a fundamental component of many Japanese dishes, such as miso soup, surinagashi and noodle dishes such as ramen and udon. It’s a very simple stock but provides a huge amount of flavour and definitely puts the “mmm” into umami, the fifth flavour. You can buy instant powdered dashi and just add water but if you can find the ingredients in your local Asian supermarket it’s really not much effort to make. The process is very simple and much quicker than traditional stock making in European cuisines, which generally require ingredients such as meat, vegetables and herbs to be boiled for several hours. Here is our Japanese dashi stock recipe
Japanese Dashi Stock Recipe
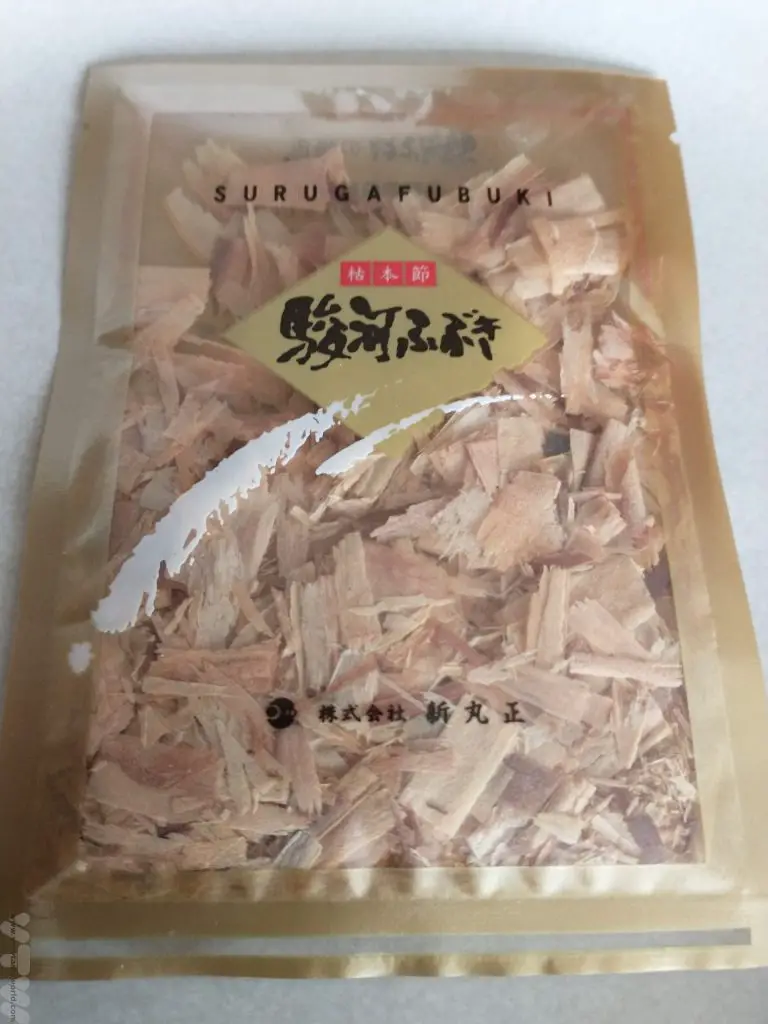
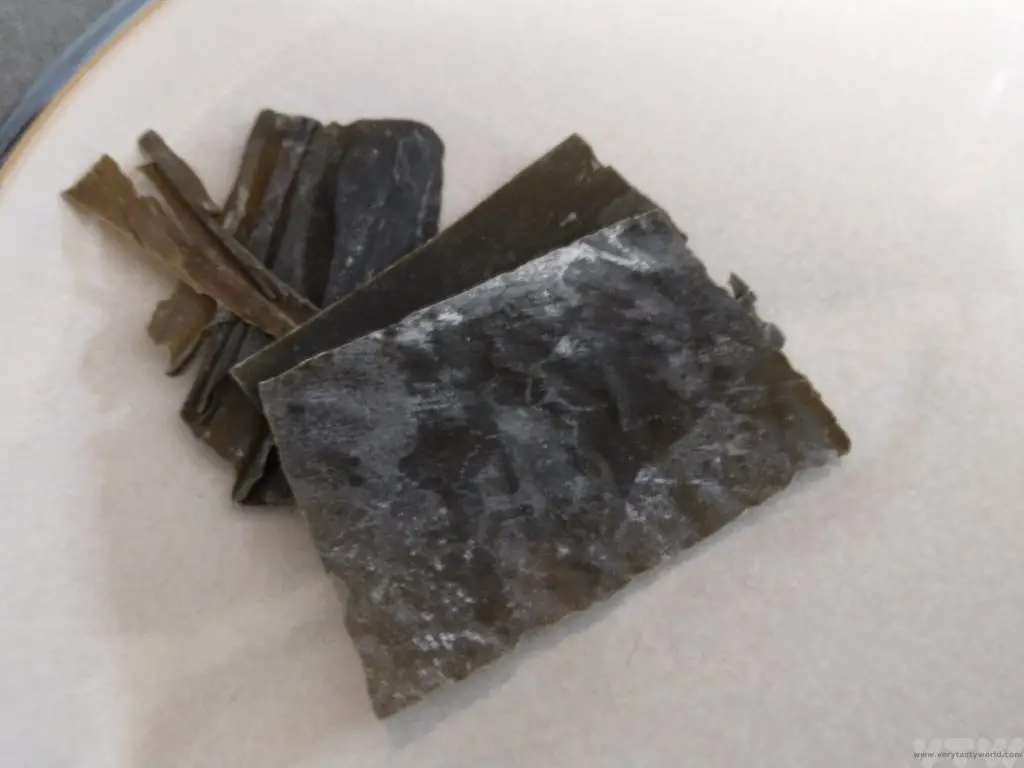
Dashi usually only uses a couple of ingredients. The dashi we made used konbu (kelp – a seaweed) and katsuobushi (bonito flakes, which are skipjack tuna flakes that have been simmered and smoked, then dried in the sun to ferment and finally shaved to wafer thin slices). Katsuobushi, like many fermented fish products (think nam pla – fish sauce from Thailand), smells somewhat stinky and not very pleasant when you open the packet, but somehow it adds a magical quality to the finished stock. Other dashi ingredients could include dried shiitake mushrooms or dried anchovies.
Ingredients
3 sheets of kombu kelp seaweed
EITHER
40g bonito flakes
OR
5 dehydrated shiitake mushrooms (for vegetarian or vegan version)
1 litre of water
 |
 |
 |
Method
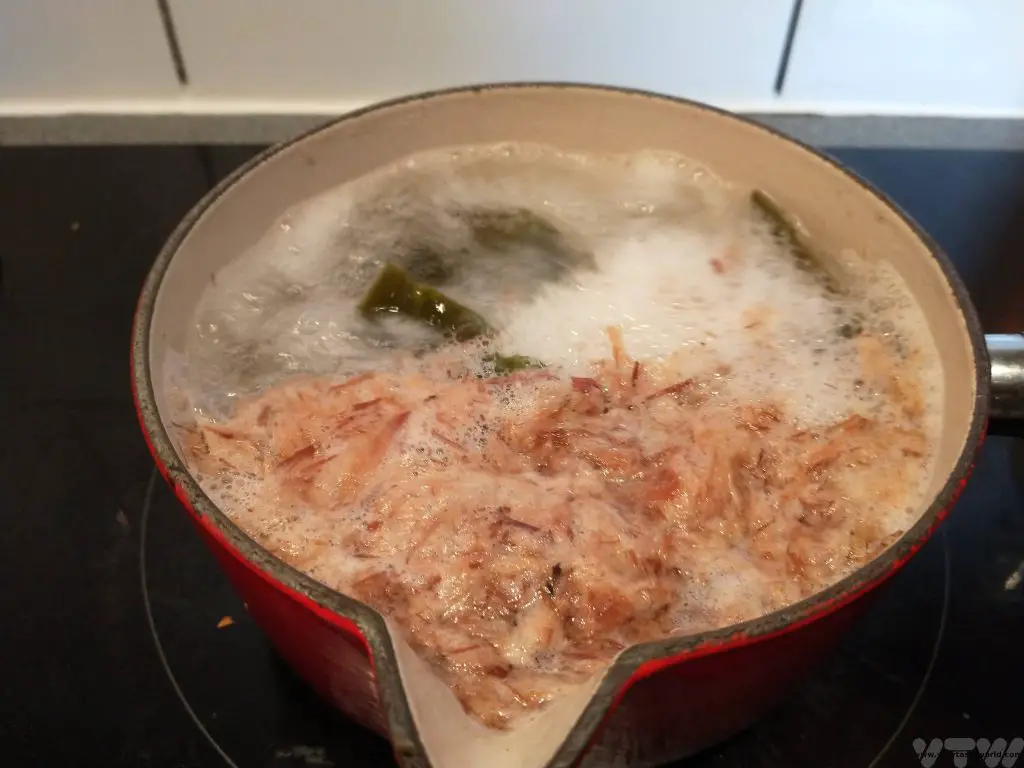
Make the dashi: Put kombu and bonito flakes (or shiitake mushrooms) into a saucepan of water.
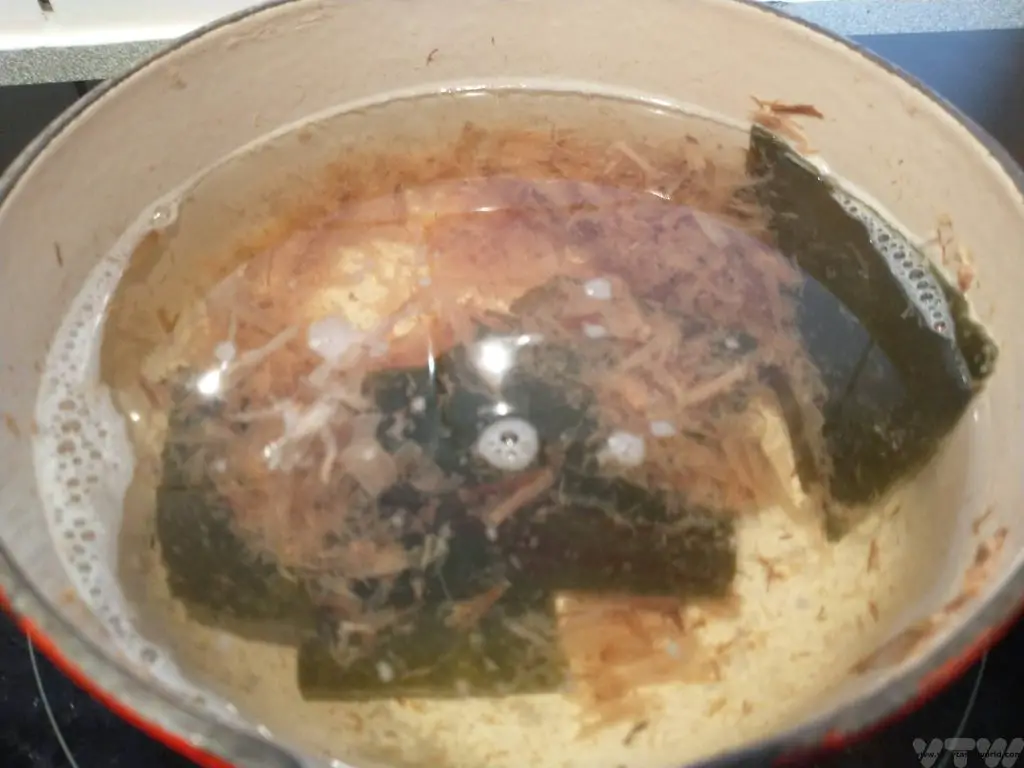
Bring to a simmer. Skim off any froth.
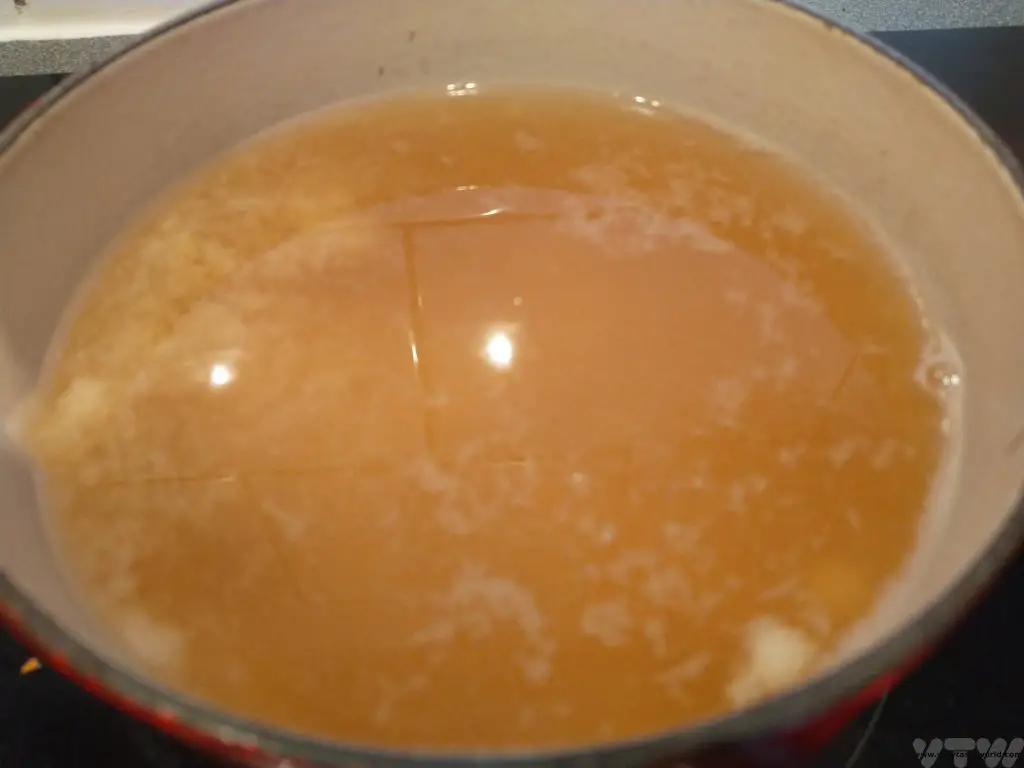
After 15 minutes, turn off the heat. You should have a clear broth
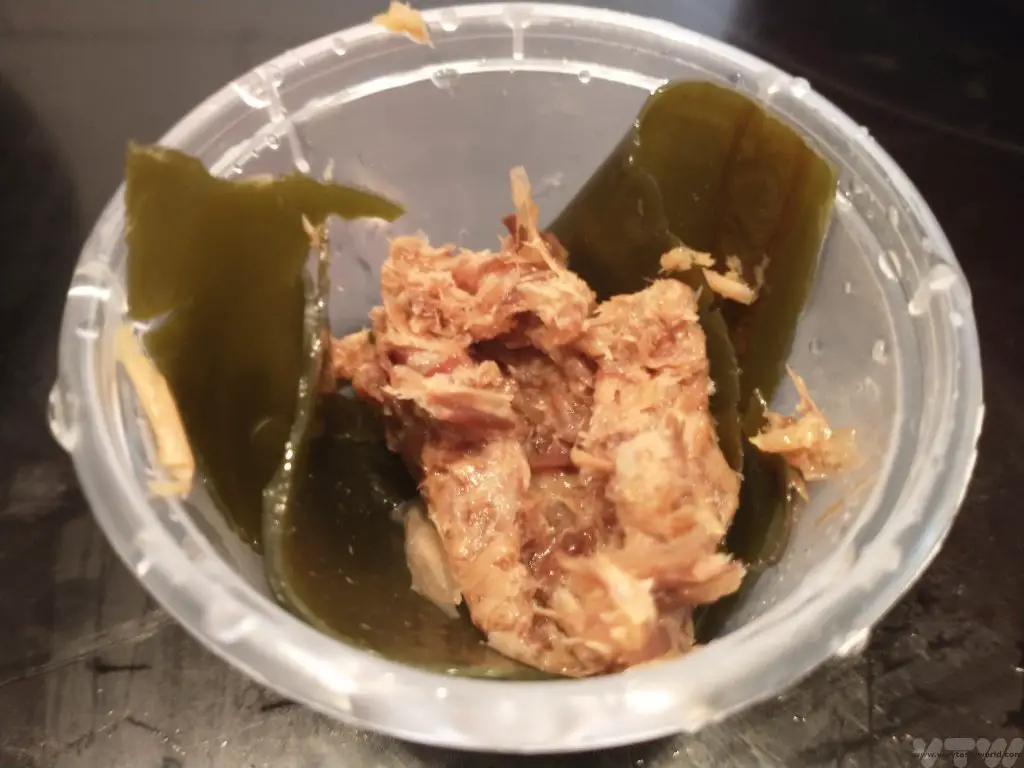
Sieve the solids from the broth.
Keep the solid ingredients. You can dry these out and use them again to make a secondary dashi.
This Japanese dashi stock recipe is so easy to make and can be used in many delicious dishes.
Related Posts You May Enjoy


Please note that this post contains affiliate links. If you click the link and decide to make a purchase we will earn a small commission, at no cost to you, which helps towards running this site.

- RECIPE Oyakodon Donburi

- Zero Waste Recipes Before Your Holiday

- RECIPE: Vegetable Biryani Tamil Nadu Style

- RECIPE: Vegan Wild Garlic Pesto

- Recipe: Venetian Pasta Sauce

- RECIPE: Biryani Raita Recipe

- RECIPE: How to Make Costa Rica’s Gallo Pinto

- Recipe: Japanese Simmered Pork Belly – Buta no Kakuni

- RECIPE: How to Make Umeboshi
Stilton Crazy After All These Years
Melton Mowbray is a small town in Leicestershire in the English Midlands which, without wishing to be unfair, doesn’t really have any remarkable features. However it is known for being a foodie town. It is home of the Melton Mowbray pork pie and has a local creamery that makes Stilton cheese.
Stilton cheese comes in two varieties – white and blue – although the blue cheese is probably the best known these days. It is often referred to as the “king of the blues,” and is likely to have been produced before the 18th century, but probably not in the form we now know it. Indeed in 1724 Daniel Defoe, when travelling through the Cambridgeshire town of Stilton, noted the location to be “famous for its cheese.” Its popularity grew over the years and producers got together in the early 20th century to specify production methods and to protect the origin of the cheese. Stilton is a geographically protected food and is only made in three counties in England… Derbyshire, Nottinghamshire and Leicestershire. Ironically, because the village of Stilton is located in Cambridgeshire any cheese made there can’t officially be called Stilton.
There is a very comprehensive history of the cheese here.
You know sometimes, you just have bad luck when you’re on the road? When we visited Melton Mowbray’s market (whilst having a brief break from our canoe building holiday) both the pork pie and the cheese shop were closed. So we just had to go back home and make our own cheese.
The amazing thing about cheesemaking is that it largely starts off in the same way – add a culture to milk, warm it up a bit, add rennet so that it coagulates, separating the solid curds (which will form the cheese) from the liquid whey. It’s the things that you do with the curds subsequently – salting, cutting, pressing, resting, stretching, brining, maturing – that offer such a rich variety of possibilities for the finished cheese.
Cheesemaker Gavin Webber’s site is a fantastic resource. His video recipes are clear and concise but with enough detail to give you confidence to start serious cheesemaking. Here is our attempt at Stilton style. We have to say Stilton style because although we live in the English Midlands we aren’t close enough for our cheese to be able to count. So we’ve called ours Stiltonesque.
This Stiltonesque is a blue cheese, creamy and with lovely veins of sharp blue flavour running through the cheese.
First of all we cleaned all the equipment thoroughly (generally boiling water on equipment is enough to sterilise it) and added 5 litres of organic full fat milk. One of the elements that makes this style of cheese so luxurious is its creaminess which is thanks to the 500ml double cream that we added to the milk.
We put the Penicillium Roqueforti mould powder into the milk and stirred gently for two minutes. This is the bacteria that ensures that blue cheese develops those deliciously tangy blue veins that run through the cheese after it has matured.
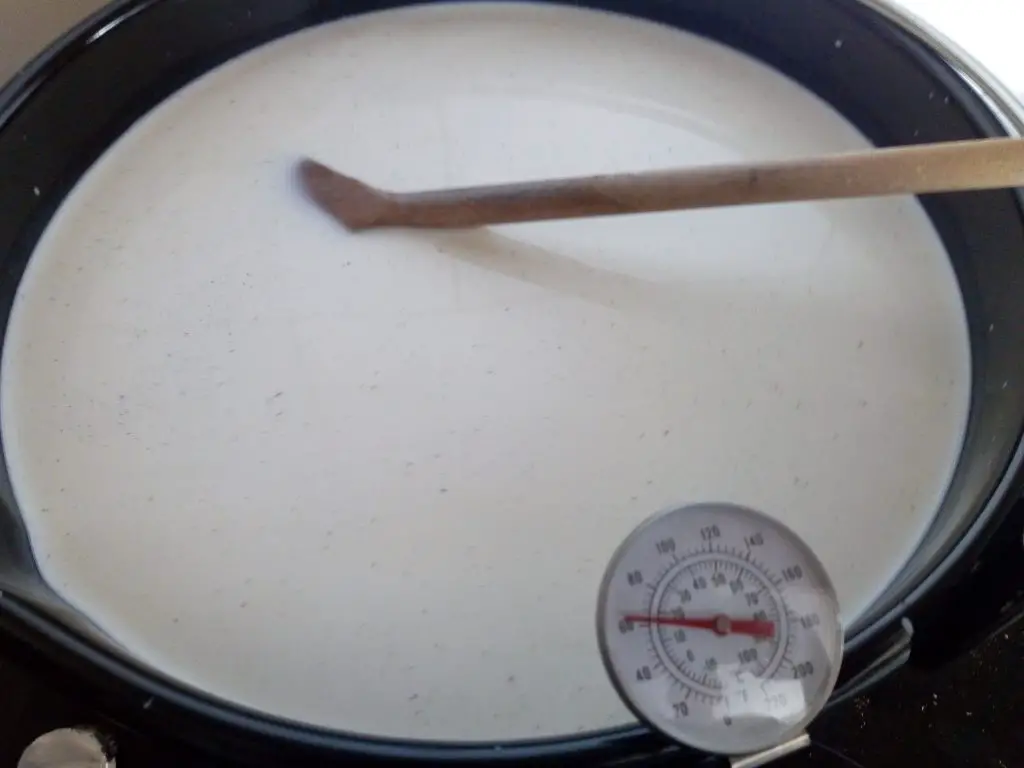
Then the milk was gently brought to temperature – 30deg. It’s possible to do this by heating the milk on the hob (very slowly, so as not to burn the bottom of the pan) but if you are serious about cheesemaking it could be worth considering investing in a sous vide (£). This is definitely a non-essential kitchen gadget but it is very cool and can be used for other purposes such as cooking steak in a vacuum pack. The great thing about the sous vide for cheesemaking is that it has a heating element and immersion circulator which stirs the milk, heating it evenly. You can also set a target temperature and it beeps reassuringly when you’ve reached the correct heat level.
Then we added the culture, stirred for a minute and left for half an hour. We’ve found that if you place a tea towel over the pan it does manage to retain the heat pretty well.
Then we added rennet in water and gently stirred it in. The cheese then needed to sit for an hour and a half. Unfortunately at this stage we had some trouble with the rennet – it just didn’t want to coagulate the cheese. A quick internet search revealed that we should try to add a little more rennet and wait a bit longer. If you add too much rennet the cheese can start to taste bitter but then, if you’ve bought the milk, starter and Penicillium Roqueforti you might as well try to continue. So we did.
We did, somewhat later than expected, get a good break (phew!), so ladled the curds into cheesecloth lined colander.
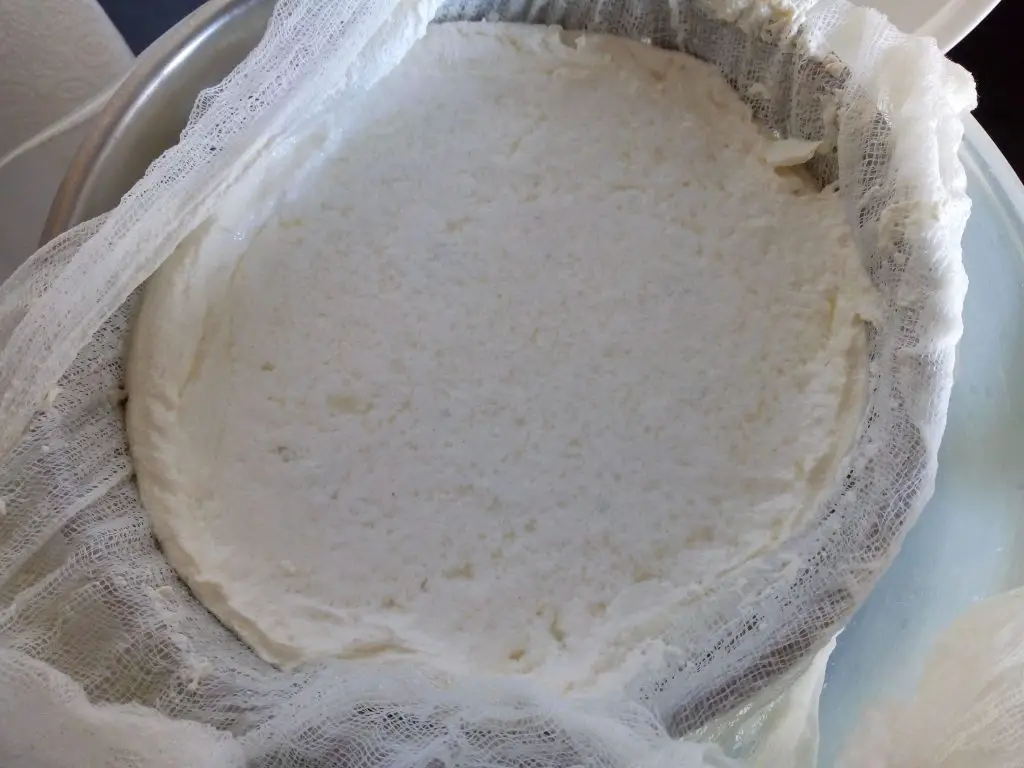
We kept the bowl of whey under the colander to let the curds sit in the whey for around an hour and a half.
Then we scooped up the cheesecloth and roll the curds into a ball. Let whey drip for 30 mins. Our set-up was a bit Heath Robinson – we tied the cheesecloth around an old broom handle and let the remaining whey drip off in the garden.

Then the Stiltonesque needed to be wrapped very tightly for a further drain and to compress the curds. We put a board on top of the wrapped curds then filled up milk bottles with water to place on top of board. We left this overnight and this process pressed most of whey away.

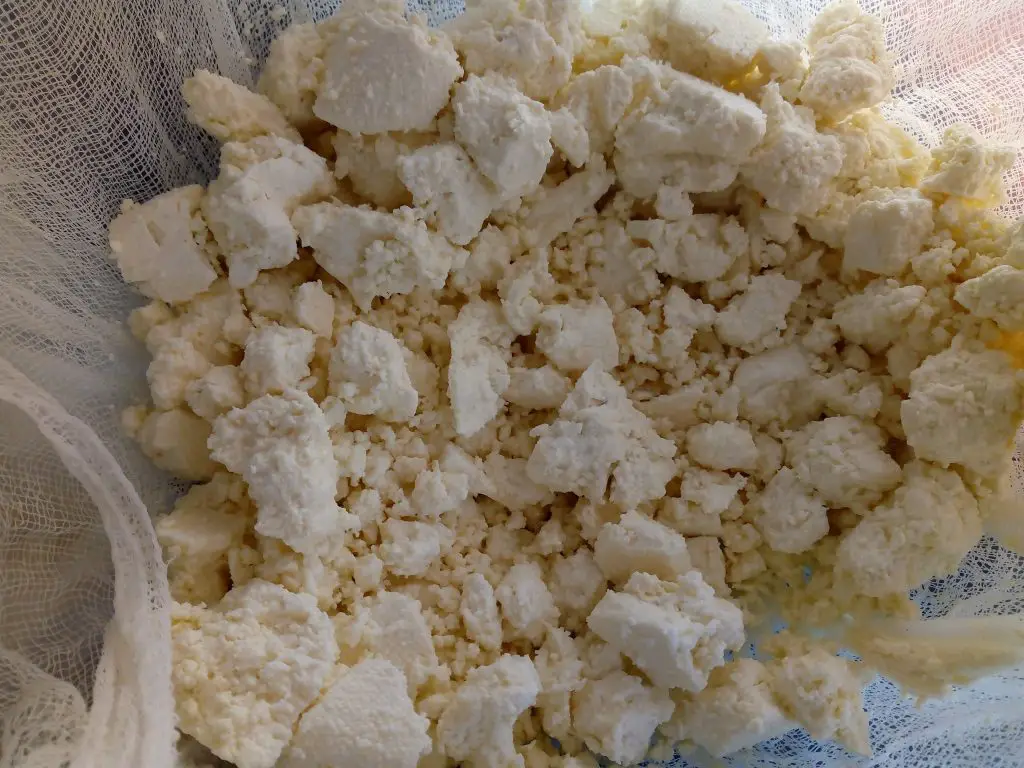
The following morning we opened up the cheesecloth in a colander, broke up the cheese into pieces and added cheese salt, mixing thoroughly.
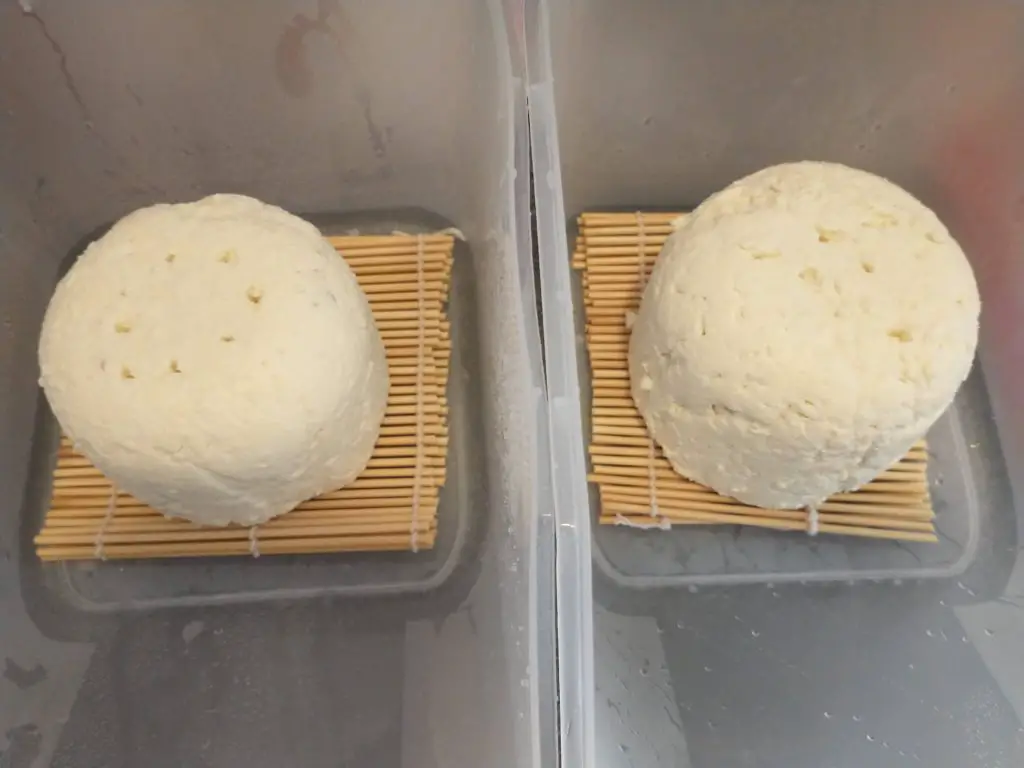
Then a plastic mould was lined with a sterilised j-cloth, and the curds packed in. We covered the cheese and flipped a couple of times. The cheeses had a very satisfying schlurp sound as they emerged from the mould and, importantly, maintained their shape well through the turning process. We flipped every 15 mins for 2 hours, then let the cheese sit in the mould overnight. Over the next few days we turned the cheese four times each day.

After the fourth day, with hands duly sprayed with white vinegar to ensure they were extra clean, we smoothed the cheese over to try to remove any cracks. The next stage is very important in obtaining that characteristic blue veining. Using a metal cheese thermometer, we (gently) stabbed the cheese.
Then the cheese was placed onto a mat and put into a cave. A cheese cave sounds hugely exotic. Sadly we don’t have ancient caves inside which cheese can be matured at the bottom of our garden in the UK Midlands – the closest we would get is a coal mine in this area! – so our cheese cave is actually a wine fridge, which can maintain a warmer temperature than a conventional fridge. We matured the cheese, turning every couple of days for the first week or so, for four months.
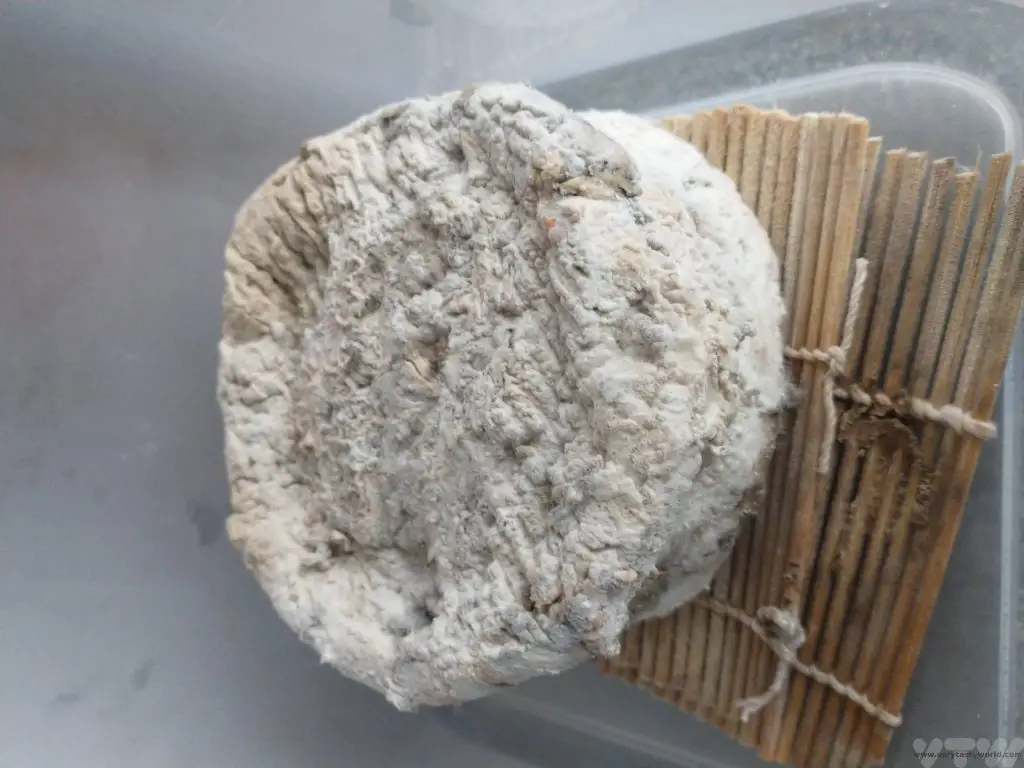
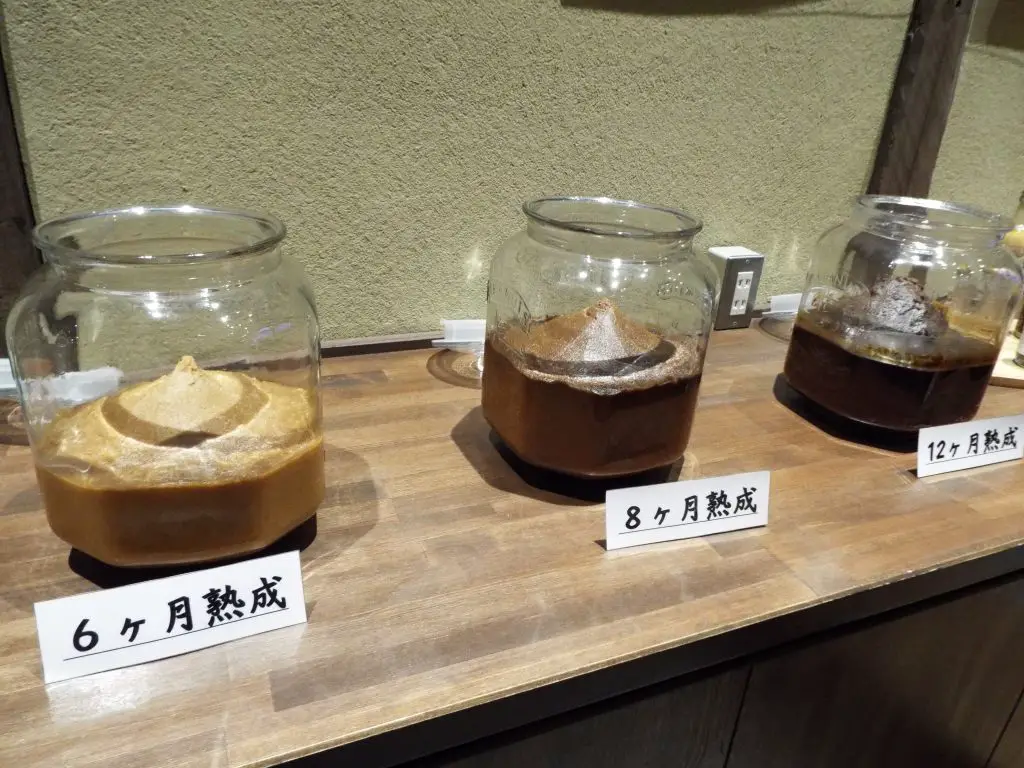
When you undertake long-term foodie experiments (such as making miso) there’s always a bit of trepidation when trying the finished product. Fortunately our Stiltonesque turned out to be a complete success. Cutting through the cheese, there were lovely blue veins.

The cheese was creamy with a lovely salty flavour and characteristic tang from the blue. It didn’t last long…

Cheesemaking is a fascinating process. There’s a lot of frantic activity followed by a lot of waiting while making the cheese itself and then there’s the anticipation of waiting several months for the finished result as it matures. But it is a very satisfying thing to be able to do, especially if the finished product works out.
You can buy cheesemaking equipment from a multitude of online emporia. There are beginners’ cheese kits – definitely recommended if you are just starting out – as well as equipment such as presses for more advanced cheeses. But you can also get by if you cobble together bits and pieces in your house – it’s amazing how you can convert ordinary kitchen utensils into cheesemaking tools.
Some of the links in this article are affiliate links, annotated by a (£). If you click the link and decide to make a purchase we will earn a small commission, at no cost to you, which helps towards running this site.
- RECIPE Oyakodon Donburi
- Zero Waste Recipes Before Your Holiday
- RECIPE: Vegetable Biryani Tamil Nadu Style
- RECIPE: Vegan Wild Garlic Pesto
- Recipe: Venetian Pasta Sauce
- RECIPE: Biryani Raita Recipe
- RECIPE: How to Make Costa Rica’s Gallo Pinto
- Recipe: Japanese Simmered Pork Belly – Buta no Kakuni
- RECIPE: How to Make Umeboshi

RECIPE: How To Make Lao Larb
Lao larb, also known as moo larb, is the perfect dish for a hot summer’s day. It’s incredibly easy to make and really refreshing. It’s kind of a meat salad which hails from South East Asia; we first tried it in Lao , where it holds the status of national dish, but we have also eaten it in Thailand, and quickly became hooked. Even better, all the ingredients are really easy to find in our home country. There’s a tiny bit of preparation needed prior to assembling the dish, so worth thinking about making it ahead of time. The following recipe will feed four as a starter or two hungry people.

INGREDIENTS
300g pork mince. (The ‘moo’ of moo larb is pork.) Chicken mince also works really well and quorn mince or mushrooms can provides a vegetarian alternative. Lamb isn’t recommended as it’s quite fatty and the fat tends to congeal a little when it cools, which doesn’t provide a very nice texture.
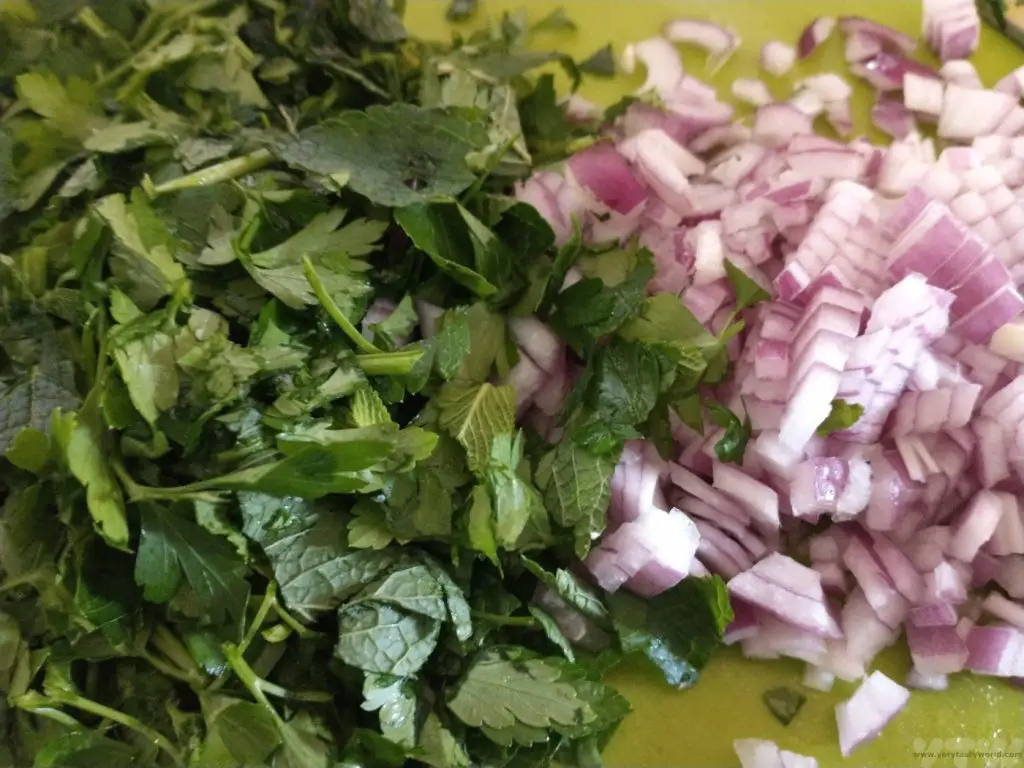
1 large red onion (or 2 small)
Generous handful of fresh mint
Generous handful of fresh coriander
Freshly milled black pepper
1 or 2 juicy limes
Generous splash of fish sauce (vegetarians can use veggie fish sauce or a combination of soy sauce with a dash of vinegar) – around half a tablespoon
Optional: chilli flakes, toasted rice, teaspoon of sugar, Thai basil leaves for garnish
METHOD
You need to allow enough time for the mince to cook and cool before assembling the dish. It’s the perfect ‘make in advance’ dish.
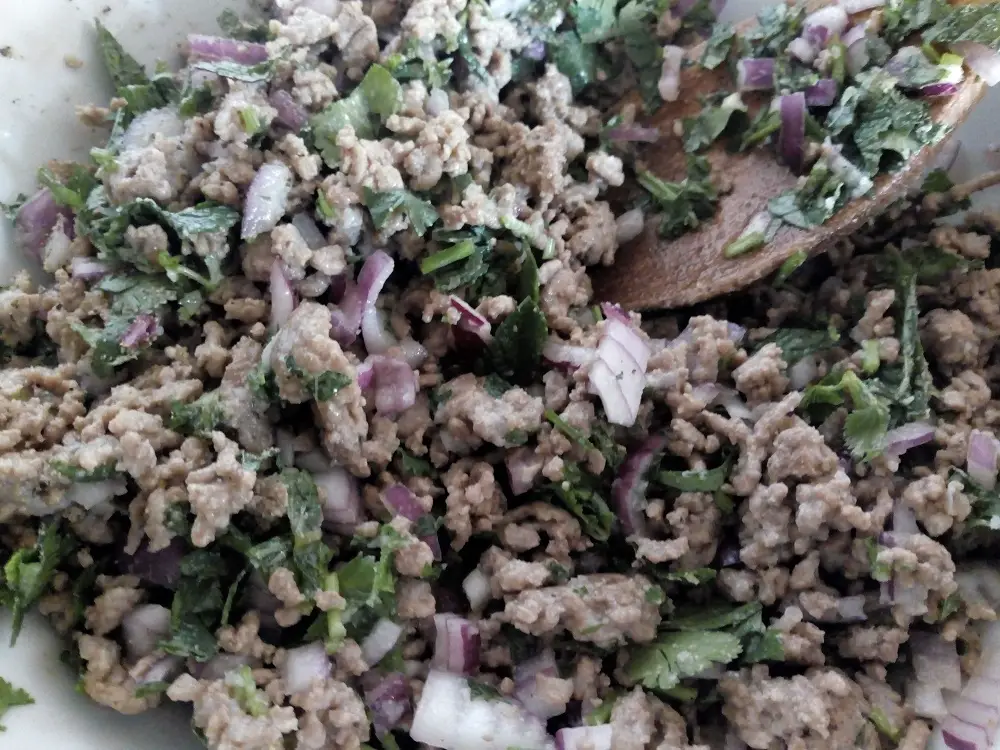
Cook the mince. Pour a little oil into a pan and fry until the meat is cooked through. Allow it to cool.
Finely chop the onion, coriander and mint and add to the mince.
Add the fish sauce, lime juice and black pepper to taste. We really like coarsely ground black pepper so grind ours in a pestle and mortar. This is really where you can adapt the flavour to your personal taste.
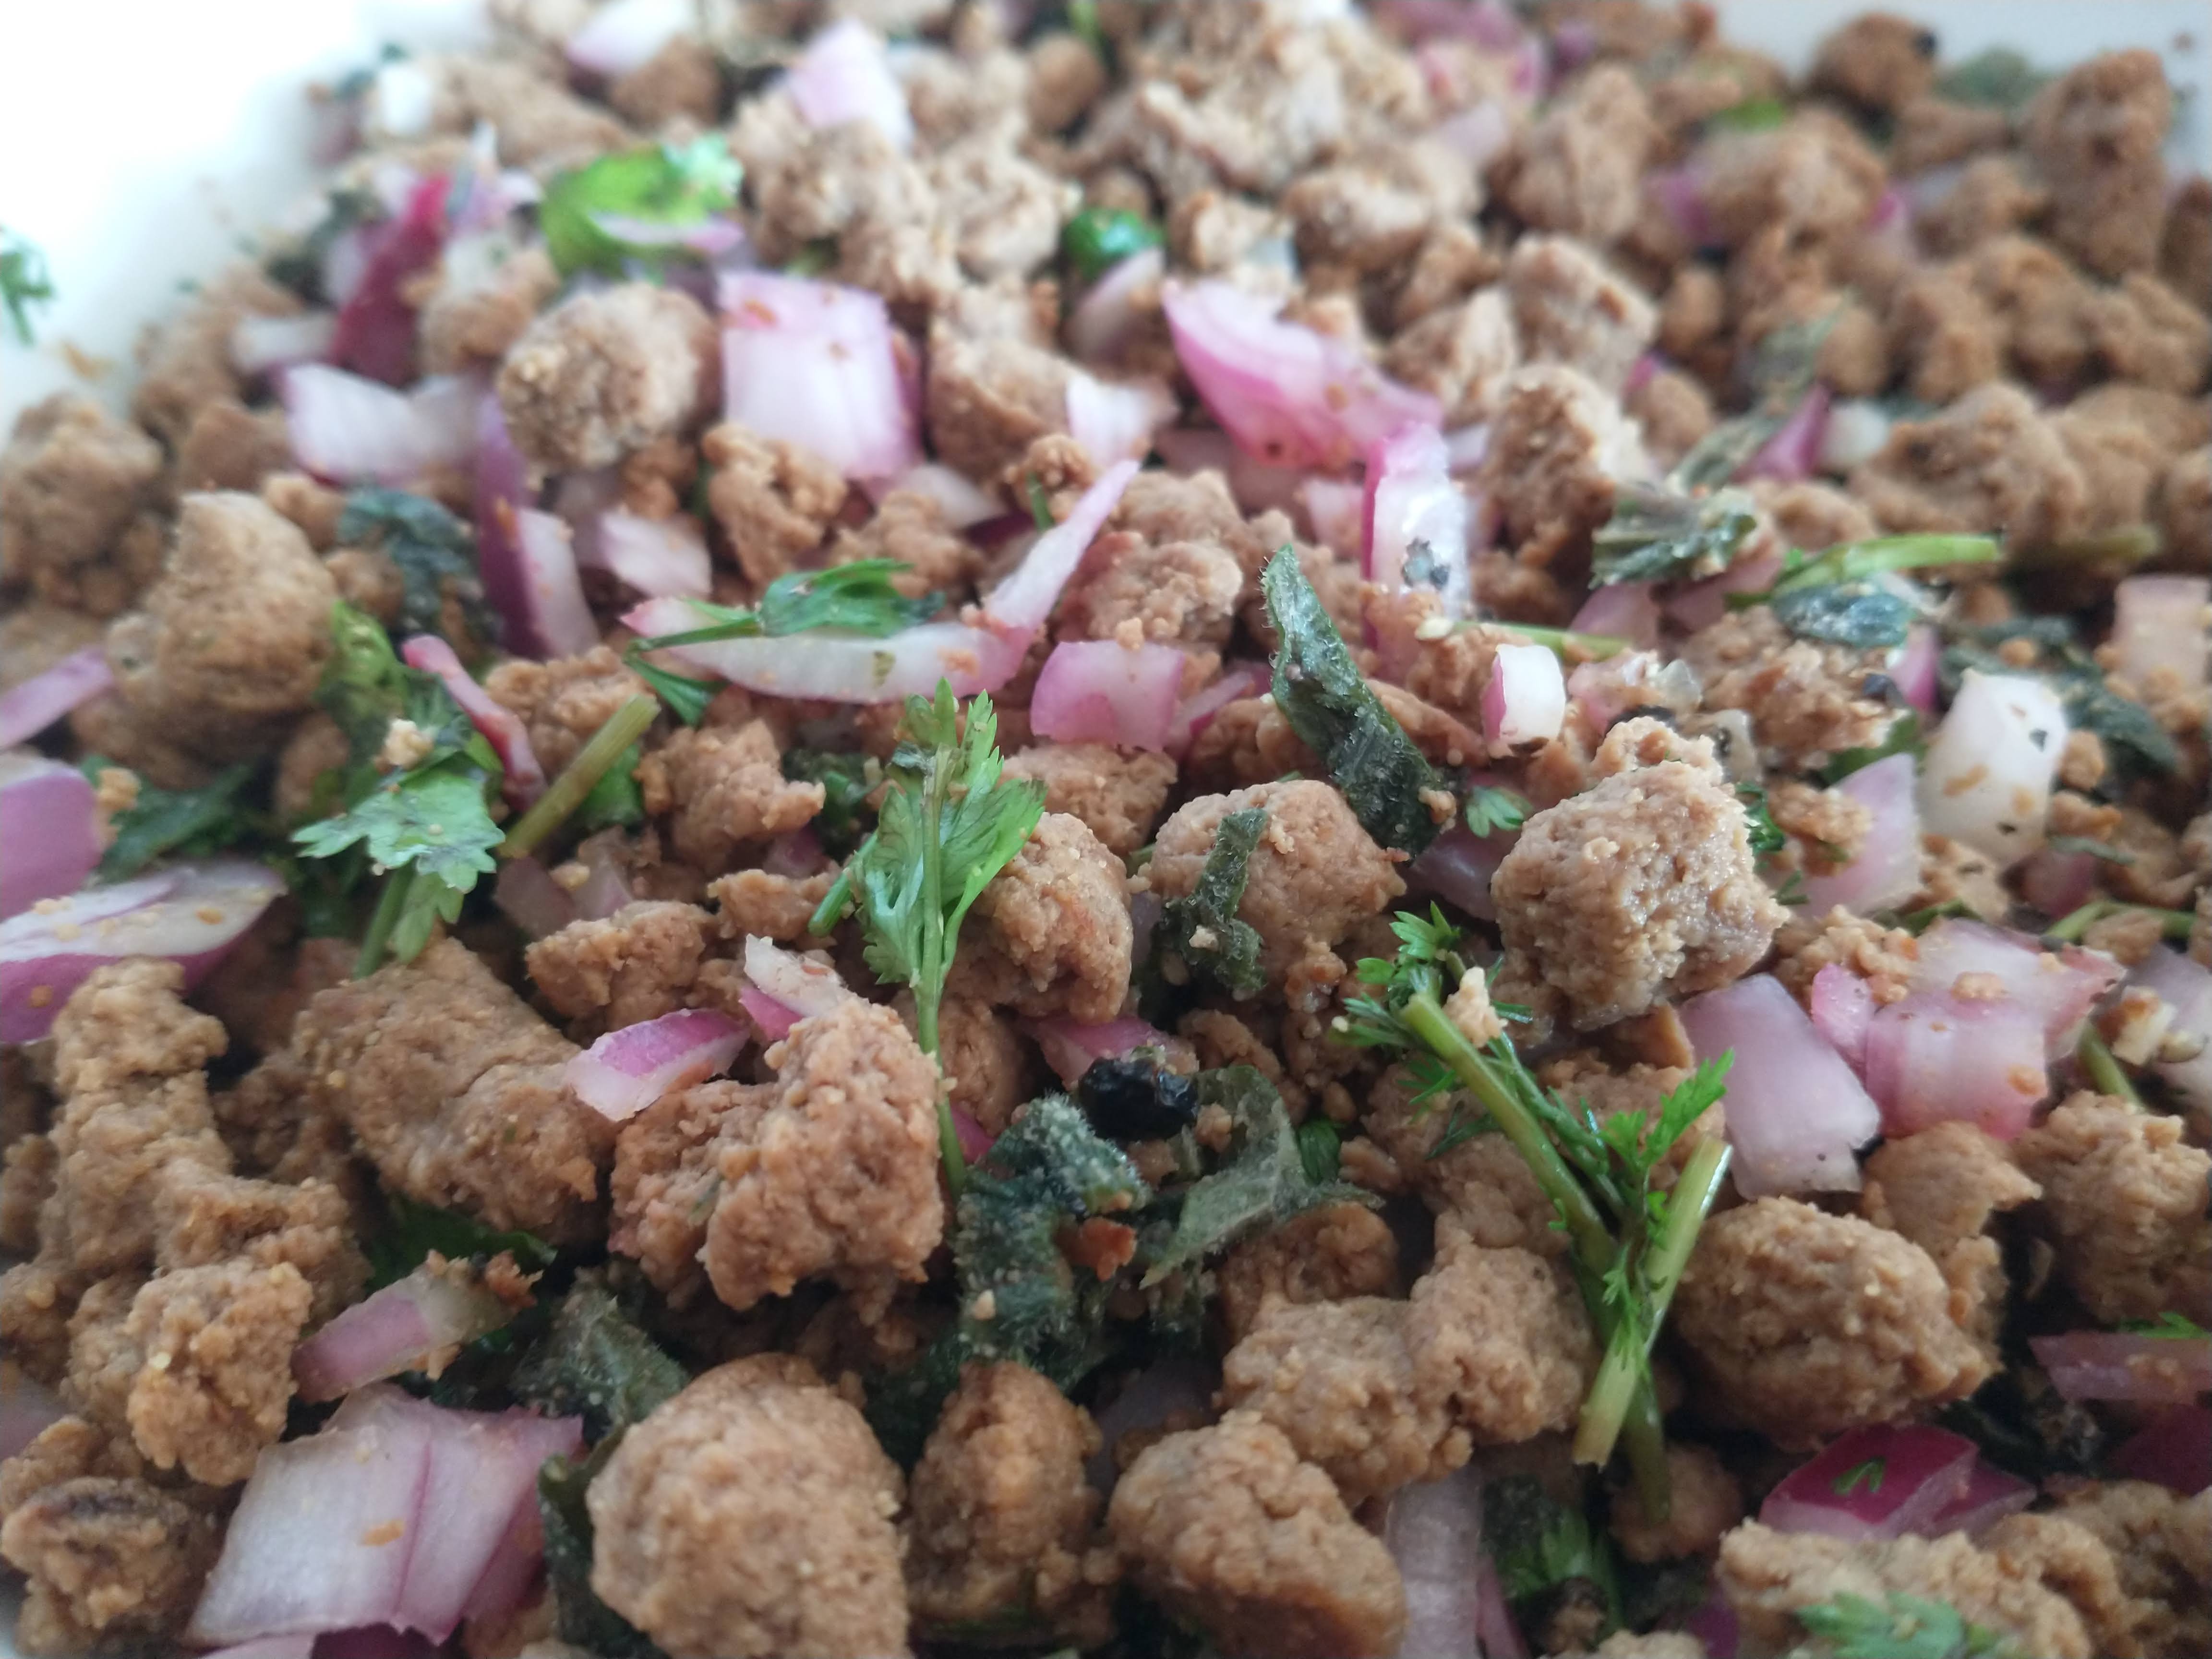
Mix well. It’s fine to make in advance and let the flavours infuse.
Serve with steamed rice and a salad garnish.
VARIATIONS
One of the lovely things about this dish is that you really can adjust it to your taste. There are some variations. If you like heat, add chilli flakes (flakes are better than fresh chilli). This was one of the dishes we tasted in Lao that wasn’t searingly hot, the spice coming from the pepper rather than chilli, but it’s fine to add more heat if you like it. If you’d like to add some sweetness, sprinkle in a little sugar and mix in.
There is also an important and popular variation where you can add roasted ground rice powder for an additional nutty complexity to the flavour and texture. It’s very simple: place a handful of uncooked Thai rice in a dry frying pan and roast the rice for 10 minutes or so, moving about in the pan until the rice is brown. Then transfer to a pestle and mortar or a spice grinder and grind to a powder.
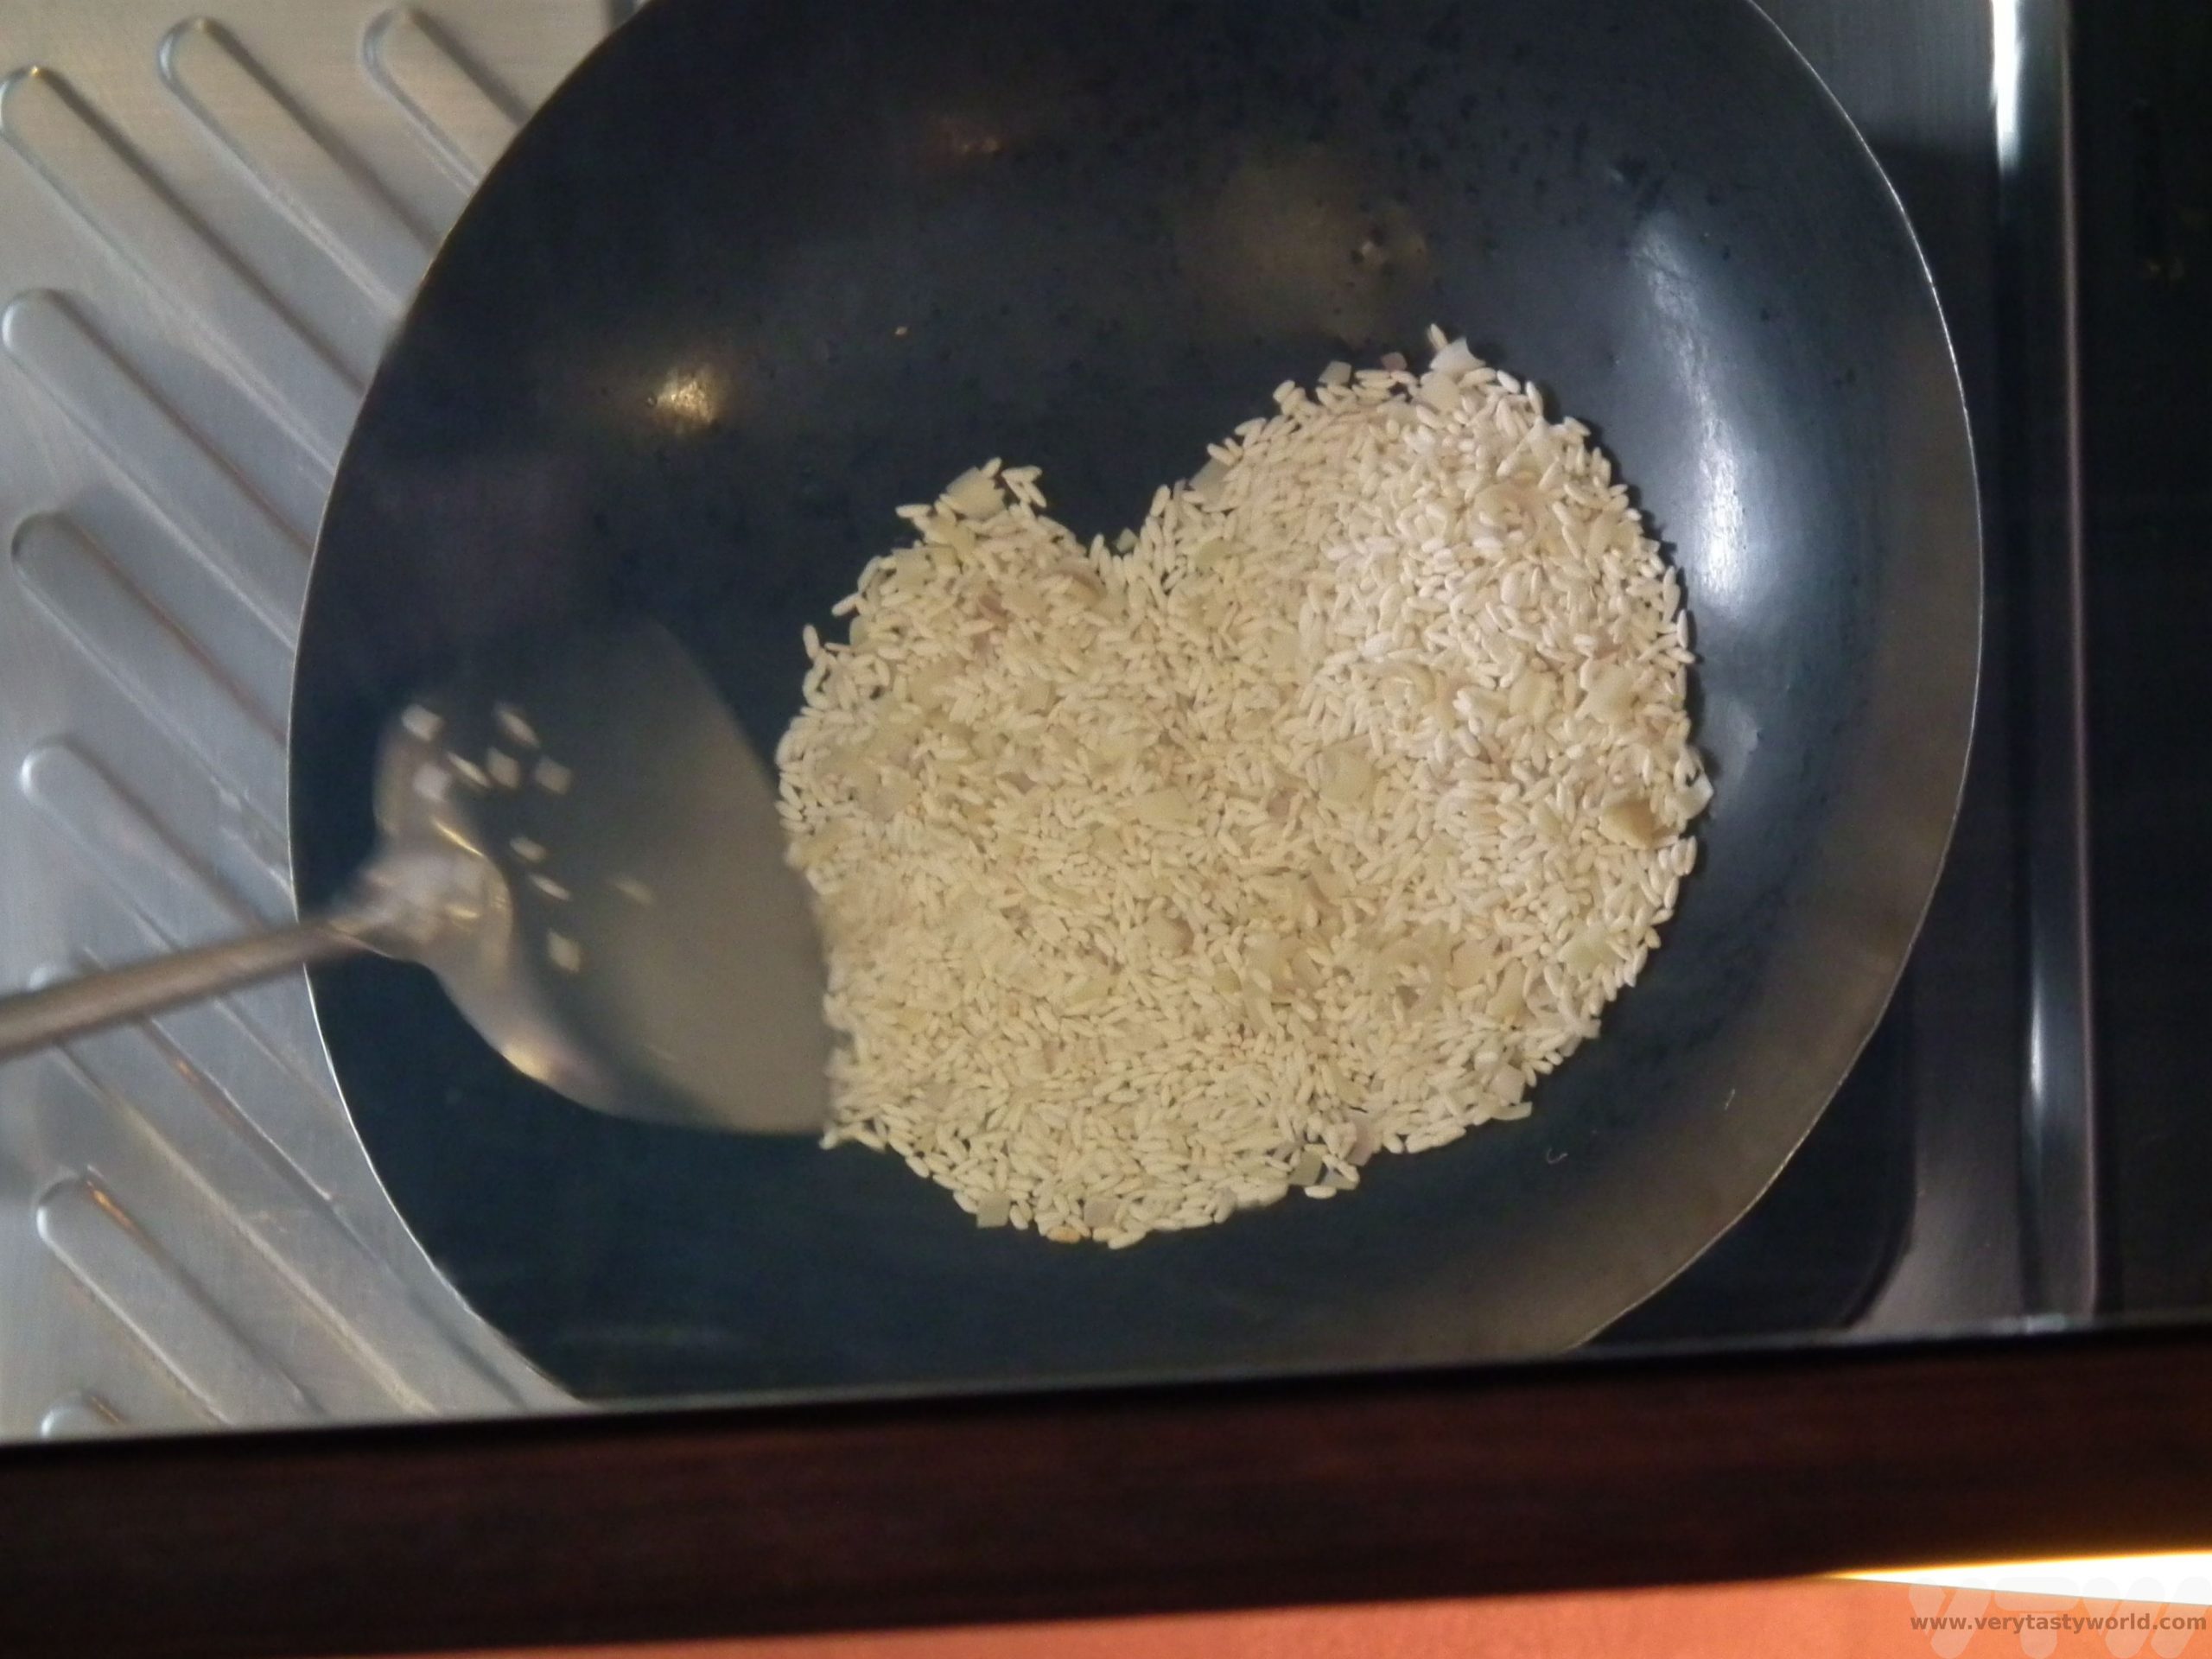
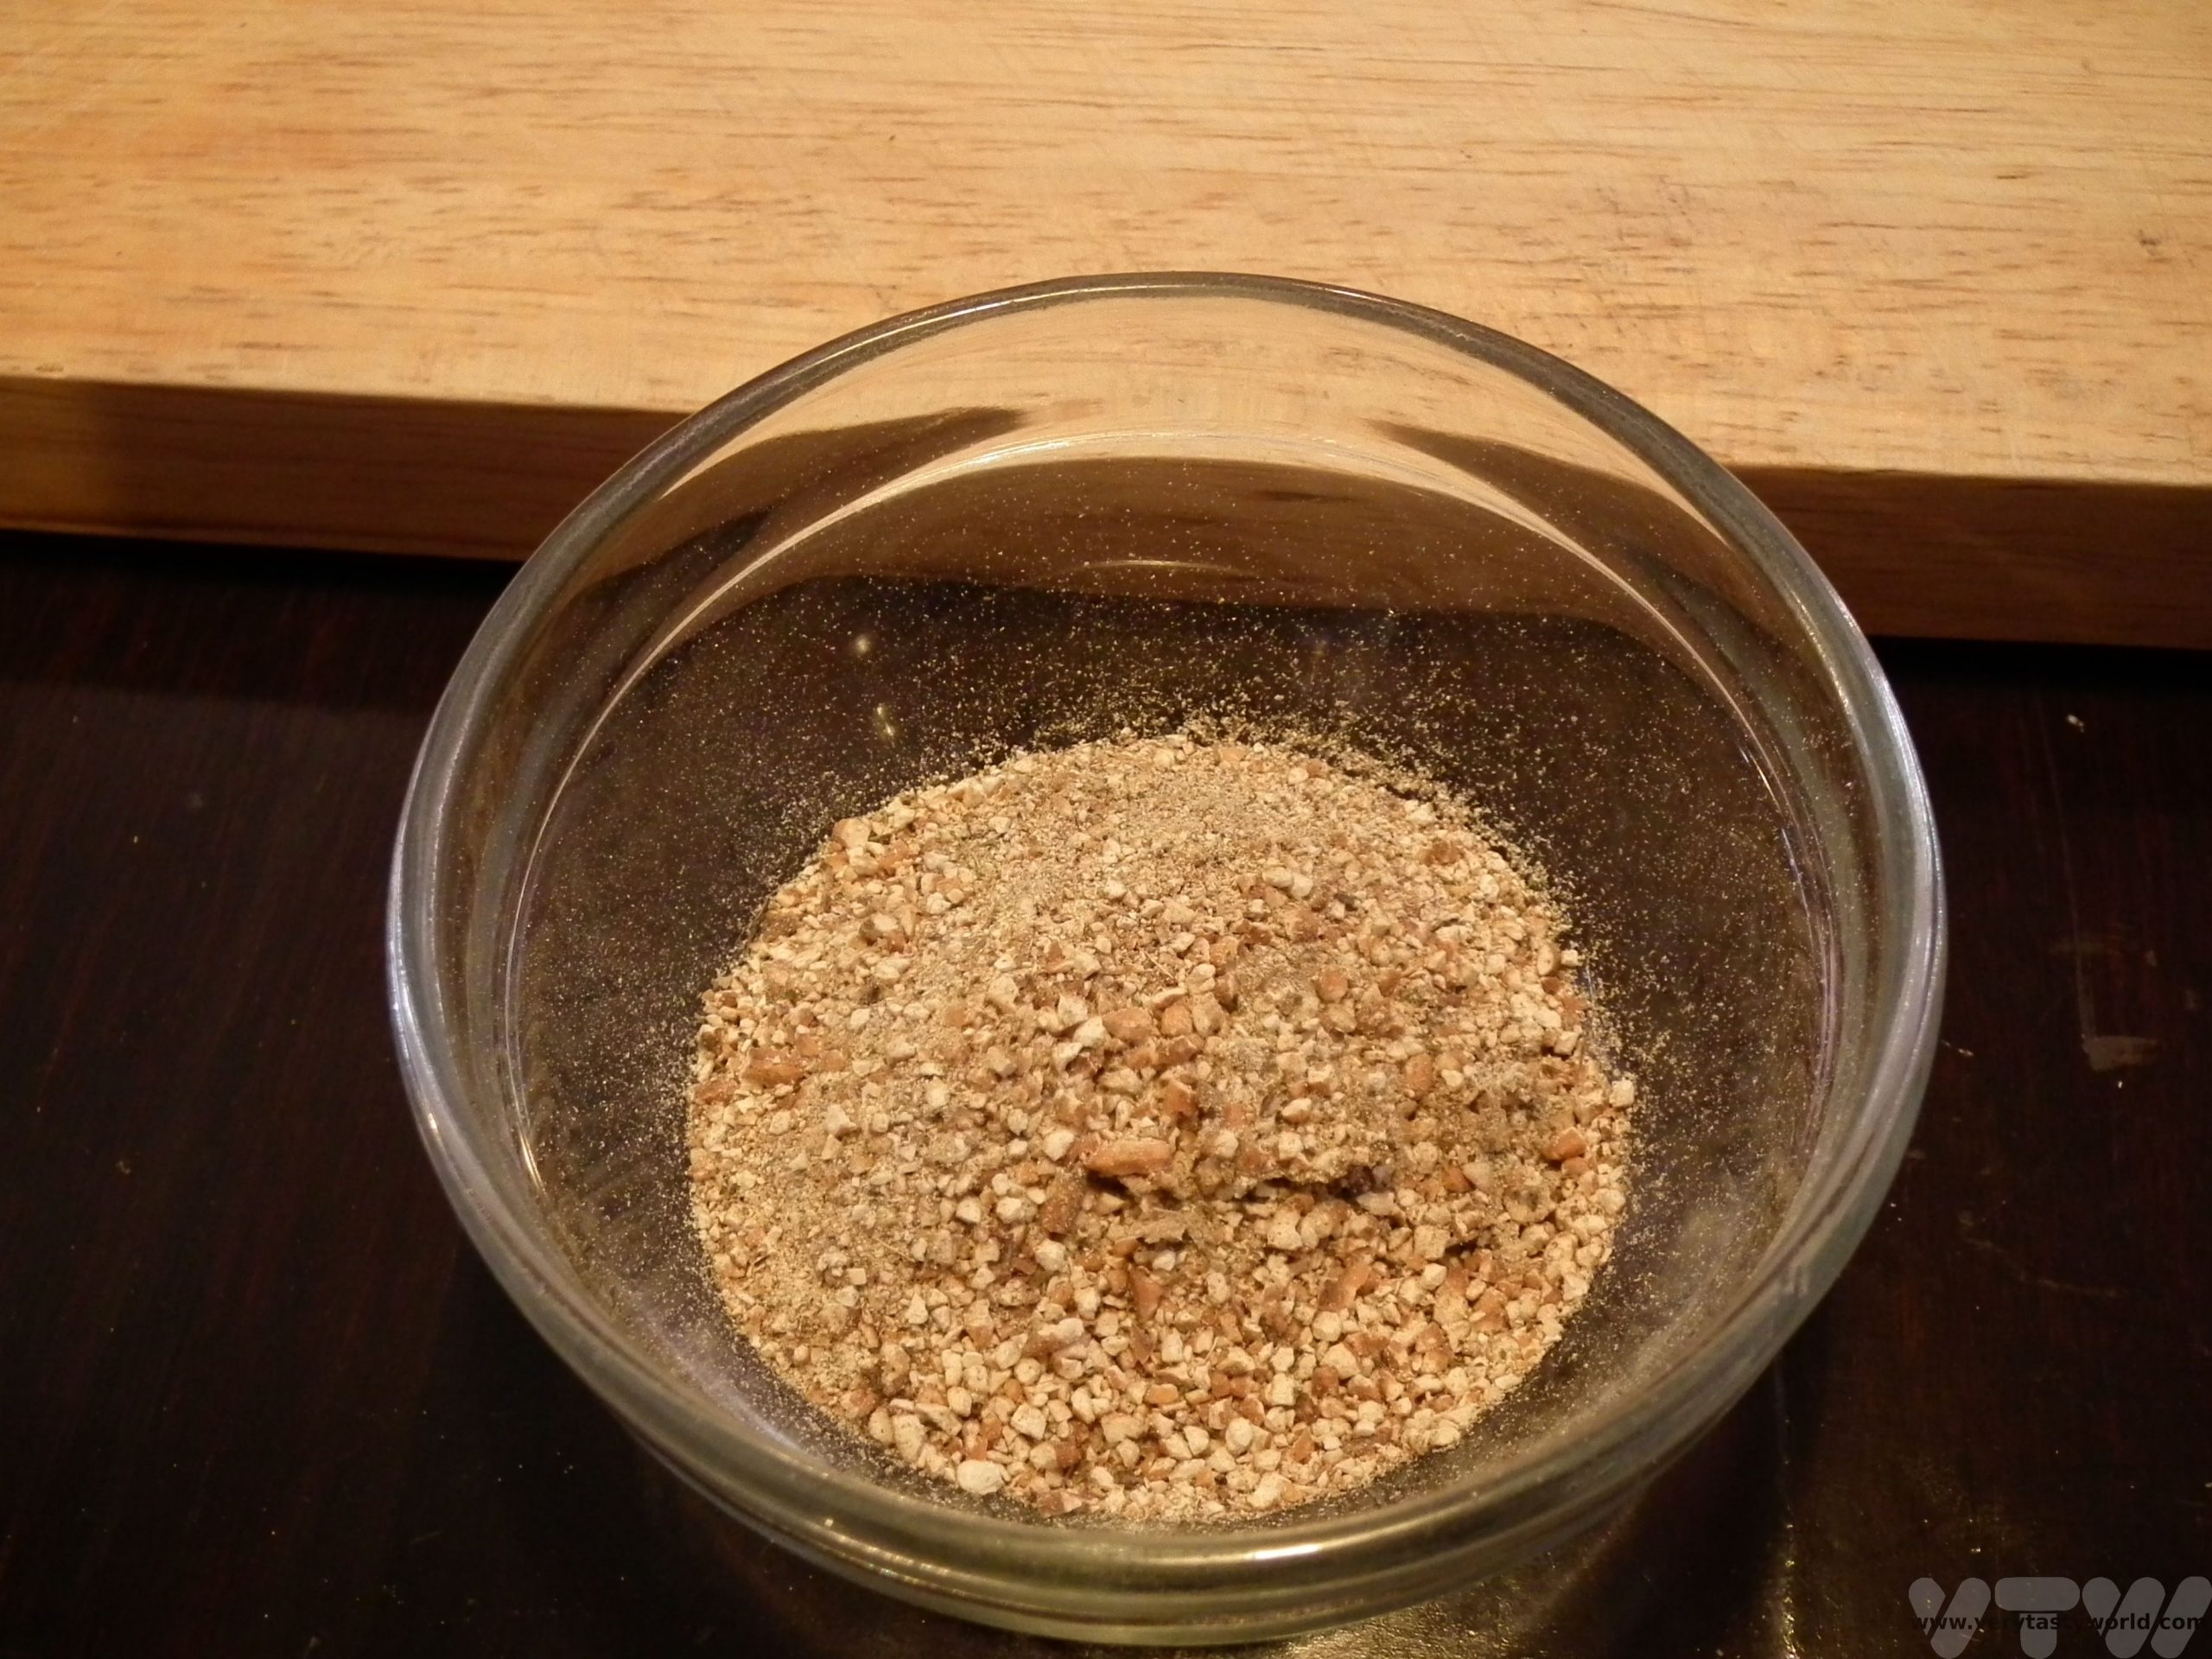
(You can actually toast more rice to make a greater quantity of this powder; it will keep for a couple of months in an airtight container.)
- RECIPE Oyakodon Donburi
- Zero Waste Recipes Before Your Holiday
- RECIPE: Vegetable Biryani Tamil Nadu Style
- RECIPE: Vegan Wild Garlic Pesto
- Recipe: Venetian Pasta Sauce
- RECIPE: Biryani Raita Recipe
- RECIPE: How to Make Costa Rica’s Gallo Pinto
- Recipe: Japanese Simmered Pork Belly – Buta no Kakuni
- RECIPE: How to Make Umeboshi
Recipe: Miso Soup
Miso soup is a traditional Japanese broth made with miso (fermented soy bean paste), dashi (a simple but delicious stock) and a variety of other ingredients of your choice. It’s the perfect accompaniment to so many Japanese dishes. Here’s our miso soup recipe.
Ingredients
3 sheets of kelp seaweed (kombu)
1 packet of bonito flakes (40g)
1 litre water
1 tbs miso paste (home made or shop-bought)
Optional:
spring onions
block of silken tofu
wakame seaweed
enoki mushrooms
Method
It should be possible to buy kombu (kelp) and bonito flakes from Asian supermarkets. The dashi really adds to the deliciousness of the soup but if you can’t get hold of the ingredients, you can make a vegetable/fish stock and skip to the step where you add the miso paste.
Make the dashi: Put kombu and bonito flakes into a saucepan of water.

Bring to a simmer. Skim off any froth.
After 20 minutes, you should have a clear broth
Sieve the solids from the broth. Keep the solid ingredients. You can dry these out and use them again to make a secondary dashi.
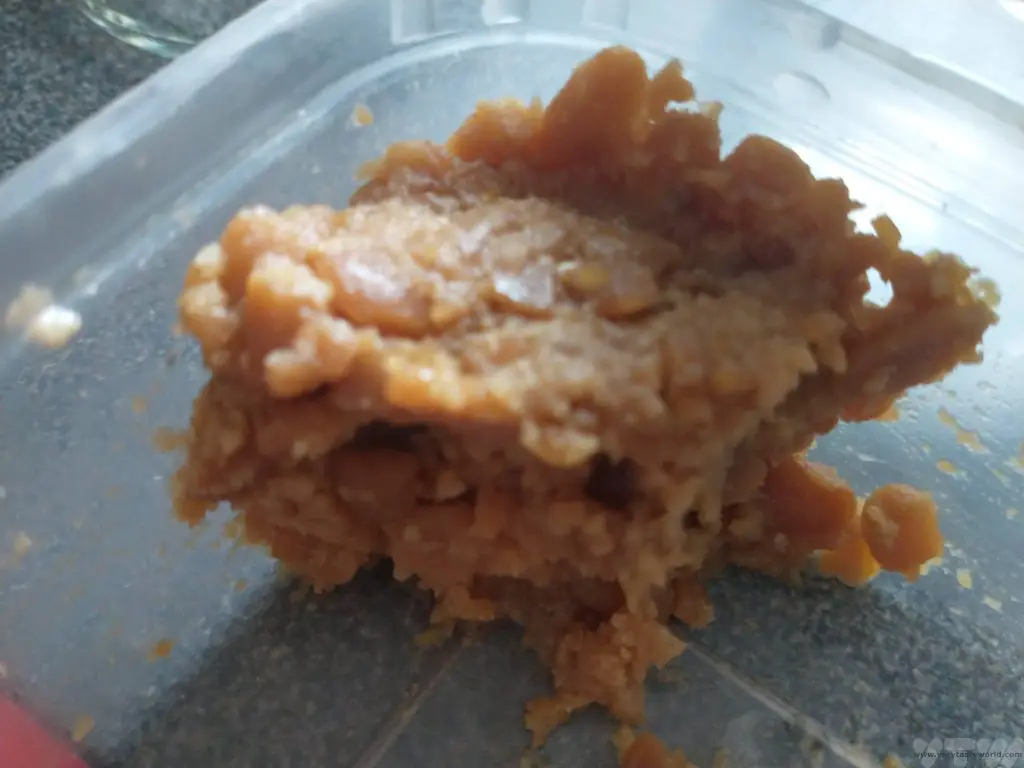
Add the miso paste to the dashi in the saucepan. You can buy miso in most supermarkets but you can also make your own. Warm through gently.
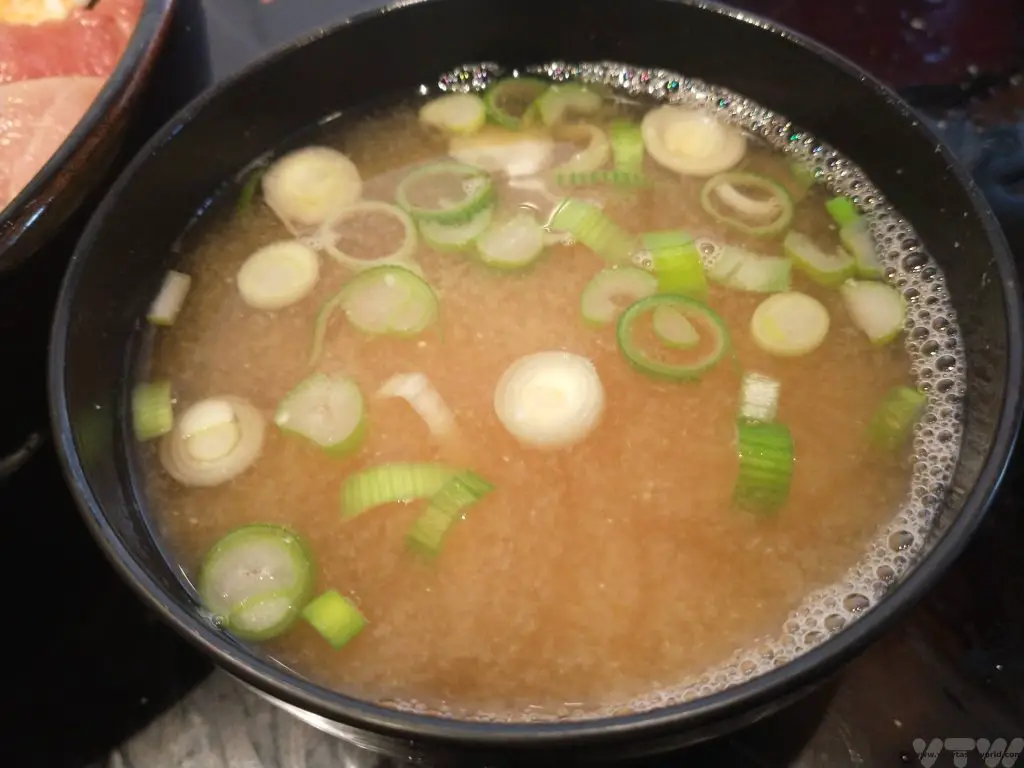
This is the soup base. In this miso soup recipe there are a number of ways to embellish the finished soup. Optional ingredients include such delights as negi (Japanese onions, they are a cross in size between a spring onion and a leek – UK spring onion will be perfect), silken tofu cut into very small cubes, wakame seaweed (a type of kelp that you can buy dehydrated from Asian supermarkets) or small mushrooms (enoki style – the teeny bunches of mushrooms are perfect, but finely chopped ordinary mushrooms will work well).
In this instance we had some spring onions to hand. So they were finely sliced and placed in a serving bowl.

Pour the miso broth on top. Enjoy while hot.
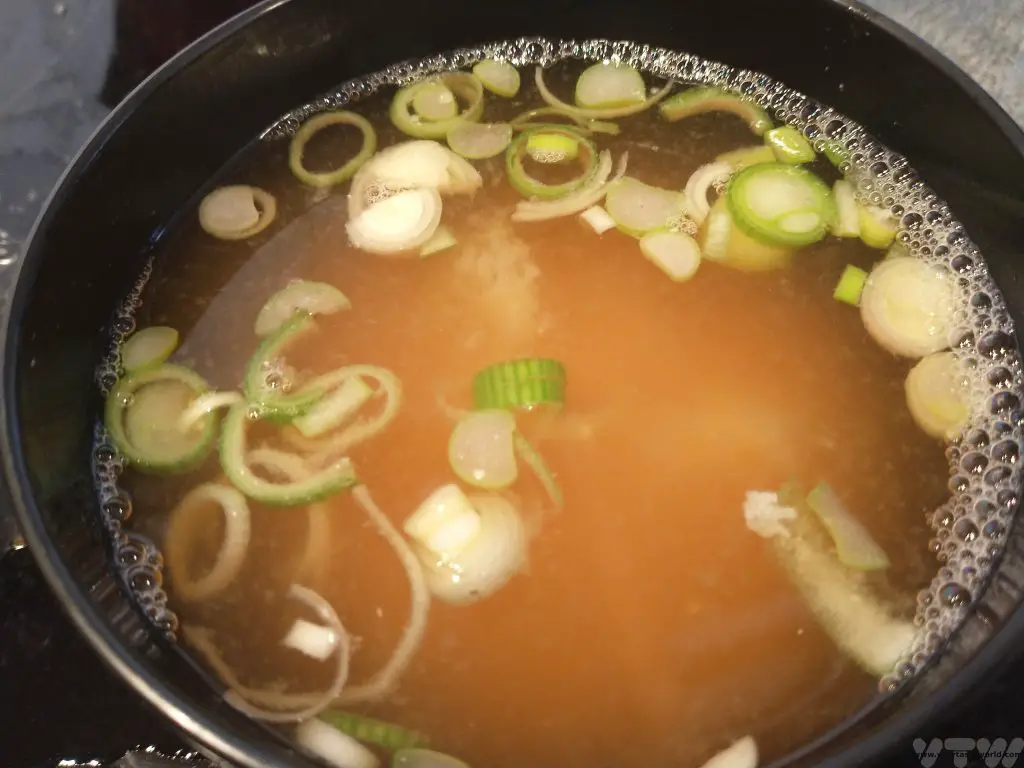
It is absolutely fine to drink the miso soup using a spoon or to drink directly from the bowl. In Japan, it’s also okay to slurp – this helps cool the hot liquid as you drink it. Make sure you stir it (you can use chopsticks to do this) before consuming so that the ingredients that settle at the bottom are agitated – the miso never dissolves completely into the broth – and produce an even flavour throughout the drinking.
Related Posts You May Enjoy


- RECIPE Oyakodon Donburi
- Zero Waste Recipes Before Your Holiday
- RECIPE: Vegetable Biryani Tamil Nadu Style
- RECIPE: Vegan Wild Garlic Pesto
- Recipe: Venetian Pasta Sauce
- RECIPE: Biryani Raita Recipe
- RECIPE: How to Make Costa Rica’s Gallo Pinto
- Recipe: Japanese Simmered Pork Belly – Buta no Kakuni
- RECIPE: How to Make Umeboshi
Chinese Spring Festival – Happy New Year!
Lunar New Year is the most important date in the Chinese calendar. It is celebrated not only in China but many other South East Asian countries. Although it is usually known as Chinese New Year in Western countries it is more commonly known as Chinese Spring Festival at home.
Like many festivals all over the world, such as Diwali, Eid and Easter, Chinese New Year is derived from the lunar calendar and is celebrated with food, family reunions and festivities.
It’s a really busy time of year when people travel across the country to visit their families in their home towns and it’s worth noting that flights and trains are likely to be booked up and very crowded. But it’s a joyous time and everyone in the country views it as a cause for celebration. Displays featuring the animals of the zodiac can be found all over town.


It’s also a lovely time of year because spring blossoms are often coming into bloom, especially in the southern part of the country.

Food is an important part of Chinese New Year when families come together and enjoy the celebrations. We have spent new year with Chinese friends in the UK who served us a feast. Traditional dishes include a whole fish, this one cooked with ginger, garlic and spring onion. It’s important that the fish is served whole – head to tail represents the start and end of the year and it also represents plentiful food and good luck.

This fish dish is easy to cook and tastes delicious. There’s a recipe here. Catfish and carp are popular fish.
We also sat around the table and made jiaozi (dumplings). These represent old-style Chinese coins which symbolise prosperity throughout the year. It’s great fun to sit around a table together drinking beer and chatting as you fill the dumplings, which are later boiled, steamed and/or fried and then enjoyed at midnight. Sometimes a gold coin is put inside one of the dumplings for a lucky recipient.
The dumplings can be filled using a variety of ingredients: minced pork and cabbage or chive (or cabbage and chive), chicken, mutton, prawns or fish are popular, as are vegetable fillings, such as mushrooms, cabbage, leek, spinach, and spring onions. Any of these ingredients can be combined. The dumplings are usually served with a dipping sauce. Soy sauce with vinegar and sesame oil is popular and gives a salt, sour, smoky flavour to accompany the dumplings. You can make it to taste but it’s worth noting that you only need a tiny amount of sesame oil – just a few drops – as it has an incredibly intense flavour. Some dipping sauces add a dash of chilli oil to provide heat.

Other traditional foods include noodles, which represent longevity (due to the length of the noodles) and happiness as well as spring rolls which represent wealth. Sweet dishes include glutinous rice cake which apparently ensure you can aim for a higher position in life/work (and hence the prospect of a better income) and sweet rice balls which represent family harmony. These, particularly, are eaten throughout spring festival.
Although the highlight of the celebrations revolve around the lunar new year, Spring Festival actually lasts for a fortnight. It begins on the new moon and ends 15 days later on the full moon. The last night is known as the Lantern Festival. Red lanterns can be seen everywhere towards the end of the celebrations. This can be a bit confusing as during the rest of the year red lanterns will often indicate that the establishment is a restaurant.

We were lucky enough to be in Xi’an on the last night of Spring Festival some years ago and went along to the Big Wild Goose Pagoda to join in the celebrations. We had never seen so many fireworks – they started at 6pm and went on till midnight – you could see fireworks in every direction you looked – and hear firecrackers. (In recent years, use of fireworks has been reduced or banned for environmental reasons.) The atmosphere was terrific – everyone was incredibly friendly on this happy occasion – and it was very much a family event.


Xi’an has a dancing fountain – it has the form of a T shape that is about 50m across and 100m long. It’s located on the north square of the Big Wild Goose Pagoda. Every night a variety of music that ranges from traditional Chinese to Western classical and Cantopop plays – and the fountain dances along, forming a colourful waterscape. All the water drains away immediately into a reservoir to be stored for the next show. The timing of the show varies depending on the season so, if you are visiting the area, it’s worth checking out the timetable so as to be sure to catch it.


2924 is Year of the Dragon and begins on February 10th. Celebrations will ensue culminating on February 24th with the Lantern Festival.
The animals associated with the years are based upon the Chinese horoscope. All twelve signs of the Chinese zodiac have different symbols and it is thought that people’s character traits can be reflected in those born in a particular year.
The personality traits for someone born in the Year of the Dragon could be deemed to be strong and independent but maybe seeking love and support – impulsive adventurers. The characteristics of Very Tasty World’s founders could be reflected in their zodiac animals because VTW has a compassionate, generous and diligent Pig associating with a sharp, smart, recondite cheeky Monkey.
Gong Xi Fa Cai! Or Gong Hei Fat Choy!


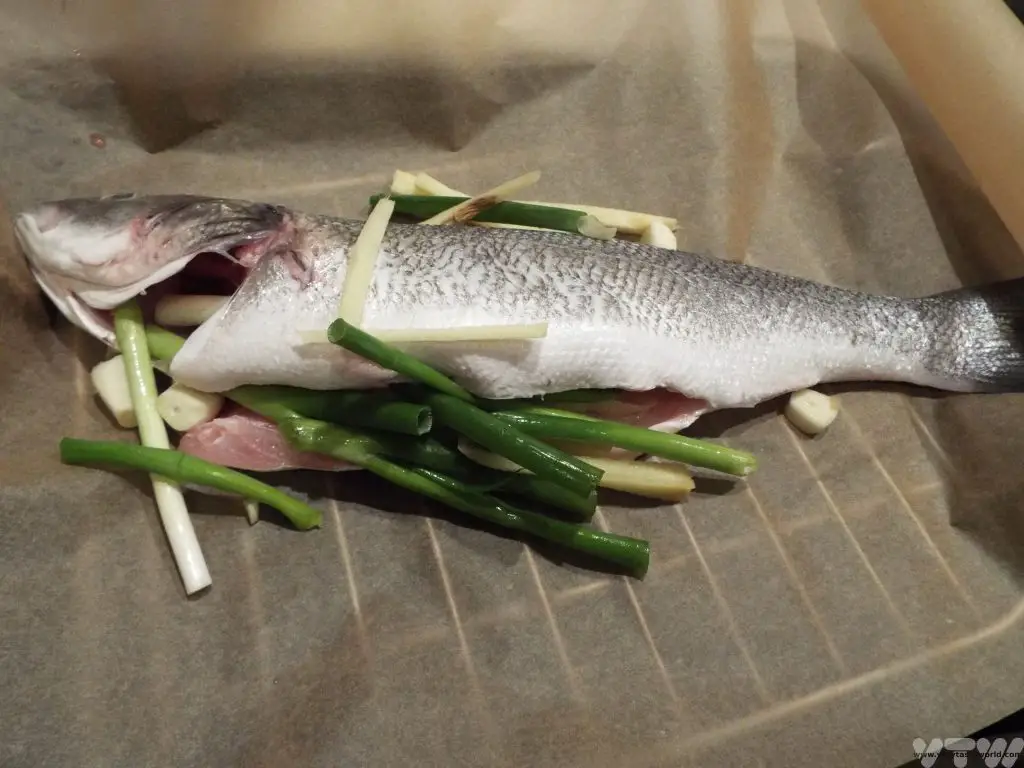
RECIPE: Baked Sea Bass in Parchment
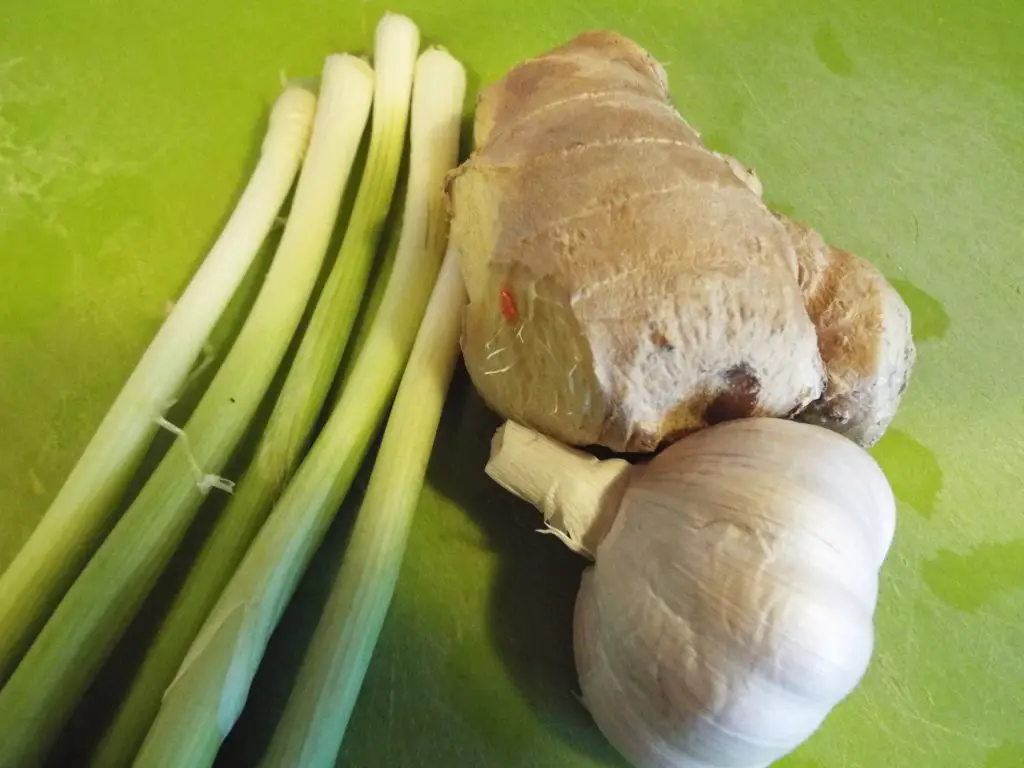
with Ginger, Garlic and Spring Onion
A whole fish baked with ginger, garlic and spring onion is one of the traditional dishes associated with lunar new year in many countries in South East Asia. The reason that the fish is served whole is because the head and tail represent the start and end of the year.
We have a recipe for baked sea bass in parchment. It uses typical ingredients in Chinese cookery – the aromatic flavours of ginger, garlic and spring onion. Some methods steam the fish, other oven-bake. This recipe is very simple

1 whole sea bass, scaled and gutted
5 cm ginger
5 spring onions
3 cloves of garlic
1 chilli for garnish
METHOD
Turn on the oven to 200C, 180C fan, or gas mark 6.
Slice the ginger (you don’t have to worry about peeling the ginger) and four of the spring onions into julienned strips, roughly chop the garlic. Open the cavity of the sea bass and stuff the ingredients inside.
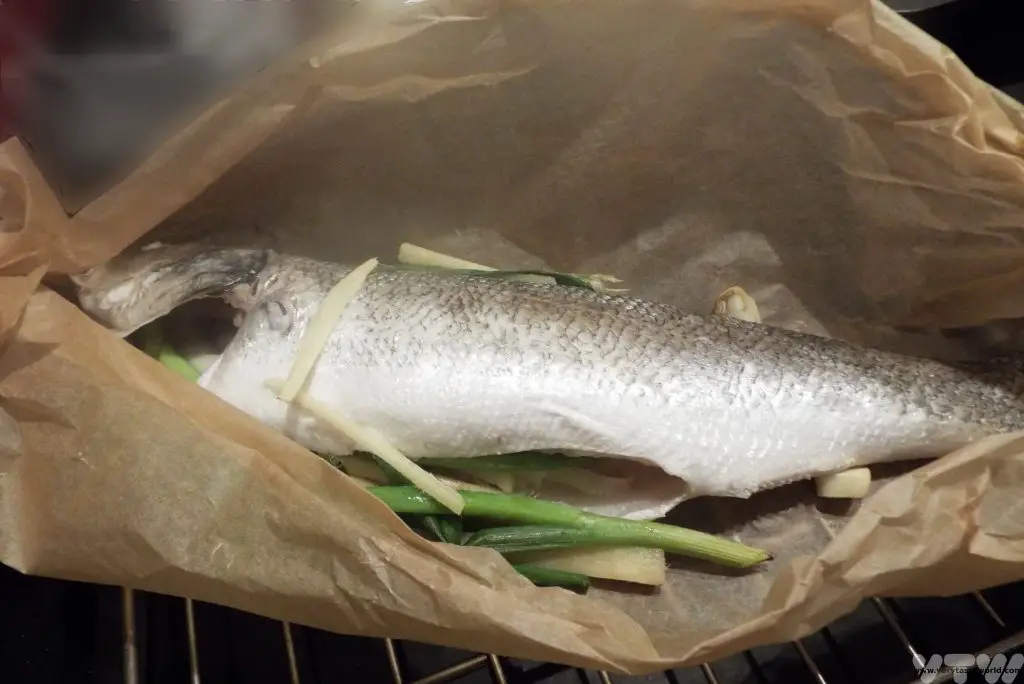
Place the whole sea bass onto a sheet of baking parchment.
Bring the sides of the paper over the fish and make a loose fold. It doesn’t need to be tightly sealed – enough to let steam escape but not so loose that the lovely juices from the fish don’t get lost.

Bung into the oven and cook for 25 minutes.
When the sea bass is cooked, open up the paper parchment – the smell is amazing!
Then garnish with the remaining chopped spring onion and some finely sliced chilli. When celebrating Chinese Spring Festival at New Year, the fish is served whole to the table as a sharing dish.
- RECIPE Oyakodon Donburi
- Zero Waste Recipes Before Your Holiday
- RECIPE: Vegetable Biryani Tamil Nadu Style
- RECIPE: Vegan Wild Garlic Pesto
- Recipe: Venetian Pasta Sauce
- RECIPE: Biryani Raita Recipe
- RECIPE: How to Make Costa Rica’s Gallo Pinto
- Recipe: Japanese Simmered Pork Belly – Buta no Kakuni
- RECIPE: How to Make Umeboshi
Damn Fine Cherry Pie – Recipes Inspired by Twin Peaks

Author Lindsey Bowden
Publisher Mitchell Beazley
ISBN-10: 1784721905
ISBN-13: 978-1784721909
As with all recipe books be sure to follow the directions otherwise you may find that your bowls are not what they seem.
 “Food is interesting. For instance, why do we need to eat?” questions the aphorism guru The Log Lady before providing an in-depth consideration of edible ethics.
So here, for you to digest, are a plethora of dishes inspired by David Lynch’s Twin Peaks (Population 51,201, although that varies).
Food is an integral part of many films but is particularly important in television series where diners, restaurants, pubs, bars, cafes and coffee shops are often central to character and plot development as much as food and its preparation. The quirky, surreal and occasionally bizarre TV 1990s drama Twin Peaks was no exception and a multitude of dishes, delicacies and general foodie oddness stretched across the series. Coffee was integral, especially for FBI Special Agent Dale Cooper who could often discuss the coffee served: “You know, this is – excuse me – a damn fine cup of coffee,” and his preference for a brew that is “black as midnight on a moonless night,” to the extent that canned Georgia Coffee in Japan even had its own great Twin Peaks adverts that tied in with the series in its own very distinct way. And then, of course, there are the cherry pies. Indeed the basis of the title of this cookery book, coupled with its delightful cover illustration, depicts Twin Peaks as slices of pie.
Before starting, there are a couple of points to mention. This publication has not been prepared, approved or licensed by any entity or individual that created or produced the TV programme. It also is focussed on the Twin Peaks world of the original series and Fire Walk With Me film rather than the series filmed and set 25 year later that reassembled the location, characters and crew to offer new directions and dimensions. This is, however, not a problem in any way and gives the original series, and its cuisine, a welcome exploration.
Damn Fine Cherry Pie – Recipes Inspired by Twin Peaks does not hold back on the number and diversity of recipes on offer so there is something for everyone. Indeed, as the title would suggest, “They’ve got a cherry pie there that’ll kill ya.” There are two such recipes to choose from – the Shelly Johnson version or a useful vegan pie from Norma Jennings. But there is more to enjoy aside from the cooking as there are a number of other excursions into the world of Twin Peaks you can engage with, from quizzes, origami and even a Ludo game. If planning a Peaks party there are fashion and costume options to ensure that you look the part at any gathering and also, should you have more seductive foodie Peaky plans, you can (practice required) learn to tie a knot a cherry stalk like Audrey Horne.
“This must be where pies go when they die,” is one of the show’s many memorable quotes and fortunately there’s an interesting tasty Blueberry Whoopie Pie on offer with helpful owl themed design for that dessert. There are many sweet foods on offer, so varieties of donut imbue the pages – including Coffee Donuts. Then there’s the mix of sweet and savoury that can’t be beaten when making Maple Ham Pancakes: “Nothing beats the taste sensation when maple syrup collides with ham.” For Scandinavian food fans (or guests at the Great Northern hotel) there are recipes for Icelandic Hangikjot and Norwegian Meatballs and Gravy. But do remember there are rules to abide amidst all this culinary joy; “never drink coffee that has been anywhere near a fish.” Wise words, perhaps, although you’ll be pleased to know there is an extremely tasty looking trout based Percolator Fish Supper here, which sounds ideal with its bourbon, garlic butter and lemon. We would contend that you should never eat fish that has been anywhere near coffee, but that could well be personal preference.
The recipes are all related to characters, events and environments in the series. Overall it’s a fun foodie folio that offers a lot to create and eat but also provides perspectives for Twin Peaks gatherings as well as the desire to re-watch (or watch if you’ve never experienced it before) a television classic of murder, mystery and distinct surrealism. Recommended both for daily meals and, particularly, for those Twin Peaks parties you know you always wanted to have or just a good old-fashioned series binge watch. With a damn fine cup of coffee of course. And perhaps a slice of cherry pie. Or two.


RECIPE: Haggis, Neeps and Tatties
Haggis, neeps and tatties is Scotland’s national dish. Haggis doesn’t sound very inviting: it is comprised of the heart, lungs and liver of a sheep, all ground up together, mixed with oats and spices, and then boiled inside the stomach of a sheep. Yes, it is basically boiled offal. But one of the reasons haggis is a great dish as that it minimises waste by using all parts of the animal. It is surprisingly delicious.
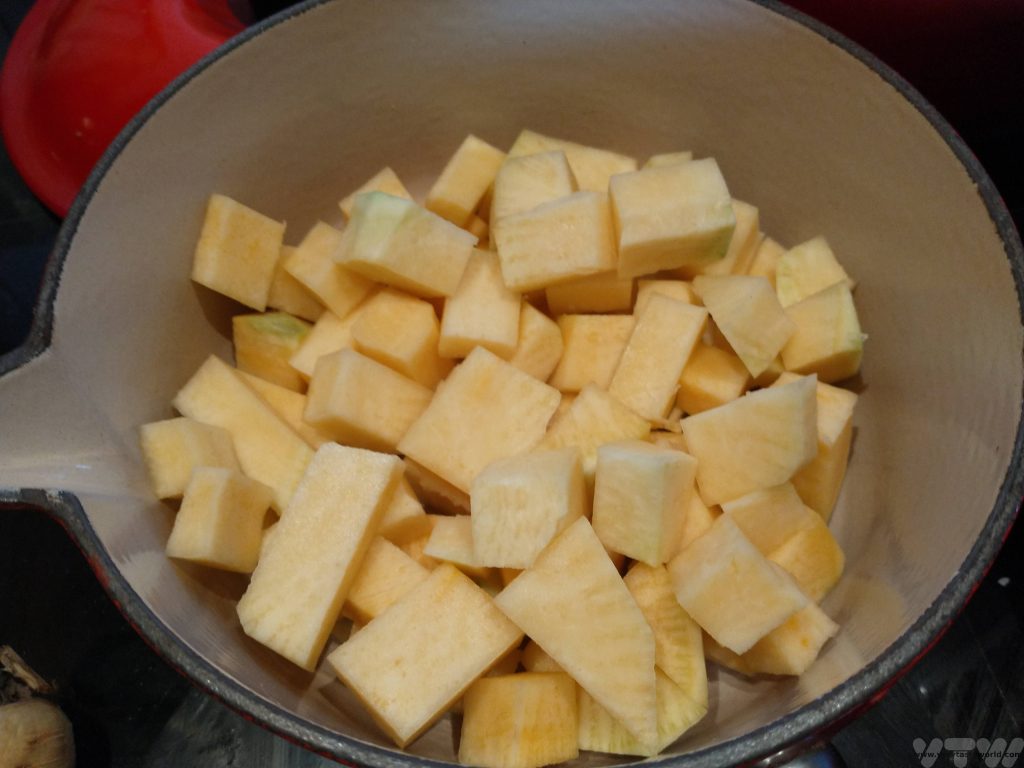
Neeps and tatties are something of a mystery until you learn that they are the root vegetables turnips (actually swede) and potatoes. These are boiled and mashed and served alongside the haggis.
Vegetarian haggis is also widely available in Scotland and elsewhere, if you really don’t fancy boiled offal.
Haggis Neeps and Tatties Recipe
Ingredients
1 haggis
2-3 potatoes per person
1 swede
lots of butter
salt and pepper
Method
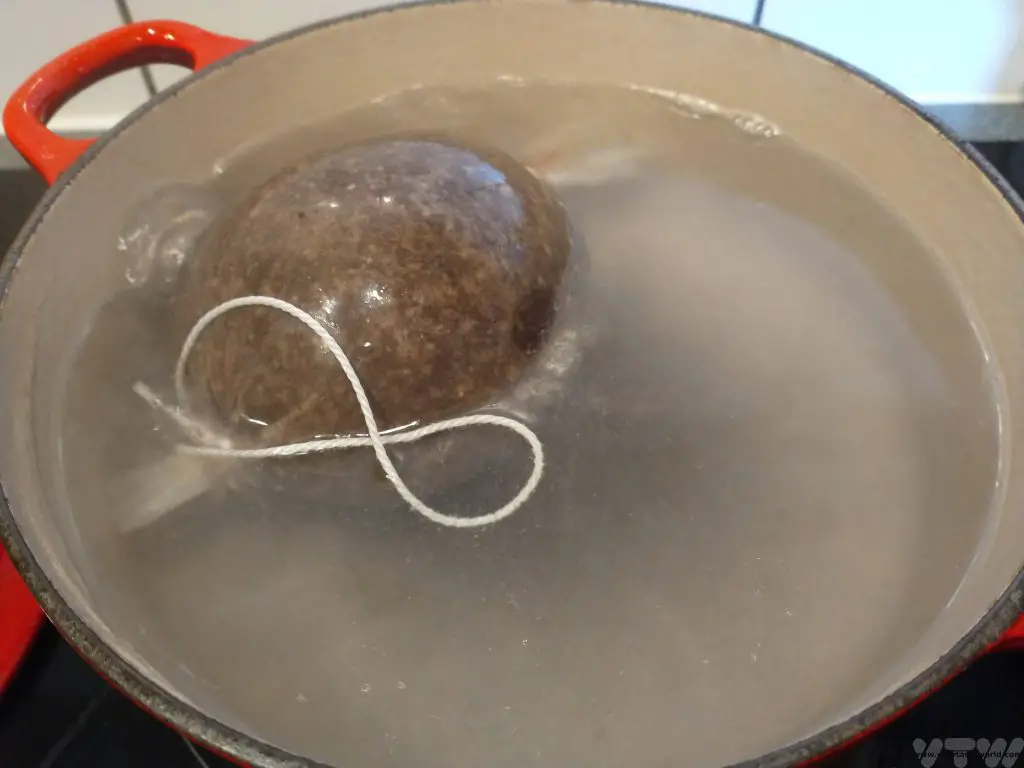
It is possible to make a haggis from scratch but it is far more convenient to buy one. A good butcher will be able to supply a quality haggis. They freeze very well and can also be cooked from frozen.
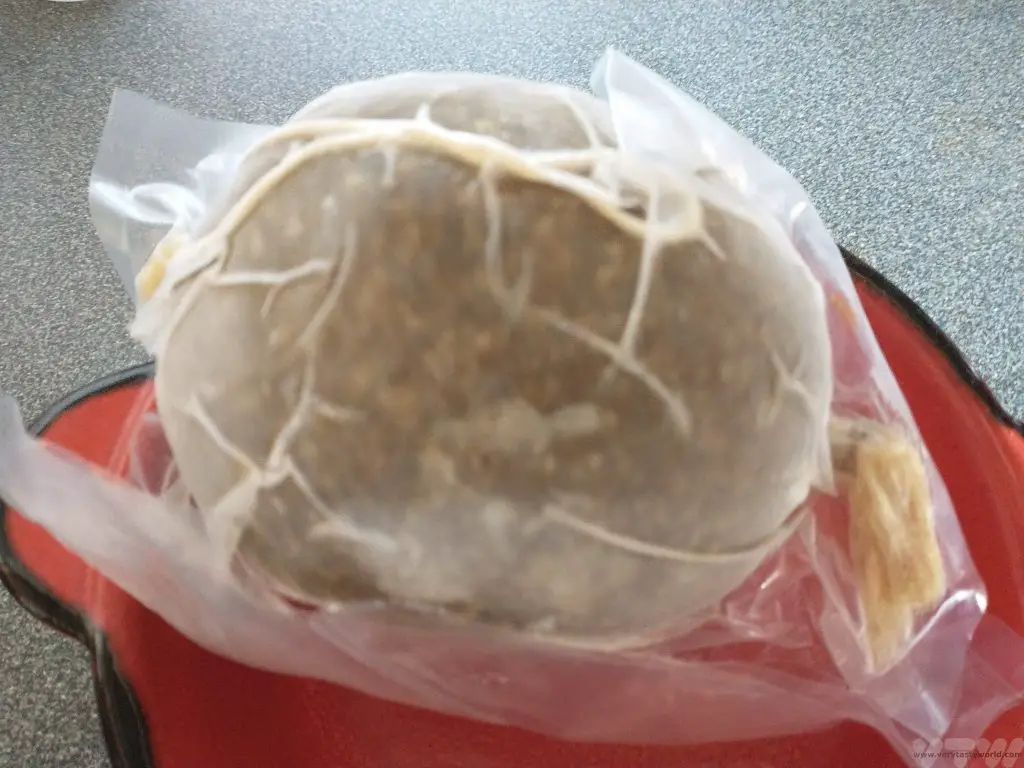
There are many ways to cook a haggis but the easiest is to boil. Remove the plastic wrapping but leave the skin intact and place into a pan of boiling water. Simmer gently – it needs to be cooked slowly to ensure that the skin doesn’t burst. Timing depends on the size of the haggis – a 1kg haggis should cook in just over an hour. Add about 20 minutes to the time if cooking from frozen.
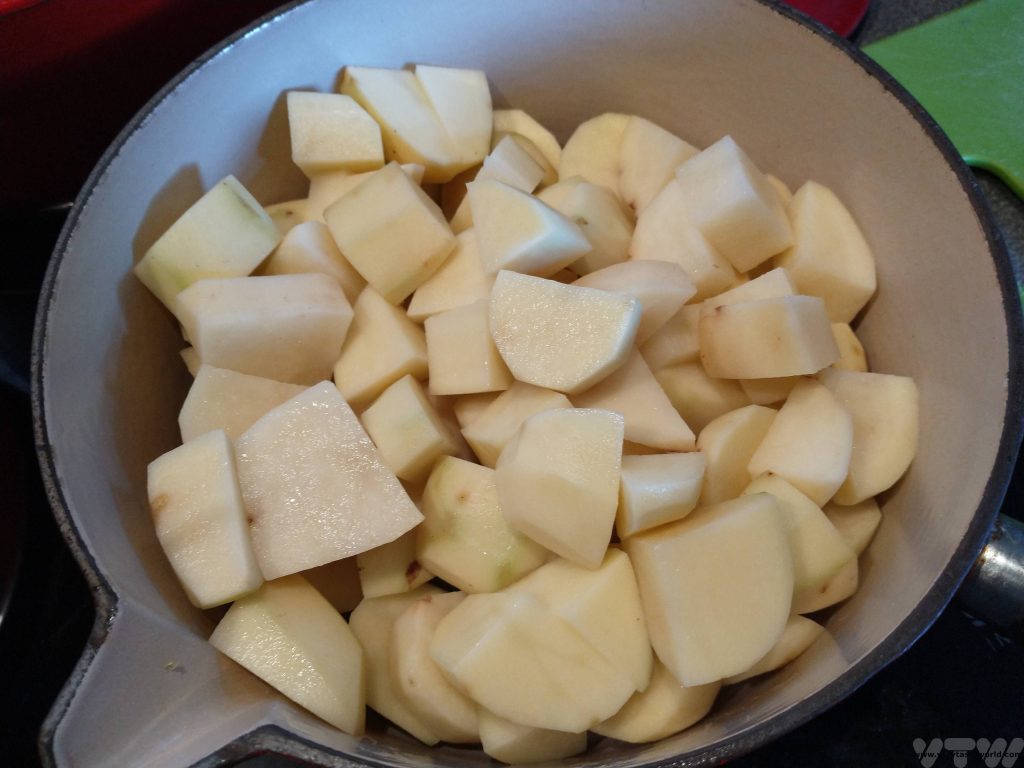
Separately, peel and dice the swede and then the potatoes. Boil until tender.

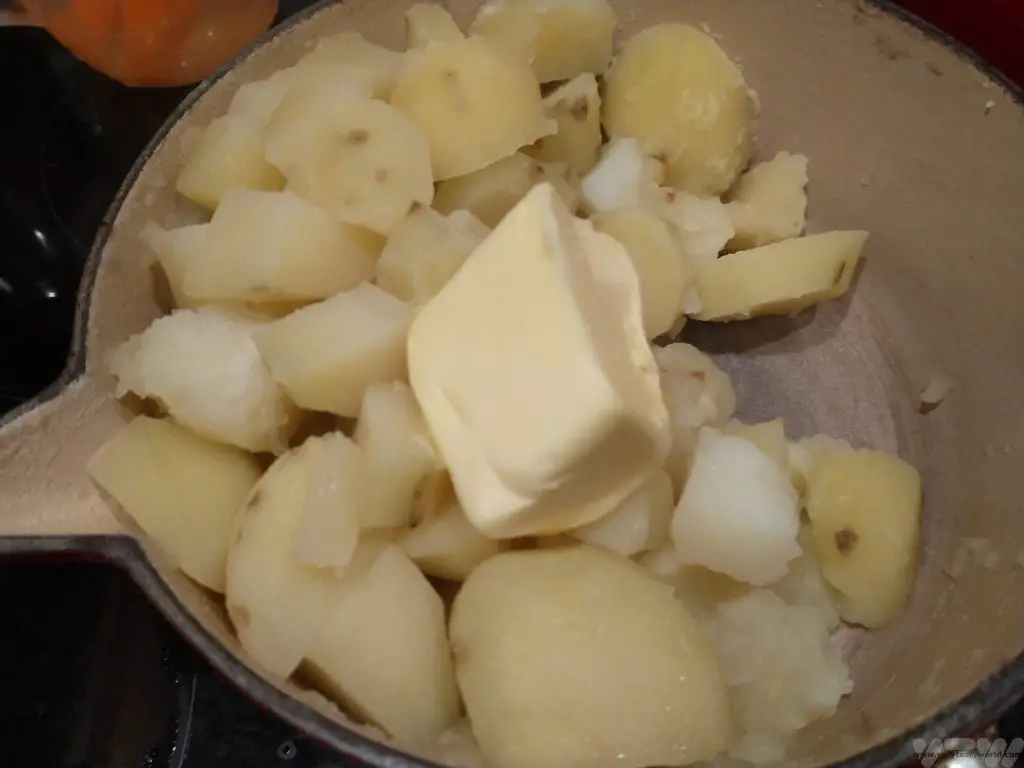
Separately, mash the swede and potatoes. Add loads of butter. There is an unwritten rule in cooking that the flavour of your mash is directly proportional to the amount of butter you add. Season to taste with salt and pepper.
Remove the haggis from its casing – just slit along the length. Use a spoon to scoop out the meat.

Then serve. It’s a very down-to-earth and honest dish, it doesn’t require any pretentious garnish. You could go all “Close Encounters” and shape the mashed potato into a mountain but your food would go cold if you did that. Slap it on a plate and enjoy…

…preferably with a wee dram (a shot of Scotch whisky), of course.

- Things To Do In Rovaniemi In Winter

- Avebury Stone Circle vs Stonehenge

- Five days in Copenhagen

- Is Sarajevo Worth Visiting?

- A Svalbard Holiday – Land of the Midday Moon

- Afternoon Tea in Coventry

- RECIPE Oyakodon Donburi
- Zero Waste Recipes Before Your Holiday
- RECIPE: Vegetable Biryani Tamil Nadu Style
- RECIPE: Vegan Wild Garlic Pesto
- Recipe: Venetian Pasta Sauce
- RECIPE: Biryani Raita Recipe
- RECIPE: How to Make Costa Rica’s Gallo Pinto
- Recipe: Japanese Simmered Pork Belly – Buta no Kakuni
- RECIPE: How to Make Umeboshi
Staying With Nomads In The Gobi Desert in Mongolia
A Life In The Day
It was 7am and sunlight was just beginning to filter through the plastic apex at the top of the ger in the Gobi Desert in Mongolia. Outside, the temperature was -15⁰ C. Inside it wasn’t much warmer, the temperature having dropped dramatically since the stove had gone out at around midnight. We were lying in beds, each on the opposite side of the ger from the other, inside sleeping bags and covered with blankets and duvets, just our noses poking out from the abundance of bedding. We hadn’t had a shower for three days. The outside toilet would involve a 50m walk in sub-zero temperatures from the ger to a hole in the ground. Mitch was lying in bed thinking, “What have I done?” Colin was lying in bed thinking, “What has Mitch done?”
This was a trip that was going to be a challenge.
There are some 165,000 nomadic families living and working in Mongolia and they still employ largely traditional farming methods, albeit using modern technology. Sheep, goats, horses, cows and yaks are the most common livestock kept and they are sent out to pasture every day. The nomads may need to relocate their herds three or four times a year and move to pastures new which means that they pack up their housing and all their possessions.
We had travelled from Ulaan Baatar across the vast Mongolian countryside in a Furgon van along roads where tiny Brandt voles would scuttle across from one side to the other and vultures circled in the sky scanning for prey. There were no road signs. Our driver just knew when to leave the road and head across the sparse desert landscape to our destination.

The previous day we had visited the town of Erdenedalai in the Gobi Desert to meet the singing weatherman. The weatherman monitors the location of all the nomadic families in the area and they communicate by radio to warn each other of potentially adverse weather conditions. The map shows the contact details for all the families in the area. The weatherman also has a range of guitars and gave us an impromptu concert.


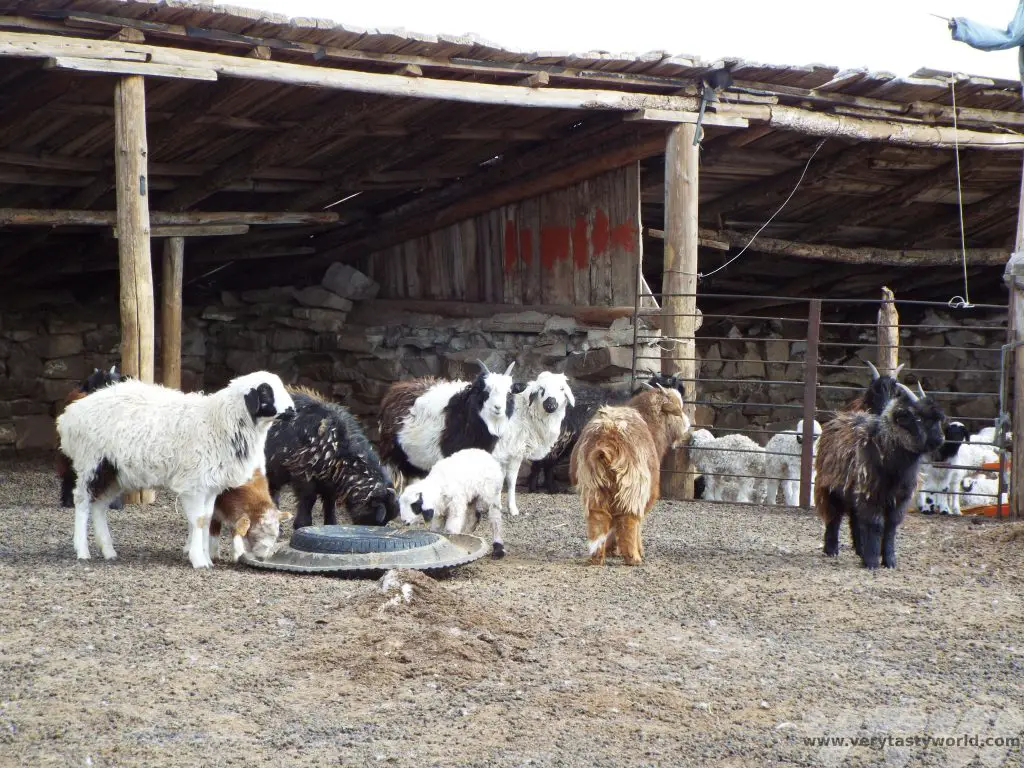
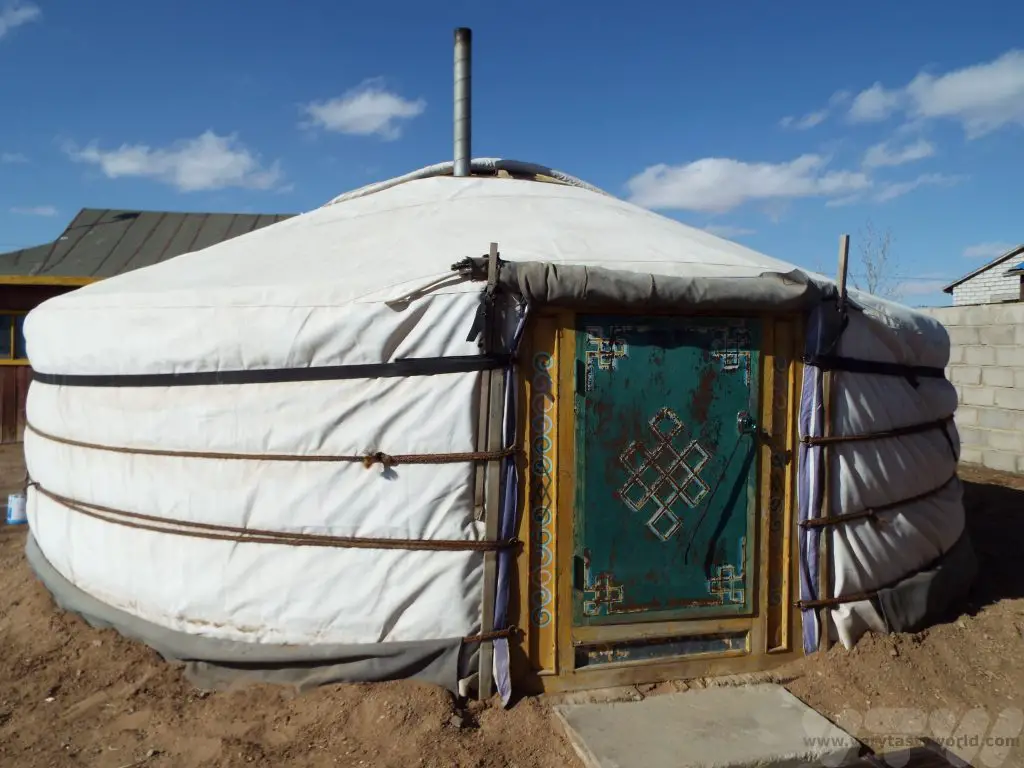
We were visiting Nergui and family who live in the Erdenedalai area, in the middle Gobi Desert in Mongolia. They kept cows, sheep and goats. The wooden pens for the animals are a permanent feature and the family move between different grazing locations several times a year. The gers are constructed alongside the animal pens. They can be taken down and put up in just a few hours – a really clever design.
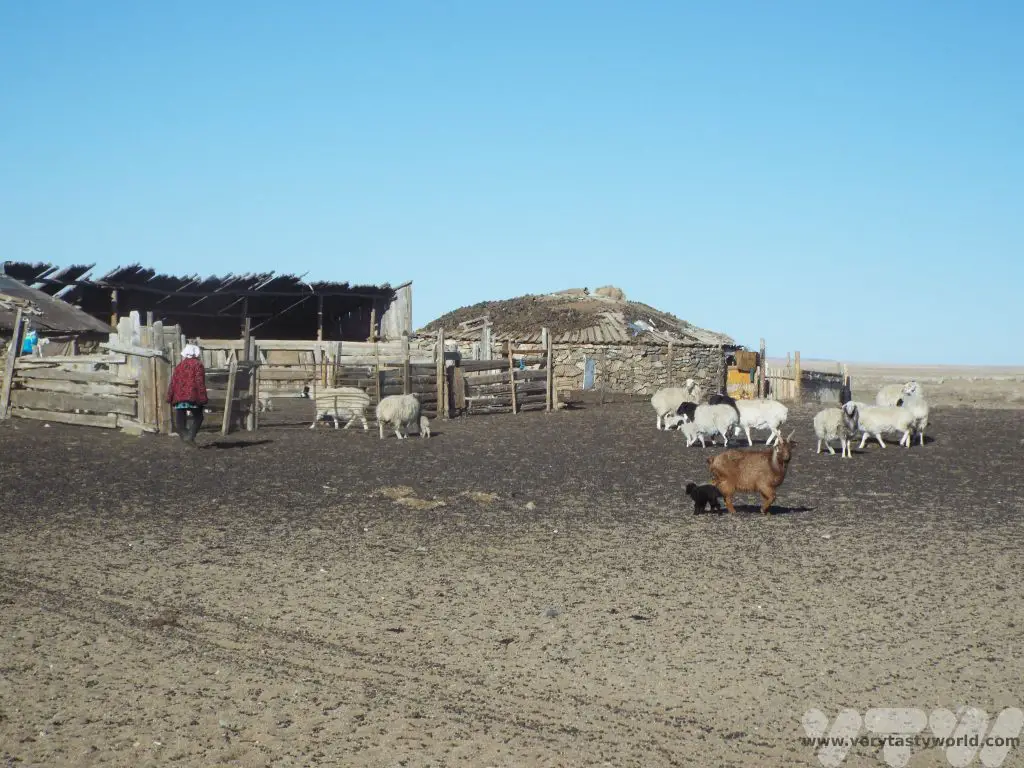
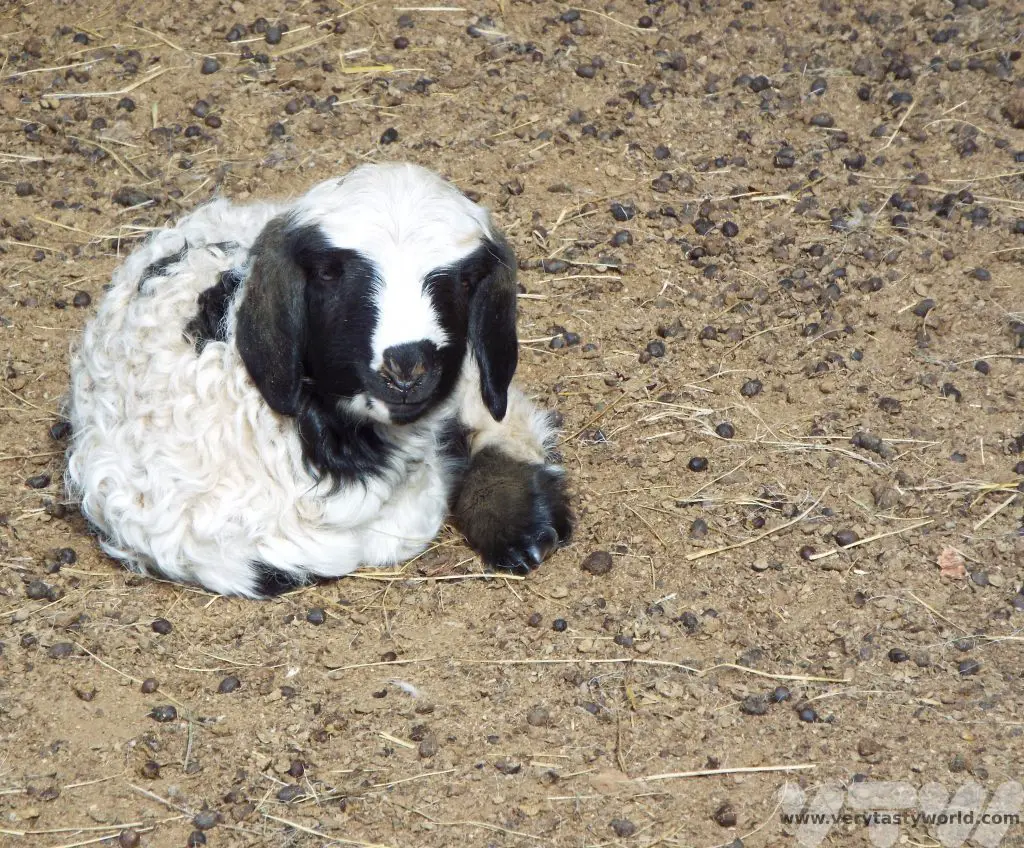
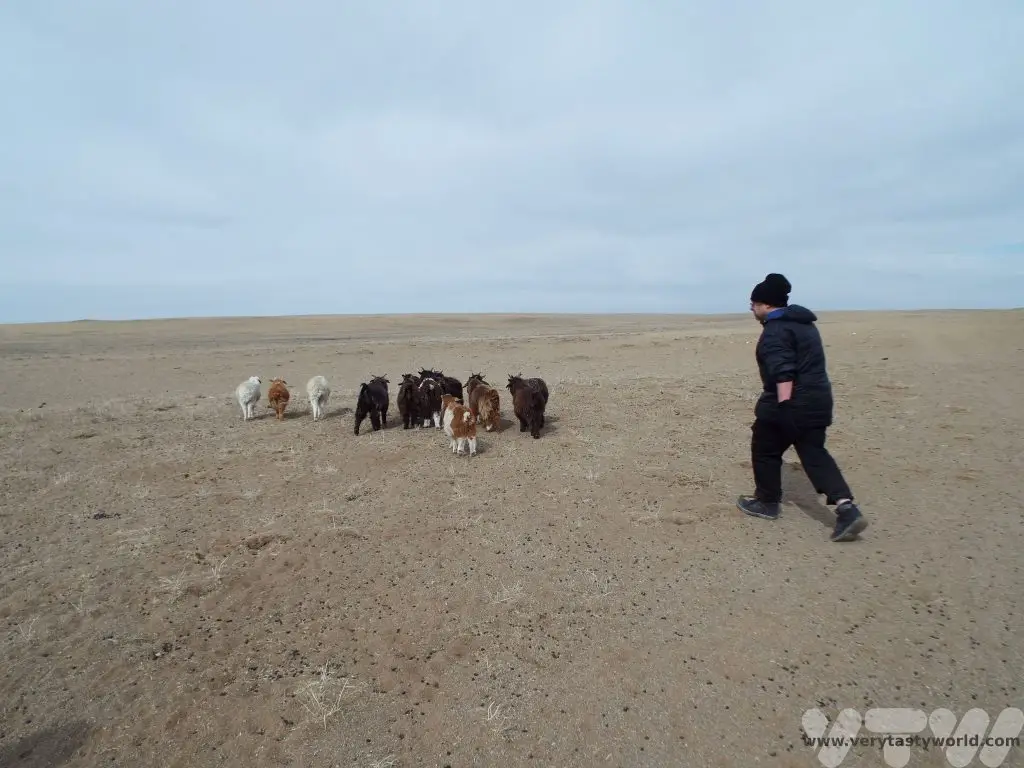
Our hosts had kindly given up one of their gers so that we could stay in their home. Just after 7am, they came in to start the fire. After a quick breakfast we offered to help with the family’s chores. First of all, the sheep and goats needed to go out to pasture. We were visiting in early springtime and many lambs and kids had been born over the previous few weeks. The youngsters were too young to go out so our job was to separate them out and put them into a pen – the nursery – for the day. (Don’t worry, they are reunited with their mums at the end of the day.) Lambs and kids are unbelievably lively little things and particularly good at evading visitors so catching them used a lot of energy! The temperature had risen to a balmy zero so we were toasty warm after all that chasing.

Once the lambs had been separated the older members of the herd were sent out to pasture. They were left to roam together and would be brought back via quad bike at the end of the day.
Then it was time to clean out the pens. We needed to rake through the wool and hairs amidst quite a significant amount of poo and gather it up.
Then we sent the teenagers out to pasture.
Next job was to water the cows. We drove to the nearest well which was several kilometres away. In the Gobi Desert there are precious few roads and we were constantly amazed at how the local people knew how to navigate across vast areas of desert and still find their way to the destination. The cows also have this in-built navigational ability as they were already waiting for us.
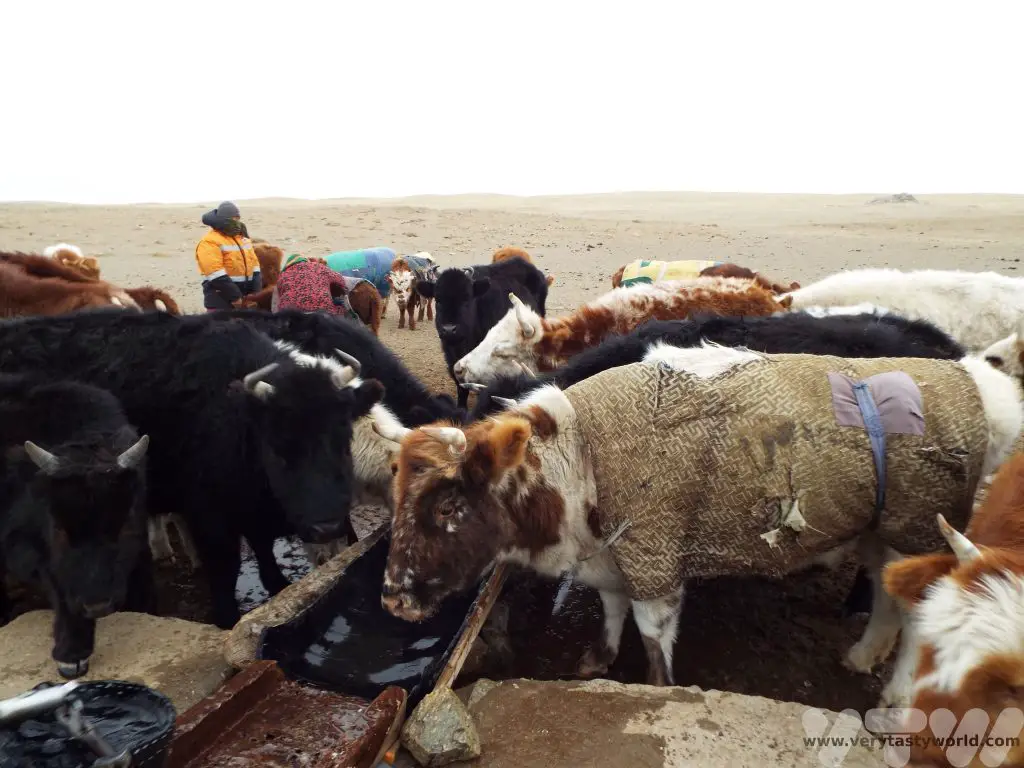
The sides of the well were frozen but the water was fine. It was a manual process to draw the water using a bucket.
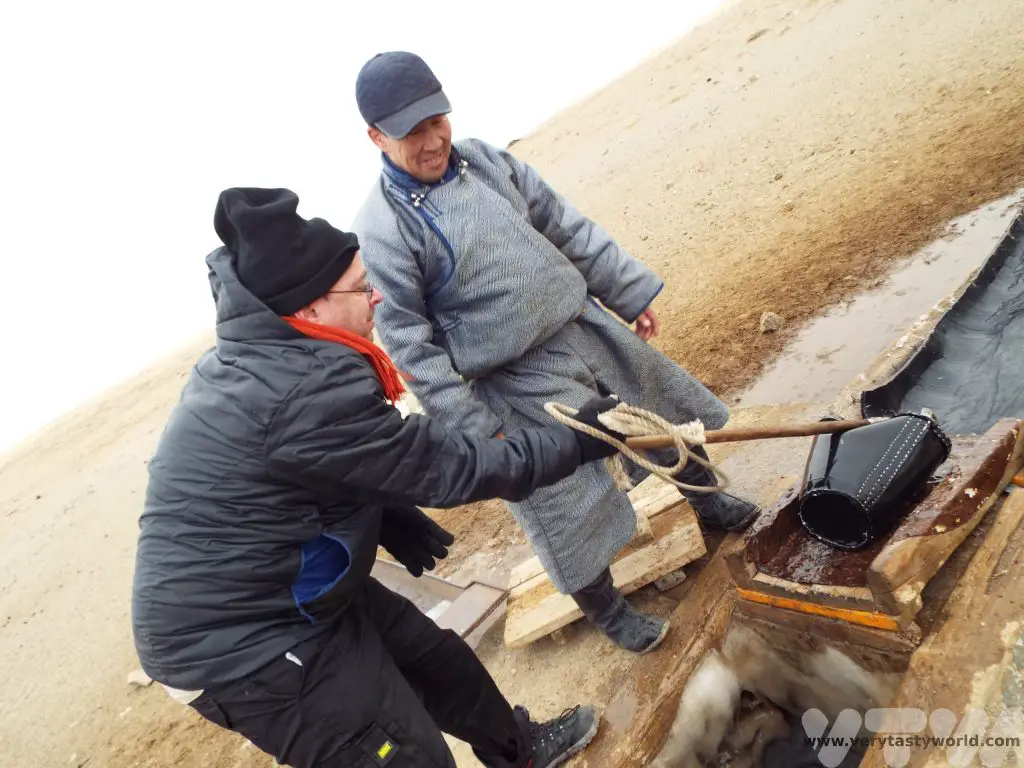
The water is pure and can be consumed without filtration. As the ger didn’t have running water we collected some for ourselves as well.
On our return to the ger camp, we needed to collect dung for the stove. The family have a dung storage area, located away from the main ger camp where the animal poo is collected and dried out. The family have a lot of animals which produce a lot of dung.

Cooking Dinner In The Gobi Desert In Mongolia
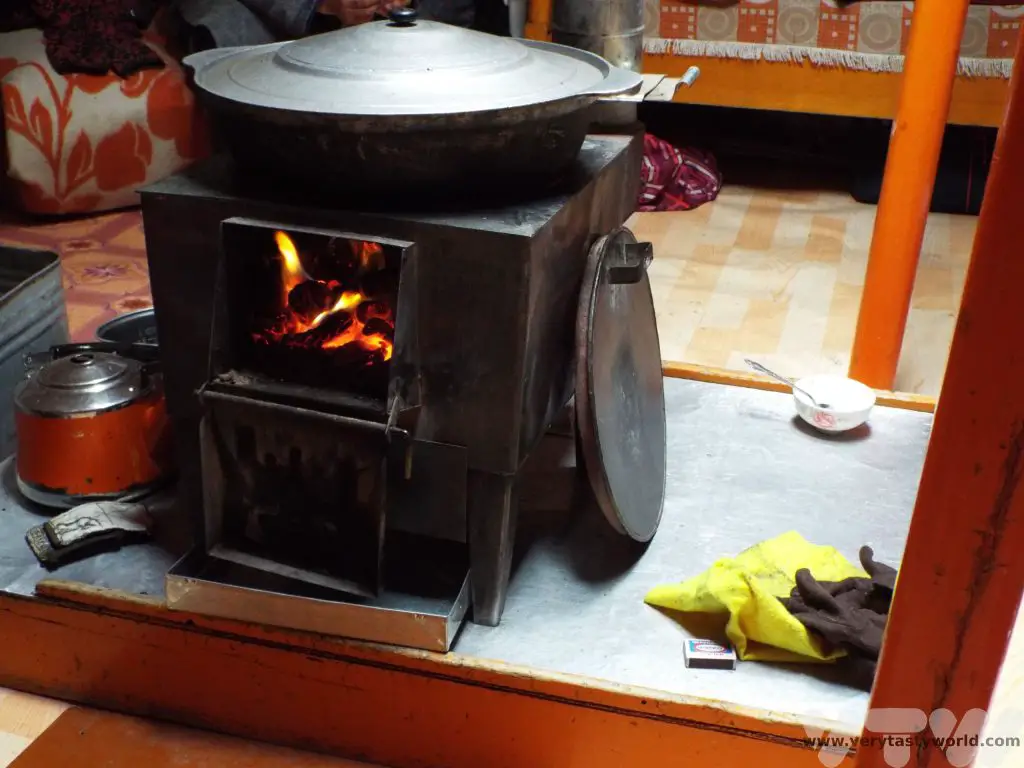
Then it was time to make dinner so we headed back to the ger. The stove is really adaptable and each are pretty much identical in terms of size and construction. Family kitchens will have various additional parts – a deep stewing pot or hob – which are interchangeable and offer a variety of cooking methods.
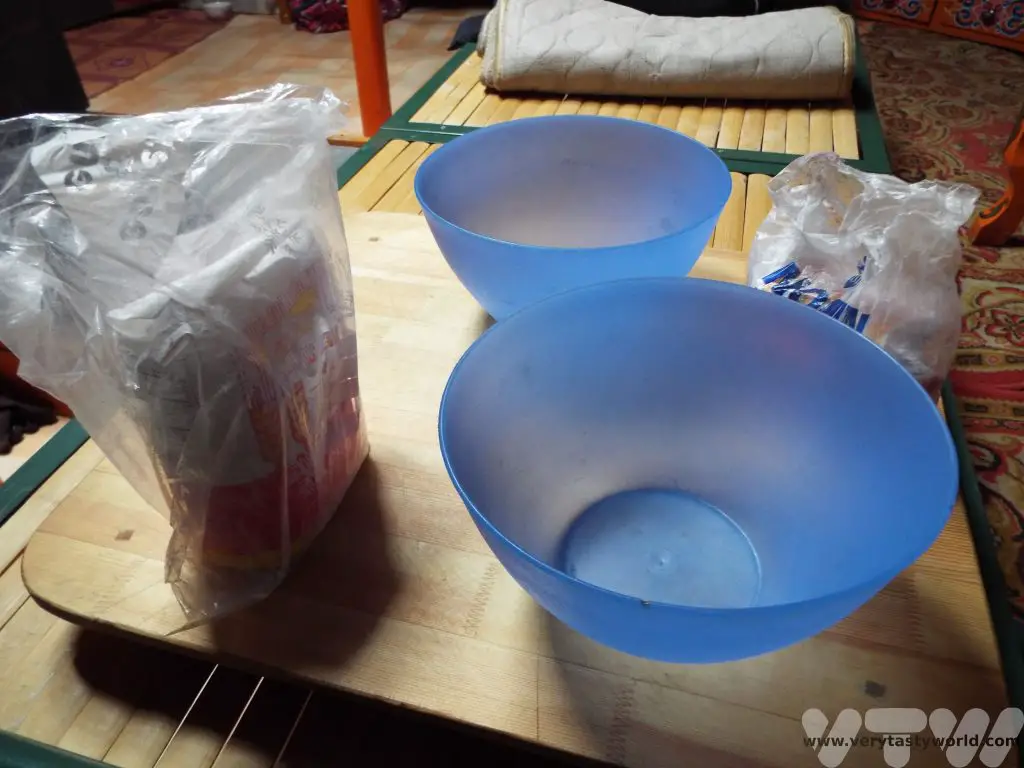
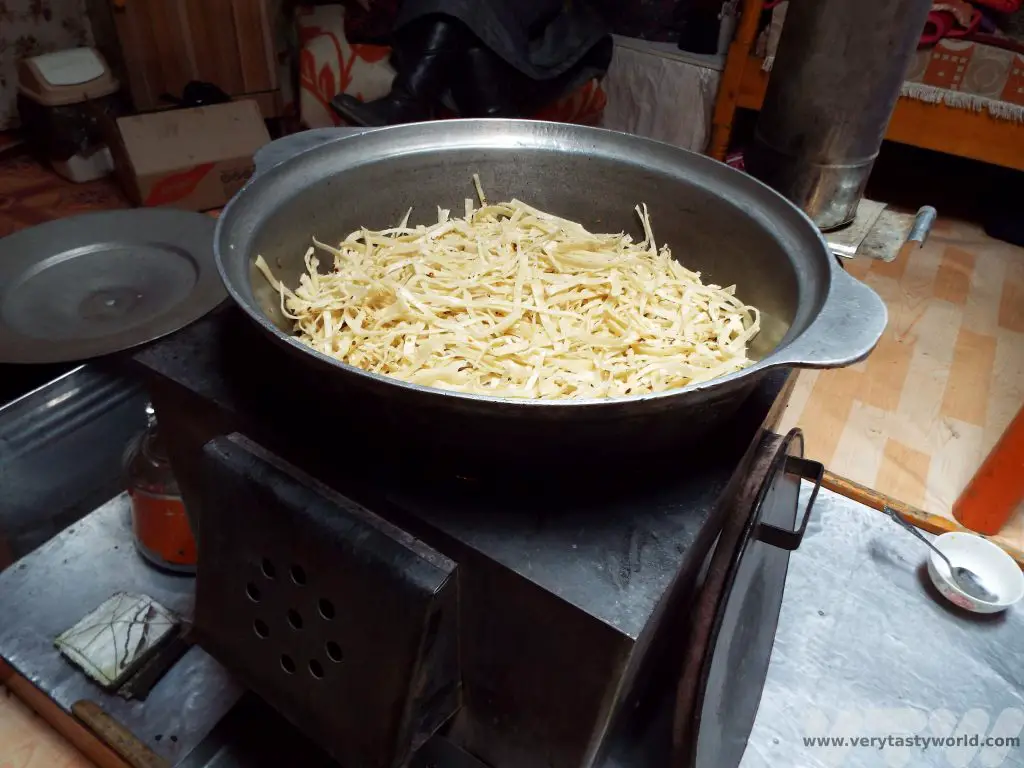
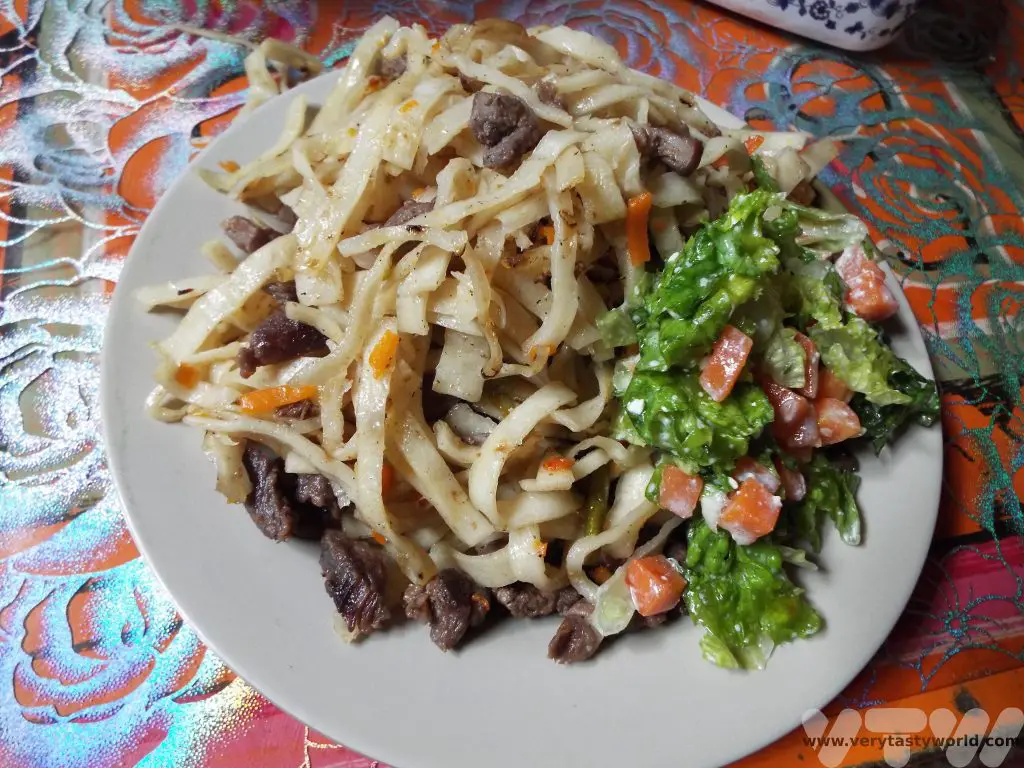
Tsuivan is a rustic dish, simple to make but it is delicious and filling. It comprises Mongolian noodles, vegetables and meat. First of all we set about making the noodles.
We made a dough using plain flour and water, kneading it until it had a soft, pliable texture and then let it rest for a few minutes.

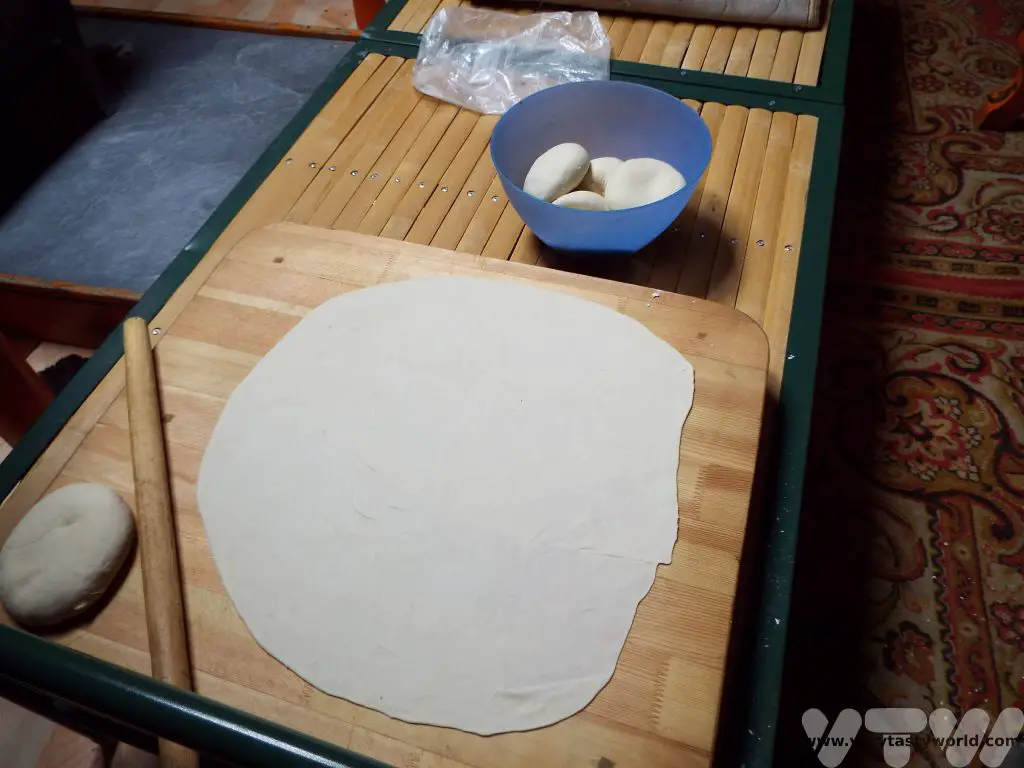
We then took a golf ball sized ball of dough and rolled it out very thinly, repeating the process until all the dough had been rolled into thin discs. The shape didn’t matter but we did try to make them as thin as possible using a rolling pin.
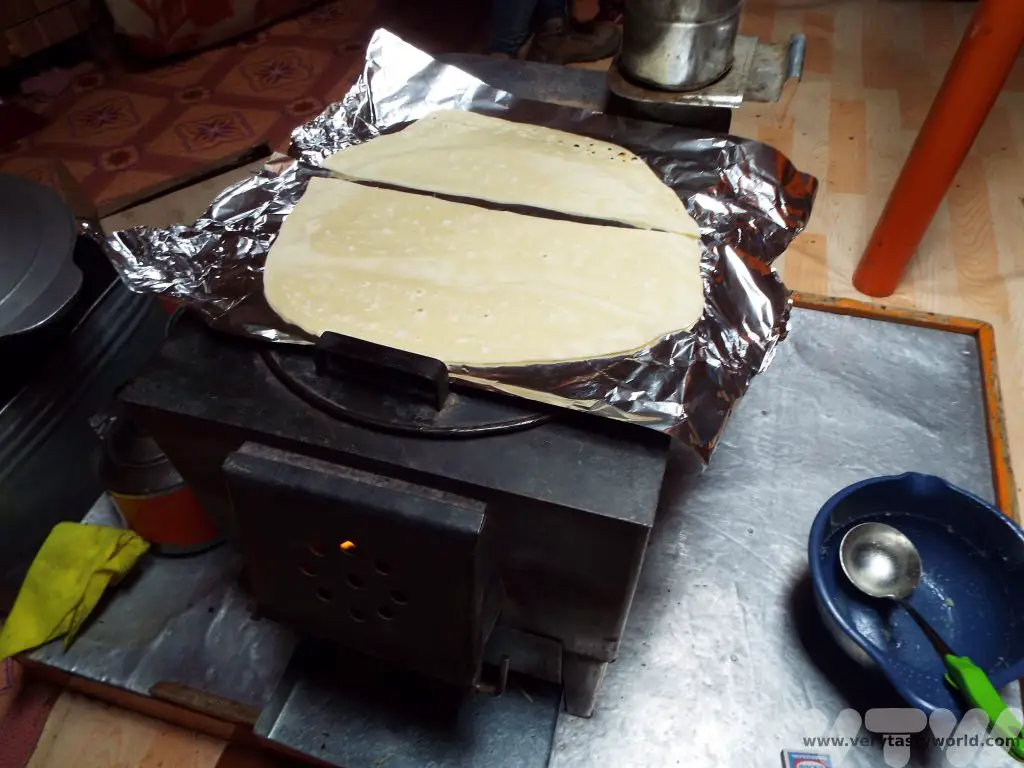
The noodles-in-waiting then need to be cooked briefly. They grill on the hob of the stove until lightly toasted – just for a few minutes, then they are turned over and the other side grilled.
In the meantime we prepared some mutton and vegetables – potatoes, carrots and onions – by chopping into chunks. The stove was so versatile that the same heat source can be used as a pot or a griddle. The hob of the stove was then switched for the cooking pot – which fits over the fire perfectly – and the meat browned and vegetables added to fry in the meat juices.
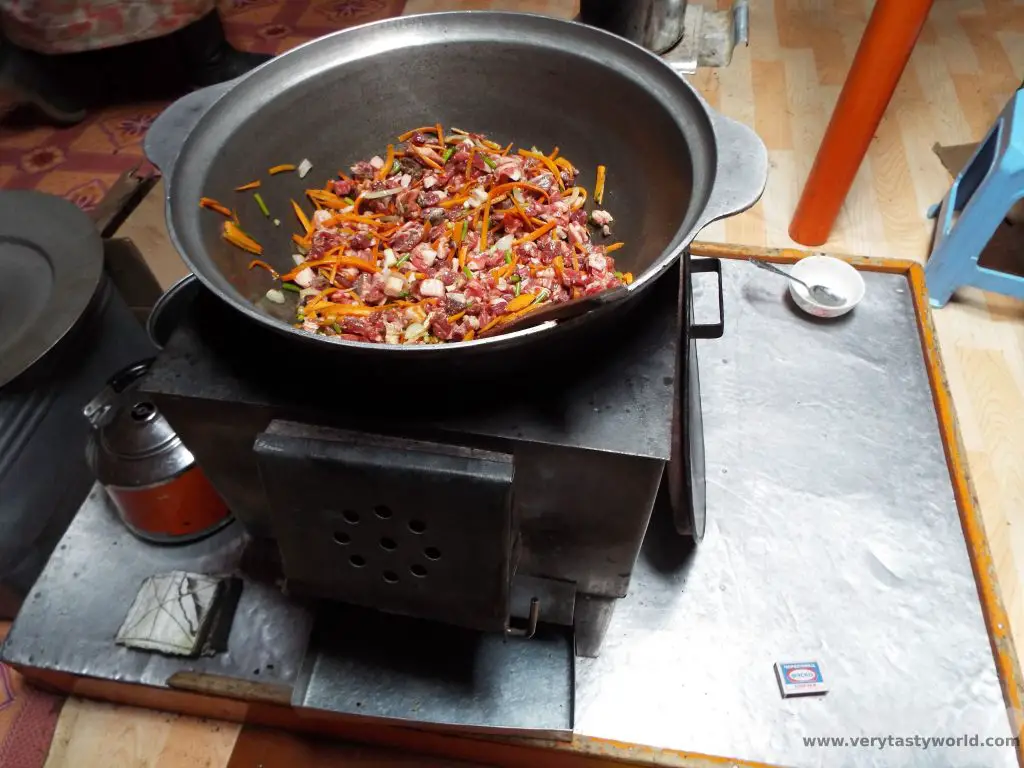
Then water is added to allow the food to stew. The seasoning was simply salt, you don’t get a variety of herbs and spices in Mongolia. Whereas we are used to eating lamb in the UK, mutton is more common across Mongolia. It has a lot more flavour than lamb and, although the meat isn’t as tender, it really benefits from being cooked for a long time over the heat. The taste of the mutton was so good that it meant we didn’t really need additional seasoning.
While the mutton and veg were stewing we stacked the toasted dough and cut it into thin noodles.

These were then laid across the meat and veg and steamed in the heat until they were soft.
Time to serve up. It’s a delicious meal. We all ate together.
After our hearty dinner we sat down with the family and played silly card games. The family also offered some of the last of their airag, an alcoholic fermented mare’s milk drink. We had been keen to try it, although we knew we were visiting outside the mare milking season, so considered ourselves to be very lucky that the family were willing to share the remnants of last year’s brew with us.

Any fear of the unexpected that we had felt that morning had vanished. Yes, it had been challenging to experience a lifestyle so very different to ours but it was a fantastic challenge. We were very privileged to have joined this welcoming family and to have shared a day in their lives. They very kindly told us that we had genuinely helped out and had done a good job cleaning the pens.
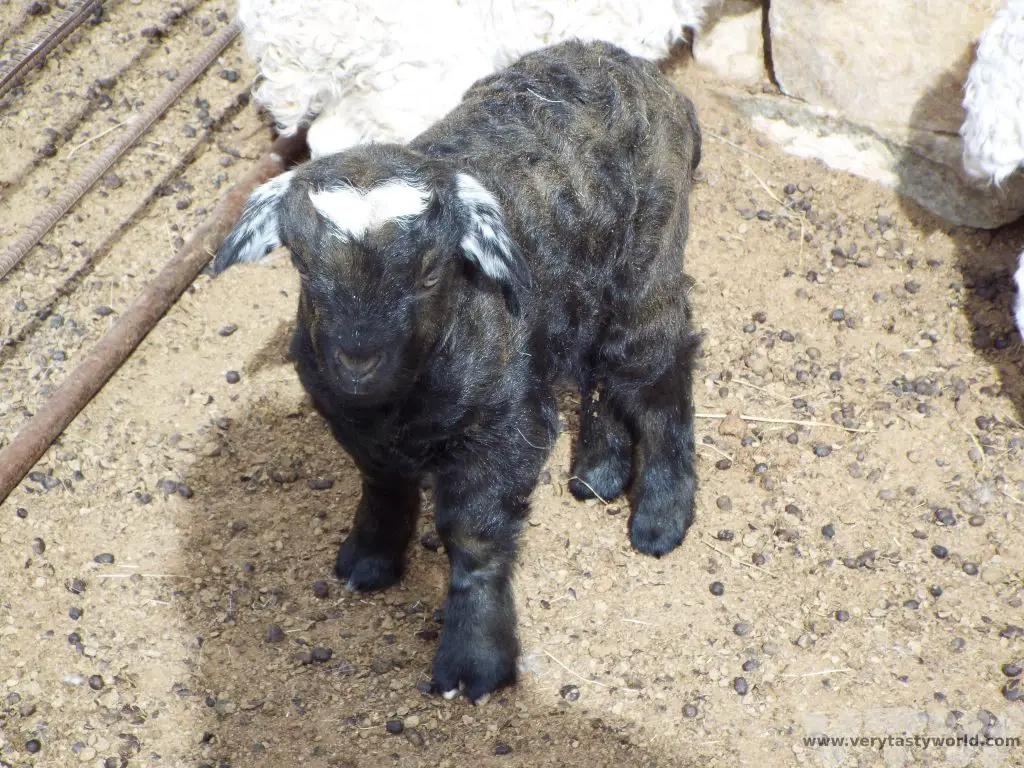
And so to bed. But before we hit the sack we were joined by this little one.

She was just 10 days old and our hosts decided that the overnight temperature was going to be too low for her to survive outside. So we fed her and let her prance around the ger. She bleated in the most delightful way throughout the night.
Related Posts You May Enjoy


Red Square and Red Soup in Russia
When we were travelling in Moscow, in between visiting Red Square and the Kremlin, we ate lunch with a local guide who declared, “Russians do not consider a meal to be a meal unless it has soup.” Which seems to be an entirely reasonable sentiment.


Borscht isn’t a favourite soup in the UK, largely because beetroot isn’t considered to be a particularly tasty vegetable by many. You are more likely to find it pickled in very sharp vinegar which detracts from the earthly flavour of the beet and sets your teeth on edge. But soup based around beetroot is popular all over Eastern Europe, from Poland to the Baltics to Ukraine, of course, Russia. It is best known for its deep red colour, derived from beetroot of course, but other vegetables such as potatoes, celery, parsnips, cabbage and carrots can also feature. Traditional borscht uses meat or bone broth as the stock along with fermented beetroot juice which gives a wonderfully sour flavour and complements the earthy sweetness of the beetroot.

We’ve been growing beetroot in our garden for many years and had a bumper crop last year. They are easy to grow – being root vegetables they can pretty much be left alone after you’ve sown the seedlings and slugs don’t seem to want to eat them. They’ll need just a bit of watering if the weather is particularly dry for a prolonged period, and they will overwinter in the ground without any problems, even enduring frosts and cold weather, to be picked any time. Which is great, because winter time is the best time to be eating a warm, hearty soup.
We had quite a glut last year so ended up making quite a lot of soup. It should probably be described as ‘Borscht-ish’. It is so easy to make and very delicious. There are loads of recipes out there but we went for a very simple approach.
Quick aside for planning ahead: Whenever we roast a chicken we always use the carcass to make a stock. It’s so easy – chuck the bones into a pan, cover with water and boil for a couple of hours. Then strain off the liquid and… instant stock. You might want to skim off any scum, then let it cool down and you can also remove any fat that floats to the surface should you wish (or not, fat does add flavour). Once the stock is made it can be frozen for several months.
Our soup ingredients are very simple:
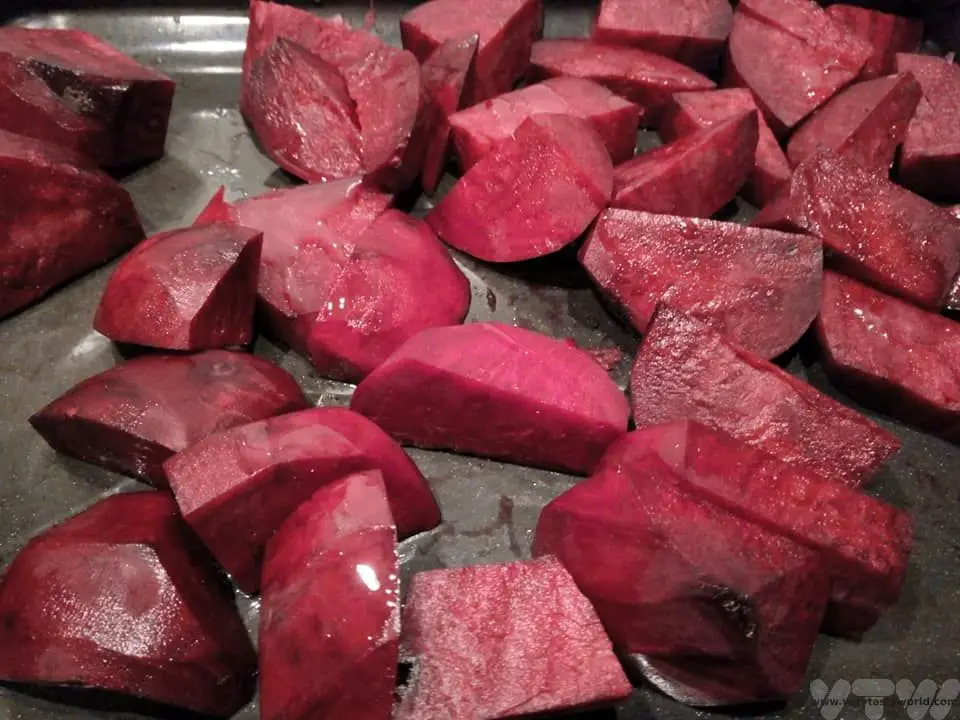
3-4 beetroot, peeled and cut into cubes. (Wear gloves if you don’t want bright red fingers.)
A couple of litres of chicken stock. If you are vegetarian you can use vegetable stock cubes.
Knob of butter
Two cloves of garlic.
Salt and pepper
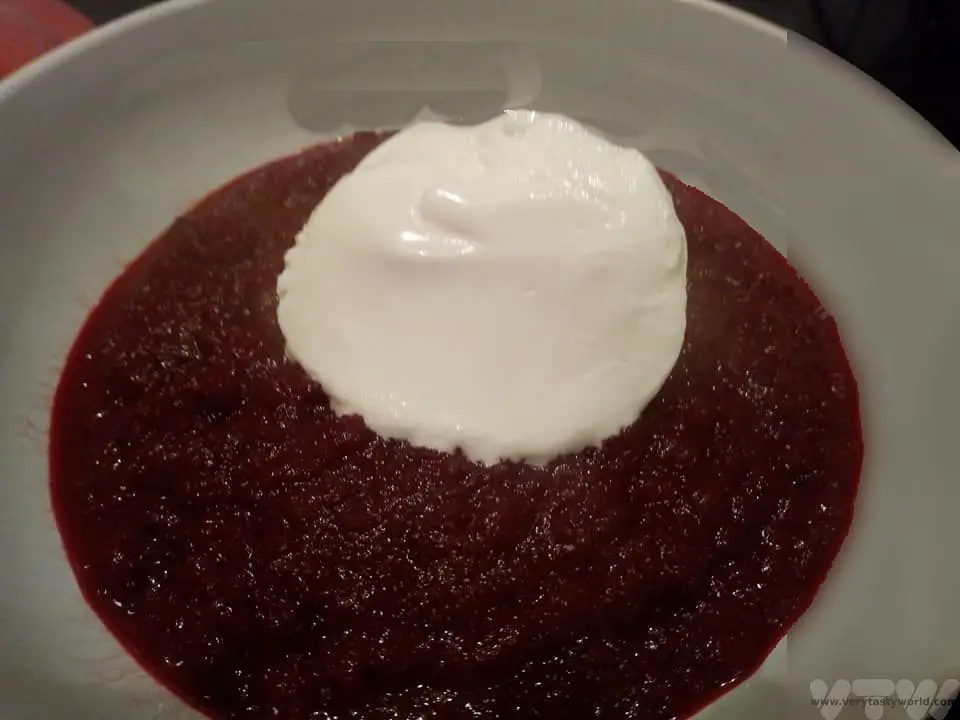
A generous dollop of sour cream. Shamefully, we didn’t have any dill to add a green flourish.
Crush the garlic and fry off in the butter.
Add the beetroot cubes and stock to cover all the ingredients. Season with salt and pepper to taste.
Bring to the boil then simmer for about 30 mins until the beetroot is soft and cooked but not mushy.
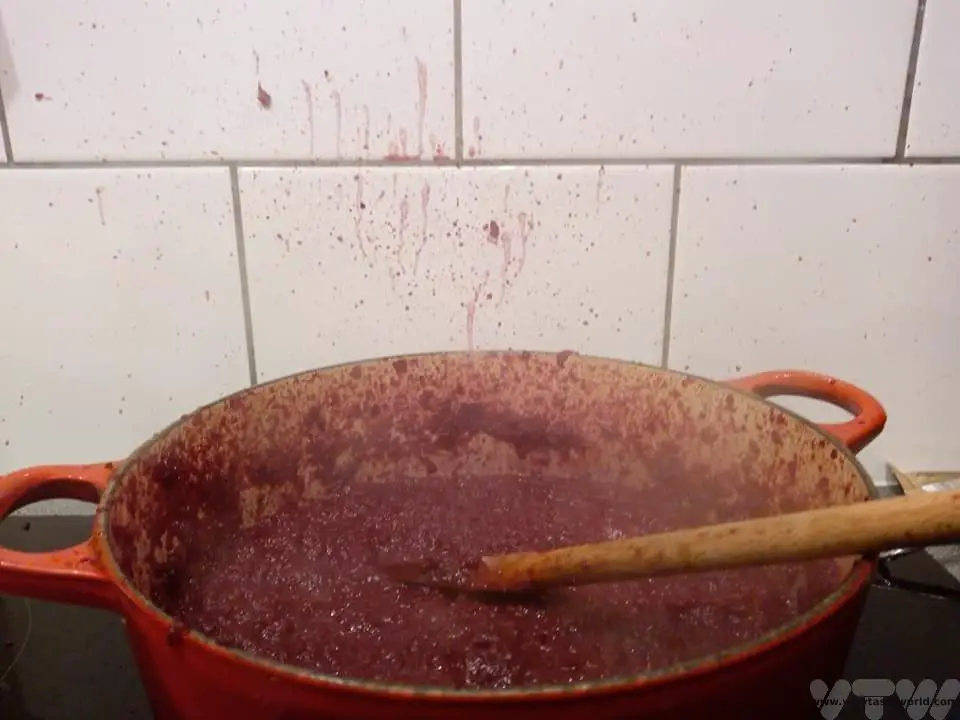
Blend with a hand blender or in a standard electric blender. The advantage of the hand blender is that you can easily achieve the precise soupy consistency that suits you. The disadvantage of a hand blender is that you stand a very good chance of getting soup all over the walls if you aren’t very co-ordinated.
Then dollop a generous spoonful of sour cream and garnish with dill if you remembered to get some. Eat with thick hunks of bread.
And yes, we did make a glorious mess of the kitchen.
- Things To Do In Rovaniemi In Winter
- Avebury Stone Circle vs Stonehenge
- Five days in Copenhagen
- Is Sarajevo Worth Visiting?
- A Svalbard Holiday – Land of the Midday Moon
- Afternoon Tea in Coventry
- RECIPE Oyakodon Donburi
- Zero Waste Recipes Before Your Holiday
- RECIPE: Vegetable Biryani Tamil Nadu Style
- RECIPE: Vegan Wild Garlic Pesto
- Recipe: Venetian Pasta Sauce
- RECIPE: Biryani Raita Recipe
- RECIPE: How to Make Costa Rica’s Gallo Pinto
- Recipe: Japanese Simmered Pork Belly – Buta no Kakuni
- RECIPE: How to Make Umeboshi