An Essential 2 day Gyeongju Itinerary
Gyeongju in South Korea is often described as a ‘museum without walls’ which may sound like a cliché but it couldn’t be more appropriate. It is a city with an enormously rich history that has so many fascinating sites to explore. We spent some time in Gyeongju on our recent trip to South Korea. We could easily have spent longer. Here’s our essential 2 day Gyeongju itinerary which will ensure that you see the highlights of this amazing city and leave you with a desire to see much more.
Please note that this post contains affiliate links. If you click through and decide to make a purchase we will make a small commission, at no extra cost to you, which will help towards the costs of running this site.
History of Gyeongju
Gyeongju has a long history that dates back over two thousand years. It was established in 57 BCE as Saro-guk when a number of villages in the area were united by leader Park Hyeokgose, the founding monarch of the Silla, one of the Three Kingdoms of Korea.
The city expanded over the years and eventually became the capital of the region, home to the court of the Silla people, who were the wealthy elite of the kingdom. They ruled for nearly 1000 years. Silla was known as the region of gold, and many gold objects have been found, reflecting the status of the kings.
By 668 CE the Silla had established a legal code and had adopted Buddhism to consolidate its political foundations. Gyeongju had a thriving society, prosperity was at its peak and it is estimated that the city’s population may have reached as many as one million people.
Sadly the city’s fortunes declined in later years during the Goryeo dynasty and then the Joseon Dynasty when the country’s administration moved further north. The city also suffered losses during the Mongol invasion in the 13th century and during the Imjin War with the Japanese (1592–1598). But a wealth of remarkable historic buildings and architectural treasures remain.
Naturally, the city has received UNESCO world heritage status. In UNESCO’s words: Gyeongju Historic Areas contain a remarkable concentration of outstanding examples of Korean Buddhist art, in the form of sculptures, reliefs, pagodas, and the remains of temples and palaces from the flowering culture of Silla dynasty, in particular between the 7th and 10th century.
How To Get To Gyeongju
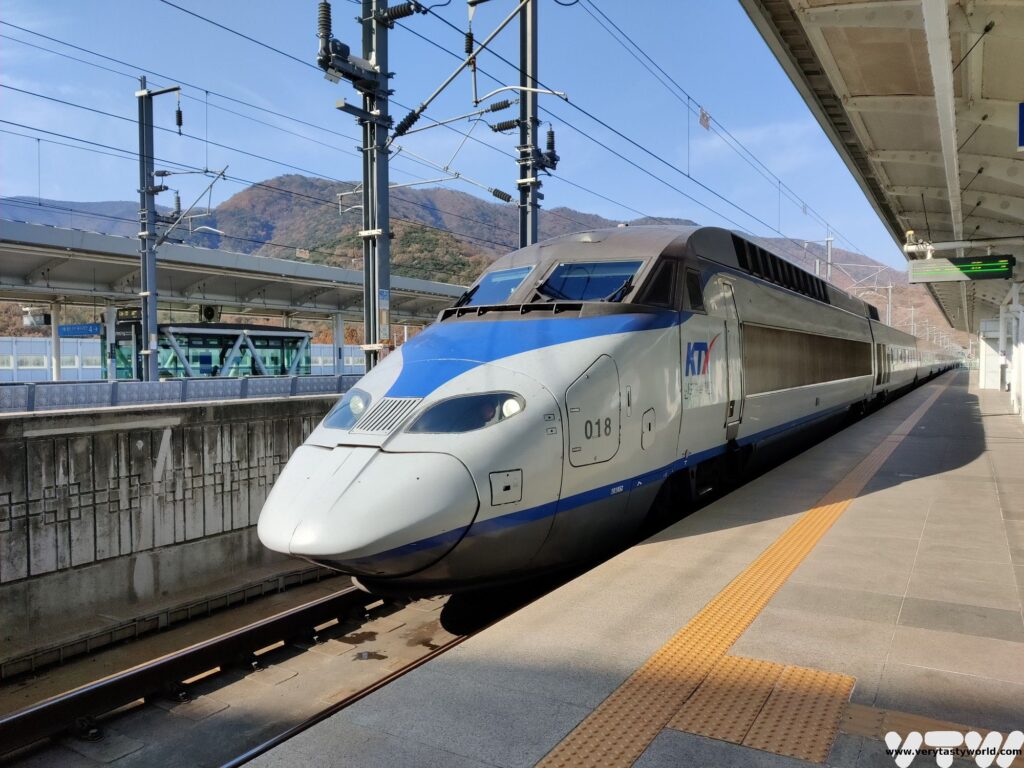
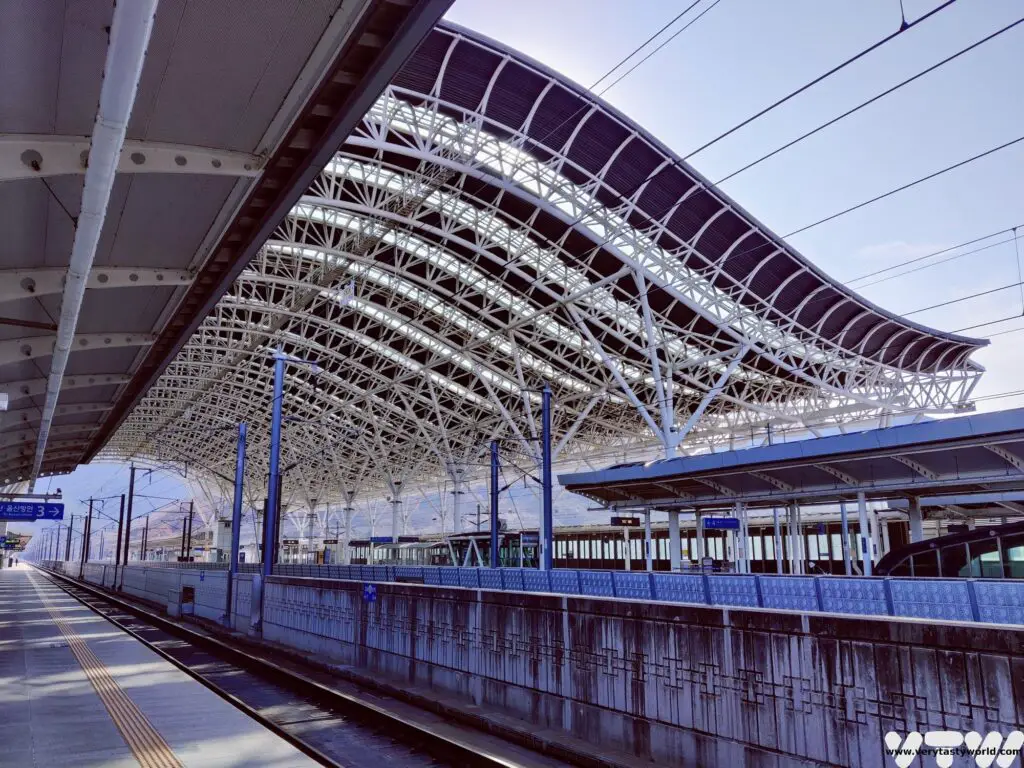
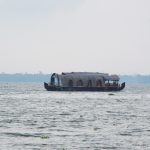
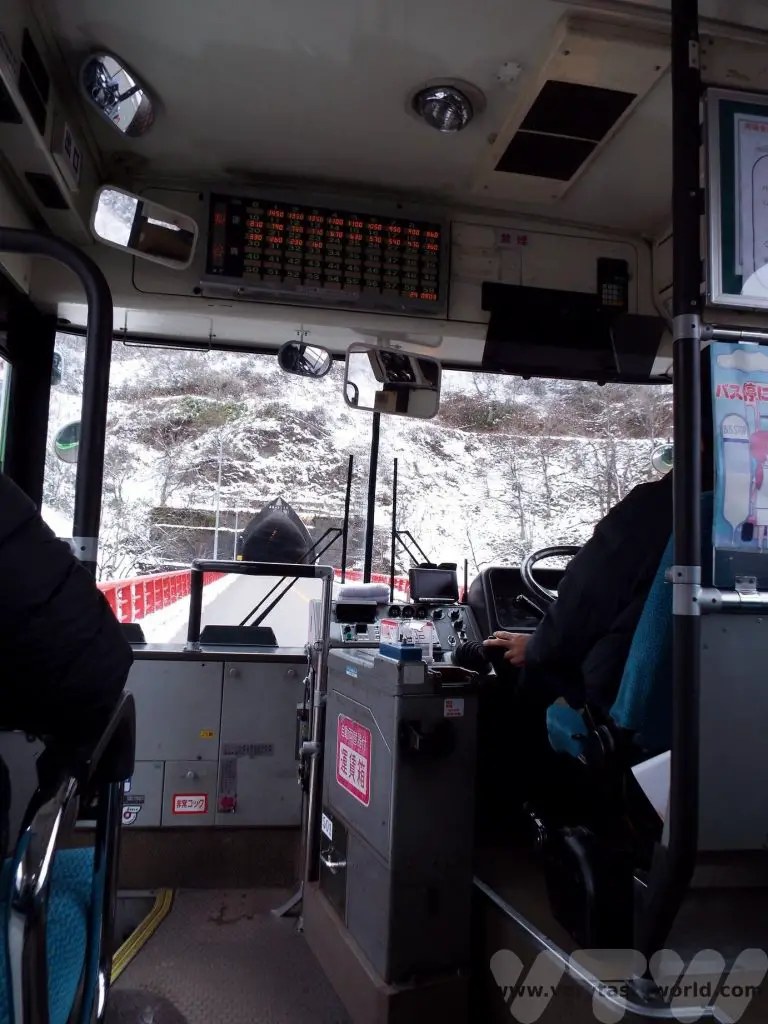
The city is located in south-eastern Korea and can be reached in around 2.5 hours from Seoul and 1 hour from Busan using the fast and efficient KTX train services. However, you don’t arrive in the city centre, but at the new station Singyeongju which is located around 10km away. We have a post about how to travel to Gyeongju.
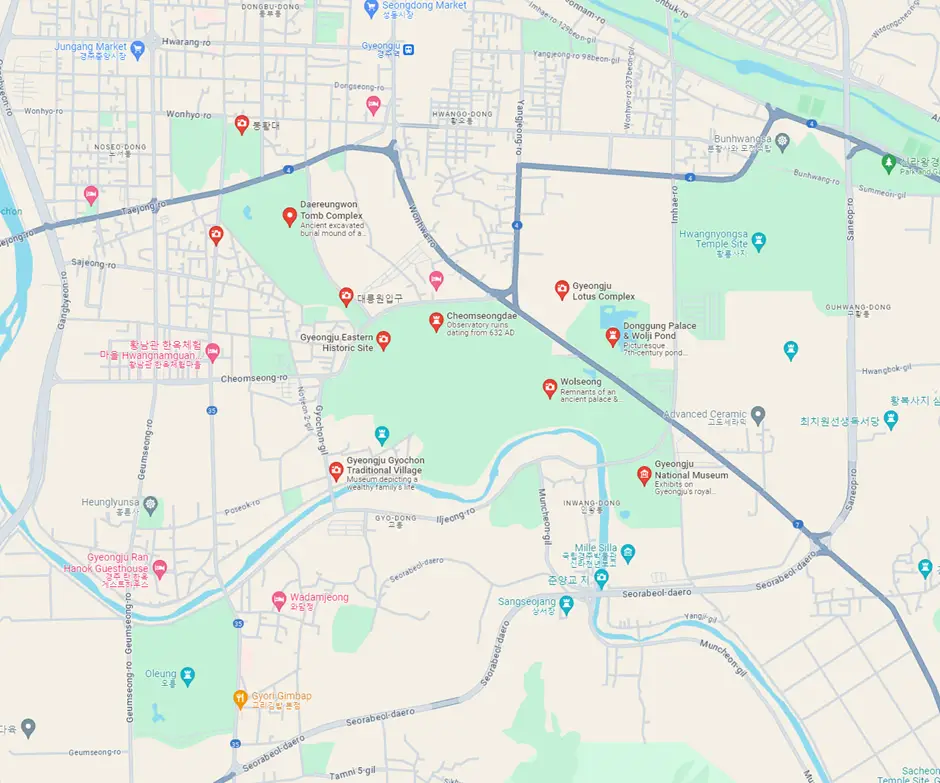
Although there are a vast number of historic sites to visit in the region, many of Gyeongju’s attractions are within walking distance of the city centre.
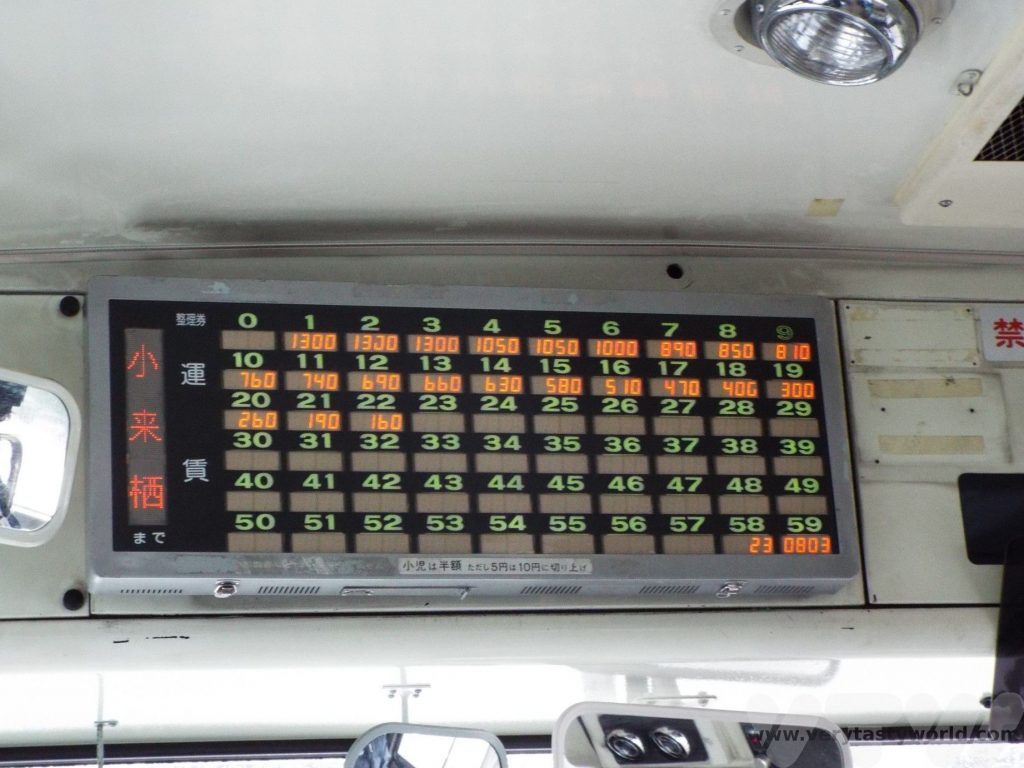
Most sites are free to enter but some have a small charge, usually around 2000 Won (about $2). Many sites can be visited throughout the day and into the evening but some have opening hours, which vary from location to location. The itinerary has a fair amount of walking, although you could use buses 10 and 11 which run on a loop and stop by some of the main attractions. Taxis are also available.
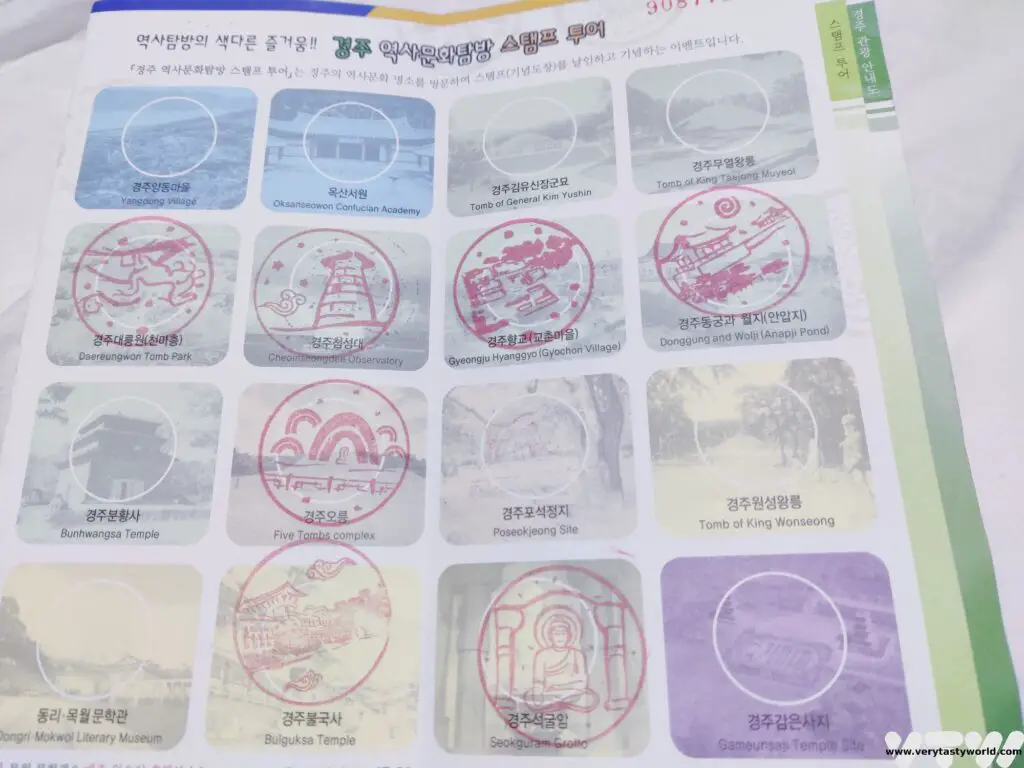
There are tourist information booths at many of the main sites. You can pick up leaflets and brochures which not only have handy maps and information about the site, but you can also collect stamps at various locations. Look out for the huts with the inkpad and stamp. Gotta collect ‘em all!
We got chatting to many of the people who were manning the booths – all had great English – and they were very keen to give us information about the site and advise on other historic areas to visit.
2 day Gyeongju Itinerary: Day 1
The first day’s attractions are within walking distance of the city centre, although you will certainly get the steps in. The main sites lie to the south of the city centre.
Day 1 Morning
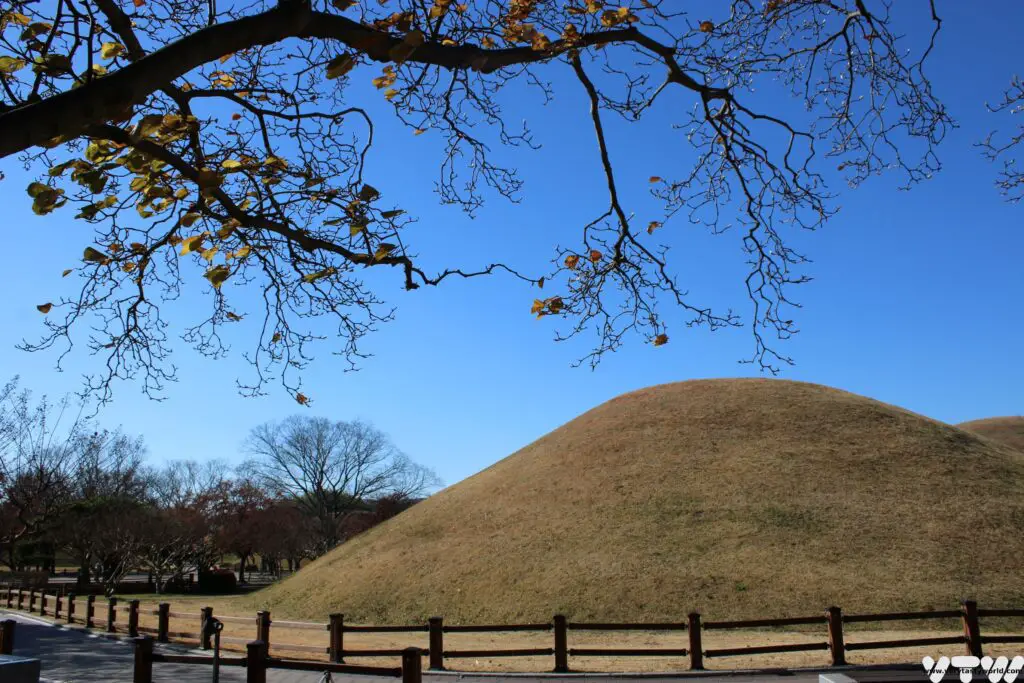
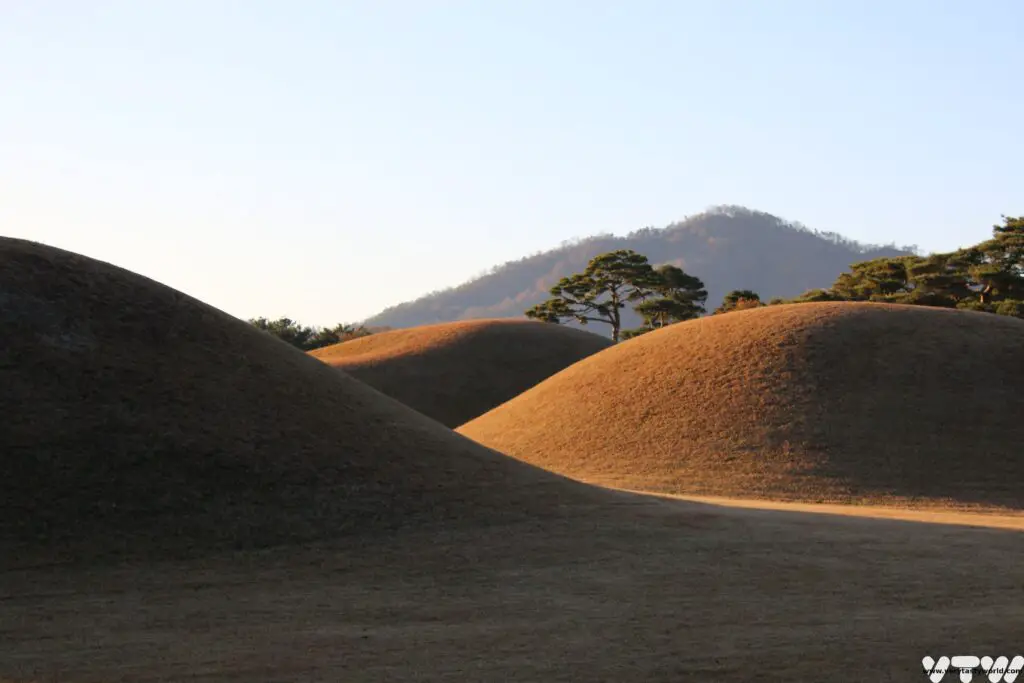
The Daereunwong Tomb Complex
This complex is the site of ancient Silla burial mounds. They are tumuli that form a distinctive part of the landscape. They are considered sacred and should be treated with respect. This complex is free to enter and you can wander around. It contains the tombs of some 50 Silla Kings, including King Michu.
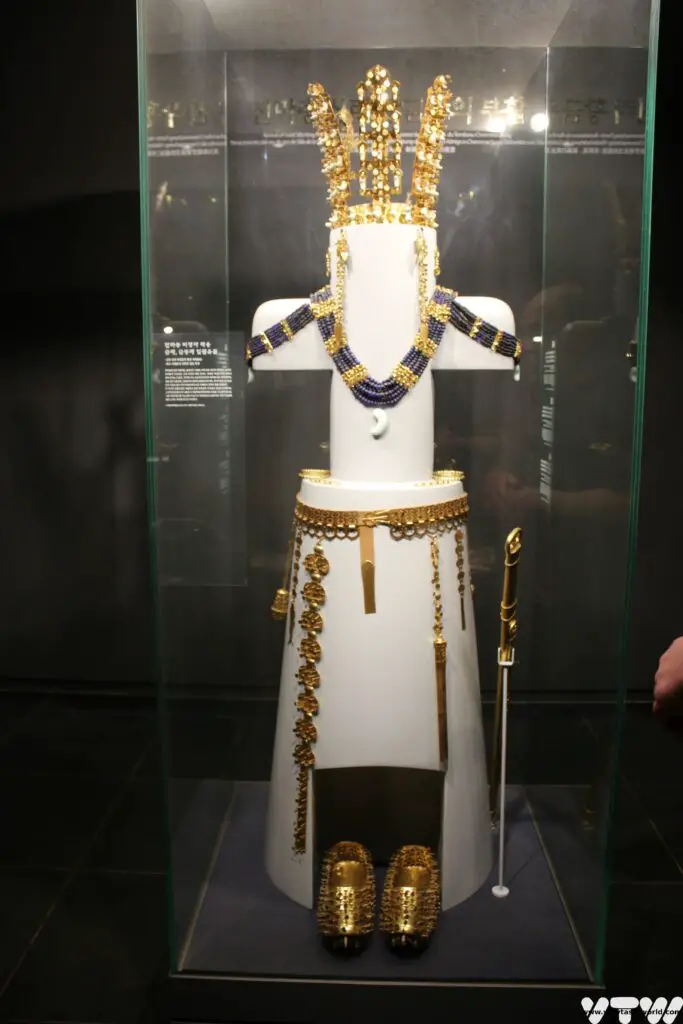
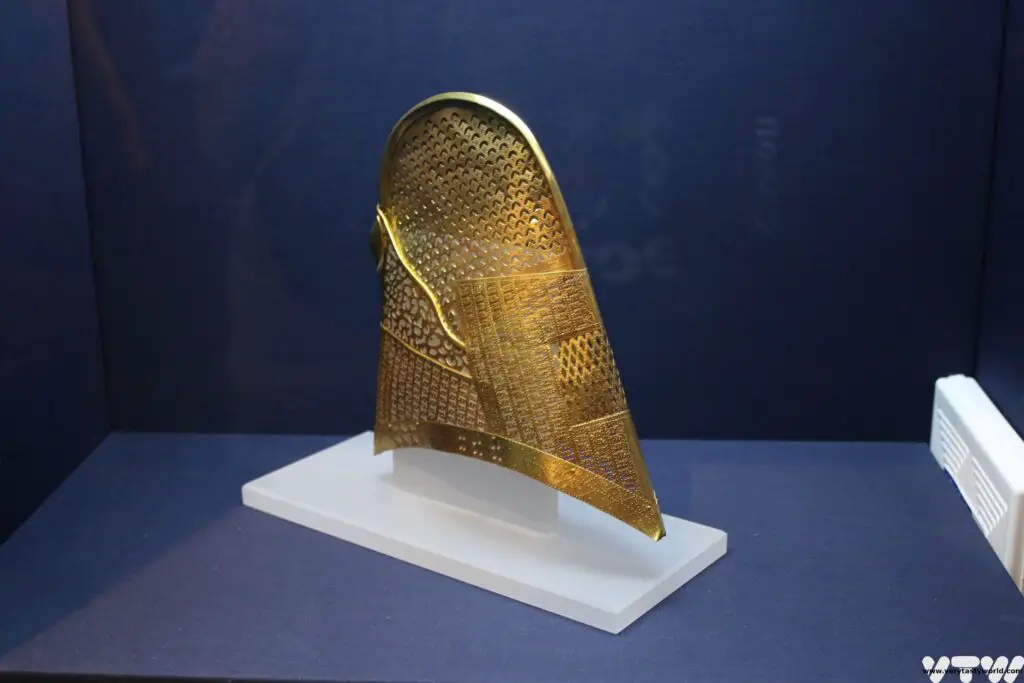
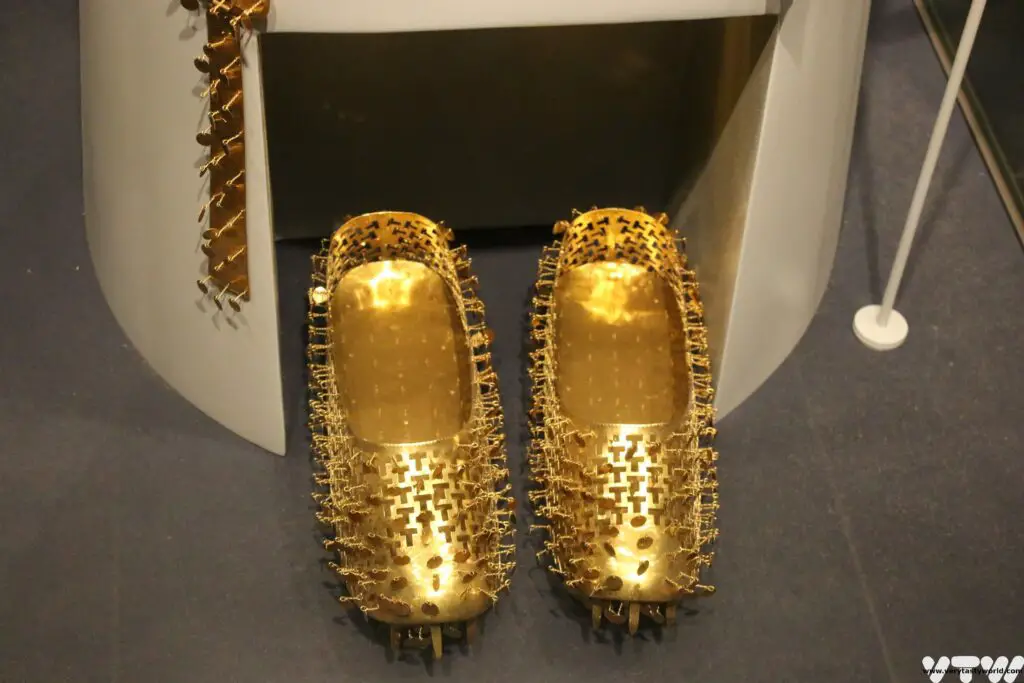
You can enter the Cheonmachong Tomb (a small fee applies). It is known as ancient tomb 155 and was excavated in 1973. Inside was a body wearing a gold crown which had been buried with a variety of artefacts.
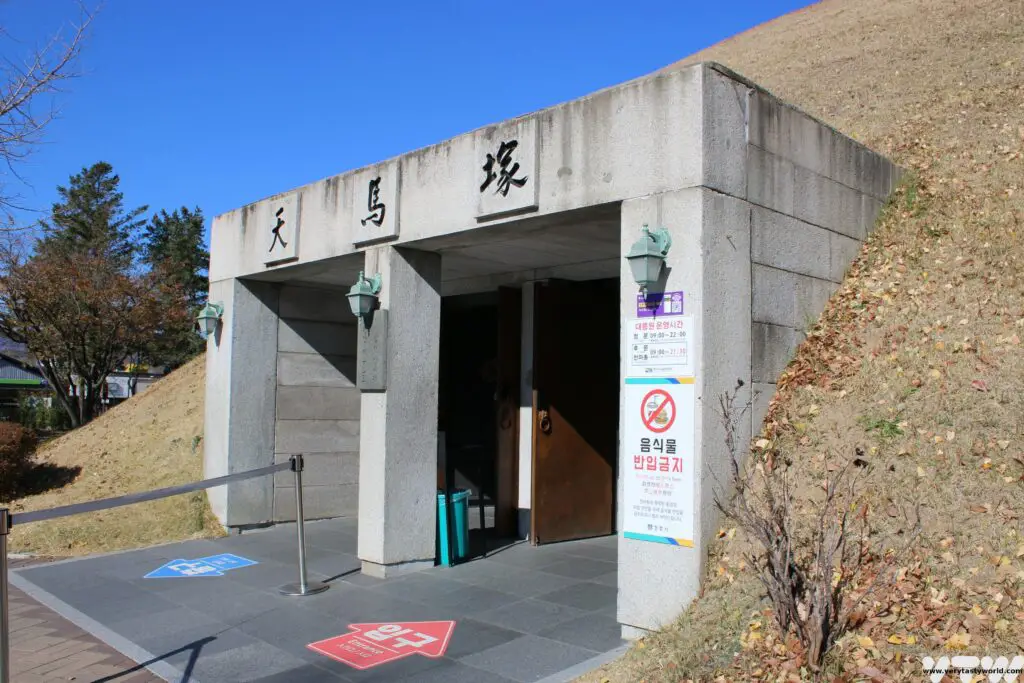
Many Silla artefacts are displayed inside the tomb and you can marvel at the craftsmanship of the intricate and delicate goldsmiths. The Silla were clearly a wealthy people and the crowns and jewels they wore reflected their status.
Exit this site to the south to visit the Gyeongju Eastern Historic Site
If you are feeling peckish, there are a number of restaurants in this area, located between the Daereunwong Tomb Complex and the Eastern site, where you can enjoy a snack or a light meal.
Gyeongju Eastern Historic Site
There are a vast number of fascinating sites to explore in this area, most of them are eminently walkable.
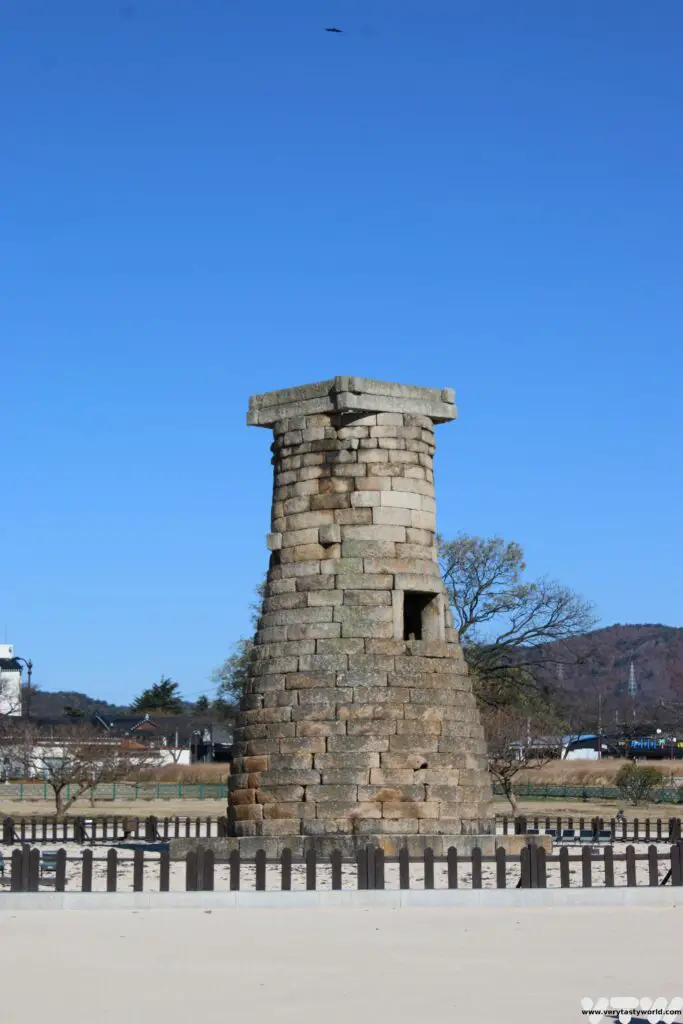
Cheomseongdae
This is the oldest surviving observatory in Asia (possibly even the world), constructed by the Silla in the 7th century. It is nearly 10 metres high and would have been used for astronomical observations. The square window halfway up the tower was also the entrance. The tower is comprised of 365 stones to represent each day of the year. It is thought that the number of the stones, and their placement, in the tower may represent astronomical figures but no one really knows what these might be so this theory isn’t certain.
As you follow the main track, take a right turn just past Cheomseongdae to walk through a pleasant path to reach the…
Gyeongju Gyochon Traditional Village
This small village has a number of houses built in traditional style, some of which are residential properties but some are accessible to enter. Many of these date from the Joseon dynasty (1392 – 1897) rather than Silla. Of particular interest is the Confucian school which is still in use to provide education of Confucian practice.

The Historic House of Rich Man Choe is a house dating back to approximately 1700, although is it is a reconstruction. The Choe family were rich through 12 generations and this house is representative of the buildings of the nobility of the Joseon Dynasty. Nearby the traditional village is the Jaemaejeoung well, situated by General Kim Yusin’s house. Next to the well is a tombstone dedicated to King Gojong (a Joseon king).
There are a number of cafes and restaurants here if you fancy having a bit of a rest from sightseeing. This is a good place to enjoy a spot of lunch.
Day 1 Afternoon
Woljeong Bridge
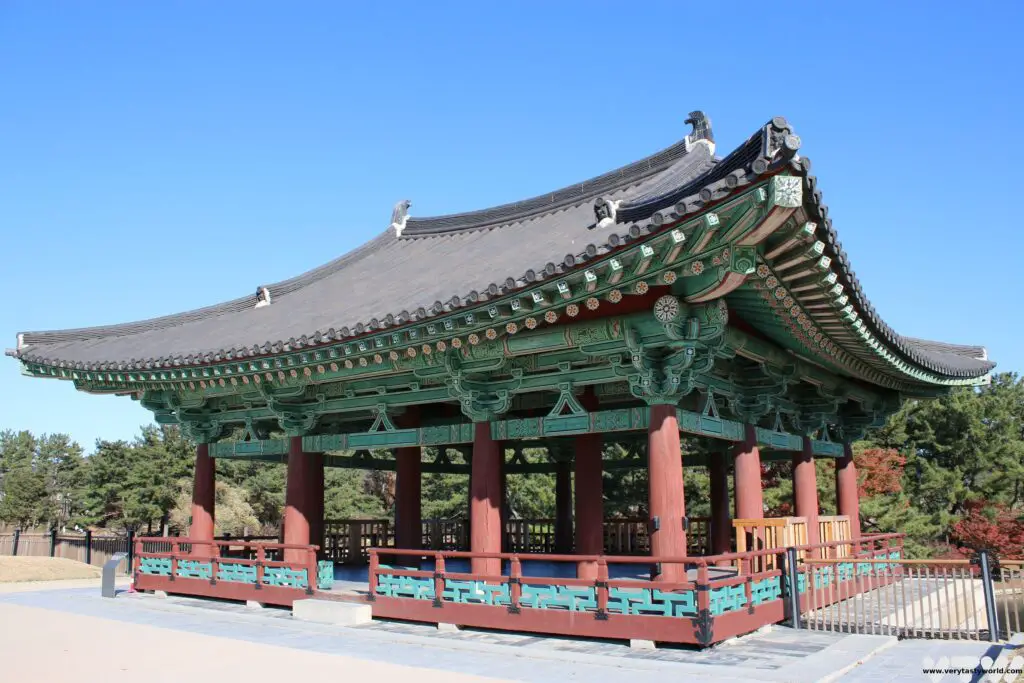
Moving further south from the traditional village, you will arrive at the river and the spectacularly beautiful Woljeong Bridge. This is a reconstruction of a Silla bridge that was originally built during the reign of the 35th Silla King, King Gyeongdeok.
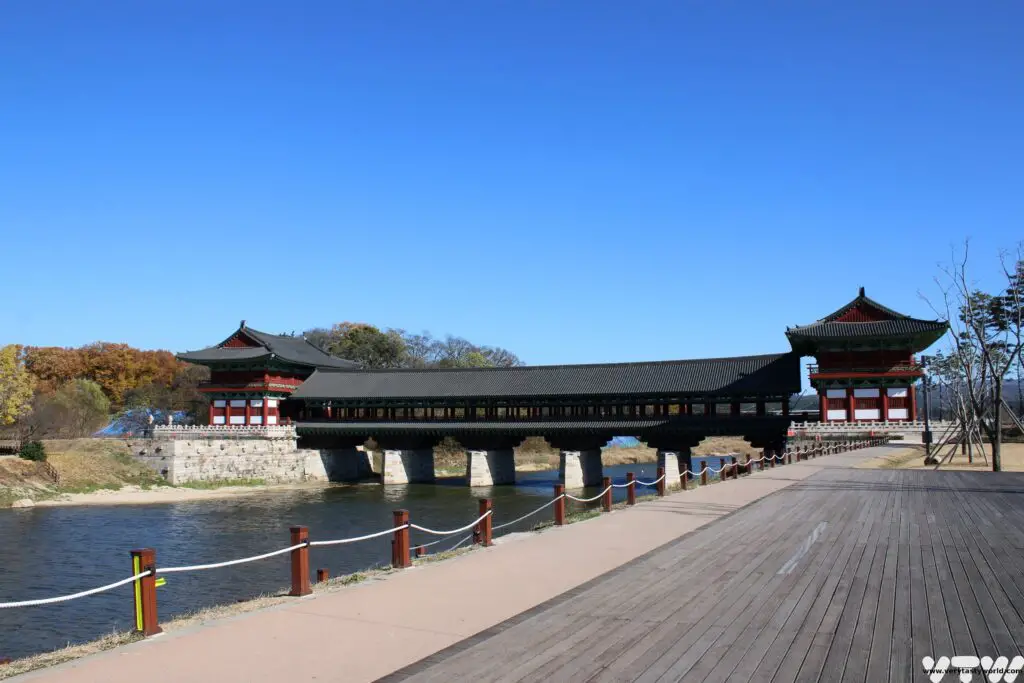
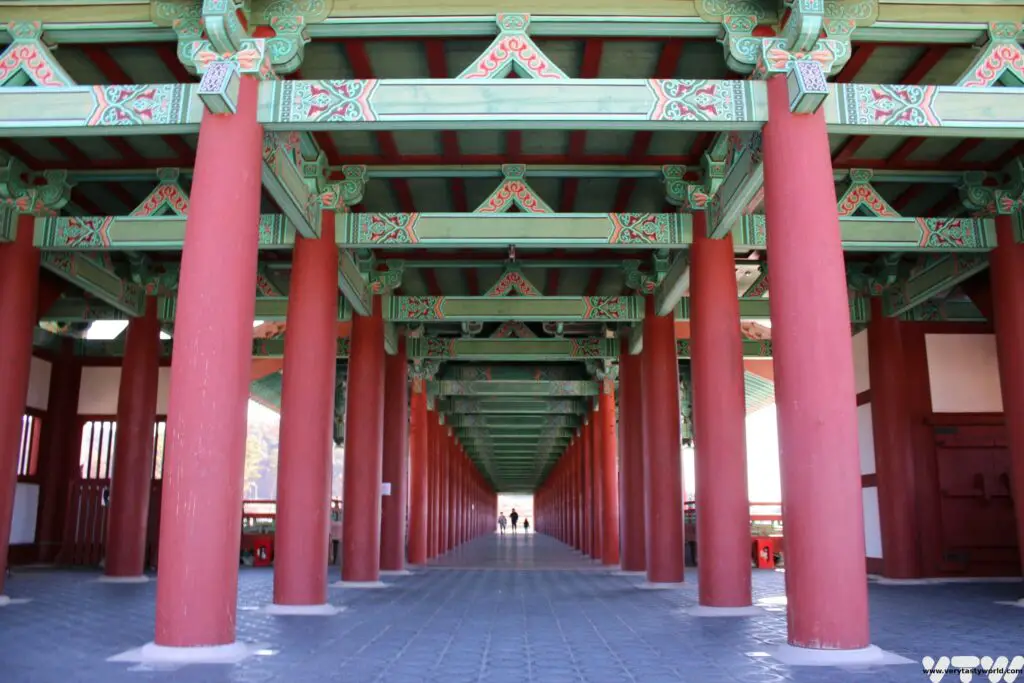
The bridge is covered all the way across, its pillars and roof highly decorated in red, green and blue.
You can also climb the steep steps into the bridge towers to view exhibitions which include a number of historic artefacts.
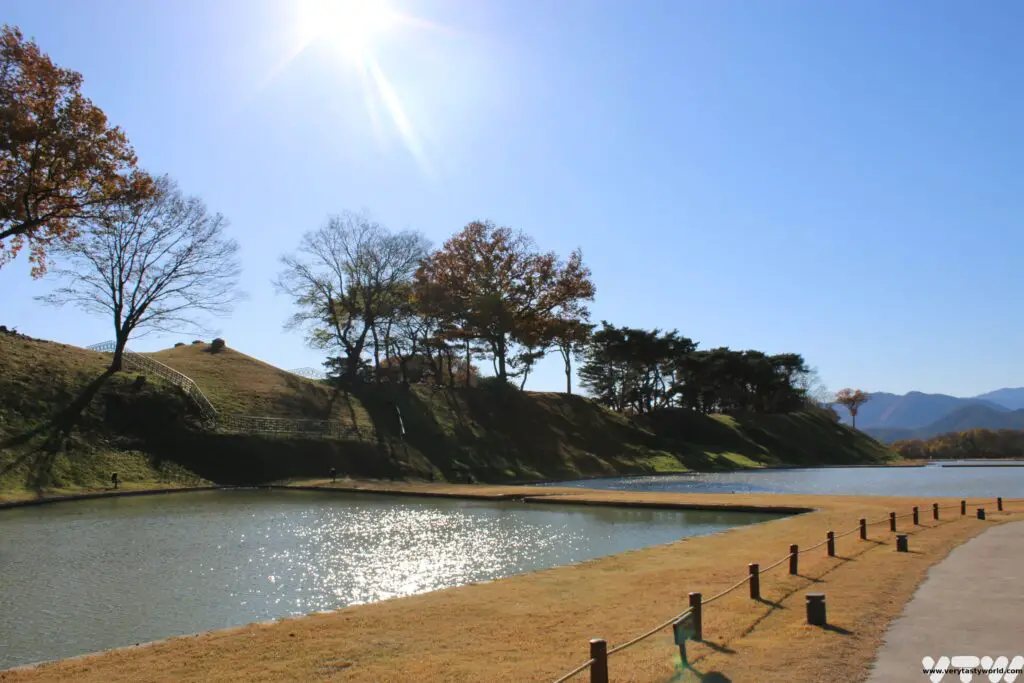
Oleung Five Tombs Site
Beyond the bridge you can turn right and walk along the riverside until you arrive at a walled complex. Follow the wall along the river and turn left along the main road and follow the wall to reach the entrance. This site has a small fee to enter. It has four earthen mounds and a round grave. They are the tombs of a single king, King Park Hyeokgeose, who founded the Silla Dynasty.
He apparently ruled for 62 years and after he died, according to a legend, his body was ripped into five pieces and fell back to earth from heaven. His people tried to bury him in a single tomb but a giant snake prevented them from doing this, so five tombs were constructed. The tombs have not been excavated.
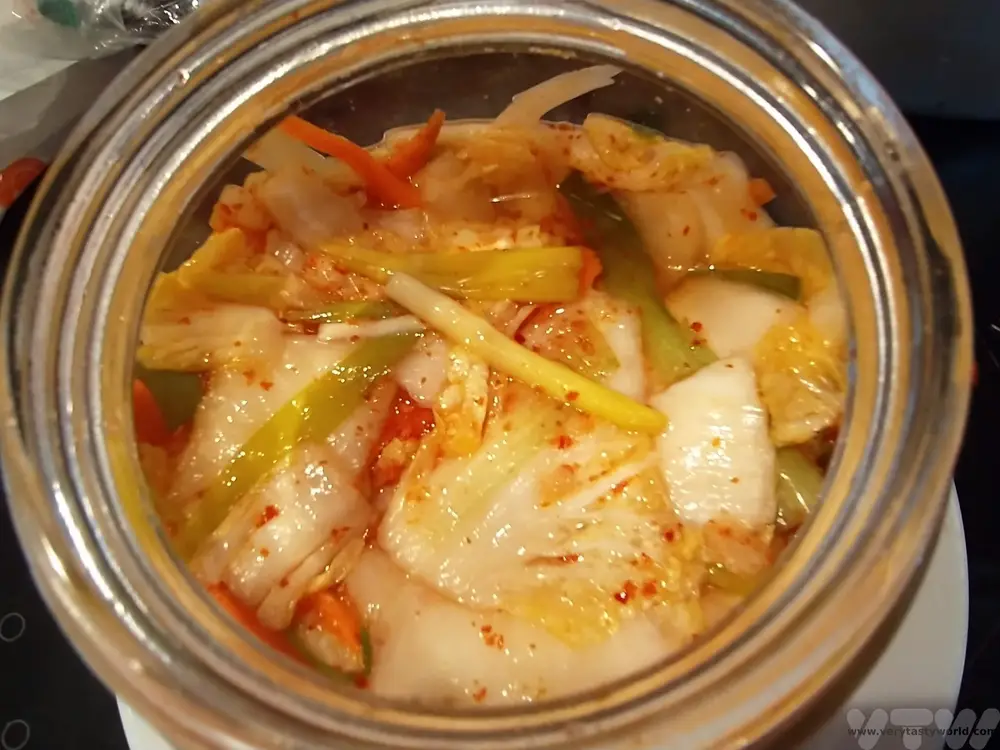
A lovely foodie moment happened after had left the site and were making our way back to the bridge. We were beckoned by a man who wanted us to meet his family and show us how they made kimchi. We were invited into his courtyard and he showed us a bathtub of cabbages which had been halved and brined. He, his sister and 84 year old mother were washing the cabbages. The following day each cabbage leaf would be smothered in a deliciously spicy paste and fermented. It was such an honour to be invited to this delightful family’s home and to see the kimchi making process.
Wolseong Palace
You can walk back along the river, cross the bridge and turn right at the traditional village to go across the park and see the remains of Wolseong. This was a Silla palace that was originally constructed in the 2nd century. No buildings can be seen, save a small ice-house, but the moat has recently been restored.
Donggung Palace and Wolji Pond
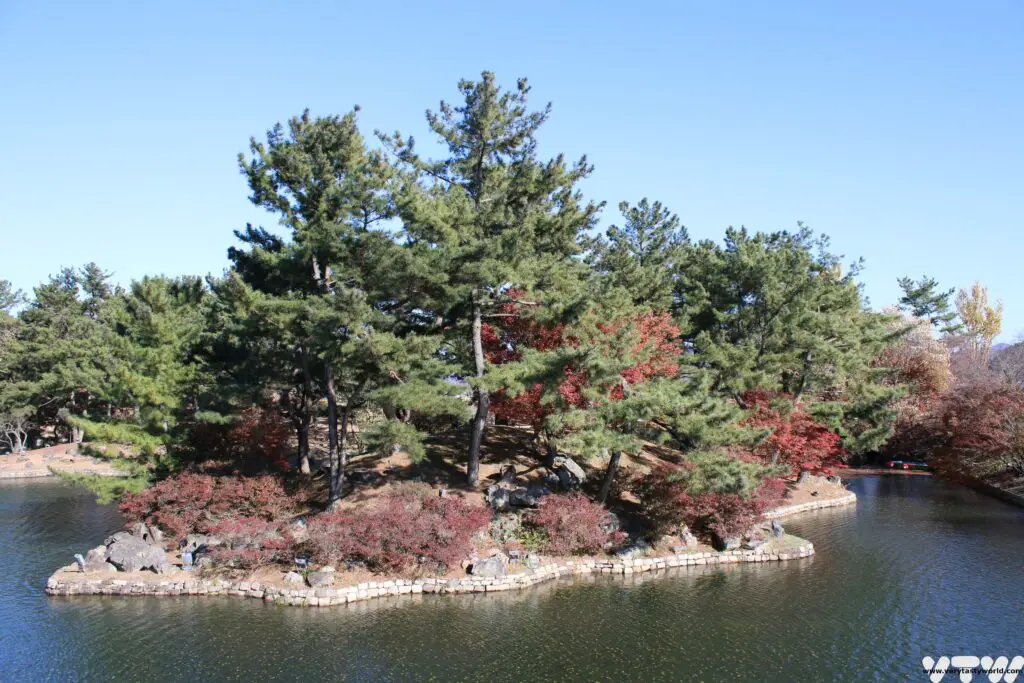
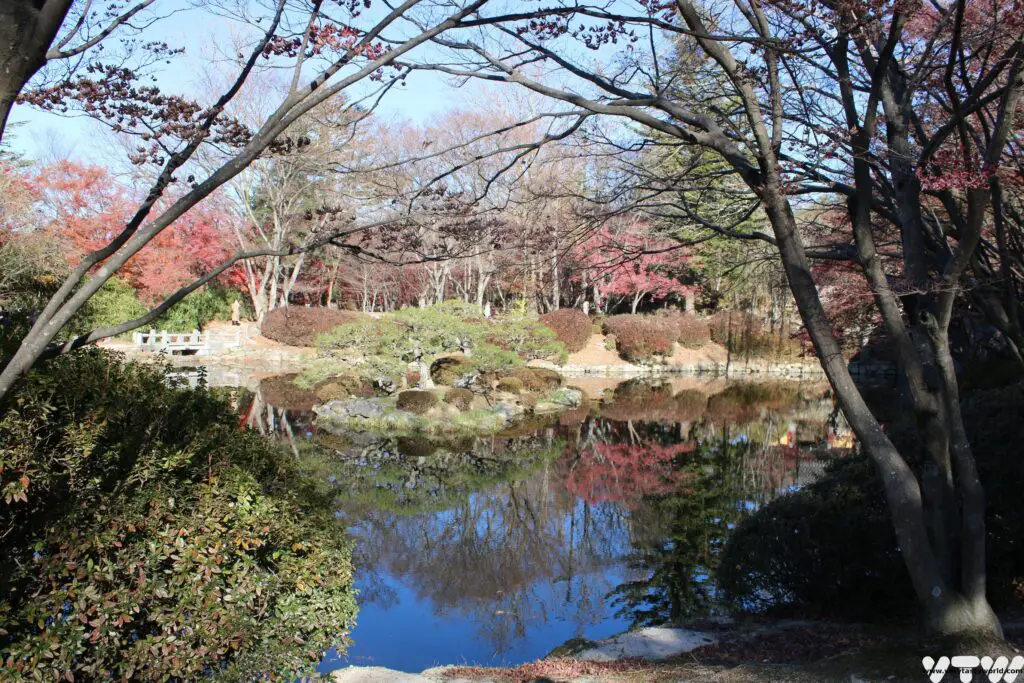
Follow the moat around and bear right. After exiting the park turn right and walk along the road, then cross to the Donggung Palace and Wolji Pond. This was a palace that was used by the Silla crown prince. The site has a beautiful pond (Wolji means “pond that reflects the moon”) which was constructed in 674 CE and is set in a lovely garden.
There is a small fee to enter the grounds. It’s possible to walk round the lovely lake to view its three islands. There are also some reconstructed lakeside buildings. It’s easy to imagine this as a place of leisure for the crown prince. It was extremely pretty, even in winter.
2 day Gyeongju Itinerary: Day 2
On the second day we suggest exploring some of the important historic sights outside the city.
Day 2 Morning – Bulguk-sa and the SeokGuram Grotto
You can catch a bus to visit the UNESCO sites of Bulguk-sa and the SeokGuram Grotto.
Bus numbers 10 and 11 go to Bulguk-sa (number 11 from the city centre is the quickest route) on a loop route.
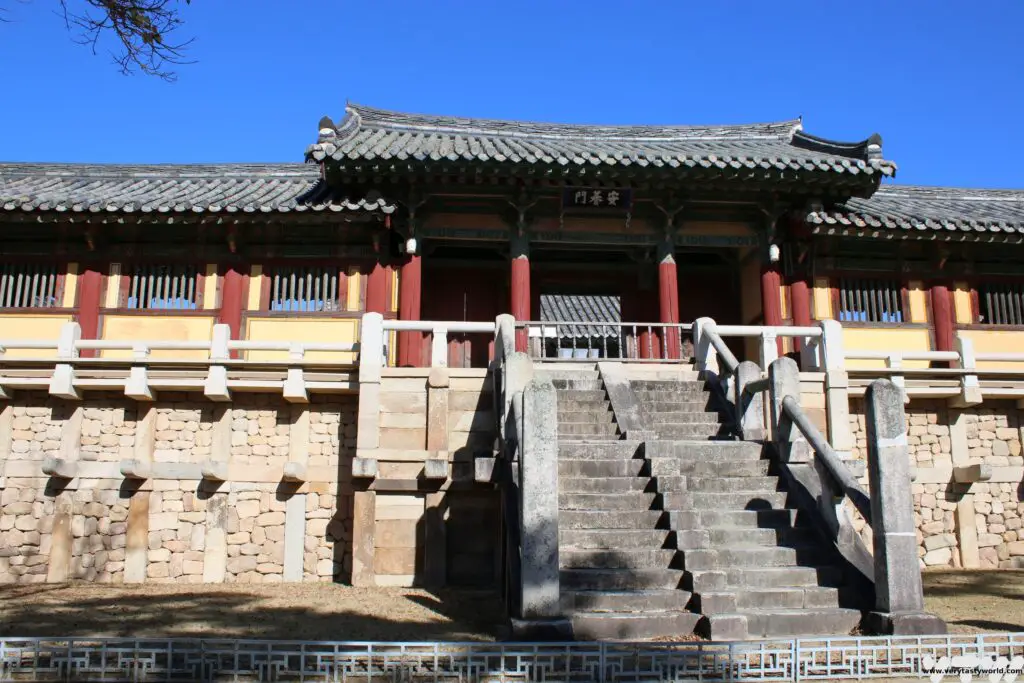
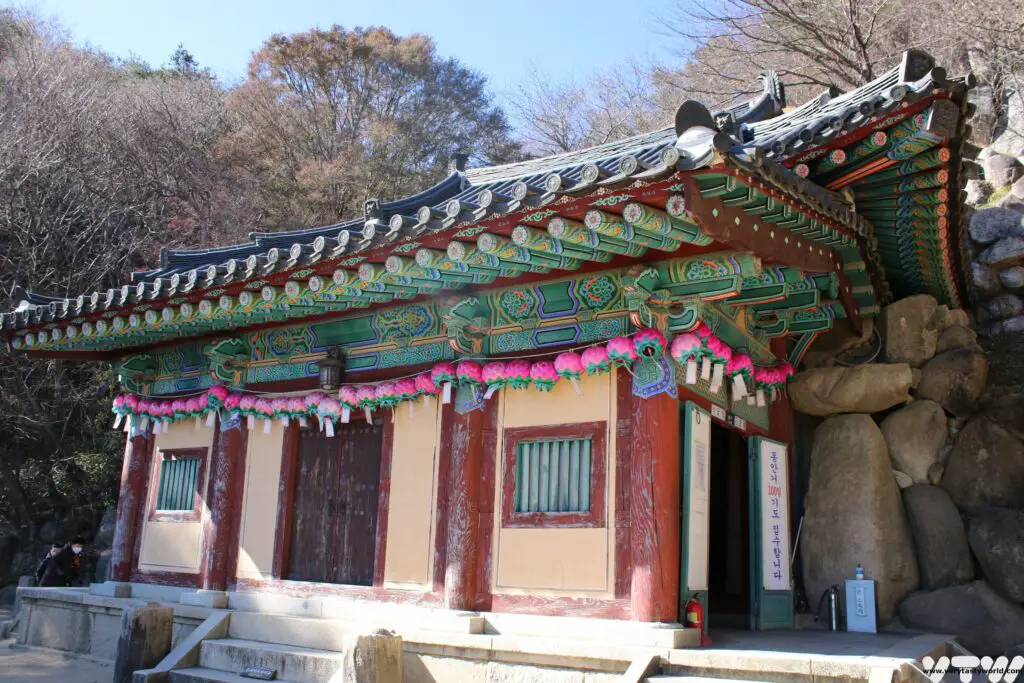
Bulguk-sa is a historic temple complex set in a beautiful garden and is a triumph of Silla architecture. It was originally built between 751 and 774 and served as the centre for Silla Buddhism and was a place for prayer to protect the country from foreign invaders.

Unfortunately the buildings were destroyed by Japanese invaders in 1593 and have been rebuilt. The main Buddha hall was rebuilt in 1765.
In front of the hall are two pagodas which survived the destruction are considered to be national treasures.
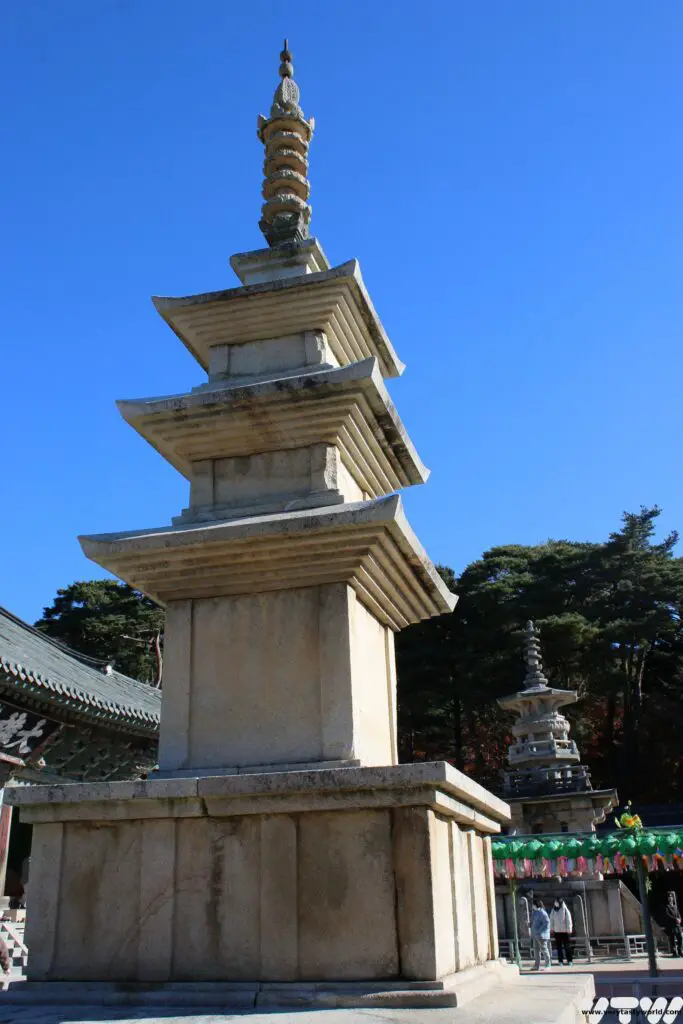
Dabotap , the Many Treasures Pagoda, is a typical Silla construction. The more ornate pagoda is Seokgatap, the Sakyamuni Pagoda, and it’s more reflective of the architecture of the neighbouring Baekje kingdom. In 1966 archaeologists discovered a copy of a sutra inside the pagoda which is an absolute treasure, considered to be amongst the world’s oldest woodblock printed books.
There are numerous other temple buildings and gardens to explore.
Bus number 12 will take you to the SeokGuram Grotto. If you’re feeling energetic, you can walk up the hill – it’s 2.2km to reach the grotto – but we’d recommend taking the bus as the road doesn’t have a great path for pedestrians. The bus stop to the grotto is at the bottom of the hill on the main road opposite the tourist information centre in the Bulguk-sa lower car park. The tourist centre will be able to give you a bus timetable.
The SeokGuram Grotto is another world heritage site. This is a cave temple, built in 751CE by the Silla people, which contains a Buddha. It is 3.23m tall, sculpted in granite and is considered to be one of the world’s most exquisite heritage carvings. The Silla cleverly designed the cave on a hillside where a stream runs underneath, perfectly regulating the humidity within the cave.
Visitors can walk into the cave and view the Buddha which is located behind a protective screen. There are deities that guard the main Buddha, two on each side. Photos are not allowed.
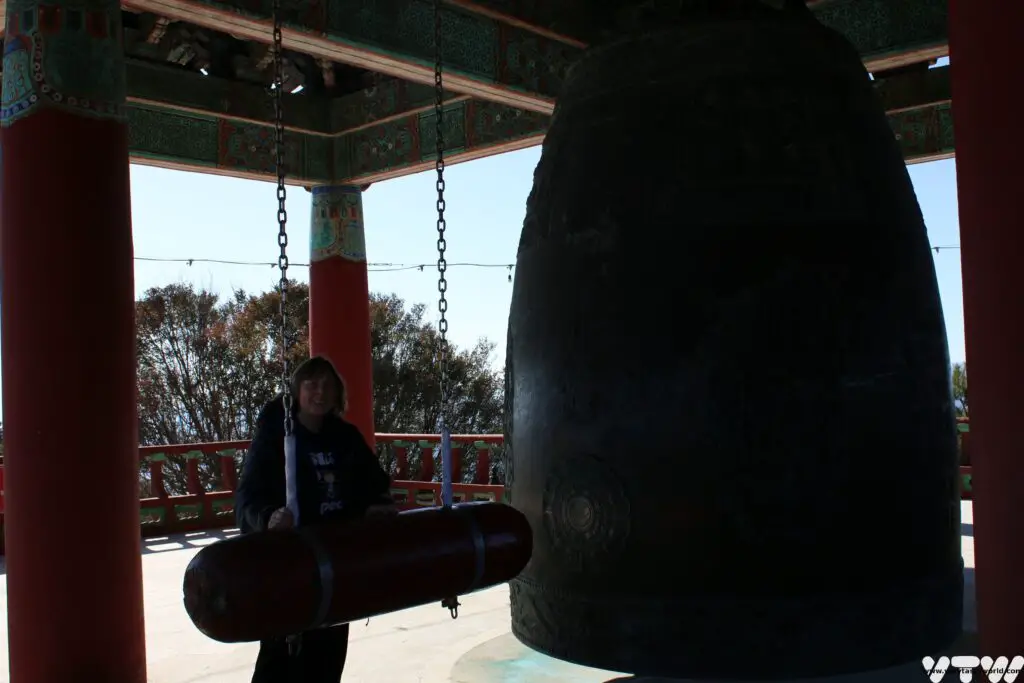
It is a short walk of around 1km along a pleasant, forested path to the SeokGuram Grotto from the entrance. At the very top of the stairs by the car park there is a traditional bell, which you can ring for a small fee of 1000Won. The money goes to charity.
Day 2 Afternoon Choices
There are choices for how to spend the afternoon.
On the way back, the buses pass by the Lake Bomun resort area. If you looking for more modern activities Gyeongju has a popular theme park which is a major draw for younger people in particular. This area also has a K-Pop museum and a museum of contemporary art. You will pass by the park on the no 10 or 11 buses and they both stop there.
Alternatively you could spend the afternoon browsing the Gyeongju Museum (open 10m-6pm, free entry) which has extensive permanent and temporary exhibitions about the Silla.
The history gallery and Silla art gallery are notable highlights, both of which exhibit precious artefacts.
Evening at the Gyeongju Eastern Historic Site
We recommend revisiting the Gyeongju Eastern Historic Site in the early evening. It’s a place where locals and visitors spend time relaxing in the park. Kite-flying is a popular activity.
Many of the historic sites are lit up after nightfall and it is especially worth walking back to Cheomseongdae and the Woljeong Bridge.
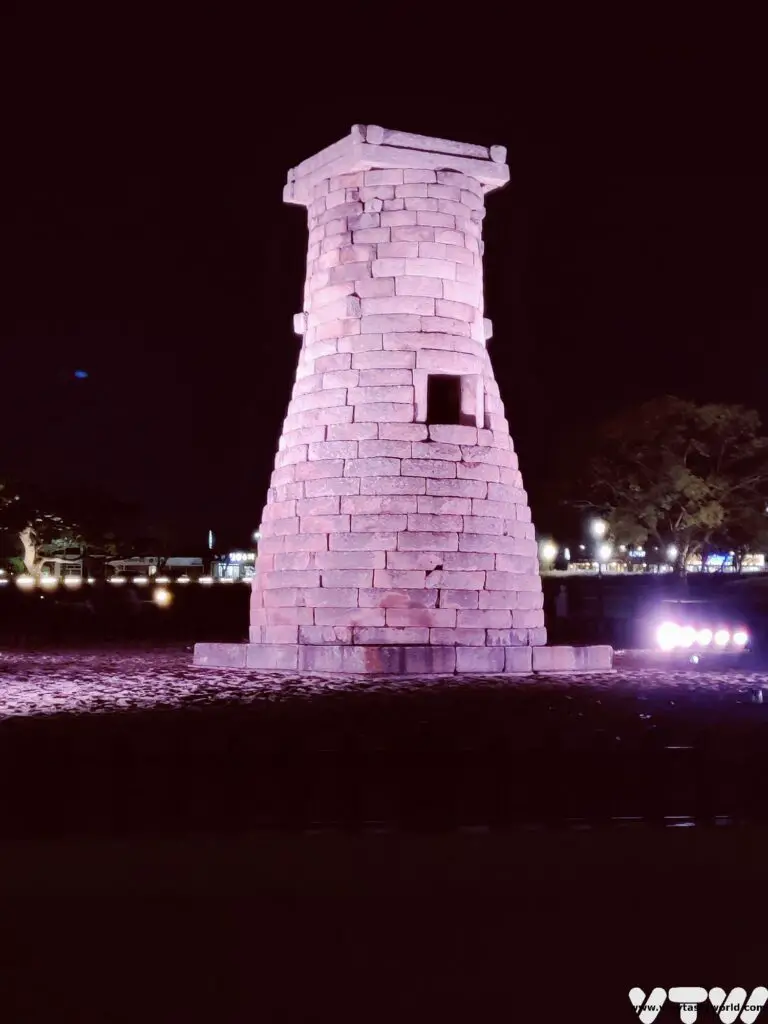
They are both impressive in the daytime but spectacular at night.

Gyeongju for Foodies
We ate very well all over Korea and the cuisine in Gyeongju was no exception. There are a plethora of restaurants in the city and around. Prices are very reasonable – most of the meals we enjoyed were around 10,000 Won (~$8) or less per person. There were a couple of excellent restaurants in the city centre or close to the Eastern Historic Site.
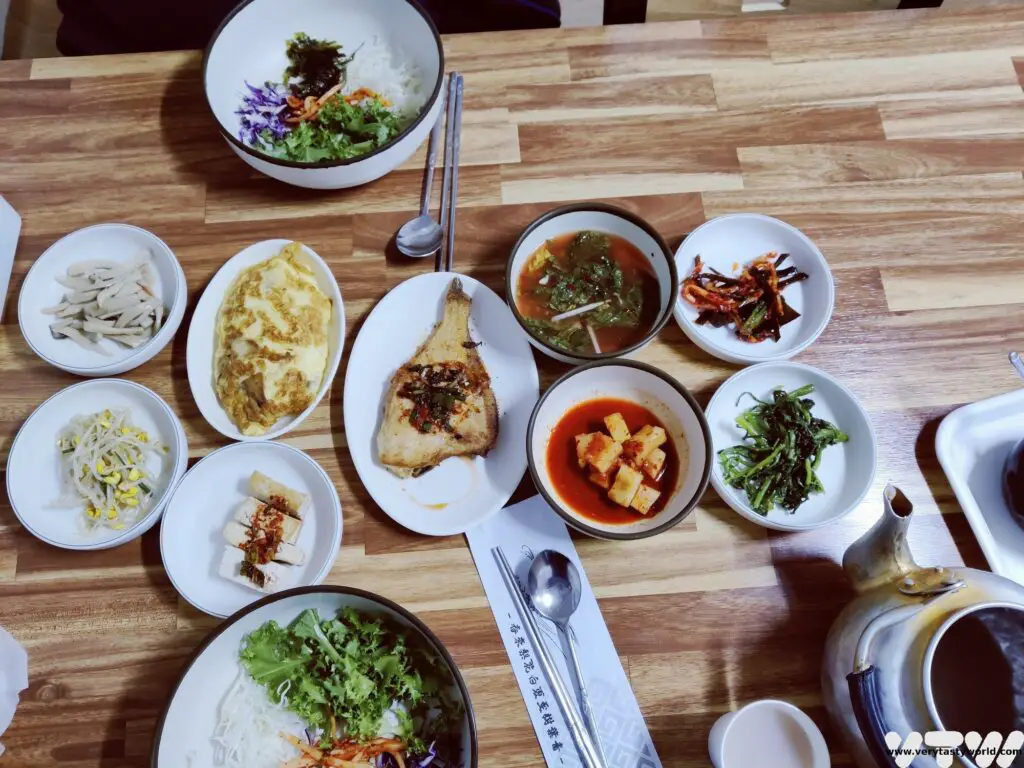
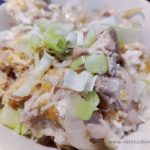
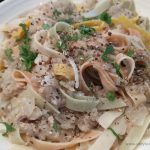
Sukyoung sikdang gyeongju on Gyerim-ro, opposite the The Daereunwong Tomb Complex, offered a home-cooked bibimbap (rice bowl) with lots of banchan side dishes and broth. This is a great option for vegetarians because all the dishes were vegetable based except for an additional order of fish (which we did order and enjoy). The sides comprised omelette, mushroom, water kimchi, radish kimchi, blanched vegetables, tofu. Barley tea was also served because it was a cold day. The proprietor also made his own makgeolli – a kind of rice wine.
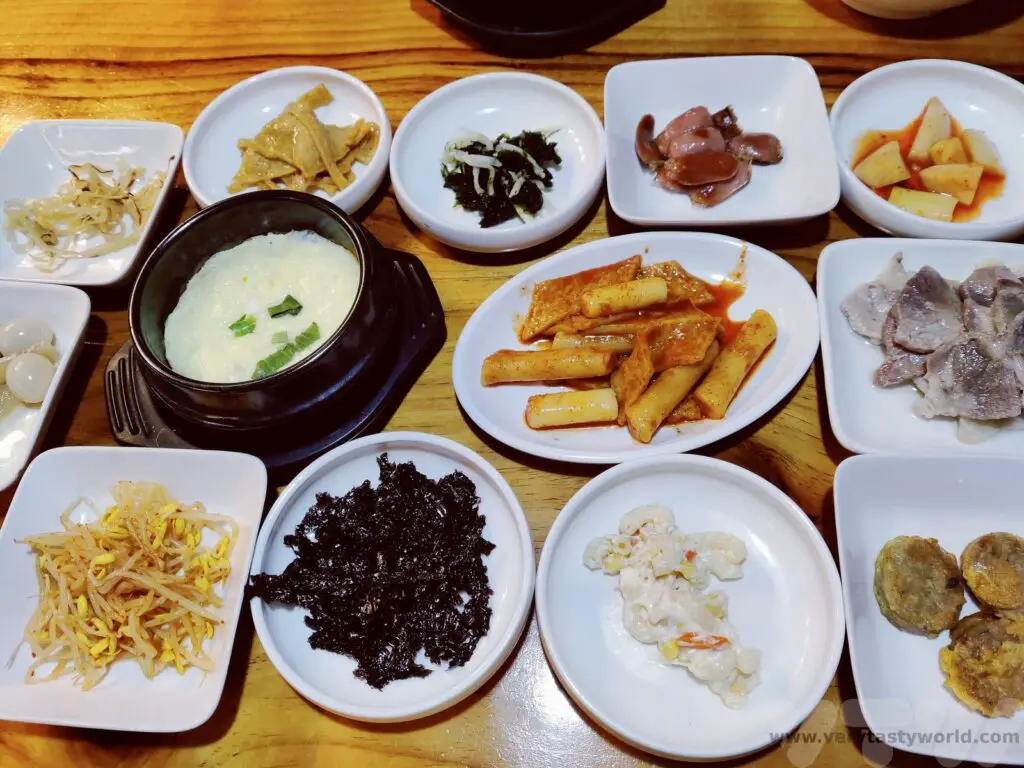
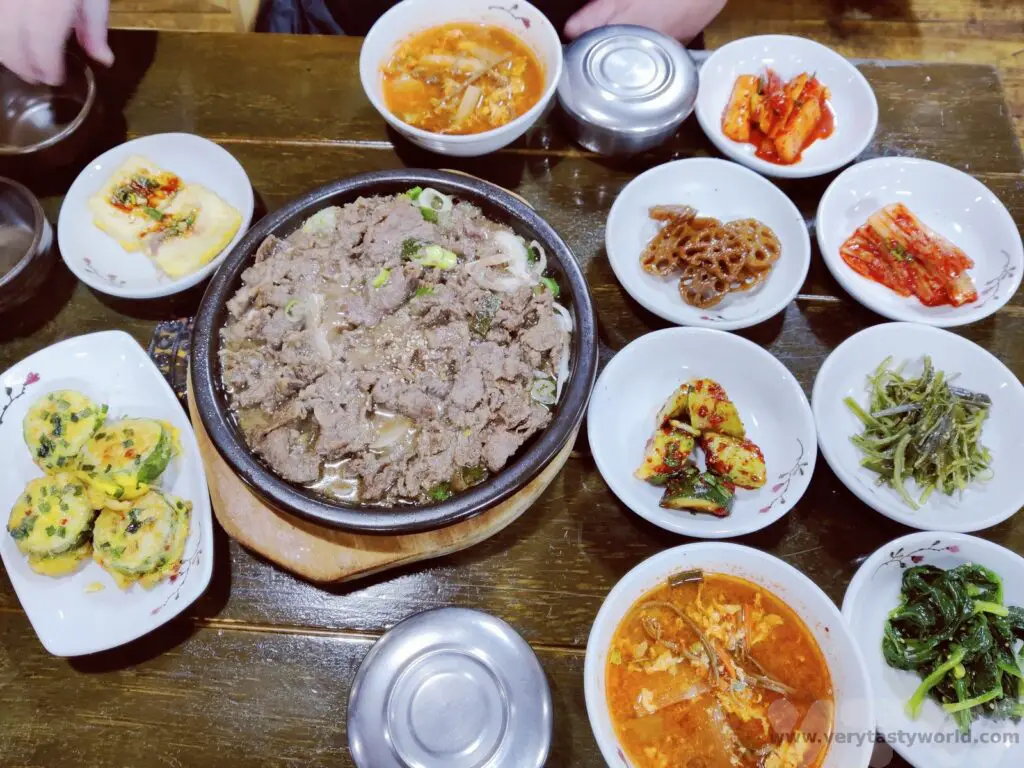
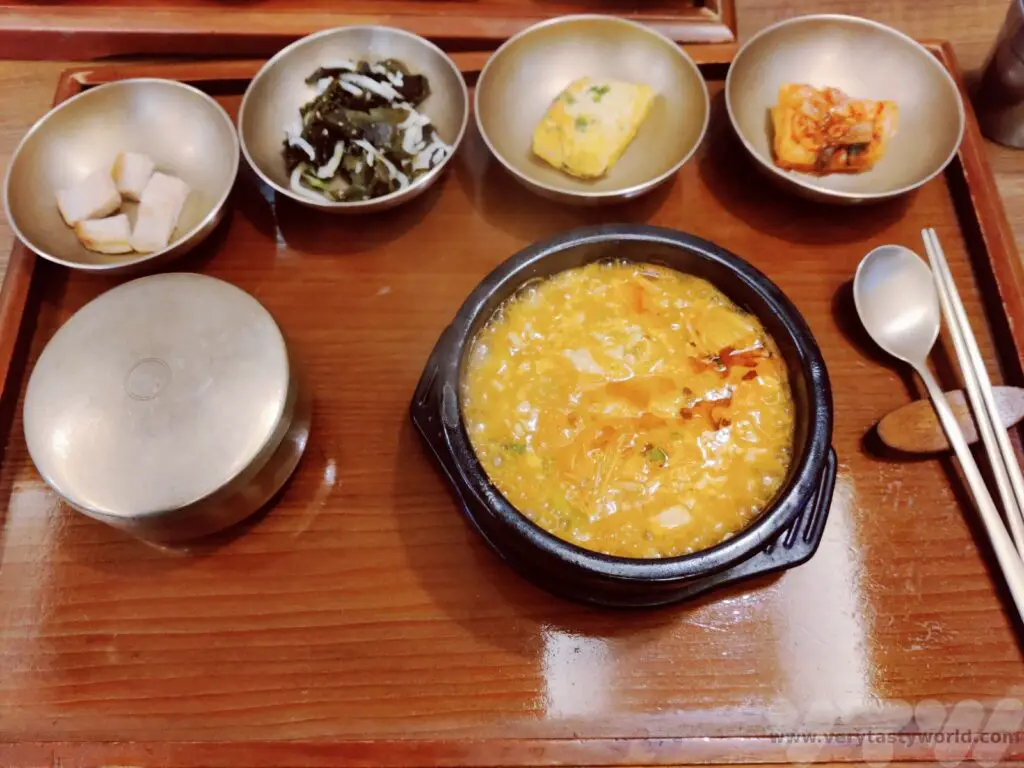
We stopped into 한식집 숟가락 젓가락 located on Taejeong-ro791 Becon-gil because we saw its sign with a huge number of dishes. This wonderful little restaurant offered a feast that was an absolute bargain. You choose a stew and then get rice, 11 side dishes and barley tea. All for 8000 Won each (about $6). And it was utterly delicious.
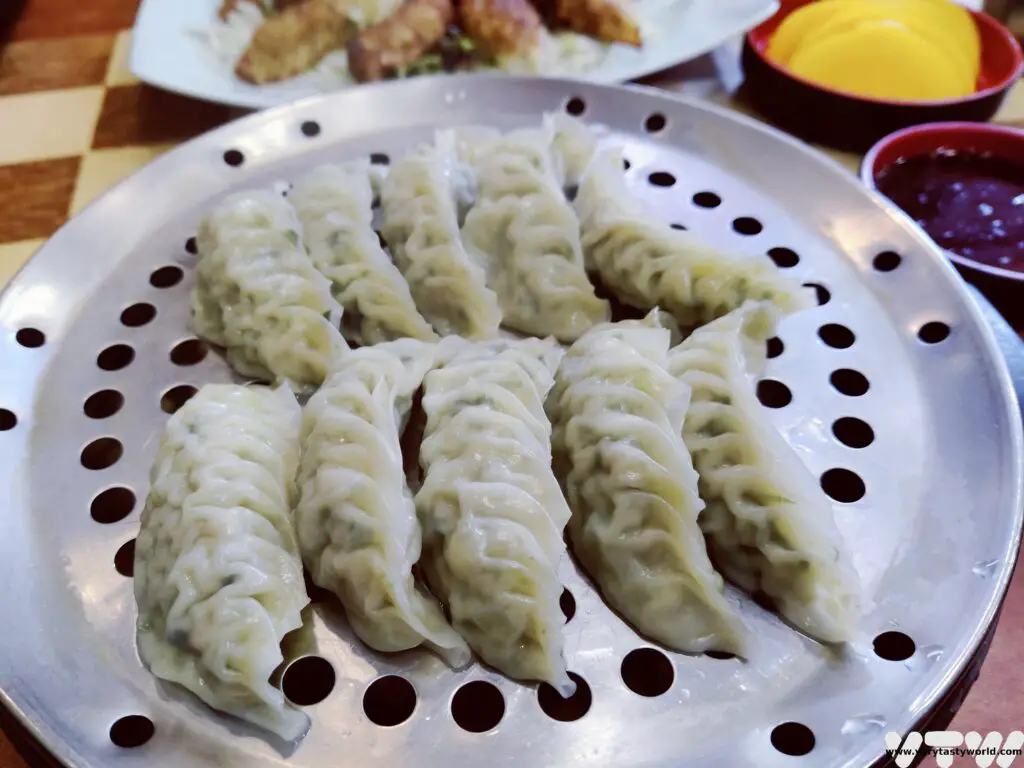
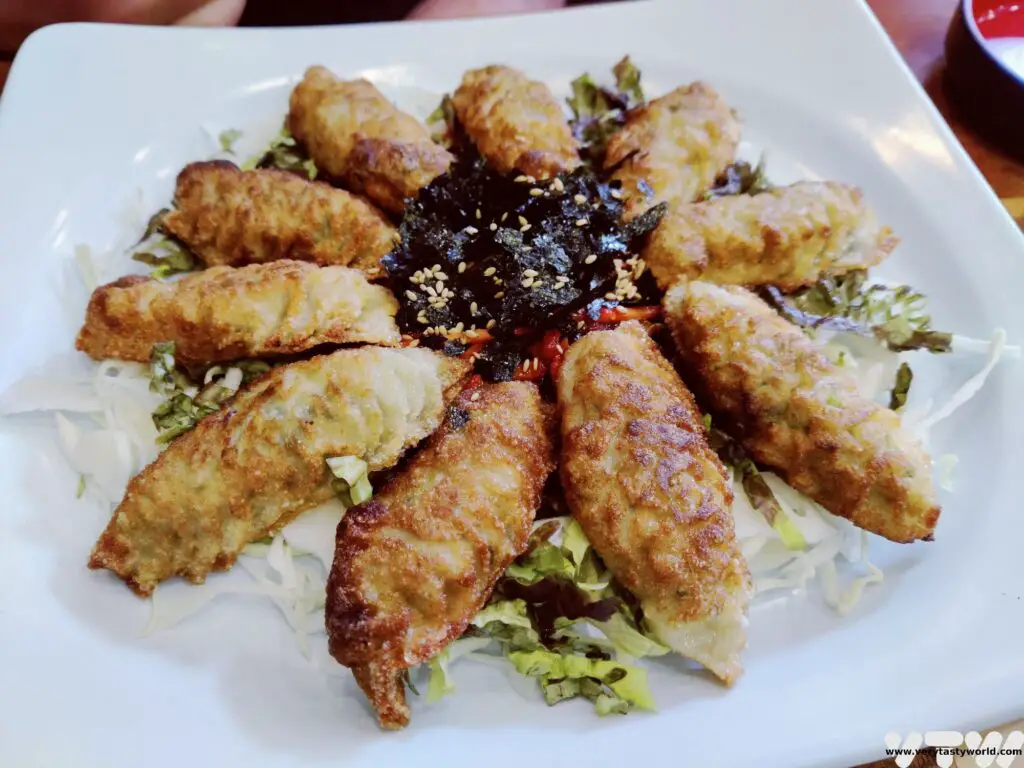
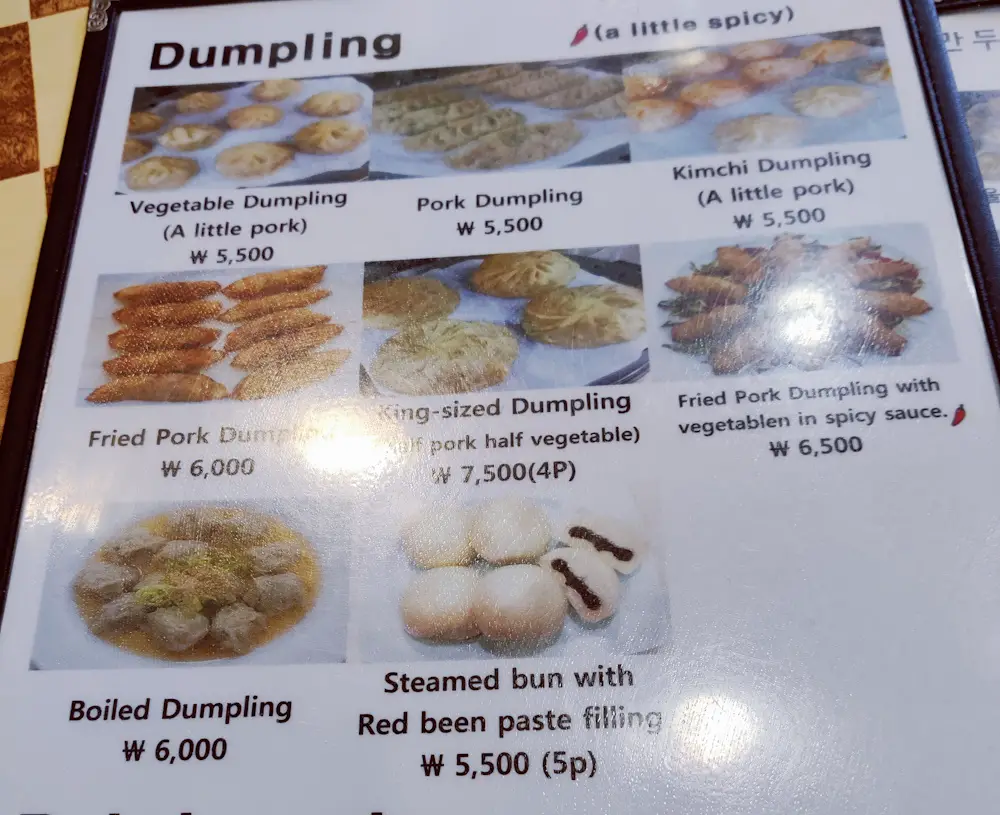
In town there is a dumpling restaurant 울타리없는만두 on Dongseoung-ro. The proprietor speaks good English and is delightful. We enjoyed two different types of dumpling. He steams them outside the shop – puts the dumplings in a basket, passes them through the window into the steamer, whereupon a rush of steam engulfs the side of the street and the dumplings cook in double quick time.
Seongdong Market, opposite the old railway station has a number of stalls if you are seeking street food. And we always advise seeking street food in South Korea – there are so many amazing dishes to try. The market also has an area with some restaurants that also serve a variety of banchan.
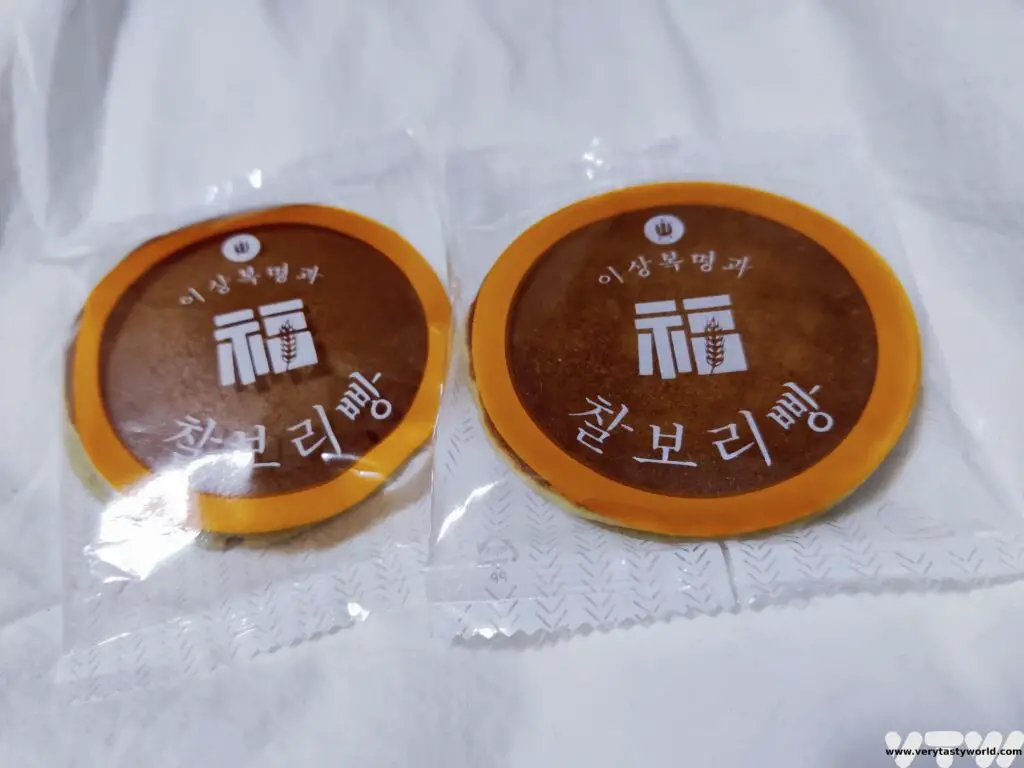
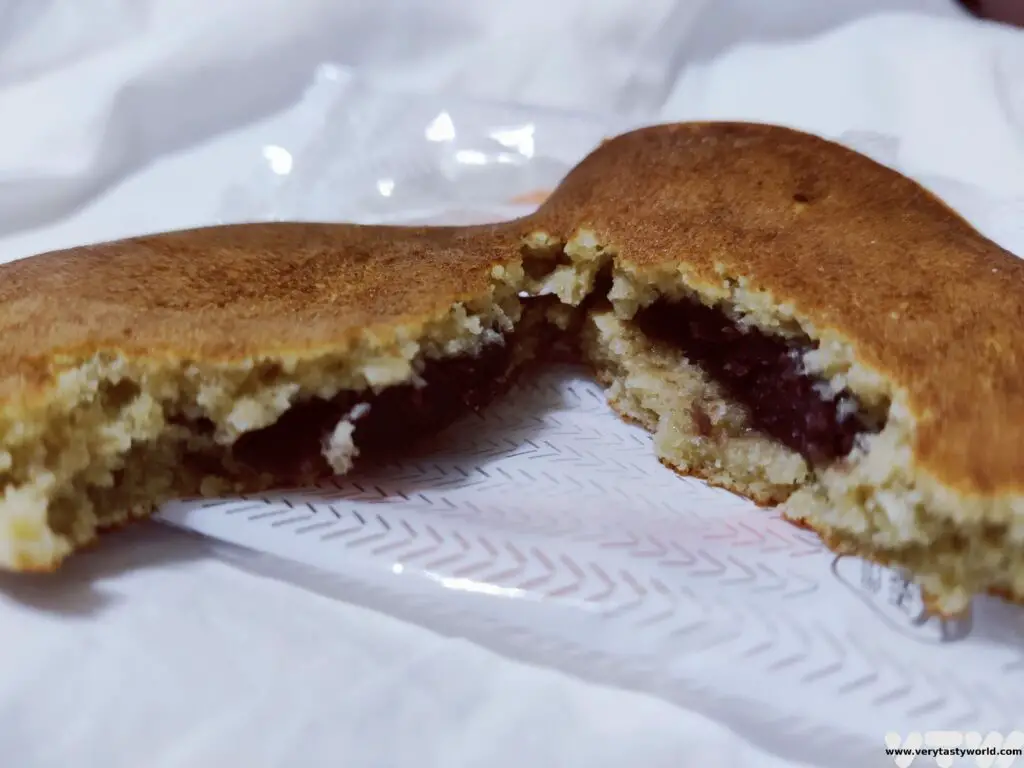
Gyeongju Specialty Food
Gyeongju has its own special bread known as hwangnam-ppan. We found it quite difficult to buy in individual portions as it is usually beautifully packaged in presentation boxes. (We were backpacking and didn’t feel that if we were carrying a beautifully packaged presentation box it would survive the rest of the trip!) However, one bakery sold us two single packs. Hwangnam-ppan is a sweet bread, which tastes like a scotch pancake. It’s soft and spongy in texture. The filling is a smooth, sweet red bean paste.
So, how did we do with collecting those site stamps? This is what we covered in two days.
We can’t recommend Gyeongju highly enough. As you can see, our two day Gyeongju itinerary gave us a flavour of the highlights but there are many, many more places to see. We want to return and spend much more time exploring this remarkable region.
Related Posts You May Enjoy


- A One Day Hanoi Itinerary

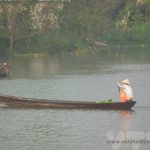
- Mekong Meanderings
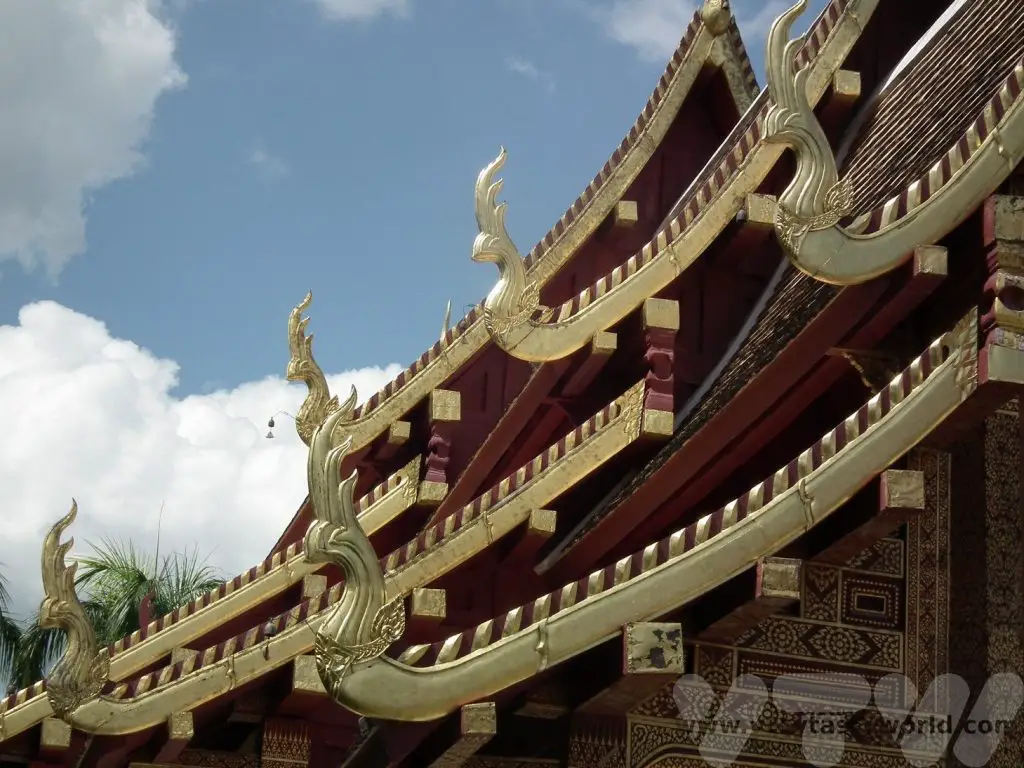
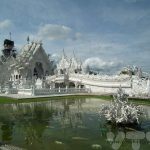
- A Chiang Rai Temple and A Country Retreat
- A Chiang Mai Tour in Northern Thailand

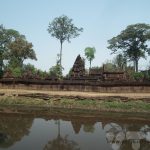
- Sunrise at Angkor Wat and Other Temples
- Mekong Delta River Cruise in Vietnam

Thanks so much for reading. We hope you enjoyed this article. If you’d like to keep up to date with new posts and recipes, please subscribe to our newsletter or follow us on social media – X, Facebook or Instagram. We always love hearing from you and would be delighted to read your thoughts about this article.

A Korean Table Setting – Eating Out in Korea
Korean cuisine is one of the finest in the world. It’s so good that UNESCO have acknowledged it. We have recently returned from a trip to this amazing country. We wanted to try as much local food as possible so ate at a variety of restaurants as well as spent time discovering the vibrant street food scene. Korean people are passionate about their cuisine. We also enjoyed learning about the importance of the Korean table setting. Here’s our guide to dining and etiquette in Korea.
Please note that this post contains affiliate links. If you click through and decide to make a purchase we will earn a small commission, at no extra cost to you, which will help towards the costs of running this site.
Our Korea trip took us to Seoul, Gyeongju, Busan, Daegu and back to Seoul, so we were able to taste dishes from all over the country. We found travelling through Korea to be very straightforward – the public transport system is excellent and very easy to use. You can buy a railcard which gives you access to the extensive rail network that will whiz you all over the country.
Dining was also easy in the main – many restaurants have multi-language menus or ordering systems. Everywhere we went, we discovered that the local people were delighted to help us learn about their delicious cuisine.
Dining Etiquette – The Korean Table Setting
The table setting is significant. Rice should be set to the left and soup to the right. (The other way round represents offerings to the dead.) The rough rule is that cold and/or dry foods are set to the left, and hot and/or wet foods to the right.
Koreans use chopsticks and a spoon to eat their food. Chopsticks are used to pick up specific items and the spoons used to scoop rice or eat soup.
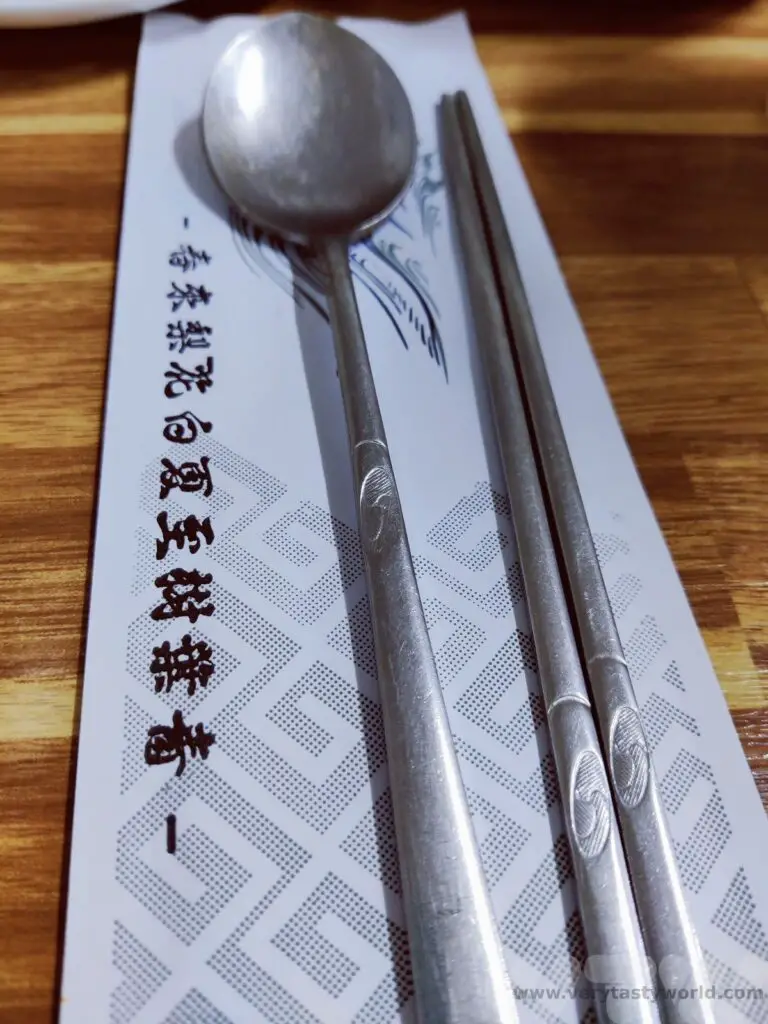
Chopsticks in other Asian countries are usually made from wood but in Korea chopsticks are metal.
It is polite to use a spoon to drink soup – in fact, unlike many countries in Asia where it is okay to bring the rice or soup bowl to your lips, it is best to keep all bowls on the table. Use the spoon to bring rice or soup to your mouth.
There’s no formal way to eat rice. If served a stew with rice how you eat it depends on personal preference. Some people tip the rice directly into the stew, others scoop a spoonful of rice at a time and dunk it into the stew to pick up some of the flavour. And yet others never mix their rice with sauce and eat it plain.
Using a spoon and chopsticks is an efficient way to eat. In fact, over the course of our trip, we learned to use the spoon with our left hand and hold the chopsticks with our right – maximising eating potential! It’s absolutely fine to swap hands, put down the chopsticks down on the chopstick rest or on top of the bowl and pick up the spoon with the same hand. It’s considered that, as most people are right handed, another reason the soup is set to the right is so that it’s easier to use your right hand with the spoon to avoid spillage.
Don’t stick your chopsticks vertically into your food as that is the way that offerings are made to the deceased at funerals.
If you are eating with a group, the eldest members of the party will eat first.
When it comes to drinks it’s polite to order just a suitable number of bottles of beer, soju (a clear distilled spirit which normally has the strength of fortified wine) or makgeolli (a cloudy rice wine which has a similar ABV to beer) and share rather than order one for each person. You can always order another. You shouldn’t pour your own drink but pour for others using both hands. The recipient should hold the cup or bowl with both hands to receive.
Before starting to eat, say, ‘jalmeokgesseumnida’ which means ‘eat well’. If you get it wrong you won’t be ostracised but the correct etiquette will be appreciated.
One of the most delightful things we found about dining in restaurants was how keen the local people were to show us how to eat the food. For example, if you order bibimbap – mixed delicious things served over rice – you receive a bowl of beauty then dig in with the spoon and mix it all together before scoffing. Even if we couldn’t speak much Korean, the restaurant staff would demonstrate what we should do with each dish. It was very helpful.
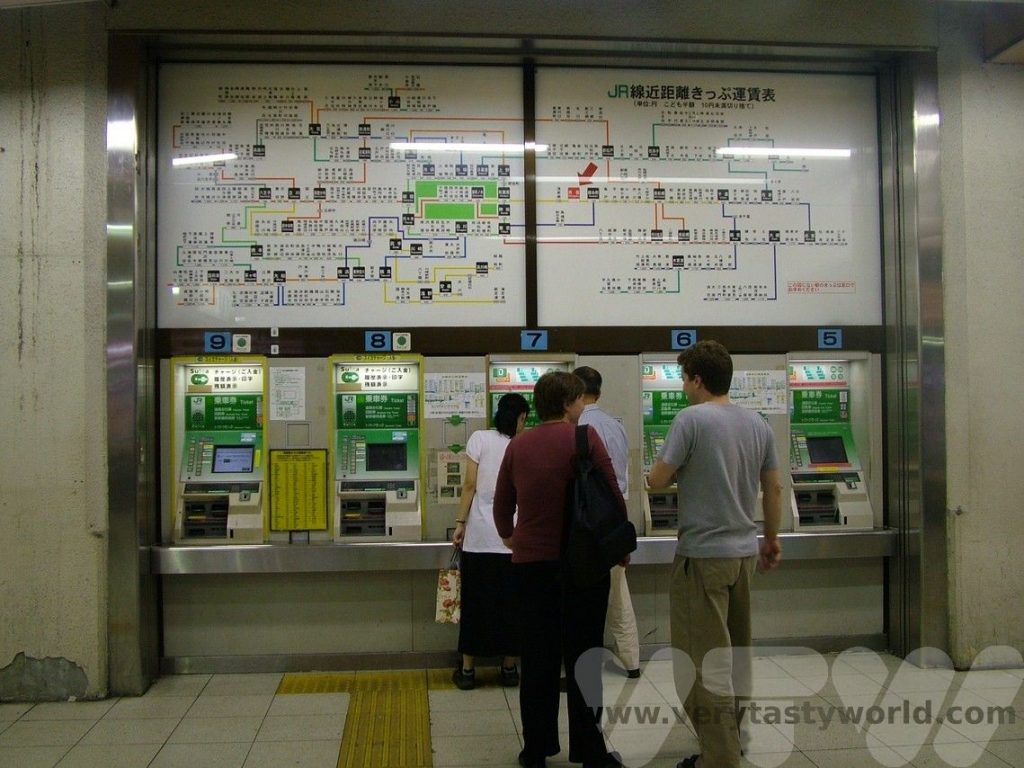
Restaurant Dining
Many restaurants offer a self-ordering process where you walk up to a machine and place the order. Pretty much every restaurant we visited that had self-ordering had an English language option, as well as Japanese and Chinese. We found that most restaurants had an English menu which was sometimes quite basic but absolutely fine. Where restaurants didn’t have an English menu, we either guessed (we had learned to read Hangul before travelling so could tell what we were probably eating but didn’t know how it was cooked, but that’s okay as we eat pretty much anything) or we pointed to pictures of the food.
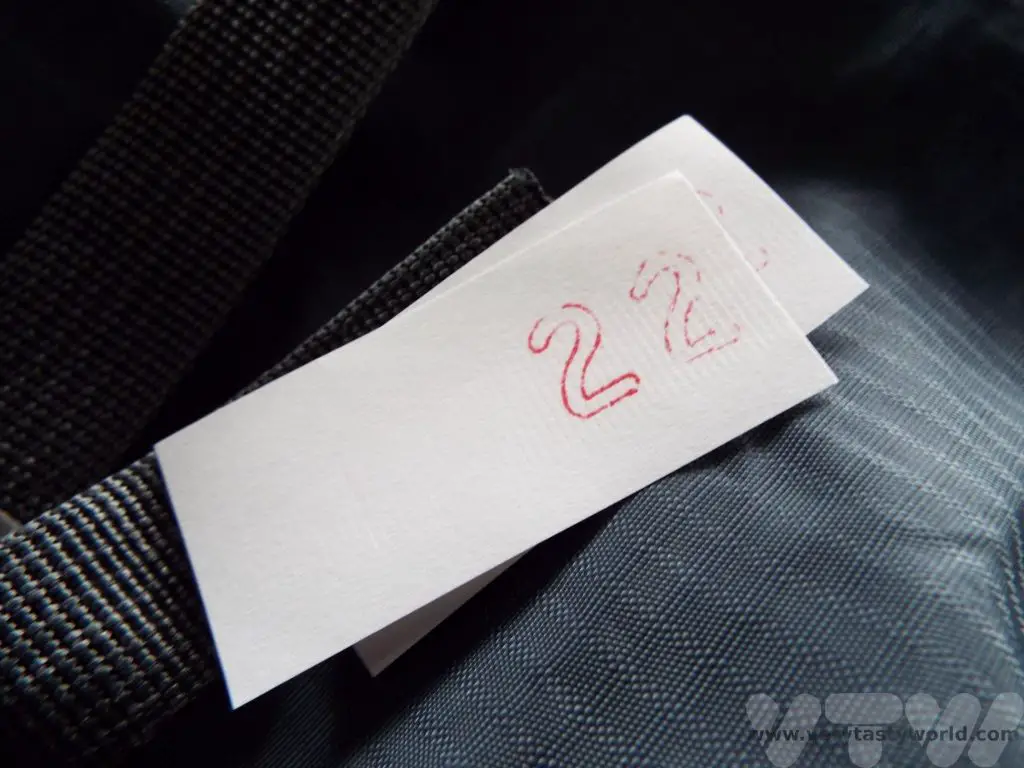
If you have ordered using a machine, order the food and either wait for it to arrive or for the number on your ticket to be called out. Keep an eye out at the serving hatch if you don’t know your number – the staff will most likely know that the food is for you and will beckon you over.
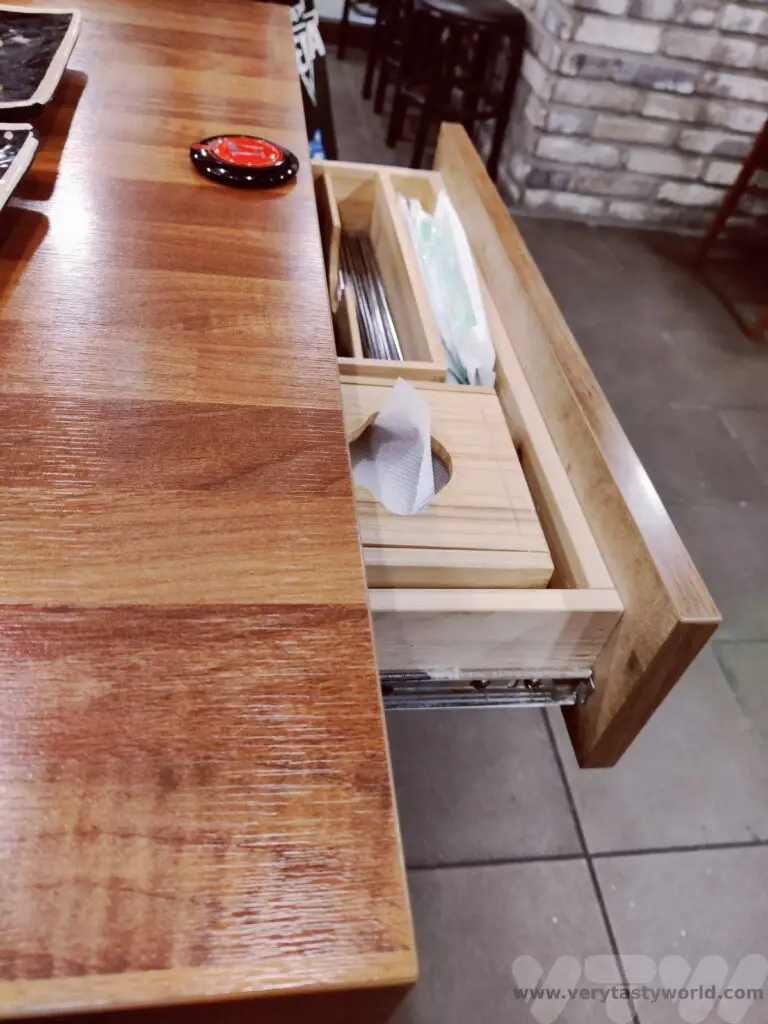
If you can’t find chopsticks and spoons on the table, they will almost certainly be available – either in a box or, rather cleverly, in a drawer under the table. The Golden Rule for a Korean restaurant: always look under the table.
Also, if you want to call over the waiting staff, there is often a button on the table which you can press.
Water is always provided and it’s free of charge. Many restaurants will bring you a bottle or jug of water and some cups but you may have to help yourself. If this is the case there will be a water dispenser and cups available somewhere in the restaurant.
Korean meals always come with banchan – side dishes. Sometimes these will be brought to the table and other times there will be a self-service bar where you can pick up a dish and fill it yourself. Look out for broths as well – there is often soup or broth in a large vat somewhere in the restaurant. It will be a rare meal when you aren’t supplied with kimchi, the ubiquitous and delicious spicy fermented cabbage, which is Korea’s national dish.
At some restaurants the bill was placed on our table when the food was delivered, at others we paid in advance using the machine and yet others the bill was calculated afterwards. You don’t request the bill – just saunter up to the payment area and pay. Cash is fine, cards were accepted in most places. Tipping is not expected nor required. Indeed, like Japan, tipping can sometimes be considered rude.
The Joy of Banchan
One of the most amazing things about Korean dining is banchan – the side dishes. The variety of banchan is quite remarkable. And they aren’t just thrown together. As much care is taken in preparing the banchan as the main dish.
And the very best thing about banchan is that you can order more for free! (It would be a bit rude to ask for more of the dish you have ordered or extra rice, unless you are happy to pay more.)
Of all the banchan, kimchi is the most famous. This crunchy, spicy fermented cabbage dish will be eaten with almost every meal. Even our airline meal to Korea included a packet of kimchi.
It is such a fundamental part of society that it has its own day – 22nd November – and families get together every year to make kimchi. Kimjang: Making and Sharing Kimchi was inscribed on the UNESCO Representative List of the Intangible Cultural Heritage of Humanity.
Korean households usually have two refrigerators – one for normal food and the other, which is set at a specific temperature, for a year’s worth of kimchi! We have been making kimchi for years and have an easy kimchi recipe.
Quintessential Korean Dishes to Try
Bibimbap
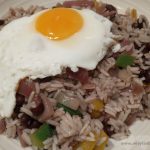
This is one of the most well-known of Korean dishes. It is a rice bowl topped with all sorts of delicious ingredients – from vegetables to marinated meat – sometimes garnished with a fried egg. Gochujang, the spicy (not overly spicy) chilli sauce forms the basis for the flavour. Sometimes the bibimbap is presented with the toppings on the rice but in ‘fast food’ bibimbap restaurants the toppings will be placed in the bowl and you will be served the rice separately, to put on top yourself.
The best way to eat bibimbap is to admire it first then get your spoon in and mix it all together, add some sauce, mix some more and then scoff.
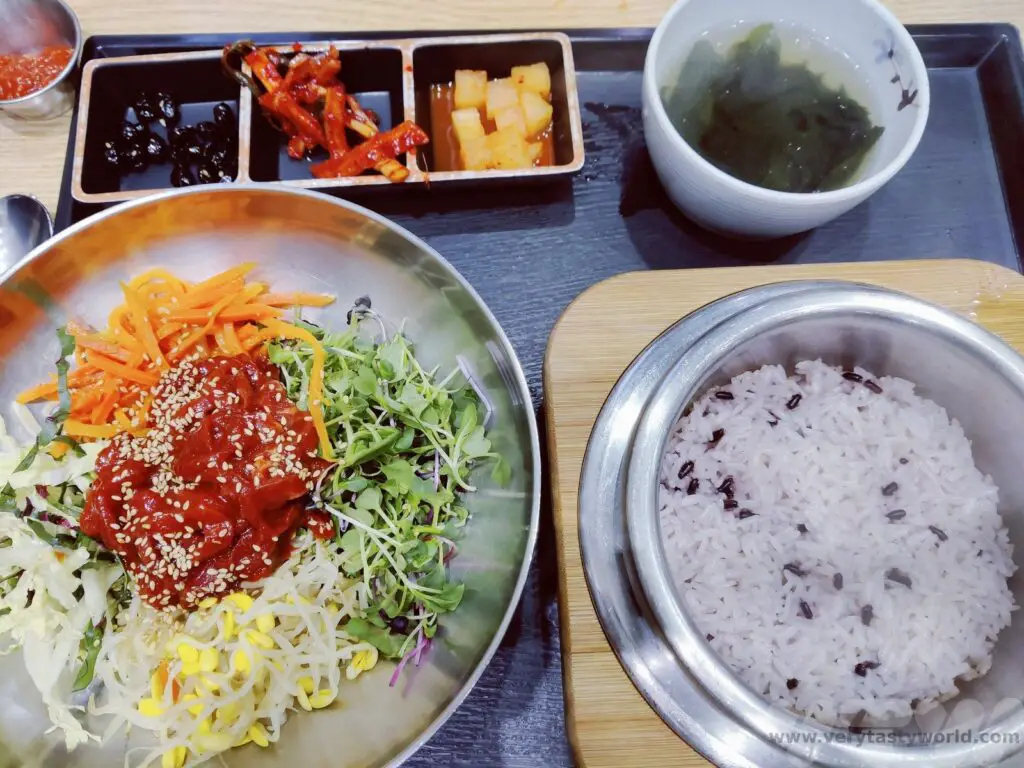
Sharp-eyed readers will notice that in the picture above the rice is served to the right. This is because we were given a tea pot and , after transferring the rice into the bowl of goodies, we then added hot stock to the rice crust inside the bowl to make a lovely soup.
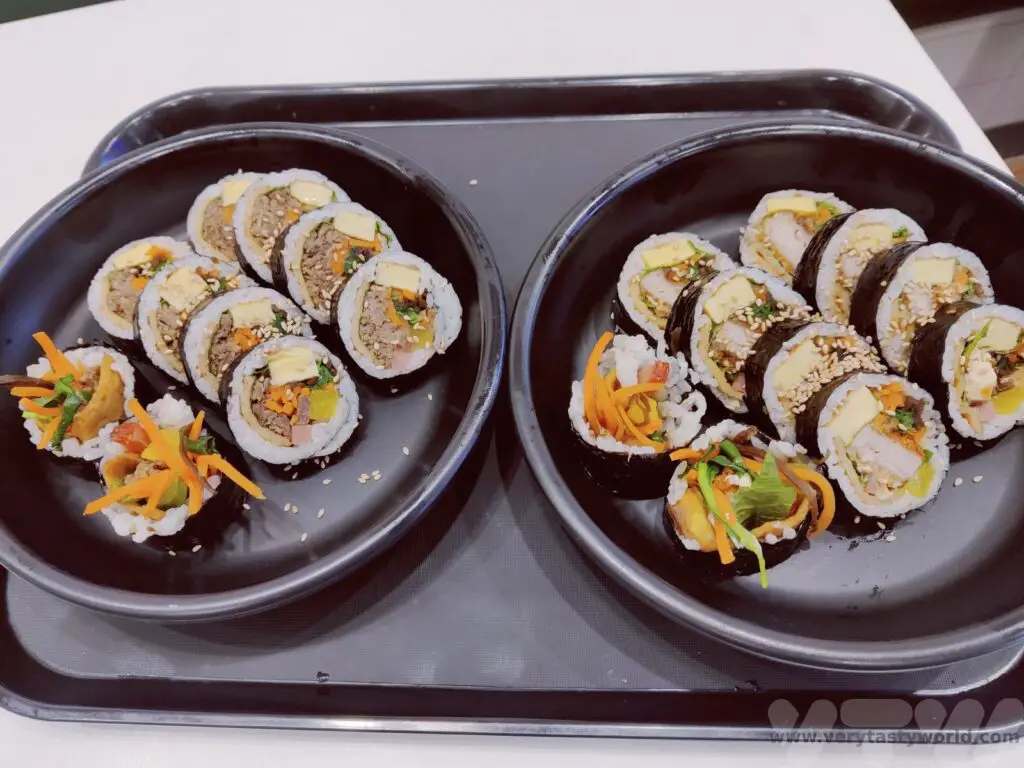
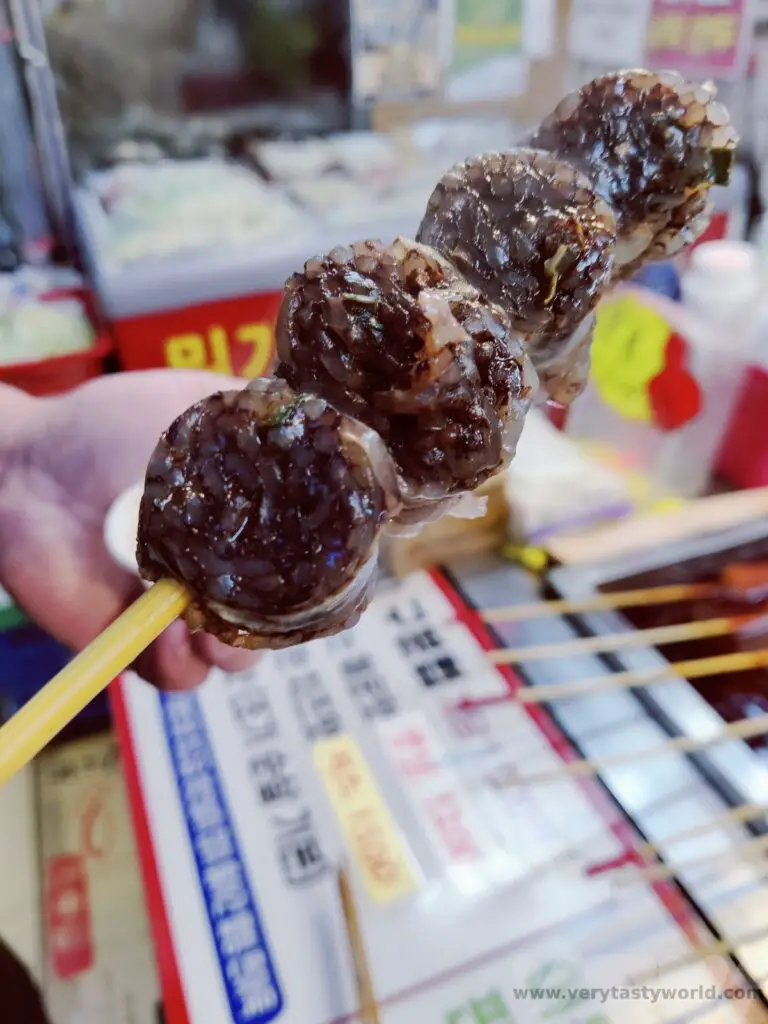
Gimbap
They may look like Japanese sushi maki (sushi rolls) but gimbap (gim = seaweed, bap = rice) are very different. They are not seasoned with vinegar but sesame and they are sauced internally. Whereas maki often largely comprise raw fish, gimbap includes a vast array of ingredients – there is much more filling than rice. You can expect pickles, fresh vegetable, meats/fish or omelette all lovingly wrapped in a seaweed casing. You don’t dip them in soy sauce or wasabi. Many gimbap outlets in the cities are open 24 hours so this makes a great breakfast option.
BBQ
Another essential meal to enjoy while visiting Korea is BBQ – luscious cuts of meat, sizzling on a hot plate, cooking over fire (sometimes butane but charcoal is traditional which adds a delightful smoky element).
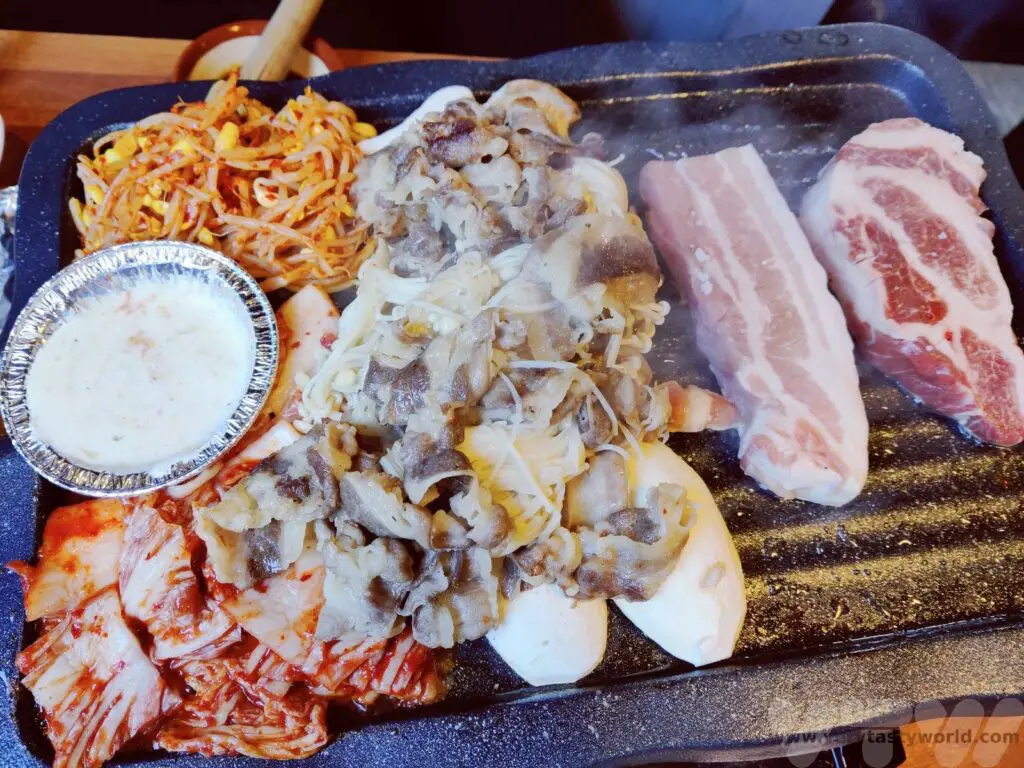
And BBQ is where another brilliant Korean table setting element comes into its own: the scissors! Korean kitchen scissors are the absolute best, they have thicker blades than ordinary scissors and cut food quickly and efficiently.
The meat is initially seared and cooked as a full joint. Then, as it cooks, tongs and scissors are used to cut the meat into bite-sized strips.
If you aren’t confident doing the cooking, the staff are absolute experts and will know exactly what to cook and in what order, so you can sit back, sip a soju and enjoy the show. But if you fancy having a go it’s fine to go for a DIY approach.
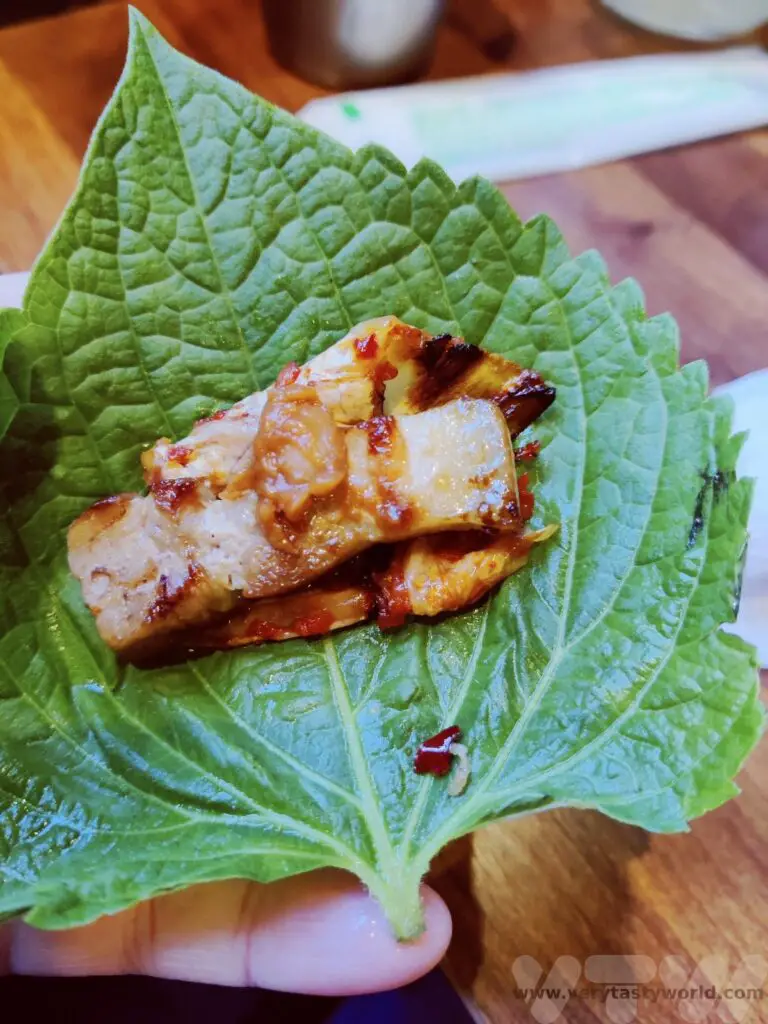
Ssam, which means ‘wrapped’, is a great way of enjoying BBQ. As well as banchan, a number of different leafy vegetables will be supplied – lettuce leaves or herbs such as perilla (below). You pick up a juicy piece of bbq meat with your chopsticks, place it on the leaf, add some kimchi and a dab of sauce, then wrap it up and pop it into your mouth – delish! If you run out of leaves, you can always ask for more.
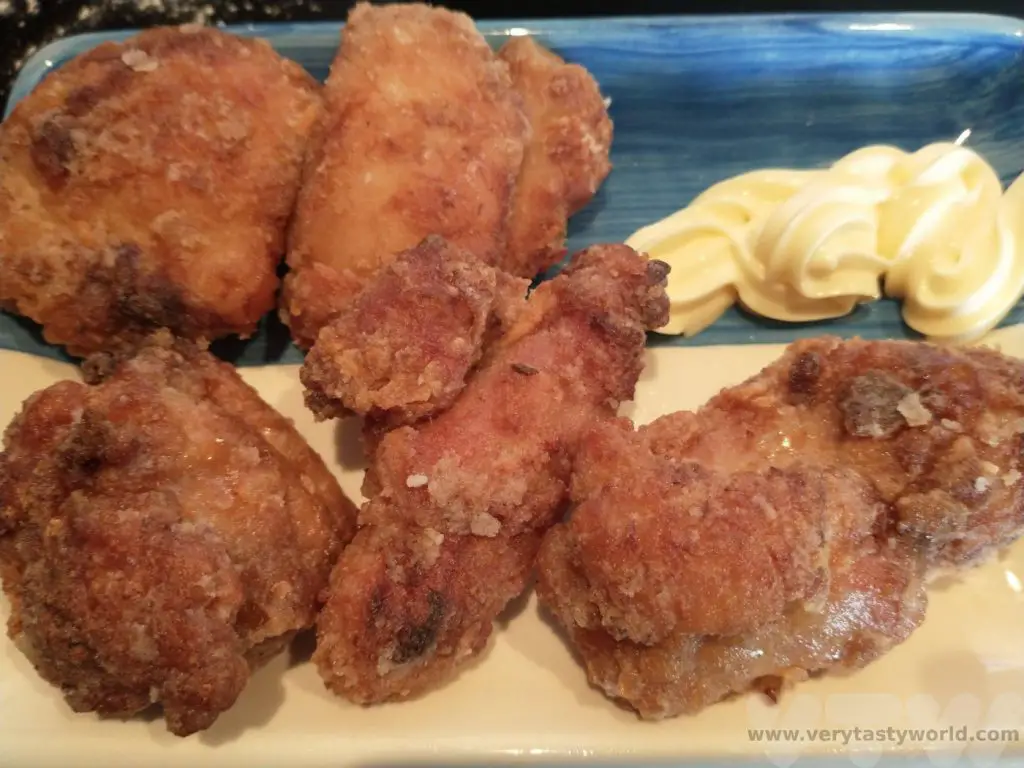
Chimaek (Chicken and Beer)
KFC is an essential item to try when visiting Korea. Not that KFC, of course, but Korean fried chicken. Chimaek 치맥 derives from chikin = fried chicken (unsurprisingly) and maekju = beer.
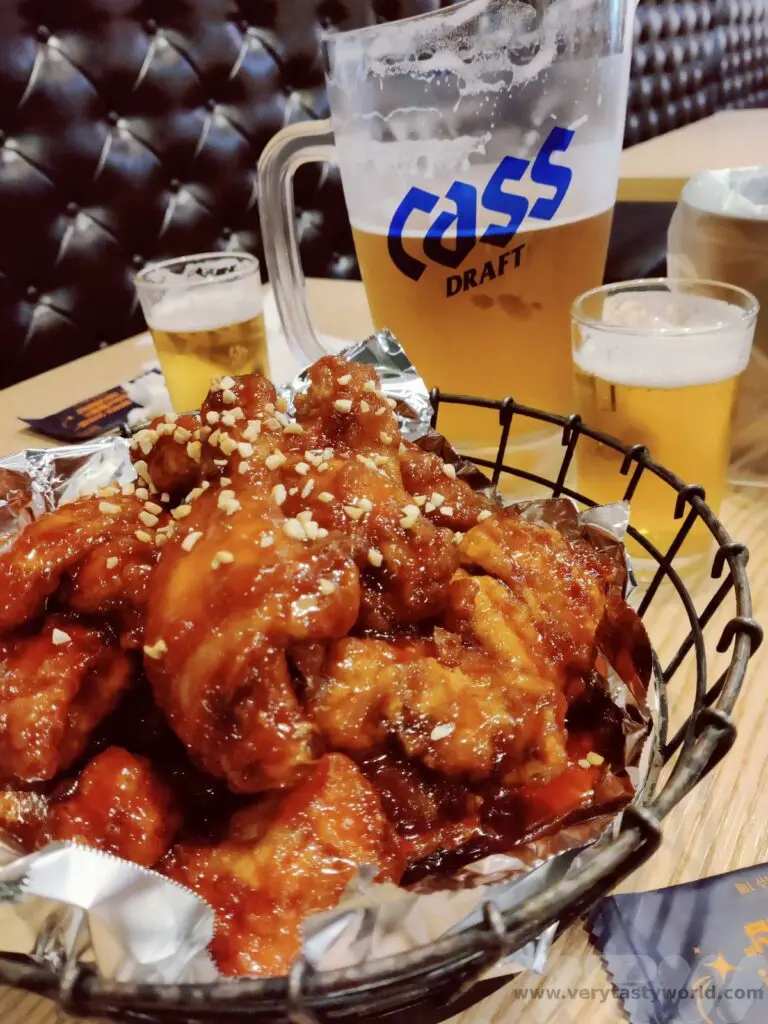
A very sociable way to enjoy fried chicken is to scoff it with beer and enjoy it with friends. When we visited a chicken and beer restaurant in Busan a single order provided a whole chicken’s worth of deep-fried joy, in a spicy sauce. Local beers are much cheaper than imported.
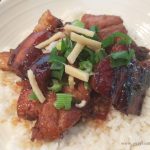
Bulgolgi
Bulgolgi is very popular dish comprised of marinated thinly slices of meat, usually beef, cooked on a griddle. The name translates as fire meat (bul = fire, golgi = meat). Some restaurants will offer a set menu where bulgolgi forms the centrepiece of the dish and you have multiple banchan to accompany, other restaurants let you cook the meat at the table. Just use your chopsticks to pick heavily flavoured, succulent pieces of meat.
Jjigae (Korean stew)
We visited in November and temperatures were dropping fast as winter approached. Jjigae is comfort food – warming and delicious. There are many varieties available – meat, tofu and vegetables – seasoned with a variety of sauces. Gochujang (chilli paste) and doenjang (soy bean paste, a bit like miso) are popular options. Stews will always be accompanied by rice and banchan. It makes for a feast.
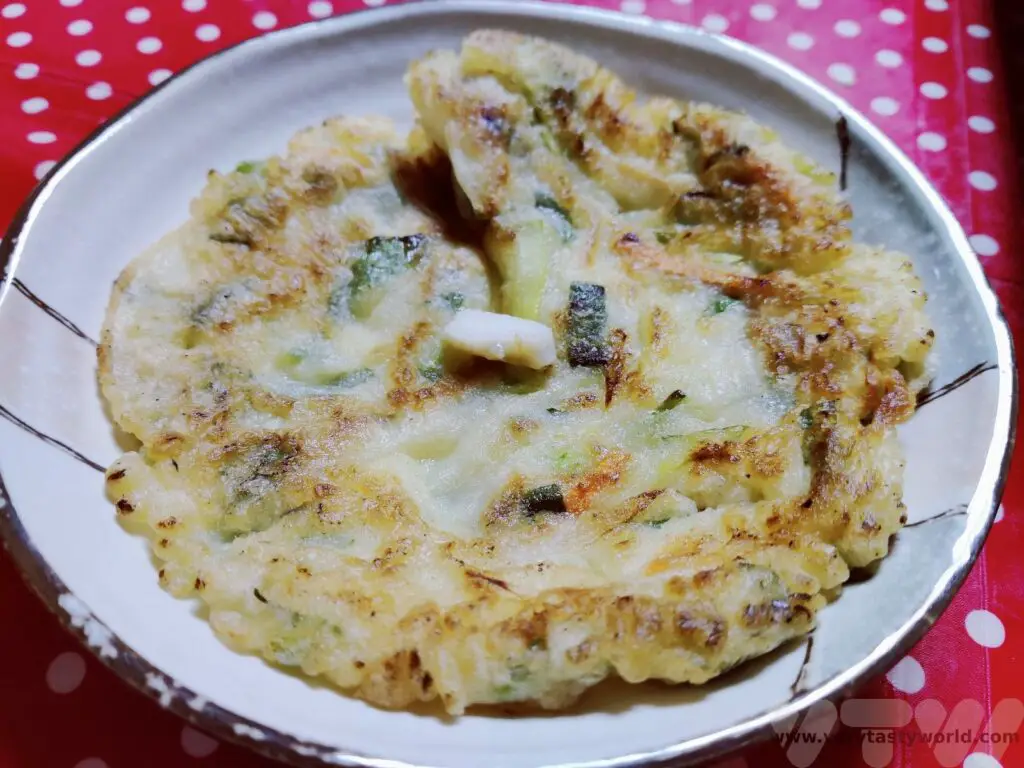
Pajeon (Korean pancakes)
Pajeon is a celebratory food. These are pancakes that incorporate vegetables (largely spring or green onions) and other delectable fillings such as seafood.
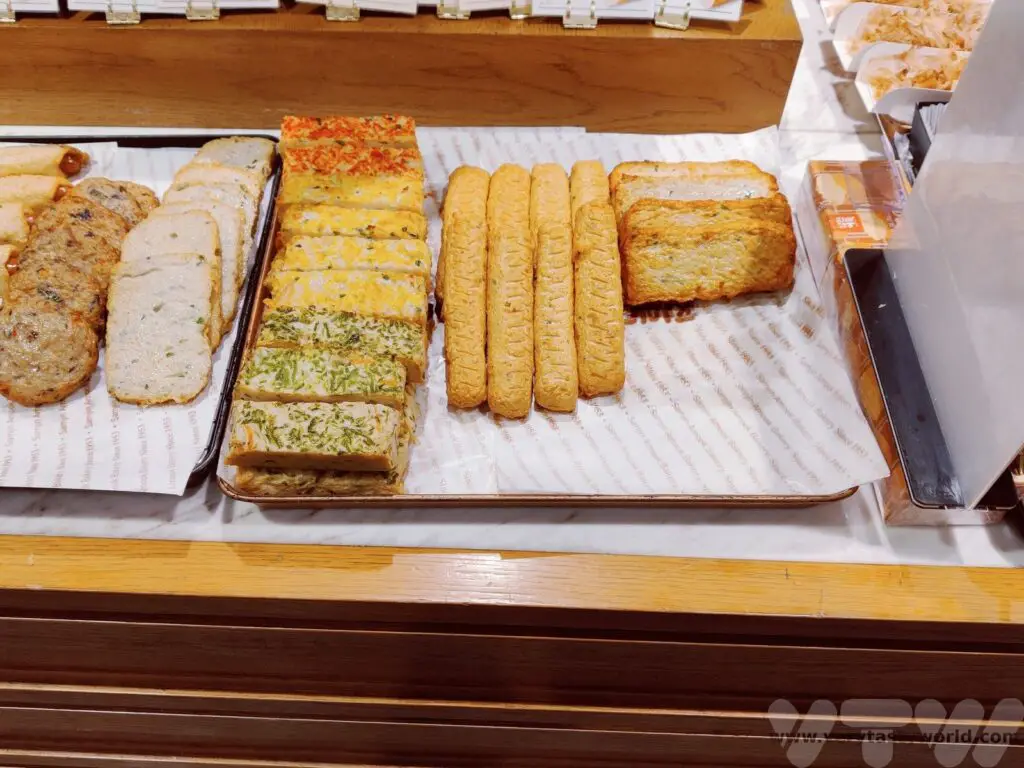
Eomuk – Fishcakes
Minced fish with vegetables and seasonings is another popular dish. These are available in shops/restaurants but are also widely available as street food.
Dining At The Market
Both Seoul and Busan have large and extensive fish markets and it is possible not only to visit them but you can also eat incredibly fresh fish in the restaurants on the upper floors.
If you want, you can buy the fish in the market and then take it upstairs to be cooked to your liking. There will be a table charge (which may be reduced if you decide to order the restaurant’s fish stew) and a cooking charge.
In Busan, the Jalgachi market is the largest in South Korea and has multiple restaurants on the first floor, which all have the same menu. In Seoul some of the restaurants in the Noryangjin fish markets will help you – either by explaining the process, or by offering a picture menu where you can choose your fish/shellfish (they will give the market price) and they will go downstairs to buy the fish for you.
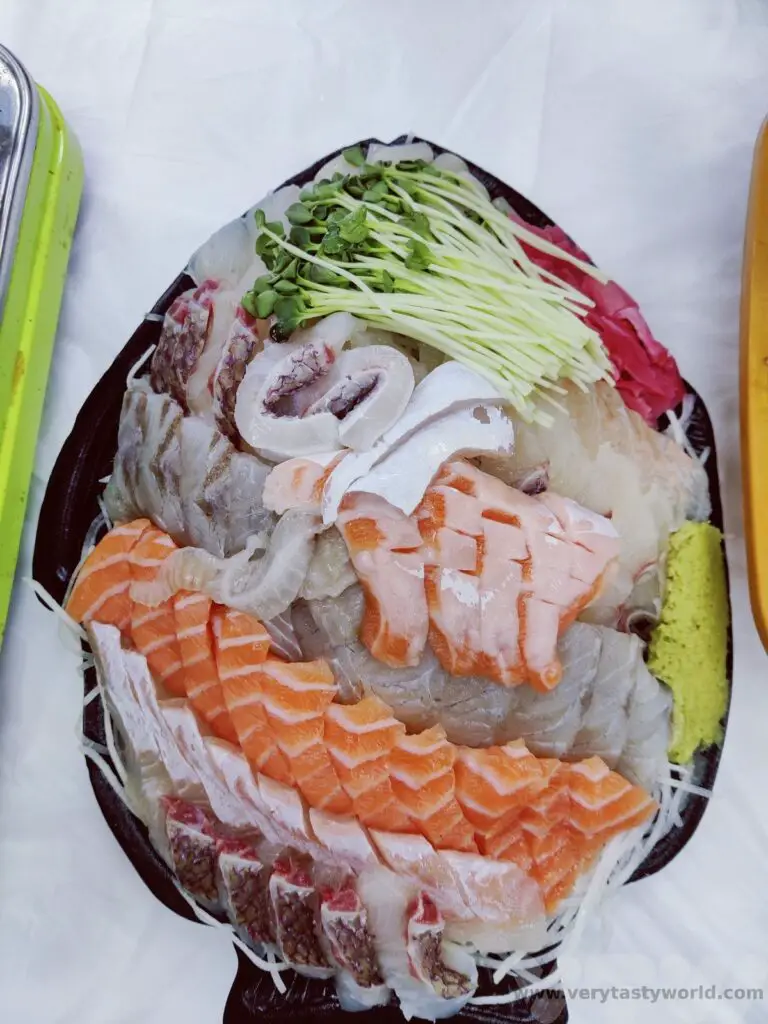
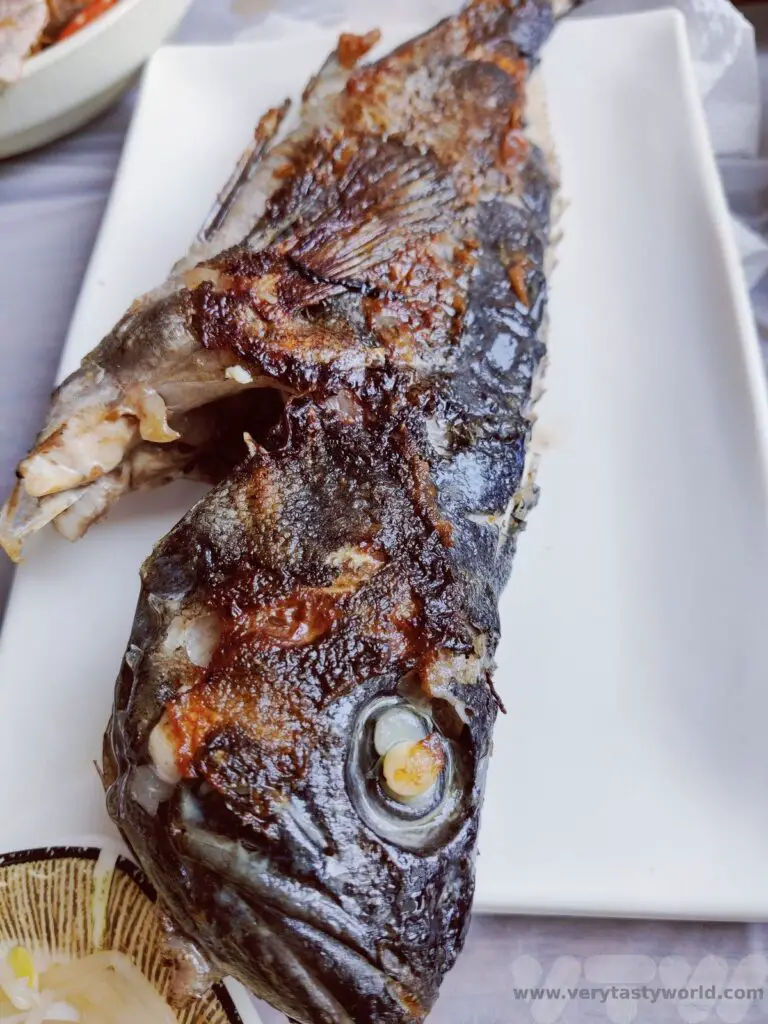
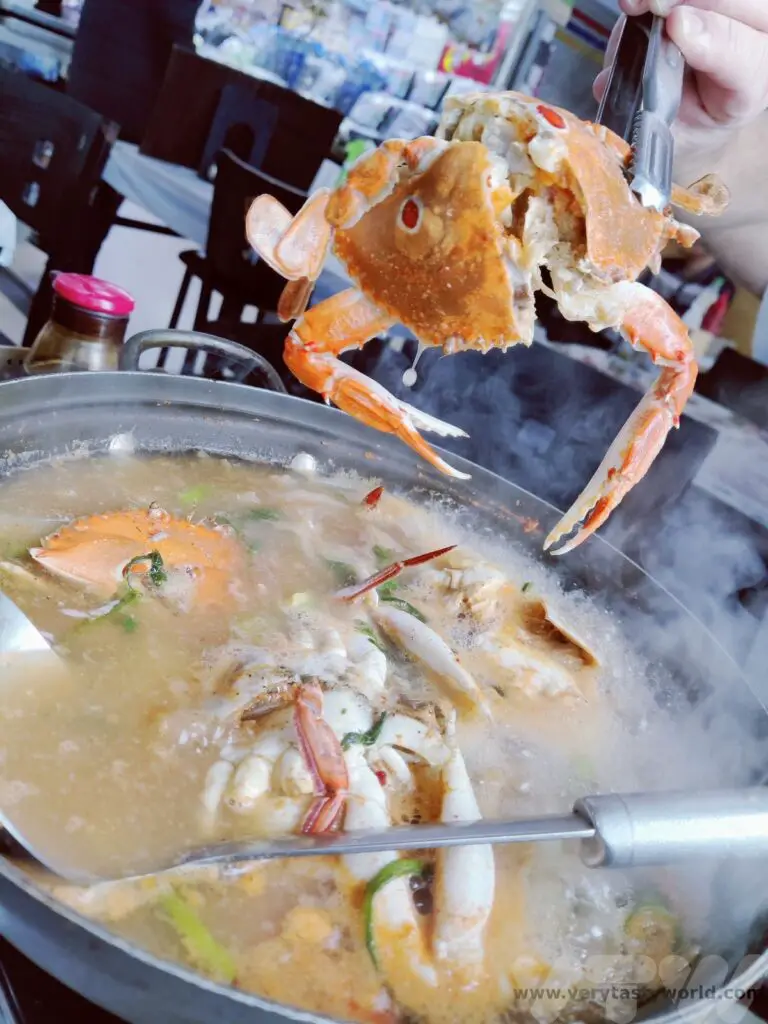
We enjoyed a plate of raw wild fish, sashimi style with eye-wateringly fiery wasabi. It was very different to the Japanese sashimi we have eaten in the past. It didn’t melt in the mouth but had a much firmer texture. The sashimi was accompanied by wonderfully sweet pan-fried rockfish, fresh crab and deliciously umami fish stews.
If you’re eating crab those amazing Korean scissors come into play – they will easily cut through the hard shell then you can use a chopstick to pick out the sweet and succulent crabmeat.
Street Food
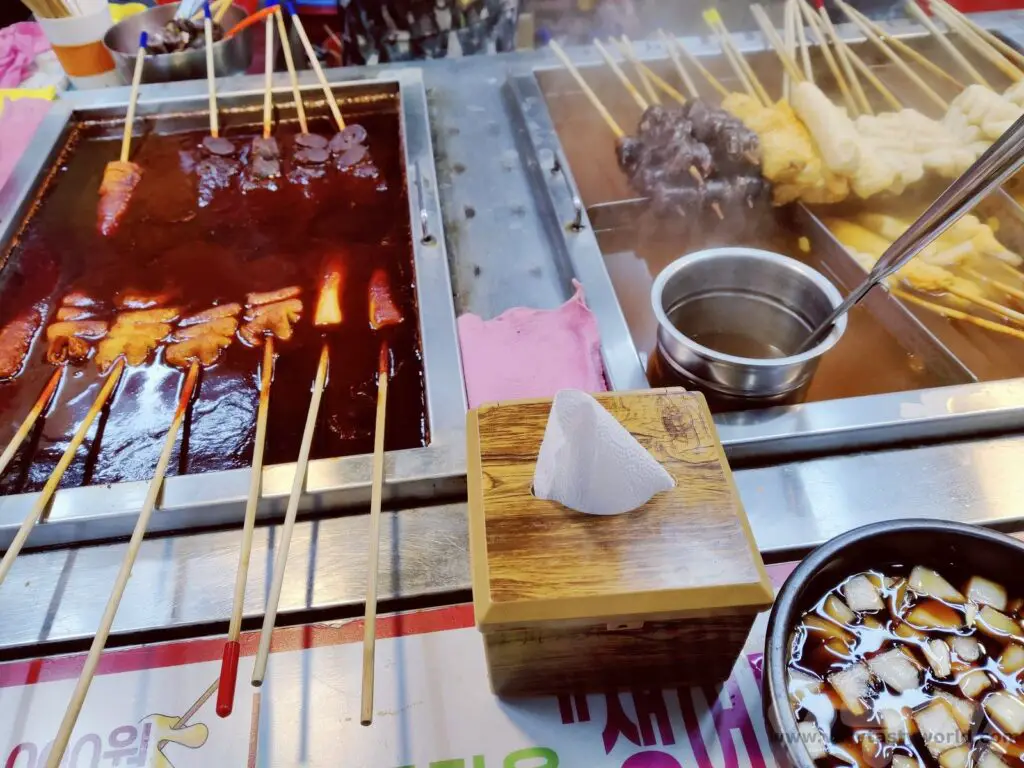
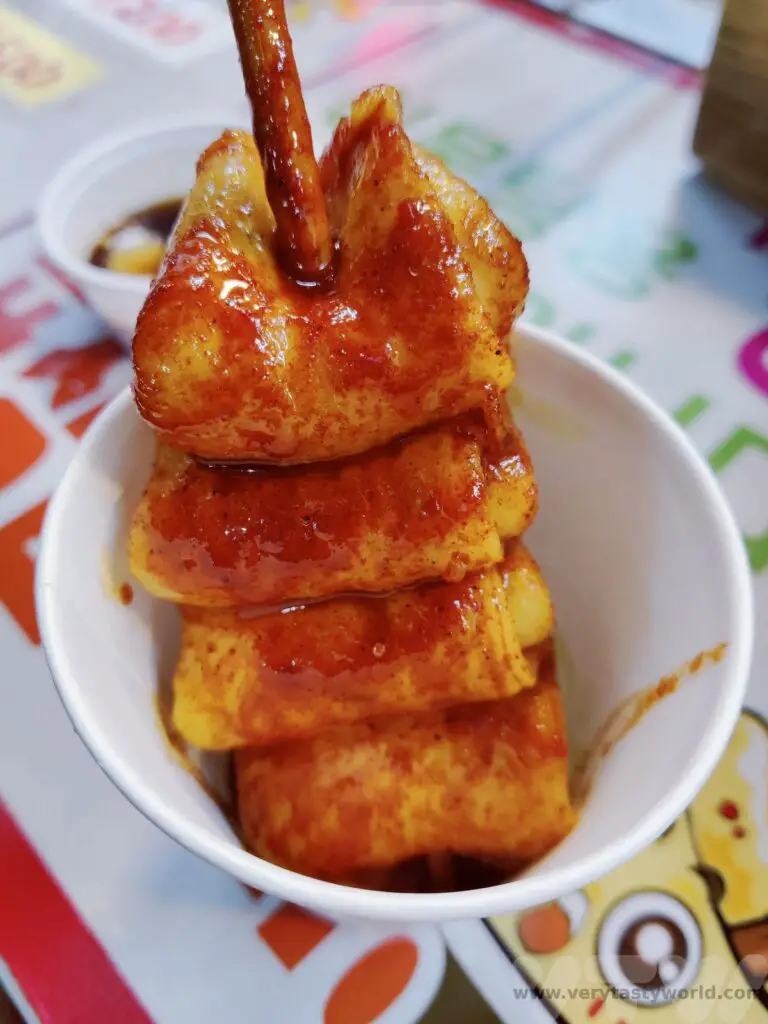
The very first Korean food we tried was at a local market which we had decided to explore just as we had arrived in the afternoon in Seoul. Feeling tired and slightly woozy after a 16 hour journey, we sauntered up to a market stall and bought a fishcake for a mere 1000 won (less than $1). This undulating slice of fishy goodness woven along a wooden stick and served in a cup with a generous splash of stock was sublime – warming and packed with umami. We were instantly sold on street food.
We decided to have breakfast at Seomun market in Daegu one day. There was a wide variety of food on offer. Some of the fishcakes keep warm in a broth – watch out for the red-tipped sticks as those will be the spicy ones!
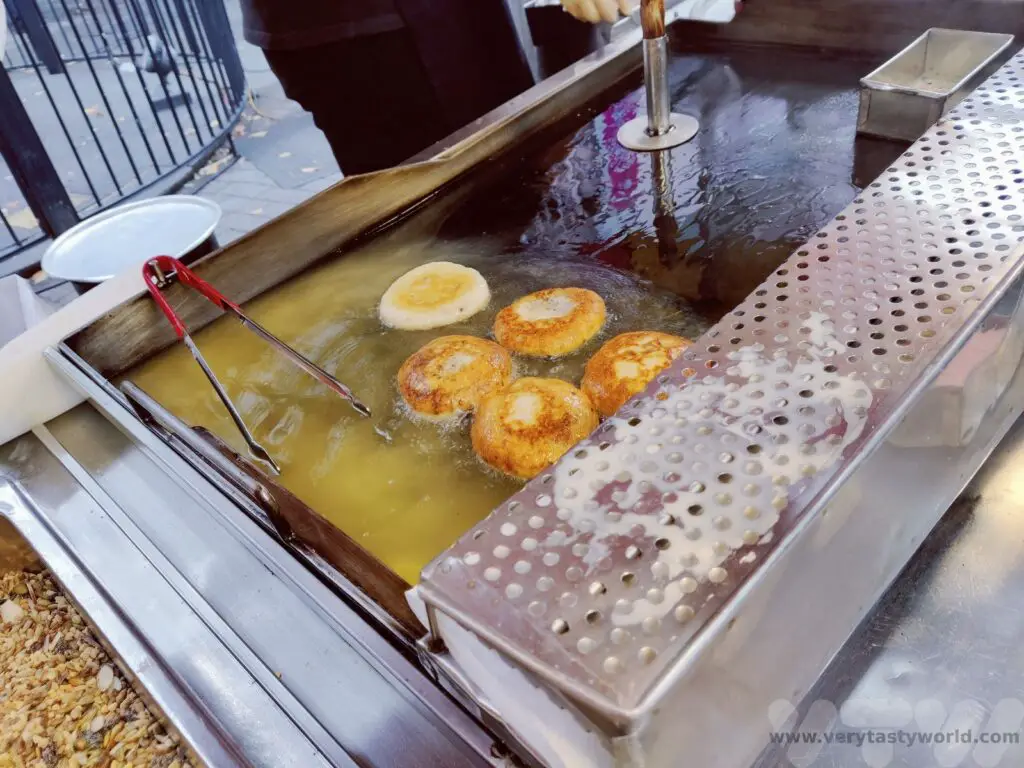
Hotteok (sounds a bit like hot-dog) is a fluffy fried doughnut filled with seeds and nuts.

Many market stalls make pancakes fresh to order.
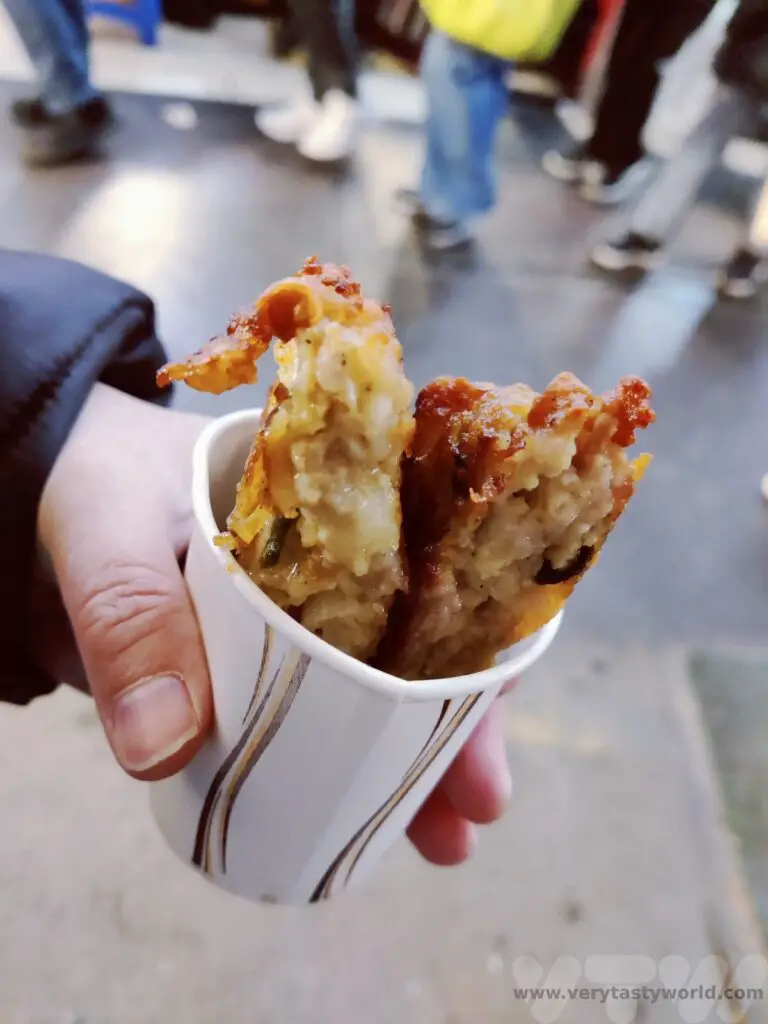
Most street food is served in paper cups.
Vegetarians/Vegans
It is not impossible to dine well if you are vegetarian or vegan. We did spot some vegan restaurants in many of the cities we visited. Veggie options will be available – e.g. tofu stews – but you might have to be careful that the base stock is vegetable based as some of these may use fish.
A menu that did make us laugh a little was a dumpling restaurant in Gyeongju. The proprietor was absolutely delightful and made awesome dumplings, plump and filling, in a variety of styles. But the menu was admirably honest about the fact that there was pork in all the savoury dumplings. Which is actually reassuring.
Some Useful Phrases
| Please give me | 주세요 | joo-say-yo | Say at the end of the sentence after the thing you want. e.g. banchan joo-say-yo |
| Excuse me YOU – over here | – 저기요 | juh-gee-oh | To get attention |
| People | 세명 | doo myung | 2 people. If you want a table for 2, it’s fine to just indicate with your fingers |
| Bottle | 맥주 여섯 병 | maek-ju doo byung | maek-ju (beer) doo byung (2 bottles) |
| 1 more bottle of soju please | 소주 두병 더 주세요 | so-ju hana-byung duh joo-say-yo | |
| More | 더 | Duh | |
| Please give me more kimchi | 김치 더 주세요 | kimchi duh joo-say-yo | |
| This please (pointing) | 이거 주세요 | Ee-guh joo-say-yo | |
| Delicious | 맛있어요 | mah-shis-say-yo | Saying this was guaranteed to raise a smile at the end of our meals! |
| NUMBER | KOREAN | Korean pronunciation |
| One | 하나 | hana |
| Two | 둘 | dool |
| Three | 셋 | sayt |
| Four | 더섯 | nayt |
| Five | 더섯 | duh-suht |
| Six | 여섯 | yuh-suht |
| Seven | 일곱 | ill-gope |
| Eight | 여덜 | yuh-duhl |
| Nine | 아홉 | ah-hope |
| Ten | 열 | yuhl |
| Eleven | 열하나 | yuhl-hana |
A Cookery Class
A fun way to spend an afternoon in Seoul or Busan is to join a cookery class. With a small group of fellow travellers these classes usually involve a visit to a local market to learn about the amazing produce on sale – from the familiar to some enticingly unusual foods.
Then you’ll go on to visit your host’s home to cook several delicious dishes. We made pajeon – and had great fun flipping the pancakes. Bibimbap and dakgalgi (a spicy chicken dish) were also on the menu.
Related Posts You May Enjoy

Thanks so much for reading. We hope you enjoyed this article. If you’d like to keep up to date with new posts and recipes, please subscribe to our newsletter or follow us on social media – X, Facebook or Instagram. We always love hearing from you and would be delighted to read your thoughts about this article.
How To Get From Seoul To Gyeongju by Train
Gyeongju in south-eastern Korea is often described as a ‘museum without walls.’ It’s easy to see why. It is the former capital of the Silla Kingdom which ruled a large proportion of the Korean peninsula from around 57 BCE to 935 CE. It is genuinely a treasure trove of historic buildings and artefacts. We recommend visiting this wonderful city if you are travelling in South Korea. Here’s our guide on how to travel from Seoul to Gyeongju.
Please note that this post contains affiliate links. If you click through and decide to make a purchase we will make a small commission, at no extra cost to you, which will help towards the costs of running this site.
Seoul to Gyeongju By Train
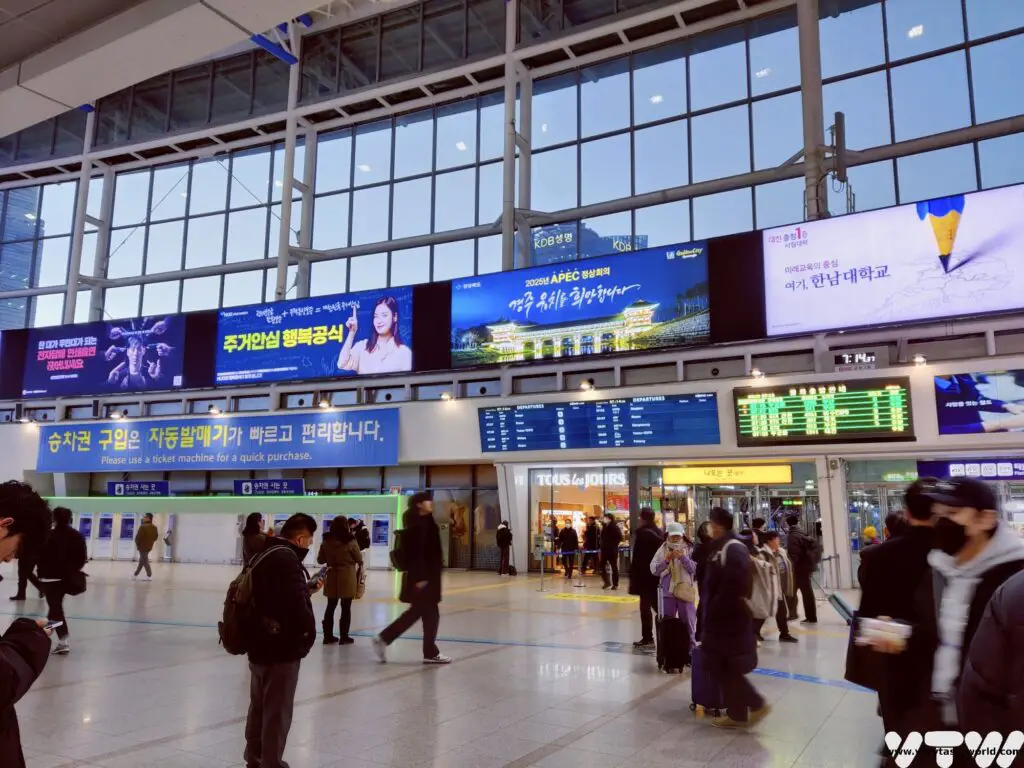
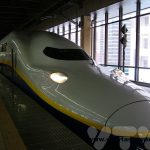
South Korea’s rail network is fast and efficient. If you want arrive quickly, we recommend using the KTX, the high-speed train service, from Seoul Station. You can reach the main railway station on lines 1 and 4 on the metro. The train station is bright and airy and the departure board will indicate the train number, time, destination and departure track in multiple languages, including English.
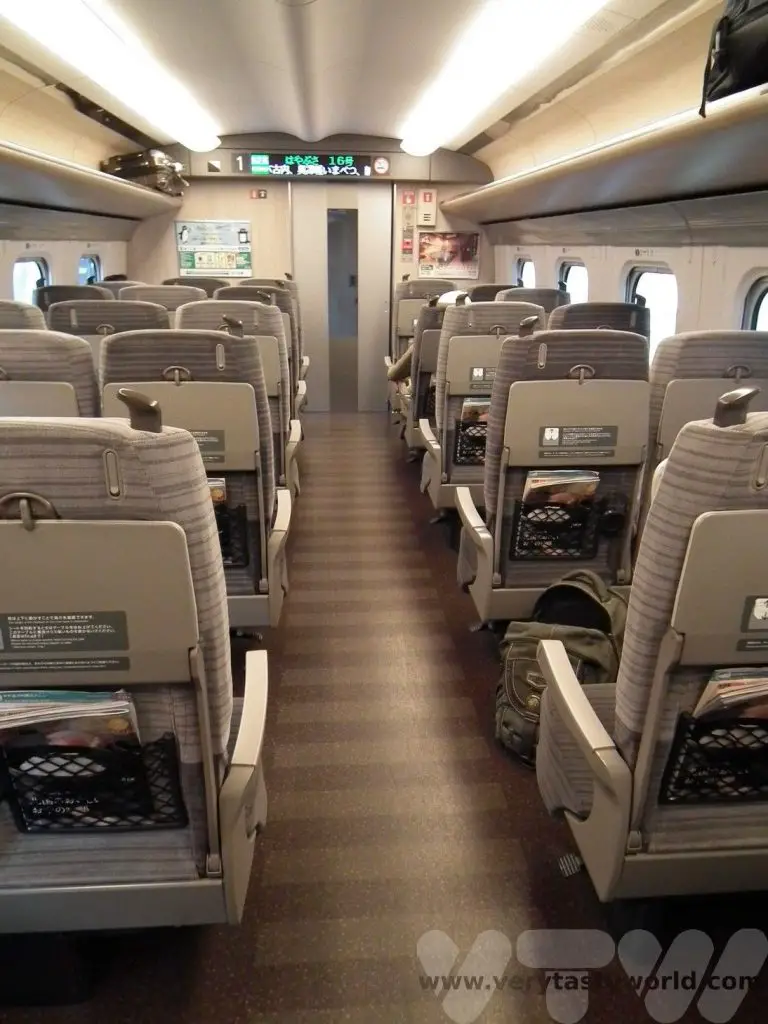
When you arrive on the platform, there will be an indication where your train’s car will be located. Your seat reservation will indicate a car and seat number. There is an overhead shelf for smaller bags above the seats inside the carriage, and a storage area for larger luggage at the end of each car by the doors. The train journey takes around two and a half hours from Seoul to Gyeongju.
However, the KTX does not reach Gyeongju centre. The train will stop at Singyeongju station which is located a few kilometres out of town. It’s the city’s newest station and was opened in 2010.
You will need to catch a bus or take a taxi to the city centre.
Taxis are definitely easier. They take around 10-15 minutes and cost between 15,000 and 20,000 Won (around $11-15 at current prices). You can also put your luggage into the boot/trunk of the taxi. There are plenty of taxis waiting at the station.
The bus journey takes around 25-30 minutes. Bus numbers 50, 70 or 700 run to and from the station regularly and will take you into town. The cost is 2,500 won (2023 price).
If you have a T-money card you can use this to pay for your bus fare. Just tap your card on entering the bus at the front by the driver and don’t forget to tap out when you exit at the middle of the bus.
We recommend getting a T-money card when you arrive in South Korea which you can pick up on arrival at the airport. They are so convenient for paying for public transport and other services. You can charge them with cash all over the country, including at convenience stores. (N.B. you can only charge them with cash)
One thing that’s worth noting is that when a train comes in there may well be a lot of passengers, so getting a seat on the bus might not be easy. We were the last ones on and had to stand. Not a problem except…
…well, Gyeongju does have a popular theme park but you can truly experience the thrills of a rollercoaster simply by travelling on the bus. Our journey into Gyeongju city was ‘enhanced’ by a driver who was either in a hurry or was a sadist who enjoyed watching hapless tourists in his rearview mirror, loaded with luggage, clinging to the handrails whilst trying to avoid flying around the bus, as he sped up, hurtled around corners and slammed on the brakes.
We think this was a one-off – our bus ride back to the station was much more sedate.
Train Travel Tips
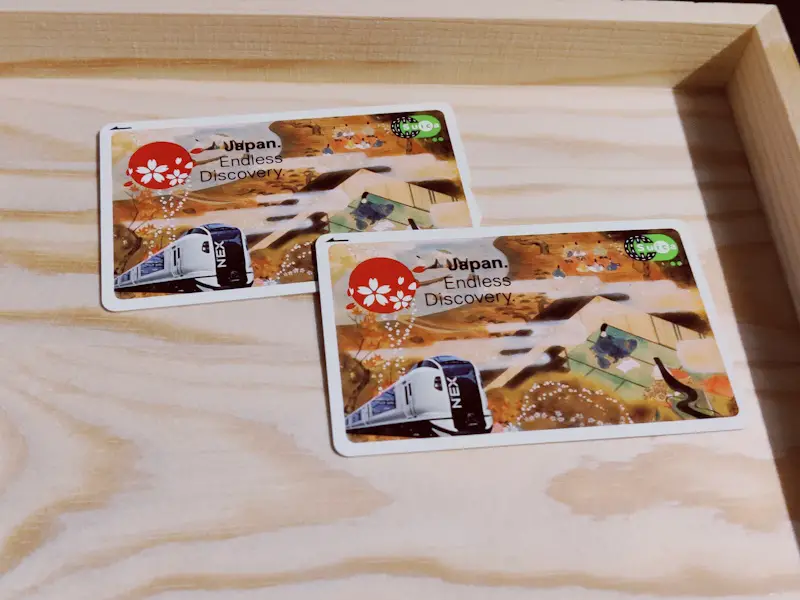
If you are planning to travel by train through South Korea you might want to consider buying a KoRail Pass. These are passes that allow foreign visitors unlimited journeys on the rail network on particular days. There are various options available:
Consecutive Passes: You can use these on either 3 days or 5 days in a row – useful if you are travelling on consecutive days.
Select Passes: You can use these on any 2 individual days or any 4 individual days within a 10 day period. These are useful if you are travelling around Korea and want to spend some time at different locations before moving on.
You can buy the pass within 31 days of travel and you need to know which day you plan to activate the card.
The pass can be ordered online and printed off. You need to carry the pass with you and it is linked to your passport.
The pass can represent good value if you are planning on travelling to lots of locations in South Korea. We recommend checking prices to see whether the cost of a rail pass is cheaper than buying individual tickets.
Tip: If you know your travel dates, book your KTX seats early, several days in advance if possible. Seoul’s railway station has a ticket office where you can purchase tickets and book seats. We went to the office to validate our rail passes and book our seats. We planned to travel on a weekday, three days after our arrival, and had difficulty getting seats together on the train. It meant that we had to leave really early in the morning to catch a train, which turned out to be a blessing as it meant we had more time to explore Gyeongju.
The Korea Trains website has information about timetables and ticket booking.
If you are travelling on the train using a pass you will need to carry a printout of the pass, the seat reservations and your passport to confirm your identity – which should match the name on your pass. We were never challenged during our journey through Korea but the terms of the pass state that you must be able to produce this documentation if requested.
Alternative Ways to Travel From Seoul To Gyeongju
It is possible to catch the express bus to Gyeongju. The price is cheaper and the bus will take you directly into the city centre. The total journey time is around three and a half hours.
The bus leaves from Seoul Express Bus Terminal which is located in the Banpo-dong part of Seocho district. You can reach the bus terminal via metro lines 3, 7 and 9.
You can check the bus route information and ticket availability at the express bus website.
If you want maximum flexibility you can hire a car. The journey time will take around 5-6 hours, depending on where you are travelling from in Seoul and how congested the traffic is. A car would also be very useful when exploring Gyeongju as many of the historic attractions are located a few kilometres from the city centre.
Getting from Busan to Gyeongju
Gyeongju is also a popular day trip from Korea’s southern city of Busan. It’s an hour away on the train. Once again you can use a KTX pass to reach Singyeongju.
Alternatively, there are companies that offer day trips to see the main sights. Although we realise that time can be tight when travelling, we loved Gyeongju so much that we recommend staying in the area if possible. There is so much to see, a day trip would only really scratch the surface.
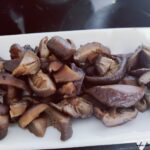
Recipe: Simmered Shiitake Mushrooms
Shiitake mushrooms are native to Asia but have become popular all over the world because they are versatile and packed with flavour. They are particularly popular in Japanese cuisine and have a variety of uses. They apparently have some medicinal properties but, more importantly, they are absolutely delicious. We have a fantastic recipe for simmered shiitake mushrooms which can be used as a side dish for many Japanese meals.
Shiitake can be used as a key ingredient for dashi – Japanese stock – which is used in many traditional dishes, including miso soup. Dashi often uses shaved bonito (a type of fish) flakes but this can be substituted for shiitake mushrooms, complemented with kombu seaweed, to make a flavoursome vegetarian/vegan dashi.
This recipe for simmered shiitake mushrooms is used as a side dish to accompany a wide variety of foods. It is packed with umami flavour which complements the sweetness of the mirin and the saltiness of the soy sauce.
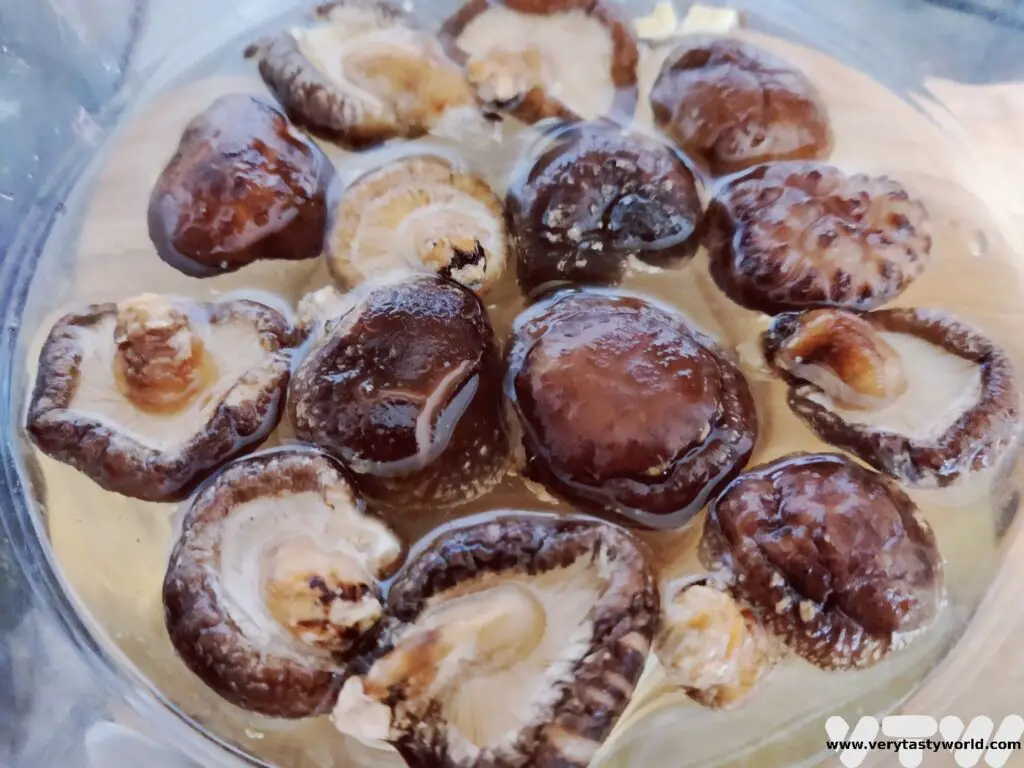
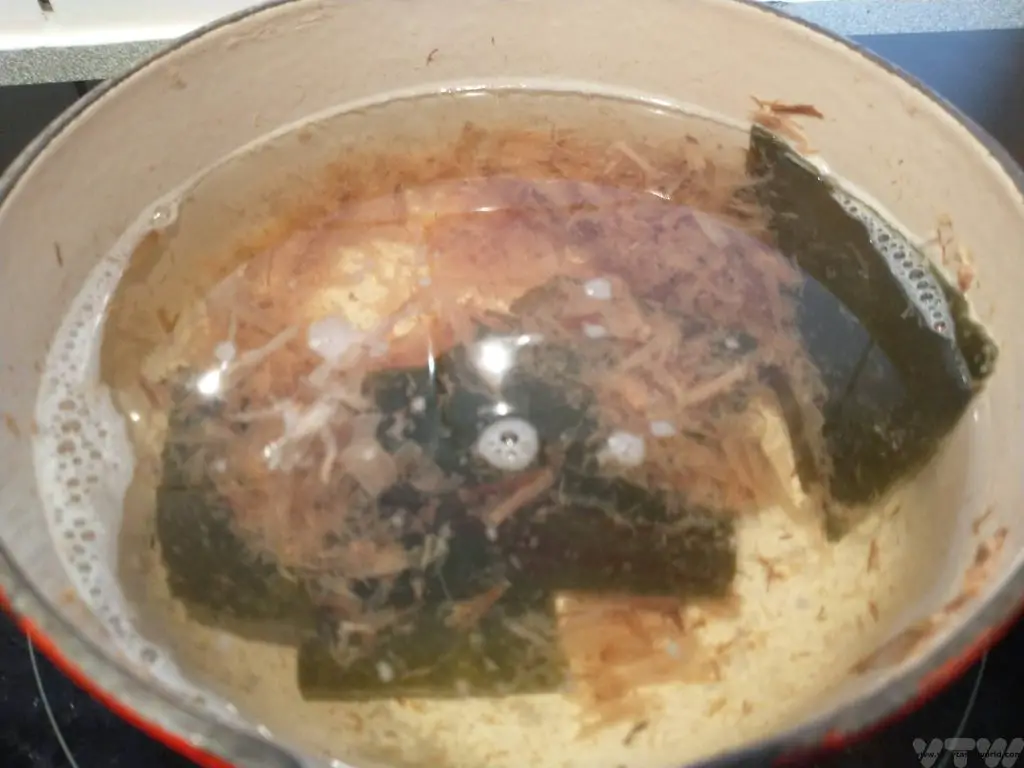
This simmered shiitake dish is very simple to make but requires a little – minimal – preparation as you will need to presoak the mushrooms. Ideally, we recommend soaking the mushrooms overnight as this will allow maximum umami. If you can’t soak overnight, we suggest a minimum of five hours. Also, make sure that you save the water the mushrooms have been soaked in as that is packed with flavour.
How To Make Simmered Shiitake Mushrooms
Ingredients
100g grams dried whole shiitake mushrooms
1 tbs soy sauce
1 tbs mirin (if you can’t get mirin you can use 1 tbs cooking sake and 1 tsp sugar and if you can’t get cooking sake use 1 tbs white wine and 1 tsp sugar)
Water to cover the mushrooms

Method
Place the dried mushrooms into a bowl and cover – just to the top of the mushrooms – with water. Soak the dried mushrooms until they are soft. Ideally a minimum of 5 hours, overnight is better. Save the water!
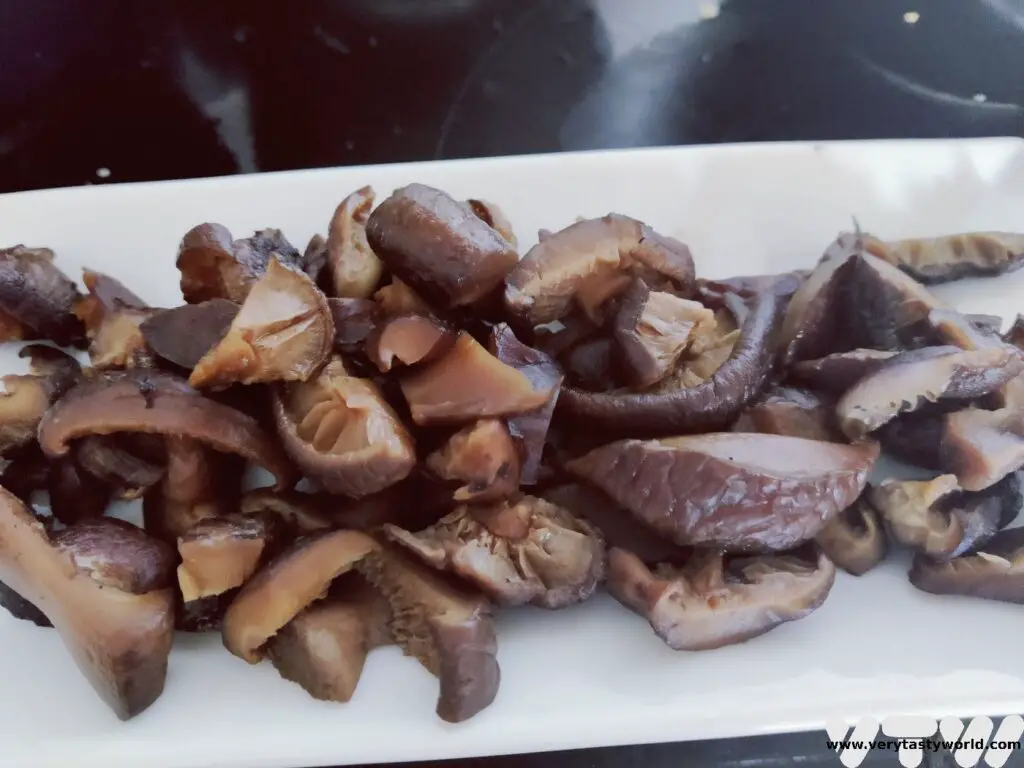
Remove the mushrooms from the water. They should have turned from woody to plump and juicy. Take off the stems if you wish and cut into slices.
Put the mushrooms into a pan.
Add 1 tbs mirin and 1 tbs soy sauce.
Then add the mushroom water to just about cover them. Be careful as there may be a little bit of residue at the bottom of the water bowl, don’t let that go in.
Bring the mushrooms to a simmer until the water has evaporated. This will take about 15 mins.
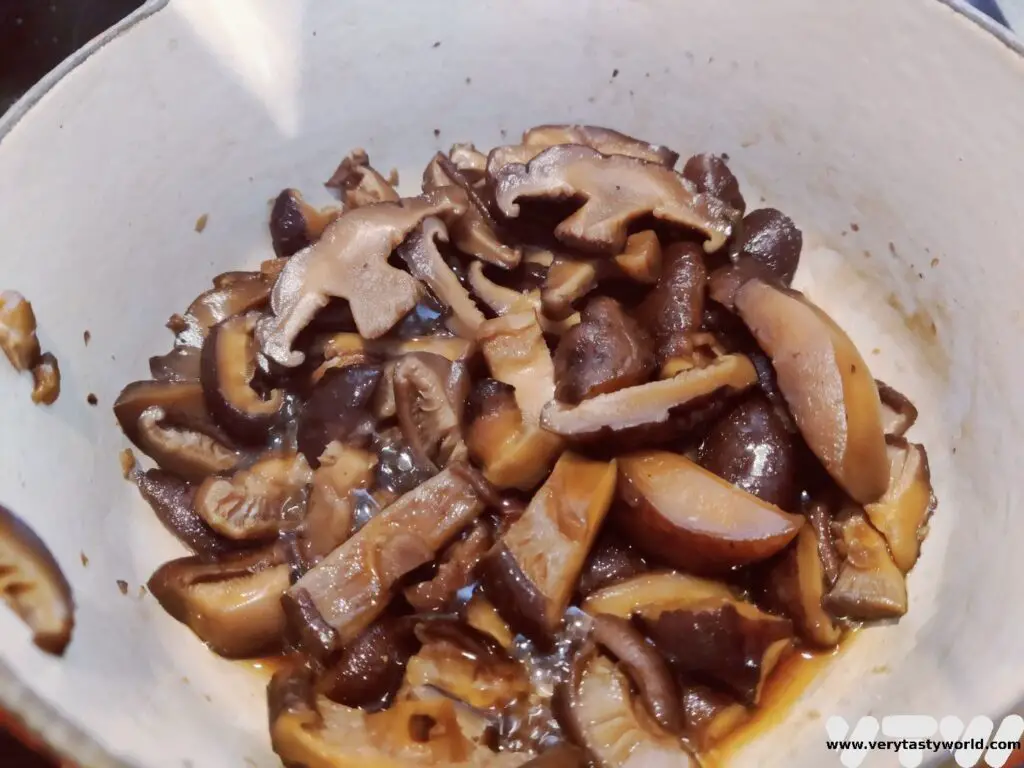
Allow to cool and serve cold.
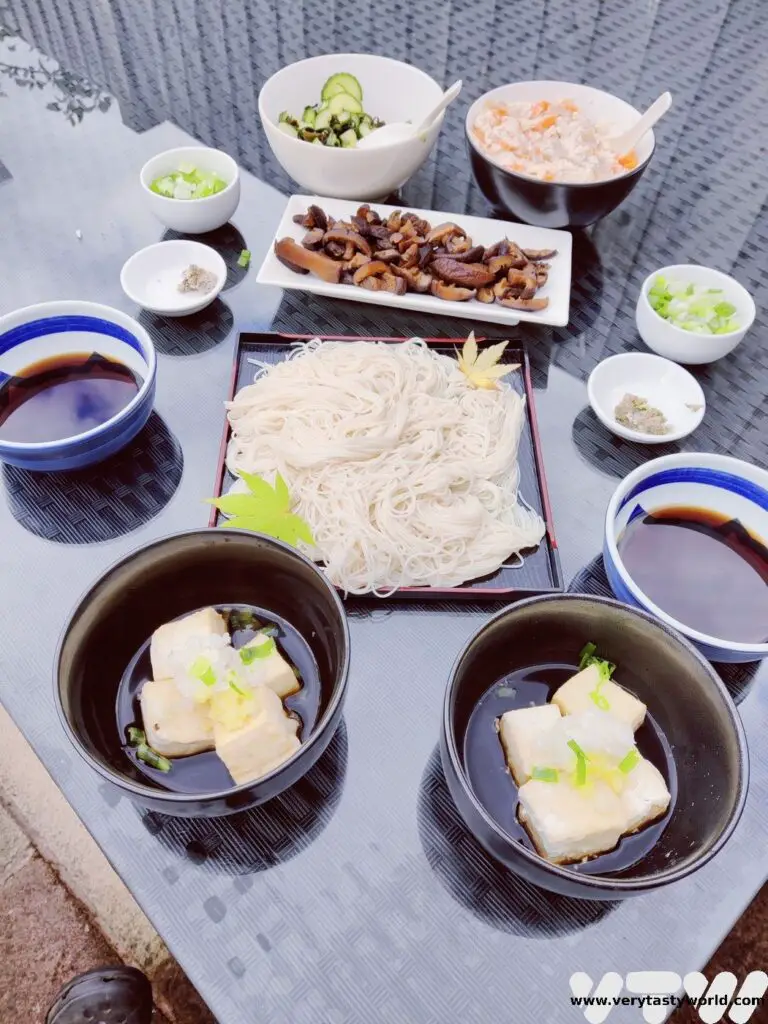
We often use these as a side to accompany a number of dishes – great eaten in the summertime with cold somen noodles, agedashi tofu (fried tofu), vinegared wakame (seaweed) and cucumber salad, and shira ae (mashed tofu and carrot salad).
Related Posts You May Enjoy

- RECIPE Oyakodon Donburi
- Zero Waste Recipes Before Your Holiday
- RECIPE: Vegetable Biryani Tamil Nadu Style
- RECIPE: Vegan Wild Garlic Pesto
- Recipe: Venetian Pasta Sauce
- RECIPE: Biryani Raita Recipe
- RECIPE: How to Make Costa Rica’s Gallo Pinto
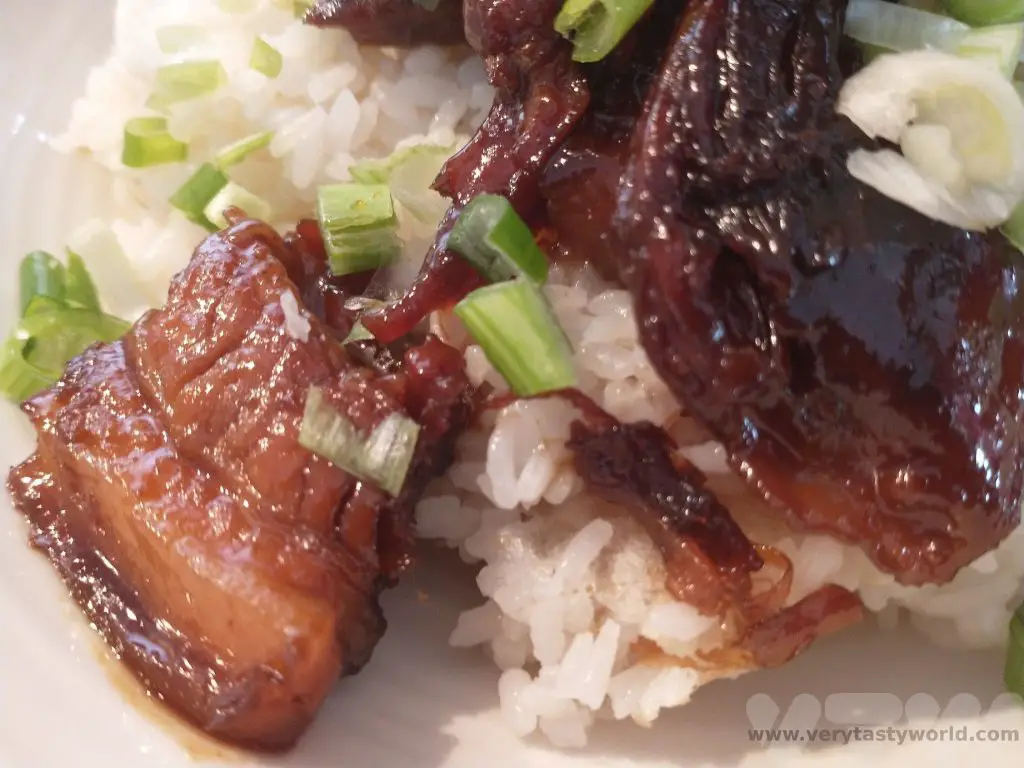
- Recipe: Japanese Simmered Pork Belly – Buta no Kakuni
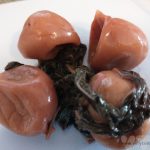
- RECIPE: How to Make Umeboshi

- Recipe: Simmered Shiitake Mushrooms
- How to Use Public Transport in Japan
- RECIPE Oyakodon Donburi
- Planning a Trip to Japan
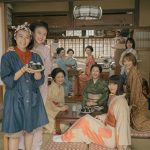
- The Makanai: Cooking for the Maiko House
- Setsubun Food – Bean Throwing Day

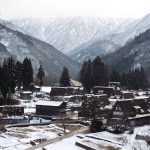
- The Gassho Farmhouses of Rural Japan
- Recipe: Japanese Simmered Pork Belly – Buta no Kakuni
- RECIPE: How to Make Umeboshi
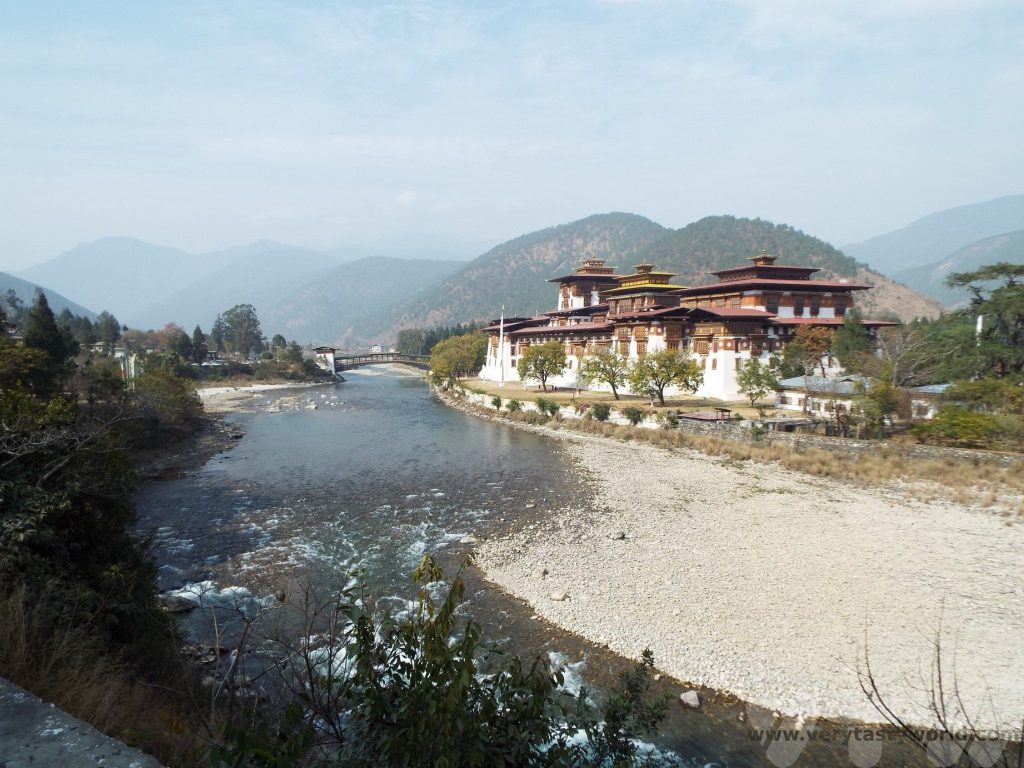
A Guide To The Bhutan Tiger’s Nest Trek
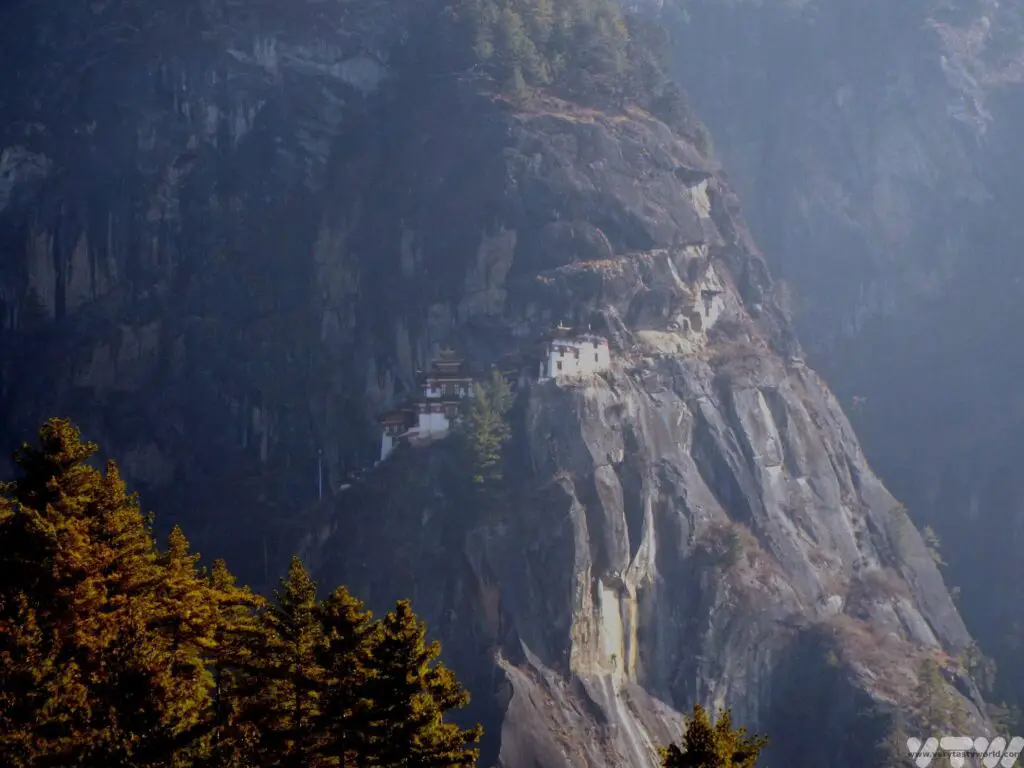
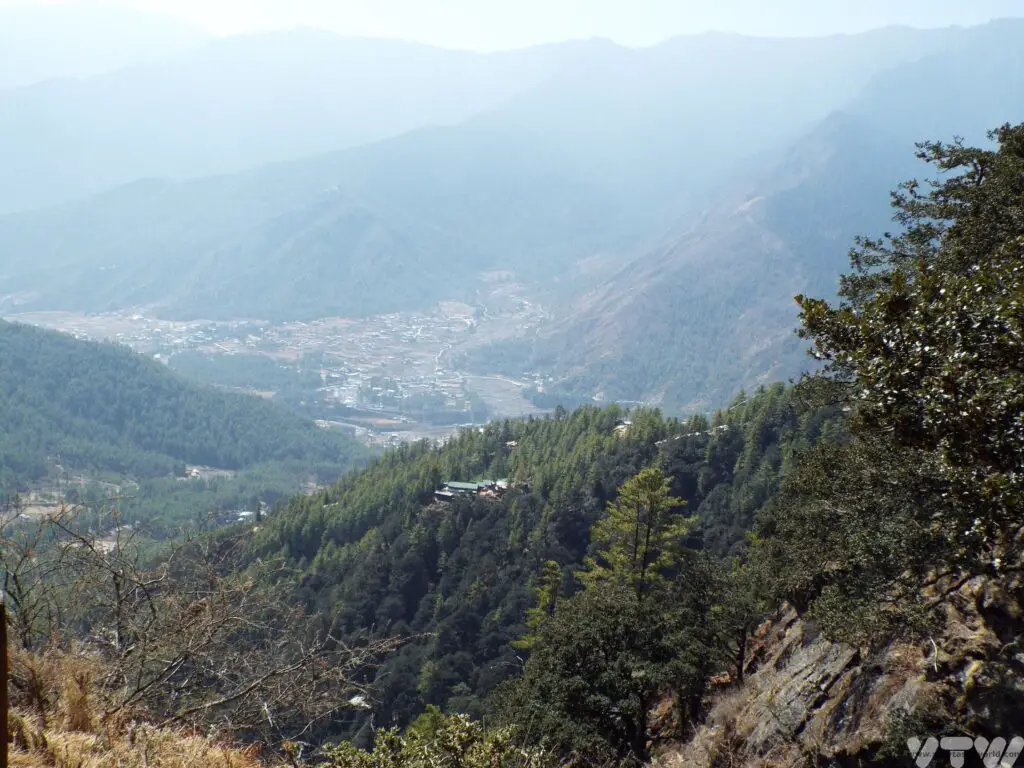
One of the highlights of a visit to the delightful Himalayan kingdom of Bhutan is a hike to the Tiger’s Nest, a monastery that clings dramatically to a cliff some 900m above the Paro Valley. Here is our guide for what to expect on the Bhutan Tiger’s Nest trek, a hike which is, quite literally, breathtaking.
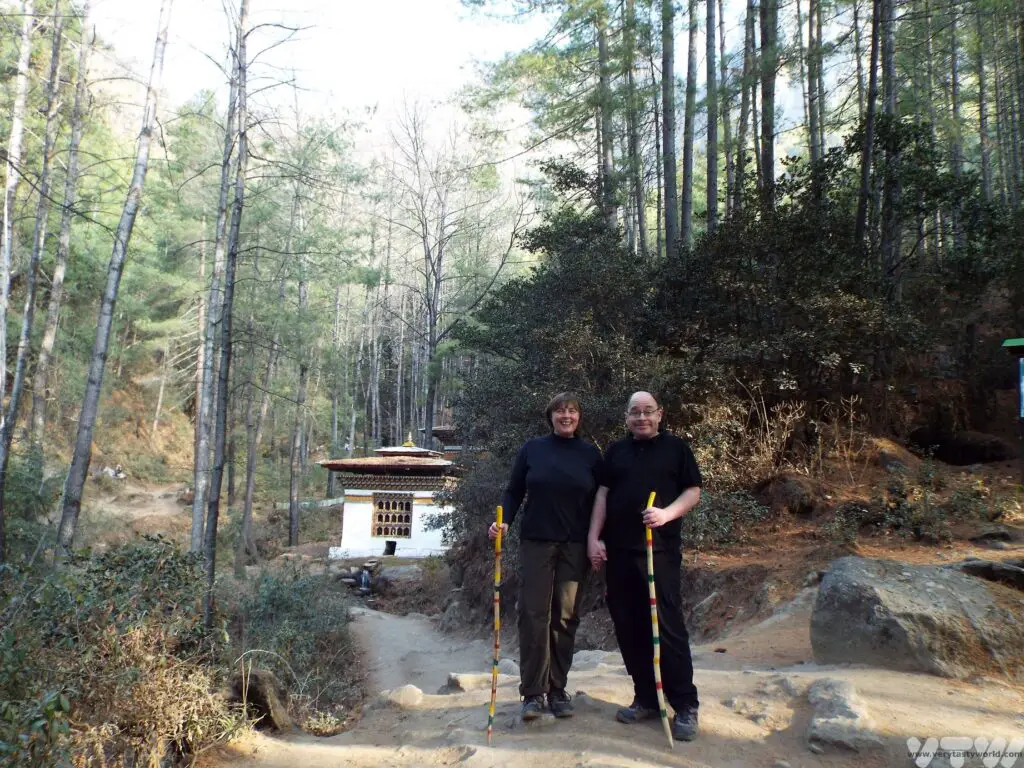
Travelling in Bhutan is a very different experience to most other journeys. It is standard practice to visit Bhutan with a driver and guide accompanying you, as independent travel is not encouraged in this country. Our lovely guide Dawa accompanied us to the Tiger’s Nest.
Paro is probably the flattest region that we visited within mountainous Bhutan and is the city where the country’s international airport is located. The flight in, as the plane weaves its way through the spectacular Himalayas, is an experience in itself. We flew from Nepal, passing Mount Everest on the way. (Top tip – ask for seats on the left side of the plane when checking in at Kathmandu airport.) But the landscape changes dramatically just outside the city as the mountains tower above the river, Paro Chu. Tiger’s Nest is located around 10km north of Paro.
The Legend of the Tiger’s Nest
Tiger’s Nest, known as Paro Taktsang, became a holy place in the 9th century. There is a legend that Guru Rinpoche (Padmasambhava) flew to this location from Singye Dzong on the back of a tigress and meditated inside the cave on the mountainside for several years. Guru Rinpoche brought Buddhism to Bhutan and is considered to be the most important saint in the country. There is a different legend that the wife of an emperor transformed into a tigress and carried Rinpoche on her back from Tibet. It is thought that the place became holy following the Guru’s meditation when he emerged in eight incarnated forms. A monastery was constructed around the caves in 1692.
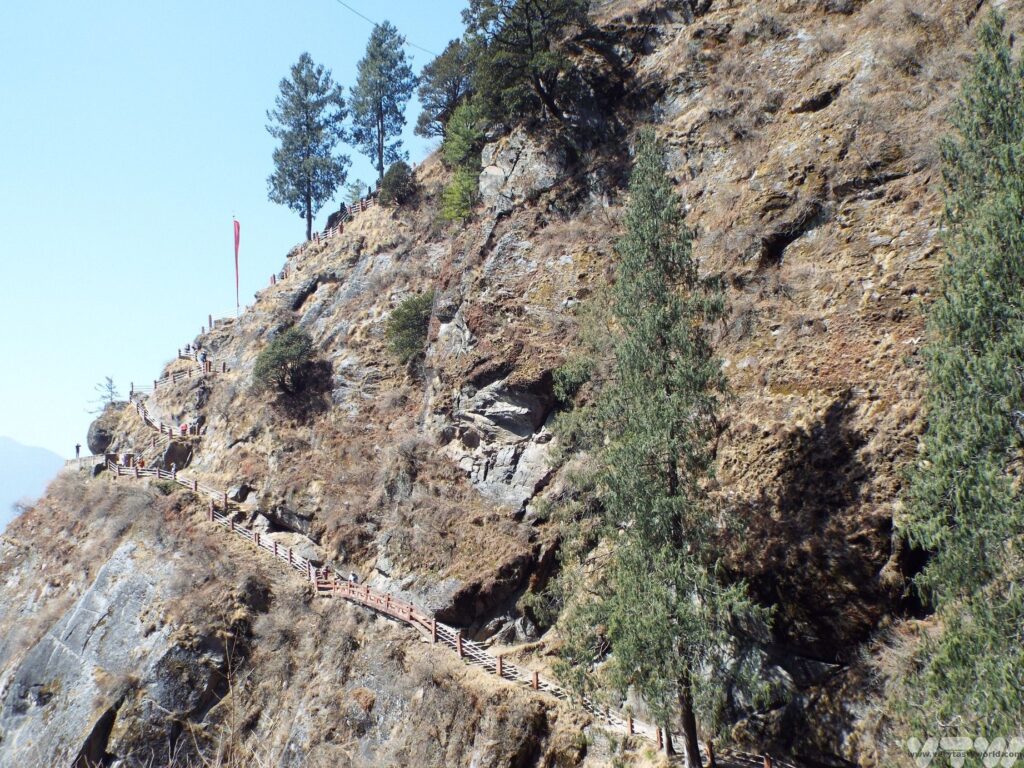
Bhutan Tiger’s Nest Trek – The Overall Route
Visiting the Tiger’s Nest is one of the most popular activities in the region. We arrived early in order to get ahead of the crowds. When you arrive you will see that there are a number of mules available for hire. They can take you halfway up the route to the cafeteria, you cannot complete the whole route riding a mule. We don’t like using animals to transport us and we love walking, so chose not to ride. Also we wanted the satisfaction of hiking the whole way!
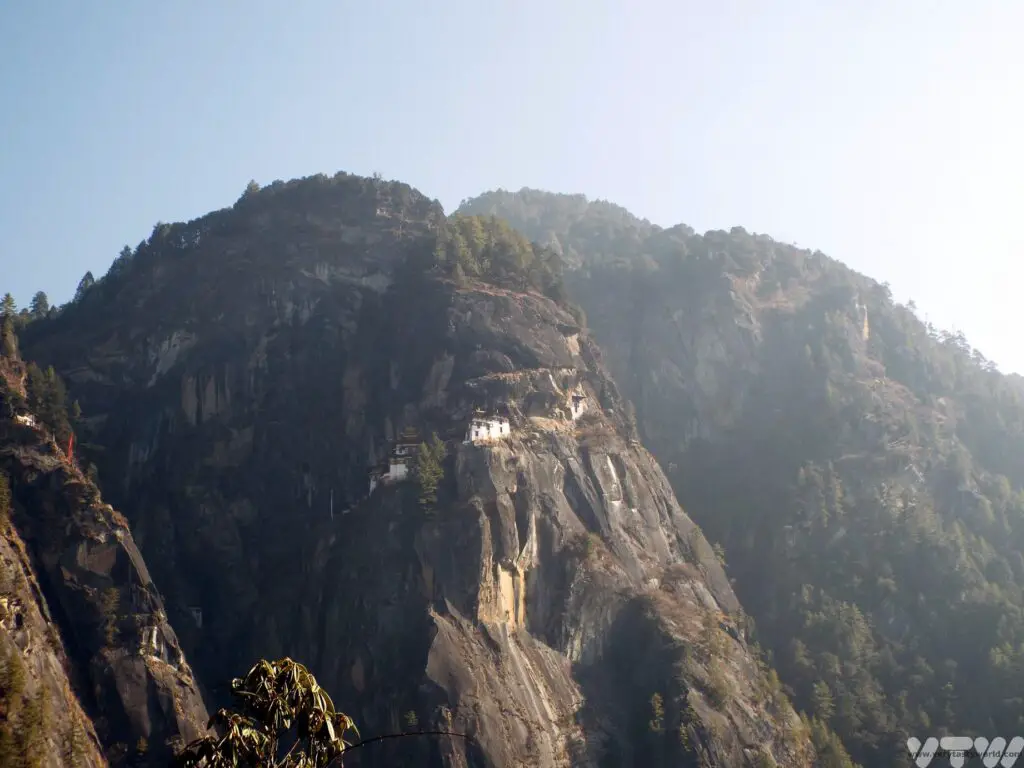
The photo – taken for posterity from the car park – shows the Tiger’s Nest. Can you see it?
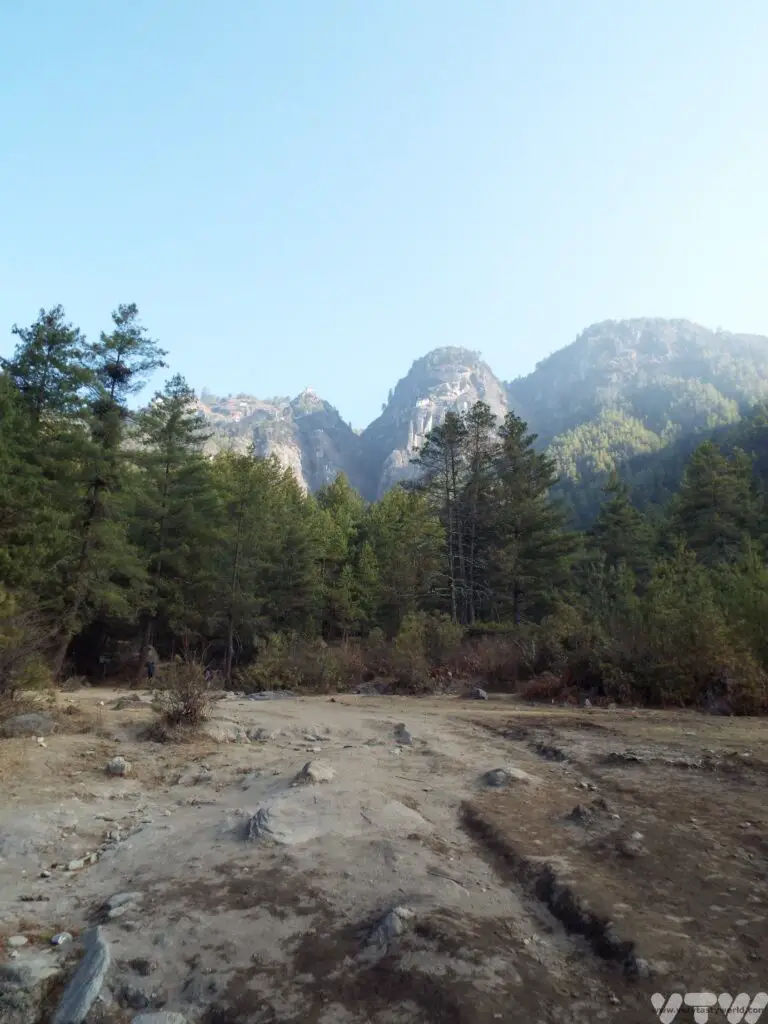
Here’s a photo with an arrow to show that it is waaaaaaay in the distance, clinging to the cliff face. It looked like a long way up. It was. But don’t worry, the route isn’t as direct as it looks – no actual climbing required!
Walk To The Halfway Point
The majority of the Tiger’s Nest trek takes place along the adjacent hillside. The walk up to the halfway point isn’t particularly steep – just a consistent upward incline through the woodland on a sandy, occasionally rocky path.
There is a cafeteria at the halfway point where you can get refreshments and use the bathroom if needed. This is as far as the mules will carry anyone. It will also be the last opportunity to use the toilet until you return to this area. The photo below shows the cafeteria from the top viewpoint.
There is a good view of the Tiger’s Nest from the halfway point.
Continue To The Viewpoint
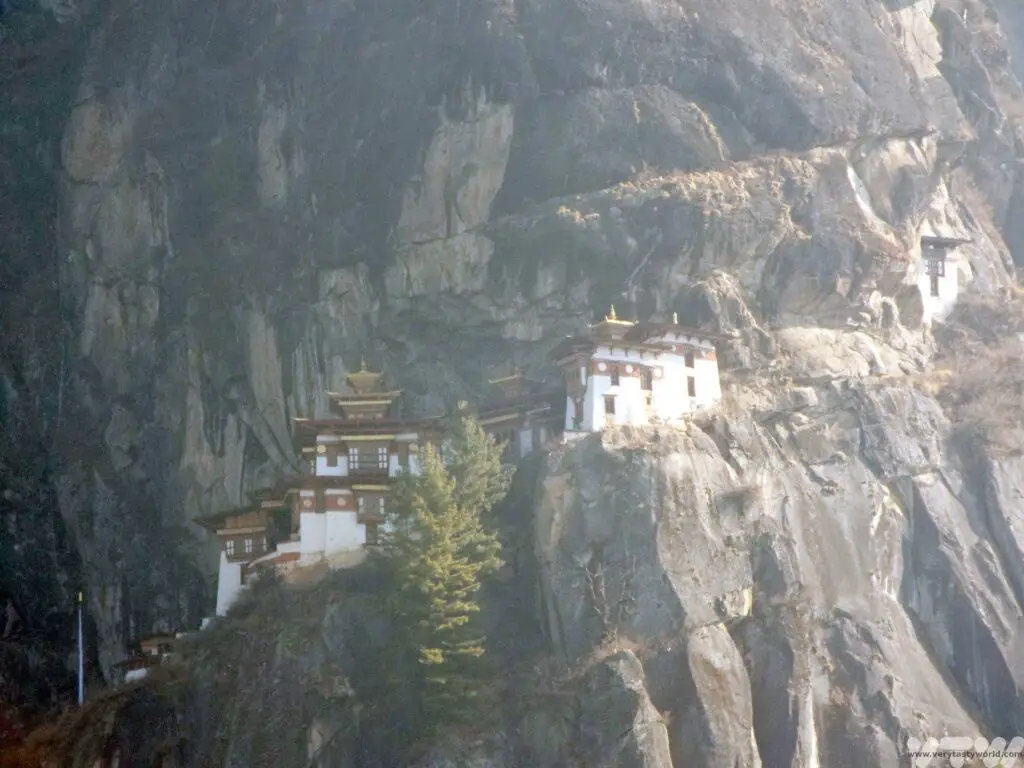
Continuing the trek you climb higher and higher until you reach the splendid viewpoint, an essential photo stop which offers your first close-up glimpse of the monastery buildings. It’s at approximately the same elevation as the Tiger’s Nest but it is located across the valley which needs to be traversed.
The Final Stretch (aka the Tricky Bit)
When you reach the viewpoint you think you are almost there but the most difficult part of the trek is yet to come. You need to cross the valley to reach the monastery on the other side. You descend slightly along the cliff path, which is easy enough.
But then need to cross a narrow section with a waterfall on the cliff-side in order to reach the next mountainside. It’s not hugely difficult but can be a little slippery and isn’t ideal if you’re not keen on heights as there’s a fair old drop to the valley below.
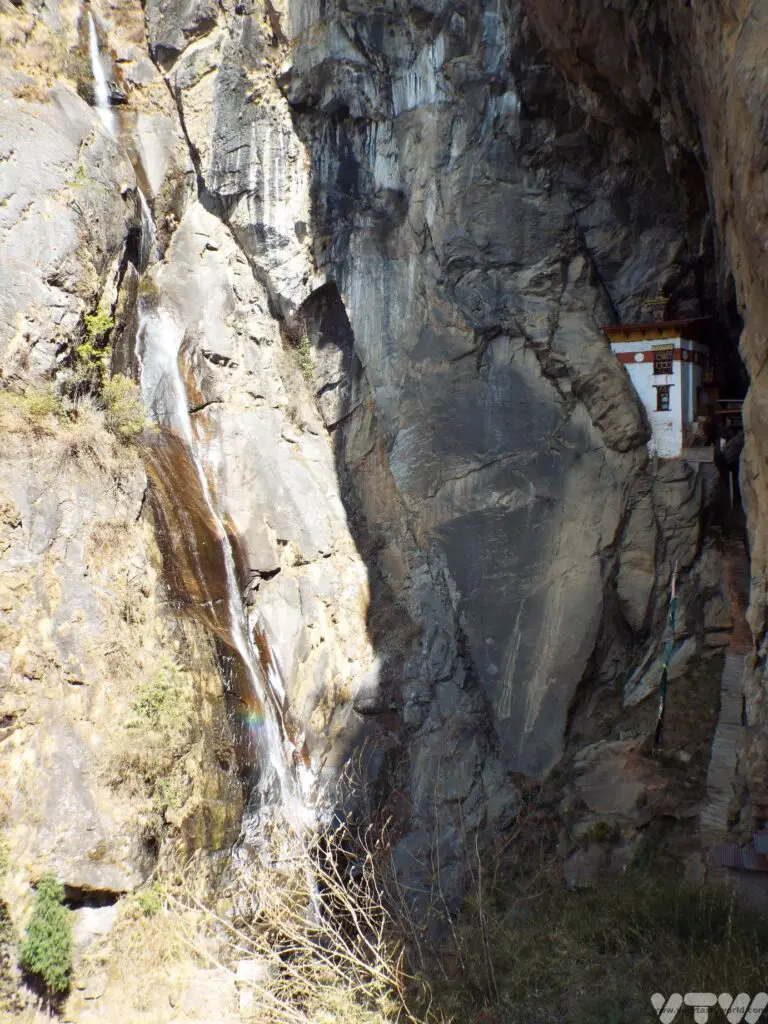
Then it’s a walk up the other side, largely on steps, to the monastery itself.
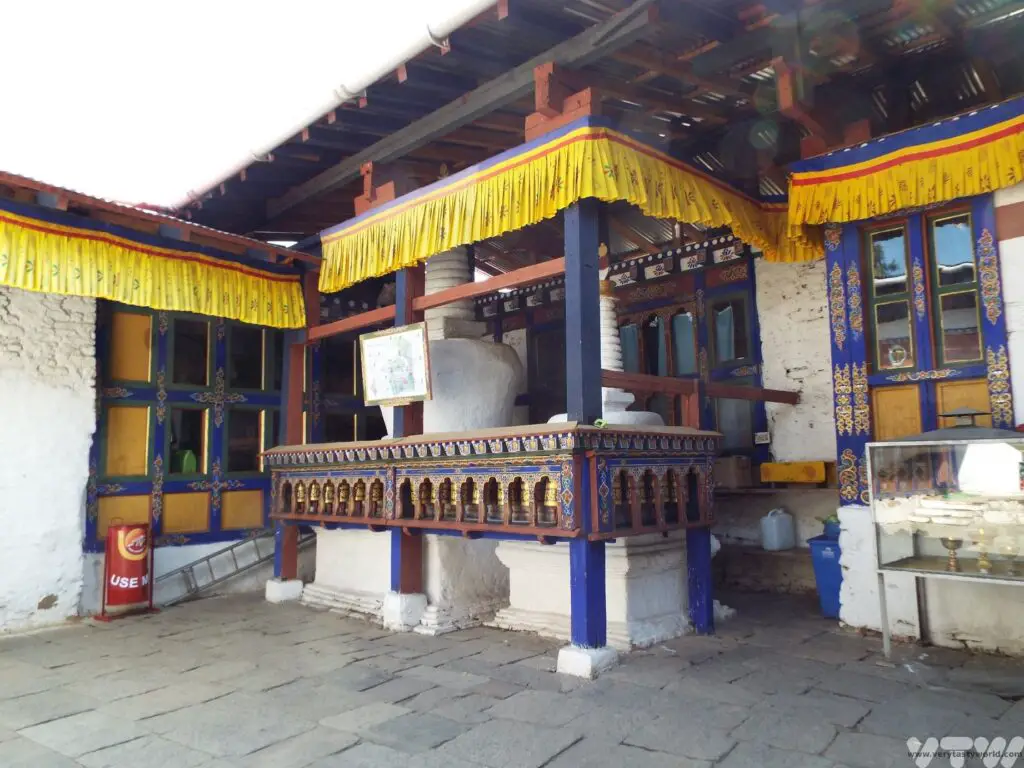
Entering the Monastery
Once you have reached the monastery entrance you might think you have reached the top. But there are a lot of stairs inside the monastery itself. We trekked up alongside a random fellow traveller who made it to the entrance but was just too tired to explore it! So save a bit of stamina. Shoes must be removed in order to visit the various rooms within the temple.
This is a working monastery so photography is not allowed. The temple is comprised of four main buildings. Padmasmabhava’s cave – the first one he entered riding the tiger, is called Tholu Phuk and the cave where he meditated is Pel Phuk. Steps have been cut into the rock and there are bridges to cross in order to reach particular rooms.
Bhutan Tiger’s Nest Trek – The Route Down
You return via the exact same route. While the upward journey is hard on your lungs, the downward journey is hard on the knees. Again, although the descent will be quicker, take it easy and don’t rush.
Information About The Hike
When Is The Best Time to Attempt the Hike?
We visited Bhutan in March which was the low season. As it was early spring the weather was a little chilly at times but that was absolutely perfect for walking in. It also meant that the route was less crowded than in the high season (April, May and September to November). It is possible to visit Tiger’s Nest all year round but beware that the monsoon arrives in Bhutan during the summer so trekking wouldn’t be much fun. And we wouldn’t want to attempt the waterfall crossing section on a slippery path in the rain.
Do You Need to Be Fit?
The walk should be fine for anyone of average fitness. The total distance covered is around 6km. The most challenging element is that you are trekking at altitude – the hike will take you to over 3000m above sea level – and this could well knock the breath out of you. There is a lot less oxygen available at these dizzying heights. The elevation gained is around 500m from the car park to the monastery. Some people do struggle with the altitude and acute mountain sickness is a serious condition. Follow your guide’s instructions and do let them know if you are feeling unwell.
We actually did our trek at the end of our trip to Bhutan. The country has the world’s highest average elevation, although for most of our trip we had been exploring the country at around 2000m above sea level. Waiting until the end of the visit meant that we had a week or so to acclimatise to being at altitude.
What Clothing Should You Wear?
As with all temples in Bhutan modest dress is required to enter the monastery and this includes long-sleeved tops to cover your entire arms. You might want to hike in a t-shirt if the weather is warm but remember to take a light jacket if you want to visit the monastery itself. Long trousers should be worn.
What Should I Bring?
We recommend wearing comfortable clothes and good walking boots or shoes for the hike. Consider wearing footwear with ankle support as you will be walking on an incline for pretty much the entire trek. It’s also worth minimising the equipment you take with you so that you aren’t carrying too much. We did the hike simply taking a day-pack containing water bottles and camera.
How Long Does the Hike Take?
The time varies depending on how fit you are and how you get on walking at altitude. There is no pressure to rush and it isn’t a race, so we advise taking the walk easy. If you need to catch your breath, stop and catch your breath. Some people take three hours, others take eight. We took five hours for the total trip which included the visit to the monastery and a buffet lunch at the resting place while chatting with some very nice visitors from Japan.
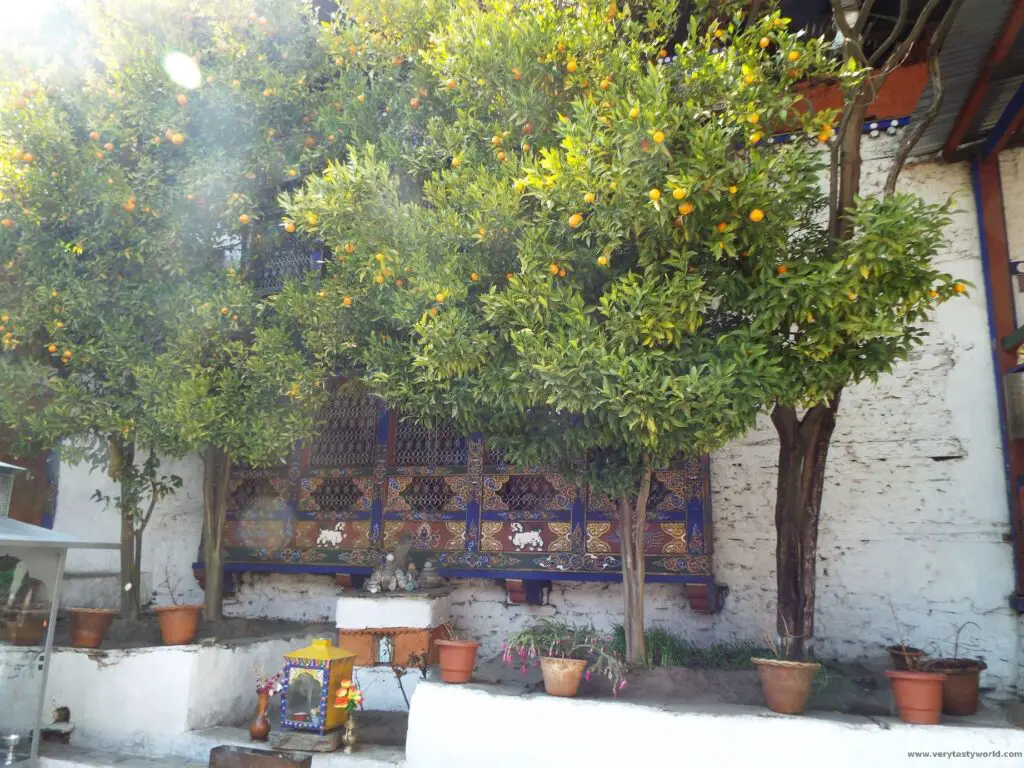
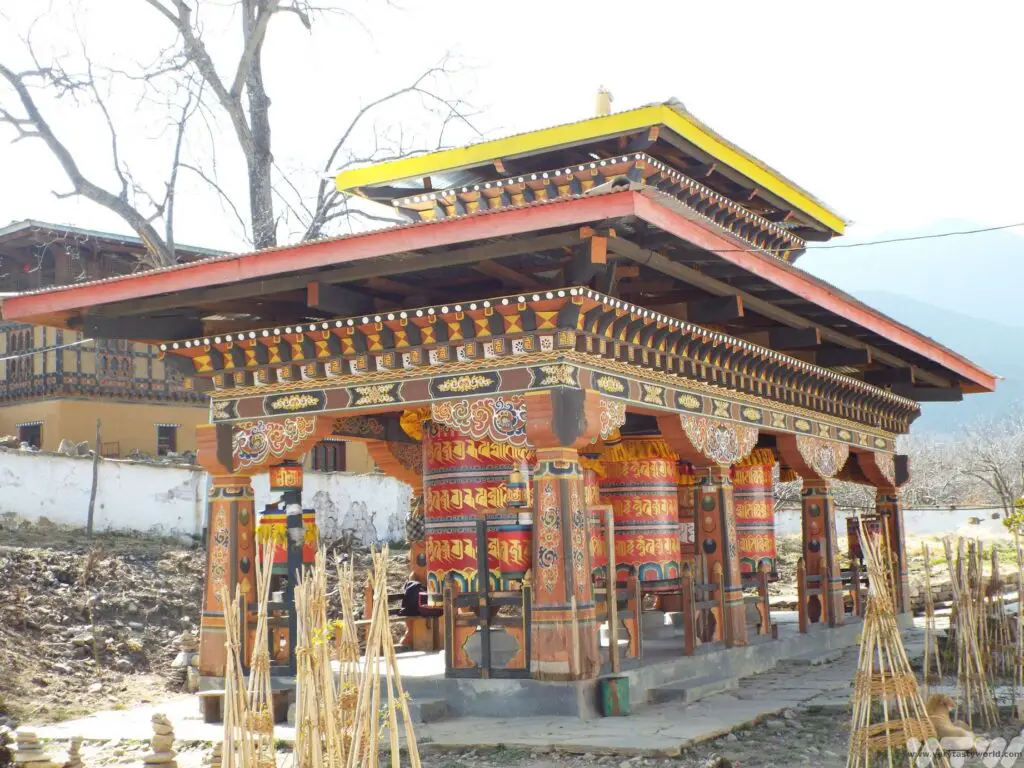
Other Places to Visit in Paro
Located in Paro valley, Kyichu Lhakhang is one of Bhutan’s oldest monasteries. Legend tells that it was one of 108 temples constructed on the same day by the Tibetan King Songtsen Gampo, to subdue Sin Mo, a feared demoness.
It has two orange trees in the courtyard and they are purported to bear fruit at all times of the year. There were certainly plenty of oranges on the trees when we visited.
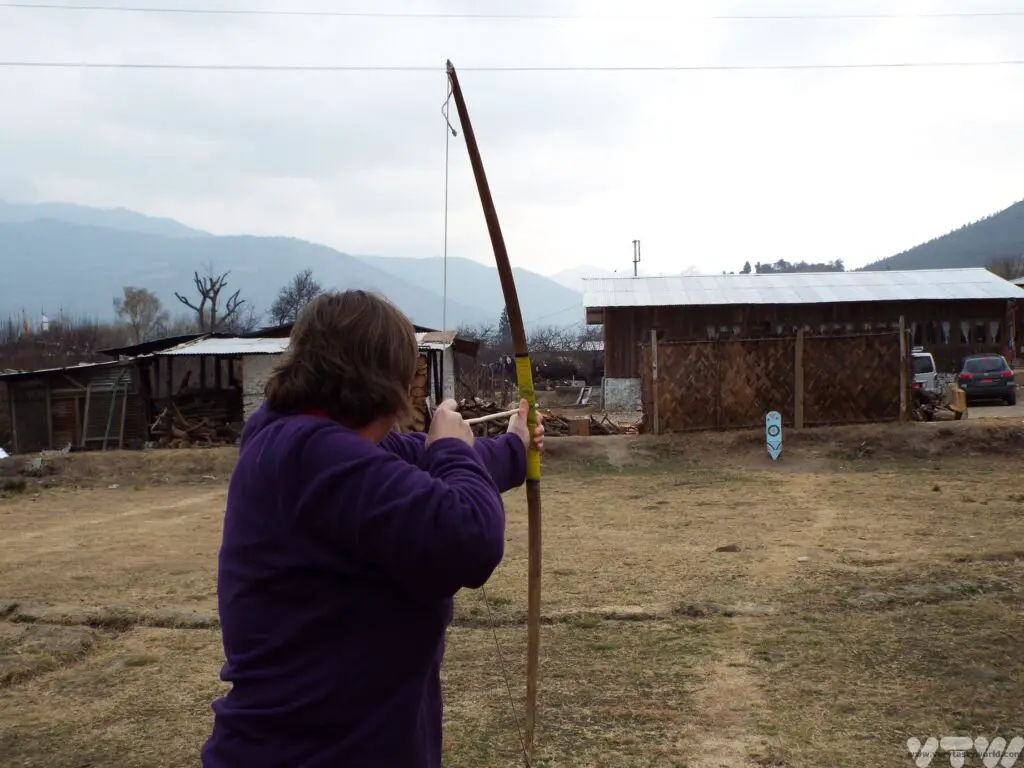
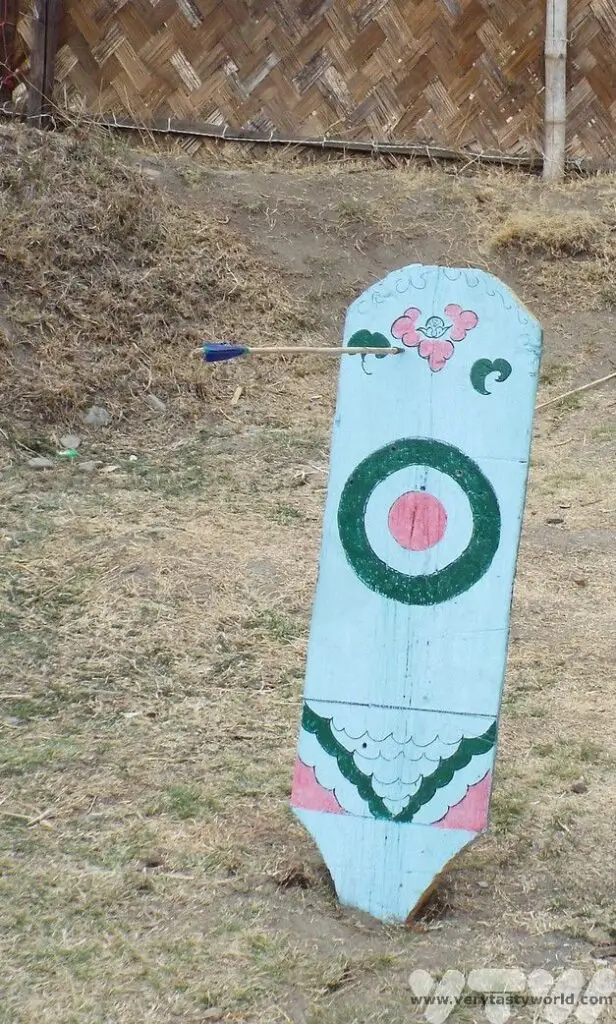
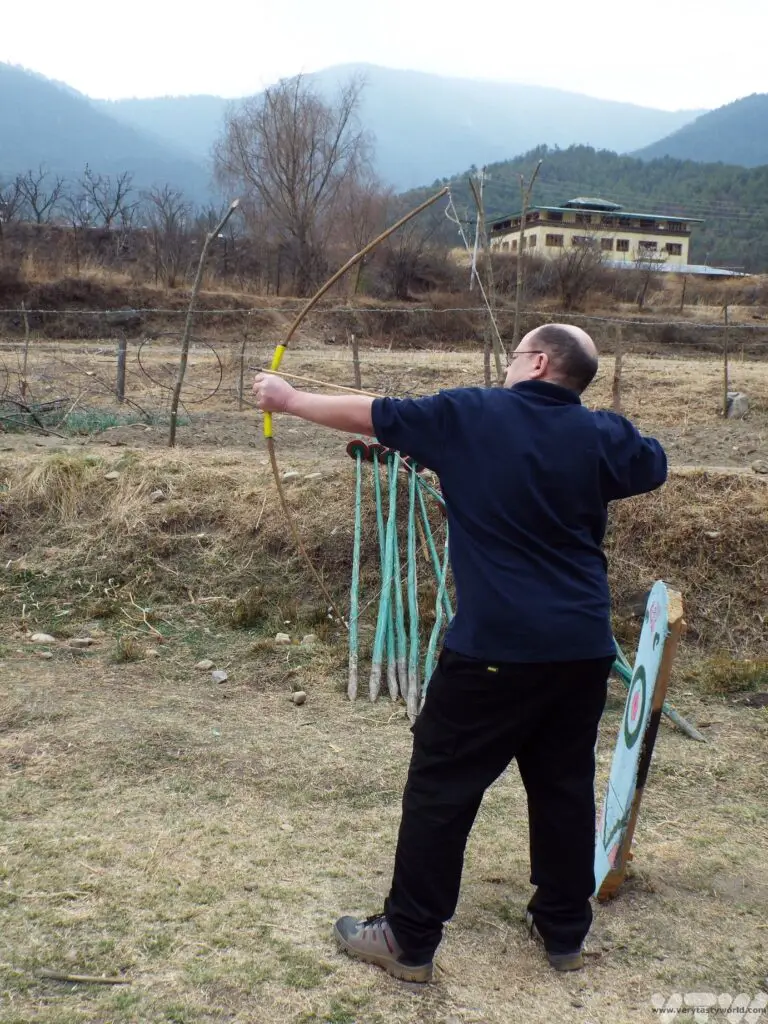
We also enjoyed trying our hands at archery, Bhutan’s national sport. There are practice ranges all over the country and it’s fine to show up and have a go. We had watched a remarkable archery tournament a few days previously – where local archers would compete to hit a tiny target from an incredible distance.
Well, it was great fun but we were fairly useless. Mitch’s first arrow flew over the fence and into the car park – fortunately, there was no one there!
Colin did, however, eventually manage to hit the target!
As with all things in Bhutan, if you want to try a particular activity or visit a particular site, ask your guide and they should be able to arrange it.
We stayed at the Metta Resort on the outskirts of Paro. It was a nice enough place but we found that the food was largely aimed at tourists – both Eastern and Western. We asked our guide whether we could eat at a local restaurant instead of at the hotel, so he took us to a fabulous farmhouse in the evening and we enjoyed traditional Bhutanese fare washed down with ara, an alcoholic drink made from fermented grains.
Essential Information About Visiting Bhutan
The Bhutanese government sets a daily tariff for visitors. When we visited this was $200 per day (low season) which included the costs for our delightful guide and driver, as well as all accommodation, food and entrance to the dzongs and museums. This cost included $65 for a sustainable development fee which went directly to supporting local people. So entrance to the Tiger’s Nest, and all other monasteries/dzongs, was included.
In 2022 Bhutan significantly increased the daily tariff from very expensive to even more expensive by increasing the sustainable development fee to an eye-watering $200 per day (on top of other costs). This resulted in a significant drop in visitor numbers, so the system changed again in 2023. The sustainable development fee has been halved to $100 per day (which is still expensive and doesn’t include accommodation and transportation etc) for the next four years (as at September 2023). So, if you’re planning to visit, it’s worth considering making the journey sooner rather than later. Bhutan is expensive to visit but we feel very much that our time spent in this remarkable kingdom was absolutely worth it.
Related Posts You May Enjoy
- A One Day Hanoi Itinerary
- Mekong Meanderings
- A Chiang Rai Temple and A Country Retreat
- A Chiang Mai Tour in Northern Thailand
- Sunrise at Angkor Wat and Other Temples
- Mekong Delta River Cruise in Vietnam


How to Use Public Transport in Japan
Japan is the most brilliant country to travel through – with exciting, vibrant, neon cities contrasting with serene temples, castle and pagodas alongside some stunningly beautiful countryside, it really has something to offer everyone. You can read about some of the finest places to visit in our guide to Planning a Trip to Japan. The best way to see all these amazing sights is to use public transport. The Japanese transportation network is fast and efficient throughout the whole country. It is also really well interconnected and integrated. Here are some tips for how to use public transport in Japan and the various transport options you might choose to use.
Please note that this post contains affiliate links. If you click through and decide to make a purchase we will make a small commission, at no extra cost to you, which will help towards the costs of running this site.
Travelling By Rail
Japan is famous for its rail network. It’s a great way to travel and is highly efficient. When planning your rail journeys we recommend the excellent Hyperdia site which has timetables and can offer information about all available routes.
If you are planning to travel through the country, it is worth considering a Japan Rail (JR) Pass. They are only available to visitors and, even though they aren’t cheap and the prices have recently increased significantly, they can represent good value. The rail pass would cover the cost of long trips between multiple cities. Beware though, if you are only staying in one city or even hopping between two (e.g. Tokyo to Kyoto and back) it’s not worth buying a rail pass. There is a JR calculator which can help you decide whether it is worth investing in a pass.
It is worth having a think about your trip when planning: If you want to spend a few days in Tokyo before travelling around the country, don’t activate your card until you need to travel outside the city. You might be able to buy a shorter duration card and hence pay less money. Alternatively you might want to consider inter-city buses which are slower but cheaper.
It is possible to buy 7, 14 or 21 day cards, either standard fare or Green Class (first class but, honestly, standard class is fantastic) and you can use them on most bullet trains as well. You need to order your pass before you travel.
You will get a voucher which you then exchange for a rail pass at a JR station. Not all stations issue passes but the main stations and stations at airports will have them. The clock starts ticking from the time you activate your card.
When using the JR pass, just have it ready at the entrance/exits to the platforms at the stations. You can’t go through the automatic gates but there will always be a station attendant on duty in an office at one end of the barriers. Show the card – with the date facing towards them – and they will wave you through.
In terms of knowing when you are arriving at your destination, most platform signs will have the name of the station in roman characters but they will be smaller than the main sign in Japanese. Keep an eye out for them – you’ll soon get used to spotting them. Also, many trains will announce the next station, so you can listen out. The announcement will be along the lines of, “Tsugi wa Destination desu.”
Beware: Not all rail lines are JR. There are quite a lot of private lines running throughout the country, including in some of the cities, so you will have to buy a separate ticket. The delineation between the lines should be clear – if you are changing trains from JR to the private line you will exit the JR station (showing your pass) and can then use a machine to buy a ticket for the line you wish to use.
Fun fact: One of the delightful things about the Tokyo JR lines (and in other cities) is that each station has its own jingle – a short tune that plays when you arrive at the station. You can even buy CDs of all the tunes!
Using the Shinkansen – the Bullet Train
There’s a reason the shinkansen is known as the ‘bullet train.’ If you visit Japan do try to ride the bullet train at least once, it’s part of the experience. You can use your JR pass on all bullet trains, except the super-fast Nozomi. (Don’t worry, the other bullet trains are still very fast indeed.) Most electronic signs toggle between Japanese and English these days so have a look at the boards and wait a few moment to check which platform your train will depart from.
If you are using the shinkansen and have a JR Pass, you can reserve seats for free. Just pop along to a JR booking office – most stations will have them, and the station doesn’t need to be a shinkansen station – and book the seats. You will need to make sure you know which train you want to travel on. We often use Hyperdia to give us a timetable that shows us a variety of options and, as our plans for the day develop, we can point to the particular train we would like to travel on.
We do recommend making a reservation early if you know your plans. Sometimes trains can book up a few days beforehand, so you would have to rely on unreserved seating.
Your ticket will show the car and seat number. On arrival at the platform the car numbers are clearly marked. The platform will indicate where the train will stop for your particular car. Stand in the queue at your boarding point. Everybody is very polite and organised and it’s an efficient way of boarding the train.
Unreserved seating is available on most bullet trains but, as you would expect, you are not guaranteed a seat. We recommend showing up at the platform well before the train arrives and get a good place in the queue. The unreserved cars will be marked so follow the signage to that part of the platform.
Travelling on the shinkansen is a real pleasure. The seats are comfortable and have loads of legroom.
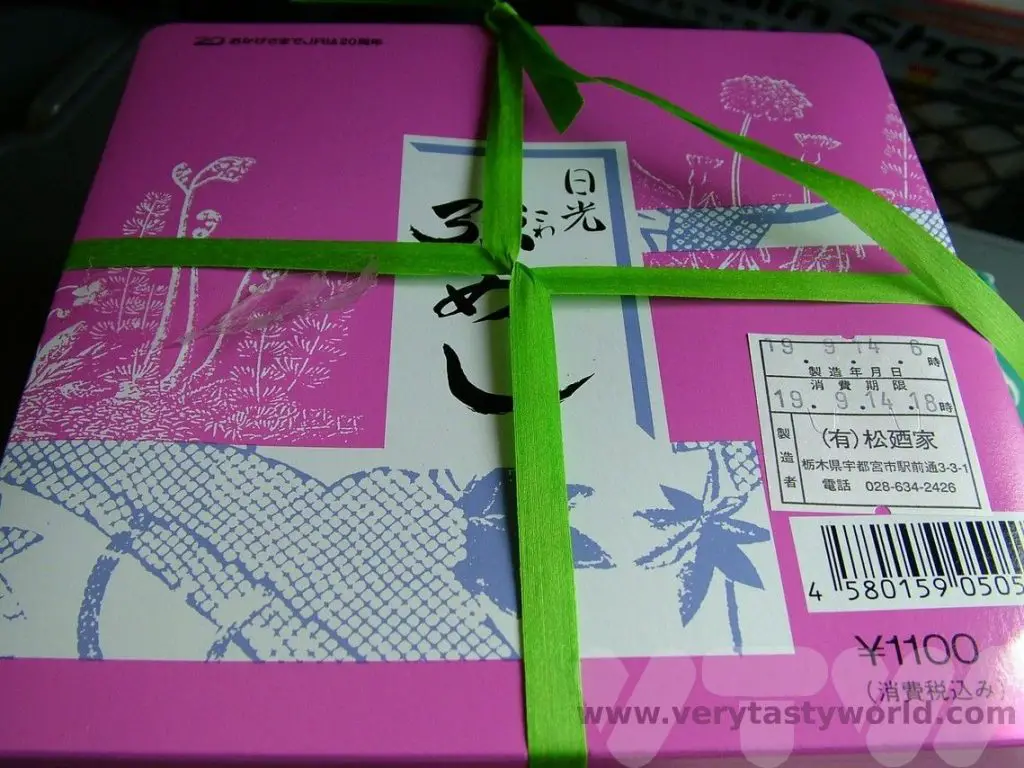
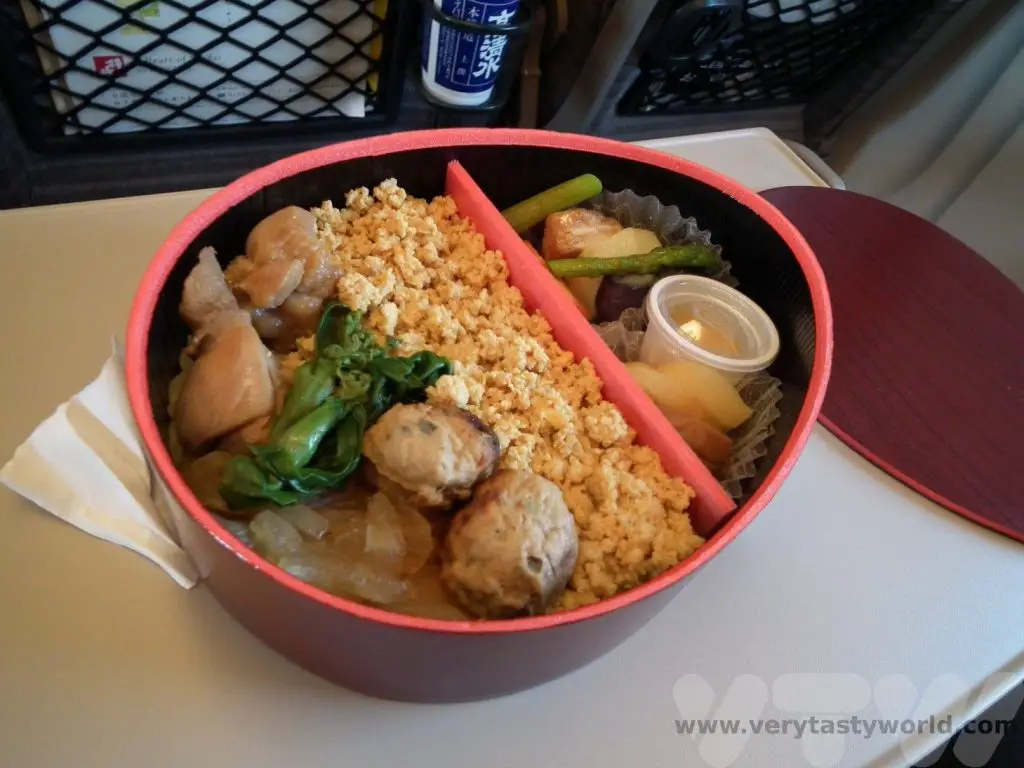
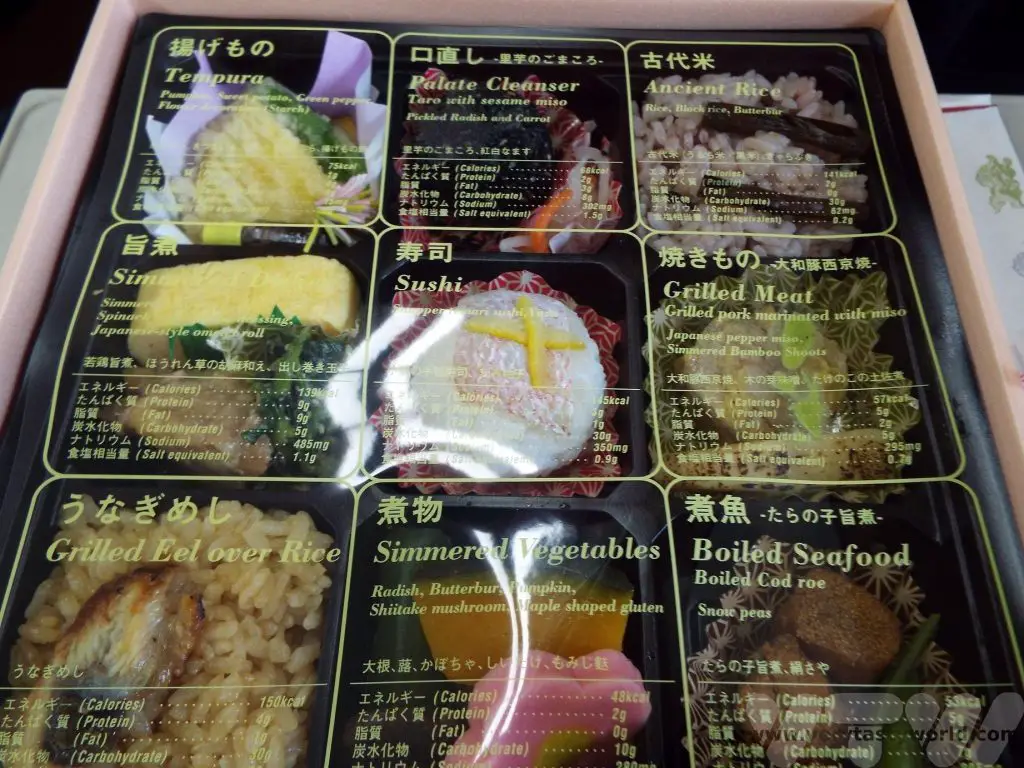
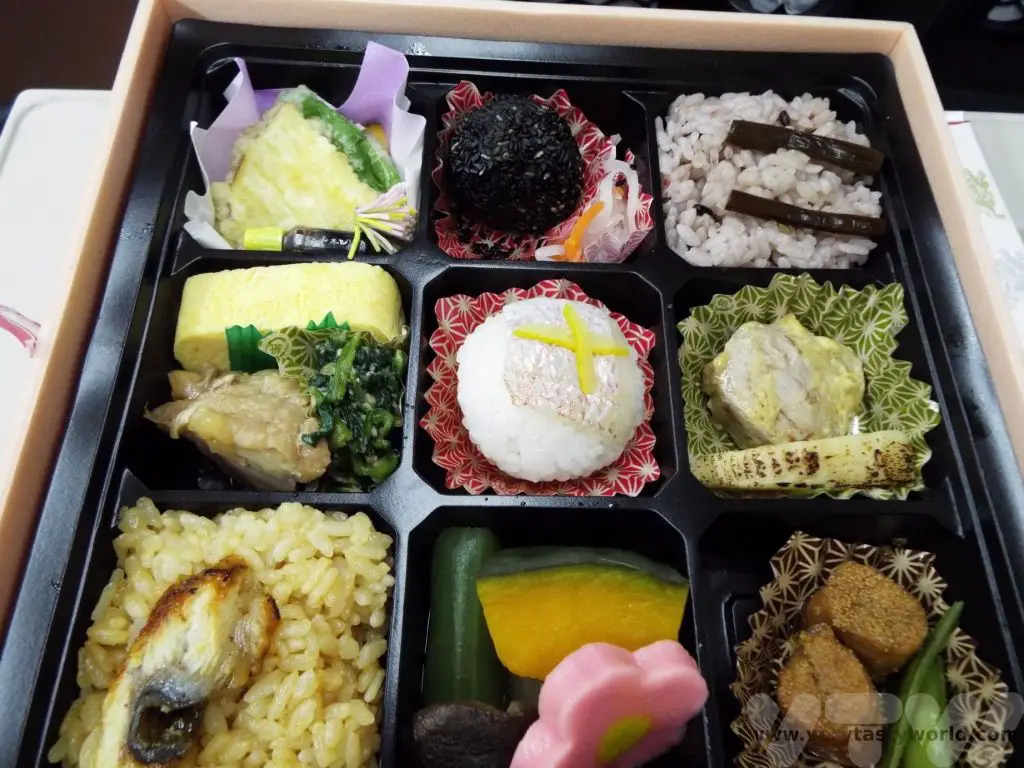
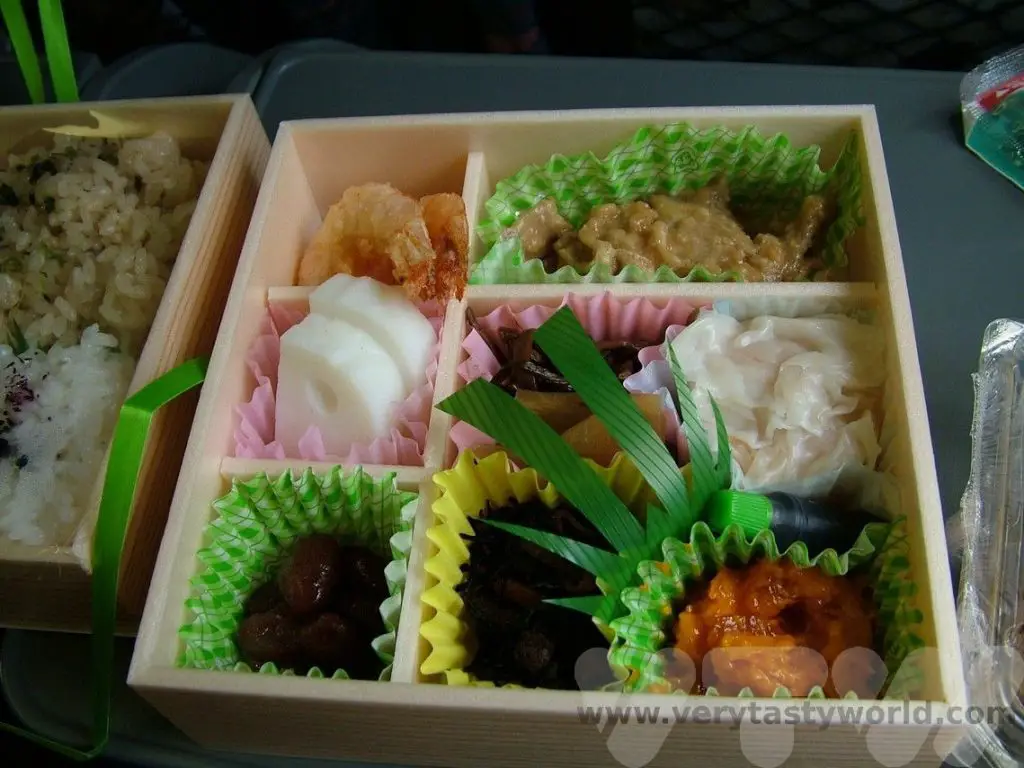
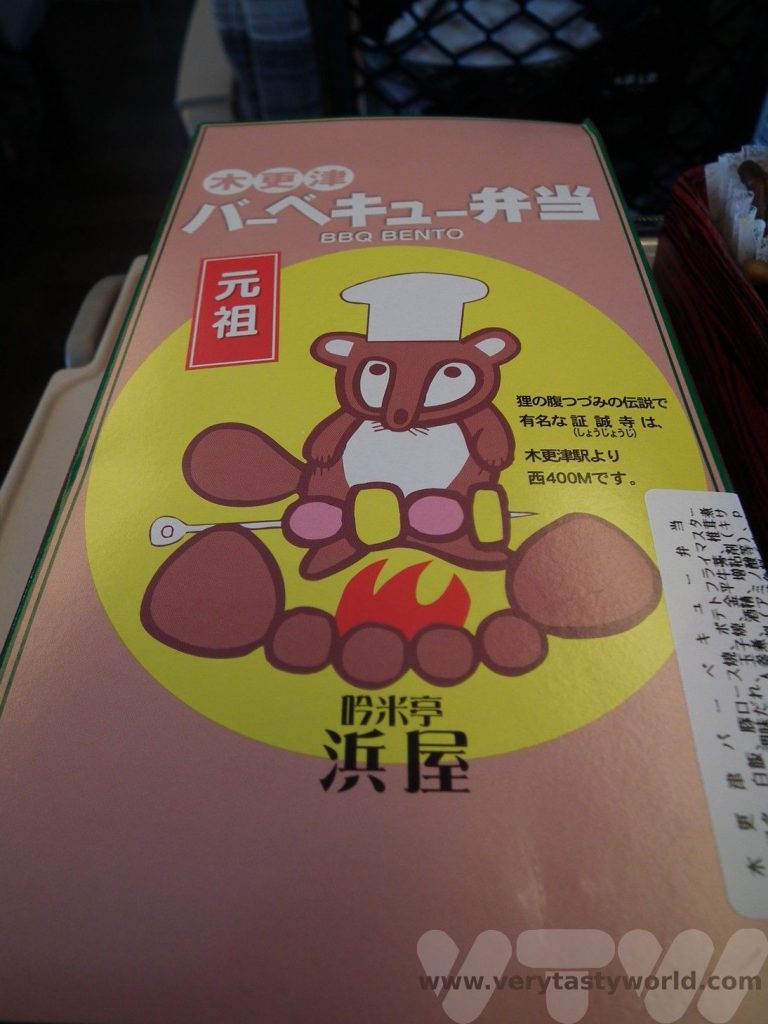
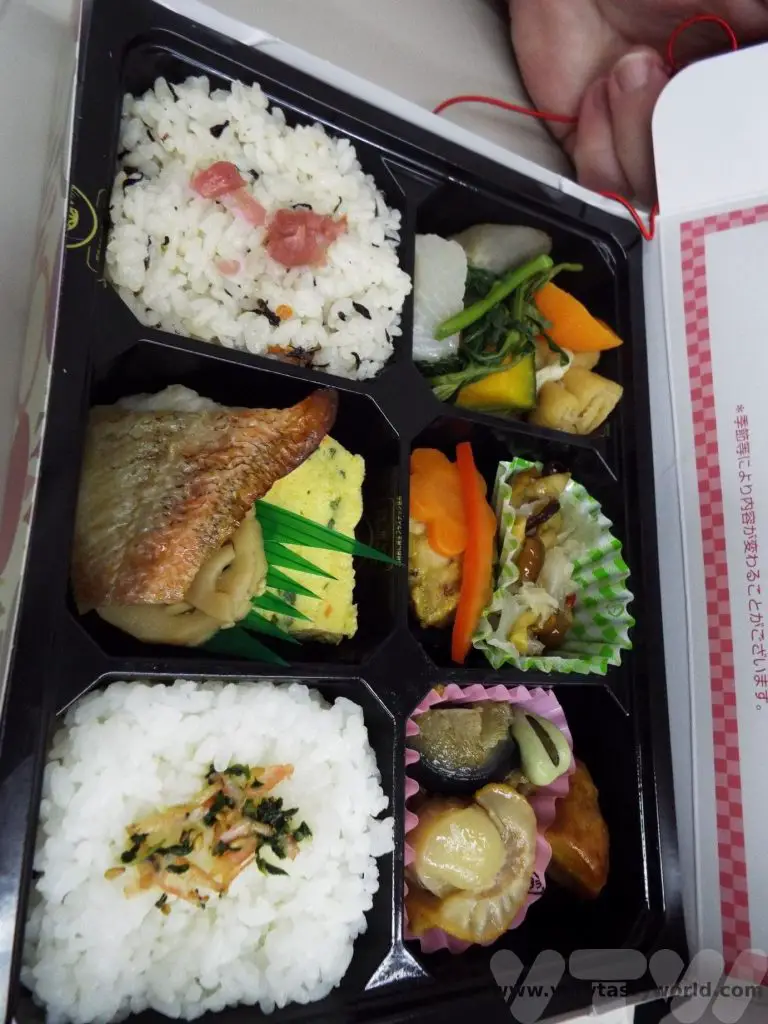
Foodie Tip: Don’t forget to get a bento box for your journey. It’s an essential part of the travelling experience. These are lunch boxes which contain all sorts of lovely delicacies. Many stations will offer ekiben (station bento) as local specialities.
You can buy food (and drinks, including alcohol) on the train itself. A delightfully low-key attendant glides up and down the carriage, gently asking if you would like to buy anything. But it is more expensive to buy food on the train so we often stock up at the station or a convenience store before we board. It’s absolutely fine to bring your own food.
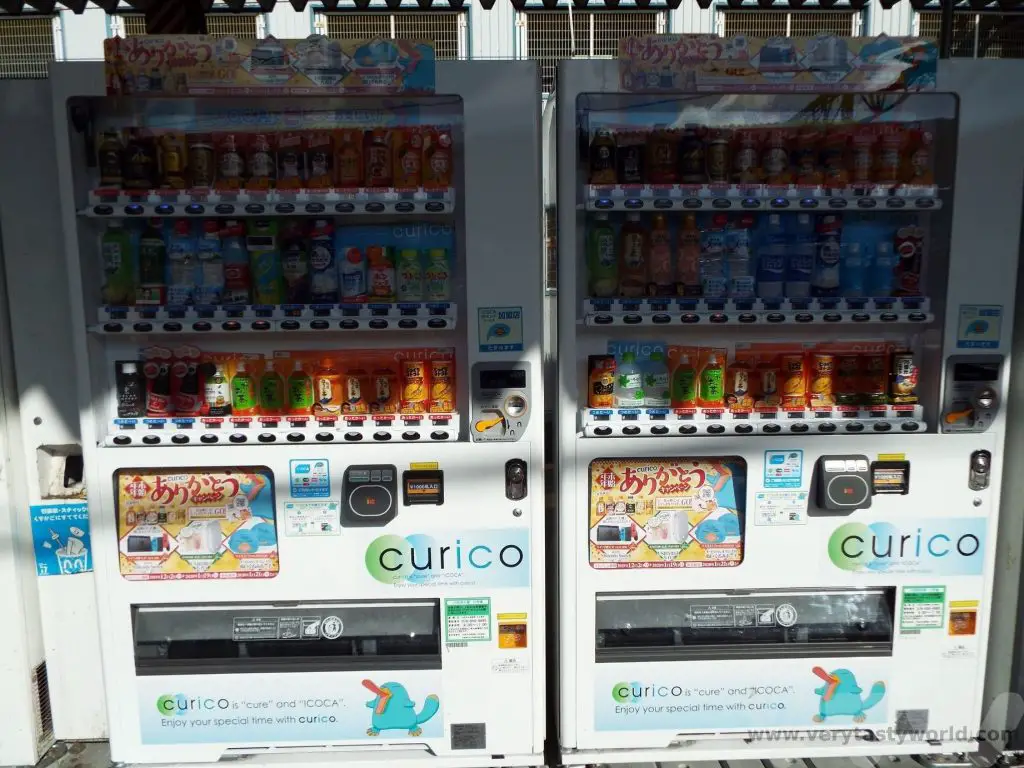
There will usually be a vending machine or three on the platform – vending machines can be found everywhere in Japan. You can even get a can of hot coffee from some machines!
How To Use the Metro/Subway
Many of Japan’s larger cities also have a metro system. You cannot use your JR pass here. You can pay for each journey but some metro lines have an all-day ticket pass, so it’s worth investigating those, depending on how much you plan to use the transport during the time period you are travelling.
Timing Tip: Metro stations can get extremely busy at rush hour. If you are planning to travel inter-city we recommend waiting until after 9am on weekdays before setting off. If you do need to leave early you may well see immaculately clad, gloved attendants on the platform ensuring that everyone can squish aboard the train.
We recommend buying an e-money card – Suica or Passmo are popular choices. You can charge your card and simply tap in and out of metro stations, the cost being automatically deducted at the gate machine. These cards can also be used in places like konbini – convenience stores – such as Lawson, Family Mart or 7-Eleven. They are often specific to the city/region so can’t necessarily be used all across Japan. For example, a Tokyo card is unlikely to work in the Kansai region.
Charging the cards is easy – most convenience stores will have the ability to do this. You can say, “kono kādo ni chāji shite kudasai,” and indicate the amount. Note that you will need cash to top up these cards, you cannot charge from a bank card or credit card.
If paying for individual tickets, there will be plenty of ticket machines at the metro station. The metro map may seem intimidating if you can’t read Japanese but there is usually an English map – although you might have to look for it. We’ve often downloaded subway maps in English onto our mobile phones. The prices are based on distance, so you need to check what your fare would be using the map.
There is usually a screen which allows you to select a language and buy tickets in English.
The Japanese language machines may seem a bit daunting but are usually quite visual. You can often select the number of tickets by pressing the button showing the number of people (adults and/or children) travelling. These are the characters to look out for:
Adult (big person): 大人
Child (small person): 小人
If you get really stuck, we’ve often found local people hovering close to the machines, keeping an eye on us to see if we need help. If you say “Destination ni ikimasu” – I’m going to Destination – in all likelihood someone will help you. Don’t forget to thank them – “arigato.”
And if the worst comes to the worst, if you get the cost wrong, the barrier will close on you when you put your ticket in the exit machine and you can just pay the difference at the other end – there will be a member of staff in a booth who can take the excess fare.
When entering and exiting the platform either tap your card or put your individual ticket into the barrier machine. The barriers generally remain open but close rapidly if there is a problem. Be warned: don’t trip over them!
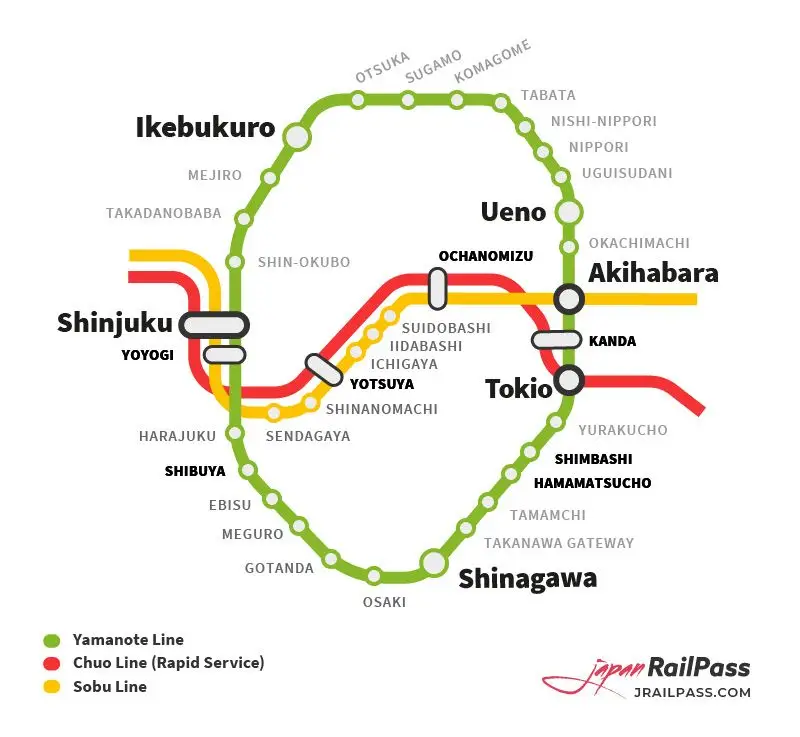
Tip: In Tokyo the Chuo (Rapid) Line and the Yamanoto Line are both Japan Rail so if you have activated your JR Pass you can use it on these tracks. The Yamanoto is a circular route and the Chuo goes straight through the centre of the city so you can reach plenty of stations. Both stop at Tokyo (labelled Tokio here) station where you can connect with the shinkansen.
Travelling on Buses in Japan
Japan has a good bus network which is useful if you are planning to explore some of the more rural areas. There are also bus connections in cities. There will usually be a bus stop close to the railway stations and often they are waiting, ready for the arrival of the train.
Buses can be a bit more challenging than trains as it’s sometimes difficult to know when you have arrived at your stop (although we have often asked the driver the name of the location we are planning to arrive at and they will indicate that you’re on the right bus).
You can ask, “Destination ni ikimasu ka”- does it go to Destination? The driver will indicate whether they do. If a driver crosses their arms in front of them in an X-shape, that’s an indication that the bus doesn’t go to that particular place.
Ticketing and payment systems can vary between companies. Some will have a fixed fare where you get on at the front door and pay the driver.
Others have boarding towards the middle or rear of the bus. When getting on, grab a ticket. It will have a number on it.
At the front of the bus you will see a display with grid of numbers showing costs in yen that increase as the journey progresses.
When you want to get off, press the bell, then make your way to the front of the bus. The cost on the grid corresponding to the number on your ticket is the price and you pay the driver by putting money into the slot on your way out.
Some buses offer change, others don’t, so always try to keep a few 100 Yen coins in change. (And if you don’t spend the 100 Yen coins on the bus, you can easily spend the money playing video games in the multitude of city arcades – so much fun!)
If we’re unsure, we just copy the other passengers!
Ferries in Japan
Japan has a lot of islands along its coastline and there are multiple ferries that you can use to reach them. Ferries are generally easy to use. We have pre-booked some in the past, especially when we visited places that were part of our itinerary and we had already booked hotels. But if we are visiting a particular attraction, we just use ferries on the day.
Japanese Taxis
Taxis in Japan are pretty expensive, so we tend to avoid using them. They are usually clearly marked with a taxi light on the roof. Inside the windscreen there will be neon sign; a red light usually means available and a green light means the taxi is already occupied. You can hail a cab just as you would in many parts of the world. Drivers are reliable and courteous but usually don’t speak much English so it’s a good idea to have your destination written down in Japanese. Hotels/accommodation may have business cards, so you might be able to pick one up in the lobby – you can show it to your driver.
If you do hop into a cab, the driver will open the door for you from the driver’s seat, it’s automatic. Payment is usually cash but some drivers might take credit cards. Most rides are metered but for some you may be able to agree a fixed fare based on a fixed journey – e.g. to an airport.
Hire car in Japan
If you are travelling in more remote parts of Japan a hire car may be a good option to explore the area. The Japanese Alps are great for driving through. We hired a car on the tiny island of Yakushima and found it was perfect for giving us flexibility. Driving is on the left, as it is in the UK.
Air
It is possible to fly between locations but we wouldn’t recommend it. Even a long journey on the shinkansen would get you to your destination within a comparable time, especially after all the faff getting to an airport and going through security etc.
Most airports are located a fair way from the cities they serve – e.g. it is around a 1.5 hour journey from Shinjuku, Tokyo to Narita Airport. Most airports will have trains shuttling between the airport and the city. Some also have what are called limousine buses, coaches that will travel to particular destinations from the airport to the city.
Trams
Some cities have tram systems. We’ve used trams in Hiroshima, Nagasaki, Hakodate and Kagoshima. They work in a similar way to buses except it’s often a bit easier to know when you have reached your destination because they are on rails and the tram stops often have a sign! They are usually fixed-fare and you pay at the end of the trip.
Some trams have machines will only take the correct amount of coins but a lot of the tram stops/stations will have a money changing machine where you can exchange notes for coins. Again, all-day passes are usually available and can be purchased ahead of time, often at stations or tourist offices. Some tram systems will also allow you to tap your e-money card if you have one for the area.
Transportation for your Luggage
Another tip for travelling in Japan is to use the amazing takkyuubin is a luggage forwarding service that will get your bags from one end of the country to the other overnight. It’s reasonably priced and highly efficient. Although there are many companies, the most well known is Yamato Transport Co , characterised by its kuroneko – black cat – logo with a black cat carrying a black kitten.
We have used this service many times and it has always been exceptionally good. Every business hotel or ryokan we have stayed at has been entirely helpful in arranging the transportation. Say, “Takkyuubin dekimasu ka?” and the helpful staff will not only have the forms, they will fill them out for the luggage destination in Japanese for you. (You can say, “Nihongo o kakemasen” – I can’t write Japanese – if you have the hotel information in kanji).
The staff will often telephone the destination hotel to check that it’s okay for them to receive your luggage and they will hold luggage for a few days if needed. You need to do a little preparation – it’s advisable to send bags the evening before you travel at the latest. And we always make sure we have our next hotel’s name written in Japanese so that the staff can know exactly how to complete the form. (Accommodation sites such as booking.com offer the booking in local language as well as your native language.)
We’ve often sent our luggage to the hotel ahead of time, swanned onto the shinkansen carrying only a day pack, and arrived at our destination to find that our bags have already been sent up to our room.
Quirky Travelling in Japan
Ropeways and Funiculars
Japan is a very mountainous country and many cities have viewing points from the tops of hills and mountains. There are often ropeways and funiculars to take you up to the top so that you can enjoy the spectacular views.
Fun Fact: Did you know that Japan has three officially designated “top views”?

Pirate Ships!
The Fuji Five Lakes area is a lovely place to visit and reasonably easy to reach from Tokyo, even as a long day trip. There are loads of things to do – we particularly enjoyed taking the funicular over the smoking volcano where you can visit a splendid sculpture park. And you can take trips across the lake on a… pirate ship! If you’re super-lucky, you might even catch a glimpse of the illustrious Mount Fuji, Japan’s national mountain. We were unlucky, unfortunately the area is often cloudy.

Other Travelling in Japan Tips
It’s worth noting that Japan is still a largely cash-based society. Cash machines are being used more but you can’t always rely on them being available, especially if you are travelling outside the big cities. That said, Japan is also a very safe society and, although nothing is 100% safe, we’ve never felt uncomfortable carrying cash.
Some Useful Words and Phrases
| Does this go to [destination] | [Destination] ni ikimasu ka |
| Where is the train station? | Eki wa doko desu ka |
| Where is the bus stop | Buseto wa doko desu ka |
| Where is… | … doko desu ka |
| How much is this? | kore wa ikura desu ka |
| Asking someone to point to a location on a map (where is here?) | koko wa doko desu ka |
| Can I make a reservation | yoyaku ga dekismasu ka |
| I have a reservation | yoyaku ga arimasu |
| Train/bullet train/bus/car | densha/shinkansen/basu/kuruma |
| Please/thank you/excuse me | onegaishimasu/arigato/sumimasen |
Related Posts You May Enjoy
- Recipe: Simmered Shiitake Mushrooms
- How to Use Public Transport in Japan
- RECIPE Oyakodon Donburi
- Planning a Trip to Japan
- The Makanai: Cooking for the Maiko House
- Setsubun Food – Bean Throwing Day
- The Gassho Farmhouses of Rural Japan
- Recipe: Japanese Simmered Pork Belly – Buta no Kakuni
- RECIPE: How to Make Umeboshi
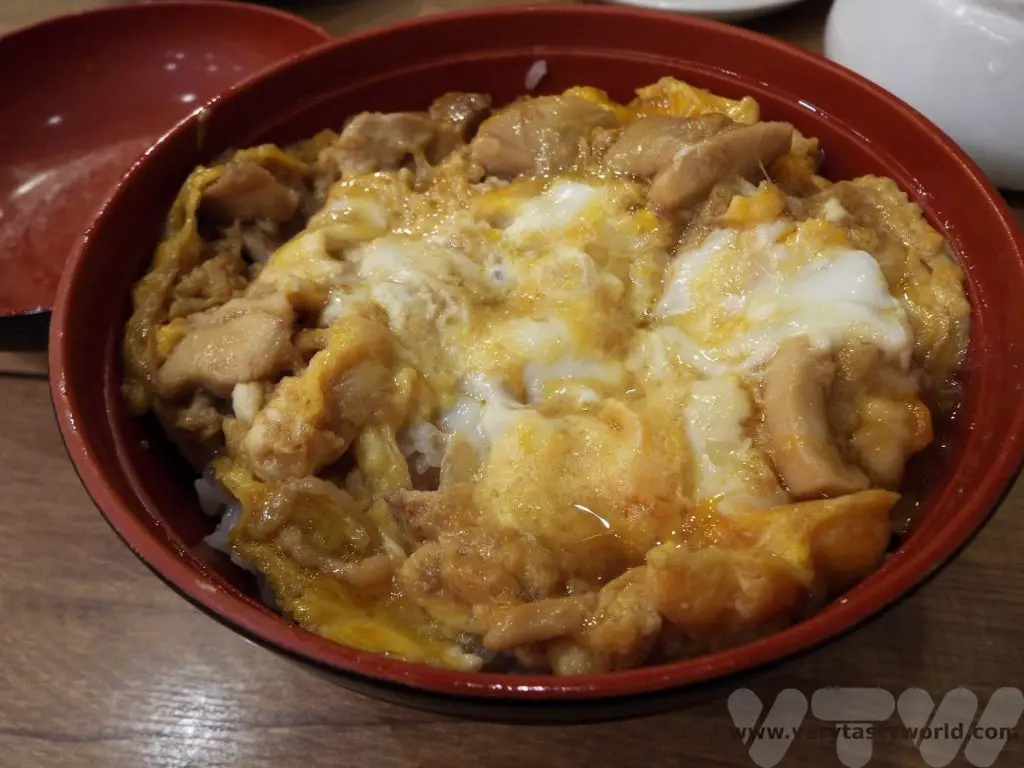
RECIPE Oyakodon Donburi
Oyakodon is a hug in a bowl – the ultimate in Japanese comfort food. Donburi are rice bowls topped with meat, fish, vegetables and other delicious ingredients. Oyakodon is a special type of donburi, which means ‘mother and child’. This is because the main components are chicken and egg! It’s an easy dish to make at home, so here is our recipe for oyakodon.
The great thing about oyakodon is that it is a simmered dish – no frying is needed. It’s also a one pot dish, where (apart from the rice) everything is cooked in the same pan. It has a lovely complex flavour – umami from the dashi (stock), salty from the soy sauce and sweet as well, a great combination.
There are specialist oyakodon restaurants in Japan – the dish is cheap and popular and, of course, delicious.

The base of okyakodon is dashi, a Japanese stock usually made from kombu (kelp seaweed), bonito flakes (shaved fish flakes) or shiitake mushrooms. The ingredients are simmered in water for several minutes and then removed leaving a clear stock full of umami flavour. Dashi forms the basis of many Japanese soups including its famous miso soup.
We have a recipe for dashi here. But if you don’t have time (or ingredients) to make dashi you can buy dashi powder online or at Asian supermarkets. It is possible to make oyakodon without dashi and still get bags of flavour. If you can’t find the powder or don’t want to use dashi, chicken stock or a stock cube will add excellent flavour.
We always use chicken thigh meat to make oyakodon as it has loads more flavour than chicken breast. Interestingly, while chicken breast meat is more expensive than thigh meat in the UK, it’s the other way round in Japan. Chicken thighs are considered to be the best meat for this dish. However, if you prefer chicken breast it’s absolutely fine to use that instead – the flavour of the broth is fantastic and because you are simmering the meat, it won’t go dry but will remain tender and juicy.
Oyakodon Equipment and Pans
If you go to an oyakodon restaurant in Japan they have special pots to cook the food in for individual portions which means that you get the omelette perfectly balanced atop the chicken.
But if you’re cooking at home for more than one person, and are serving different portions from the same pot it’s a bit more difficult to get the fluffy omelette on top. But however you present the food, it is still guaranteed to taste delicious! We tend to use as small a saucepan as we can get the ingredients into – that is with the smallest diameter – in order to get the egg to rest on top.
We have a rice cooker which is absolutely brilliant for cooking rice. Add rice and water (twice as much as the rice by volume), pop on the lid, press the switch and it will cook the rice perfectly, automatically switching itself to a keep warm function. If you don’t have a rice cooker you can cook the rice in a saucepan – same ratio, just let the rice simmer until all the water has absorbed.
Recipe Oyakodon: Ingredients
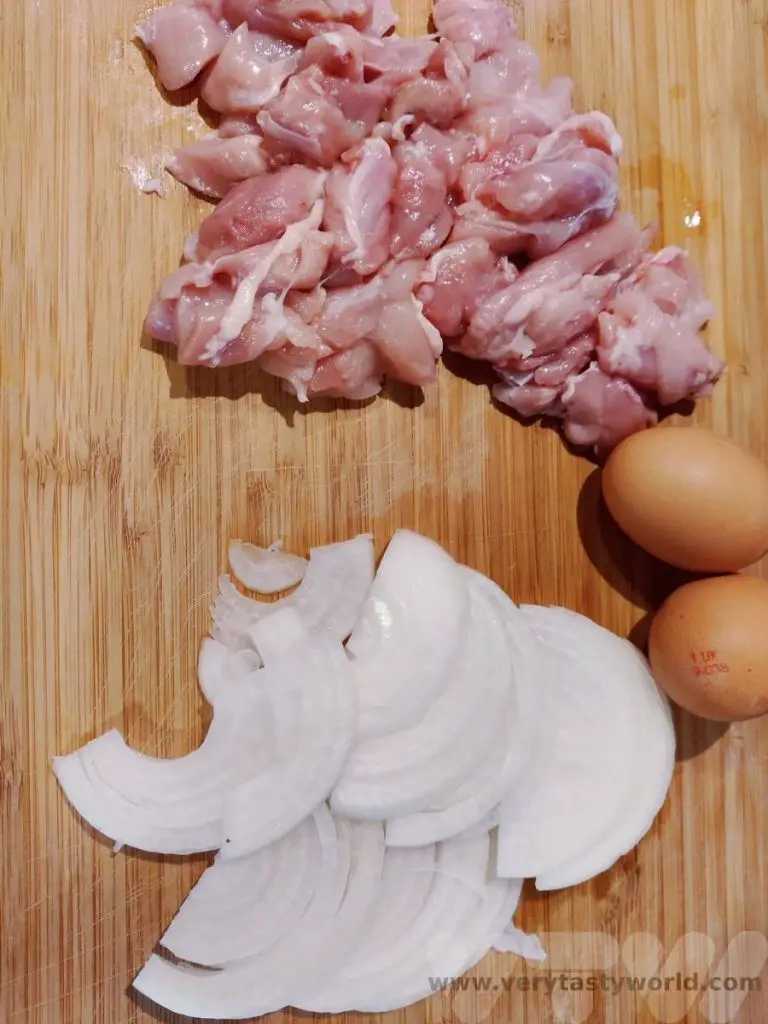
2 chicken thighs per person
1 onion
100ml dashi (if you can’t get dashi use chicken stock)
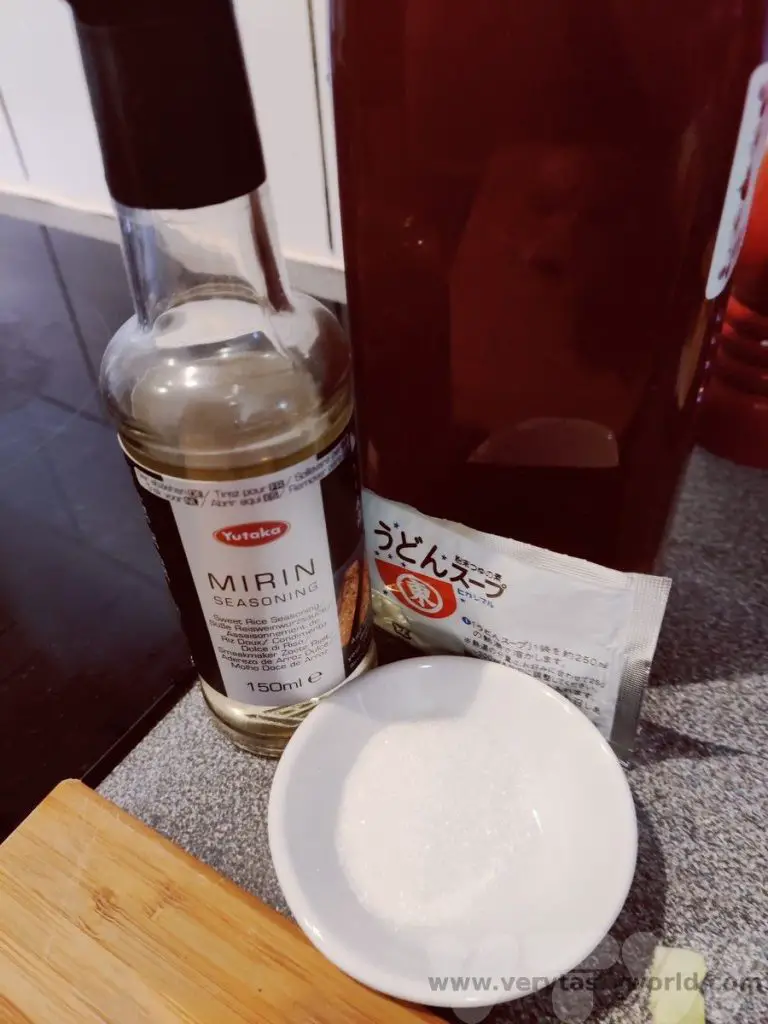
1 tbs soy sauce
1 tbs mirin (If you can’t get mirin, use cooking sake. If you can’t get cooking sake use white wine. Whatever substitute you use, add an extra teaspoon of sugar.)
1 tsp sugar
2 eggs
Rice – about 100g per person
2 spring onions (green onions) to serve
Method
Start cooking your rice. We use sushi rice as it has a nice texture. We put it in a rice cooker but you can use a pan on the stove. The ratio for both methods to use is 1 cup of rice to 2 cups of water. Cook until all the water is absorbed.
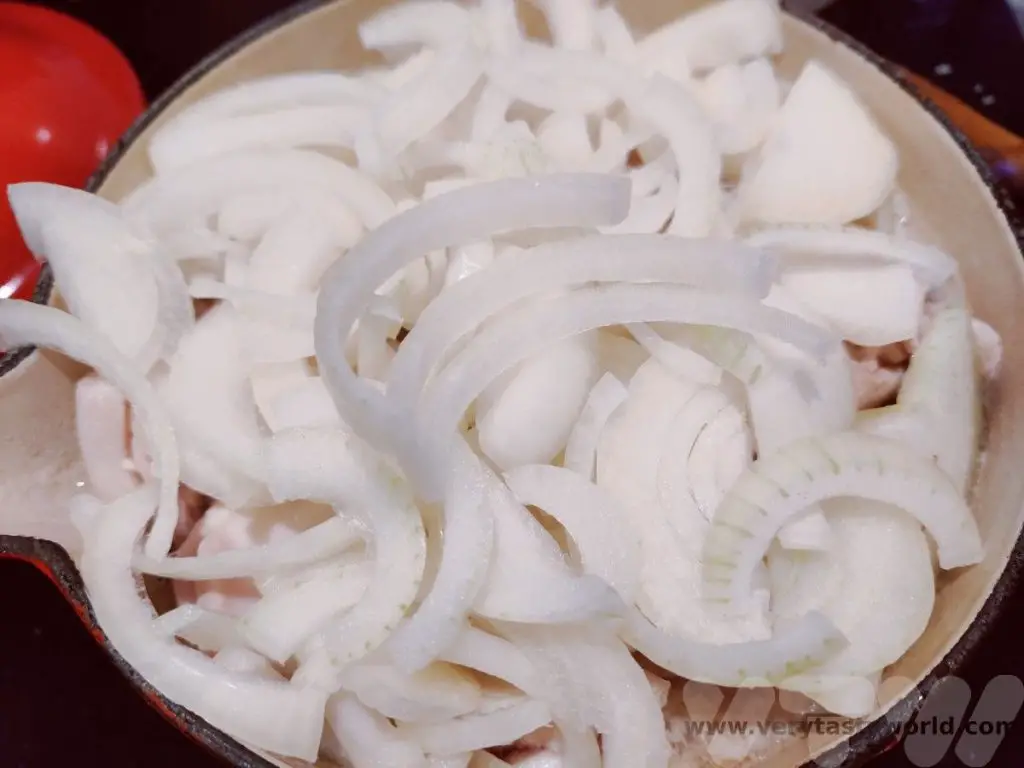
Chop up the chicken into bite-sized pieces. Slice the onion into thin slices.
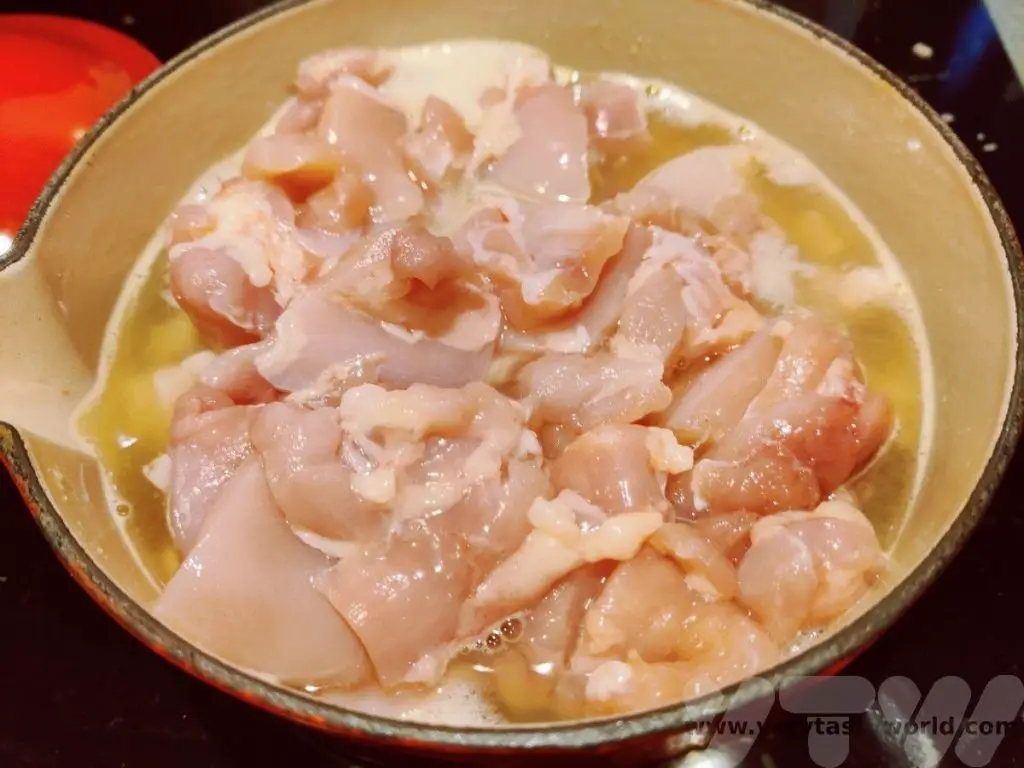
Make the dashi or stock and add the soy sauce, mirin and sugar. Put into the smallest diameter pan you have (it needs to be deep enough to accommodate all the ingredients). Bring to a boil. When the liquid is simmering add the raw chicken. Stir it around to make sure each piece can cook.
Allow the chicken to simmer for about 5 minutes.
Add the onion on top and simmer further for about 10 minutes.
Let everything simmer until the rice is cooked.
Beat the eggs gently in a bowl.
At last minute pour the egg slowly on top of the chicken and onions. Turn the heat off and let the eggs cook for a couple of minutes in the residual heat.
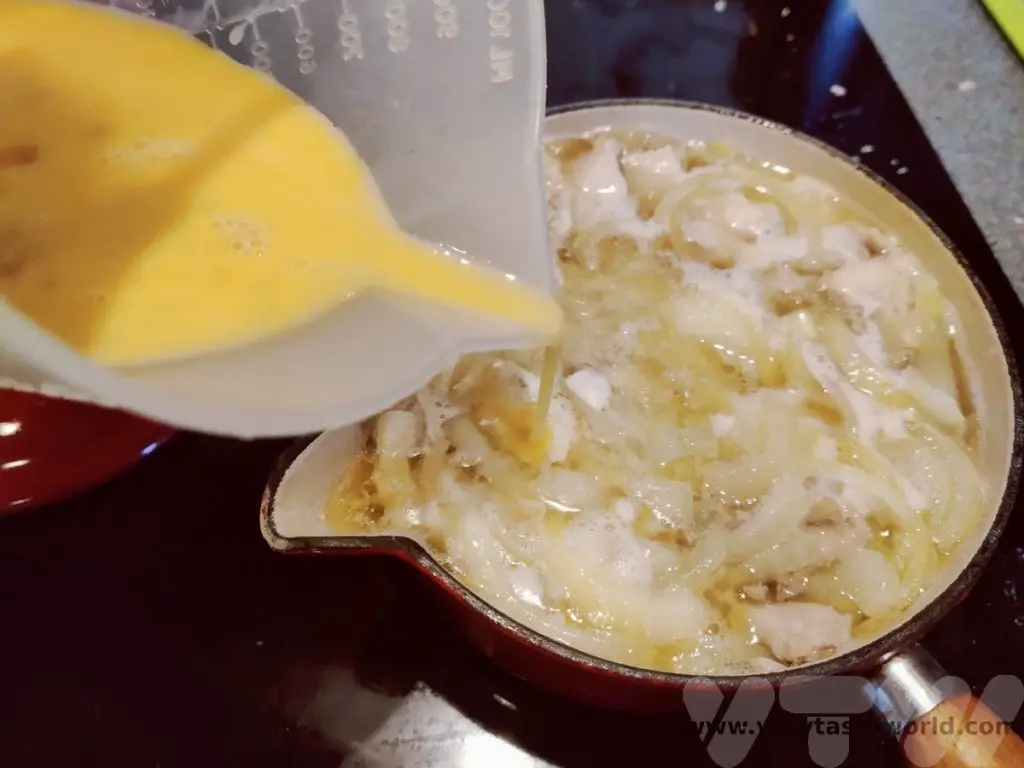
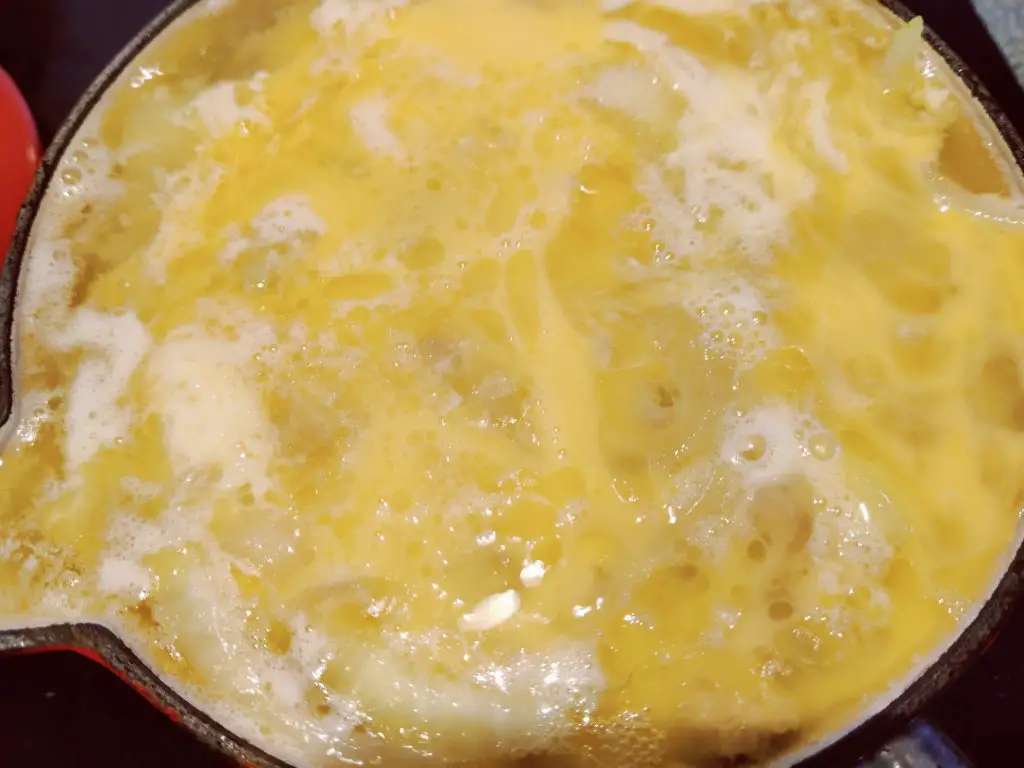
Place the rice in a bowl.

Then slide the chicken, egg and any broth on top. This is the tricky part. You can buy special donburi pans which can cook an individual portion that glides neatly onto the rice bowl. But in a practical kitchen, when you are cooking one dish for more than one person and using a standard saucepan, it’s a bit trickier to produce multiple portions without the egg breaking up. So, you may not be able to get the perfect presentation but the finished result will still taste utterly delicious.
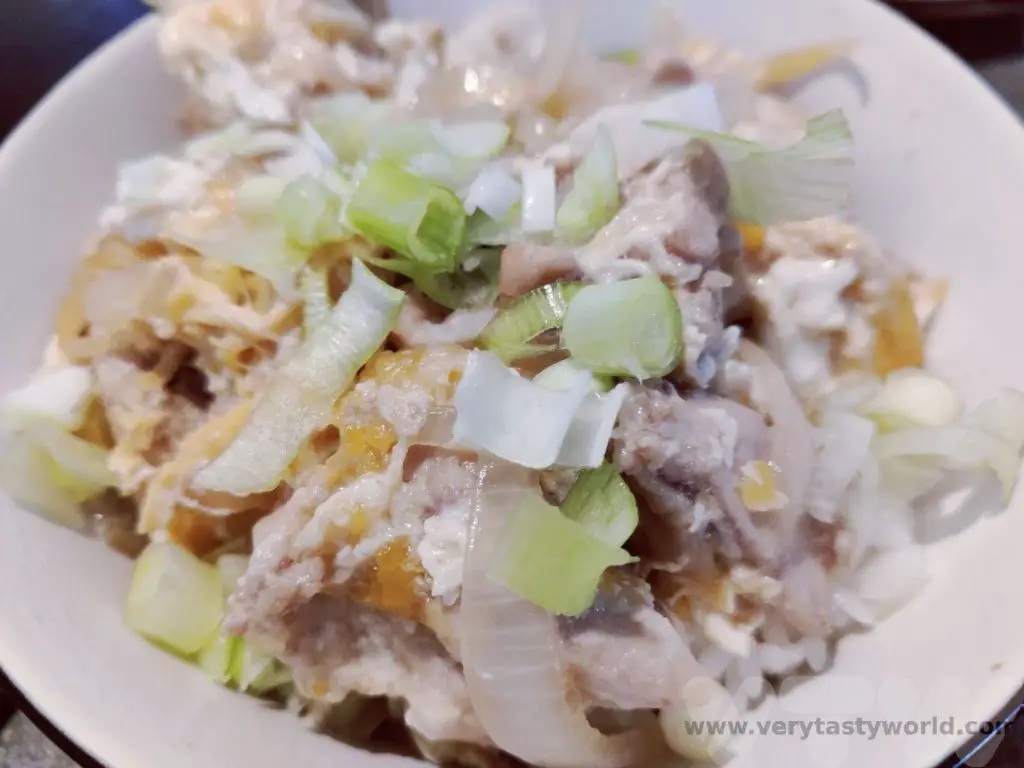
Finely chop the spring (green) onions and use them for garnish. Enjoy!
Related Posts You May Enjoy
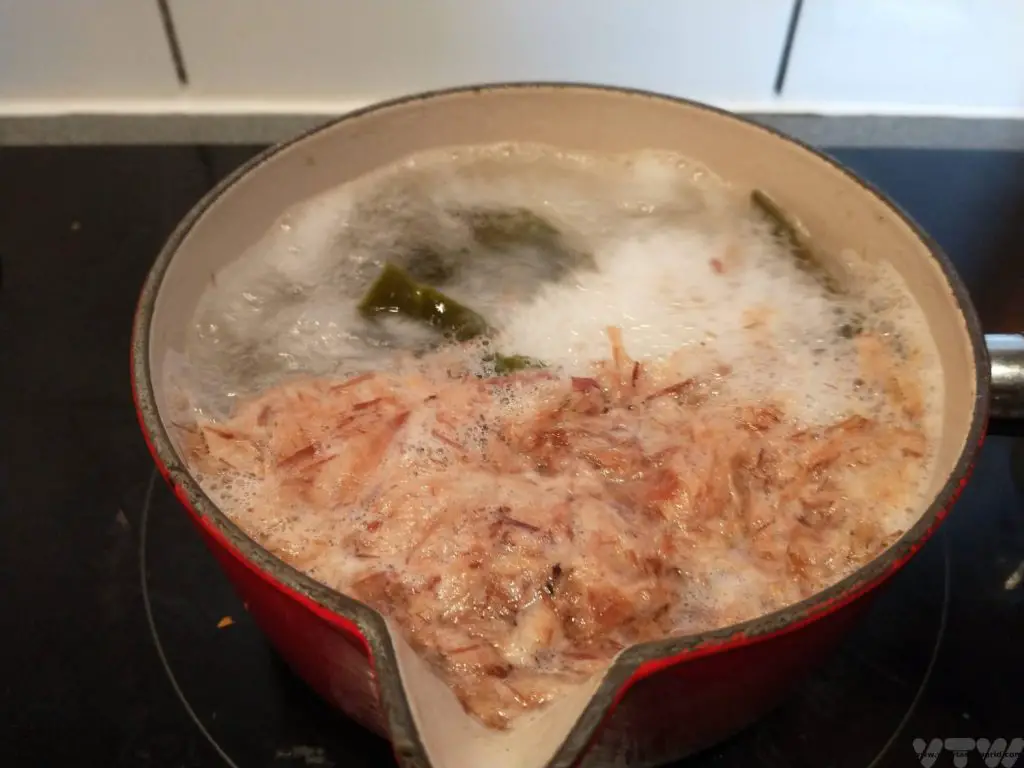
- RECIPE Oyakodon Donburi
- Zero Waste Recipes Before Your Holiday
- RECIPE: Vegetable Biryani Tamil Nadu Style
- RECIPE: Vegan Wild Garlic Pesto
- Recipe: Venetian Pasta Sauce
- RECIPE: Biryani Raita Recipe
- RECIPE: How to Make Costa Rica’s Gallo Pinto
- Recipe: Japanese Simmered Pork Belly – Buta no Kakuni
- RECIPE: How to Make Umeboshi
- Recipe: Simmered Shiitake Mushrooms
- How to Use Public Transport in Japan
- RECIPE Oyakodon Donburi
- Planning a Trip to Japan
- The Makanai: Cooking for the Maiko House
- Setsubun Food – Bean Throwing Day
- The Gassho Farmhouses of Rural Japan
- Recipe: Japanese Simmered Pork Belly – Buta no Kakuni
- RECIPE: How to Make Umeboshi
A One Day Hanoi Itinerary
The northern city of Hanoi is an essential place to visit on a trip to Vietnam. It’s a city we would describe as ‘shabby chic’ compared with the ‘bling’ of Ho Chi Minh City (aka Saigon) in the south. Hanoi has a long and interesting history and lots of fascinating sights. Many are located within a reasonable distance of each other, close to the old part of the city. Here are our suggestions for a one day Hanoi itinerary.
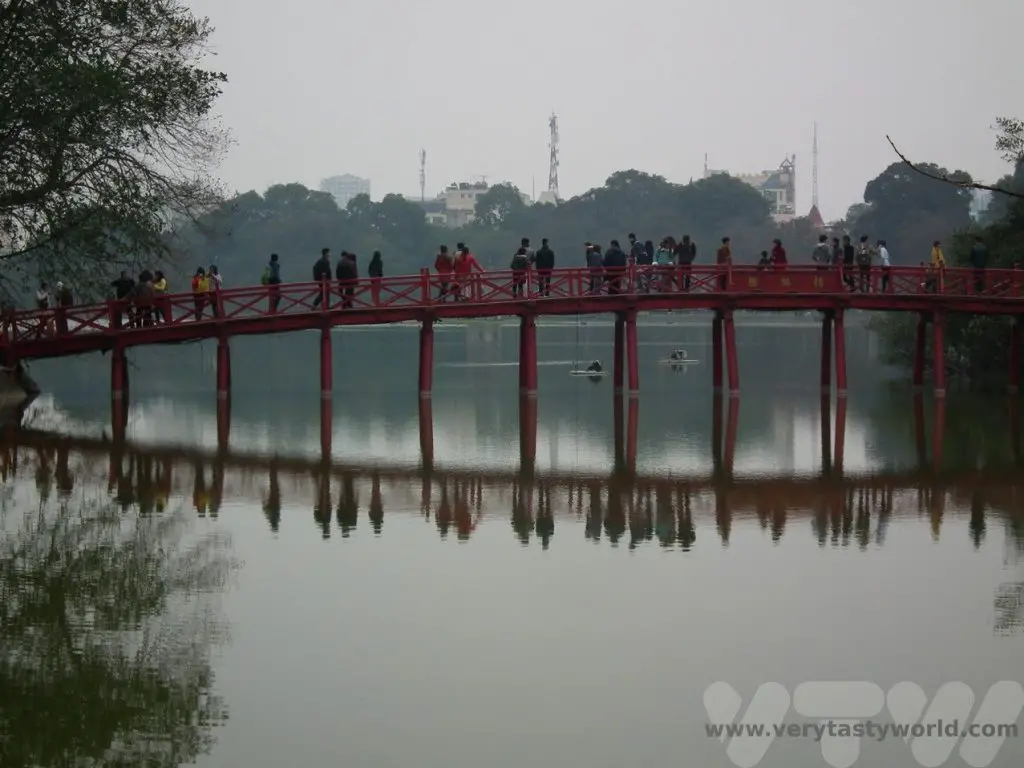
A Brief History of Hanoi
The location where the city now stands has been populated for around 5000 years, and was the capital of the Au Lac, the Vietnamese nation during the 3rd century BCE, but the area was conquered by the Han Dynasty and ruled by China for hundreds of years. In 939 the Vietnamese Ngo dynasty was founded when Ngo Quyen conquered the Chinese in the Battle of Bach Dang River. The last king of this dynasty, the sadistic Le Long Dinh died in 1009.
Power transferred to a palace guard chief called Ly Cong Uan who became Emperor Ly Thau To, founding emperor of Ly dynasty. He established a political centre in the north of the country, naming it Thang Long which means ‘ascending dragon’. Highly revered, he was the emperor who established an era of prosperity for the city. Thang Long was the capital of Vietnam until 1802 when the Nguyen dynasty moved the administration to Hue. In 1831 Thang Long was renamed Hanoi, which means ‘inside the rivers.’ Vietnam was colonised by the French in 1873 and they designated Hanoi to be the capital of the whole of French Indochina. The French abandoned Vietnam during World War 2.
Ho Chi Minh, leader of the communist revolutionary party the Viet Minh, declared Vietnamese independence on the 2nd September 1945 and established Hanoi as the capital of the Democratic Republic of Vietnam, an independent country. The city endured turbulent times during the last half of the twentieth century – the French returned in 1946 so Ho Chi Minh led a guerilla war and defeated them in 1954 in the First Indochina War.
The Second Indochina War, better known as the Vietnam War (although in Vietnam, local people refer to it as the American War) followed immediately and was fought from 1955 to 1975, eventually leading to the reunification of Vietnam. Since 1976 Hanoi has been the capital of the Socialist Republic of Vietnam.
Getting Around Hanoi
There are plenty of options for getting to Hanoi’s attractions. We stayed very close to the Old Quarter which was perfect for exploring the area. Most of the attractions mentioned here are within walking distance. Although beware, the very first thing that will strike you about Vietnam is the sheer number of scooters and motorcycles. They are everywhere!

The next thing that will strike you is – how do you cross the road? We have a helpful video guide in this post. Wandering around Hanoi is a pleasure in itself – an undeniable assault on the senses perhaps, but walking in this city is a great way to discover its marvellous nooks and crannies.
Alternatively, there are buses and taxis available for transportation.
One Day Hanoi Itinerary – Morning in The Ba Dinh District
Ho Chi Minh – The Father of the People
The morning started with a visit to the Ho Chi Minh Mausoleum on Ba Dinh Square, the final resting place of the highly revered Vietnam revolutionary leader. Inspired by Lenin’s tomb and other communist leaders, the body of Ho Chi Minh has been embalmed and lies in state, guarded at all times. It is possible to visit the grand marble construction and file past the body.
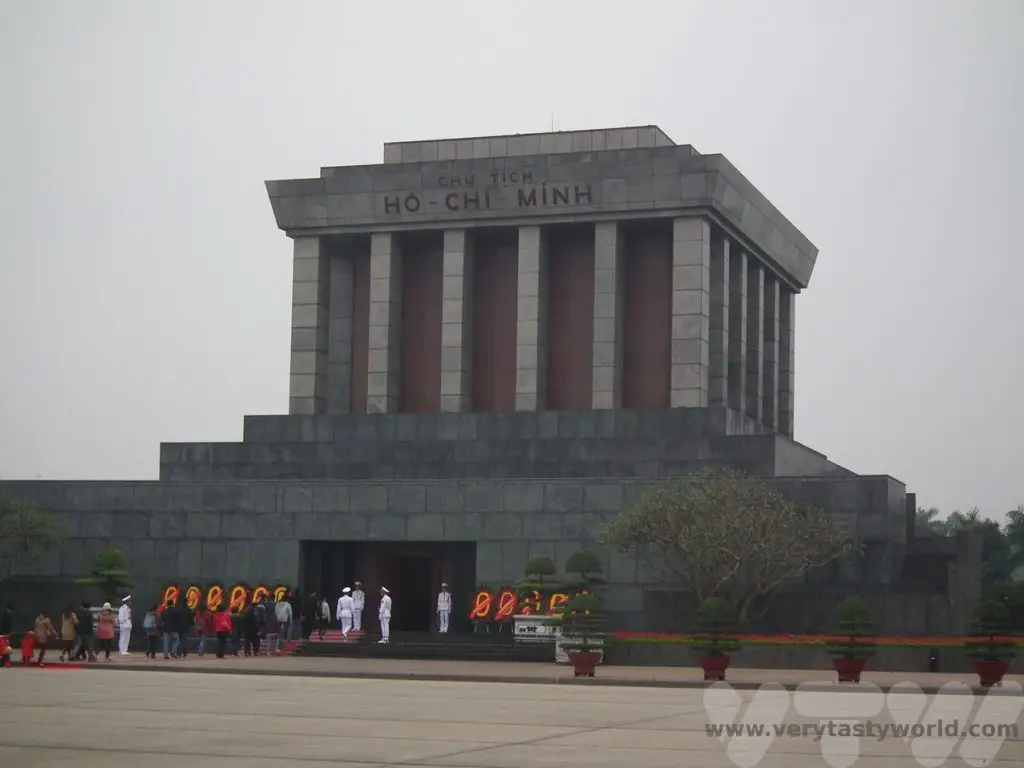
You will most likely need to queue to enter the mausoleum. Respectful dress is required (sleeveless shirts and shorts are not allowed) and you may need to leave your backpack in a locker. You are also expected to pass by the body in silence as a mark of respect. If you are visiting the mausoleum between the 4th of September and the 4th of November, the body will not be available for viewing because it goes to Russia for maintenance at this time.
Interestingly, Ho Chi Minh himself wanted to be cremated and have his ashes distributed through different regions of Vietnam. But the communist party wanted to celebrate and commemorate him, so the mausoleum was constructed in his honour. His wish seemed, to us, to be a much more humble approach.
Our next stop was the presidential palace and former residence of Ho Chi Minh.
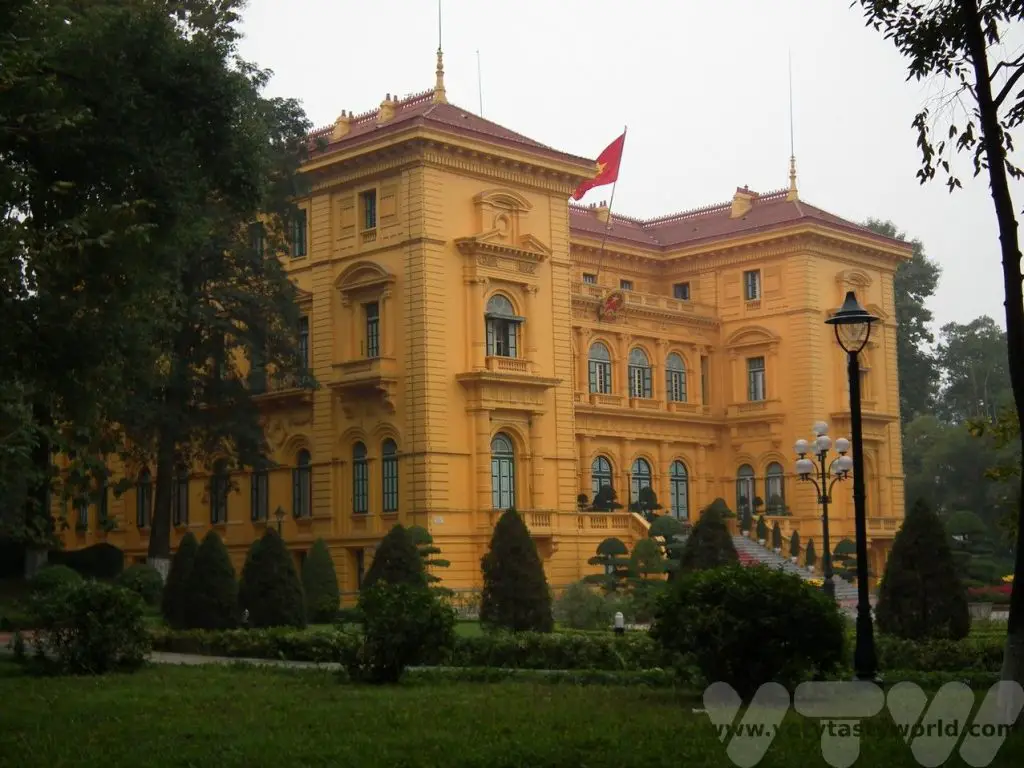
Although Ho could have used the opulent presidential palace as a residence he chose to live somewhere much less ostentatious. The two room stilt house, set amidst a pretty garden with a carp pond, was his ostensible home from 1958 to 1969. A simple traditional building with minimal facilities. It’s possible to look through the windows to see how Ho lived.
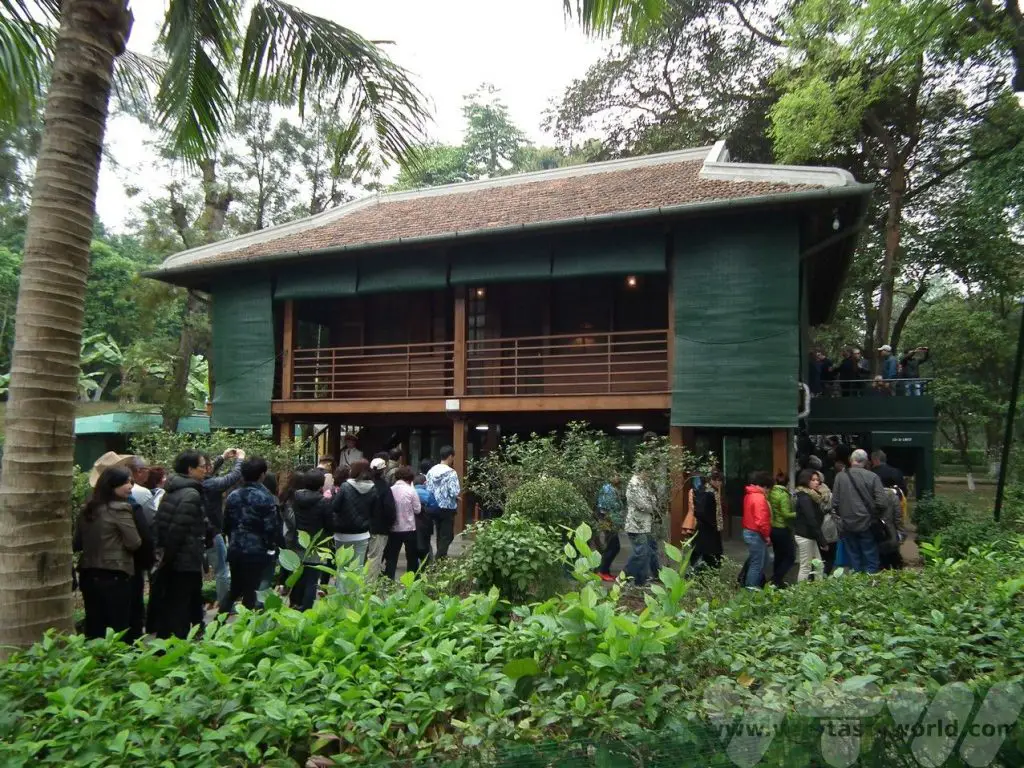

It was fascinating to learn about Ho and quite easy to understand how he was – and still is – revered by the Vietnamese people in Hanoi.
One Pillar Pagoda
Just to the south of the complex is the One Pillar Pagoda (note this is open every morning but closed on Monday and Friday afternoons). It is a wooden pagoda built on a single stone pillar that sits in the middle of a serene lotus pond that is designed to give the appearance of a lotus flower emerging from the water. It is a Buddhist pagoda and was constructed in 1049 by Emperor Ly Thai To apparently to celebrate the birth of a male heir.
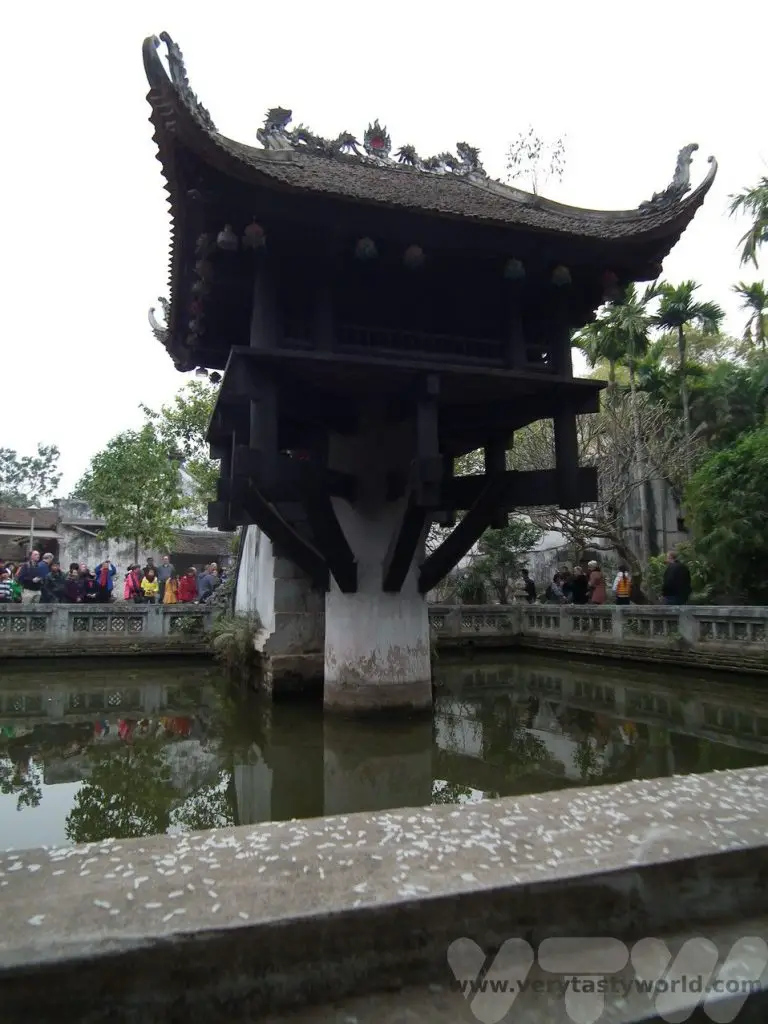
The Temple of Literature
Moving south again, the morning concludes with a visit to the remarkable Temple of Literature. It was constructed in 1070 to honour philosopher Confucious and went on to become Hanoi’s first university in 1076, a prestigious seat of learning. It is another legacy of the Ly dynasty. Students learned mathematics, literature and calligraphy. Although it is no longer a university (and hasn’t been since 1779) it is a monument to education. Even today, Vietnamese students often visit the temple to receive blessings for their own studies.
A beautiful site to visit it has five courtyards.
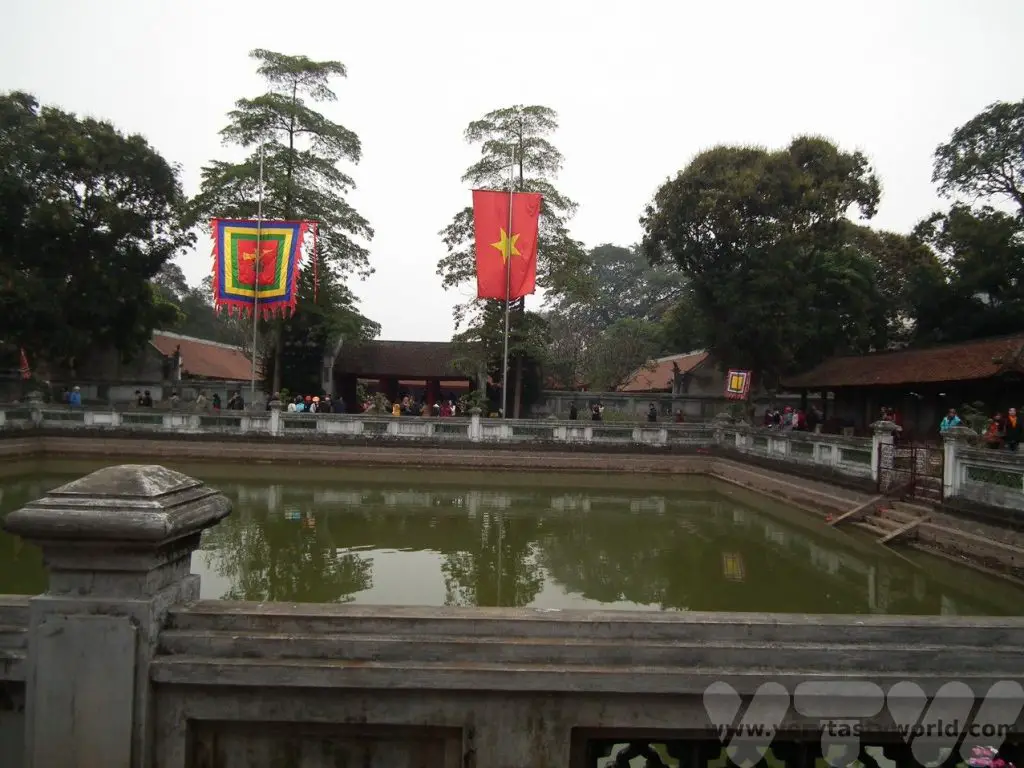
In the centre is a pool, the well of heavenly clarity. It can be seen on the 100,000 dong note.
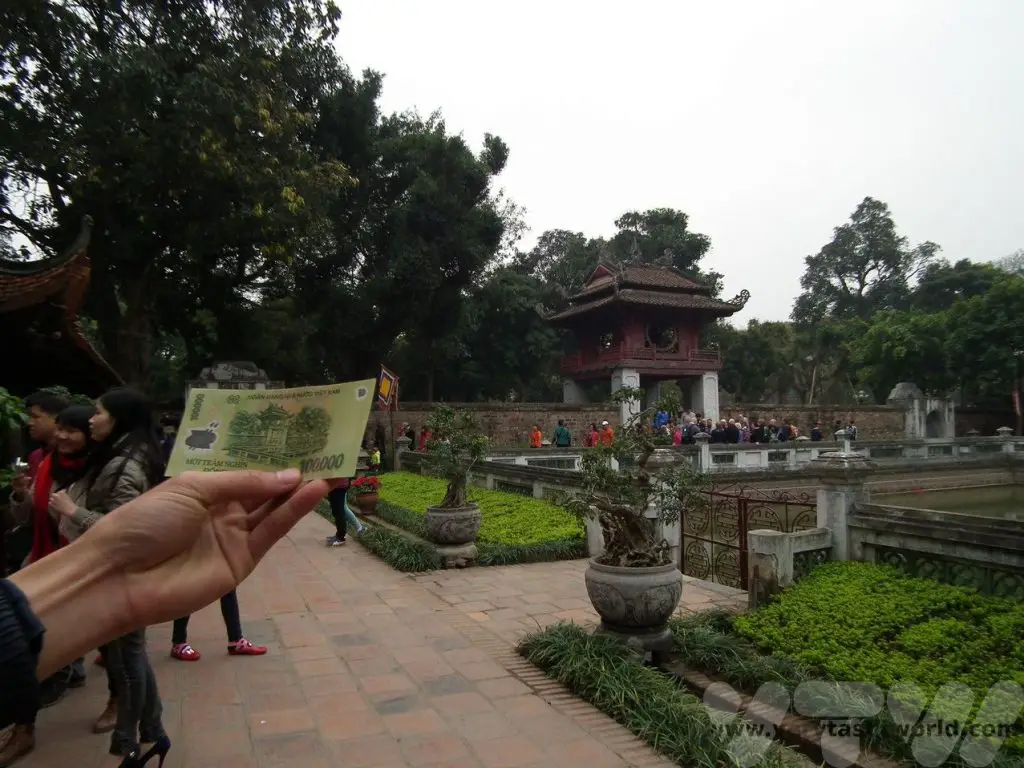
You will see many tortoises throughout the temple – these represent wisdom. There are multiple stelae onto which the names and birthplaces of graduates of the university (renowned for its incredibly difficult exams) are carved. The crane standing on top of a tortoise is a symbol of longevity.
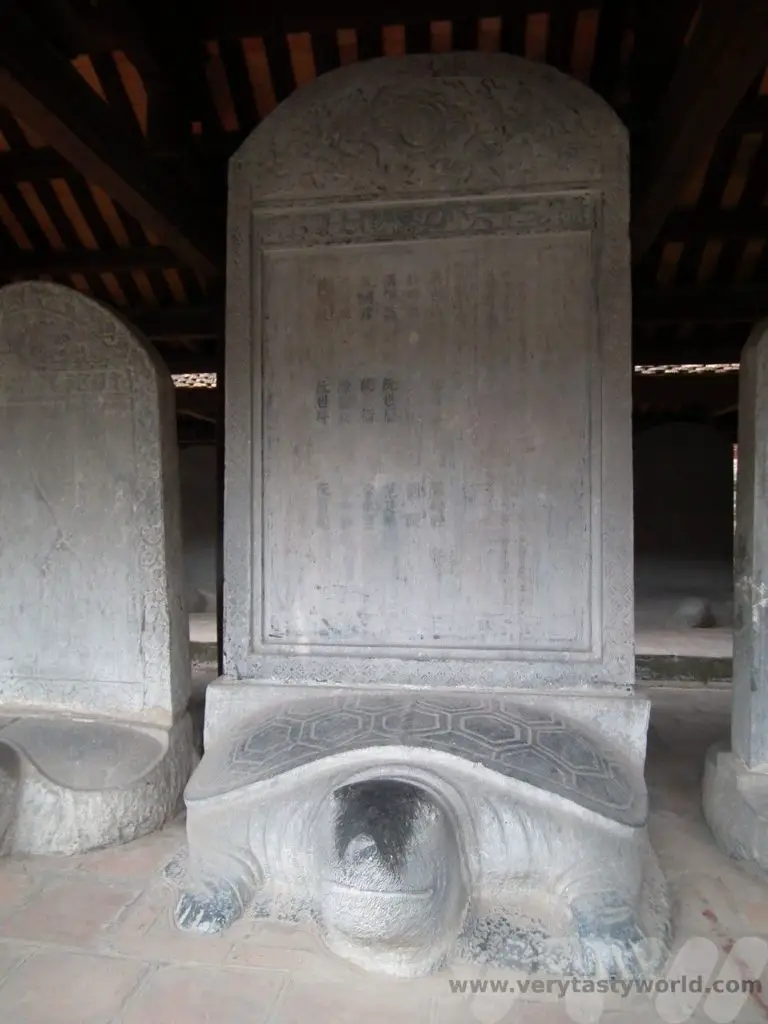

Again, this is a site that is considered hugely culturally important so it is important to behave respectfully. There are even rules about not stroking the tortoises’ heads (quite right too!).
The street on the eastern road adjacent to the Temple of Literature has a large number of restaurants. There’s a great variety of local food here, perfect for stopping for lunch.
One Day Hanoi Itinerary – Afternoon In The Old Quarter
Just up the road from the Temple of Literature is the Vietnam Museum of Fine Arts. If you like art, especially discovering local art, this is definitely a must-see attraction. It’s perfect for a leisurely after-lunch visit.
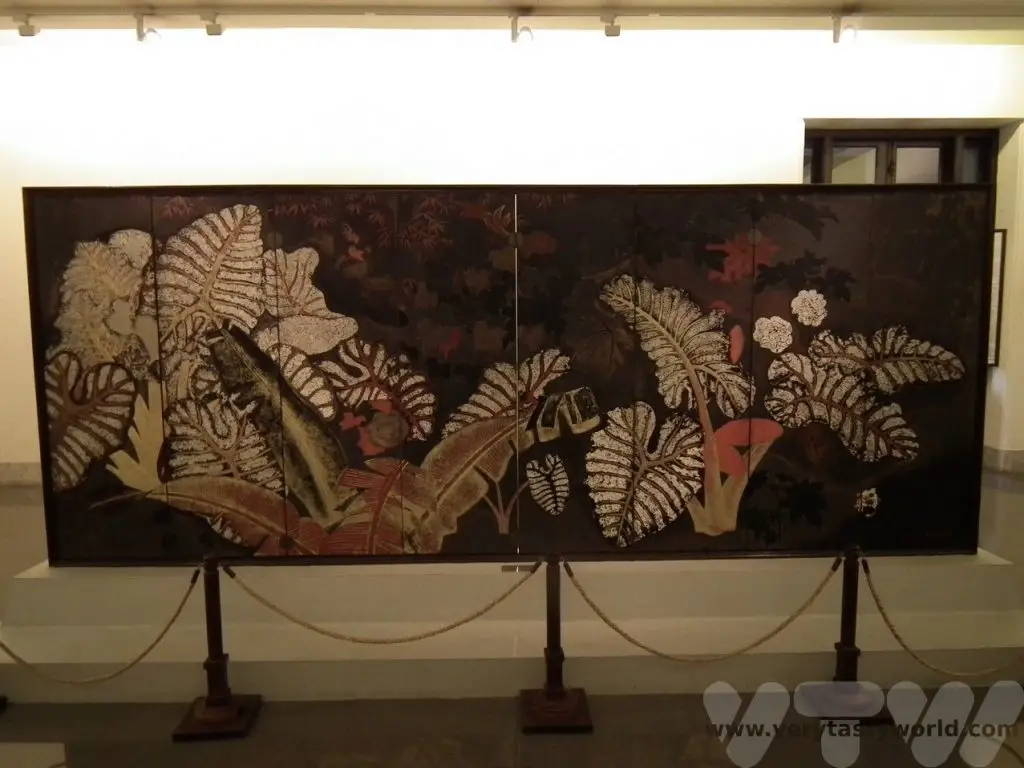
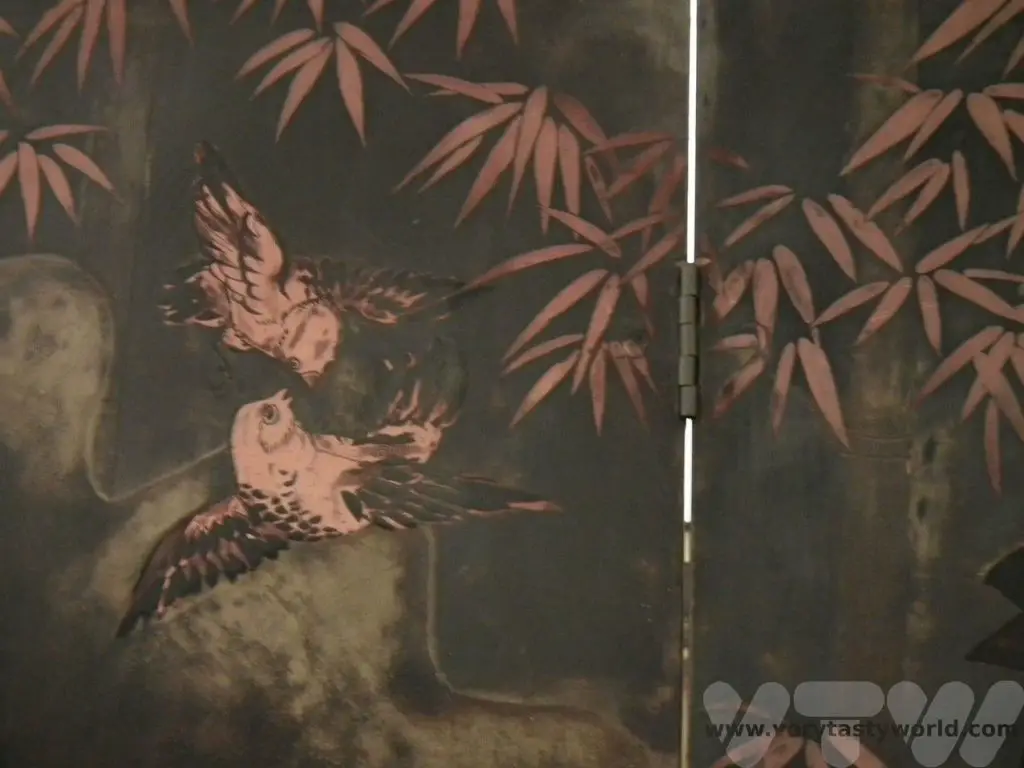
Hoan Kiem Lake
Visiting Hanoi’s old quarter, which lies around a kilometre to the east of the museum. Follow Trang Ti to reach Hoan Kiem Lake (also known as the Lake of the Restored Sword) and the Ngoc Son Temple.
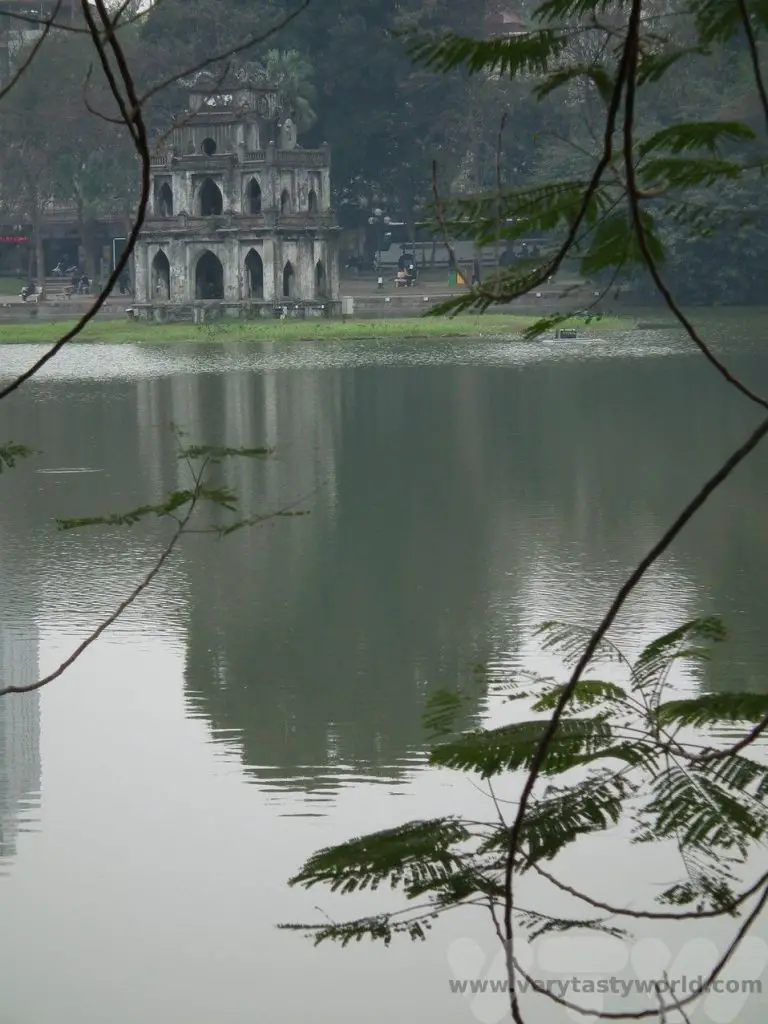
Again, this is a hugely important historic area with a legend that dates back to the founding of Hanoi (as Thăng Long) by Emperor Ly Thai To. A giant golden turtle lived in this lake and gave the Emperor a magical sword which he used to defeat the Chinese occupiers. As soon as he had won the battle, Ly Thai To respectfully returned the sword to the turtle, who dived back into the lake in order to give it back to the gods. It’s very pleasant to walk around the lake.

The lake has an island where the Ngoc Son Temple, also known as the Temple of the Jade Mountain, is situated. It is accessible via a vermillion bridge.
It celebrates Van Xuong who was a revered scholar, La To, and General Tran Hung Dao who defeated the Mongol invaders in the 13th century, a glorious victory.
A Cyclo Tour
An enjoyable way to explore the old town is via a cyclo tour. An hour’s tour takes in the atmosphere of Hanoi’s old quarter and is a relaxing way to end this busy day of sightseeing. You also get to experience the thrill of being on the road amidst all those scooters – an experience in itself.
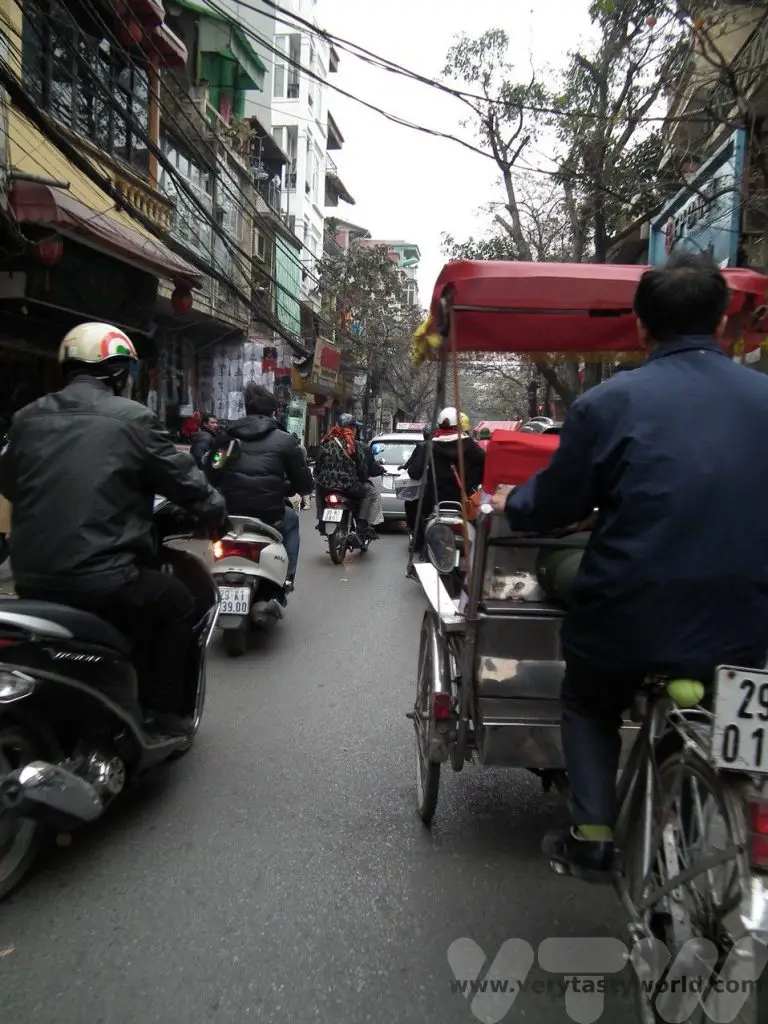
The old quarter is comprised of 36 streets located within a square kilometre just north and west of the lake. The streets have been named for the artisans and craftspeople who traded specific merchandise in that street: bamboo street, silver street, decoration street and silk street to name a few.

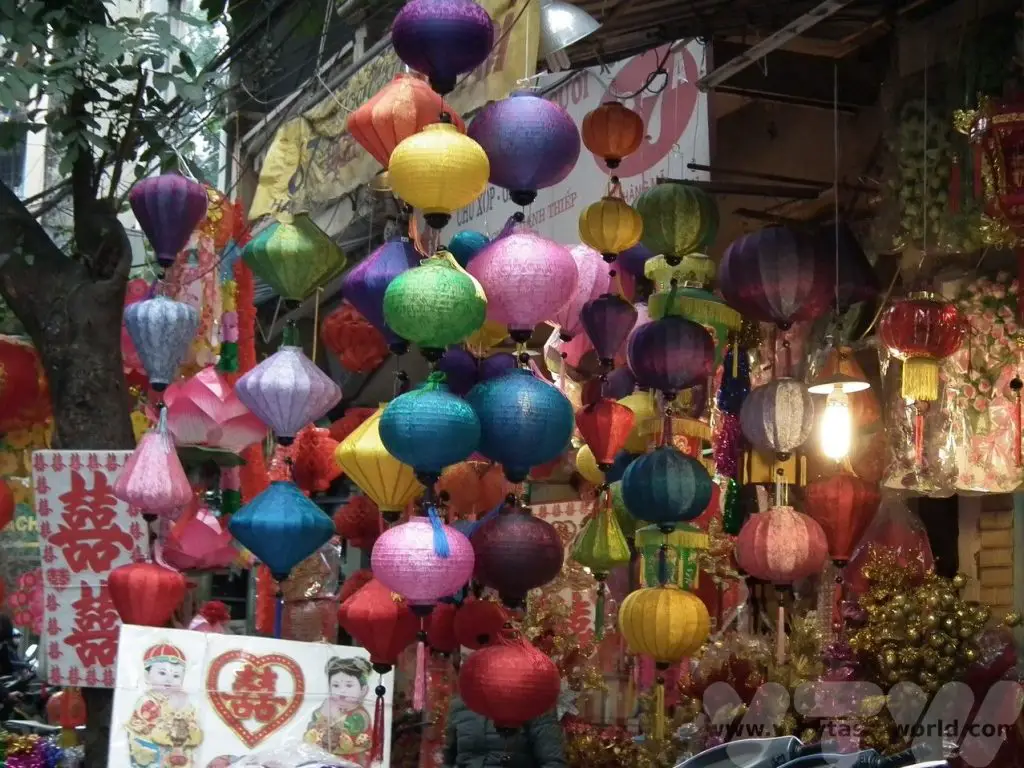
Part of the tour can include a visit an ancient Vietnamese ‘long house’. One of the characteristics of the architecture in Hanoi is that the houses are very thin and tall. The width can be as short as just 2.5m, sometimes up to 5m. However, when you go inside the houses seem to stretch forever. This is because properties used to be taxed according to the amount of façade on the street, so they were constructed this way to minimise costs. This house had a lovely open feel to it thanks to its open balconies, despite the narrow width.
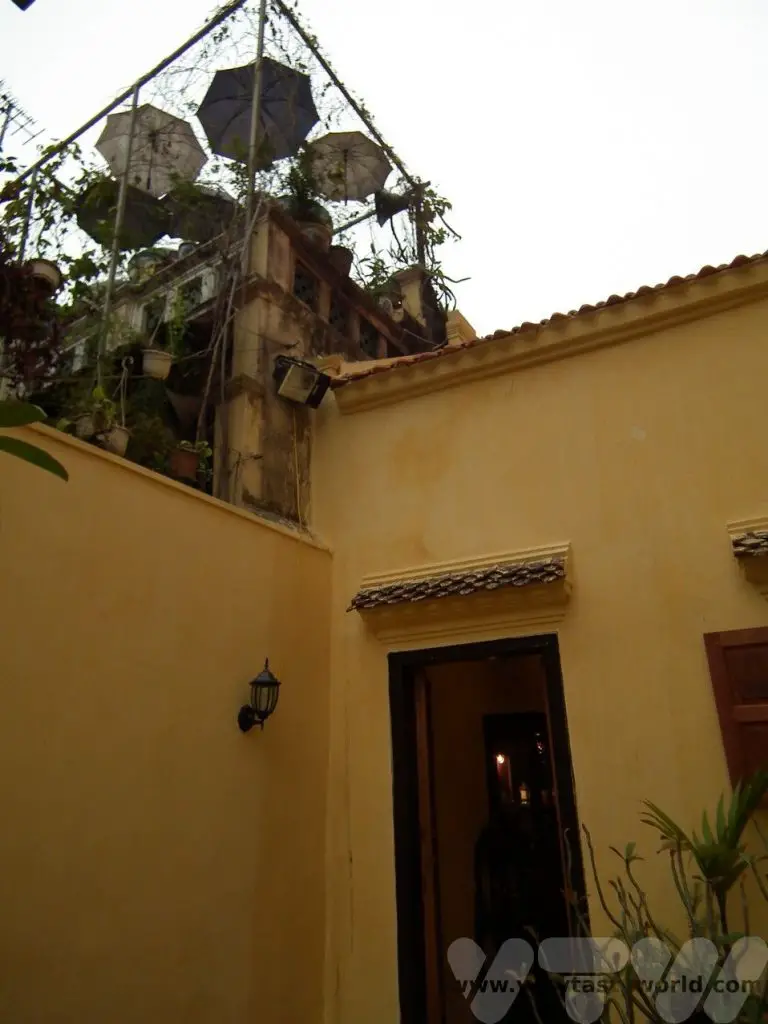
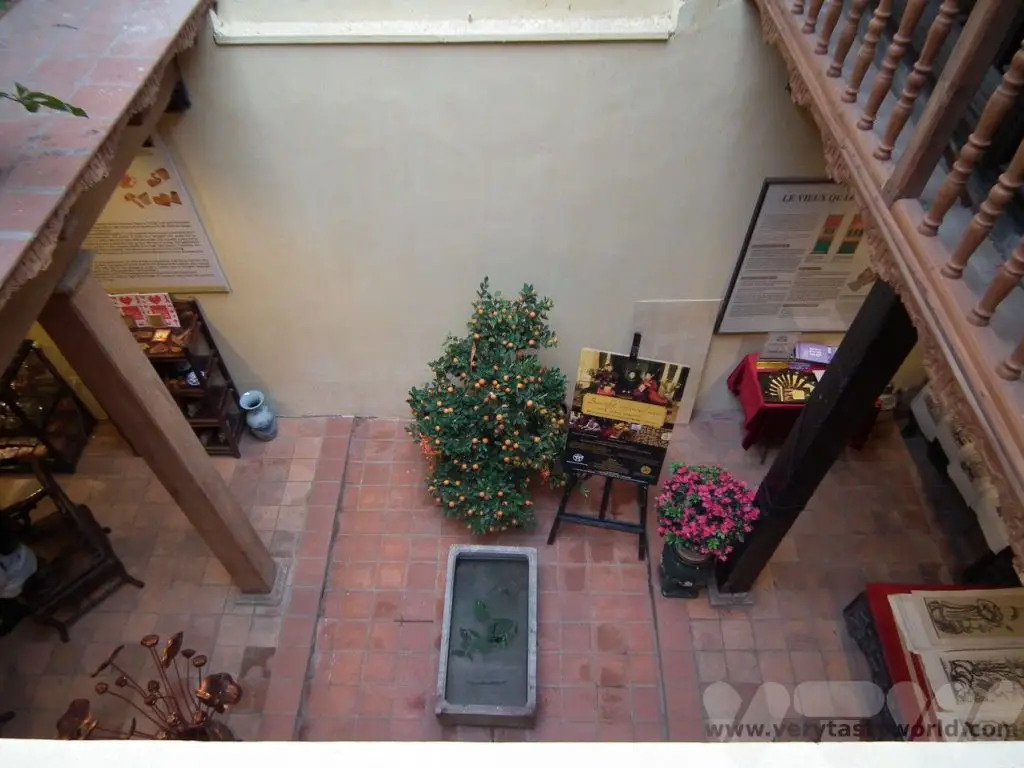
Evening in Hanoi
There are lots of places to eat in Hanoi, ranging from posh dining to street food. The old quarter is a perfect place to hang out in the evening. There is a night market right in the heart of the area. Another popular place is the Bia Hoy Corner which is frequented by both tourists and locals. Be prepared for plastic seats, street snacks, cheap beer and a chance to get chatting with new friends.
The Water Puppet Theatre is a popular attraction, and it’s worth making a booking. It’s located by the north side of Hoan Kiem Lake.
While this is a pretty intense itinerary, it is possible to make the most of a single day in Hanoi.
Vietnamese Food
Just as there are differences between the culture of north and south Vietnam, the cuisine reflects this as well. Food from northern Vietnam is subtle with a balance of flavours, whereas southern dishes are often more spicy. And even though regional variations exist, pho can be found all over Vietnam and is the country’s national dish.
There’s No Business Like Pho Business
Pho is a noodle soup – soft rice noodles served in a warm, very slightly spicy, bone broth with thin slices of meat such as beef (pho bo) and chicken (pho ga). These are the traditional varieties of pho in Hanoi.
Pho is a staple of Vietnamese cuisine. Its pronunciation is like the French word, feu (fire), which is appropriate because it’s thought that the name derives from the term ‘pot au feu’, or French beef stew. It’s so good that you can have it for breakfast, lunch or dinner. Or indeed breakfast, lunch and dinner if you feel so inclined. Yes, we did. In Vietnam it is primarily a breakfast dish – healthy and hearty – it truly sets you up for the day ahead.
The soup is meant to be drunk. Like Japanese ramen, the broth is absolutely key to the flavour. The best broths will have been simmered for hours. A beef stock will use the bones, a chicken stock often uses an entire chicken. Spices such as cinnamon, ginger, cardamom and cloves may add a subtle heat in addition to flavour. The soup should be clear.
The noodles are soft but with a bit of bite. They are cooked separately inside a wire basket that is plunged into boiling water for a few minutes. These are then added to the serving bowl before the broth and meat are added.
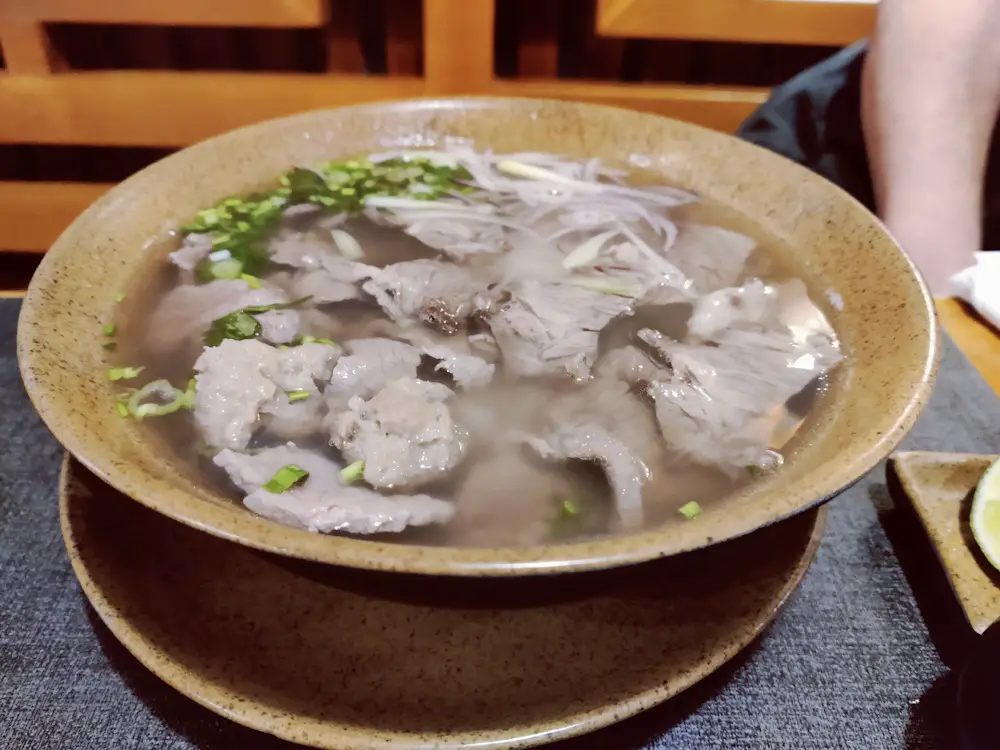
One of the best things about pho is that you can flavour it to your own taste. Alongside each nourishing bowl of pho a plate containing all sorts of potential flavours and textures will be served. Want heat? Add chilli (the smaller the chilli, the hotter the spice). Like sour flavours? Squeeze in some lime juice.
Texture and crunch? Add beansprouts or green onion. More flavour? You’ll be offered a variety of aromatic herbs, commonly coriander, holy basil and mint which can be added in whichever ratio you desire.
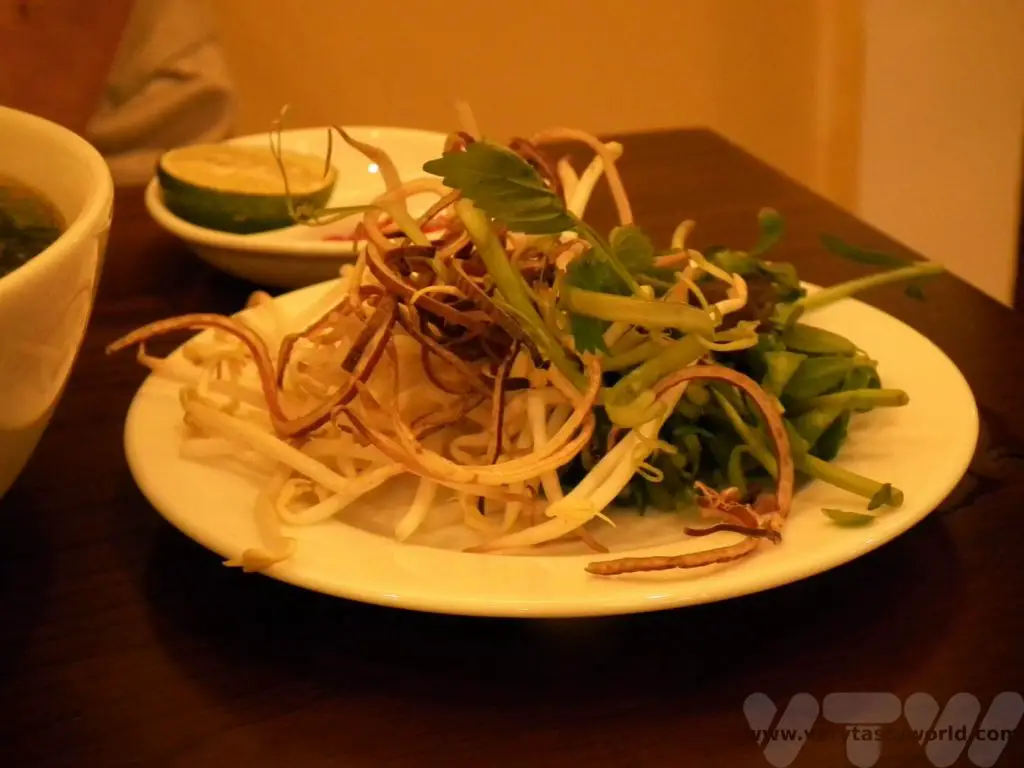
But the key is making sure that you taste the broth before you start wading in with additional garnishes. And, while Vietnamese pho restaurants in other countries often offer sauces such as hoisin or chilli to add to the soup, it is unlikely that you would ever see this in Vietnam. It would be a shame to add sauce which detracts from the delicate flavour of the broth.
You eat pho using chopsticks to pick up the meat and noodles. There is usually a spoon available to sip the broth. Actually, it’s okay to bring the bowl to your lips and drink directly from it. Slurping is fine. For British people who were brought up to believe that it’s rude to slurp your soup, it’s actually quite difficult to do this without spilling the broth or accidentally spluttering! A very positive side effect of consuming so much pho was that we were kept well hydrated in the warm, humid climate.
Bun Cha Ha Noi
Another typical dish from the northern region is Bun (noodles) Cha (grilled pork). It is a delicious combination of grilled pork slices and/or meatballs accompanied by rice noodles and herbs, in a spicy and flavoursome sauce. It is thought to have originated in Hanoi.
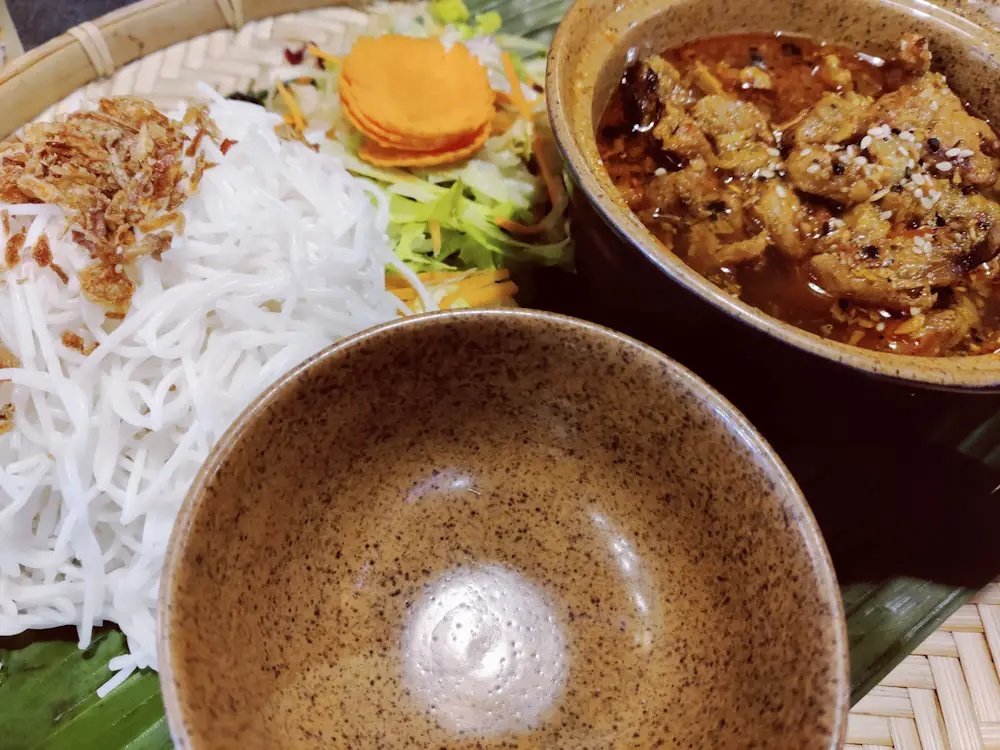
Bo La Lot
Another delicious dish is Bo La Lot – grilled beef balls wrapped in betel leaves. Served with a sweet and fragrant dipping sauce, these are juicy, full of flavour and make for a brilliant starter or snack.
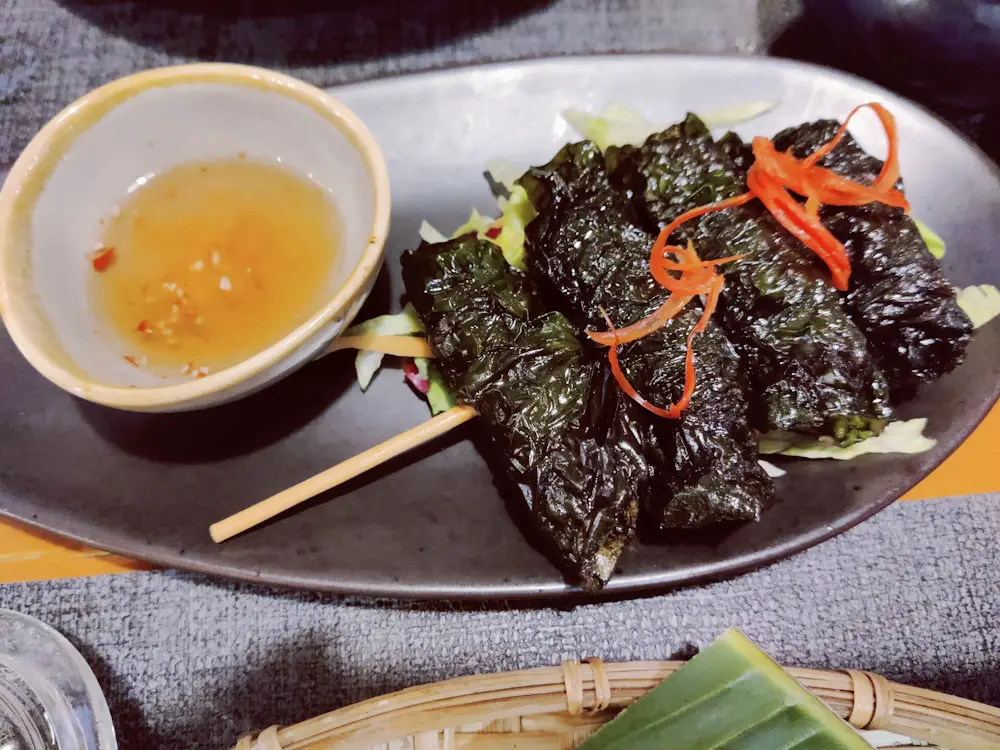
One of the best garnishes is Vietnamese pickled garlic, a zingy condiment. We have a recipe for this – it’s great for accompanying Vietnamese food but really versatile for other dishes as well.
Related Posts You May Enjoy
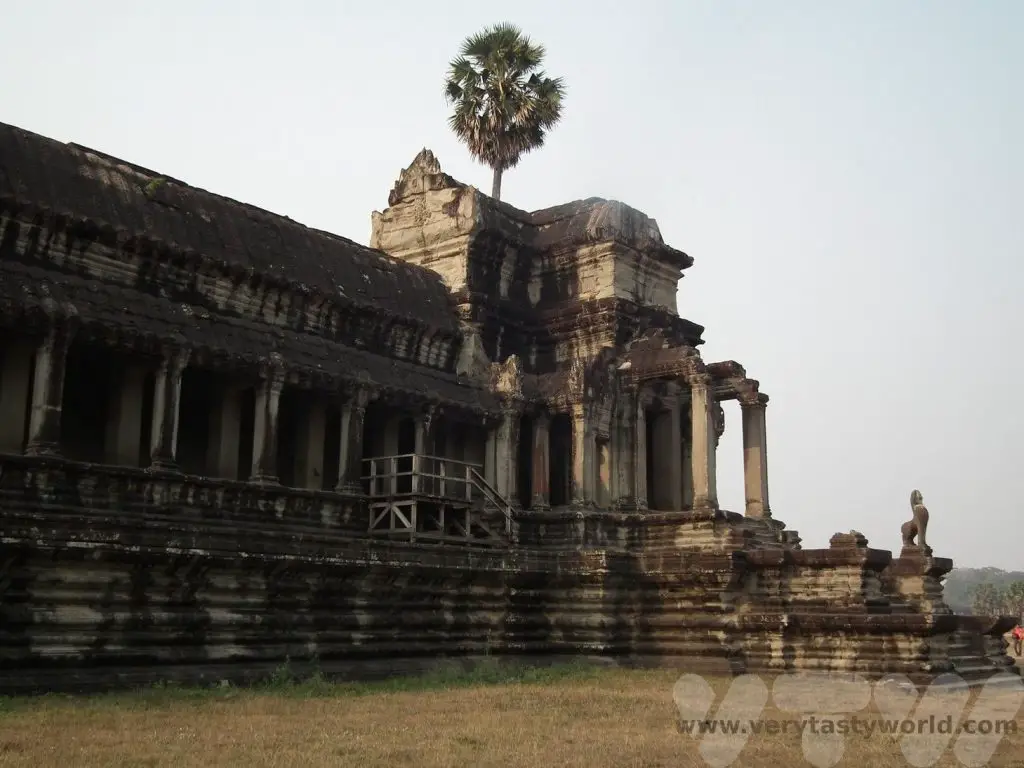
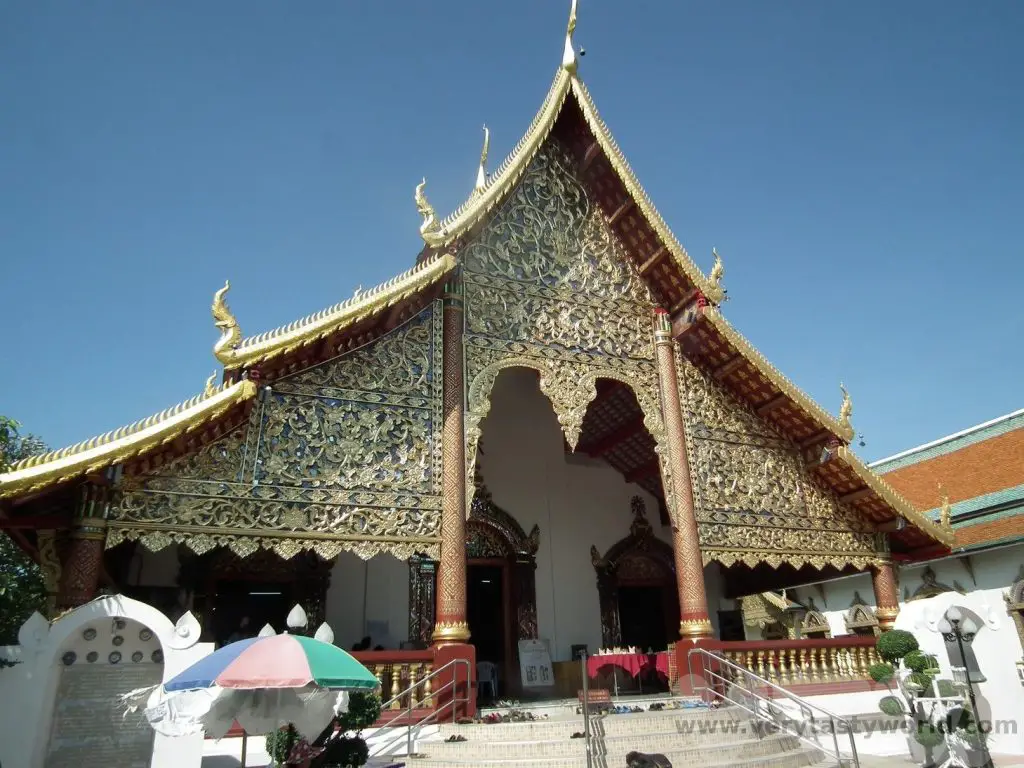
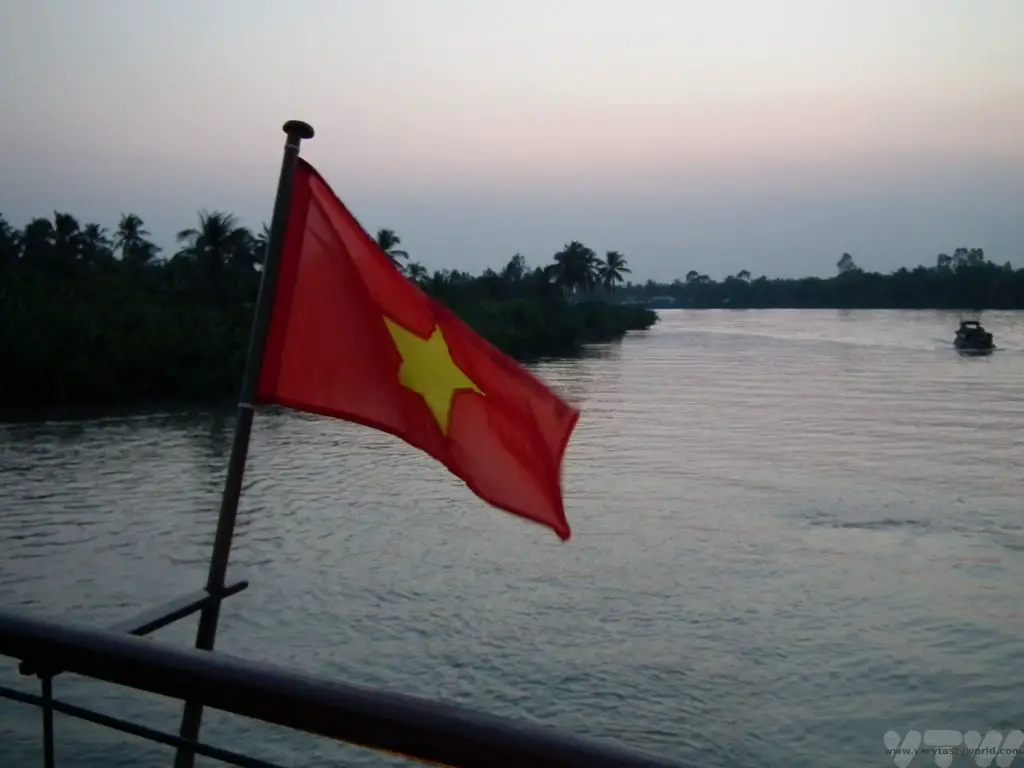

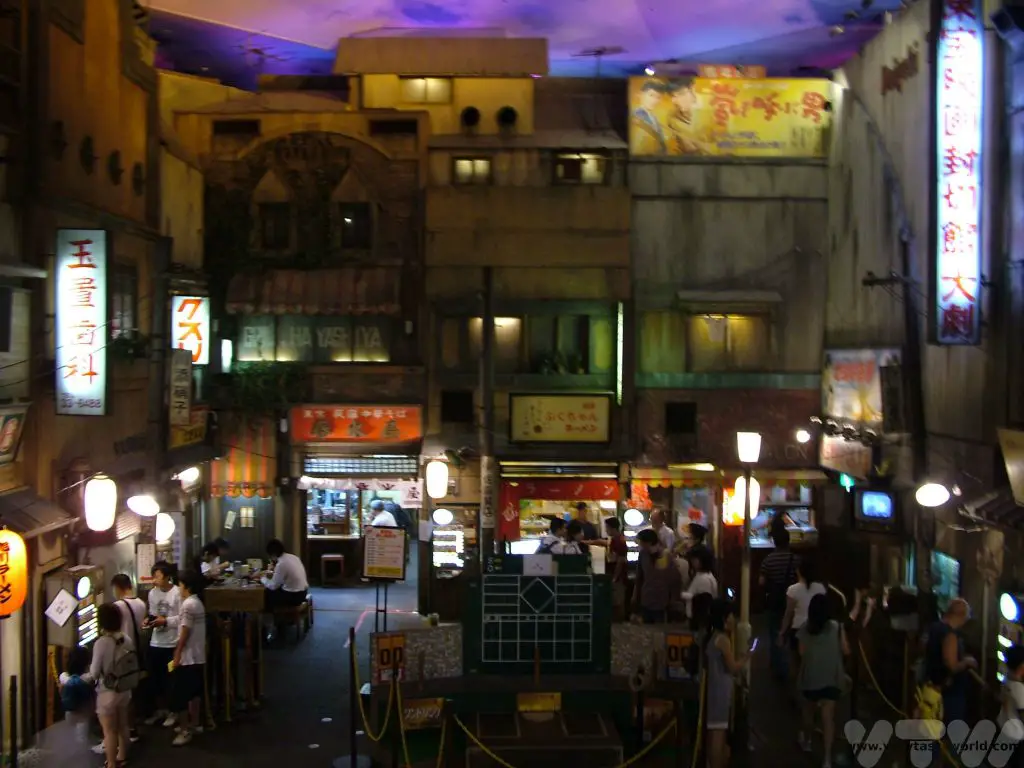
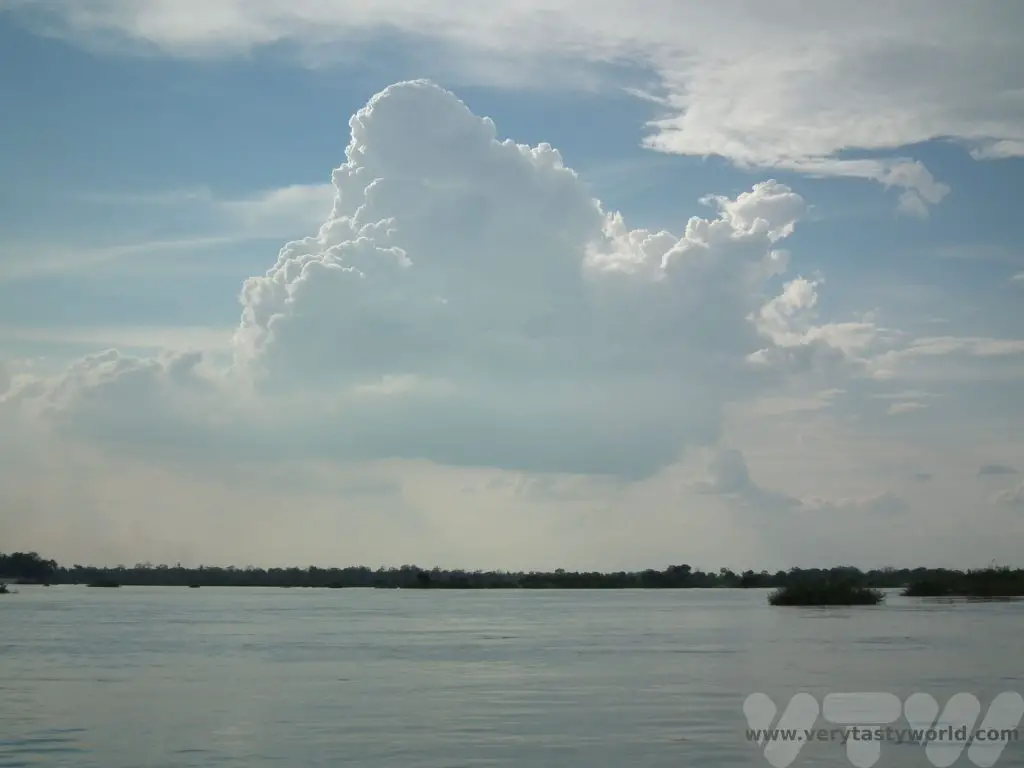
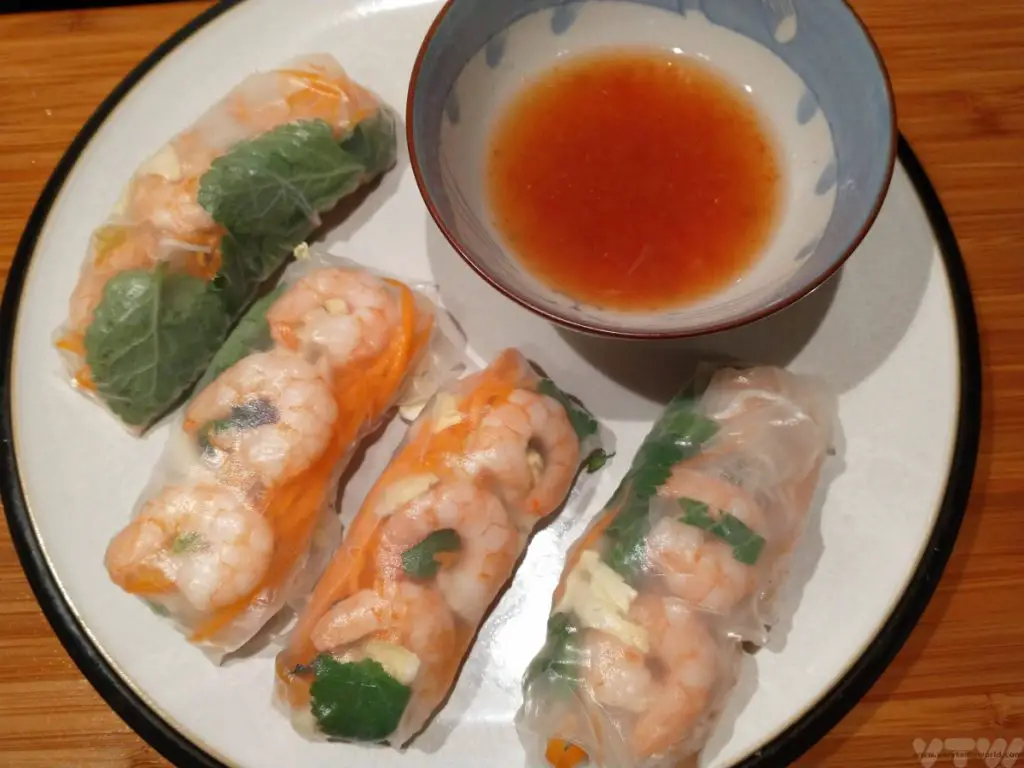
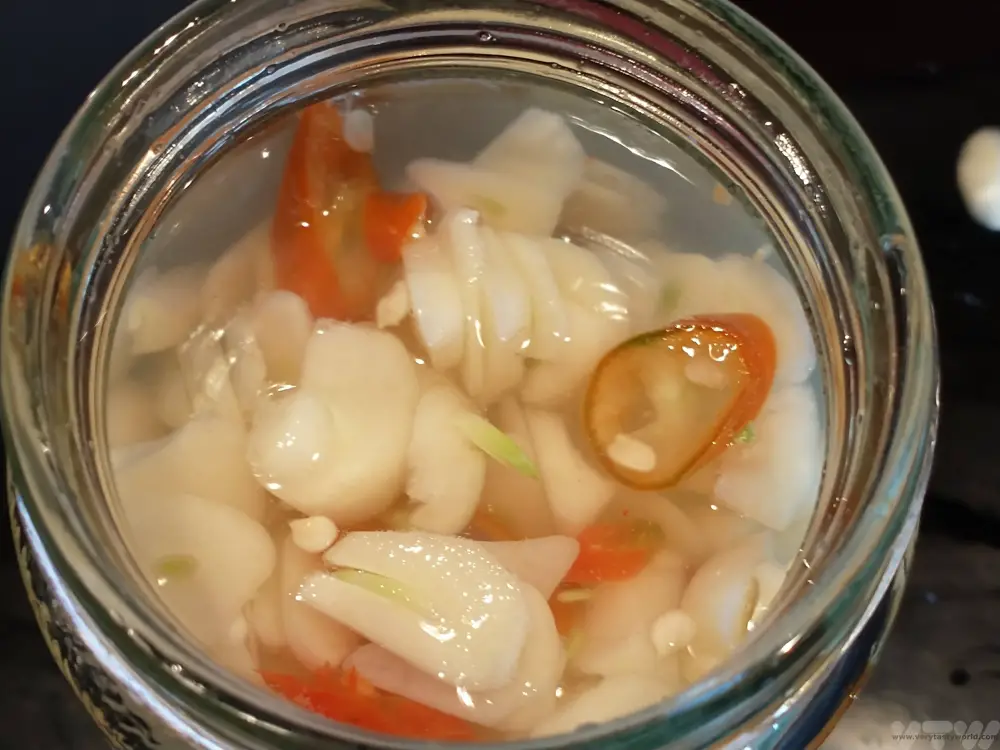
RECIPE: Vegetable Biryani Tamil Nadu Style
Biryani is a delicious aromatic spicy rice dish that is a meal in itself. Eaten all over India, it is also very popular in Tamil Nadu, the south eastern state which runs from Chennai in the north, all along the Bay of Bengal to Kanyakumari in the south. We visited this brilliant state a couple of years ago and were not only inspired by wonderful places to visit but also the deliciousness of south Indian cuisine. And we have a recipe for vegetable biryani Tamil Nadu style.
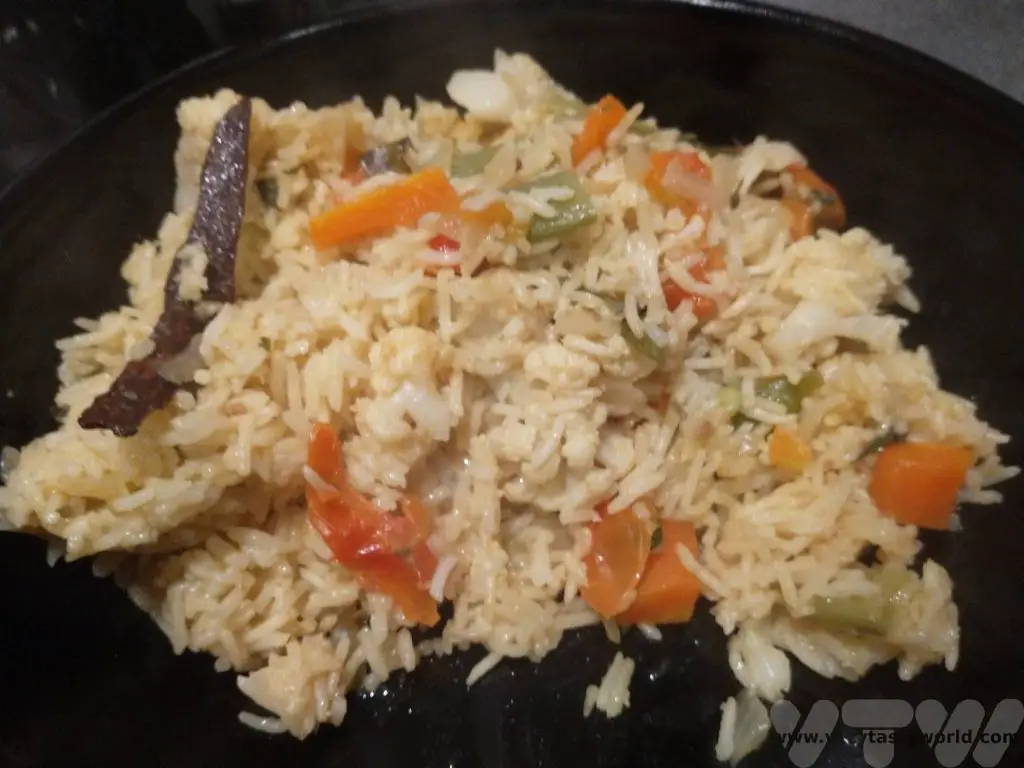
Although biryani is best known as a dish from India it is thought that it probably originated in the Middle East. The Persian word ‘birinj biriyan’ means ‘fried rice’. The cuisine of the Mughals, who ruled much of South Asia between the 16th and 19th centuries, had a significant influence on Indian food. The Mughals also introduced ingredients, such yoghurt, and also the ‘dum’ technique of cooking the dish over a low heat in a sealed pot which helps retain all the flavours as the food cooks.
This recipe comes from Tamil Nadu courtesy of our dear friend, Shankari. We were lucky to be gifted a traditional Indian pressure cooker which is absolutely perfect for cooking this delicious biryani but we have adapted and tested the recipe for a standard hob top pan as well. We often use a rice cooker to cook rice but we find it really doesn’t work very well with biryani because you are sautéing spices and vegetables beforehand and the rice is layered on top of these. A rice cooker can do this to some extent but not really enough to properly cook the spices.
Many people in Tamil Nadu are vegetarian so this dish contains no meat. When we visited this region every restaurant offered both a veg and non-veg meal option. This biryani could easily be adapted to include lamb or chicken but we love the simplicity of the vegetables and it is so tasty, you really don’t miss the meat. The spice combinations are warming and aromatic. If you wish to make the dish vegan, fry the ingredients in oil and omit the yoghurt.
The process involves cooking whole spices first to release their oils and to maximise the flavour. We leave the whole spices in the finished biryani but they aren’t really designed to be eaten – they won’t harm you if you do but you might get an overly intense hit of flavour if you chomp on a clove!
The quantities here will serve 2 hungry people but you can double up to feed more people, or you can use these quantities if you are accompanying the biryani with other dishes. We use a cup that is around 200ml in volume.
How To Make Vegetable Biryani from Tamil Nadu
Ingredients:
1 bay leaf
1 stick of cinnamon
3 green cardomom pods
3 cloves
2 tbs mint leaves
2 tbs coriander leaves
½ teaspoon red chilli powder
½ teaspoon coriander powder
1/8 teaspoon turmeric powder
½ teaspoon garam masala
1 cup of Basmati rice
2 tbs ghee or butter (use vegetable oil for a vegan biryani)
Small, finely chopped tomato
2 tbs natural yogurt
1 tsp ginger garlic paste (you can buy this frozen or in jars, or you can crush 2 cloves of garlic and a thumb of ginger in pestle and mortar)
1 green chilli (add another if you like spice)
Chopped vegetables (anything you like but beans, carrot, peas and cauliflower work really well)
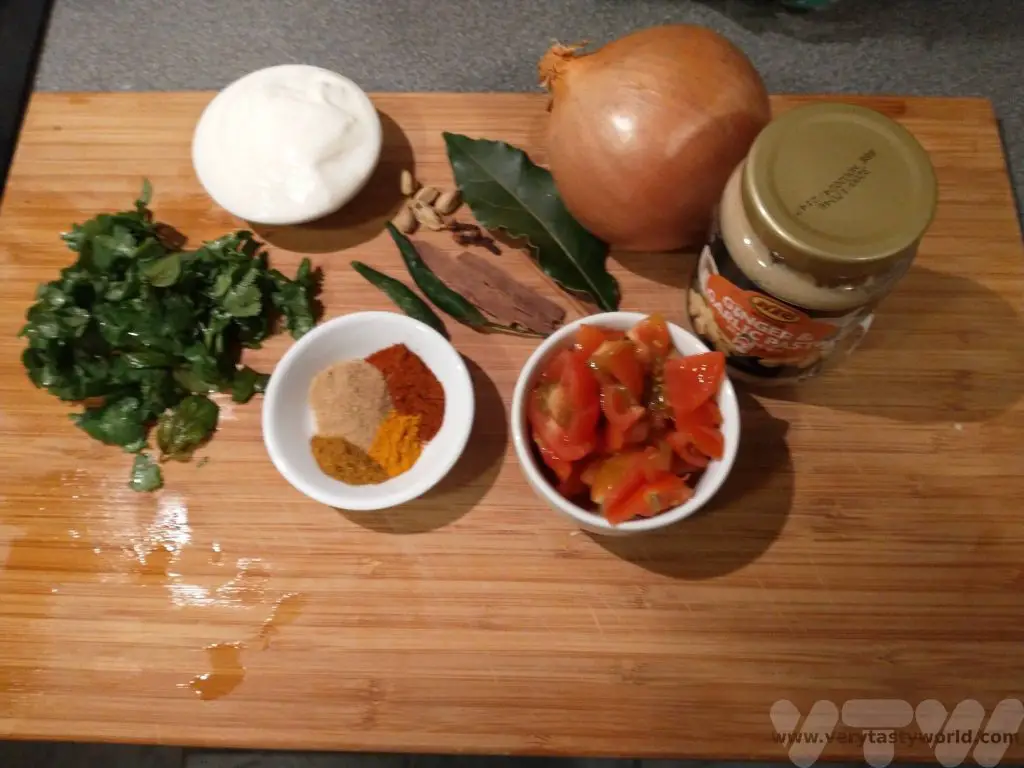
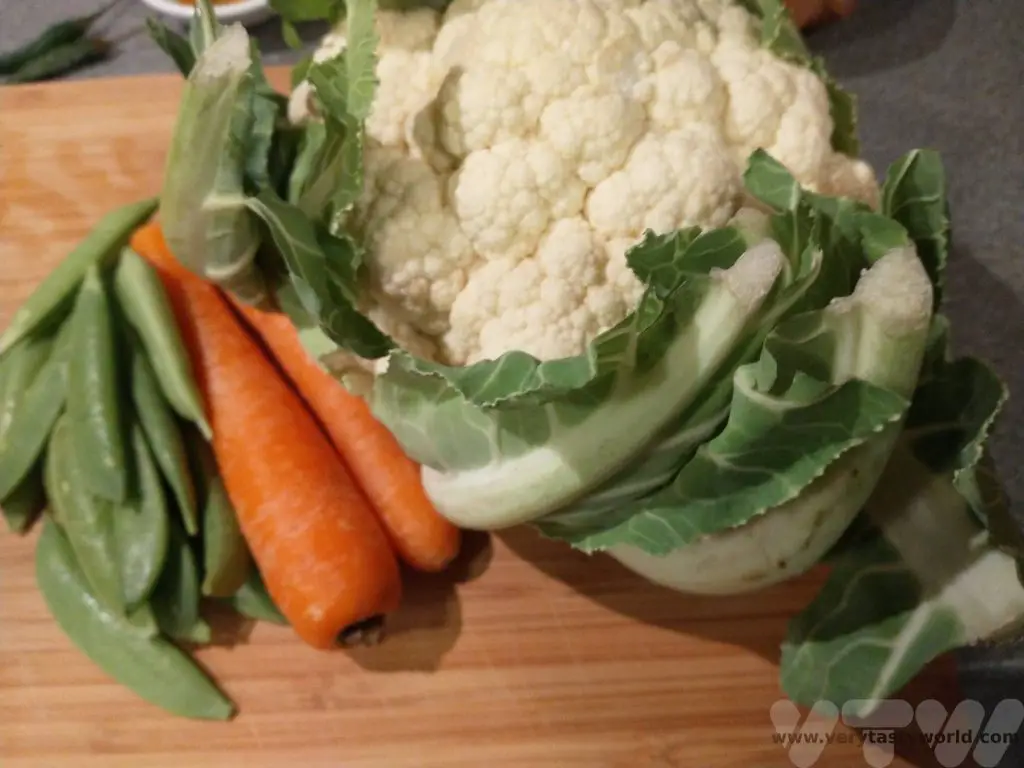
Method:
Add 1 cup basmati rice to a bowl and soak it in water for 30 minutes.
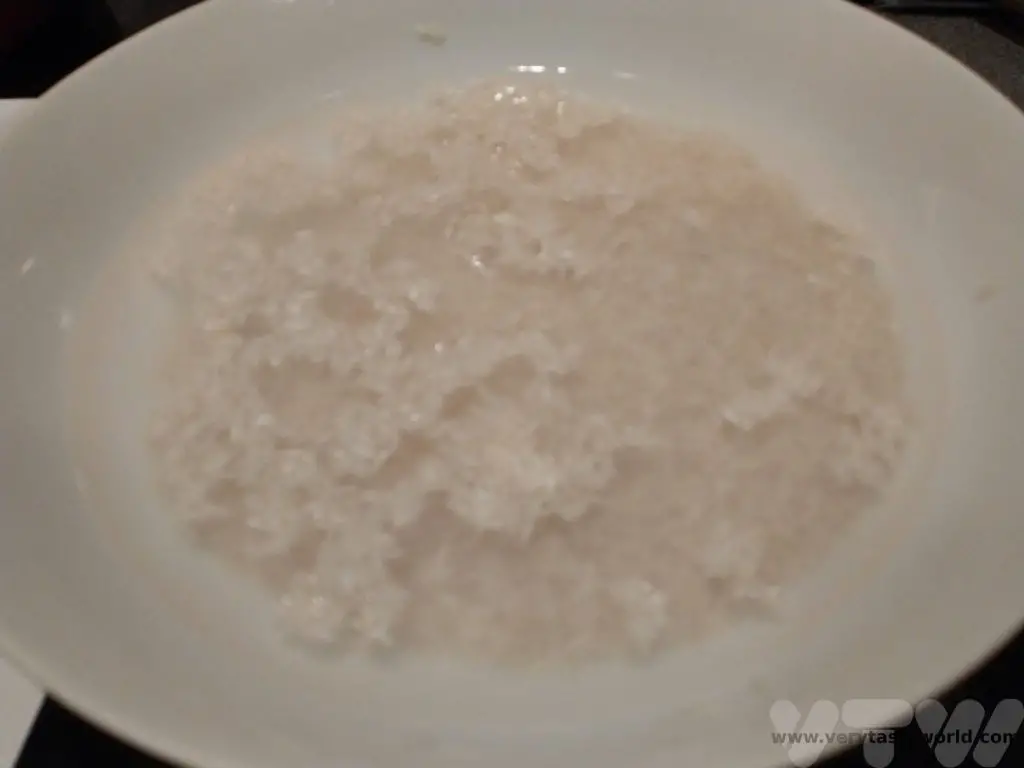
Heat 2 tablespoons oil or ghee or butter in a pot or pressure cooker.
Add whole spices:
1 bay leaf
1 inch cinnamon
3 green cardomom
3 cloves
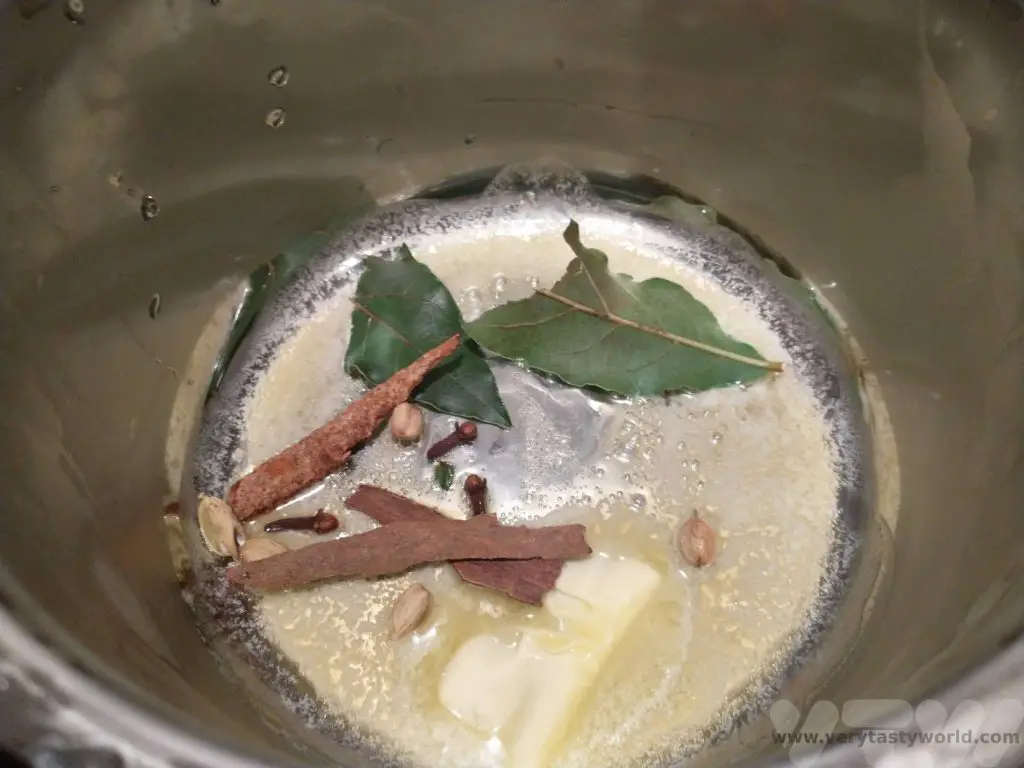
When the spices, begin to crackle, add 1 sliced onion and 1 chopped green chilli. On a medium heat, sauté until the onions turn golden.
Add 1 teaspoon ginger garlic paste. Sauté this for a couple of minutes until the raw smell goes away.
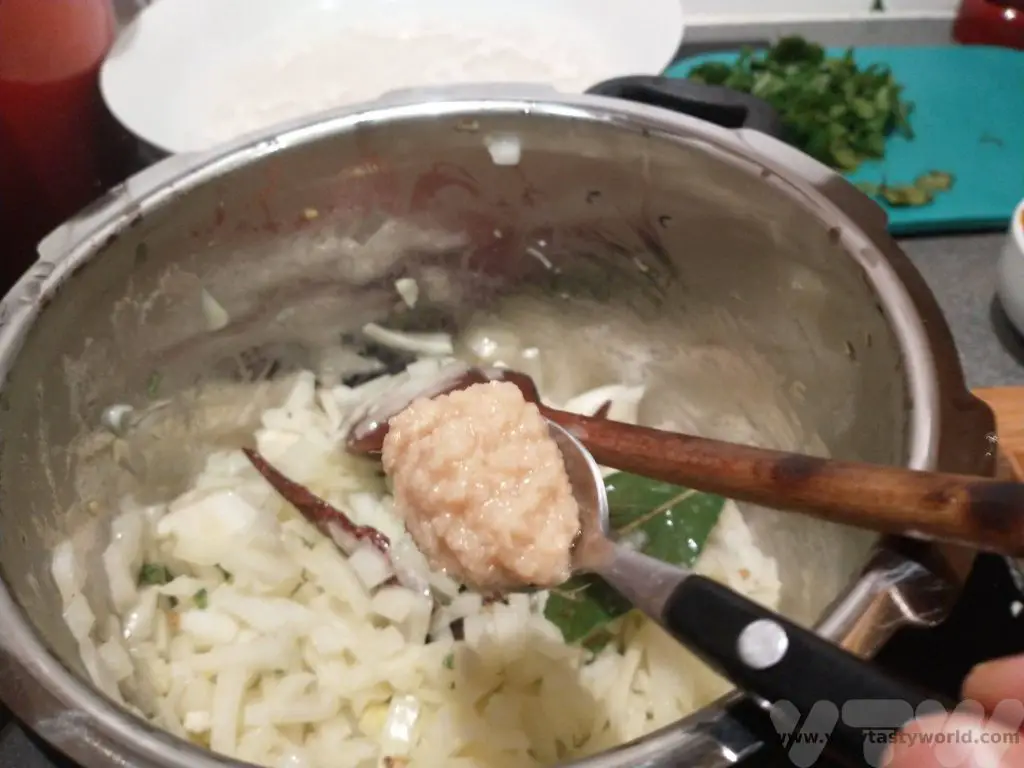
Add 1 cup chopped mix veggies and sauté on a medium heat for 2 -3 minutes.
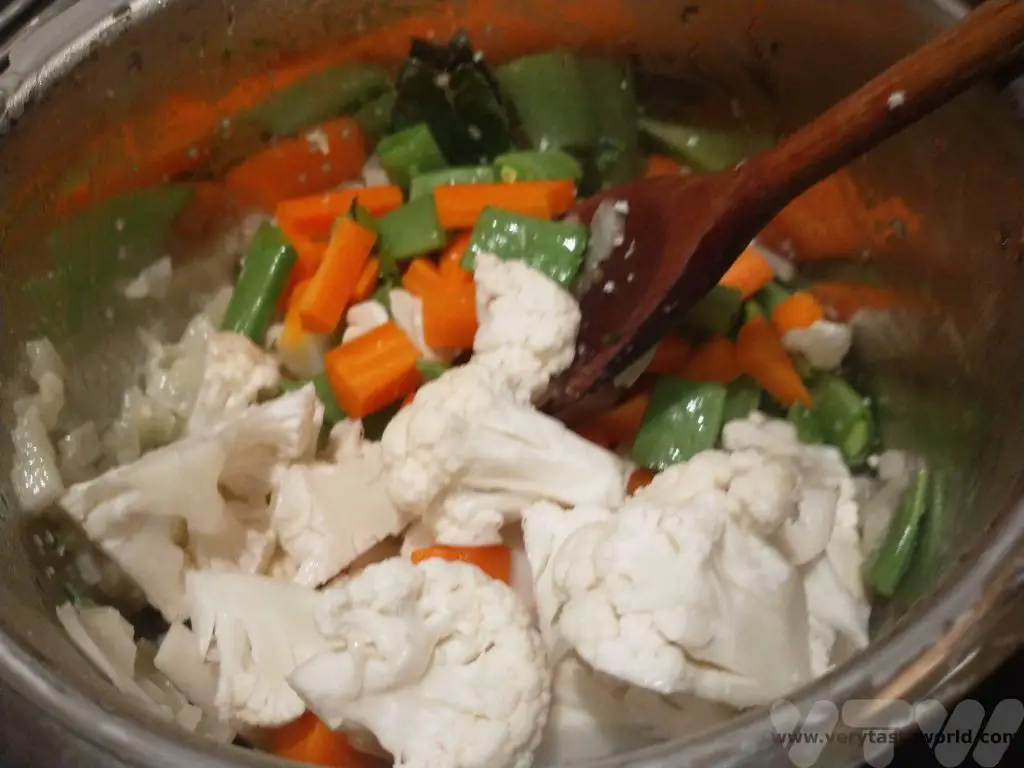
Add the following:
2 tablespoons mint leaves
2 tablespoons coriander leaves
½ teaspoon red chilli powder
1/2 teaspoon coriander powder
1/8 teaspoon turmeric powder
½ teaspoon garam masala
1 small finely chopped tomato
2 tablespoons of yogurt
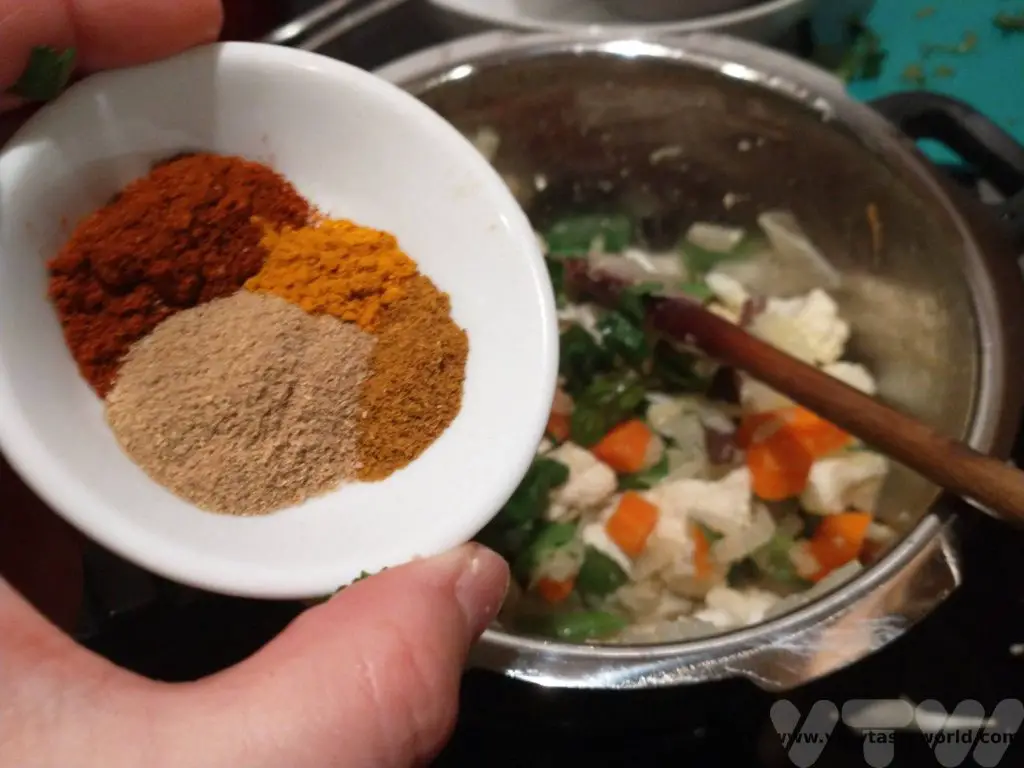
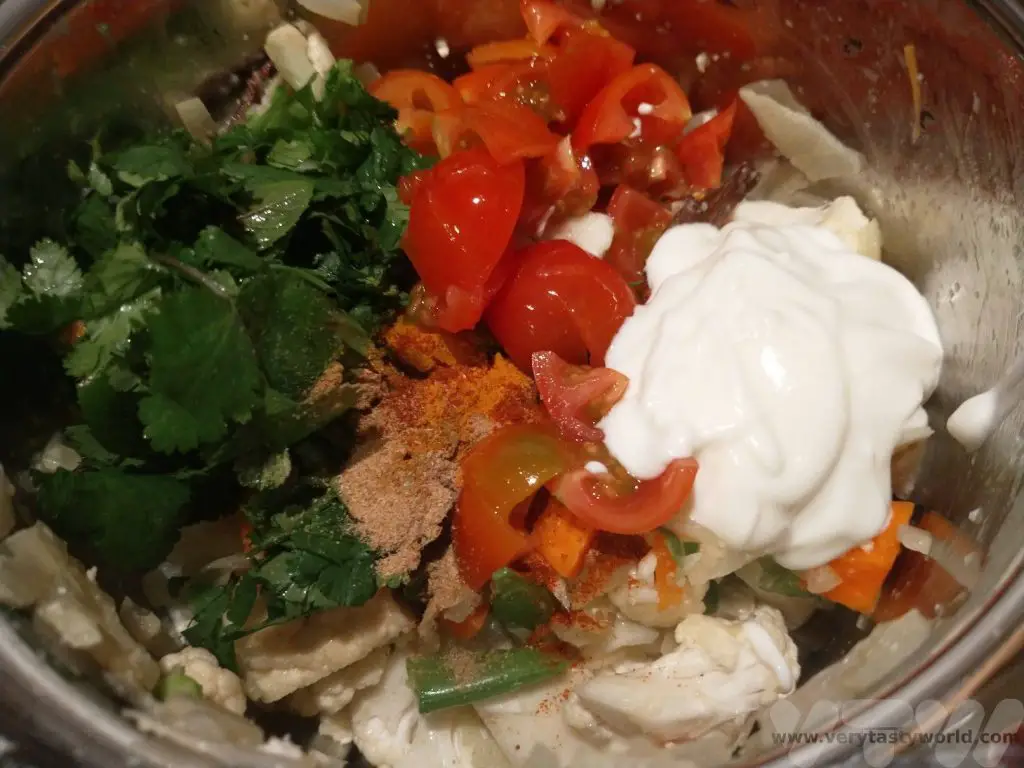
Mix and fry again for 5 minutes on a medium heat until the tomatoes break down. The mixture turns aromatic after frying.
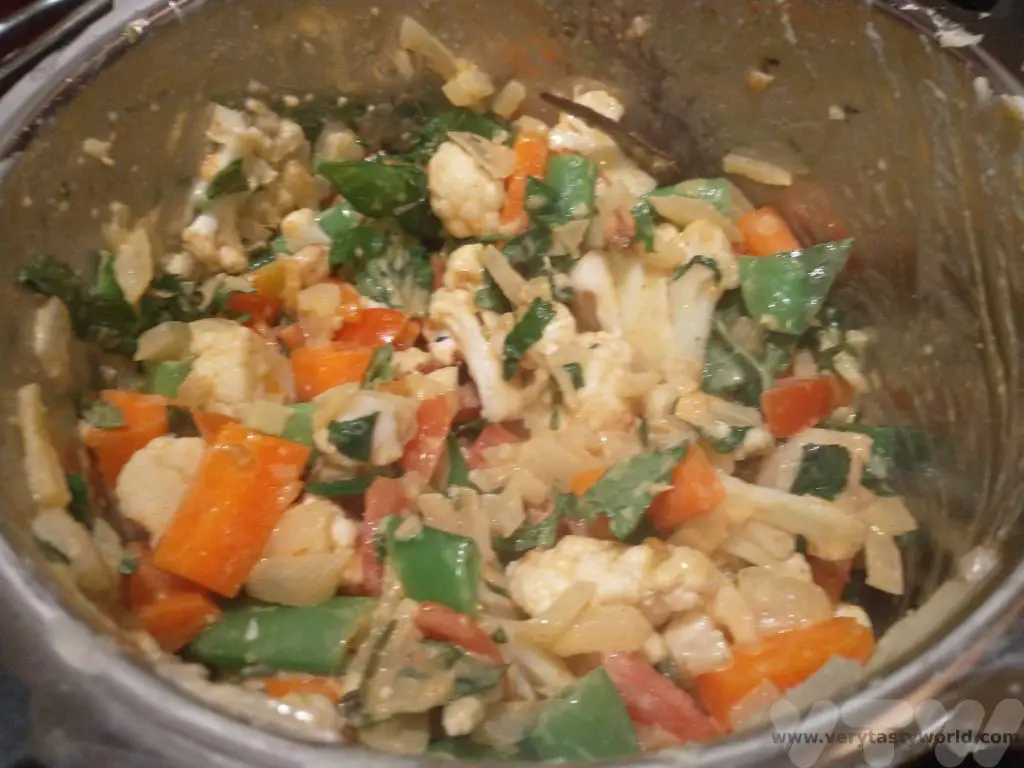
Add the drained rice and spread it evenly across the top of the mixture.
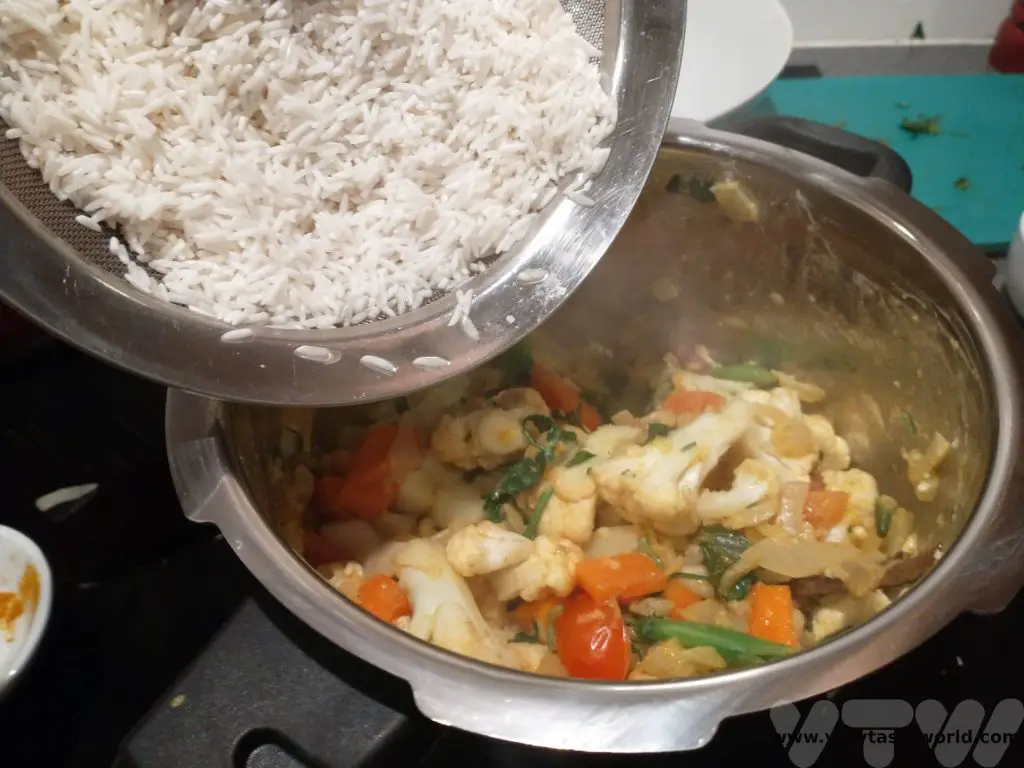
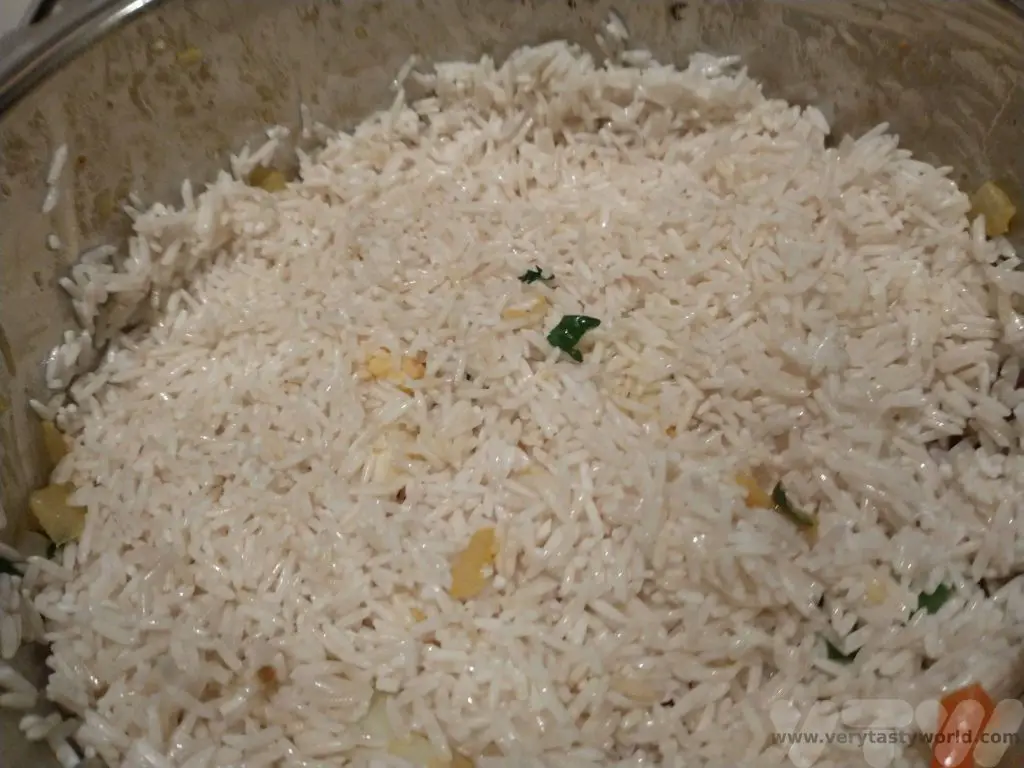
If you are using a pressure cooker: add 1 cup of water and salt to taste.
If you are using a pot: add 1.5 cups of water (this is because some steam will escape) and salt to taste.
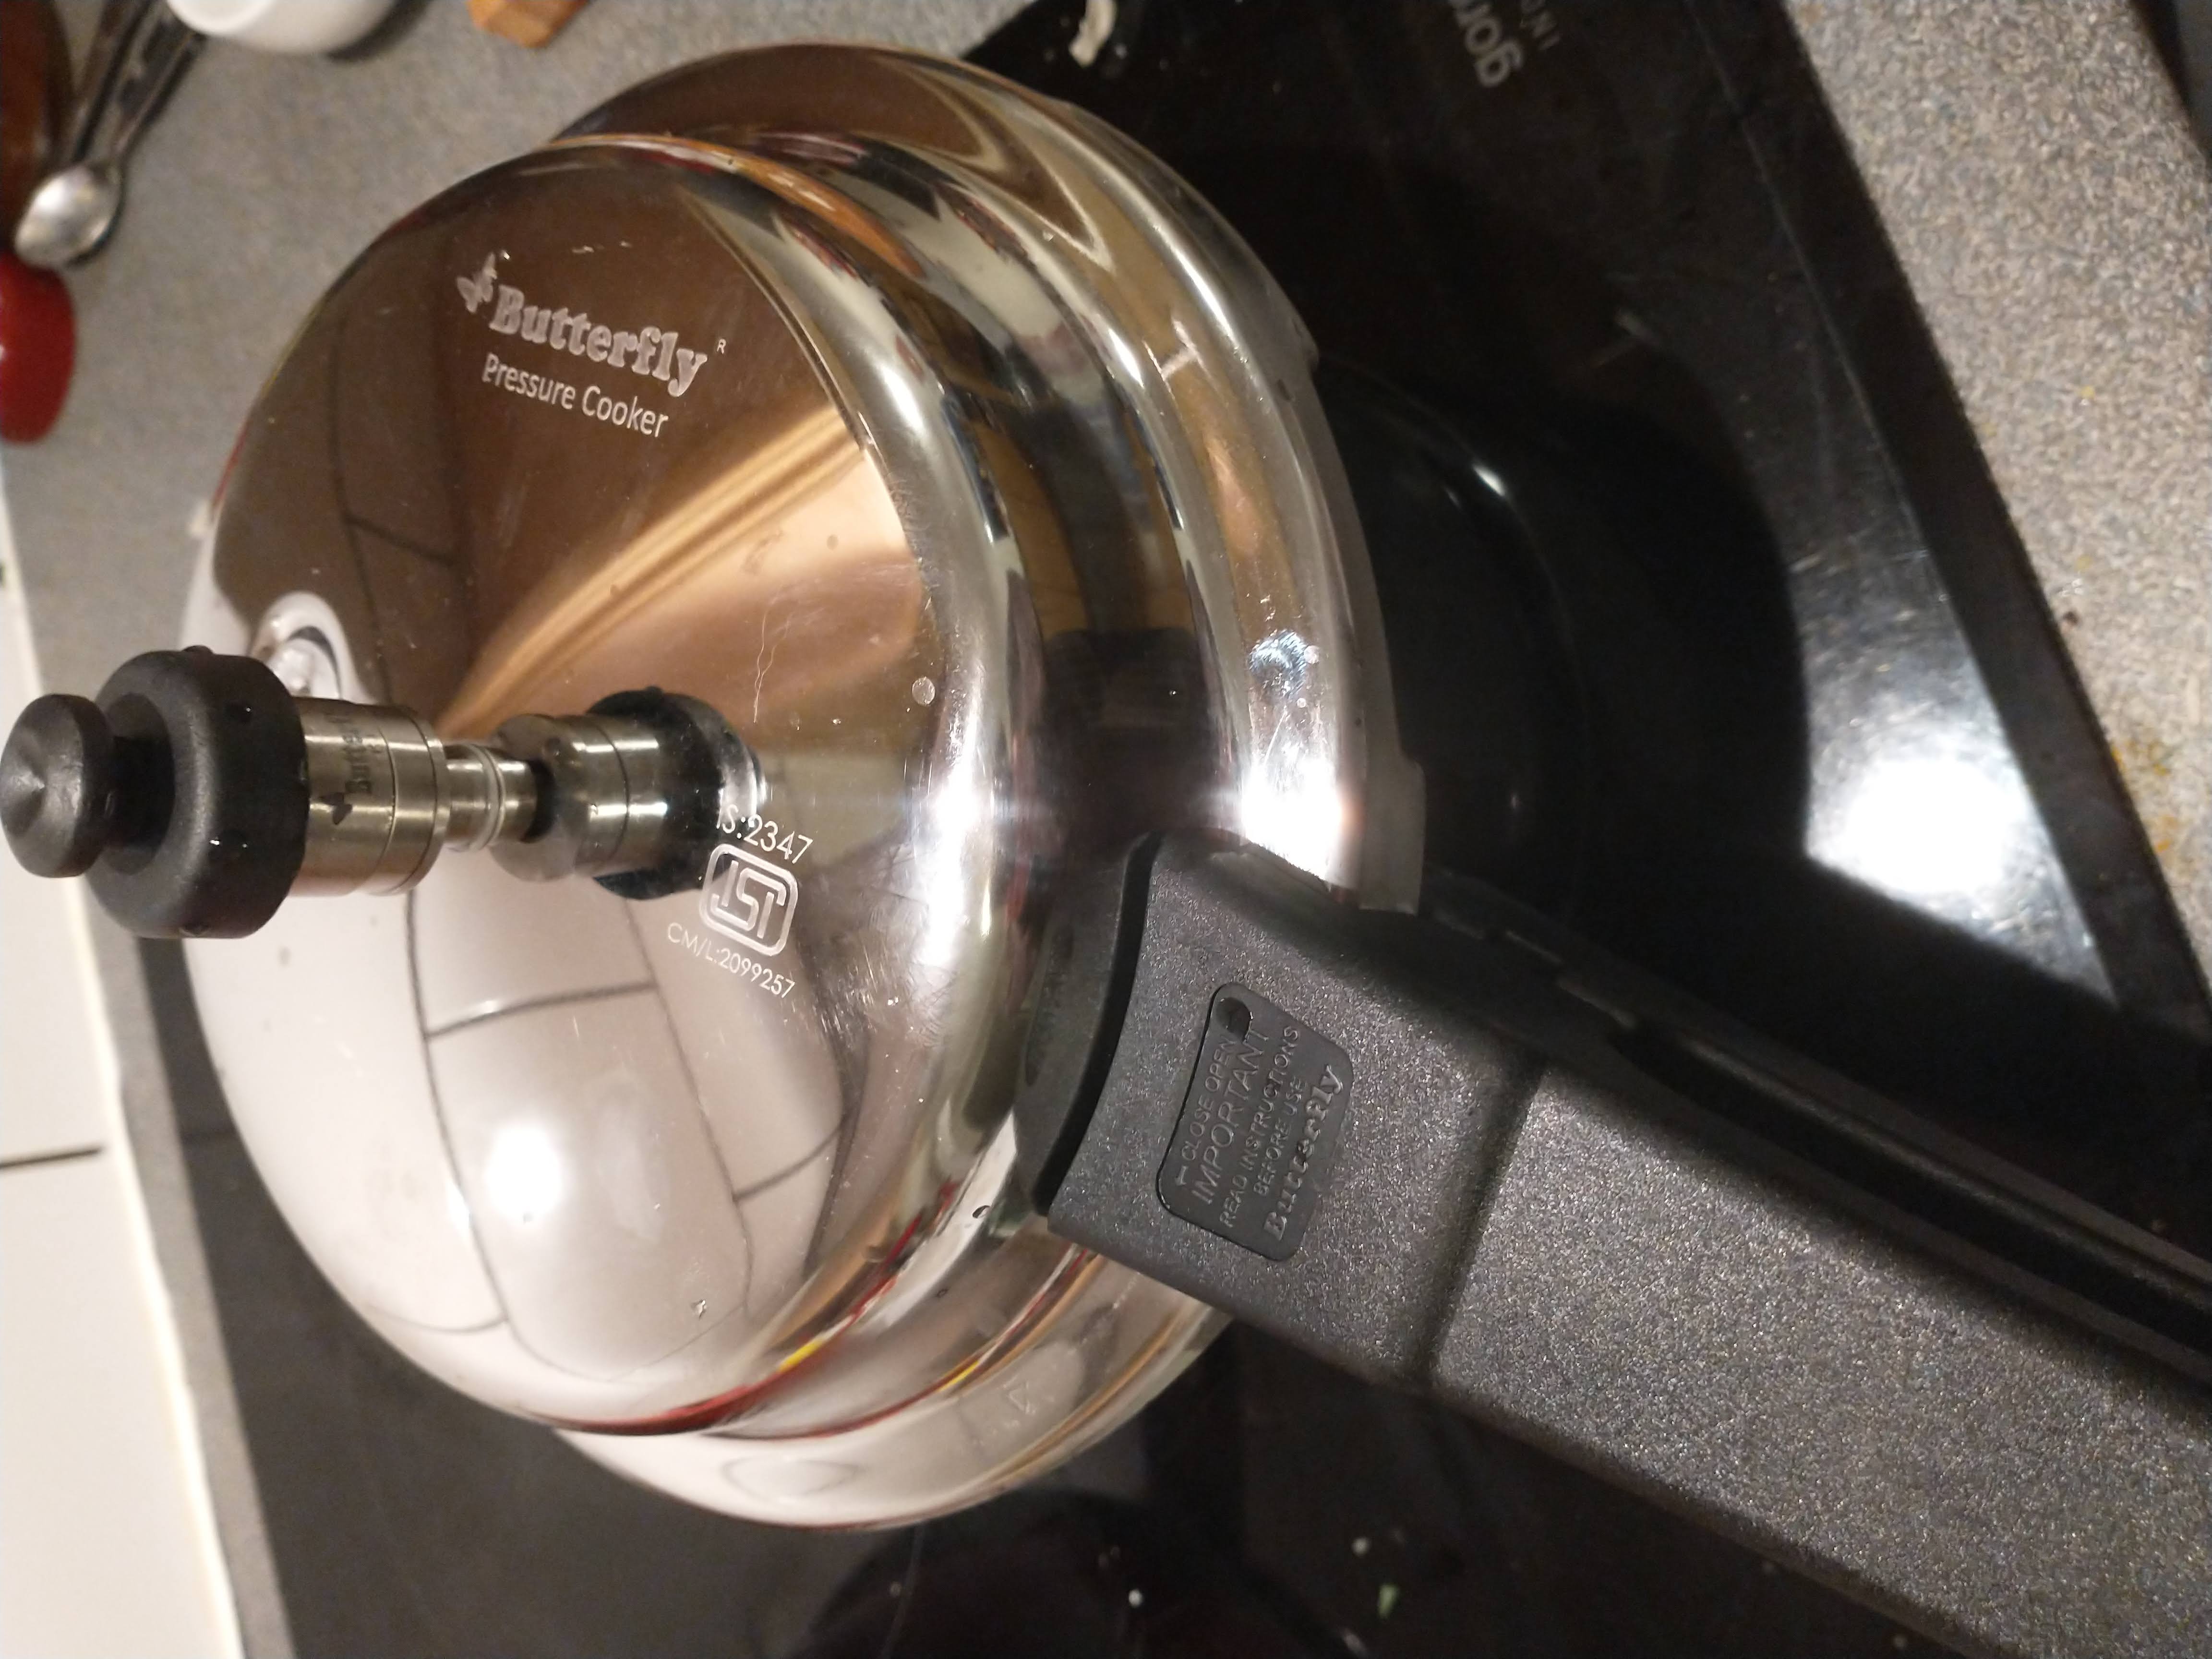
Cover the pot or pressure cooker with the lid.
Pressure cooker – cook on a medium-high flame for one whistle
Pot – cook on low heat until all of the water is absorbed and rice cooked is nicely.
Once the rice is cooked, take the biryani off the heat and let it rest for 15 minutes.
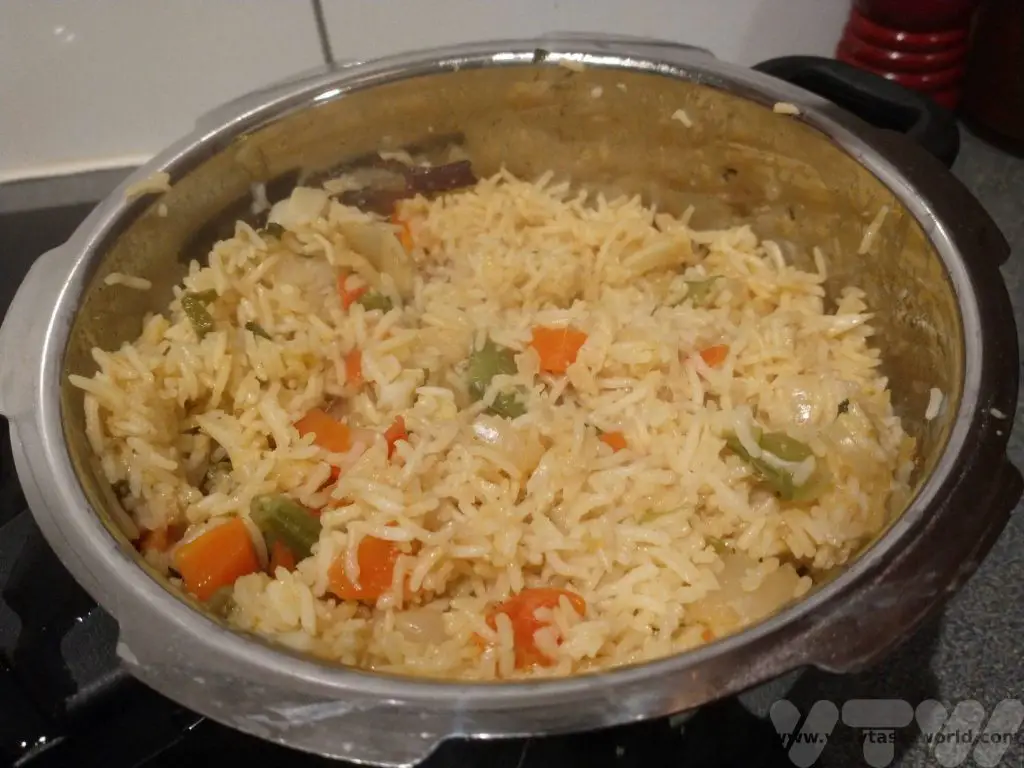
Serve on its own as a main meal, with a biryani raita, or it also makes a great accompaniment to other dishes.
We often enjoy it as an accompaniment to palak paneer – a paneer cheese and spinach curry – for a really delicious veggie meal.
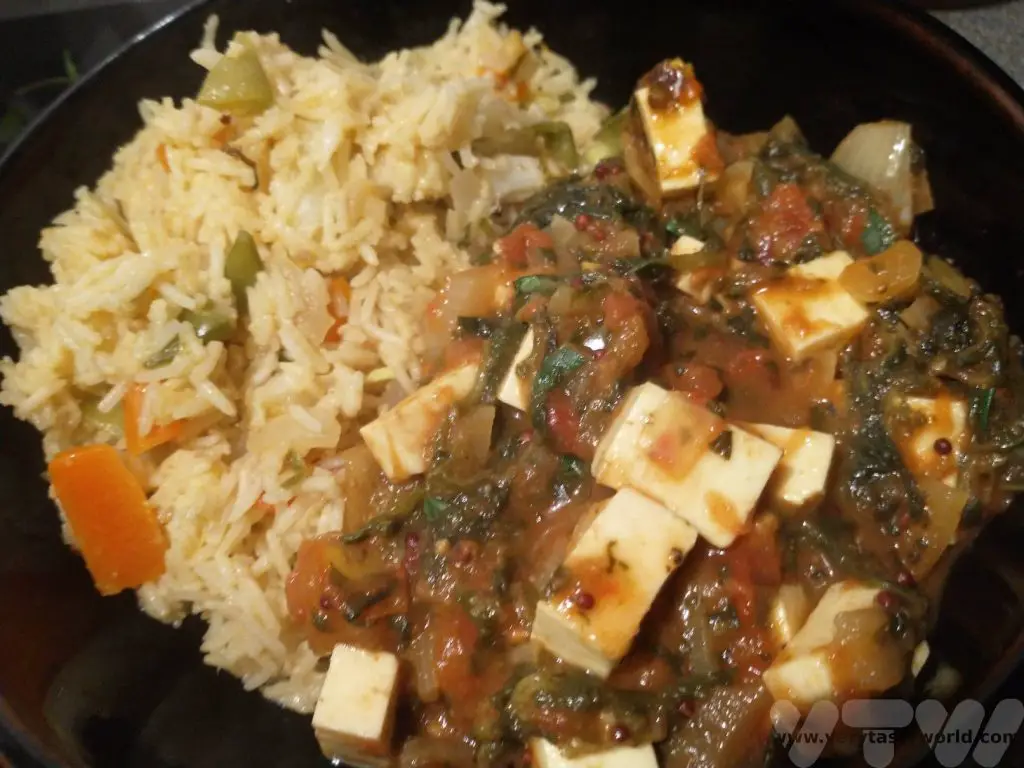
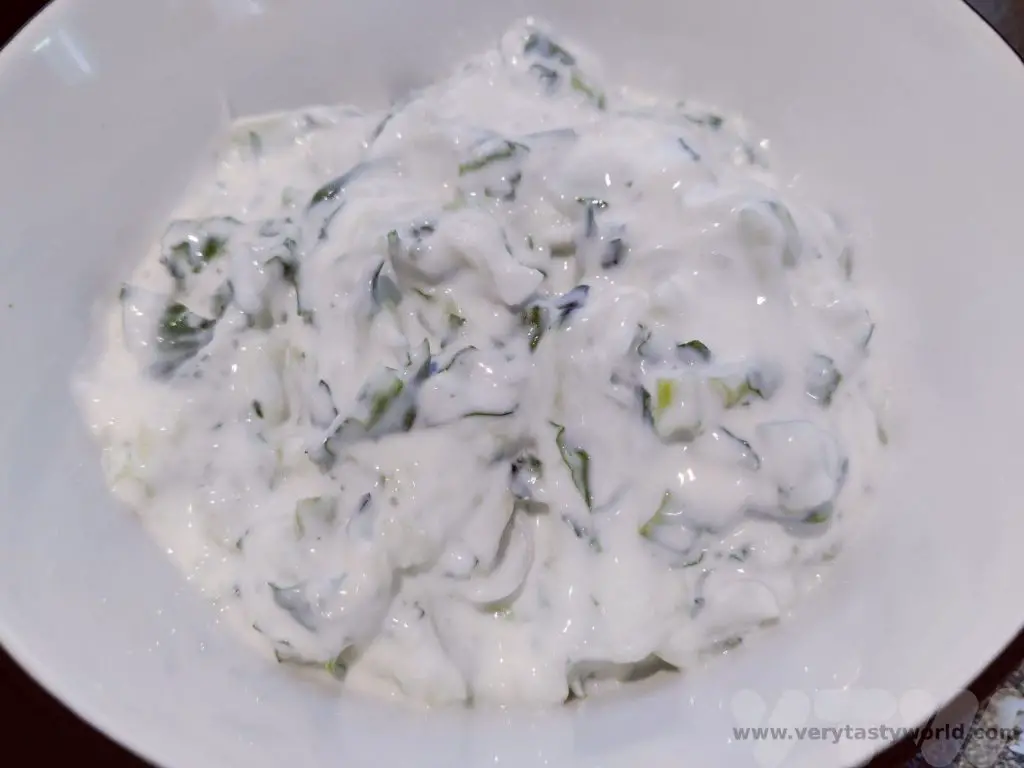

Mekong Meanderings
The mighty Mekong river is the 12th longest river in the world. We have been lucky enough to have encountered it many times over the years as it has meandered through our journeys across South East Asia over the course of two trips in Lao PDR, Cambodia and Vietnam. And we learned some interesting facts about the Mekong river along with way.
The Mekong rises in Tibet and flows for nearly 5000km through China, Myanmar, Lao, Thailand, Cambodia and Vietnam, where it runs into the South China sea. It’s a river that clearly has an enormous impact on the people who live on and around it. From a geographical perspective it has some amazing features. And, if you’re lucky, you can get to see some really special wildlife, notably the Irrawaddy dolphins that live in the river. Many people’s livelihoods depend on it. It also provides a rich source of food for the local people that live along it whether that is bounty from the river itself or the irrigation it provides for the farmers who work the land alongside it.
Lao – Luang Prabang
Our northernmost encounter with the river was when we started our journey through Lao PDR. Luang Prabang is a lovely laid-back town at the confluence of the Mekong and the Nam Khan rivers. Each year, when the rivers flood, the bridge across the Nam Khan is washed away and it is reconstructed when the waters subside.

Luang Prabang is the former capital of Lao and has plenty of places to see. There are lots of temples to visit as well as the royal palace which was built in 1904. When the monarchy was overthrown by the communists in 1975, the building converted into a museum and Lao’s capital was transferred to Vientiane.

It’s possible to take an evening cruise on a longboat – motor upriver and then float downstream watching the sunset with a cool beer is a lovely and relaxing way to spend an evening.
Luang Prabang was also where we first encountered Lao food. A lunch of typical Lao delicacies included local river weed which we had seen for sale in Phosi market.
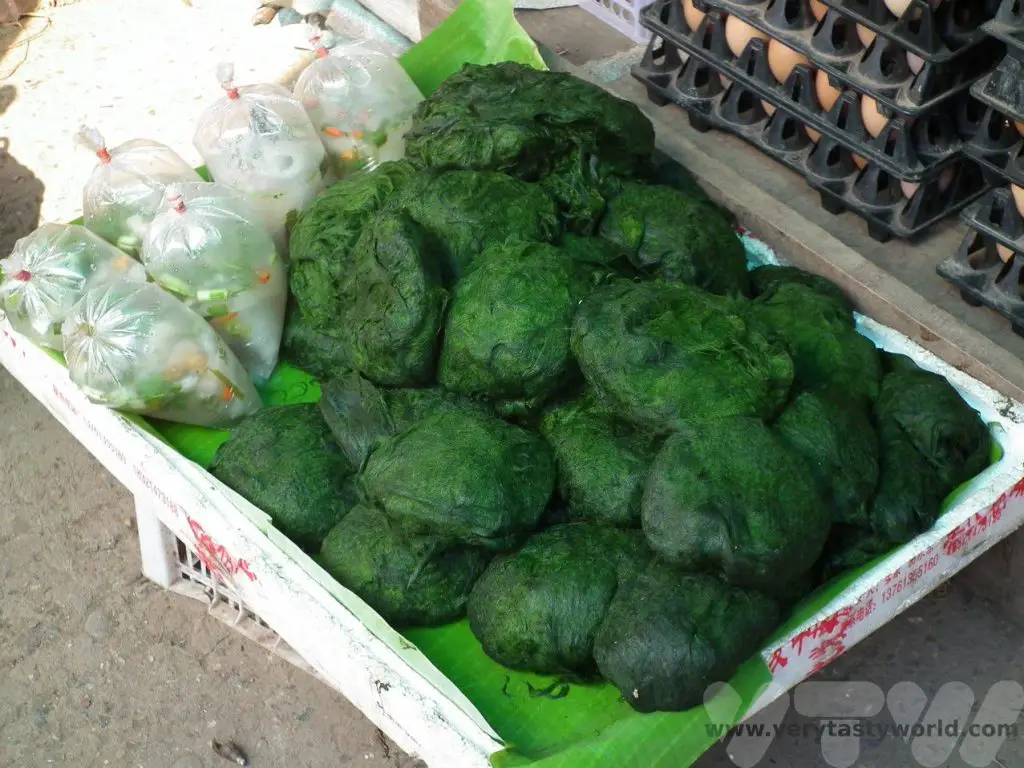
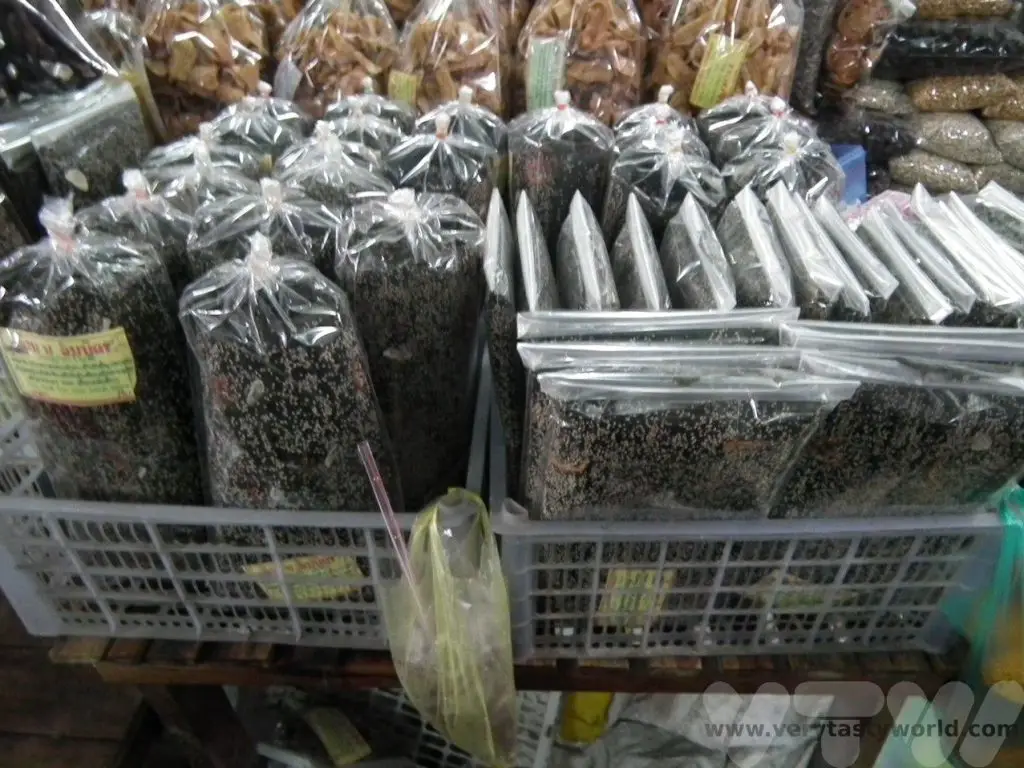
It is flavoured with seasonings and then dried in the sun. It makes for a delicious snack which is incredibly moreish, especially with beers. We enjoyed a lunch of typical Laotian specialties at Tamarind restaurant which included the dried river weed. While the ‘PDR’ of the country’s name means ‘People’s Democratic Republic’ many locals say it stands for ‘Please Don’t Rush’, an invitation to enjoy eating at a leisurely pace.
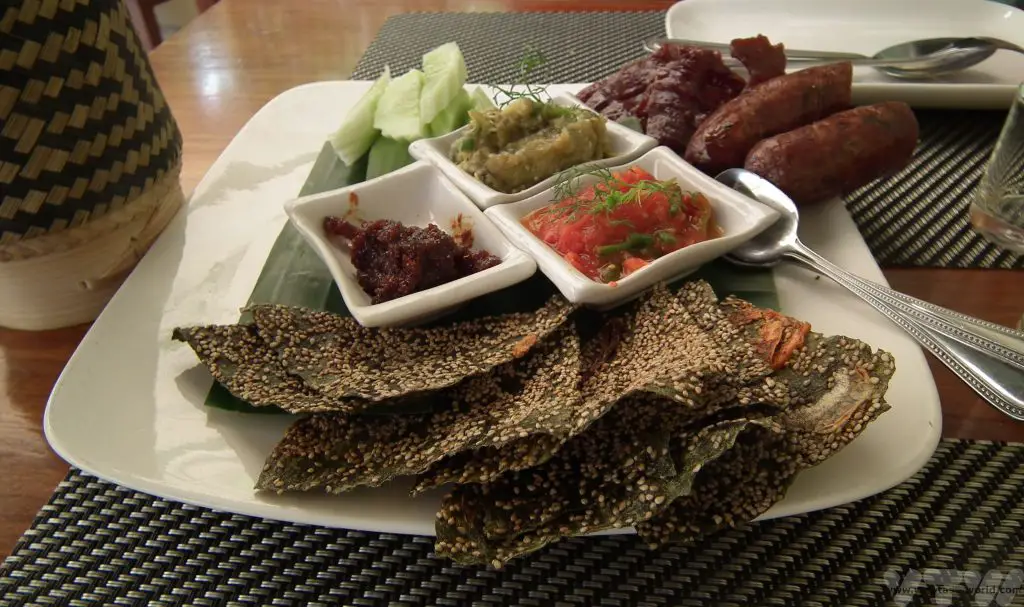
Lao – Vientiane
The Mekong traverses the border between Lao and Thailand before moving inland through Lao. Vientiane is the capital of Lao PDR and its largest city. Although it’s a city that is growing fast, it’s less hectic than the other capital cities in South East Asia.
The Mekong is broad and wide and Vientiane has a long promenade along its banks. You can see Thailand right on the other side of the river.
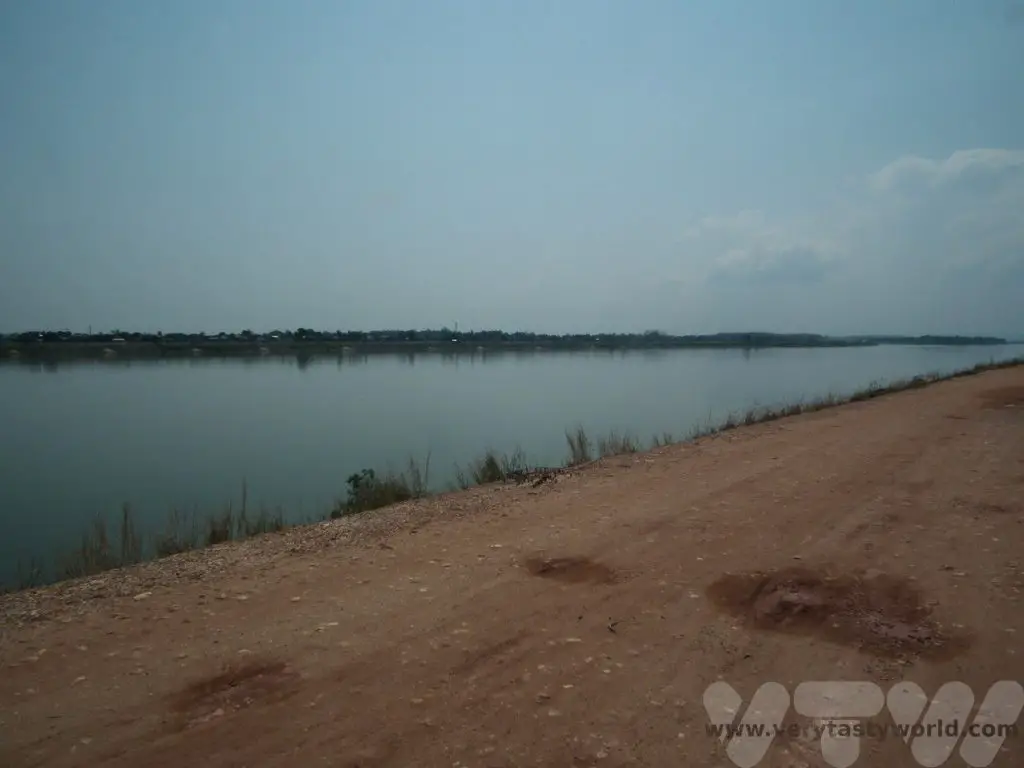
In the evenings a bustling night market opens up on the river’s promenade.
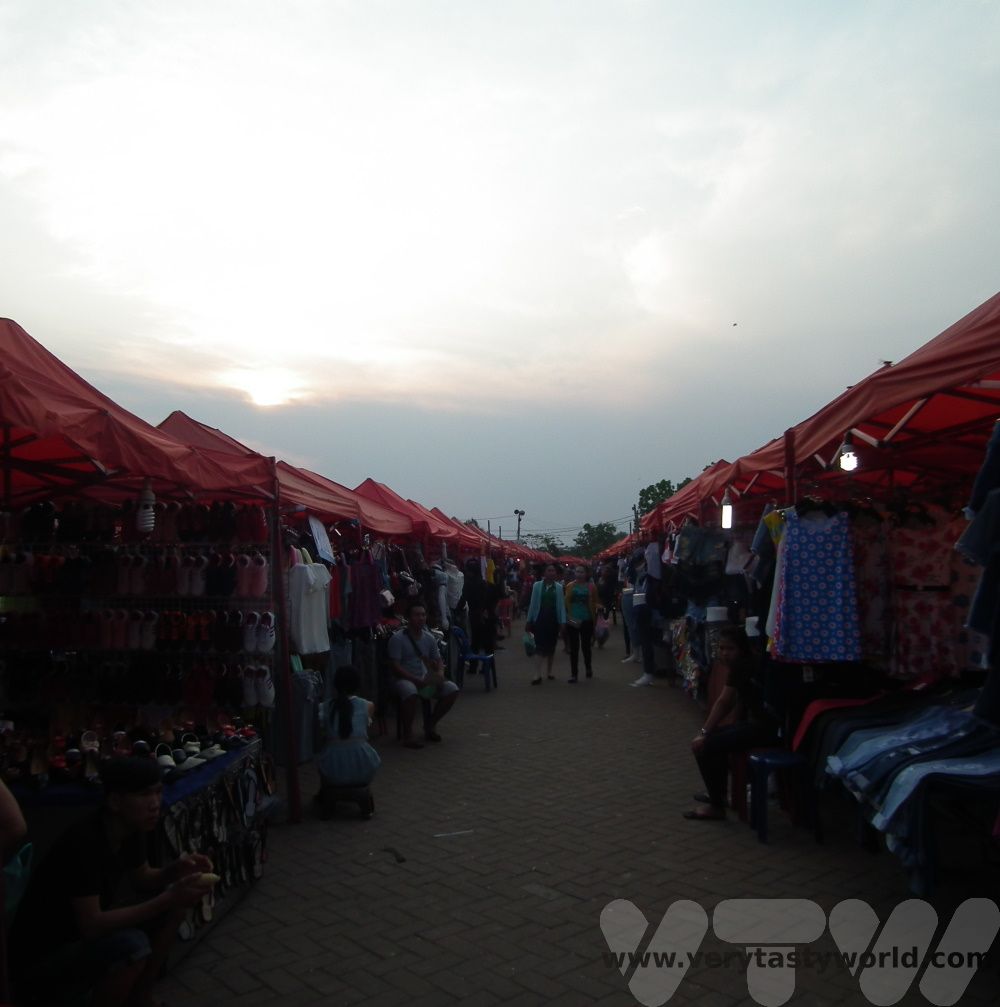
We left Vientiane to travel further south. Our next encounter with the Mekong offered a complete contrast to the serenity of its flow through Lao’s capital.
Lao – Siphandone
Siphandone is a delightful stopping point in the Champasak Province in South Lao, close to the Cambodian border. The river splits into multiple channels, leading to the formation of many islands – the name Siphandone means ‘4000 islands’.
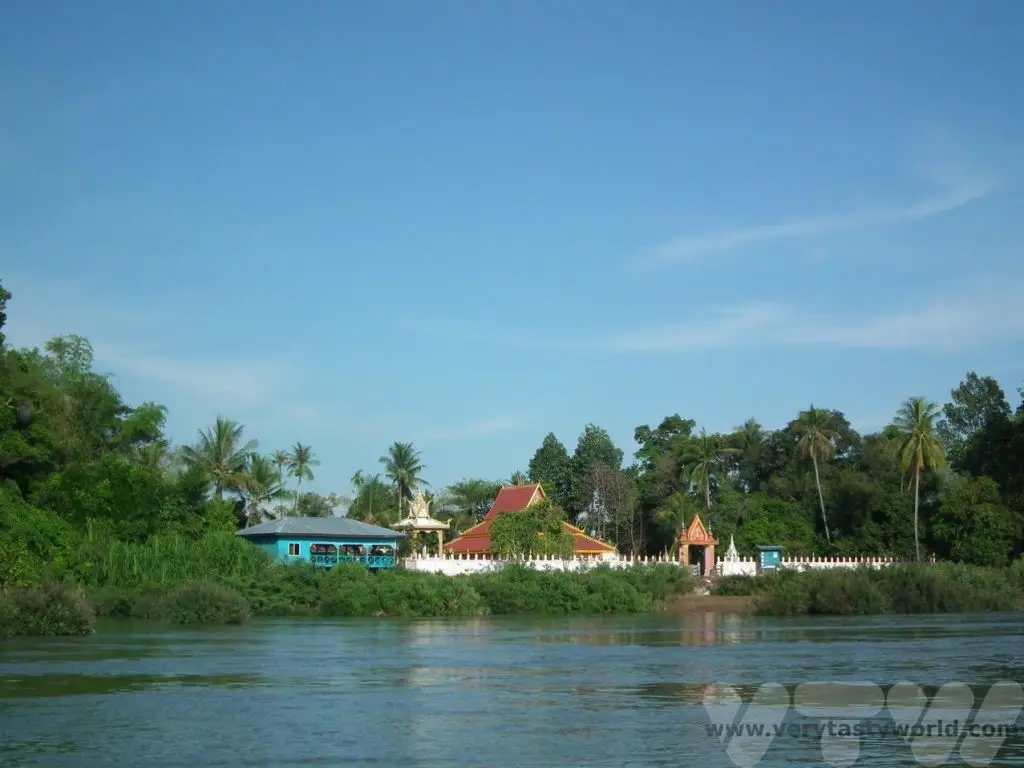
The area is very beautiful but parts of it are also ephemeral as some of the smaller islands disappear under the water when the river is in flood during the rainy season. We spent a couple of lovely, relaxing days exploring Don Khong, the largest island. There are some nice walks and some interesting things to see, including the remnants of a railway, an initiative by the French colonial administration who wanted to make the Mekong navigable to China – Siphandone and the waterfalls just to the south proving to be the geographical blockers.
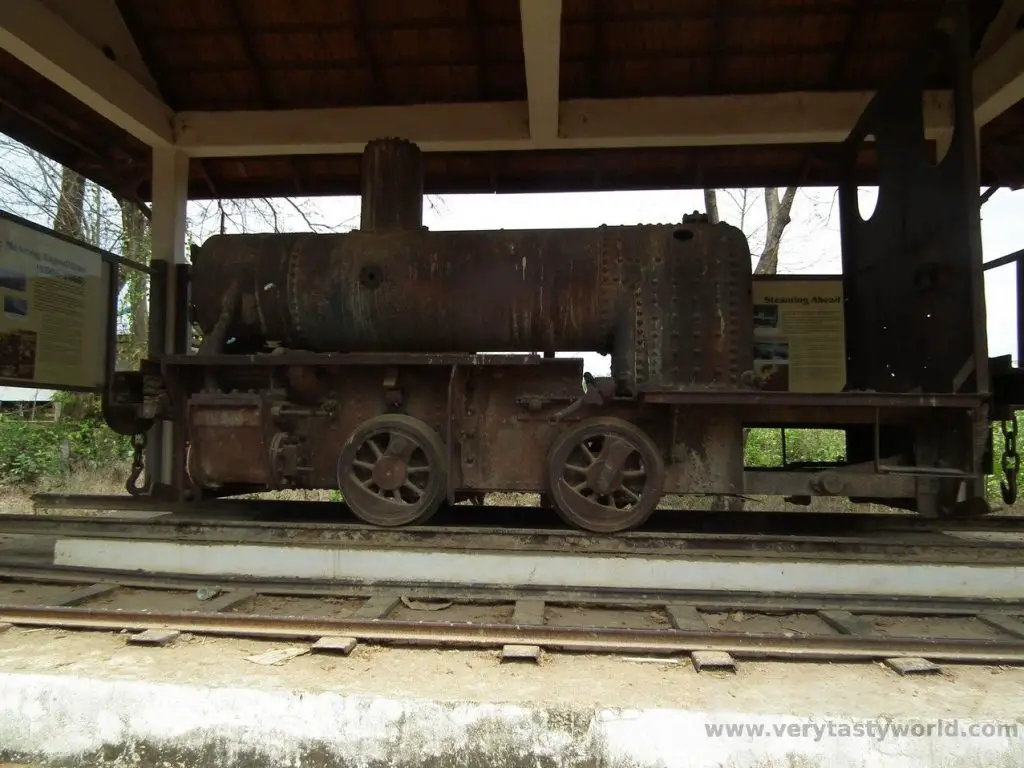
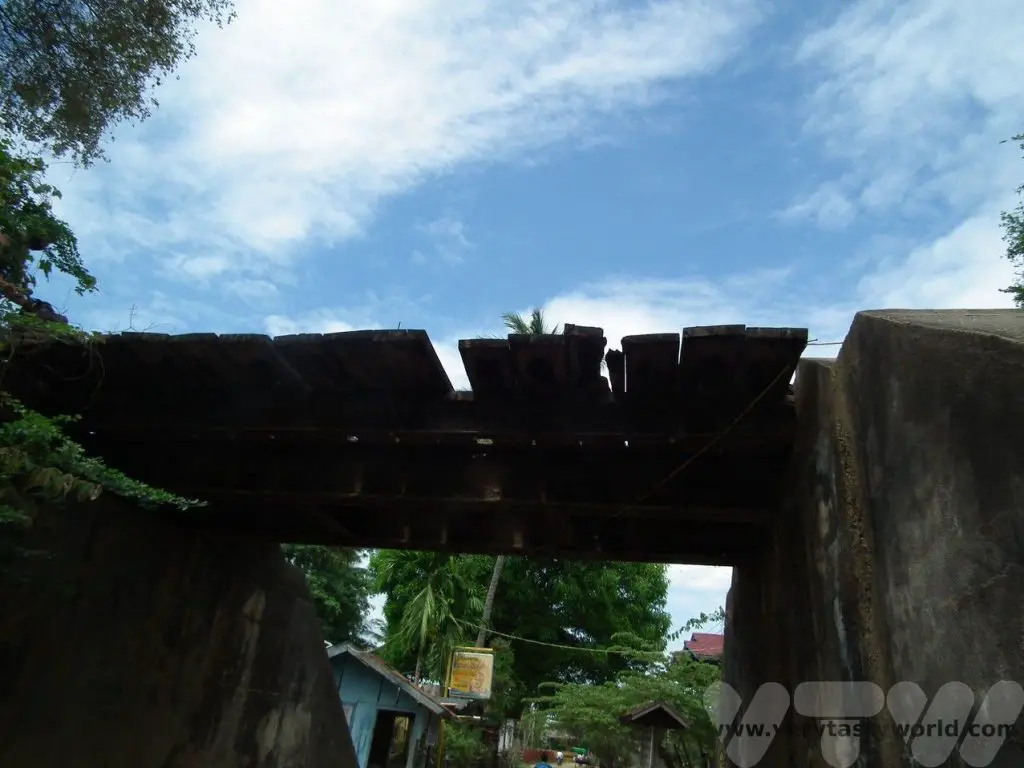
It may be possible to find local people who can take you out for a boat trip on the river in search of the rare and highly endangered Irrawaddy dolphins. These lovely creatures inhabit just a very small length of the river between southern Lao and northern Cambodia. According to the World Wide Fund for nature there are less than 100 dolphins left in this area.
Irrawaddy are an unusual looking dolphin – they have a more pronounced forehead than their seafaring counterparts and a smaller, broader beak. If they are around and you want to see them just head for a beach to find a boat. You can pay for the trip in cash.
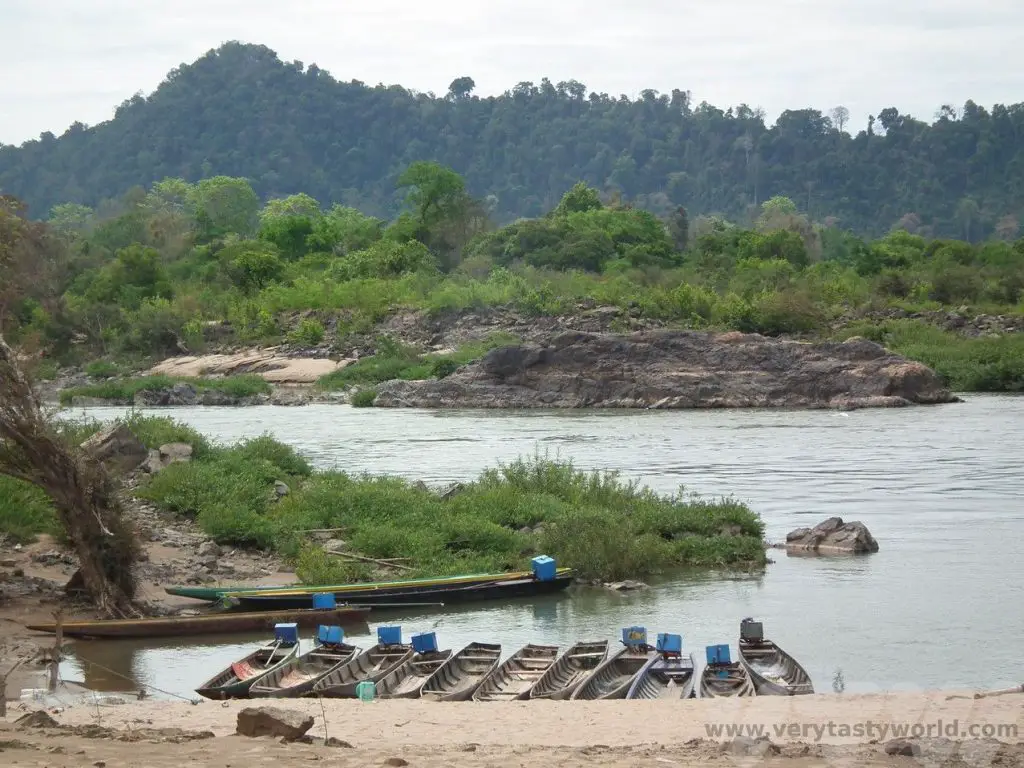
The dolphins are quite tricky to photograph as you only really see them as they pop above the surface for air, but it is magical catching sight of them.
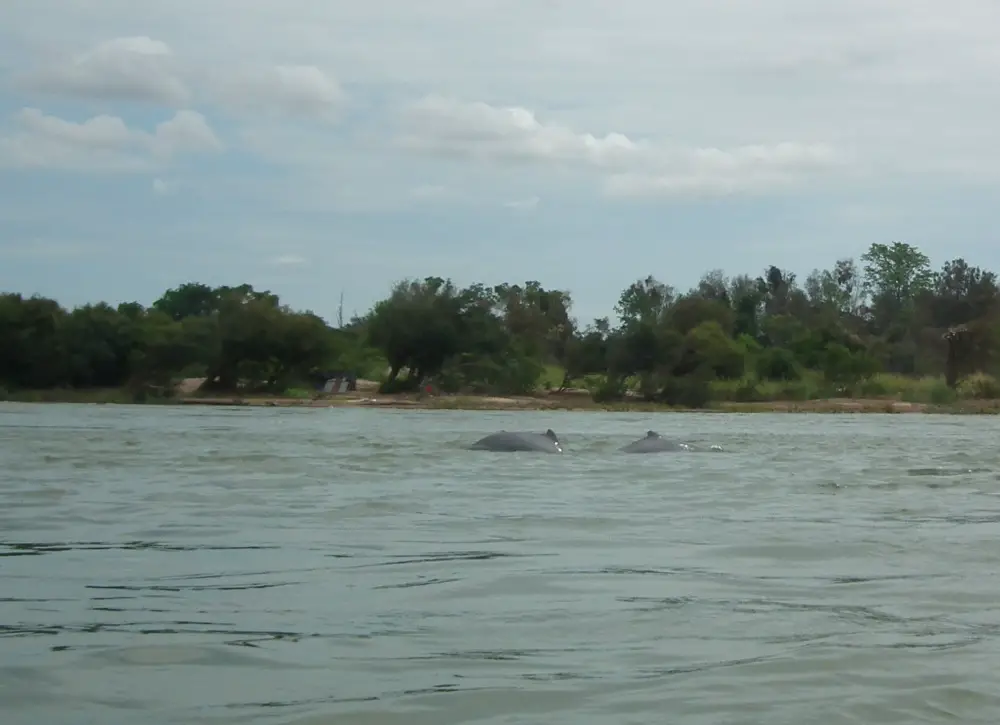
But mainly the area is a place to relax and explore at a sedate pace. It is very peaceful, especially in the evenings.
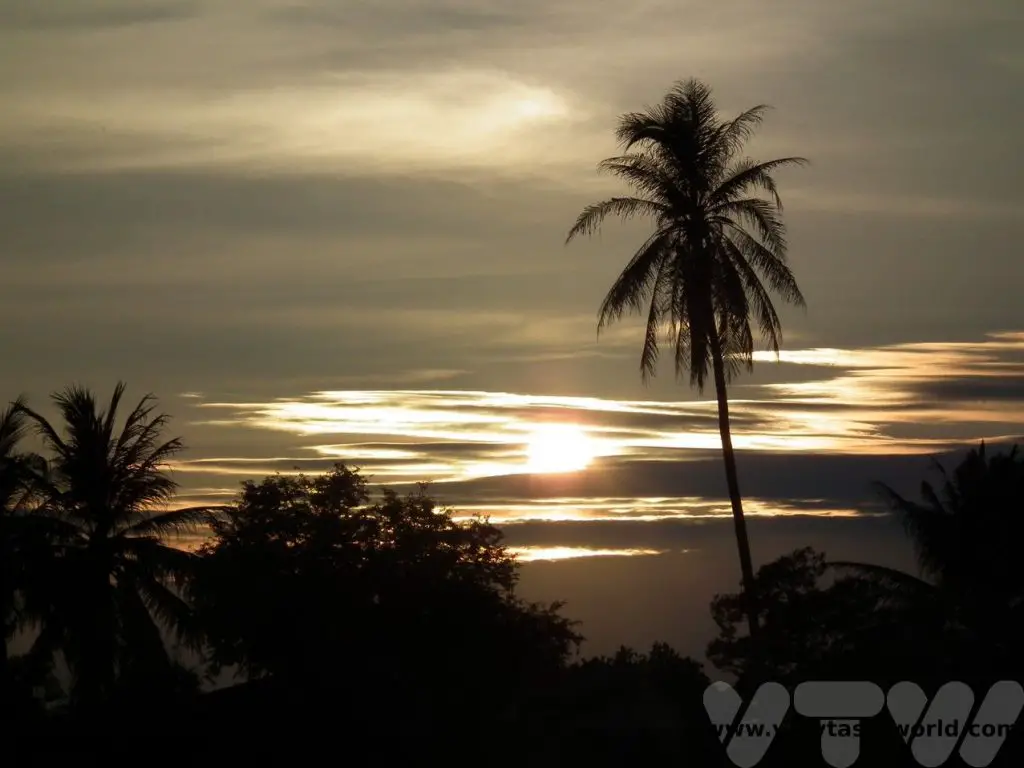
Lao – Khone Phapheng Waterfalls
Located just a few kilometres south of Siphandone are the Khone Phapheng falls. Due to the many, many channels that have formed at this point in the river these are the widest waterfalls in the world.
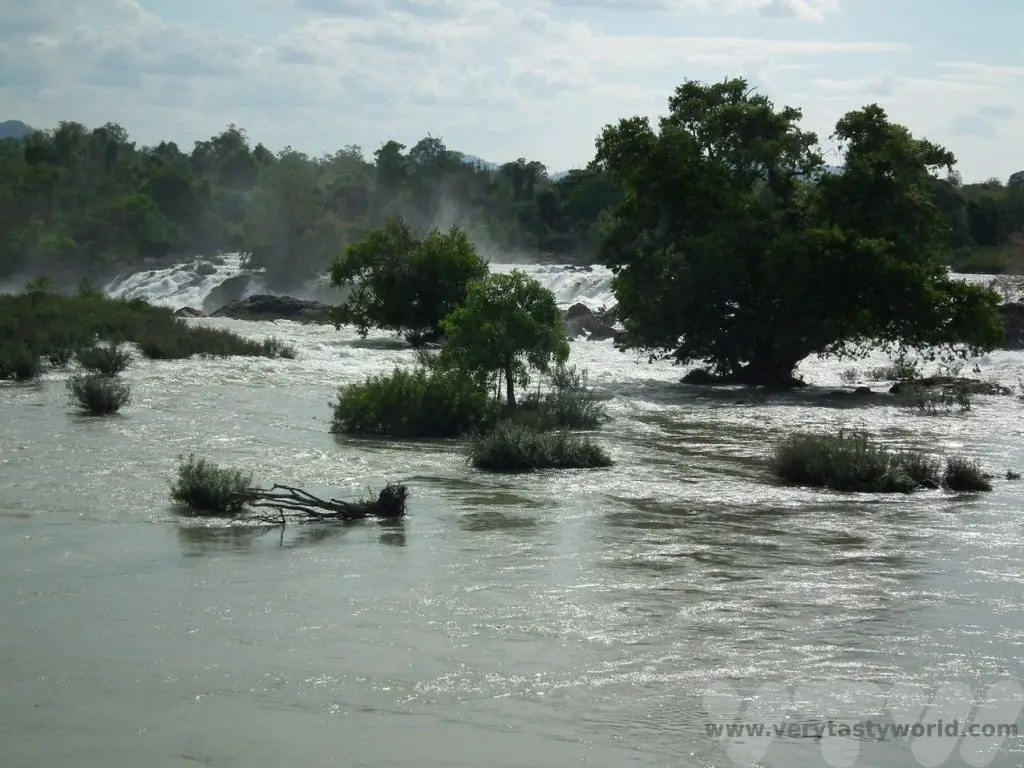
They are also the reason that the Mekong isn’t properly navigable from the South China Sea through to China. The rapids extend for a length of around 10km.
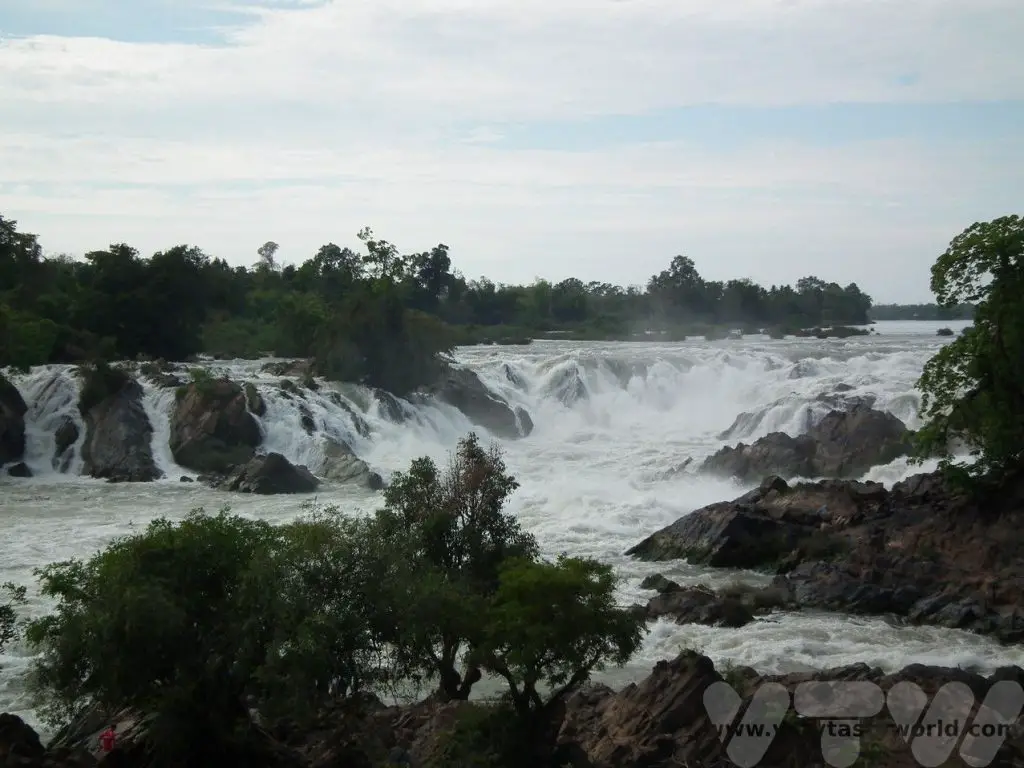
Several attempts were made to construct steamships that could scale the falls – with a lot of manual pulling – in the late 19th century. All of them failed. There were ideas to construct a canal with a series of locks around the falls but the expense was prohibitive so the railway was built – the idea being to deconstruct the boats, carry them on the trains via Siphandone and reassemble further upstream. Which sounds like a right faff, not an elegant engineering solution.
It is possible to walk along the banks of the falls and view the sheer might of the river at this section. There are restaurants and cafes in the area to enjoy a snack and a coffee while watching the falls.
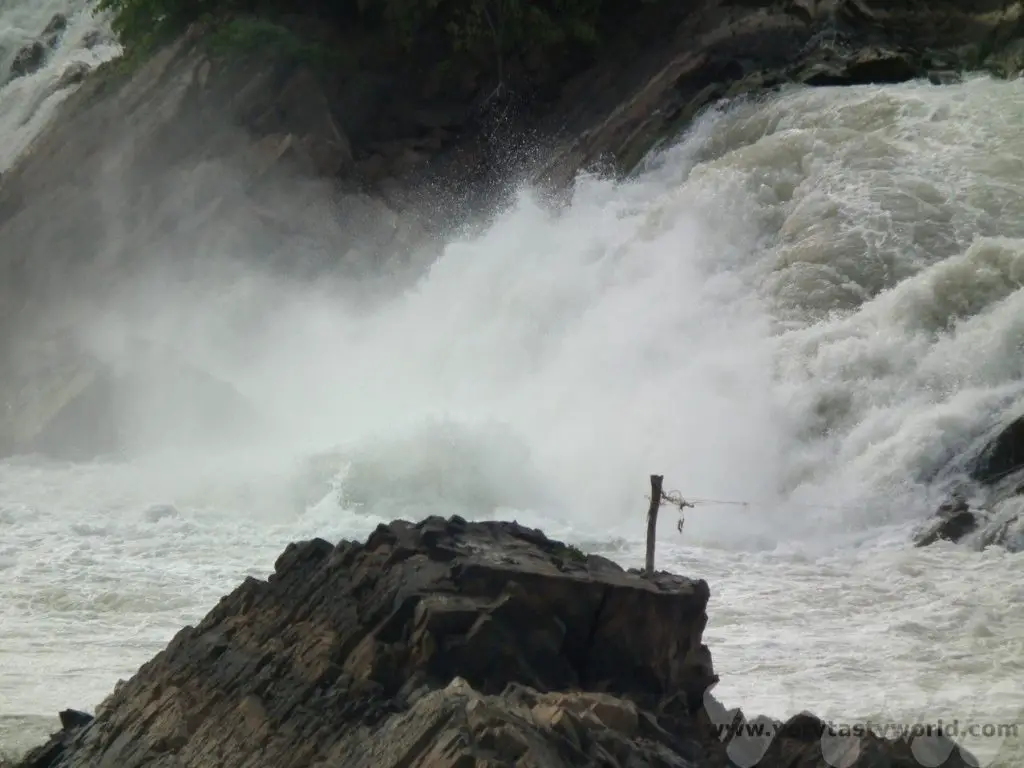
There is a tree – the Manikhoth – which is highly revered by local people. It stood for centuries in the middle of the river, apparently defying the flow and gravity – with roots facing the sky.
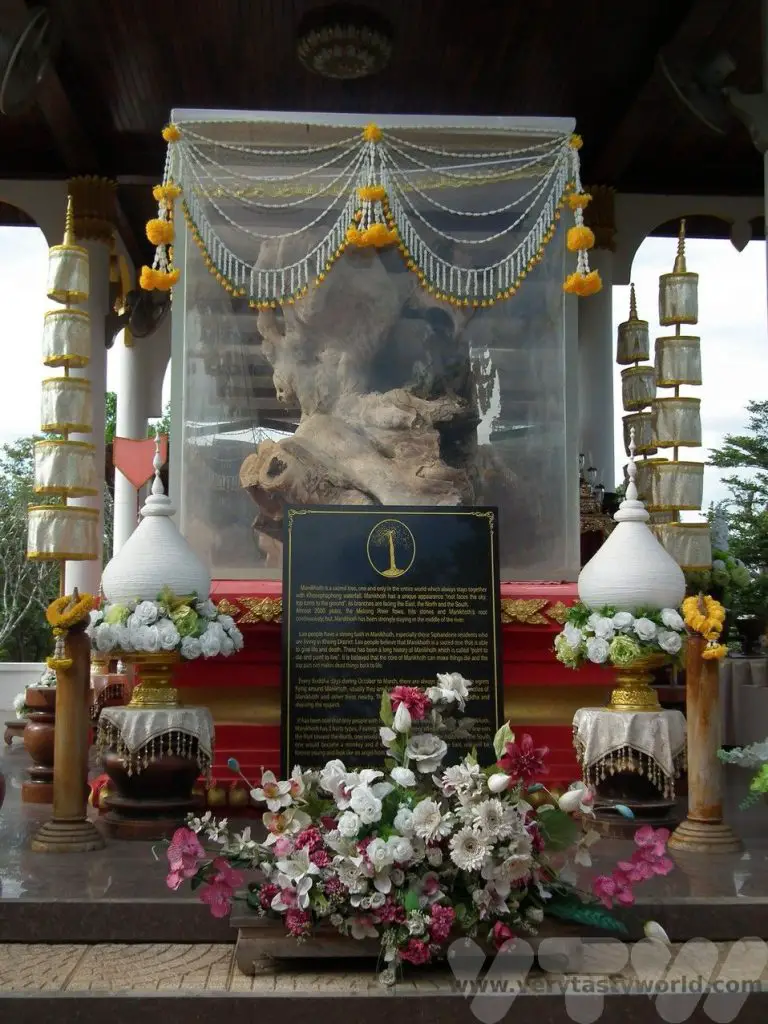
Sadly, it was washed away in 2012 but was later recovered and it now exhibited by the riverbank.
Crossing into Cambodia
Siphandone is very close to the Lao/Cambodian border so we got a lift to the border and walked across into Cambodia. It looks like a thin line on a map but leaving one country and entering another by crossing ‘no man’s land’ is actually a walk of several hundred metres.
A word of warning: We got stung for extra cash by the border guards who issued our visas at the crossing. At the time a Cambodian visa cost $30US but, after the border guard had taken our passports, he demanded $35. We queried this but he was insistent. We didn’t have a signal on our phones to be able to confirm the cost. What were we going to do? He had our passports and we wanted to get into Cambodia. So we paid. Humph.
Chatting with ordinary Cambodian people later in our trip we learned that civil servants were not respected at all… and also understood the reason why they drive around in flashy cars. The guy pocketed $10 in 5 minutes. In Cambodia that’s a lot of money. In future we will check the costs beforehand and produce evidence from the official website. We will be polite but insistent.
Cambodia – Longboat to Stung Treng
Still, all those irritations melted away when we headed to the river again, picked up a long boat just a couple of kilometres from the border and embarked on a delightful journey along the Mekong.
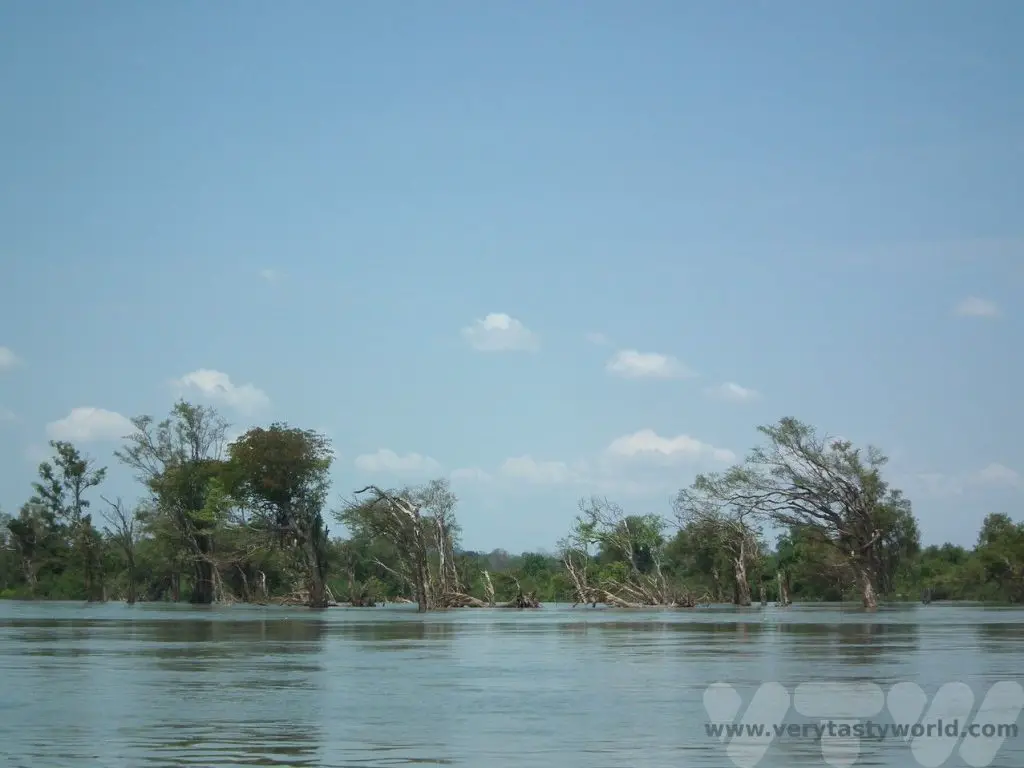
It was a glorious three hours travelling along the most beautiful stretch of pristine river.
You can really understand how the flow of the river Mekong has shaped its environment and the flora that grows alongside it.
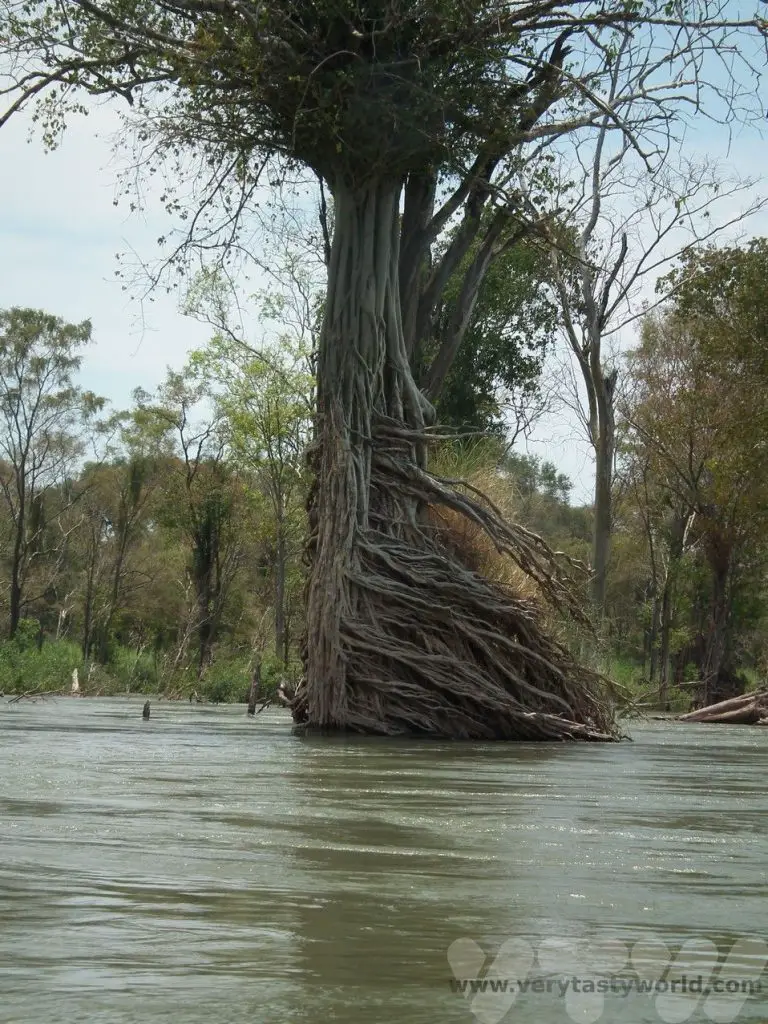
The roots of the trees cannot help but comply with the relentless force of the water’s flow.
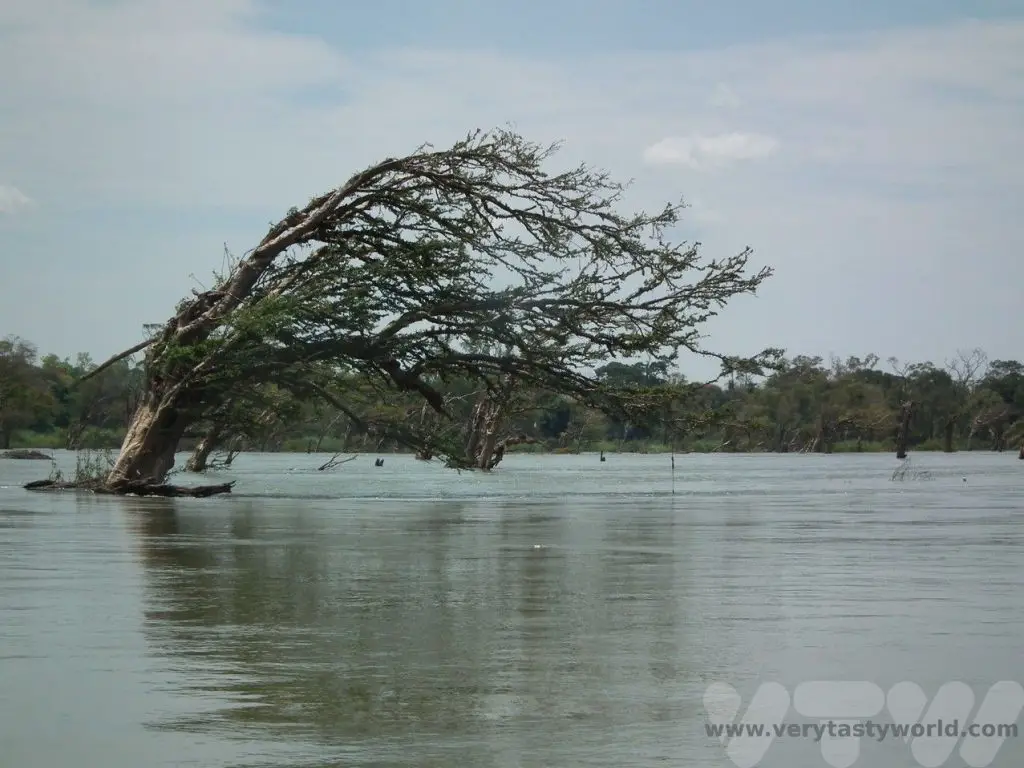
We arrived in the northern Cambodian town of Steung Treng. There’s not a huge amount to see when you get there but the journey was simply sublime. Just out of town we visited a local women’s development centre, an initiative where women and offered the chance to learn how to weave silk. Accommodation is available and there is a primary school where the children can receive an education while their mums are learning new skills. Their beautiful products are available to buy and are both good quality and incredible value. It’s a great opportunity to contribute to the local community.
Cambodia – Kratie
We then made our way by road to Kratie, a much larger town with a very laid-back vibe. It lies right on the Mekong and the river is calm and broad. It has a pod of Irrawaddy dolphins that live nearby and it’s easy to pick up a tuk-tuk to reach their location a few kilometres outside of town and upriver. There are plenty of boats that offer trips to see them.
The water is somewhat murky and the dolphins here were also a touch elusive so getting a photo of them as they come up for air was quite tricky. So it was fun to sit back in the boat and enjoy watching them.
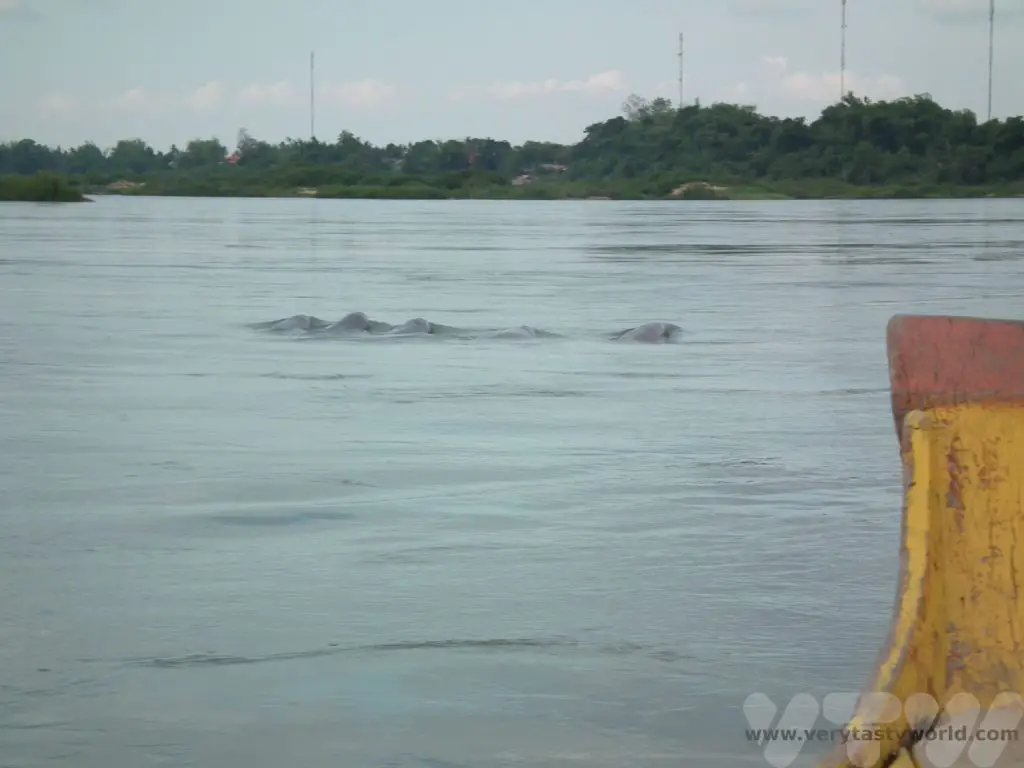
Back in town, Koh Trong island is one of the larger islands on the Mekong. You can pick up a ferry across to the island from the centre of Kratie and it takes a few minutes to make the crossing.
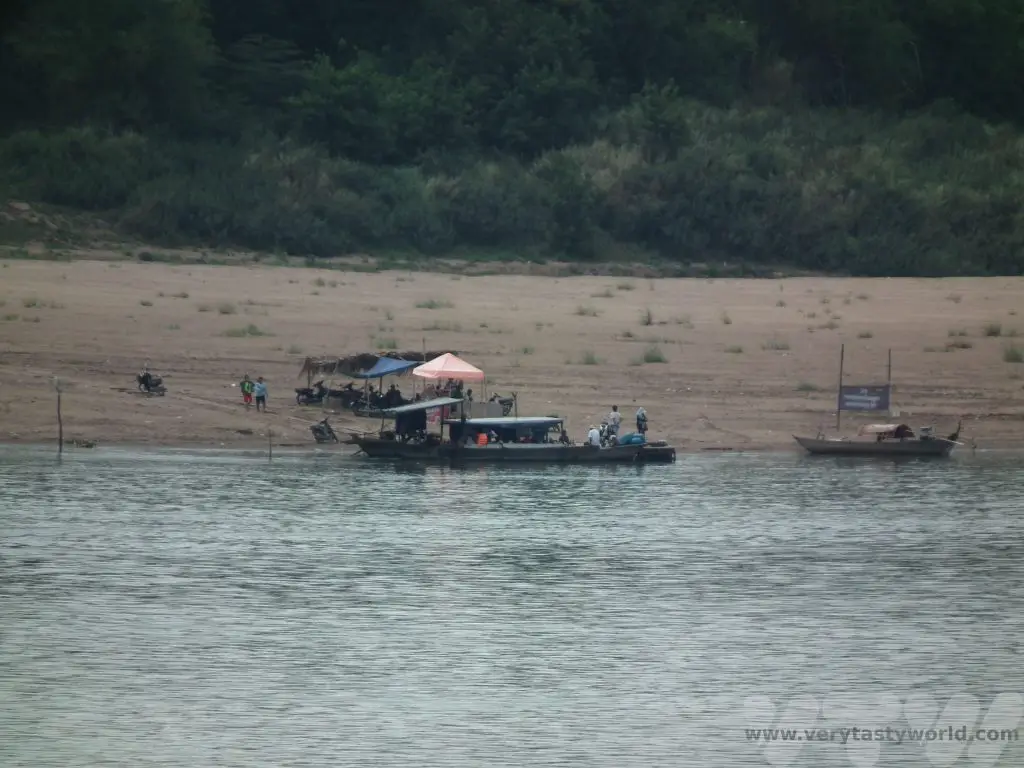
It’s possible to hire a scooter or a bicycle for just a few dollars and circumnavigate the island. It’s a really pleasant way to spend a morning or afternoon. Everyone was very friendly and waved to us as we cycled on the roads.
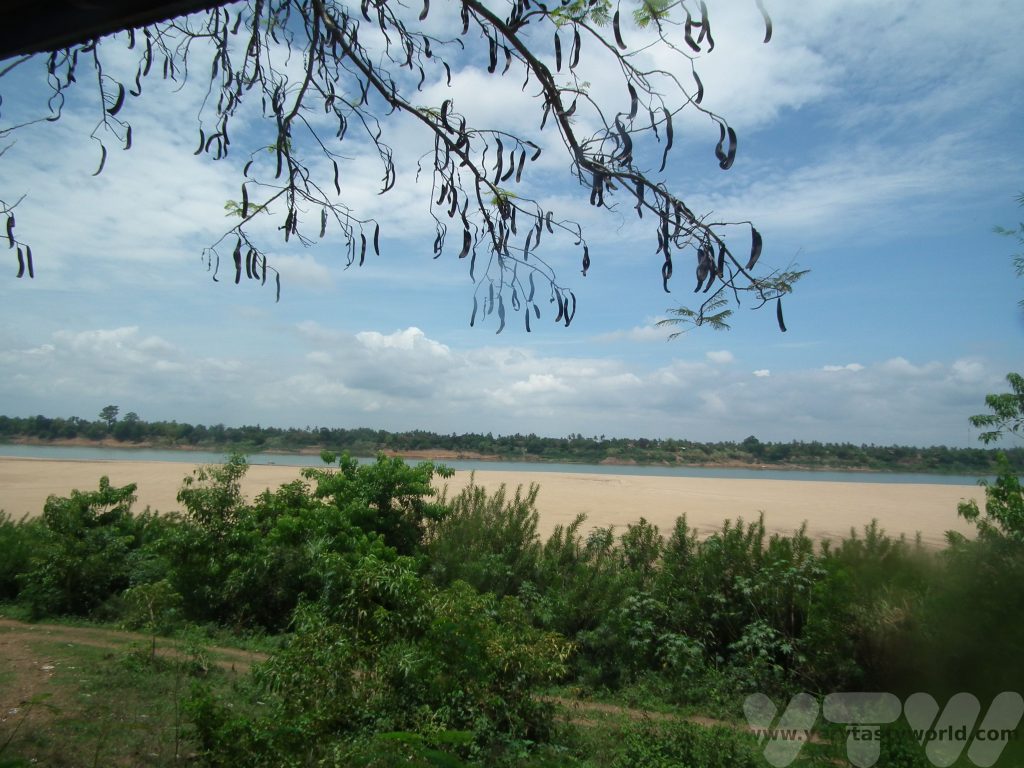
Cambodia – Lake Tonle Sap
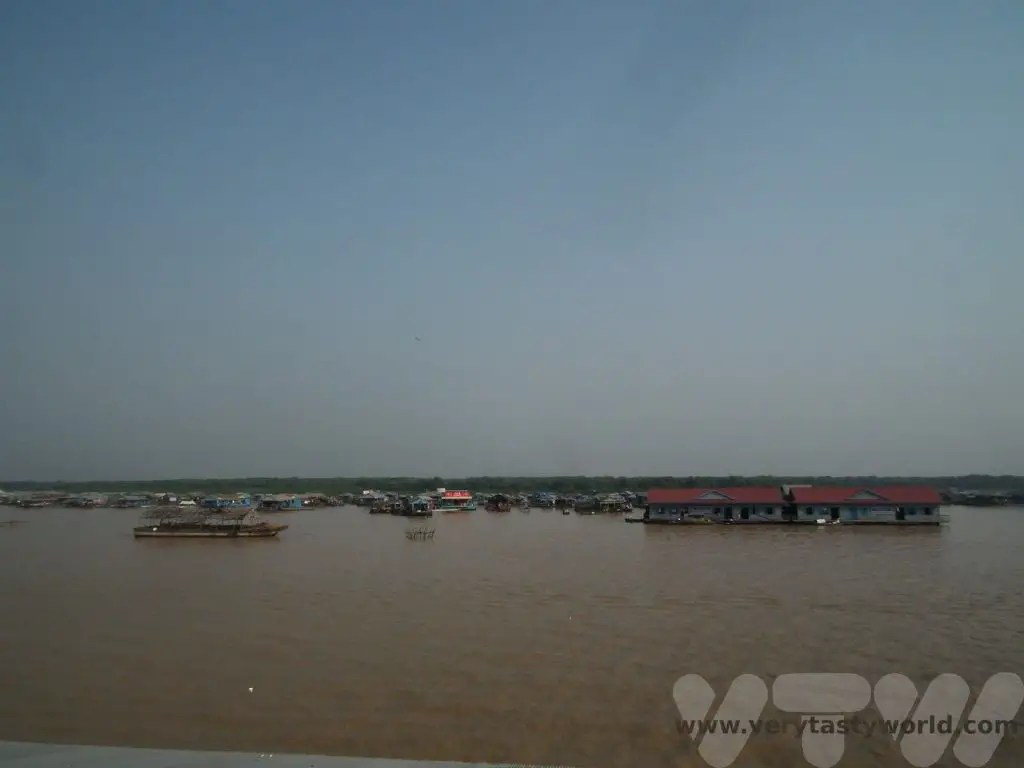
Tonle Sap has fascinating geographical features. It is located within a depression and as such its water levels are highly influenced by the flow of the Mekong; at certain times of the year the lake is fed by the river, at other times the flow reverses and flows into the Mekong along the Tonle Sap river. The river starts flowing into the lake during spring and the volume of water increases due to the monsoon during the rainy season which takes place between May and October. The rains can bring up to 4000mm of water.
The lake reaches its maximum area around November time and the water level will have risen by up to 10 metres. As the monsoon ends, lake Tonle Sap starts draining back into the Mekong via the Tonle Sap river, a journey of 120km. We visited in February when water levels were low – the lake’s depth can be as shallow as one metre – and you can see how the vegetation has adapted to this amazing natural cycle.

Tonle Sap is around an hour’s drive from Siem Reap and Angkor Wat and it’s possible to enjoy a boat ride to visit some of the floating shops.
Cambodia – Phnom Penh
Cambodia’s capital city is the location of the confluence between the Tonle Sap and Mekong rivers. There is a legend that in the 14th century a widow named Penh discovered a tree which contained four statues of Buddha and one of Vishnu floating down the Tonle Sap river. She asked local villagers to increase the height of a nearby hill and established a temple there. The name Phnom Penh translates as ‘Penh’s hill’.
The centre of the Khmer empire moved to Phnom Penh after Angkor Thom was sacked sometime in the 17th century, although it formally became established as the capital in 1865 by King Norodom. It is a lively city. The river Mekong is broad and serene and there are plenty of walkways along its banks. The royal palace is located by the riverside.
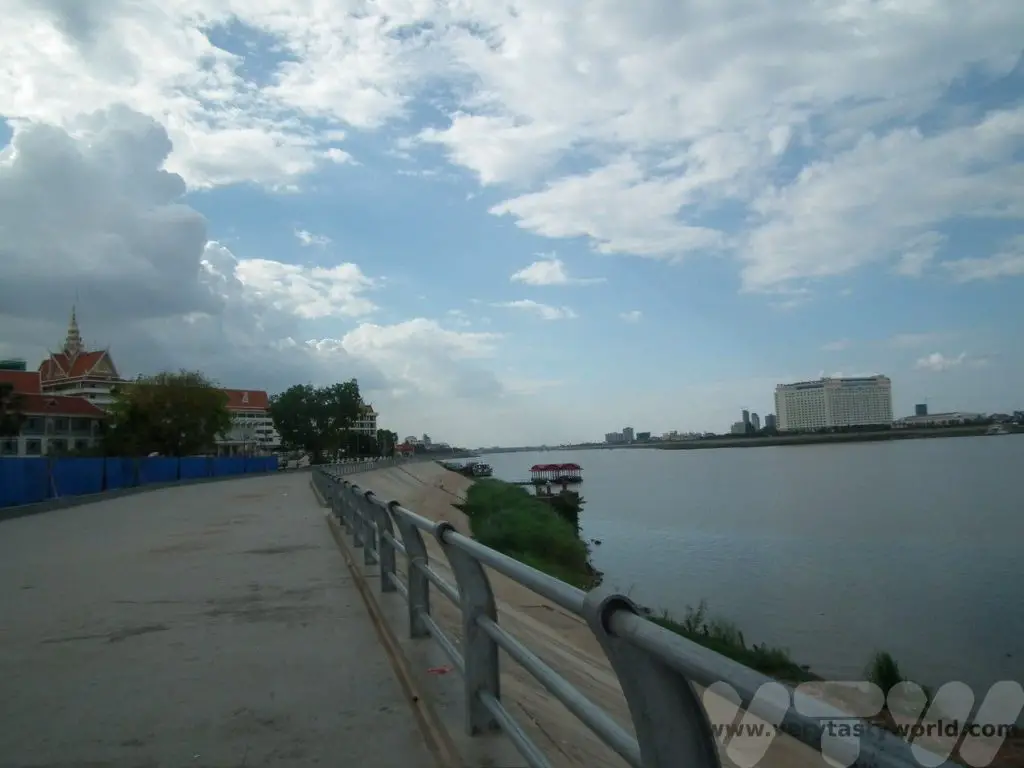
Vietnam – Mekong Delta into the South China Sea
The river then leaves Cambodia and flows into Vietnam. As it approaches the South China Sea it splits into what is known as Cuu Long, which translates as ‘Nine Dragons’, representing each of the channels that the river divides into.
The Mekong delta is vast and covers an area of about 40,5000 square kilometres. It is the rice basket of Vietnam, where two to three yields of rice can be grown each year.
It is possible to enjoy a cruise on the river. There are lots of options from a day trip to overnight stays. The easiest way to reach the Mekong Delta is to get transportation from Ho Chi Minh City – a 3-4 hour drive.
We enjoyed a leisurely two day cruise traditional style Bassac boat along the Sông Hậu branch of the river from Cần Thơ to Cái Bè.
It’s a lovely way of seeing the river and many boat trips offer land excursions where it’s possible to visit local villages which grow rice and fruit.
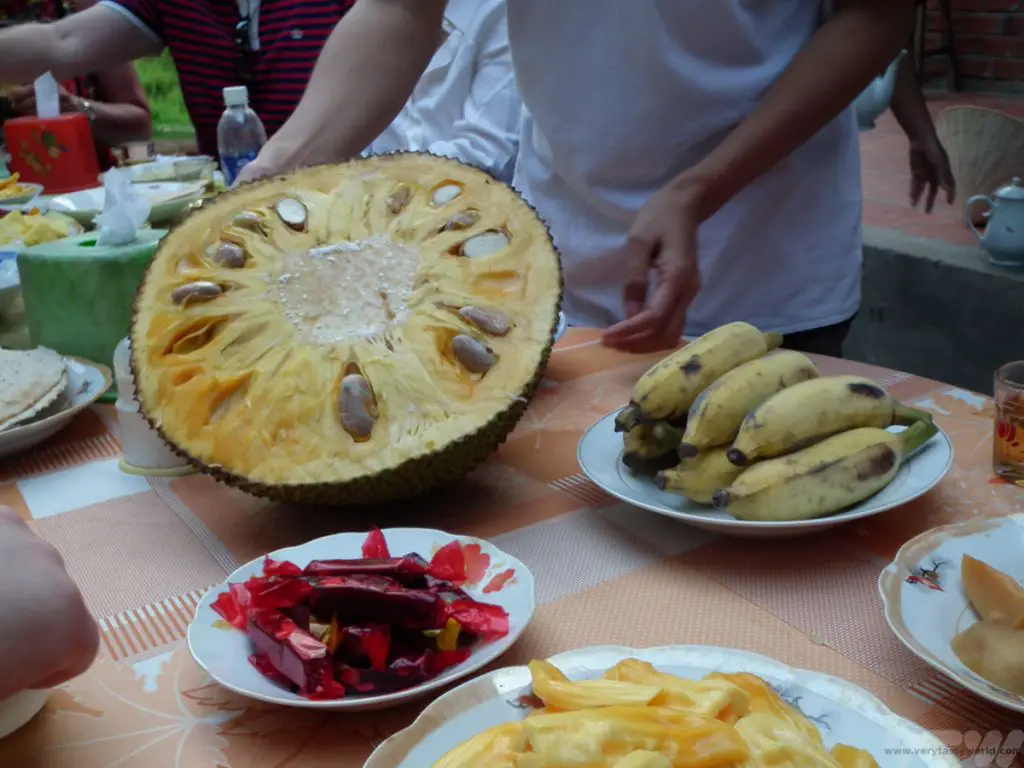
There are also onshore factories which manufacture sweets such as coconut candy, and rice paper.
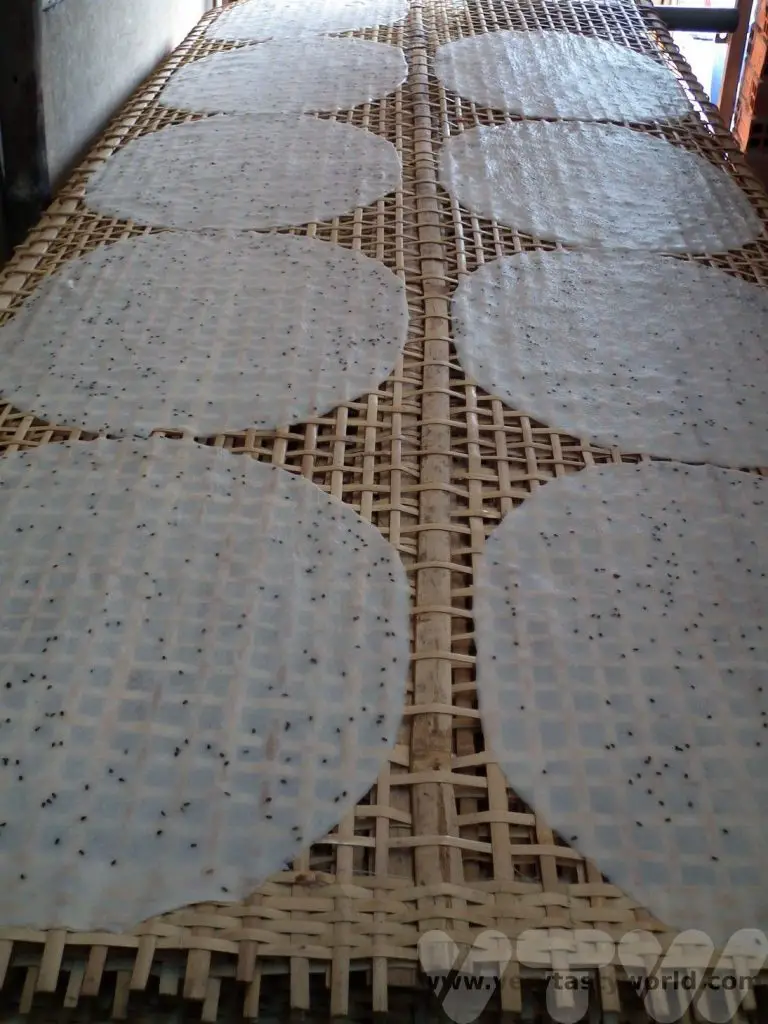
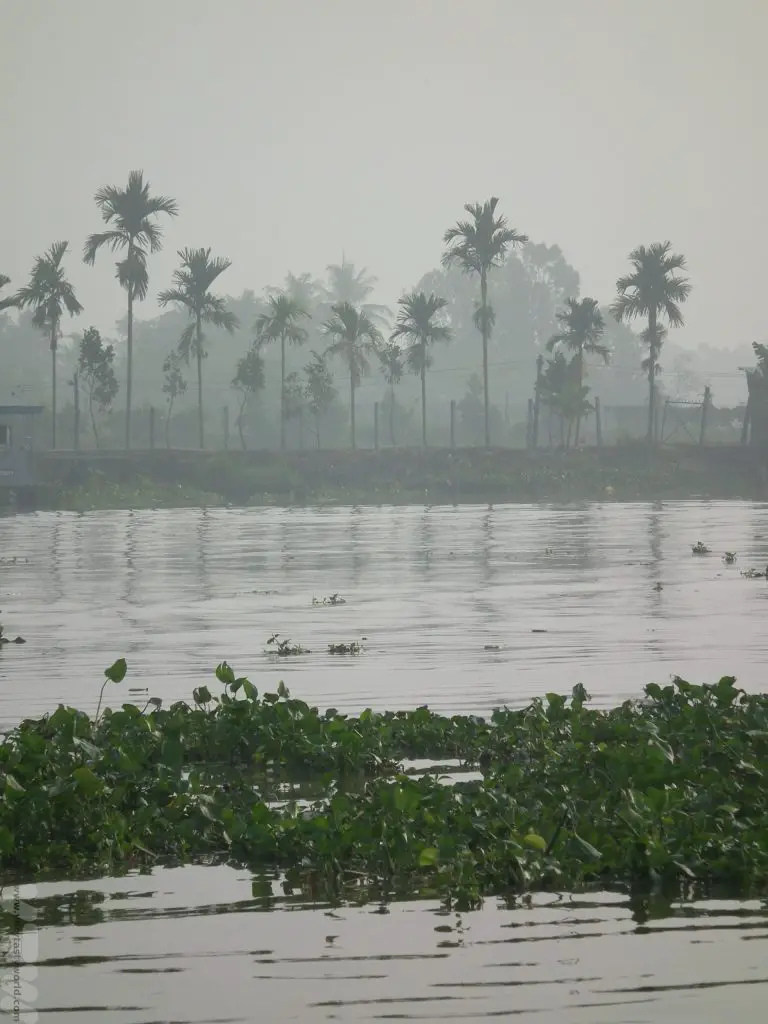
While we didn’t follow the river all the way from Lao to the South China Sea, the Mekong has meandered its way through many of our travels throughout South East Asia. It has provided diverse points of interest from the beautiful landscapes it has shaped, the wildlife that live in and around it, and the bountiful food it supplies. It is clear to see how much it has influenced the lives and livelihoods of the people who live on and around it.
Related Posts You May Enjoy

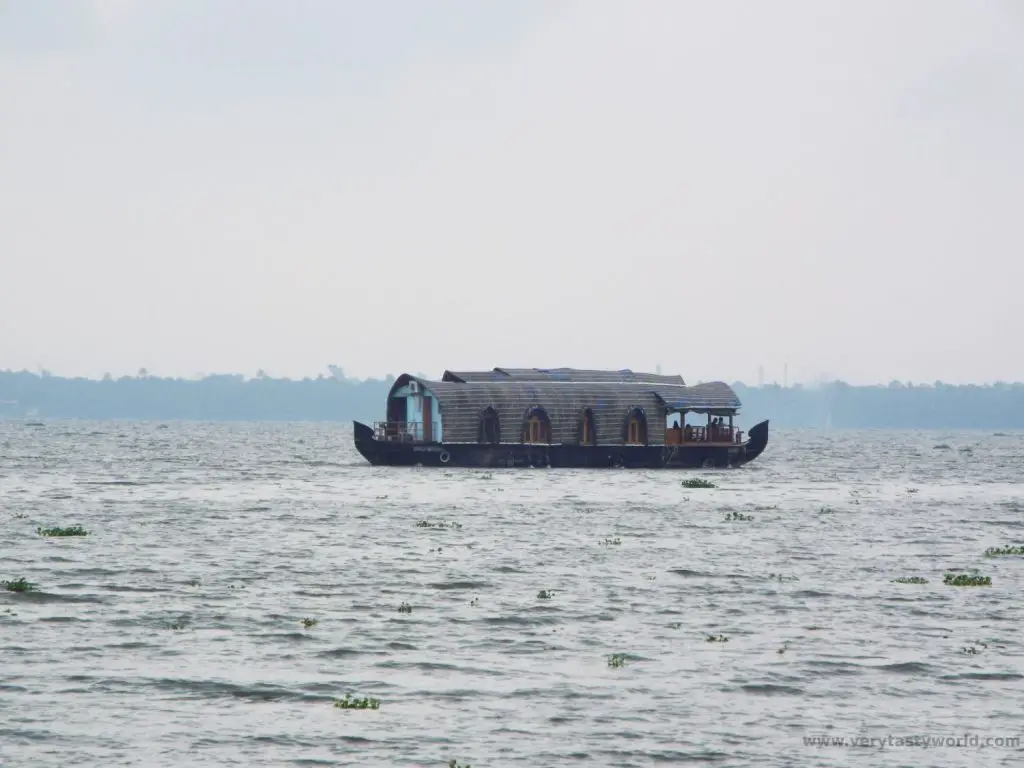
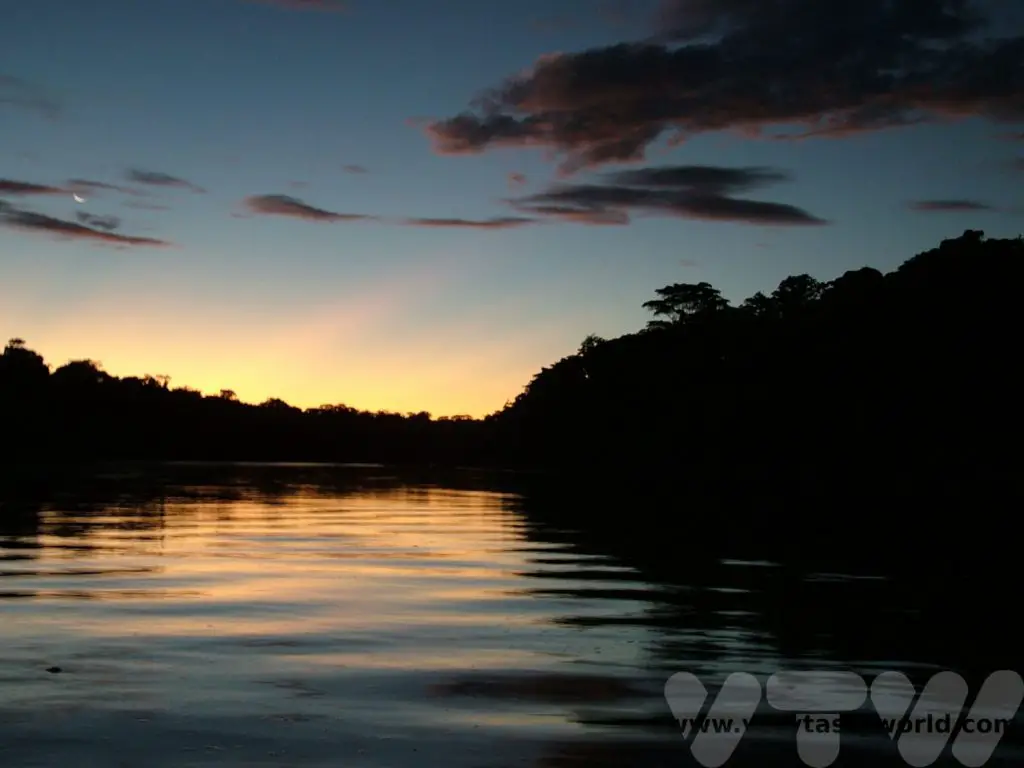
- A One Day Hanoi Itinerary
- Mekong Meanderings
- A Chiang Rai Temple and A Country Retreat
- A Chiang Mai Tour in Northern Thailand
- Sunrise at Angkor Wat and Other Temples
- Mekong Delta River Cruise in Vietnam
- Recipe: Simmered Shiitake Mushrooms
- How to Use Public Transport in Japan
- RECIPE Oyakodon Donburi
- Planning a Trip to Japan
- The Makanai: Cooking for the Maiko House
- Setsubun Food – Bean Throwing Day
- The Gassho Farmhouses of Rural Japan
- Recipe: Japanese Simmered Pork Belly – Buta no Kakuni
- RECIPE: How to Make Umeboshi