Home » VTSub
Category Archives: VTSub
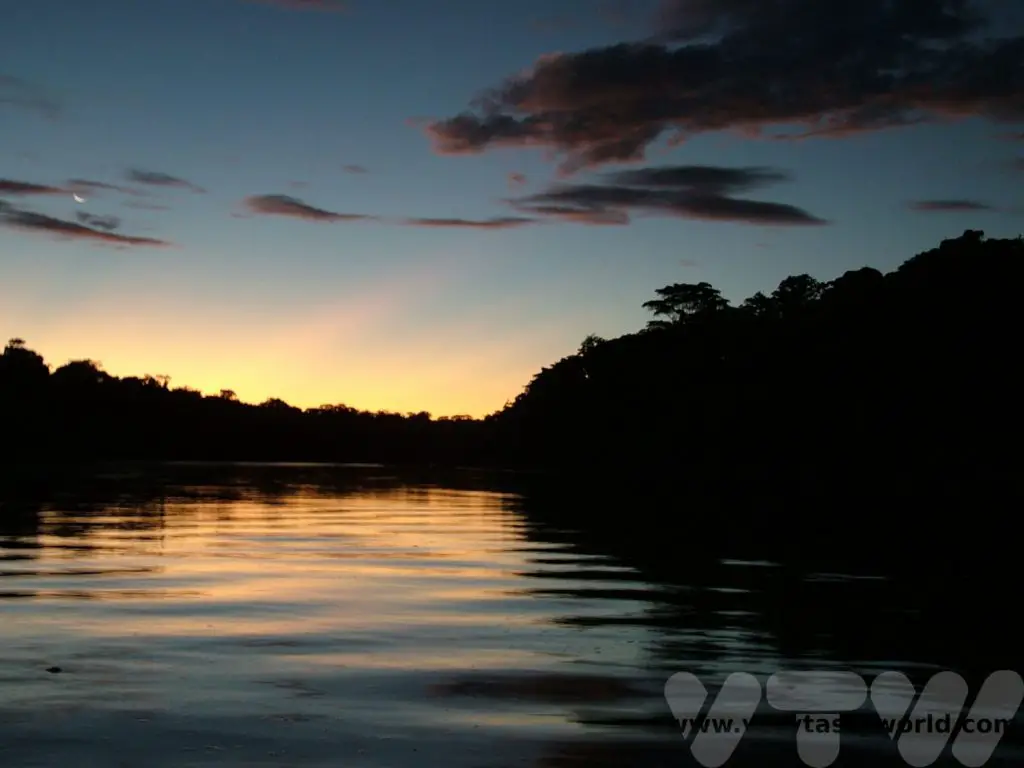
Rivers and Rainforests – A Guyana Itinerary
Guyana is one of the most densely forested countries in the world. Located in the northeast of South America, over 90% of its landmass is covered in lush rainforest. One of the things we most wanted to do on our recent visit was to explore the rivers and rainforests of this fascinating country. Here is our Guyana itinerary.
In order to make this journey we found a local tour operator, Adventure Guianas, who were able to book the accommodation for us and arrange the transfers between locations. Guyana receives very few visitors. Only around 5000 people visit purely for tourism each year. Indeed, outside Lethem and Georgetown we didn’t see any other visitors at all.
Where is Guyana?
Guyana is a small country which borders Venezuela, Brazil and Suriname. It was the only British colony in South America and hence the only country in this continent which has English as its main language. The country gained independence in 1966. Guyana is a word derived from the indigenous language and means ‘The Land of Many Waters,’ a description that couldn’t be more appropriate.

In his book, 92 Days: Travels in Guiana and Brazil, Evelyn Waugh travelled to the interior of Guyana in 1932, around 92 years before we made the journey. He didn’t seem to have a very good time at all. Waugh was a British novelist who had just been through a divorce and had decided to travel to pretty much the most remote area he could think of. So he probably wasn’t in a very good mood.
Waugh found it difficult adjusting to slow travel (in an era of much slower travel) through a challenging landscape and didn’t seem to understand the cultural differences. It was fascinating to read about his visit, embarrassingly patronising colonial language aside, and to see some of the places he described. Apparently it inspired the conclusion to his novel, A Handful of Dust.
What To Expect When Travelling Through The Rainforests of Guyana
There is a lot of travelling between locations but the scenery is spectacular and there are always wildlife viewing opportunities along the way. We were also interested in learning about the local culture, especially the indigenous people of the region. We were delighted that we were able to stay in lodges run by local communities.
Get ready for some early mornings. When we were out on excursions to look for wildlife, we’d be out very early in the morning, when the animals and birds were most active. We’d then have an afternoon siesta, when the sun was at its hottest and the wildlife was also avoiding the heat of the day. In the late afternoon/early evening, as the sun started to go down, we’d be out again, exploring the rainforest and the rivers.
The weather is hot and humid all year round. The country has wet and dry seasons, but the temperature is around 25-30C every day.
Guyana is close to the equator, so sunrise and sunset are around 6am and 6pm respectively, with a small variation (about half an hour) depending on the time of year. In the rainforest there is an insect which is called the 6 O’clock Bee, a cicada which buzzes like a chainsaw in the morning and evening, bang on time every day.
Many of the lodges we stayed in either didn’t have electricity or had solar electricity which stopped when it was dark or ran out when the battery had drained down. There was no aircon at all, but most lodges were able to supply a fan to help us keep cool… until the electricity ran out! Power banks are useful if you want to charge any electronic equipment when there is no electricity.
Some lodges had wi-fi, some didn’t. Some only had internet access in communal areas. Whenever we couldn’t get online, it was a good opportunity to switch off the phone and get away from the modern world for a while. We did take a small tablet device with us so that we could read books or watch some films offline while we were resting during the middle of the day.
Showers were always cold water but this wasn’t a problem as it provided a lovely relief from the heat. No toiletries were provided, just a bar of soap..
Creature Comforts?
There will be critturs in your room. We found it delightful that birds and bats were flying into and around our room or that frogs were hopping around the bathroom. It felt as though we were part of the natural environment.
Keep your bags zipped up so that nothing can crawl inside them when you are not looking. And you need to be aware of bat droppings – we recommend keeping your bags under the bed or underneath a shelf to avoid them being covered in yucky poo pellets in the morning. Also, beware of where you tread with bare feet.
Shake out your boots before putting them on! You never know when a scorpion has snuck inside. Our boots were generally empty each day, although Mitch did find a teeny frog in one of her boots on one occasion. It probably wasn’t harmful but a shake-out avoided it getting crushed by her foot.
You’ll need to sleep under a mosquito net. Insect repellent is also essential. We still got bitten to shreds as the nasty little insects took advantage of even the smallest patch of unsprayed skin. We are clearly delicious to the local mosquitoes! So we also made sure we had had our Yellow Fever vaccinations and we took anti-malarial pills throughout the trip. Check vaccination requirements with your healthcare provider.
We advise packing light because we there is a lot of travelling and we didn’t want to lug heavy bags everywhere. Most of the lodges are able to do laundry, some include it in the cost of the stay, others will charge a small fee.
A Two Week Guyana Itinerary
Our trip to Guyana started in its capital Georgetown, on the Atlantic coast. Most of the country’s population live along the coast. Around 90% of the people live on 10% of the landmass. Of the people living in the rainforests in the interior of the country, the majority are indigenous Amerindians.
Our Guyana itinerary largely took us to the interior of this amazing country. This is a full-on journey which took two weeks to complete.

Days 1-2: From the Coast To The Savannah
After spending a day in Georgetown, we flew to the border town of Lethem. The airport has a dirt runway and a teeny terminal. The aircraft is very small, less than 20 passengers. So your luggage will get weighed and so will you! There is ostensibly a 9kg hold luggage limit. We knew about this so packed as lightly as we could. Our bags were slightly over the limit and weren’t charged excess baggage but it’s worth knowing that there can be a charge. It’s a few dollars per extra kilogram.
Most tourists fly to Lethem – the journey takes around an hour – but it is possible to catch a bus from Georgetown. Travelling by road takes around 12 hours and this time does depend on the limitations of the ferry across the Essequibo river.
Lethem is a strange little town, located right on the border with Brazil, separated by the Takutu River which delineates the border. The lovely driver who greeted us at the airport described it as ‘small but nice.’ It has a suprising number of large retail outlets selling all sorts of consumer goods which are generally more expensive in Brazil. So it receives carloads of visitors who cross the border just to buy things. And many Guyanese cross to Brazil to pick up goods that are cheaper on that side of the border.
We didn’t spend much time in Lethem. Our itinerary was to take us across the savannahs and through the rainforest, staying at various lodges along the way. It was a circular route, anti-clockwise, starting and ending in Lethem and much of our journey was by river.

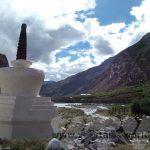
Day 3: The Savannah To The Rainforest: Lethem To Yupukari
On leaving Lethem, our first port of call was the Yupukari Amerindian village, home of the Macushi and Wapishana groups. It took a couple of hours to reach there on a largely dirt road. We stayed in Caiman House, a lodge run by the villagers, who work within the business on a rotational basis, so that each member of the village gets employment from tourism. It was a lovely place to stay – we had a large room within a small complex which included a sitting area and library.


We spent some time walking around the village and were introduced to the staff and children frequenting the local library.
In the evening we enjoyed a boat trip along the Rupununi river, spotting birds.


At nightfall, we met up with a caiman monitoring team. Caiman are members of the alligator family and the team run a project surveying and monitoring these creatures in the river. This project is funded entirely through tourism.


We observed the capture of a caiman, a male, number 836, who was caught and measured. He was fairly big at 1.66m long. Once all the data had been recorded he was released and he slunk back into the murky waters of the river.
Day 4: Yupukari to Rock View
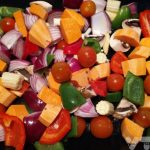
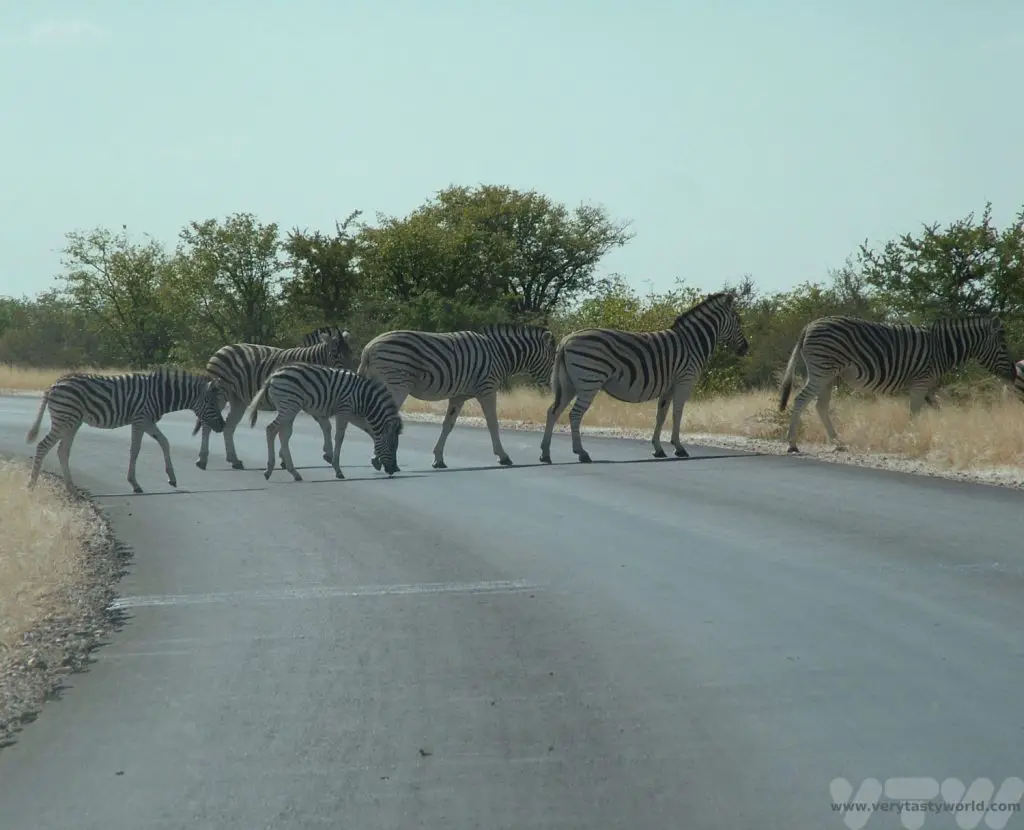
The next morning we were up before sunrise in order to go out into the Savannah to see if we could find giant anteaters.
The grassy plains of the Savannah offer an ideal environment for termites. You can see their impressive mounds dotted like fluffy grey bushes throughout the landscape. And where there are termites there are anteaters. These extraordinary and slightly bizarre-looking creatures amble through across the Savannah in order to enjoy snacking on the insects.


After around half an hour criss-crossing the various trails, a local spotter found one, sauntering across the grassland, feeding at termite mounds and trees.

We then left Yupukari and hit the road for a couple of hours before reaching the foothills of the Pakaraima Mountains. Rock View Lodge is run by an Englishman and his family.

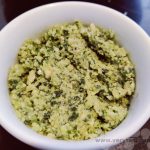
We enjoyed some walks in the area as well as trying local food, especially a demonstration of how to roast cashew nuts.
The family were very hospitable. We were invited to tea and biscuits at tea-time and to enjoy a rum and lime aperitif, with delicious cashews, before dinner. They were also keen to make sure that our transfer the following day could be adjusted because the planned river journey on the Rapununi was not going to be possible due to ultra-low water levels.
Day 5: Rock View To Rewa Amerindian Village
Sadly, we missed the river journey and had to drive to the landing. We were impressed at how all our hosts communicated with each other and went out of their way to ensure that the transfer went as smoothly as possible. The landscape transitioned from bone-dry Savannah to the lush rainforest. When we arrived at Rewa we were picked up to be taken to our next lodge.

Located at the confluence of the Rapununi and Rewa rivers, this is another Amerindian village community which has set up an eco-lodge. We stayed in benabs with traditional roofs woven from dried palm leaves. There is a communal dining area and it has a bar.

We thoroughly enjoyed visiting the village with our Macushi guide to see how the local people live and work. Many of the modern buildings have been constructed by the government and include schools and community buildings. It was also great to see an IT centre which the villagers can use.


Many local people still live in traditional homes and practice the farming and foraging methods of their ancestors.


We were particularly keen to learn about Amerindian farming, food and cookery.

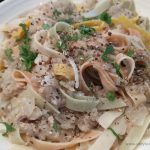
The staple food cassava is processed to form farine (a coarse flour) and beiju (cassava bread) as well as cassareep (a sticky liquid which provides lots of flavour in cooking, including in Guyana’s pepperpot dish). These woven matapi contain grated cassava. The cassava flesh will dry out to make farine and the juice will be retained to make cassareep. Fruit and vegetables are also important in the Amerindian diet. And, of course, the river supplies bountiful fish.
Sports play a big part of village life and the local teams regularly play matches against other villages. We watched the men practice hardball cricket and the women playing volleyball. And there was plenty of wildlife to see.


The only disappointment about this lodge was that we didn’t realise that they had a giant waterlily pond close by until it was too late to visit. We had wanted to see the Victoria Amazonica with its enormous leaves and sadly didn’t have time.
Day 6 – 8: Rewa to Piraiba Lodge. Days on the Essequibo River
Another early start, we were picked up by the Adventure Guianas team who had left their base location at 2am to reach Rewa.

This was our longest river journey. We spent five hours travelling downstream right into the heart of the rainforest in the middle of nowhere. The Rapununi met the Rewa and then flowed into the mighty Essequibo.
Part of the reason for the length of our journey was that the water level was incredibly low, exposing the rounded boulders of the river’s bed. Our boat was piloted by two Amerindian guides who knew the river intimately – the deep parts and the shallow sections, sending us from one side of the river to the other, negotiating rapids (think of a theme park ride with piranha!) and also kindly pointing out interesting birds and wildlife.

At times we had to get out of the boat and clamber over the rocks while our pilots carried the boat to deeper waters. It was a magical journey along a pristine river within a vast forest and we loved every moment.
We arrived at Piraiba Lodge, a wooden construction overlooking the river. And the only construction for miles around. The lodge is on stilts because the river levels rise significantly in the rainy season. Accommodation is basic but comfortable enough.

The hospitality at the lodge was fantastic. Many of the friendly staff are Amerindians who know the jungle and river well. Our local guide Lawrence looked after us beautifully, taking us on treks through the jungle and guiding us along the river.
We spent three nights here. Our mornings and evenings were out on the river looking for wildlife and we even tried our hands at fishing. Caiman live on the river nearby, gliding nonchalantly and slightly menacingly across the water. Some are up to 12 feet long. We made sure we checked for caiman if we ventured onto the beach.

Guyana is rightly a top destination for birding and we saw a huge variety of species.


Sadly, we didn’t see river otters but had an exciting moment when our host caught an electric eel… while we were sitting in a metal boat. These fish can discharge about 700 volts of electricity, so we really didn’t want to come into contact with it! Fortunately, Lawrence managed to pilot the boat to a sandbank and released the eel using a wooden implement. It swam away quite happily and nobody received an electric shock.
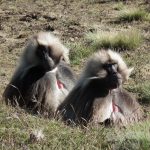
The forest comes alive at dusk. In the evenings the howler monkeys howl. Initially we thought the sound was the whoosh of the wind. But there was no movement of swaying trees. There is a legend that these monkeys hate drinking water directly from the river because they don’t like seeing their own reflection. They prefer to drink rainwater from leaves. And because we were visiting during the dry season, they were howling for rain. We saw a Red Howler in a tree, just hanging around on a branch on one of our jungle walks.

In the deeper parts of the river the Drum Fish lurk on the river bed. They make a rhythmic sound in the evening. Apparently they have muscles that vibrate causing a resonant noise within the swim bladder. If you’re fishing and want a catch, they just won’t bite when drumming.
As with all lodges, all meals and water were fully inclusive and at Piraiba we could help ourselves to unlimited soft drinks from the freezer. We were also treated to some local rum. And, quite unexpectedly, the staff washed our dirty clothes for us – which was really helpful.
The food was great – lots of river fish, enhanced by vegetables, including some mega-hot little yellow chillies that grow on the adjacent land. Pork cooked in cassareep, the sweet reduced casssava juice, was sticky and sumptuous. And our hosts caught a red paku in the shallower waters one day and this was roasted for dinner that evening.
Day 9: Atta Lodge and the Iwokrama Canopy Walkway
After our stay at Piraiba, we boarded the boat again and travelled further downstream for a couple of hours to Fairview Amerindian village. It was another lovely journey, especially as we traversed the rapids.
We said goodbye to the marvellous Essequibo and started the journey inland.
The next stop was the Atta Lodge where, once again, we received a friendly welcome. We had a lovely room and electricity throughout the night. Joy! There are a couple of Black Curassows living nearby that strut inquisitively across the lawn showing off their delightful curly crests.

The lodge is located around a kilometre from the Iwokrama Canopy Walkway. This is a fantastic initiative, developed and constructed by local people, where you can climb up to a treetop canopy suspension walkway, 35m above the ground.

The walk isn’t too onerous – a climb up the hillside followed by some steps which take you up to the treetops. Then you can walk across suspension bridges to the trees and be amongst the birds.

We visited in the evening and again in the early morning, in order to see the birds of the region when they were at their most active.


After leaving Atta we made our way to the next lodge but stopped off on the road to see a very, very special bird. The Cock of the Rock is one of the most striking birds we have ever encountered – a brilliant orange colour with a distinctive head crest and fluffy feathers.
A short walk of around one kilometre took us through the jungle until we reached the rock of the Cock of the Rock. Mrs Cock of the Rock was in the nest looking after Cock of the Rock junior. She viewed us with a small degree of suspicion.


We walked a little further to see whether the male would make an appearance. Our guide used a phone app to imitate his call and, sure enough, curiosity got the better of him and he appeared, posing proudly to show off his magnificent plumage.

Day 10: Surama Eco Lodge
Then we journeyed on to Surama Eco Lodge. Another lodge set in the village of the Macushi people, we were given a tour of the area by a local guide and also enjoyed a walk through the rainforest.
Surama’s accommodation was a bit more basic. Although the room was lovely and large, there was no electricity during the daytime and a generator ran for just four hours in the evening, between 6pm and 10pm. However, the wide windows of the benab took advantage of the breeze blowing through.

We also had a number of visitors to our room, including house wrens that had built a nest in the rafters of the roof and were flitting in and out of the eaves. And a cute little frog in the shower room.


The village comprised traditional homes which were located around a shared communal area. There were two schools, a computer centre, a church, a social club and a sports stadium. We learned about life in Surama – how the residents form a council to decide about village matters.


The totem pole at the village entrance represents the indigenous peoples and depicts humans at the bottom and creatures of the rainforest in a vertical design. This includes an eagle, fish, snakes and a jaguar.

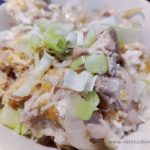
Surama Eco-lodge was very accommodating in terms of cooking local food for us. We’ve discovered over the years that it’s often okay to ask your hosts if they would kindly prepare a local breakfast and every time, they’ve been more than happy to do so. On this occasion, it was difficult to supply breakfast but they provided us with a splendid feast for lunch instead:
Pork cooked in sticky cassareep, farine and callaloo (a leafy plant cooked a bit like spinach) with garlic. It was accompanied by cassava bread, which is more like a biscuit, but perfect for absorbing all those delicious meaty cassareep juices.


Day 11 Back to Lethem
Then we returned to Lethem, a couple of hours’ drive away on a bumpy, dusty road. We popped over to Brazil in the evening, crossing at the Takutu River bridge.

This was the easiest border crossing we had ever undertaken. No need even to show passports (although we carried them with us as the border guards may do spot checks). We had a brief look around Bon Fim, which was pleasant enough but unremarkable.
There are a lot of ranchers in the area, both in Guyana and Brazil, and rodeos are held in both countries. The rodeo is hugely popular – it’s a real family event with funfair rides and music concerts in addition to the main attraction. Accommodation at both locations will be absolutely packed out when the rodeo is in town, so it’s worth considering when rodeos are taking place and booking accommodation early if possible. Many people were buying hammocks so they could sleep outside.
Day 12 Kunaku Mountains
Our final day in this area was a day trip across the savannah to the Kunaku mountains, located a short half-hour drive from Lethem. The Kunaku are considered sacred by the Macushi and Wapishana people who live nearby.

We enjoyed a hike up and down the mountain with a local guide and then relaxed by the river. There was a BBQ area and we enjoyed a delicious roasted Tambaqui fish, a delicacy of the Amazon system, accompanied by local vegetables and, of course, farine.

Then we had a leisurely walk along the river to see the Kumu Falls followed by a relaxing snooze in a hammock with a cold beer to hand.

Day 13 Back to Georgetown
The following day was a travel day as we flew back to Georgetown.
Day 14 Flight to the Kaieteur Falls
The highlight in a trip full of highlights was our flight to the Kaieteur Falls, the world’s largest single-drop waterfall. We have a post about this most spectacular Kaieteur Falls visit.

And that concluded our Guyana itinerary. Although though the term ‘off the beaten track’ does tend to get overused these days, it’s a very appropriate description of Guyana. This amazing country has so much to offer visitors, particularly nature enthusiasts. The infrastructure is still a little basic but the welcome is warm – we often received hugs from our hosts as a greeting or farewell. We can’t recommend Guyana highly enough – it’s a country just waiting to be discovered.
Related Posts You May Enjoy


- Rivers and Rainforests – A Guyana Itinerary

- Best Time To Visit Machu Picchu 2024 Update
- A 2 Week Patagonia Itinerary

- Day of the Dead in Campeche

- A Galapagos Land Based Itinerary

- RECIPE: How to Make Costa Rica’s Gallo Pinto
- A Tasty Puebla Food Tour

- Costa Rica Wildlife Sanctuary – Caño Negro
- Visit Torres del Paine National Park in Patagonia
RECIPE: How To Make Elderflower Champagne
Going for a walk in the English countryside during springtime is one of the great pleasures in life. Foraging for food whilst on a splendid walk is another. And when the elderflowers are out, it is the perfect time to pick a few sprigs from the trees and make elderflower champagne. It’s a gorgeous drink – fizzy, floral and fabulous. Here’s our recipe for how to make elderflower champagne.
(Disclaimer – obviously it’s not champagne as that has a protected name designation.)

The Elder tree is a forager’s delight – you can pick its flowers in the spring/summer but always leave enough for them to transition to delicious elderberries in the autumn. There are all sorts of things you can do with elderflowers and elderberries.
One of the loveliest things to do is to make elderflower champagne. It is a slightly alcoholic sparkling drink which has a lovely floral scent. We never really know how alcoholic it is but it’s not very strong because we use the natural wild yeasts on the flowers. (If you wanted to measure the alcohol content you can get a hydrometer which would give an indication.)

The great thing about elderflower champagne is that it uses very few ingredients and you can make it with minimal equipment. You will need bottles that can withstand fizz, we use recycled pop bottles. We don’t recommend using glass bottles because they will build up quite a bit of pressure and you don’t want them to explode!
Foraging For Elderflowers
You need to go foraging when the weather is dry. That’s because rain will wash the pollen from the flowers away. When you pick the flowers you’ll want to see a small cloud of yellow pollen on the petals. That’s when they are perfect. You’ll need about 10-15 sprigs to get that lovely elderflower scent. Don’t wash the flowers, just check for any insects that might be lurking within their delicate blooms and pick them off.

When you are foraging always make sure you are 100% certain about what you are picking. In our park we often find cow parsley growing under the elder trees and the flowers can look quite similar. And, while cow parsley isn’t poisonous it is related to some very toxic plants such as hemlock, which also has a spray of white flowers and is deadly. This photo has both elderflowers and cow parsley.

The elderflowers are attached to the tree and the cow parsley is growing up from the ground. Please be careful.
Elderflower Champagne Recipe
Ingredients
10-15 elderflower heads
600g sugar
3 lemons
4 litres of water

Method
If you are using tap water, either boil it and let it cool or pour it into a bowl and let it stand for several hours so that the chlorine can evaporate. This recipe uses natural yeasts from the flowers so it’s better to remove as much chlorine from the tap water as possible.
Use a very clean bowl. Dissolve the sugar in the water.
Cut the lemons in half. Squeeze the juice into the water (don’t worry about pips) and add the lemons.

Add the elderflowers.

Cover with a clean tea-towel and let the fermentation magic begin.

The mixture should ferment using yeasts that occur naturally but have a look under the cloth after a couple of days to check that it is foaming. If it isn’t, add a teeny amount of winemaker’s yeast. We sometimes find it goes a little bit gloopy, but that’s okay.

After around 5 days and no more than a week, strain off the elderflowers and lemons using a sieve.
Then decant into bottles. VERY IMPORTANT. Fermentation will continue in the bottle – the yeast will eat the remaining sugar and produce carbon dioxide (and alcohol). If carbon dioxide builds up and your bottle isn’t strong enough to contain it – BOOM! You’ll have to clean up your entire kitchen of sticky liquid and, worse, wait a whole year before you can try again.
We recommend strong plastic carbonation bottles with screw lids or you could use strong glass bottles with champagne stoppers. You need to wash them very thoroughly, ideally sterilise them.
One way of making sure you are getting fizz is to put a little dent in the pop bottles. After a few days the CO2 will push the dent out and you’ll feel pressure on the bottle. That’s a great sign that the fizz is getting fizzy!


Store for at least a week but they will last in a cool, dry place for a few months.
All you need to do is wait for a nice summer’s day. (Which, in England, is sometimes quite a long wait!) On a hot, hot day, pop a bottle in the fridge for a few hours. Then open it up, relishing the hiss of the fabulous fizz, and pour into glasses.

Go straight out into the garden and sip decadently.

- RECIPE: How To Make Elderflower Champagne

- RECIPE Oyakodon Donburi
- Zero Waste Recipes Before Your Holiday
- RECIPE: Vegetable Biryani Tamil Nadu Style

- RECIPE: Vegan Wild Garlic Pesto
- Recipe: Venetian Pasta Sauce
- RECIPE: Biryani Raita Recipe

- RECIPE: How to Make Costa Rica’s Gallo Pinto
- Recipe: Japanese Simmered Pork Belly – Buta no Kakuni
Kobe Beef in Kobe – Is It Worth It?
One of the very best things about travelling is tasting the local food. And one local food we had particularly wanted to try on our travels was Kobe beef. But this beef, reputedly amongst the best in the world, is not only known for its deliciousness, it’s also famous for its extremely hefty price tag. We were keen to try this most exclusive of meats when we visited this region in Japan. So is eating Kobe beef in Kobe worth the hype? (With apologies to vegetarians.)
Where is Kobe?
Kobe is located in the Kansai region of Japan (the same region as Kyoto and Osaka) in the southern central area of the main island Honshu, and it is the capital of the Hyōgo Prefecture. It is a port, and one of the cities that opened up to the world in 1868, after Japan’s long period of isolation, and just before the Meiji restoration. It is a lively and cosmopolitan city with plenty of things to see and do.

What Is Kobe Beef?
Kobe beef is one of the world’s most luxurious meats. It’s characterised by the high level of fat content, marbled through the flesh, which means that the meat has both flavour and a sublime melt-in-the-mouth texture.
Like many foods of distinct origin, there are a number of very strict rules to ensure that only cattle bred in a specific region and to the highest standards can bear the name Kobe beef.
The Kobe Beef Marketing and Distribution Promotion Association was established in 1983 with the aim of defining and promoting Kobe beef as a trademark. They were hugely successful – the Kobe beef brand is known worldwide.
The beef is graded using a letter and number system. The letter (A to C) relates to the ratio of meat/fat to the carcass weight of the cow (i.e. the yield) and the numbers (1-5) represent different elements, notably marbling, colour, fat, firmness and texture, 5 being the greatest amount of fat and therefore the tastiest. Remember, fat means flavour! So, A5 beef is the best quality – and the most expensive – that you can get.
Why Is Kobe Beef So Expensive?
The cattle are raised in a way that to give them a stress-free life – the more relaxed the cow, the more tender the meat. It’s a slow process and they are fed a top-quality diet. They are raised naturally over a period of two to three years, which takes time. The cows often have names and usually have a pasture to graze in. Sometimes they are given a brush massage to increase circulation. There are even stories about them drinking beer, but this is a myth.
And, given the success of the branding, you are also paying for the name.
Where to Eat Kobe Beef in Kobe?
We figured that if we were visiting Kobe we really should try Kobe beef while we were there. There are a number of official restaurants in the area close to Sannomiya station. You will see promoters with leaflets wandering the streets and offering deals on meals at specific restaurants.
The Kobe Beef Association has a guide to official restaurants.
We decided to have lunch at Kobe Beef Yazawa Hankyu Sannomiya ten (and not just because Spider-man was clinging precariously to the wall).
The menu was eye-wateringly expensive. Most restaurants in Japan prefer cash to credit cards but the Kobe beef restaurants will happily take cards. We had prepared for a splurge, so closed our eyes, ordered and figured we’d worry about the credit card afterwards – well, within reason!
So What Does Kobe Beef Taste Like?
We wanted to try a variety of dishes, so as to taste the different ways the Kobe beef could be prepared.
You buy the beef by weight and the restaurant has a set of helpful models which indicate quite how much steak you get in each portion. The answer is… that you don’t get much. And 120g of top-grade beef can cost from 9000 to over 29000 Yen ($50-$140) depending on the cut of meat.

The restaurant offered a set menu and we ordered a couple of extra dishes. The beef ‘sushi’ comprised slices of seared raw beef draped lovingly across seasoned sushi rice with just a dab of condiment.

Then a plate of sliced wagyu, decorated somewhat over-fancifully with a dressing and garnishes.

The set menu comprised beef served steak teppanyaki (cooked on an iron griddle) style accompanied by a number of small dishes – including a beef stew with rice and salad and, of course, ubiquitous miso soup.

We were surprised at the western flavours of the beef stew – carrots and broccoli lying atop some braised beef in a rich gravy just didn’t feel Japanese at all. But the beef had been slow-cooked and was so soft you could cut it with a spoon.
The teppanyaki grilled steaks were served more simply. They had been cooked medium rare. We normally like to eat our steak rare but with Kobe beef you need the fat marbled throughout the flesh to melt into lusciousness, so medium rare is the minimum amount of cooking.


Although the dish was plated with sauces, we wanted to taste the meat without any sauce. Soy sauce or salt are flavour enhancers, and wasabi was served as well. Garlic is a popular accompaniment.
How To Keep Costs Lower
We figured that eating Kobe beef in Kobe would at least cut down on transportation/export costs, so we looked for local restaurants.
If you want to go for the all-out Kobe experience, lunch menus are usually much cheaper than dinner. Some restaurants may even include a service charge at dinner time, which is very unusual for Japan. Service charges and tipping are generally not part of the culture.
Also, some of the prices on the menu may not include sales tax, so bear this in mind when ordering.
An alternative Kobe beef restaurant which is a much cheaper option is the Gyu Tan restaurant. This is beef tongue – but from Kobe cattle. It doesn’t have the melt-in-the-mouth lusciousness of steak because the tongue does not contain fat, but it is a lot cheaper and a very tasty meal in itself. Although as soon as we entered the restaurant, the staff were very keen to make sure that we knew we weren’t going to get a steak. It was fine, we had planned to visit this restaurant anyway.

A gyu tan rice bowl accompanied with a delicious consommé was a reasonable price. The tongue is soft and full of delicate flavour.

Alternatives To Kobe Beef in Japan
With Kobe beef you are paying for the name and the fame. But while Kobe beef is the most famous, other delicious varieties of beef are produced in Japan. Matsusaka Ushi from Mie prefecture and Omi beef from the Shiga prefecture are also highly prized.
In the central region, the Japanese Alps, the lovely mountain town of Takayama is a centre for Hida beef. Hida is derived from kuroge wagyu – black cattle. But the meat still has a high level of fat marbling.


It’s very delicious indeed and a lot cheaper, although it is not a cheap eat, we would still class it as a posh meal. The restaurant Maruaki Hida Restaurant in the centre of town, which is attached to a butchers, offered a BBQ. You are presented with a plate of raw beef and veggies and you cook them on the grill.
The only essential condiment was salt – a sprinkling of salt crystals on top of the meat before cooking. Our friendly server showed us how to do this. Salt is a flavour enhancer – it opens your tastebuds and really maximises the flavour of the meat. We found that the unpretentious atmosphere and grilling the meat ourselves (with help if we had wanted it) was much more to our taste and the meat was flavourful without all the fancy garnishes and sauces.
Other Foodie Fun in Kobe
Steamed Pork Buns in Chinatown
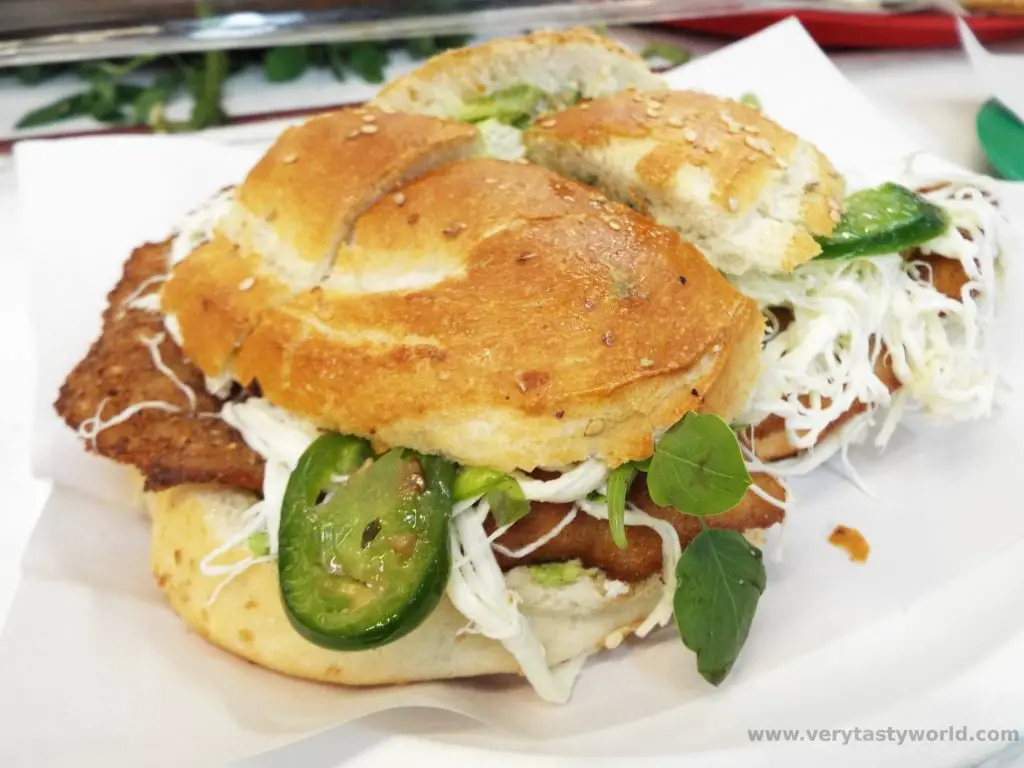
Kobe has a large Chinatown. It is here that you can visit Rosyoki and scoff their stunningly good pork buns which are at the opposite end of the pricing spectrum. You will easily find Rosyoki – there’s usually a long, but relatively fast-moving, queue outside.

Their steamed pork buns are a delight – light and fluffy with a juicy pork and flavoursome spring onion filling.


At just 100 Yen for a bun – and we suggest getting a minimum of three – you can help offset any busted budgets from a Kobe beef splurge.
As you enter the restaurant you can see the buns being made on a grand scale. It’s a swift service – order your required number and then pay.

There are seats inside but they are likely to be occupied. However, the restaurant is located in a nice square which has some areas to sit, so it’s okay to munch outside. (Normally in Japan people don’t eat while walking around or standing in the street, but it was fine here.)

Sake Brewing in the Nada District
Kobe is also famous as a centre for sake brewing. Sake is rice wine brewed by fermenting polished rice. A combination of great quality rice, clean local water and a good climate makes the area ideal for brewing this delicately refined alcoholic drink.

There are a number of breweries located in the Nada district. The Hakutsuru Sake Brewery has an adjoining museum which displays exhibitions that show the sake brewing process.


Sake samples are available so that you can taste the different grades of sake. And of course there’s a shop where you can indulge in some bottles of the local brew.
You can also buy a tub of sake ice-cream. This was definitely worth investigating – and was delicious.
Kobe Herb Garden
Kobe has an extensive herb garden located in the Chuo Ward on the slopes of Mount Rokko. You can take the rope-way up the mountainside and walk through the gardens. The slopes are pretty steep, so it’s best to take the cable car all the way to the farthest station at the top and then walk downhill to the bottom rope-way station.

A visit makes for a pleasant afternoon and you can learn about the different uses of Japanese herbs and vegetables that are used for medicinal and culinary purposes.


So, Is Kobe Beef Worth It?
Honestly? While eating Kobe beef was undoubtedly an experience and a delicious one at that, it is extremely expensive. Part of the problem lies with the marketing – your expectations are inevitably incredibly high.
And, although we very much enjoyed our meal, it wasn’t the sublime gastronomic joy we were hoping for, especially given the cost. If you are looking for a good quality meal that is also good value (although that doesn’t mean cheap), Hida beef would be our preference.
And, as Kobe’s pork buns prove, sometimes you don’t need a large, showy establishment with all the high-end posh-restauranty trimmings to enjoy down-to-earth, simple food that is both cheap and utterly delicious.
Related Posts You May Enjoy


- Kobe Beef in Kobe – Is It Worth It?

- World’s Best Breakfasts -Breakfast of Champions!
- Recipe: Simmered Shiitake Mushrooms
- How to Use Public Transport in Japan

- RECIPE Oyakodon Donburi
- Planning a Trip to Japan
- The Makanai: Cooking for the Maiko House
- Setsubun Food – Bean Throwing Day

- The Gassho Farmhouses of Rural Japan

- World’s Best Breakfasts -Breakfast of Champions!
- A One Day Hanoi Itinerary

- Mekong Meanderings
- A Chiang Rai Temple and A Country Retreat
- A Chiang Mai Tour in Northern Thailand

- Sunrise at Angkor Wat & Other Temples To Explore

Thanks so much for reading. We hope you enjoyed this article. If you’d like to keep up to date with new posts and recipes, please subscribe to our newsletter or follow us on social media – X, Facebook or Instagram. We always love hearing from you and would be delighted to read your thoughts about this article.
World’s Best Breakfasts -Breakfast of Champions!
Some years ago we were excitedly choosing all sorts of delicacies at the breakfast buffet at our hotel in Yerevan, Armenia, when another guest glanced at our plates, shrivelled their noses very patronisingly and bellowed, “Ugh! Salad? For breakfast?” It’s widely considered to be the most important meal of the day but so many people seem to be set in their ways when it comes to eating a hearty breakfast. And many hotels seem to cook the same type of food for their guests: Western visitors are often offered bacon, sausage and eggs with breads and pastries, and Eastern visitors can usually select rice or noodle dishes. All these foods are familiar to the tourist but they often don’t reflect the traditional breakfasts of the country they are visiting. Here are some of the world’s best breakfasts.
Maybe people don’t feel so adventurous first thing in the morning, and that’s fair enough, but the thing is, we’re British and can have bacon and eggs any time we like. (Although, to be honest, we haven’t cooked a fry-up for years as it’s quite a lot of effort.) We’d much rather eat a typical breakfast from the country that we are visiting, especially if they are using local ingredients.
An Abundance of Diverse Dishes
Some countries have a typical breakfast that is simple, others have a variety of foods that make up the morning meal.
Japan
Japan is well known for its fabulous cuisine and also offers one of the world’s best breakfasts. A Japanese brekkie often comprises grilled fish, vegetables and pickles, maybe with tofu, dumpling and an omelette.

These are accompanied with a bowl of rice, into which you could crack a raw egg mixed with shoyu (soy sauce) – the egg sort of cooks in the heat of the rice – or that famous smelly fermented soybean concoction, natto, maybe with some sliced negi (similar to spring onion). Just grab a slice of nori (dried seaweed), place it over the rice, then using a pincer movement with your chopsticks grab a portion of rice with the nori. Scrumptious. (It’s worth noting that if you are at a breakfast buffet in Japan the eggs on offer may well be raw – be careful when cracking them.)


India
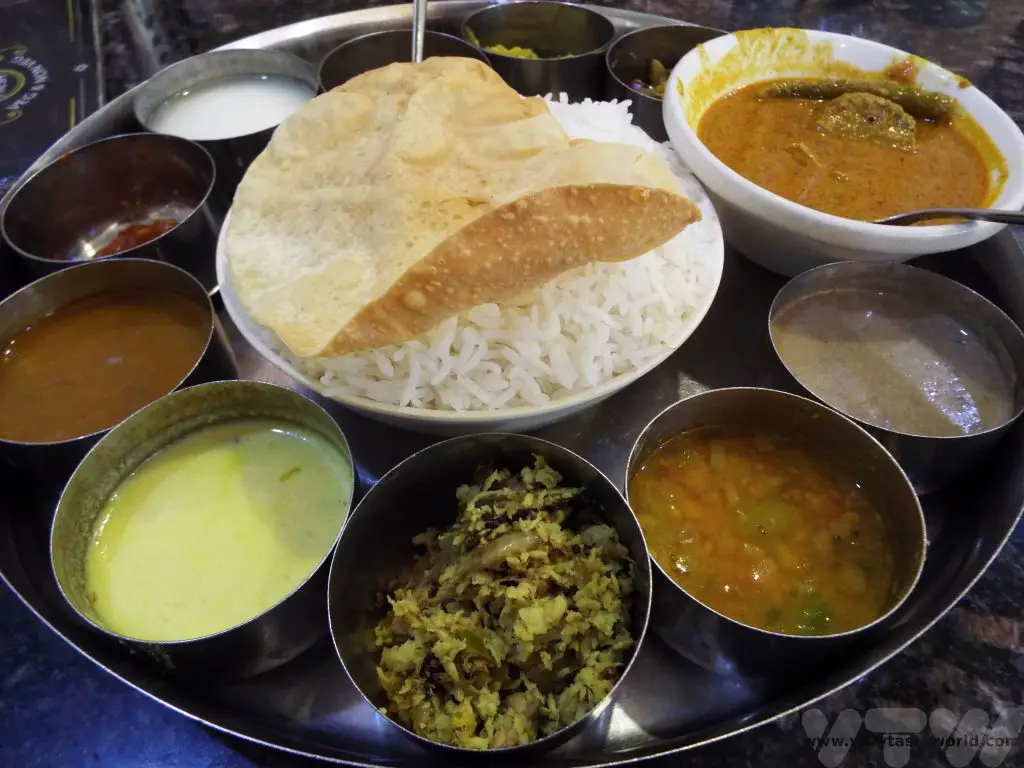
A dosa for breakfast in South India is an absolute joy. This is a pancake traditionally made from rice and dal (lentils) which are ground to form a batter and then fermented. The batter is cooked on a hot plate to form a large pancake and served with chutney – coriander, coconut and tomato are particularly popular.

In Kerala, this breakfast comprised vada, which is a doughnut made from fermented pulses and a puffy bread puri served with sambar, a delicious stew made from lentils, vegetables and spices. Multiple chutneys feature as well to provide a variety of flavours that soak into the vada and puri.

It’s Often Okay to Go Off-Menu
It’s quite common for hotels to ask their guests to pre-order breakfast. It makes sense: the hotel staff know what to order in beforehand and this can help minimise food waste. There is usually a form with tick boxes and you can choose from a variety of typical breakfast offerings. But if you do want to eat like a local, we’ve learned that many hotel restaurants are really happy to cook you a regional breakfast.
Uganda
It all started in Uganda when we breakfasted at a lodge with a local guide. We were eating standard fare but our curiosity was piqued when something entirely different was brought out for him. On asking, we learned that it was a rolex – a chapati with a layer of omelette on top, then rolled into a spiral cylinder, perfect for munching on. So the next day we asked the lodge staff if it would be possible for us to have a rolex for brekkie and they were happy to oblige. It’s great – tasty and filling – a good start to the day.

Nepal
In Nepal we were given a standard pre-order form to complete (eggs, bacon, sausage, toast…) to pre-order breakfast for the following morning. We politely asked whether it was possible to have a local breakfast instead. We didn’t specify any dish – just asked for local food. They were delighted. The following morning we were served a marsala omelette accompanied by a joyous curry and roti with home-made yoghurt. It was delicious.

Madagascar
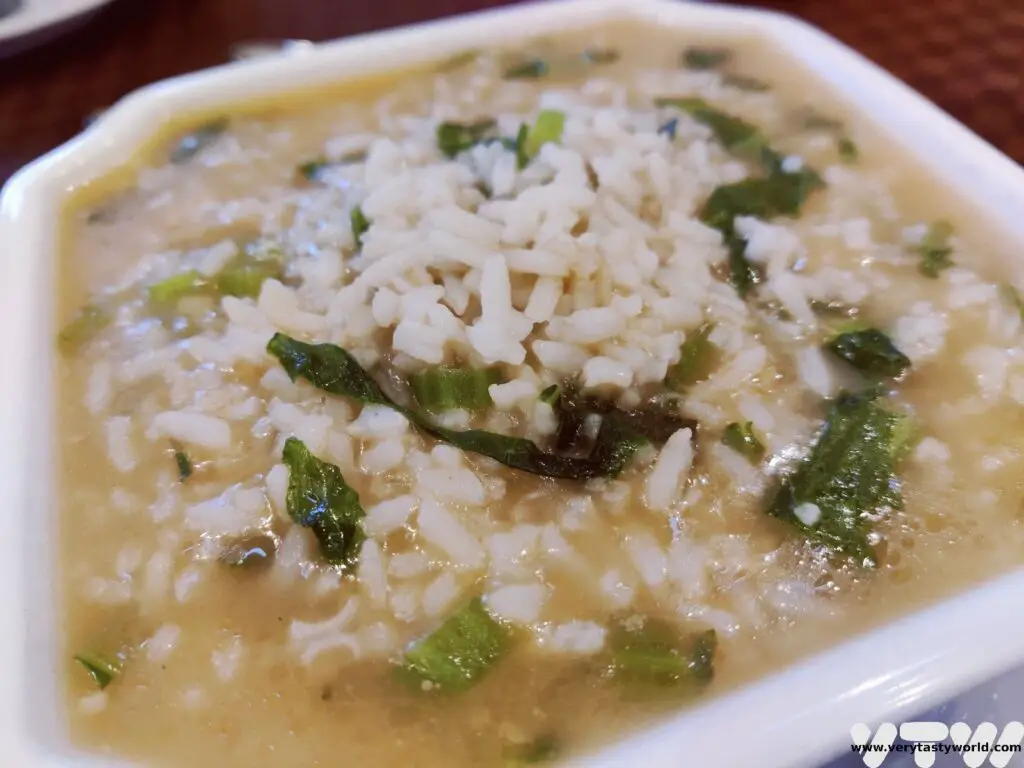
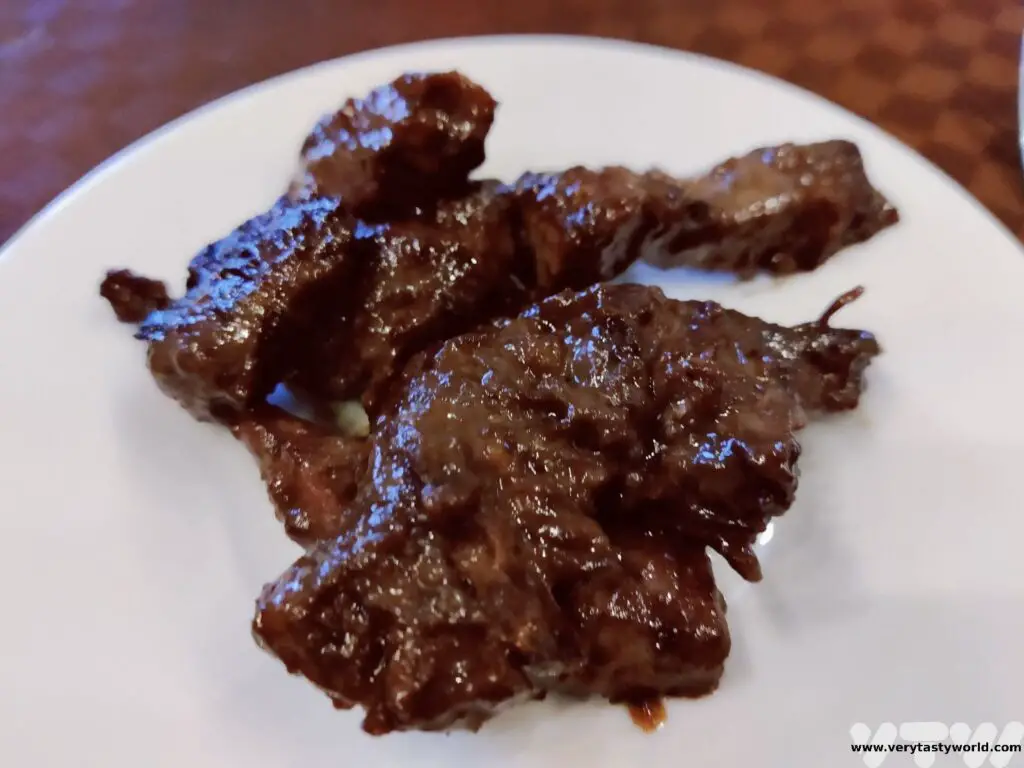
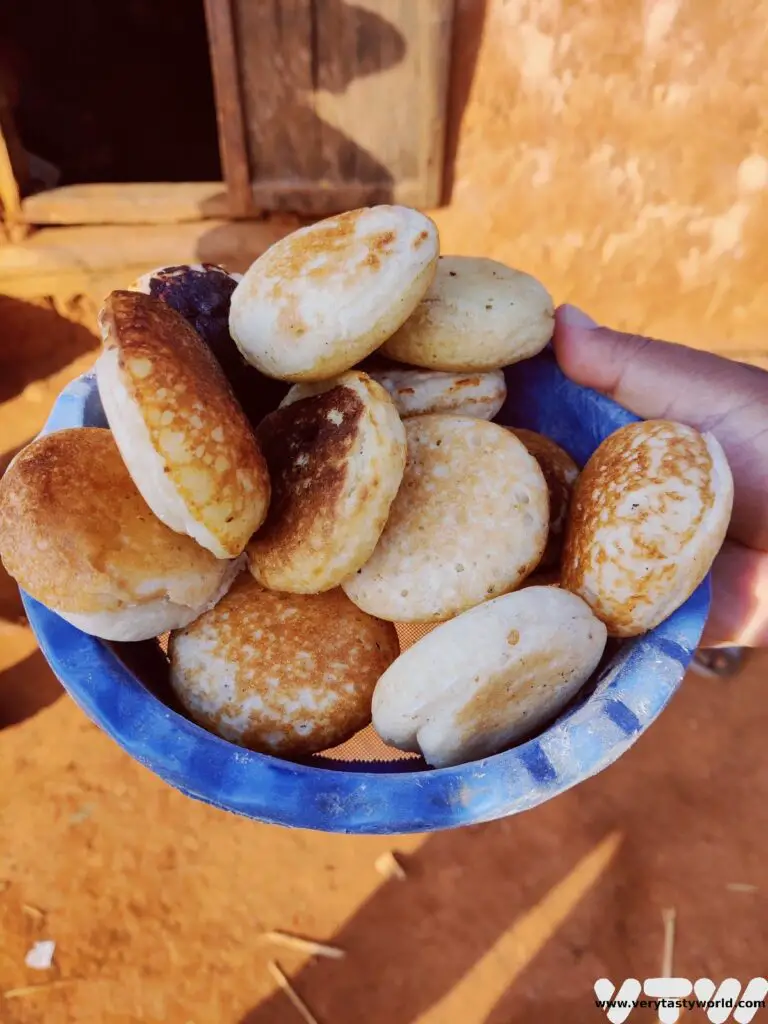
Madagascar is famous for its amazing landscapes and unique flora and fauna and isn’t really known at all for its cuisine. But its breakfasts are great – really hearty and filling. If you want to try a local breakfast, it is best to request it the night before because it takes some time to cook. Rice is the staple in Madagascar, so a typical breakfast includes vary sosoa, or rice porridge. Sometimes it is served with zebu (a kind of cattle) steak for a very rich and decadent breakfast.
Mofo baoline are fried doughballs. They are very fluffy and filling and will really set you up for the day.
Breakfast, Lunch, Dinner and Breakfast Again
Many countries offer breakfasts that aren’t necessarily only eaten in the morning. When the food is this good, why restrict the dish to the morning?
Costa Rica
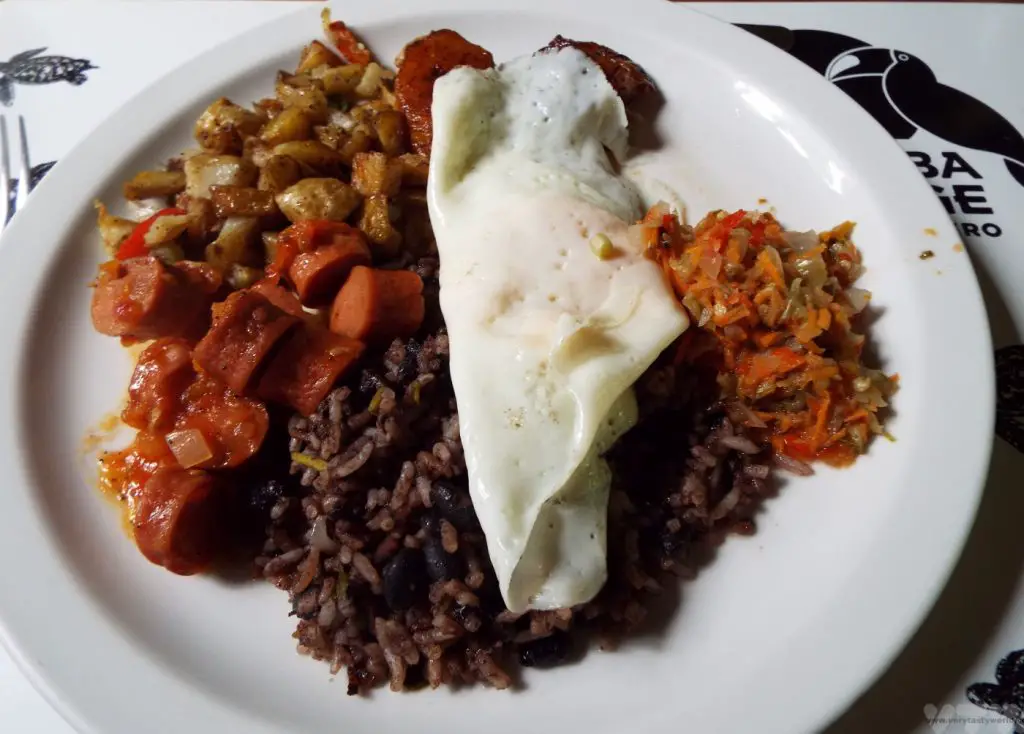
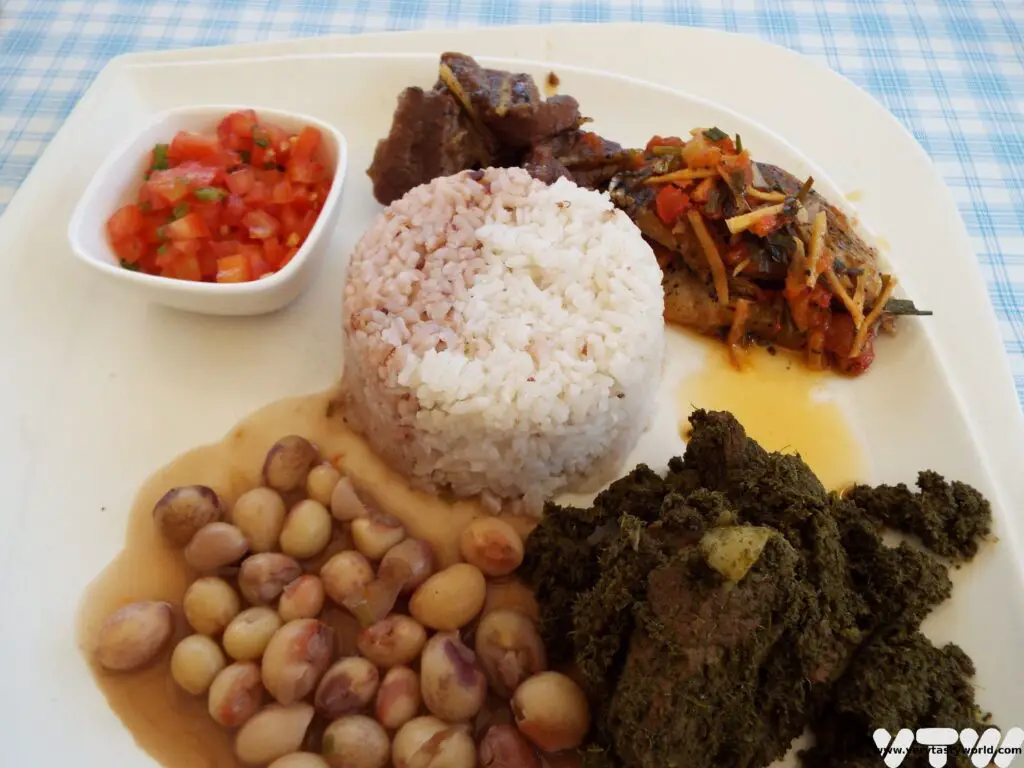
One of the world’s best breakfasts is gallo pinto from Costa Rica. It’s so popular it is often eaten for lunch and dinner as well. Which is just as well because it tastes great and is also really healthy. It comprises rice and beans and is usually accompanied by a fried egg at breakfast. Other accompaniments to start the morning include sausage, fried potatoes and some salad.
Vietnam
In Vietnam breakfast usually took a buffet form but often there were chefs on-hand to cook some food to order. We were always offered Pho – a tangle of noodles, freshly cooked and served in a yummy broth, topped with meat and vegetables. You pick up a side plate and add herbs, chilli, limes and other delicious items so that you can create your own personalised taste sensation. The liquid of the broth also ensured that we were thoroughly hydrated for the day ahead.

Mexico
We’ve said it before and we’ll say it again: with Mexican cuisine more is always more. There are so many dishes on offer, we didn’t have the same breakfast twice throughout our trip. Tacos with all the trimmings were just as fantastic to eat at breakfast as they were at lunch or dinner (or even for a mid-excursion snack). You can never have too many tacos.

Chuilaquiles are basically tortillas (often leftovers) which form a carb base. Then they are covered in red or green salsa and other ingredients such as shredded chicken, cheese or refried beans.


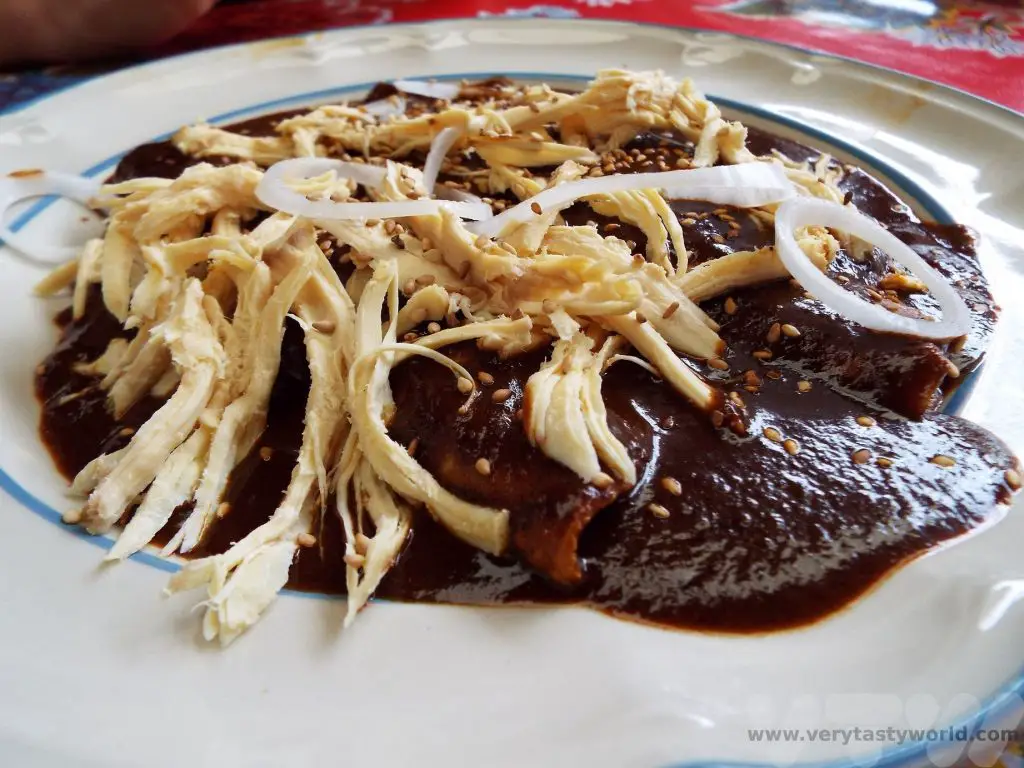
Tortilla with mole (pronounced molay) makes for a sophisticated breakfast. Mole is famous as the savoury sauce which contains chocolate but it’s so much more than chocolate sauce. It’s actually a very complex sauce, which contains a vast number of ingredients and takes a long time to make. Hotels in Mexico will often provide a sweet, glossy mole but the best ones can be found at the local market.
Huevas chiopanecas (below left) are eggs with red sauce and pork tamales (corn dough steamed inside a husk). And huevos coletos (below right) are fried eggs over tortillas with beans and pork sausage, which sounds western enough, until it’s adorned with spicy red sauce.


These dishes are also the sort of food that will be eaten through the day. And quite right too – they are all delicious, so you wouldn’t want to restrict yourself to just the first meal of the day.
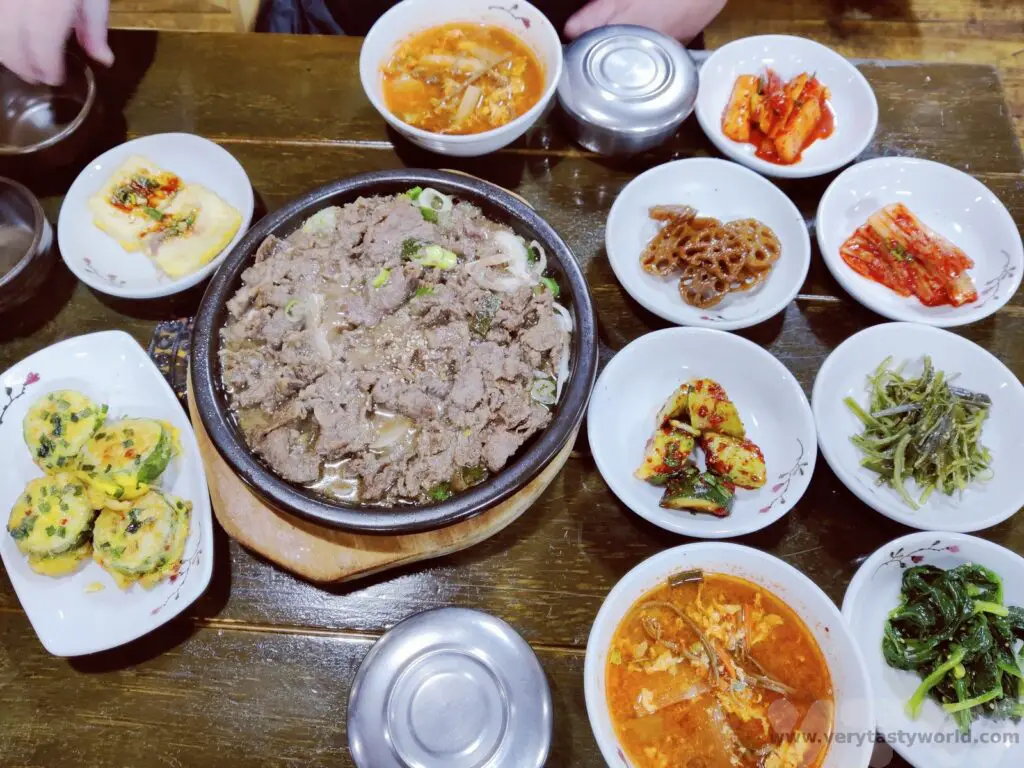
South Korea
Like in Mexico, Korean people eat a wide variety of dishes in the morning and many of these aren’t solely for breakfast. Stew, known as jigae, accompanied by rice and side dishes, known as banchan, are popular.


Kimchi also features, as it does with pretty much every Korean meal. It is a spicy fermented cabbage dish and is so popular that most Korean people have two refrigerators – a normal one and a kimchi one. We make our own – you can find our kimchi recipe here.
World’s Best Breakfasts: Minimal Preparation, Maximum Flavour
And there are some brekkies that are surprisingly simple and make full use of great ingredients.
Spain
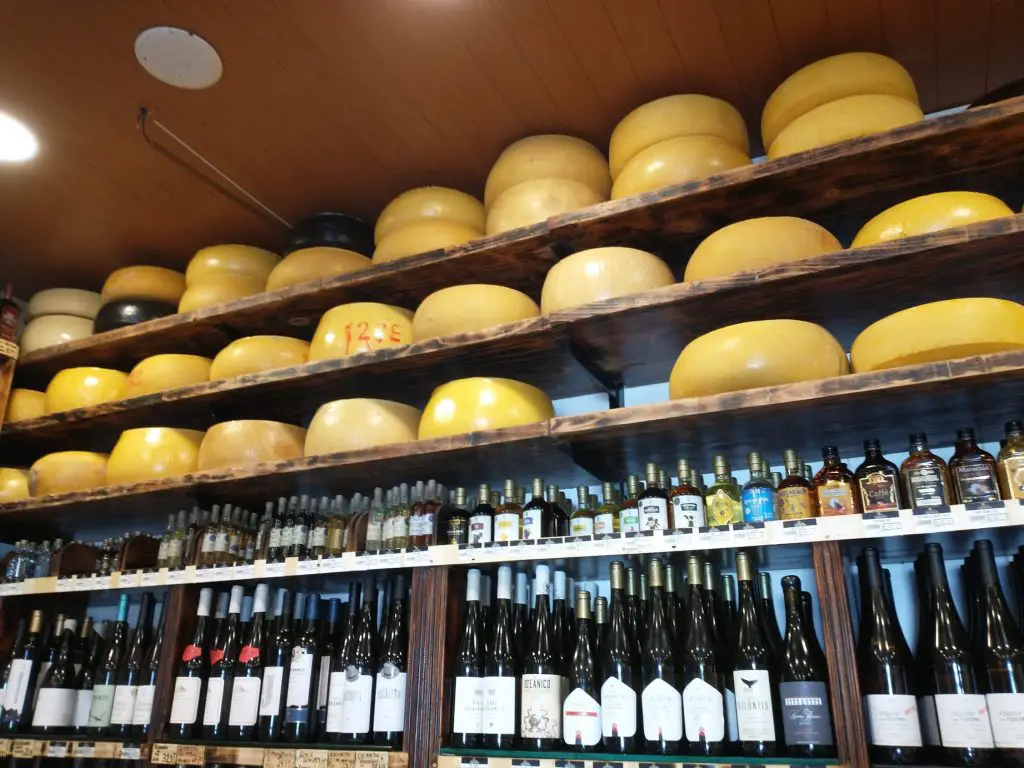
Andalucia is known as the breadbasket of Spain, and is a region that has more than its fair share of delicious produce. Alongside wonderfully fresh fruits and vegetables, it is the region of Iberico ham, sourced from the black pigs that forage for acorns in the mountains. And in nearby La Mancha, Manchego cheese is a hard cheese made from sheep milk which has a strong, nutty flavour. Sometimes simplicity is the key to a fantastic breakfast.
Pan con tomate is a thick slice of toasted bread, rubbed with olive oil and sometimes garlic, topped with a salsa of crushed ripe tomatoes and just a sprinkling of salt. such a simple dish but it is so delicious. It’s proof that quality ingredients speak for themselves.


Germany
A German breakfast is clever because it really needs minimal preparation in the morning. the perfect way to start the day is to get up and eat.
Key to its deliciousness is the bread. There are over 3000 types of bread in Germany, both breakfast and evening breads. There are so many varieties of tasty Brot (breads) and Brötchen (rolls) for brekkie – white breads, rye breads, whole-grain, wheat-rye and many, many more. There are so many variations, sometimes they are seeded or nutty, all are hearty, filling and a perfect vessel for sweet or savoury delights.
So what can you put on your bread: a variety of meats, cheeses and smoked fish or, if you have a sweet tooth, jams and honey. Honeycomb, dripping with sweetness, slathered over a slice of buttered bread, is a thing of joy. And how can you not love the fact that every September 25 Germans celebrate Butterbrot Day – a day of bread and butter?

Scandinavia
A Norwegian breakfast is savoury. Local seafood is amazing so fish features heavily in the first meal of the day. This may be smoked salmon or pickled herring in a variety of marinades. Bread with pålegg – a spread – is common.
Norway also offers some unusual cheese – brown cheese, called Brunost. This is one of the strangest cheeses we’ve tried because it uses what is normally considered to be the waste product from cheese-making – the whey. Whey boiled with cream results in caramelisation which gives the cheese its distinctive brown colour. A slice of cheese atop a slice of bread is an important part of a typical breakfast.
And you are always guaranteed a great cup of coffee – or three – when visiting Scandinavia. Coffee is an essential part of breakfast.

World’s Best Breakfasts – Back At Home
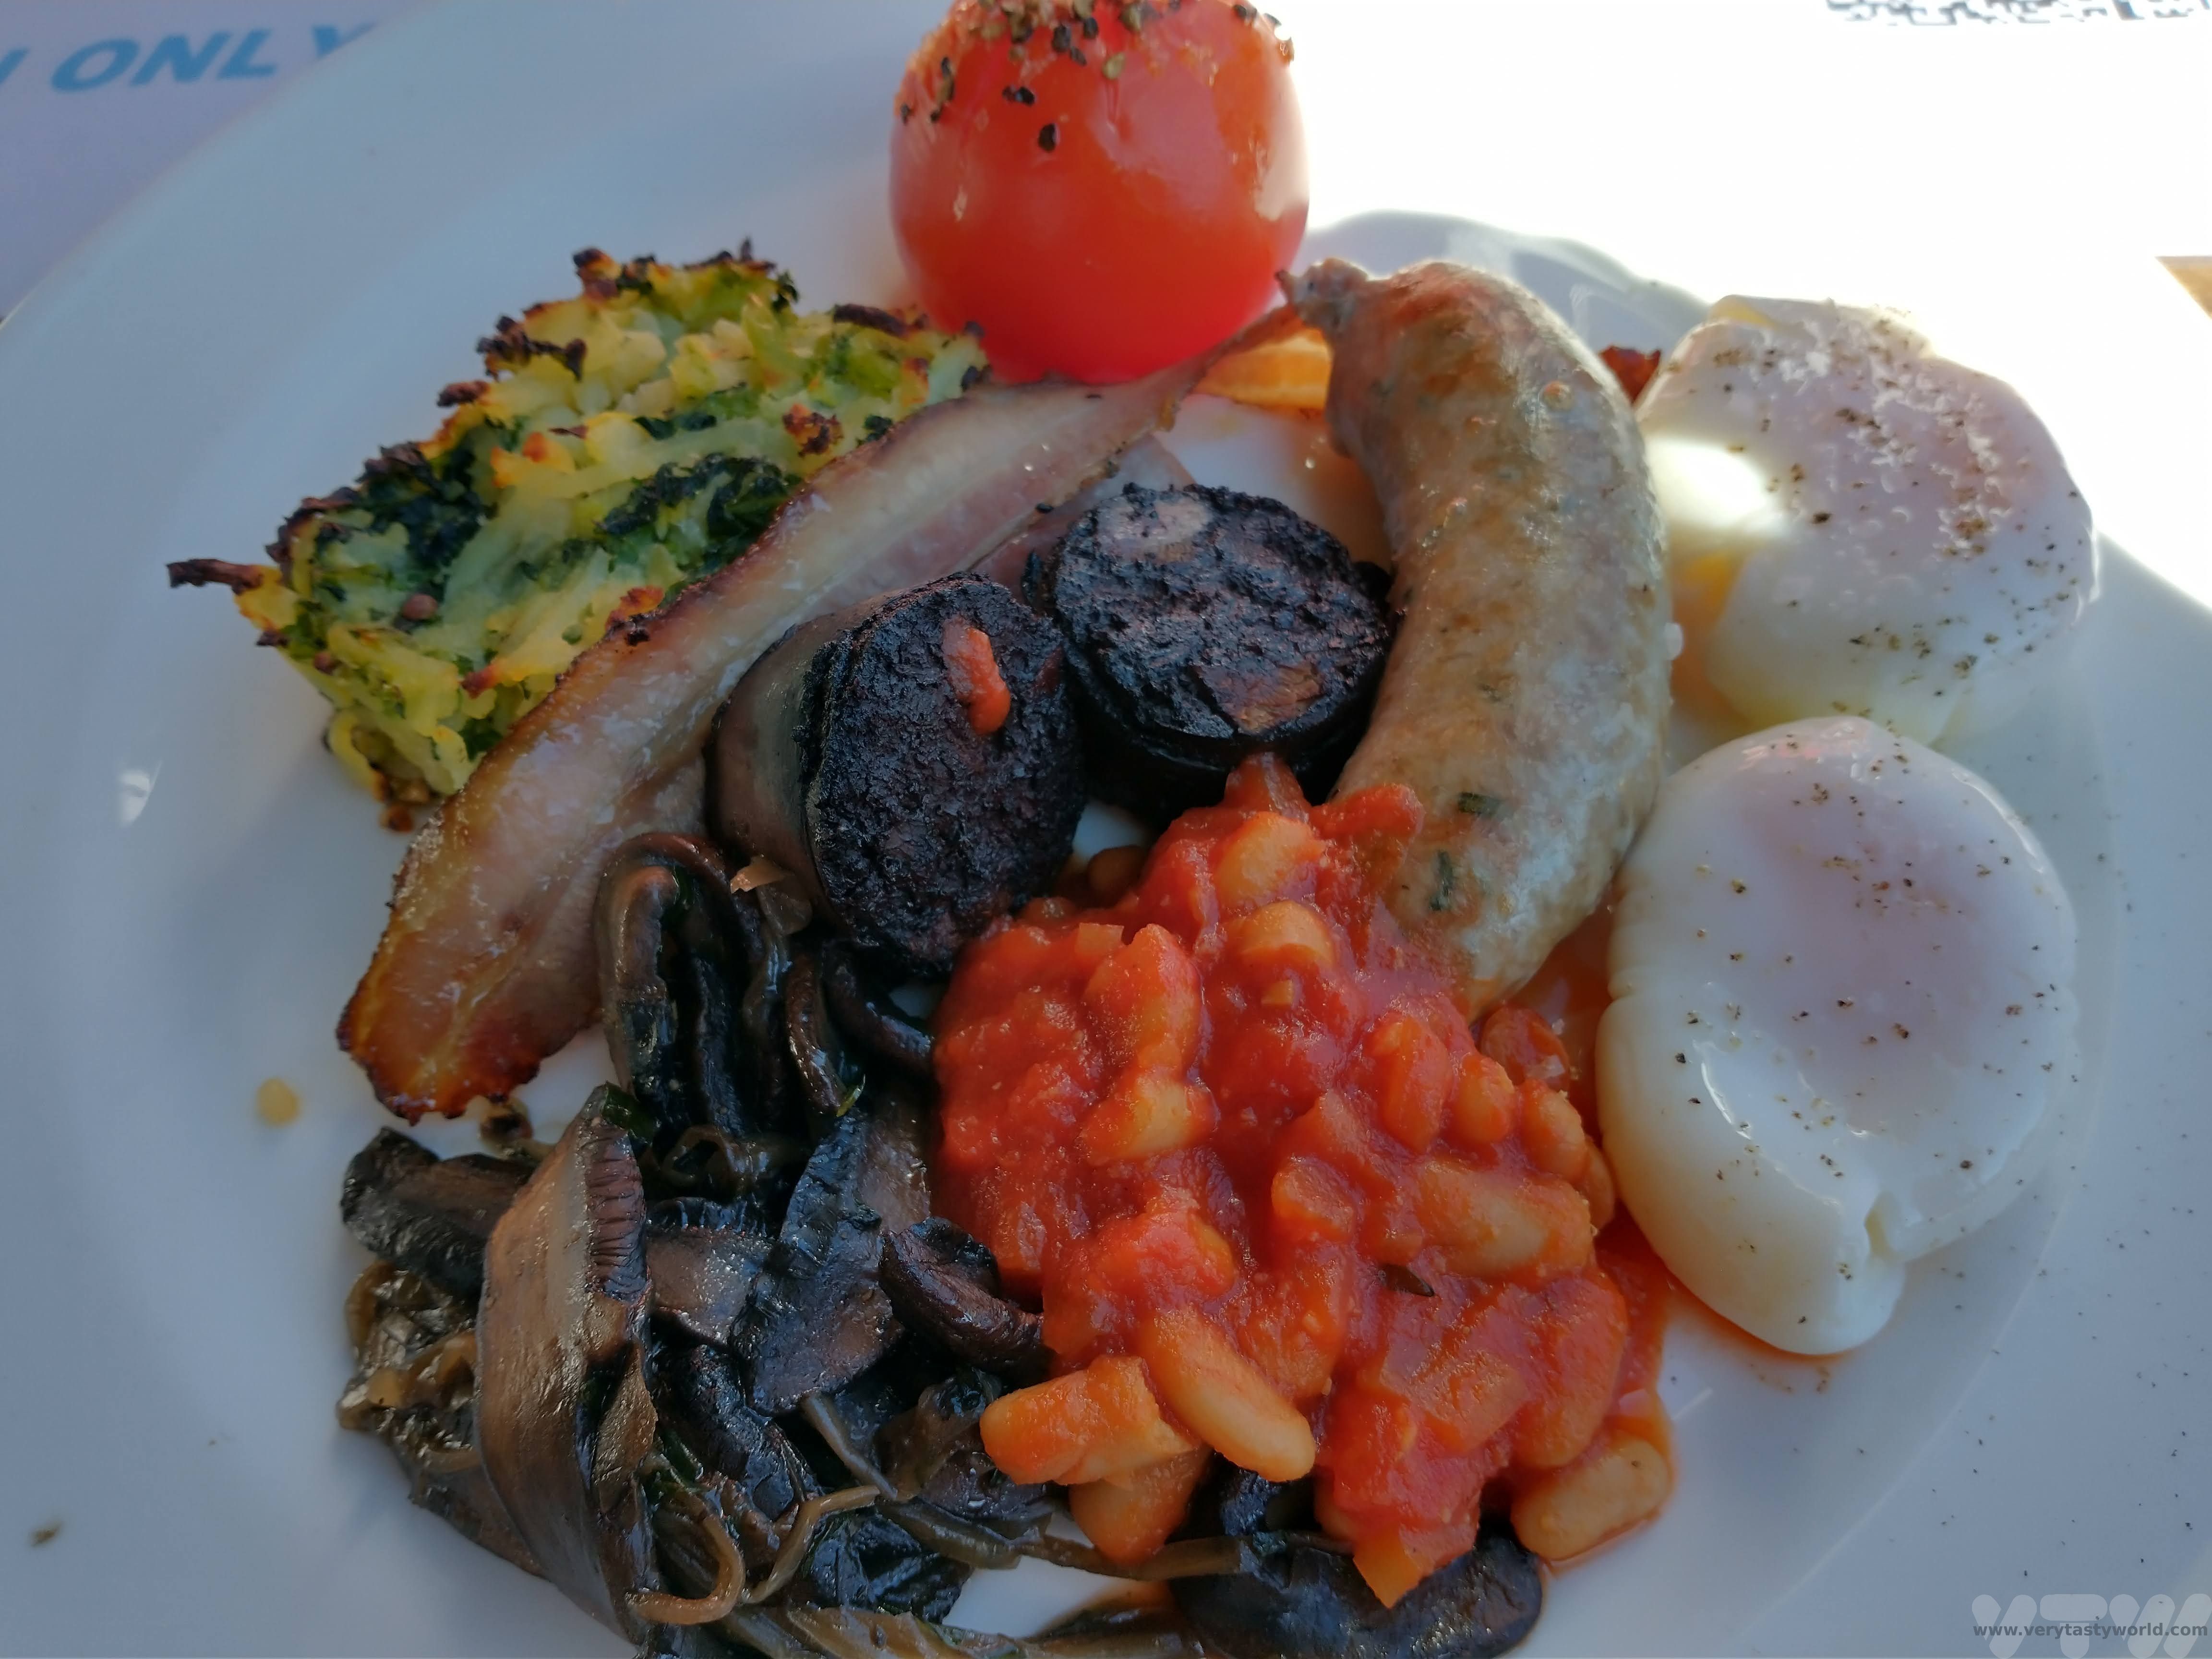
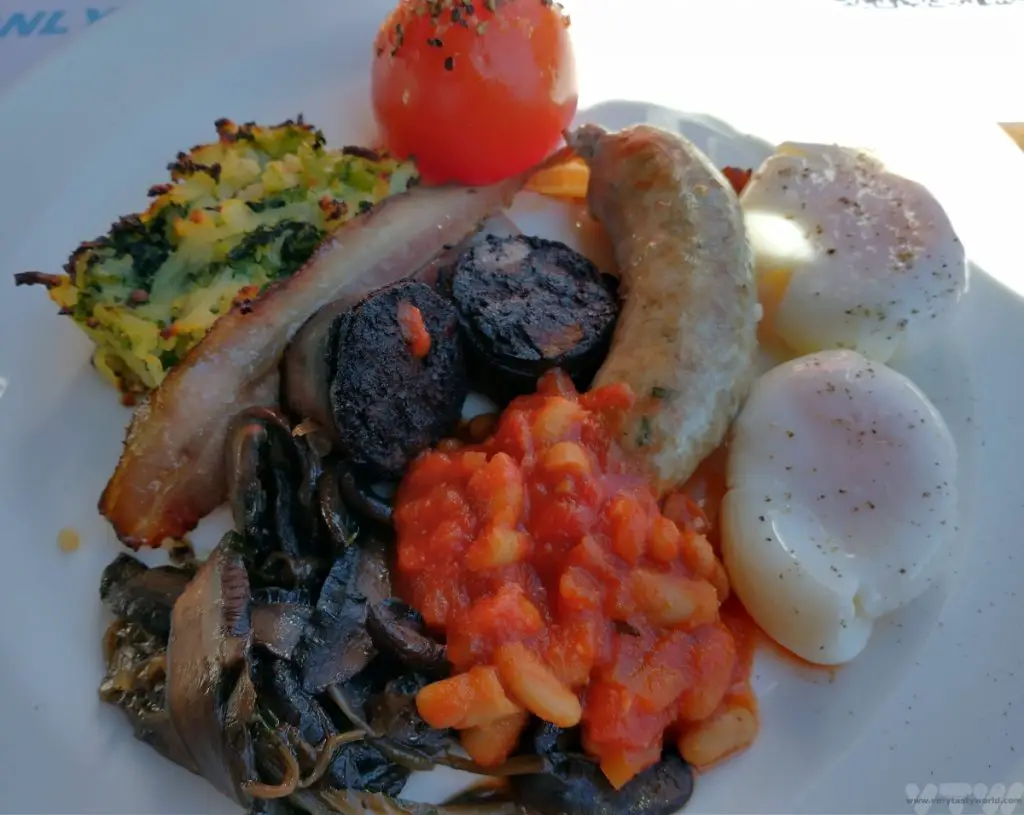
And, of course, whenever we are staying away from home in the UK, we’ll always have an honest-to-goodness fry-up. Sausage, bacon, egg (usually fried, poached or scrambled), black pudding, mushroom, tomato, beans and sometime a hash brown are the usual components.

We recently discovered that the best possible place for a full English breakfast that we’ve ever eaten is actually in our home town. While many top breakfast establishments boast locally sourced food (which is, of course, delicious) some go one step further to cure their own bacon and make their own sausages and black pudding. And that’s just the start: The hash brown (never the most fabulous component of a British breakfast) is a home-made bubble and squeak, a glorious blend of fried potato and cabbage. The beans have never seen a tin – they are home-made baked beans in a rich tomato sauce. There is even rich and tangy brown sauce to accompany the feast.
These are our favourite breakfasts from around the world. Do you have a favourite? Let us know!
Related Posts You May Enjoy

- RECIPE: How To Make Elderflower Champagne
- RECIPE Oyakodon Donburi
- Zero Waste Recipes Before Your Holiday
- RECIPE: Vegetable Biryani Tamil Nadu Style
- RECIPE: Vegan Wild Garlic Pesto
- Recipe: Venetian Pasta Sauce
- RECIPE: Biryani Raita Recipe
- RECIPE: How to Make Costa Rica’s Gallo Pinto
- Recipe: Japanese Simmered Pork Belly – Buta no Kakuni
- World’s Best Breakfasts -Breakfast of Champions!
- A One Day Hanoi Itinerary
- Mekong Meanderings
- A Chiang Rai Temple and A Country Retreat
- A Chiang Mai Tour in Northern Thailand
- Sunrise at Angkor Wat & Other Temples To Explore

- World’s Best Breakfasts -Breakfast of Champions!
- RECIPE: Vegetable Biryani Tamil Nadu Style
- RECIPE: Biryani Raita Recipe
- The Leh to Manali Highway
- Places to Visit in Munnar, Kerala

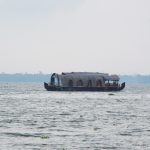
- Kumarakom Houseboats on the Kerala Backwaters
Thanks so much for reading. We hope you enjoyed this article. If you’d like to keep up to date with new posts and recipes, please subscribe to our newsletter or follow us on social media – X, Facebook or Instagram. We always love hearing from you and would be delighted to read your thoughts about this article.
Skeleton Coast Self Drive in Namibia
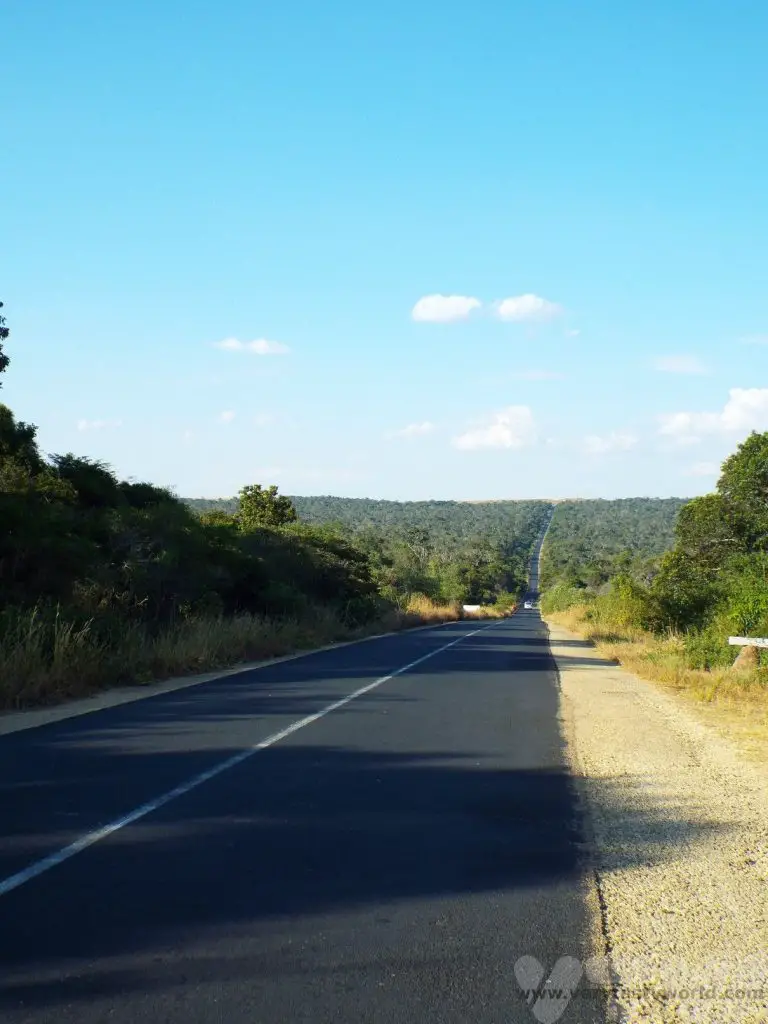
Namibia is a perfect country for a fly-drive holiday. The roads are wide and, outside the towns and cities, virtually empty, which makes for really easy driving. You can drive for thousands of kilometres across spectacular scenery, encounter amazing wildlife and even take yourself on safari. The country’s Atlantic coastline, known as the Skeleton Coast, is wild and desolate. Here is our guide to a Skeleton Coast self drive itinerary – what you need to know and what to expect.
Please note that this post contains affiliate links. If you click through and decide to make a purchase we will make a small commission, at no extra cost to you, which will help towards the costs of running this site.
We particularly wanted to explore the Skeleton Coast, where the Namib Desert meets the South Atlantic. It is a place that is truly wild and lives up to its name – where the skeletons of animals and shipwrecks are scattered across the desolate sandy beaches. The coastline is incredibly long and large parts of it totally inaccessible.
Swakopmund
Swakopmund is located on the wild Atlantic coast in the very west of Namibia. It is the major city on the Skeleton Coast and its name means ‘mouth of the Swakop’, a reference to the river that flows out to sea. Swakopmund was founded in 1892 by Captain Curt von François as a German colonial city. Originally a trade port it has since become a tourist destination. It still retains much of its colonial architecture although many of the street names have changed since Namibia’s independence in 1990.
It is very much a resort town and there are plenty of activities to enjoy. It is also the gateway to exploring the Skeleton Coast.
How to Get to Swakopmund and the Skeleton Coast
The city is located around 350km west of Namibia’s capital Windhoek. Public transport options are available if you just plan to visit Swakopmund but if you want to explore the Skeleton Coast, it is better to rent a car. A 4-wheel drive isn’t needed as Namibia’s roads are well-made, easy to navigate and are usually clear of traffic. Some of the roads are constructed from gravel but they are broad and well maintained. And the scenery along the route is guaranteed to be wonderful.
Activities in Swakopmund
We recommend spending a couple of days in Swakopmund. The city has some museums and an art gallery and there are a plethora of activities, from nature tours to adrenaline-fueled adventures, such as hot-air ballooning or even skydiving. Swakopmund has a long and extensive beach but, while it is theoretically possible to go swimming in the sea, it’s not really a place for a traditional beach holiday. The Atlantic is cold and the currents can be strong and potentially dangerous and you should never swim unless there is a lifeguard on the beach.

We had driven to Swakopmund from Windhoek via the amazing red sand dunes of Sossusvlei and spent a couple of days in town, taking part in all sorts of adventuresome activities.
There are loads of tour operators in town that offer activities and you can make bookings with them directly. Some activities, such as the hot-air ballooning need some notice, for others you may be able to book on the day. If there is an activity you particularly want to try we recommend booking in advance.
Kayaking on Walvis Bay
One of the best things to do is to visit nearby Walvis Bay and see the seal colony. Walvis Bay is a natural harbour located a short 45 minute drive straight down the coastline to the south of Swakopmund. It’s also possible to rent a kayak and paddle amongst the friendly seals.
The sea is calmer in the morning, so it’s worth making an early start. You drive to a pickup point and are then driven to Pelican point in a 4WD.
It was a touch foggy when we visited – this often happens when the warm air from the desert clashes with the cool temperatures of the coast – but it gave the bay an ethereal feel.
Bring swimwear, water, sunscreen and a hat – you might get lucky with the sunshine! It’s also worth bringing a towel and change of clothes in case you get wet.
Up to 50,000 Cape fur seals, also known as African fur seals, live in the area. They can be incredibly curious and it is lovely to be able to kayak amongst them. They are happy to swim alongside the kayak.

If you don’t wish to go kayaking there are boat trips to Walvis Bay from Swakopmund.
Exciting Activities In and Around Swakopmund
There are a plethora of companies that offer a range of exciting activities. We indulged in a few. Most operators offer a pickup from your accommodation
We couldn’t miss the chance to go hot-air ballooning over the Namib desert. An early start at the crack of dawn, we were picked up and taken to a quiet location a few kilometers out of town. Our host assembled and inflated the balloon.

The sun was glowing gently in the sky by the time we clambered into the basket and took off. The view of the vast and lonely desert from above was sublime. We climbed high then glided low, skimming the desert just a few feet above the sands before soaring skyward again. There was nothing to hear but silence, occasionally interrupted by the whoosh of the gas burner.

We also enjoyed some other exciting activities including parasailing and quad biking.


Swakopmund For Foodies
Being right on the coastline, Swakopmund is a fantastic place to enjoy seafood. One of the best restaurants is The Tug, where we enjoyed our most decadent meal. The Tug restaurant is located on a jetty right on the coastline and, as its name suggests, was constructed around a Danie Hugo tug-boat. Naturally the restaurant specialises in seafood. And you can look out to the wild Atlantic as you dine.

We ordered a sharing dish – the seafood extravaganza, an indulgent seafood feast. It comprised rock lobsters, kabeljou and kingklip fillets, juicy prawns cooked in their shells and the softest melt-in-the-mouth calamari we had ever eaten. All washed down with a crisp white wine.
Exploring The Skeleton Coast
Having dosed up on adrenaline we then packed up our car and headed north along the remote Skeleton Coast.
This is one region that we particularly wanted to explore. It is a place that is truly wild. It was going to be a full day’s journey along an isolated road through the Skeleton Coast National Park.

Our plan was to drive up the C34 and D2302 (basically the same road) from Swakopmund, exploring the coast along the way, and arrive 350km later at Terrace Bay for an overnight stay. We would then leave the park the following morning at the Springbokwasser gate on the D3245 to drive inland and explore Damaraland and eventually Etosha.
Preparation For The Skeleton Coast Self Drive
You need to buy an entry permit. If you are simply driving through the park you can get the permit at the gate. But if you wish to stay you must get an overnight permit beforehand. If you are planning to lodge at Terrace Bay you must pre-book and get your confirmation permit which you will need to show at the office when you enter the park at the main gates. You can get one at the office in Swakopmund (located near the Woermann & Brock Arcade). Permits are also available in Windhoek.
You need to arrive at the gate before 3pm, otherwise you will not be allowed into the park.
You don’t need a 4WD to drive the C34 but you should stay on the road if you’re not driving one – or if you are driving one but don’t know how to engage the four-wheel drive.
We also recommend hiring a car with at least one spare tyre. Punctures on gravel roads can happen quite frequently and this area is very remote, so you may need to change a tyre yourself should you get a flat tyre.
Accommodation Options
There aren’t many options for accommodation in this area. The Namibia Wildlife Resorts website has details of some of the resorts available.
Torra Bay – about 100km from the gates, which offers camping facilities. It is only open at certain times of the year, so you will need to check availability.
Terrace Bay – continue for a further 60km on the D2302 to this resort on the coast which offers basic accommodation in chalets.
Shipwreck Lodge – you can drive beyond Terrace Bay for a further 82km to Mowe Bay and arrange a pickup (strict times apply) to Shipwreck Lodge. This private lodge offers more luxurious accommodation and a number of activities.
The Drive From Swakopmund to Terrace Bay
We decided to spend a night at Terrace Bay. It is a four and a half to six hour drive from Swakopmund, so we recommend leaving early.

If you are renting a 2WD, stay on the road. If you’re renting a 4WD you may be able to drive along some of the side tracks.
We passed by the smelly Cape Cross seal colony and onto the park.
The gates are excitingly ominous. You need to register on arrival.

Once we had entered the park we saw just one other car during the entire day.
We were driving a two-wheel drive car so kept to the road but our plan was to break up the drive by stopping off at various points along the way to explore the wild, windswept beaches, observing shipwrecks and other skeletons. The area is quite often misty but it enhances the enigmatic nature of the stark landscape.


Our final destination was the Terrace Bay resort, near the Uniab River Delta. It’s very remote and popular with anglers and there aren’t a huge number of things to do when you get there.

Travelling along the Skeleton Coast is more about the journey than the destination. But if you like wild, wide and desolate regions there is plenty of walking along the beach and across the dunes. It’s possible to encounter a variety of local seabirds in the area.

Facilities At Terrace Bay
The accommodation in chalets was pretty basic but perfectly adequate.

The car was filthy. We didn’t have a choice with car colour when we rented it, but white really wasn’t the best colour to travel along the coast with. (The terms of our rental stated that we needed to refuel and ensure the car was clean. It was very easy to find a local garage on our way back to Windhoek where we could get the car cleaned – but we did this the day we returned the car!)
Food at Terrace Bay was taken in a communal dining hall. Because the area is so remote, we weren’t expecting a brilliant meal. It may have been a far cry from The Tug’s seafood extravaganza that we’d enjoyed the night before, but our dinner was good old fish and chips and they were absolutely great.
There aren’t many facilities at Terrace Bay but, importantly, there is a petrol station. We recommend keeping your fuel topped up while on your trip. Throughout our trip we made of point of stopping at every petrol station we came across, to make sure we always had enough in the tank.
There is also a small shop that will sell essentials for your journey.
It is possible to explore further along the coast up to Mowe Bay and from there you could be picked up and transferred to Shipwreck Lodge (although this would have to be pre-arranged). Any further north and you would have to fly. We decided not to do this leg of the trip, so headed south and then inland towards Damaraland, stopping to admire the famous Welwitschia plant, some of which can live to be over a thousand years old, and eventually on to the Etosha National Park.
The Skeleton Coast is remote and evocative. As a destination, it isn’t for everyone, but if you like wide, open spaces and landscapes that are strangely beautiful – in a wild and desolate kind of way – a Skeleton Coast self drive trip is a worthy addition to a Namibia itinerary.
Related Posts You May Enjoy


- Skeleton Coast Self Drive in Namibia

- Malagasy Cuisine – The Food of Madagascar
- Mora Mora on the RN7 Madagascar – A Road Trip

- Tree Climbing Lions, Hippo Hordes and Safari Shenanigans in Uganda

- Tourist Attractions In Ethiopia
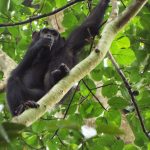
- Uganda Chimpanzee Trekking in Kibale
Thanks so much for reading. We hope you enjoyed this article. If you’d like to keep up to date with new posts and recipes, please subscribe to our newsletter or follow us on social media – X, Facebook or Instagram. We always love hearing from you and would be delighted to read your thoughts about this article.
A Spectacular Kaieteur Falls Tour in Guyana
One of Guyana’s key attractions is the Kaieteur Falls. Located in the heart of pristine rainforest, this is the world’s largest single-drop waterfall. It’s 226m tall (over four times higher than Niagara) and about 100m wide, with an astonishing 663 cubic metres of water falling every second. Here is our guide to finding a Kaieteur Falls Tour and everything you need to know about your visit.
When watching the 1925 version of The Lost World, Willis O’Brien’s forerunner to the classic King Kong, we couldn’t help but contemplate where this thrilling adventure could have been set.
Although the film was ostensibly set on the borders of Brazil, Colombia and Peru, a bit of research revealed that the South American country of Guyana had similar landscapes that were both highly evocative and very remote. And while we were pretty certain we wouldn’t encounter any dinosaurs we decided that we would like to have our very own adventures in the Lost World.
Although we weren’t able to visit the plateau mountain Mount Roraima, the Kaieteur Falls gave us the opportunity to see a dramatic landscape set amidst an astonishing and vast rainforest.
Where Are The Kaieteur Falls?
The Kaiteur Falls are located on the Potaro river in the Kaieteur Falls National park, in the Guiana Highlands. This is Guanya’s first national park and it was established in 1929.
The rainforest is part of the watershed that lies between the Amazon and the Orinoco rivers.

The falls were ‘discovered’ in 1870 by geologist Charles Barrington Brown working in what was – at the time – British Guiana. Of course the indigenous Amerindians knew about them way before then.
Kaieteur apparently means ‘old man fall.’ There is a legend that the falls were named for a Patamona chief named Kai, who paddled over the falls as a sacrifice to the great spirit in order to protect his people from invaders.
To be clear, the falls aren’t the highest single drop fall but the largest volume.

There is a cave behind the falls but it is not known to have been explored, even by the local Amerindians. The cave is home to hundreds of thousands of swifts. In his film, White Diamond, film director Werner Herzog documents the attempts of a British engineer to fly a small airship around the area. A member of the crew is an experienced mountaineer and abseils down the side of the falls to look into the cave. Although they recorded footage of the cave, the team decided not to include it in the film, so its dark secrets remain a mystery. Which is as it should be.
When to Visit the Kaieteur Falls
Guyana doesn’t have four seasons but rainy and dry seasons. The main rainy season runs from May to August followed by a dry season, which runs from September to November, a mini rainy season from November to January and the main dry season from February to April.
The volume of water in the falls will be at its highest after the rainy seasons, so November and February should offer maximum flow. But the weather will be better for flying during the dry seasons. That said, we visited at the end of a particularly dry dry season in April and the flow was still pretty spectacular.
Kaieteur Falls Tour Operators
Although it is possible to take a tour where you can trek to the falls and climb to the top, most people fly there from Guyana’s capital city Georgetown.
There are a number of tour operators who can arrange a trip. We recommend using an approved tour operator.
Airlines such as Transguyana , Roraima and Air Service Limited offer trips. We flew with JAGS Aviation on a trip organised by Adventure Guianas.
The cost of the flight is around $250-270 (US) per person. (Prices correct in 2024.)
We recommend booking early as flights can fill up at popular times.
Need to Know: There are a number of conditions to getting a flight. The airlines will usually only operate a flight if a minimum number of people make a booking. So it is better to plan your trip for a weekend because more people are likely to book on a Saturday or Sunday. Your tour operator should let you know when the flight becomes confirmed.
The other thing to bear in mind is that the aircraft are very light and will land on a teeny runway in the middle of the jungle close to the falls. Sometimes the weather can be unfavourable and flights may be delayed or even cancelled at short notice. If the flight is cancelled, costs should be refunded.
Flying To the Kaieteur Falls
Georgetown’s main international airport is located nearly 40km out of town but it has another airport, E.F. Correia near Ogle, which is just on the outskirts of the city and it takes around 20 minutes to reach (traffic permitting). It’s best to arrive at least an hour before the scheduled flight. Go to the reception area and wait for an invitation to check in.
On checking in you will be weighed so that the airline can establish the seating plan – as the aircraft is incredibly light. As with all our internal flights in Guyana, the flight was running late, but it took off eventually.
The aircraft is very small and can accommodate a maximum of 12 passengers. If you’re lucky you may get to sit next to the pilot.

After around an hour of flying – briefly over Georgetown and then over the pristine rainforest, the flat landscape starts rising and the geography of the area becomes more undulating. This is a good time to start looking out of the window.
When you reach the falls the pilot will fly past so that people on one side of the plane can take photos and then bank and turn so that the passengers on the other side of the plane can see the falls from the air. Then they will land on a small airstrip.

Walking To The Viewpoints
There is a small pavilion next to the airstrip. It has bathroom facilities and a small exhibtion. A guide will be waiting to take you to the falls. Drinking water will be provided.The visit will last approximately two hours in total.
The guide follows a set route to view the falls at three specific viewing points.
Along the way, the guide pointed out some of the natural features of the area including some rare species.

There aren’t too many mosquitoes in the area because this clever little plant consumes them. It is a carnivorous plant, the sundew, which lures insects in and then traps them on its sticky tendrils before closing up and consuming them overnight. We wish we had had one of these as a pet whilst travelling in the rainforest, because the mosquitoes were very hungry and decided that we were particularly delicious.
The Tank Bromeliad is one of the largest examples of this plant in the world. It is home to the teeny Golden Frog, which lives its entire lifecycle inside the water that collects in the plant. It is poisonous, so be careful!


If you are lucky, it may be possible to see the stunningly beautiful bird, the cock of the rock, probably the most orange thing we have ever seen. We didn’t get lucky at Kaieteur but did see this magnificent bird in the other parts of the rainforest in Guyana.
Warning – the viewpoints are completely natural. There are no viewing platforms nor barriers to stop you going over the edge, so take care when taking photos and selfies, especially if someone offers to take your picture – don’t move backwards without looking!

It’s a leisurely 10-20 minutes stroll to walk to the first viewpoint, the furthest from the falls.

The next viewpoint is the Rainbow View, which offers exactly what its name suggests, offering the best photo point to capture the rainbow which shimmers across the falls.

Then finally onto the closest viewing point – where you can really get to feel the sheer power and majesty of the falls. You can also see the colour of the water as it tumbles relentlessly to the valley below. You can see a sepia tinge which is due to the tannins in the water from the trees and plants lining the river bank.

Don’t forget to look behind you to see the remarkable canyon that the river has carved over the millennia.

At the end of the walk, the group will return to base for a quick – and very filling – lunch. Vegetarian options are available, although it’s probably worth mentioning any dietary requirements when booking the trip.

The two hours fly by and it will soon be time to return. Board the aeroplane and don’t forget to get your camera/phone ready to record a final view of the spectacle.
What To Bring On A Kaieteur Falls Tour
It’s a good idea to minimise the items you need to bring as there isn’t much room on the aircraft. A small daysack will be absolutely fine.
Because these are charter flights it’s okay to take liquids aboard the plane.
Although water will be supplied, we recommend taking extra water if you are likely to need it.
We also advise bringing sun-cream and a hat to provide protection from the sun, which is strong in this area, even on a cloudy day.
Also, although the walk is not long, difficult or strenuous, good walking shoes will be useful.
It is easy to understand why the Kaieteur Falls are Guyana’s biggest attraction. You run out of superlatives trying to describe them. And, while it’s great to take photos to get that perfect instagram shot, take time to enjoy the beauty of the natural surroundings and the sheer mighty power of the falls.
Related Posts You May Enjoy

- Rivers and Rainforests – A Guyana Itinerary
- Best Time To Visit Machu Picchu 2024 Update
- A 2 Week Patagonia Itinerary
- Day of the Dead in Campeche
- A Galapagos Land Based Itinerary
- RECIPE: How to Make Costa Rica’s Gallo Pinto
- A Tasty Puebla Food Tour
- Costa Rica Wildlife Sanctuary – Caño Negro
- Visit Torres del Paine National Park in Patagonia
Thanks so much for reading. We hope you enjoyed this article. If you’d like to keep up to date with new posts and recipes, please subscribe to our newsletter or follow us on social media – X, Facebook or Instagram. We always love hearing from you and would be delighted to read your thoughts about this article.
Malagasy Cuisine – The Food of Madagascar
The island of Madagascar is famous for its unique and fascinating wildlife as well as its spectacular landscapes. But Malagasy cuisine is less well known. It is both interesting and delicious and a fundamental part of the country’s culture. Rice is the staple but the food of Madagascar has also been influenced by settlers, many from Africa and South East Asia, as well as the French, who colonised Madagascar between 1896 and 1946.
We followed the RN7 (Route Nationale) road from Toliara in the South West of the country to the capital Antananarivo (also known as Tana which is both more pronounceable and easier to spell!) and then we drove along the RN2, heading eastwards to Andasibe.
Food Regions in Southern Madagascar
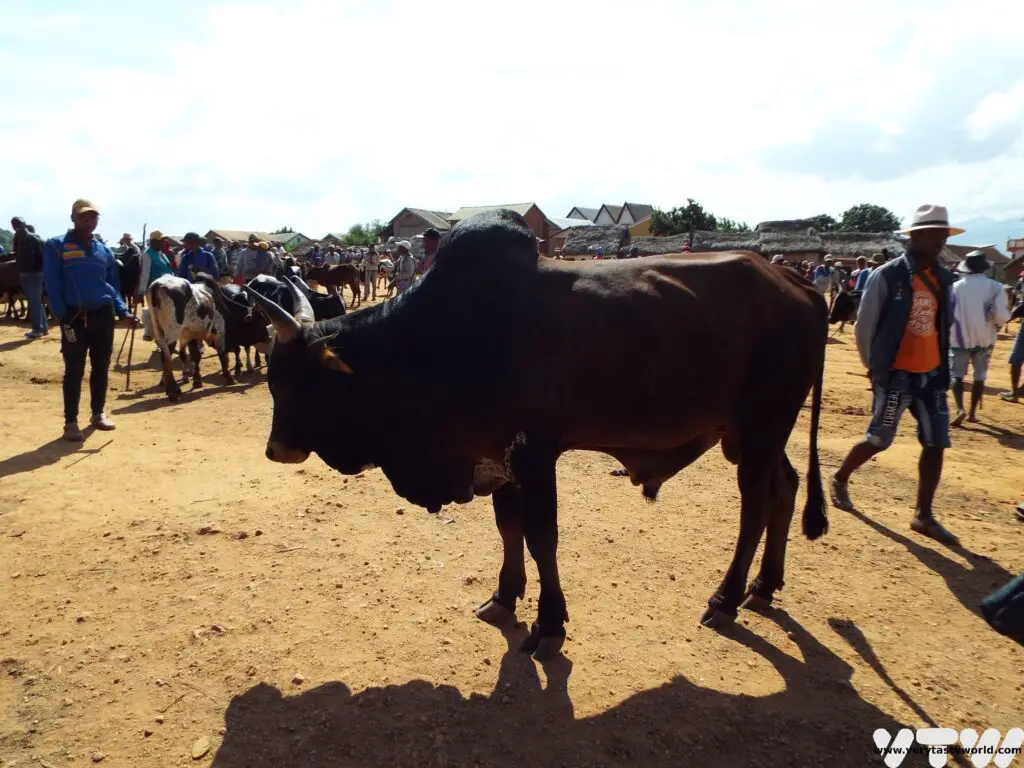
The southwest of Madagascar is the home of the Bara tribe. They are cattle farmers, who raise zebu, a cow which has a distinctive hump.
The Bara have a tradition of stealing zebu from other families in the area. This is a custom that young men undertake to prove their worthiness to marry a wife. Gaining permission from a local shaman at an auspicious time, the men will go out at night, protected by magic, to capture a zebu and bring it home.
We visited a zebu market in Ambalavao. Herders will walk their cattle for miles from all around to sell their zebu. This magnificent beast was worth around $500.
As you travel further north into the centre of Madagascar you reach rice country. The Betsileo tribe live here and they are farmers who cultivate rice, providing a significant proportion of the country’s food. Rice is the staple crop throughout the country and Malagasy people eat rice for breakfast, lunch and dinner.
As we travelled north along RN7 we saw many paddy fields. The communities work together to bring the harvest in. The Betsileo are amongst the richest tribes because of their rice cultivation. As we were travelling through this region our guide bought a huge sack of rice for his family as it was much cheaper than in Tana.
Different varieties of rice are cultivated – white rice and brown rice, but also red rice which was excellent for making rice porridge. Generally families eat together and share a plate, so everyone eats quickly to grab as much food as they can.
Our journey along RN7 continued until we reached Tana and then we travelled eastwards along the RN2. It’s always worth stopping at Amanistena – sausage town. An initiative to create a tourist attraction as visitors make their way to the remarkable site of Andasibe, you can stop for lunch for a sausage or two.
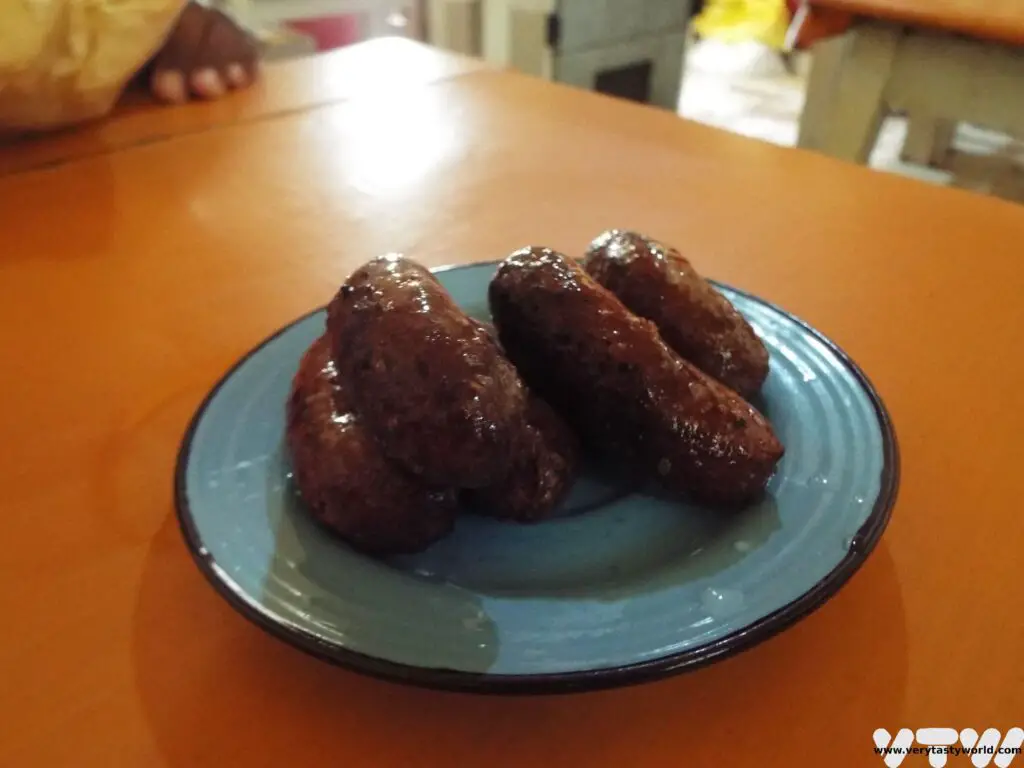
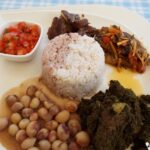
We enjoyed zebu and pork sausage with cassava chips and hot chilli sauce. Apparently Madagascar’s president always stops for a sausage when he’s in the area.
Dining in Madagascar
Most of the lodges we stayed at offered western food, particularly at breakfast. But hotel kitchens are usually absolutely happy to cook a typical Malagasy breakfast for you, although you have to request it the night before as the rice porridge takes some time to cook. We have a post about learning to go off-menu for breakfast – we’ve discovered over the years that people are often delighted that you want to eat a local breakfast.
We used a local company to tour Madagascar. The reason for doing this is that we were short on time and travel through the country is mora mora – slowly, slowly – as the country’s infrastructure isn’t great. It isn’t even good. You think you’ve seen bad potholes in the road in your hometown? That’s nothing compared with Madagascar.
We stayed in a variety of hotels and lodges, many of which offered evening meals. Again, these were often western options. We asked our lovely driver whether it would be possible to find a local restaurant to eat at and he knew some great places to try food from each region. If you see a sign for a ‘restaurant hotel’ it means that you will be visiting a restaurant.
Typical Malagasy Dishes
Zebu, pork and chicken are popular meats. Fish is also eaten – river fish is popular inland. Beans and vegetables also feature heavily. Cassava leaves have quite a strong flavour. Surprisingly, you don’t see a massive range of spices. Popular flavourings are ginger and garlic. Condiments that are always found on the table include sakay, a very spicy chilli sauce which packs a real punch, and achards, which are vegetable pickles.
Vary sosoa, or rice porridge, for brekkie is lovely, really filling dish that sets you up for the day. When we tried it at our lodges it was served with zebu steak and was absolutely delicious.
Another popular breakfast is fried doughballs called mofo baolina. They’re a teeny bit stodgy but very filling.
We often ate zebu as steaks. The hump meat is highly prized and is a contrast to the standard meat – its texture is soft and its flavour rich and fatty.
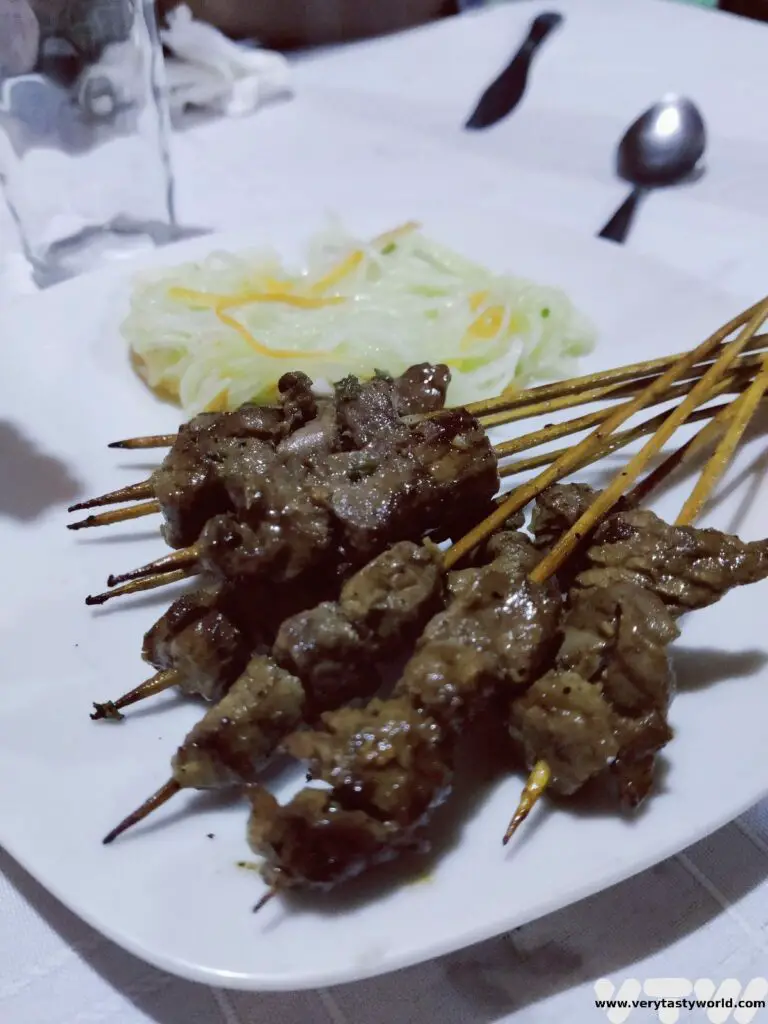
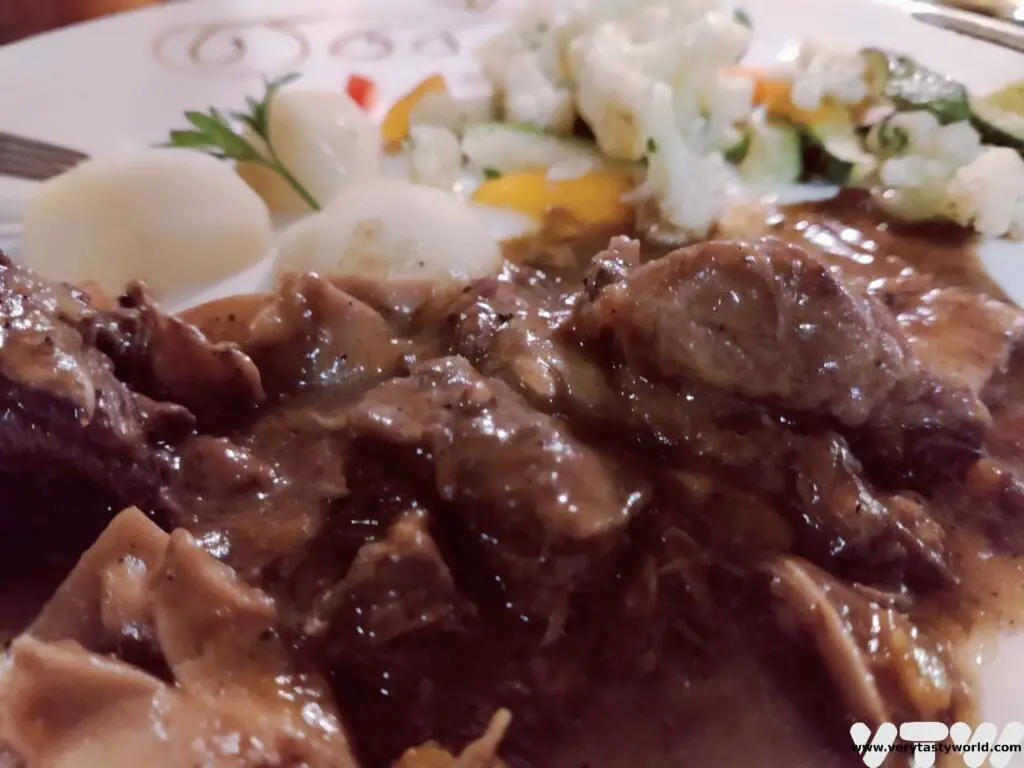
Henakisoa and ravitoto – belly pork with cassava leaves – is one of the country’s national dishes and is delicious. Cassava is a green, leafy vegetable and is shredded and cooked a bit like spinach. The pork is slow-cooked and because belly meat is fatty, the meat is soft and full of flavour. The richness of the pork is complemented by the strong, herby and slightly bitter taste of the cassava leaves.
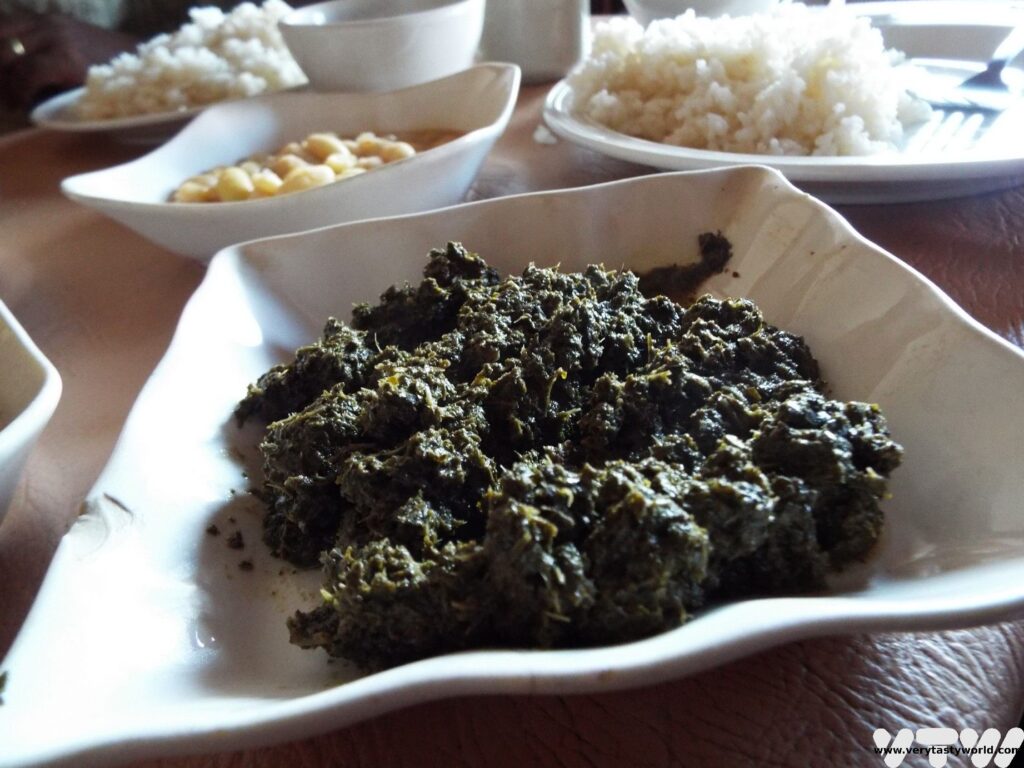
Red and/or white rice plus beans often accompany the main dishes to ensure that the meal is filling and hearty.
A comfort food is akoho rony, chicken soup. It is made by boiling a whole chicken – including the offal, as that is packed with flavour – for several hours which creates a rich, flavoursome stock. The main flavouring is ginger and garlic. Like many chicken soups all over the world, this is considered to be the ideal meal for anyone who’s recovering from being sick. Traditionally the back meat is the most prized and is usually eaten by the eldest members of the family. It’s a delicate soup, lightly flavoured but warming and wholesome. It’s okay to pour the chicken soup over rice.

Another traditional Malagasy dish, Romazava is a meat stew with green, leafy vegetables.
Tilapia with chilli and ginger is a popular fish dish. River fish are often served whole and can be a bit bony, but they are full of flavour.
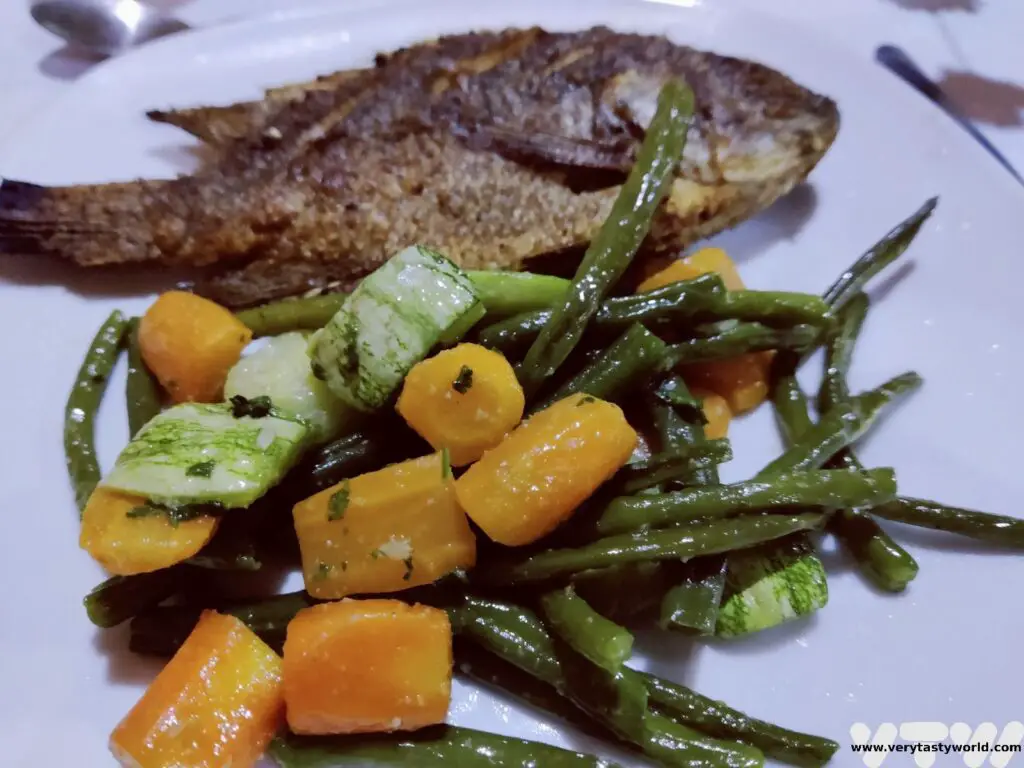
We adored Malagasy tomato salad with peanuts and ginger. The peanuts are ground to extract the oil and then lemon juice is added to make a dressing. The ginger adds a lovely zing.
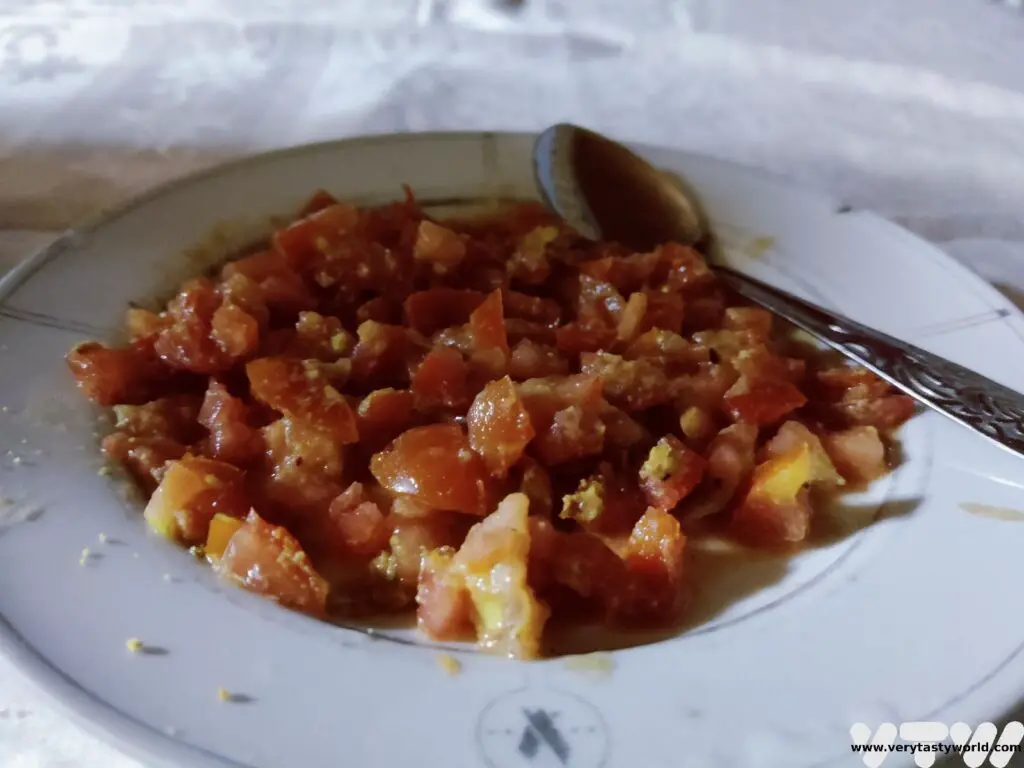
We didn’t eat many desserts but we did get to try Madagascar’s most famous cake, koba ravina. It’s a labour of love made from ground peanuts, rice flour and sugar. The mixture is baked in a banana leaf for 3 days and comes out in a huge long cylindrical (ish) shape. It is cut into slices and served. It tastes delicious – smooth, sweet and nutty.

In Tana, ice cream parlour Blanche Neige (Snow White) offers a huge variety of splendid ice creams and sorbets.

A particular favourite was a tamarind sorbet served with just a couple of salt crystals delicately placed on top to bring out the sweet and sour flavour.
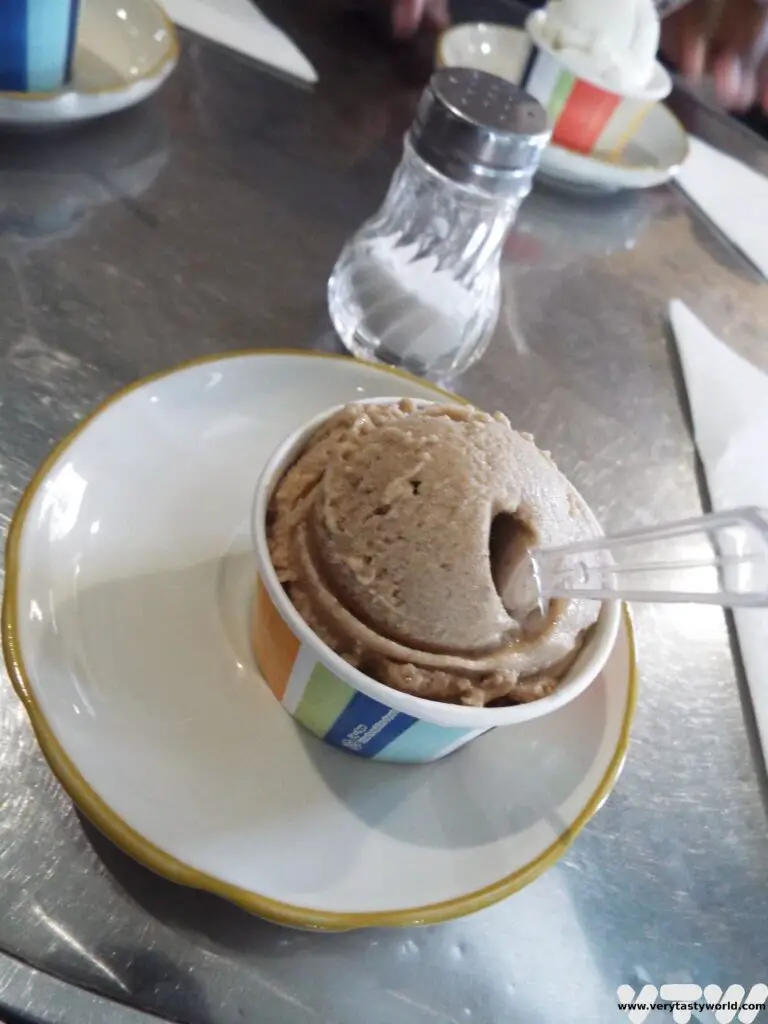
Banana fritters make for a great roadside snack. There are plenty of banana trees growing in Ranamofana.
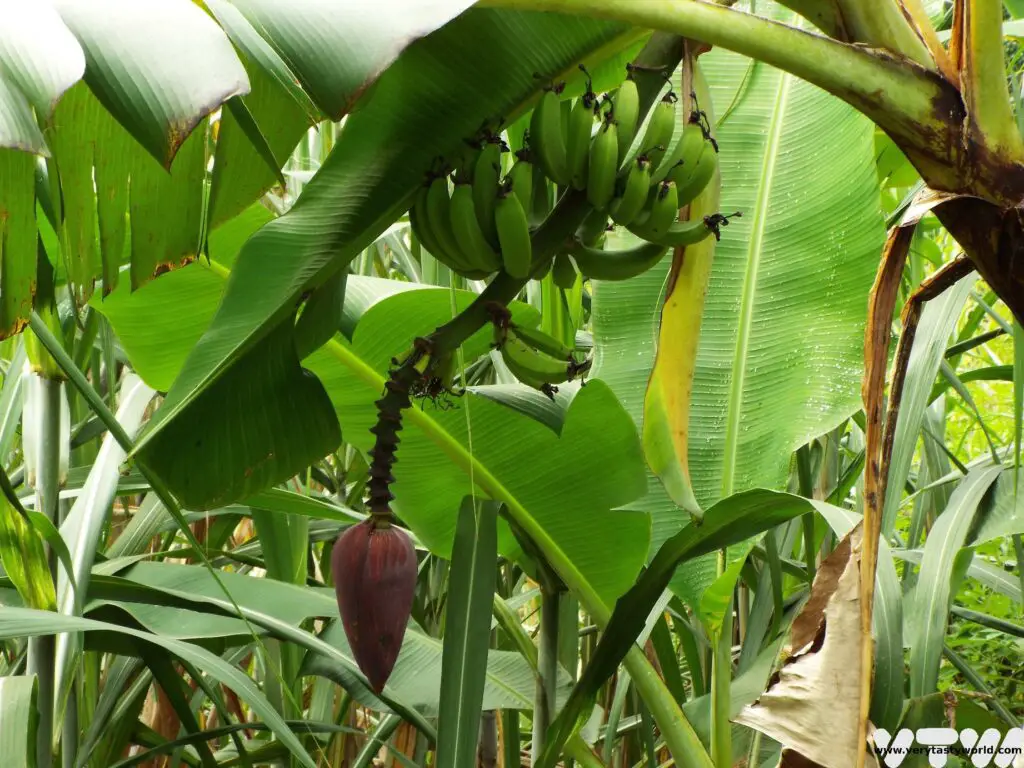
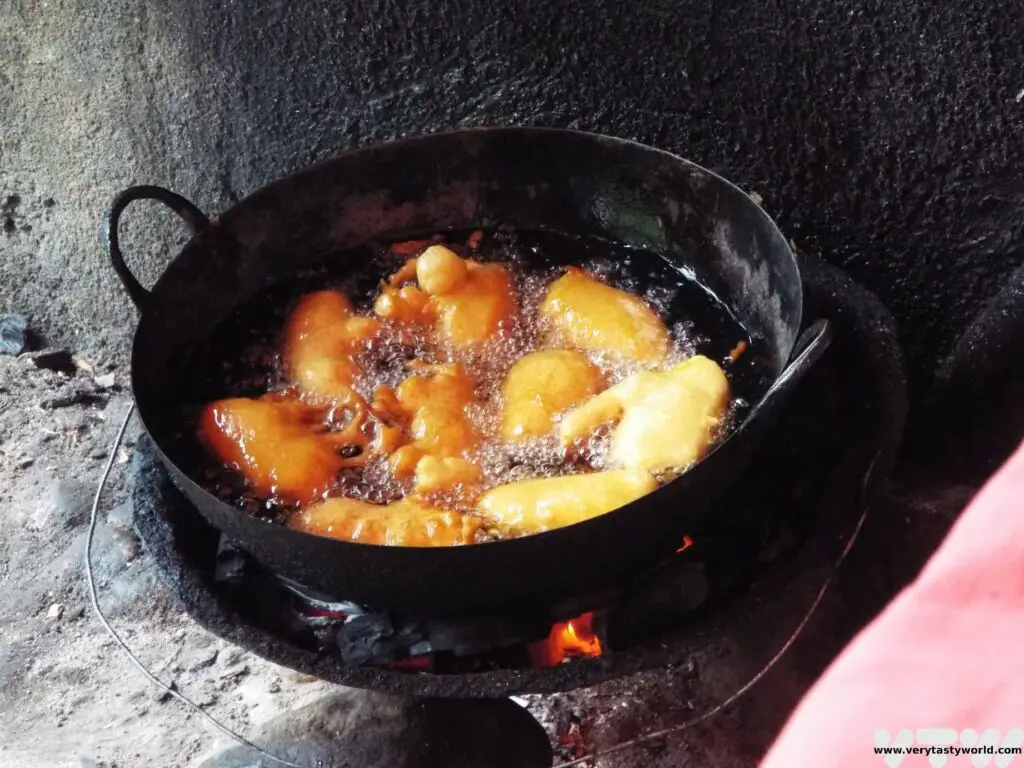
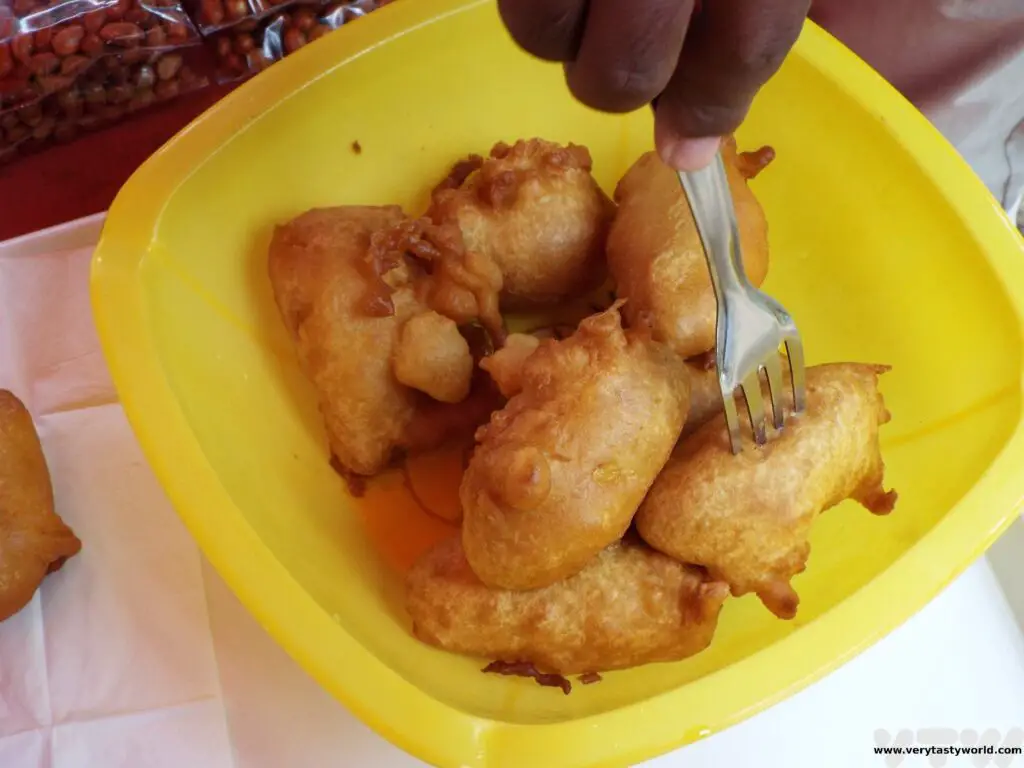
The French Influence
On the RN7, in the town of Behenjyin, which is around 50km away from Tana, we stopped off at a restaurant which offered foie gras of all things! There is no doubt that foie gras is a controversial food. Here the producers do not use industrial feeding processes but rather they feed the geese by hand. What is interesting is that the foie gras is served in unusual ways – flavoured with green pepper or vanilla.

Madagascar Drinks
The tap water is not safe to drink but bottled water can be obtained all over the country.
Our favourite hot drink was ranovola, which is known colloquially as ‘smoke.’ It’s a burnt rice tea made by boiling water in the cooking pot that contains the remnants of the rice that has been slightly toasted on the base of the pot. Ranovola is a smoky drink which looks like tea but has no tannin. It’s a bit like Genmaicha, the Japanese brown rice tea and is delicious.
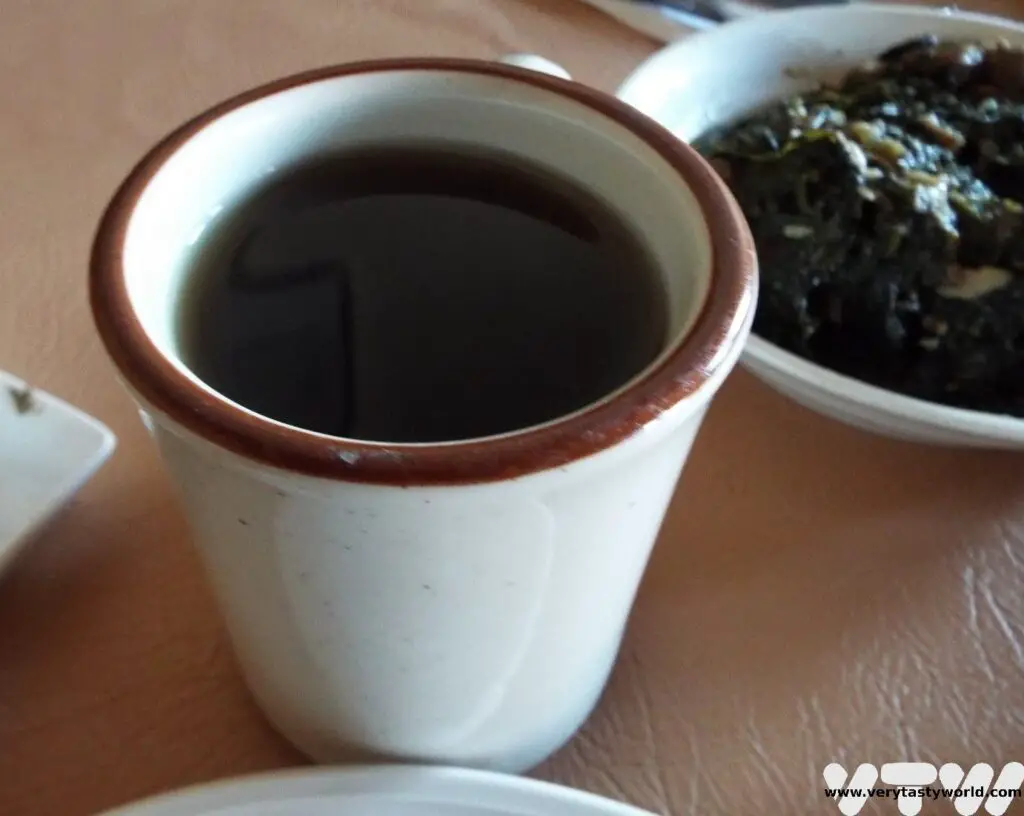
Madagascar’s local brew, Three Horses Beer, or THB as it is normally referred to, has been brewed by Star Breweries in Antsirabe since 1958. It’s a light, refreshing pilsner, that is great to drink in the heat. Another eminently quaffable lager was Gold Blanche.
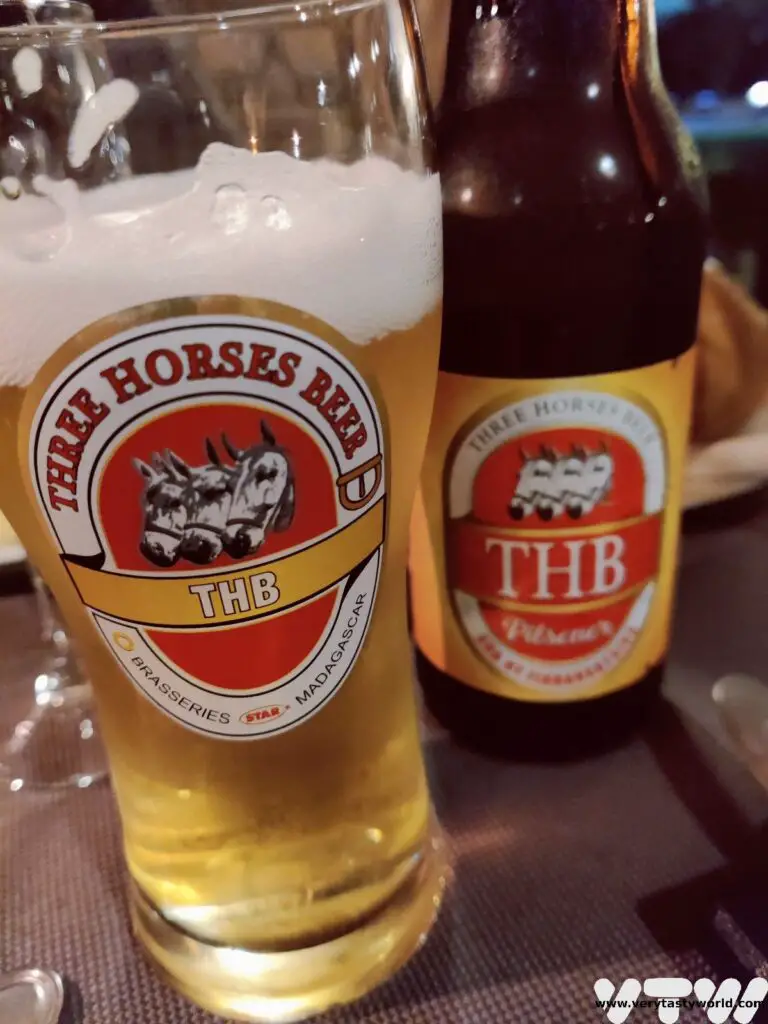
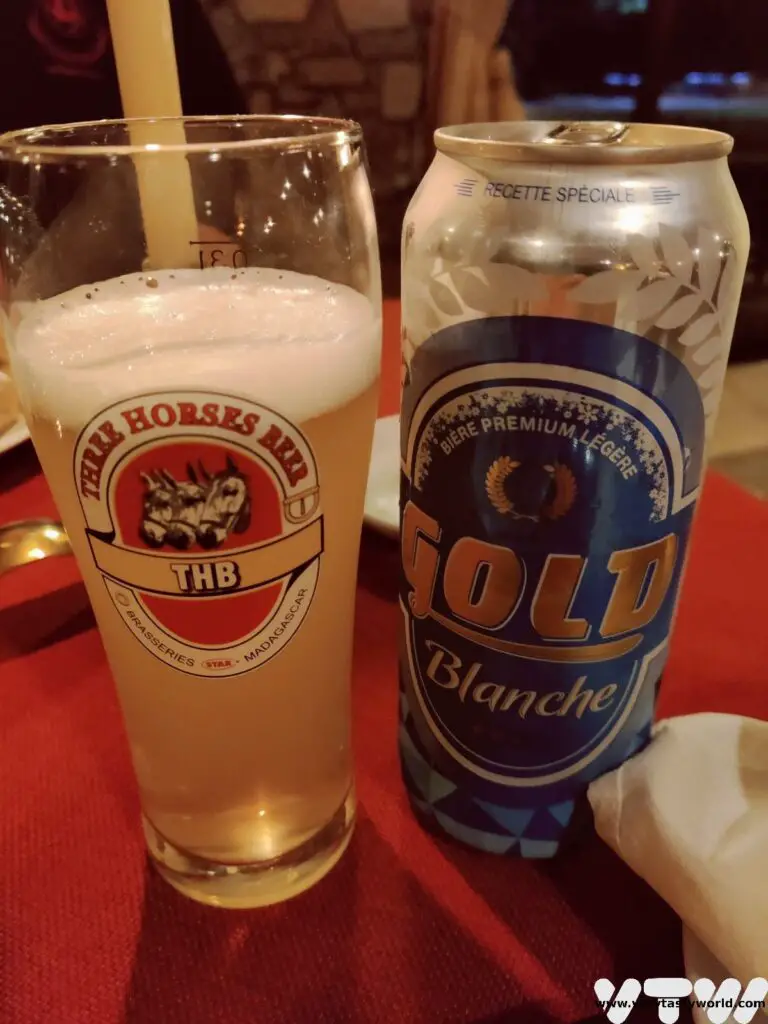
World Cola is probably Madagascar’s most popular soft drink, and both the flavour and packaging bear quite a lot of similarities to its more famous counterpart.
Rum is the tipple of choice in Madagascar. We passed by many local people making rum by the roadside on the RN7.
Rhum Arrangé is a splendid and popular way to enjoy rum. It consists of white rum infused with fruit or spices. There are so many variations. All of the restaurants or lounges in our hotels had huge glass jars, filled with rum, flavourings and intrigue. Every evening offered new rhum possibilities, both as an aperitif and digestif.
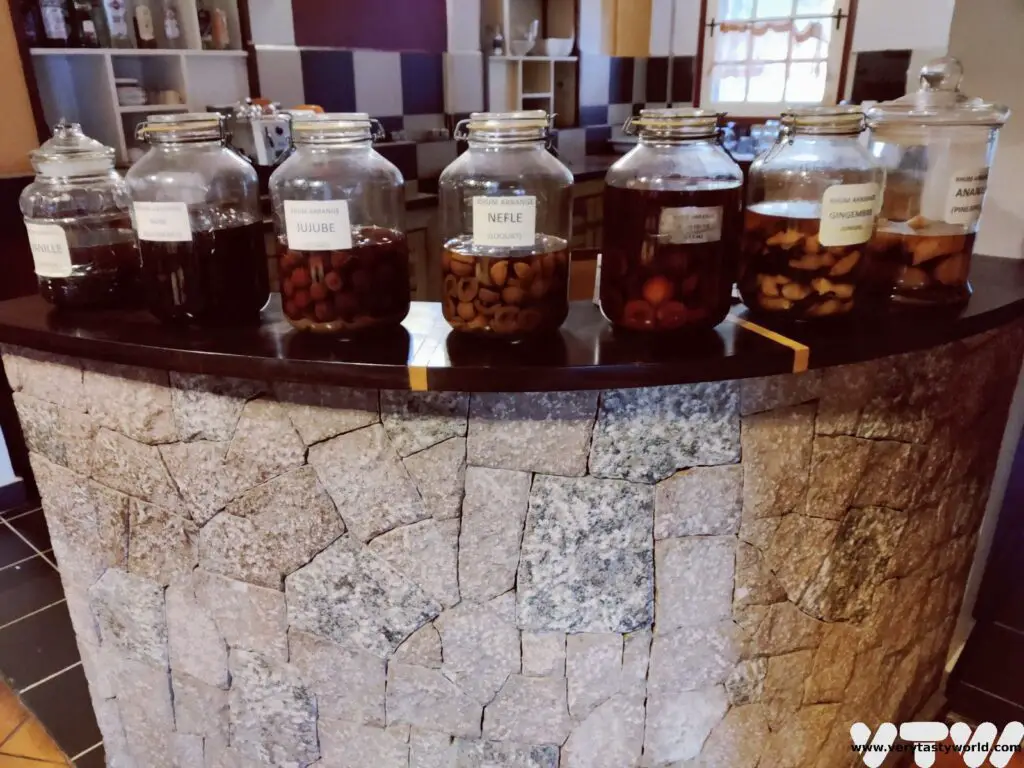
Ginger, tamarind, lychee, guava and, of course, vanilla are popular flavourings. Local fruits include bilbas and tapias.
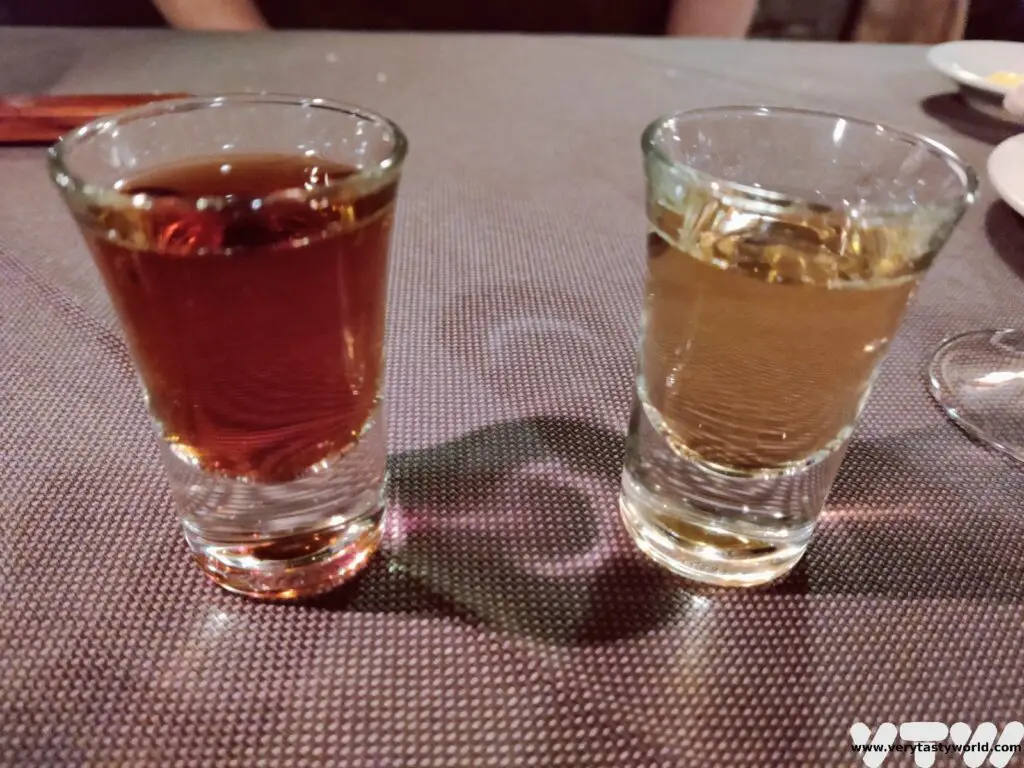

Madagascar’s Most Famous Export – Vanilla
It’s well known that Madagascan vanilla is some of the best in the world – top chefs rave about it. It is possible to visit vanilla plantations.
Interestingly, vanilla is not native to Madagascar – it originated in Mexico. Growing vanilla is a true labour of love and is also monitored by the government.
Vanilla is a juicy vine type plant and needs a tree to climb up. It isn’t a parasite, it just uses the tree for support. In Mexico a type of bee pollinates the vanilla flowers but this species doesn’t exist in Madagascar so the plants are hand-pollinated.
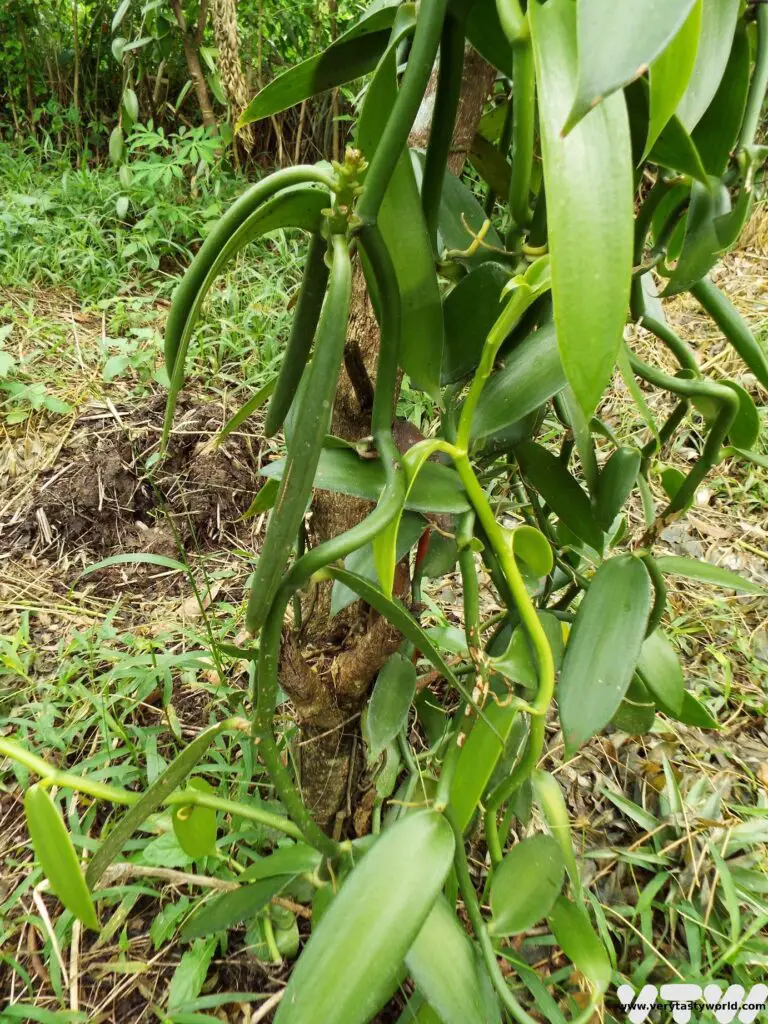
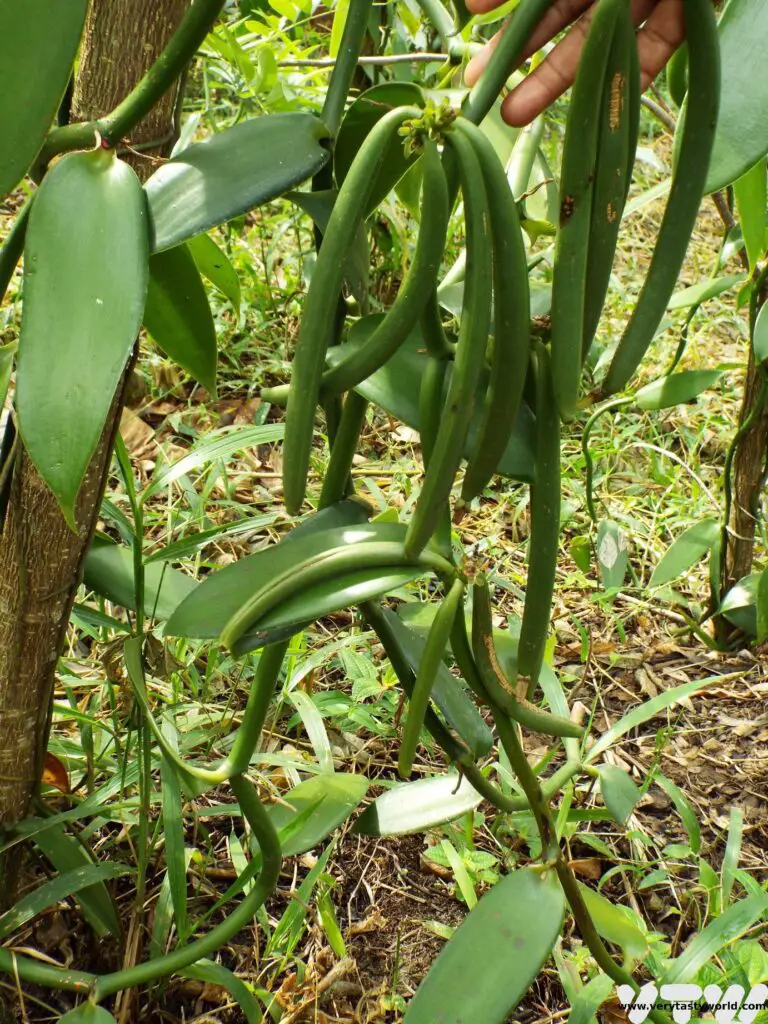
When the vanilla pods are harvested, they need to be blanched and then sun-dried over several days. Madagascar’s heat and humidity are ideal for processing. Vanilla should be stored in airtight glass jars to prevent mould. It can also be frozen.
We naturally brought back lots of vanilla from our trip and made the most sublime ice-cream.
Thanks so much for reading. We hope you enjoyed this article. If you’d like to keep up to date with new posts and recipes, please subscribe to our newsletter or follow us on social media – X, Facebook or Instagram. We always love hearing from you and would be delighted to read your thoughts about this article.
Related Posts You May Enjoy
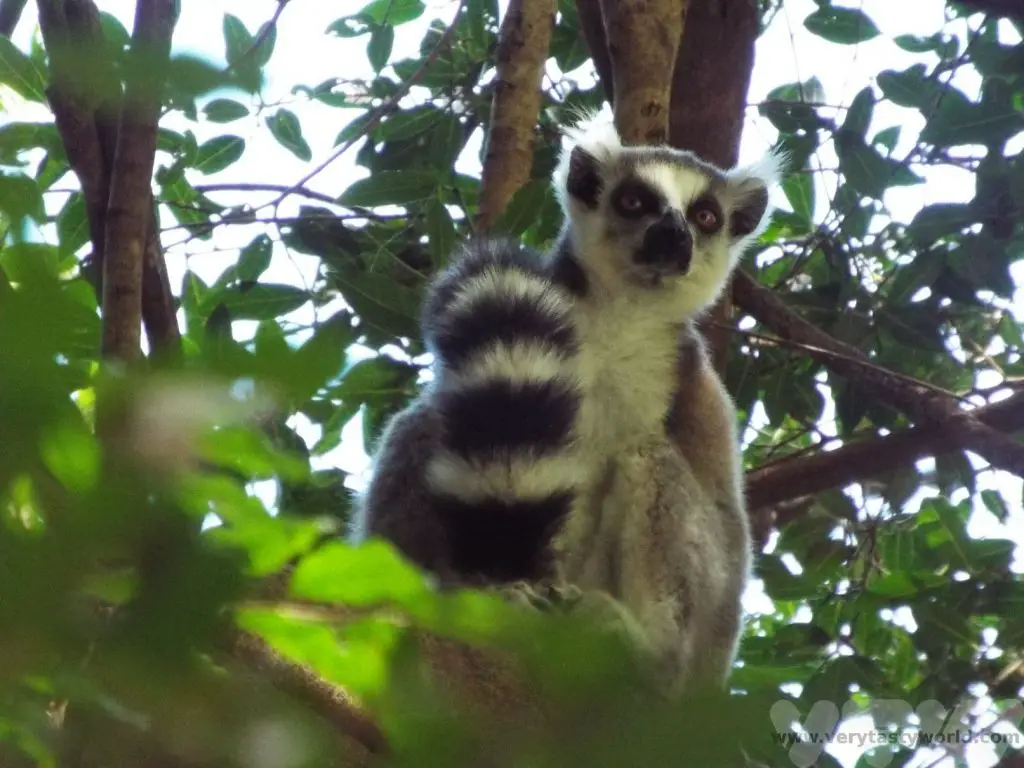
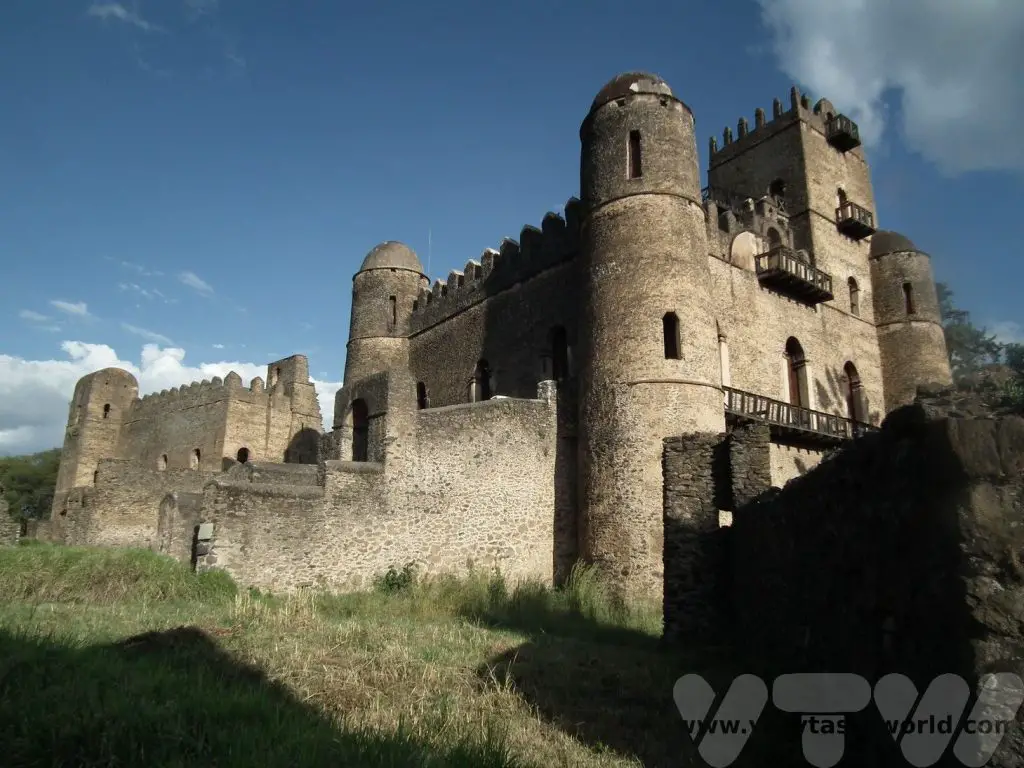
An Essential 2 day Gyeongju Itinerary
Gyeongju in South Korea is often described as a ‘museum without walls’ which may sound like a cliché but it couldn’t be more appropriate. It is a city with an enormously rich history that has so many fascinating sites to explore. We spent some time in Gyeongju on our recent trip to South Korea. We could easily have spent longer. Here’s our essential 2 day Gyeongju itinerary which will ensure that you see the highlights of this amazing city and leave you with a desire to see much more.
Please note that this post contains affiliate links. If you click through and decide to make a purchase we will make a small commission, at no extra cost to you, which will help towards the costs of running this site.
History of Gyeongju
Gyeongju has a long history that dates back over two thousand years. It was established in 57 BCE as Saro-guk when a number of villages in the area were united by leader Park Hyeokgose, the founding monarch of the Silla, one of the Three Kingdoms of Korea.
The city expanded over the years and eventually became the capital of the region, home to the court of the Silla people, who were the wealthy elite of the kingdom. They ruled for nearly 1000 years. Silla was known as the region of gold, and many gold objects have been found, reflecting the status of the kings.
By 668 CE the Silla had established a legal code and had adopted Buddhism to consolidate its political foundations. Gyeongju had a thriving society, prosperity was at its peak and it is estimated that the city’s population may have reached as many as one million people.
Sadly the city’s fortunes declined in later years during the Goryeo dynasty and then the Joseon Dynasty when the country’s administration moved further north. The city also suffered losses during the Mongol invasion in the 13th century and during the Imjin War with the Japanese (1592–1598). But a wealth of remarkable historic buildings and architectural treasures remain.
Naturally, the city has received UNESCO world heritage status. In UNESCO’s words: Gyeongju Historic Areas contain a remarkable concentration of outstanding examples of Korean Buddhist art, in the form of sculptures, reliefs, pagodas, and the remains of temples and palaces from the flowering culture of Silla dynasty, in particular between the 7th and 10th century.
How To Get To Gyeongju
The city is located in south-eastern Korea and can be reached in around 2.5 hours from Seoul and 1 hour from Busan using the fast and efficient KTX train services. However, you don’t arrive in the city centre, but at the new station Singyeongju which is located around 10km away. We have a post about how to travel to Gyeongju.

Although there are a vast number of historic sites to visit in the region, many of Gyeongju’s attractions are within walking distance of the city centre.
Most sites are free to enter but some have a small charge, usually around 2000 Won (about $2). Many sites can be visited throughout the day and into the evening but some have opening hours, which vary from location to location. The itinerary has a fair amount of walking, although you could use buses 10 and 11 which run on a loop and stop by some of the main attractions. Taxis are also available.
There are tourist information booths at many of the main sites. You can pick up leaflets and brochures which not only have handy maps and information about the site, but you can also collect stamps at various locations. Look out for the huts with the inkpad and stamp. Gotta collect ‘em all!
We got chatting to many of the people who were manning the booths – all had great English – and they were very keen to give us information about the site and advise on other historic areas to visit.
2 day Gyeongju Itinerary: Day 1
The first day’s attractions are within walking distance of the city centre, although you will certainly get the steps in. The main sites lie to the south of the city centre.
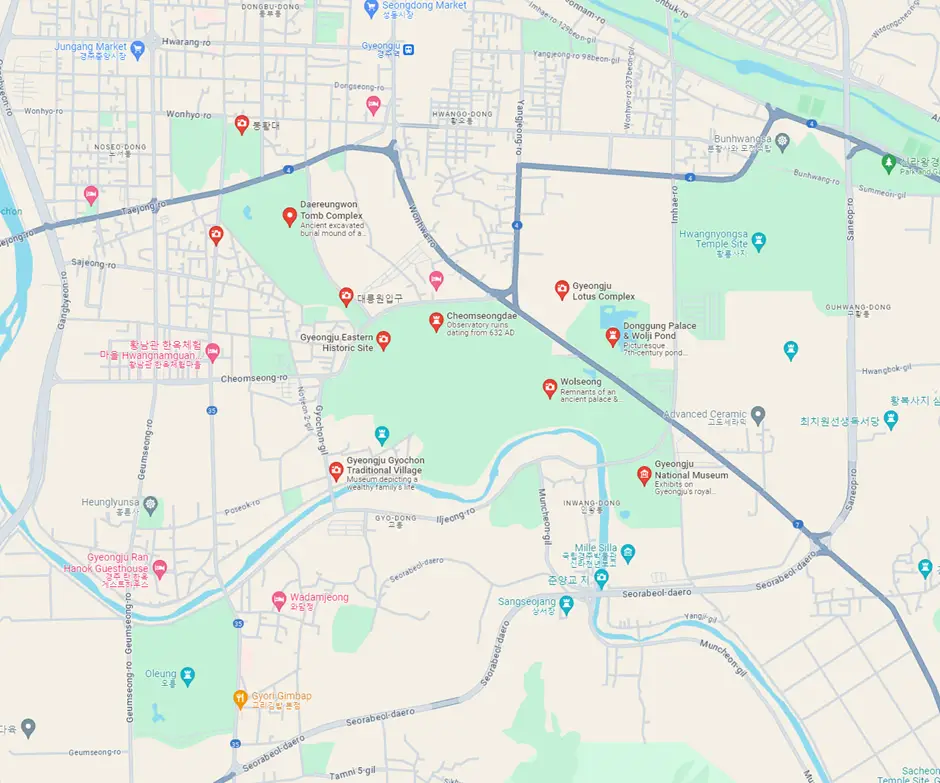
Day 1 Morning
The Daereunwong Tomb Complex
This complex is the site of ancient Silla burial mounds. They are tumuli that form a distinctive part of the landscape. They are considered sacred and should be treated with respect. This complex is free to enter and you can wander around. It contains the tombs of some 50 Silla Kings, including King Michu.
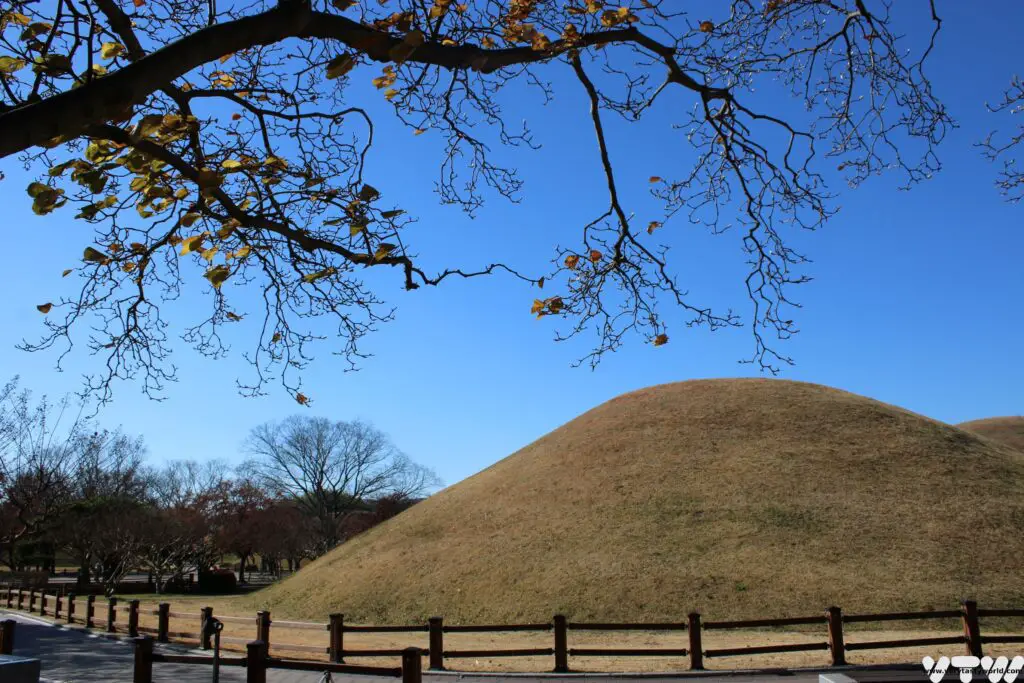
You can enter the Cheonmachong Tomb (a small fee applies). It is known as ancient tomb 155 and was excavated in 1973. Inside was a body wearing a gold crown which had been buried with a variety of artefacts.
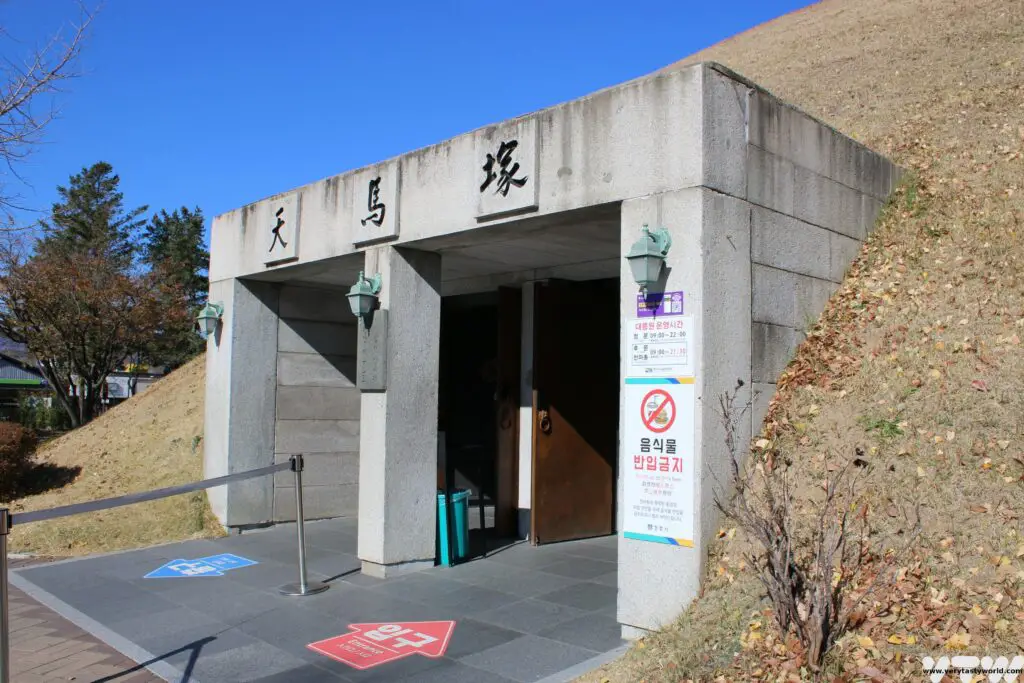
Many Silla artefacts are displayed inside the tomb and you can marvel at the craftsmanship of the intricate and delicate goldsmiths. The Silla were clearly a wealthy people and the crowns and jewels they wore reflected their status.

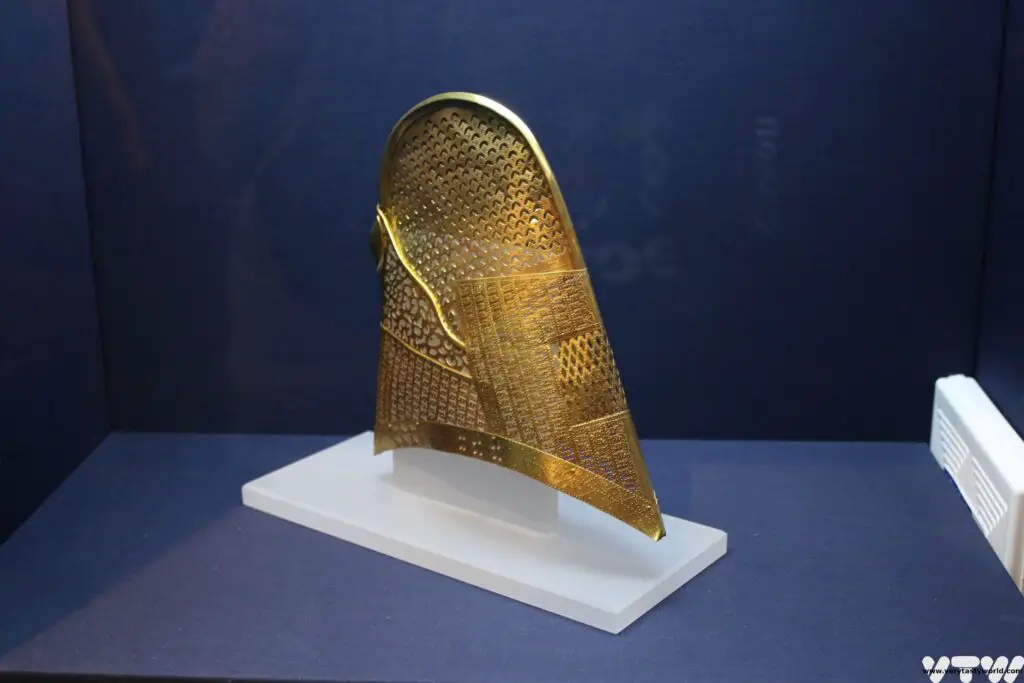

Exit this site to the south to visit the Gyeongju Eastern Historic Site
If you are feeling peckish, there are a number of restaurants in this area, located between the Daereunwong Tomb Complex and the Eastern site, where you can enjoy a snack or a light meal.
Gyeongju Eastern Historic Site
There are a vast number of fascinating sites to explore in this area, most of them are eminently walkable.
Cheomseongdae
This is the oldest surviving observatory in Asia (possibly even the world), constructed by the Silla in the 7th century. It is nearly 10 metres high and would have been used for astronomical observations. The square window halfway up the tower was also the entrance. The tower is comprised of 365 stones to represent each day of the year. It is thought that the number of the stones, and their placement, in the tower may represent astronomical figures but no one really knows what these might be so this theory isn’t certain.
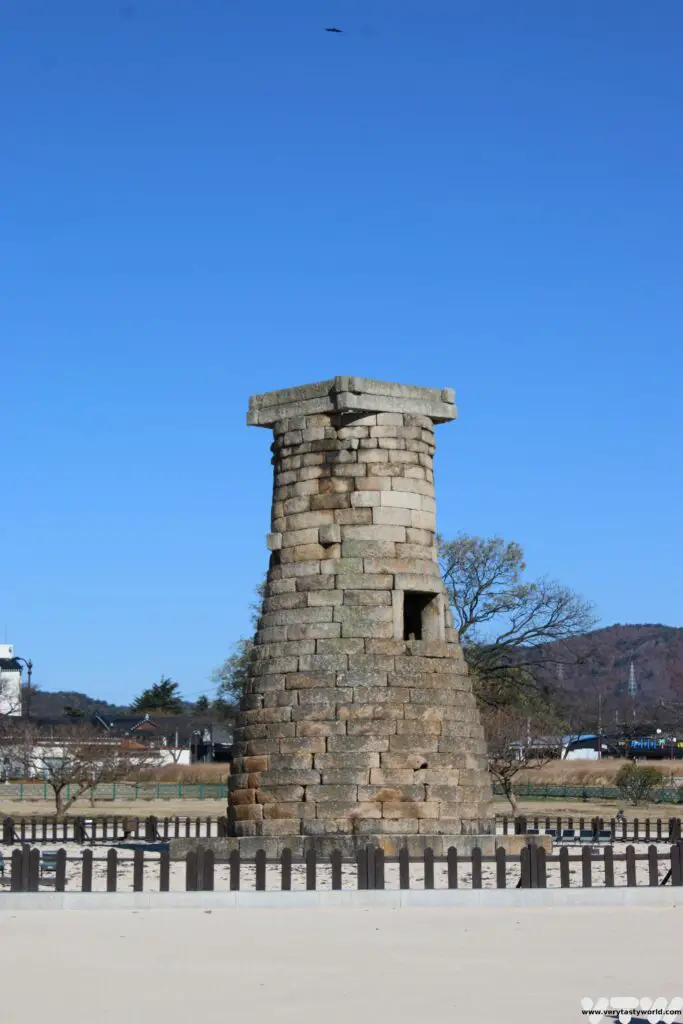
As you follow the main track, take a right turn just past Cheomseongdae to walk through a pleasant path to reach the…
Gyeongju Gyochon Traditional Village
This small village has a number of houses built in traditional style, some of which are residential properties but some are accessible to enter. Many of these date from the Joseon dynasty (1392 – 1897) rather than Silla. Of particular interest is the Confucian school which is still in use to provide education of Confucian practice.

The Historic House of Rich Man Choe is a house dating back to approximately 1700, although is it is a reconstruction. The Choe family were rich through 12 generations and this house is representative of the buildings of the nobility of the Joseon Dynasty. Nearby the traditional village is the Jaemaejeoung well, situated by General Kim Yusin’s house. Next to the well is a tombstone dedicated to King Gojong (a Joseon king).
There are a number of cafes and restaurants here if you fancy having a bit of a rest from sightseeing. This is a good place to enjoy a spot of lunch.
Day 1 Afternoon
Woljeong Bridge
Moving further south from the traditional village, you will arrive at the river and the spectacularly beautiful Woljeong Bridge. This is a reconstruction of a Silla bridge that was originally built during the reign of the 35th Silla King, King Gyeongdeok.
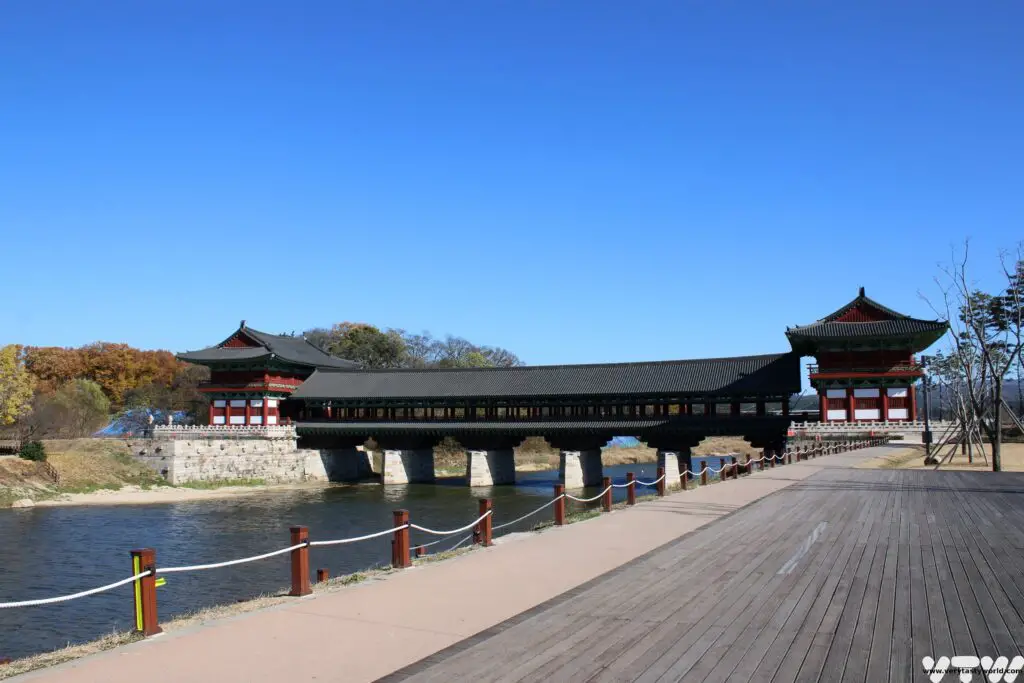
The bridge is covered all the way across, its pillars and roof highly decorated in red, green and blue.
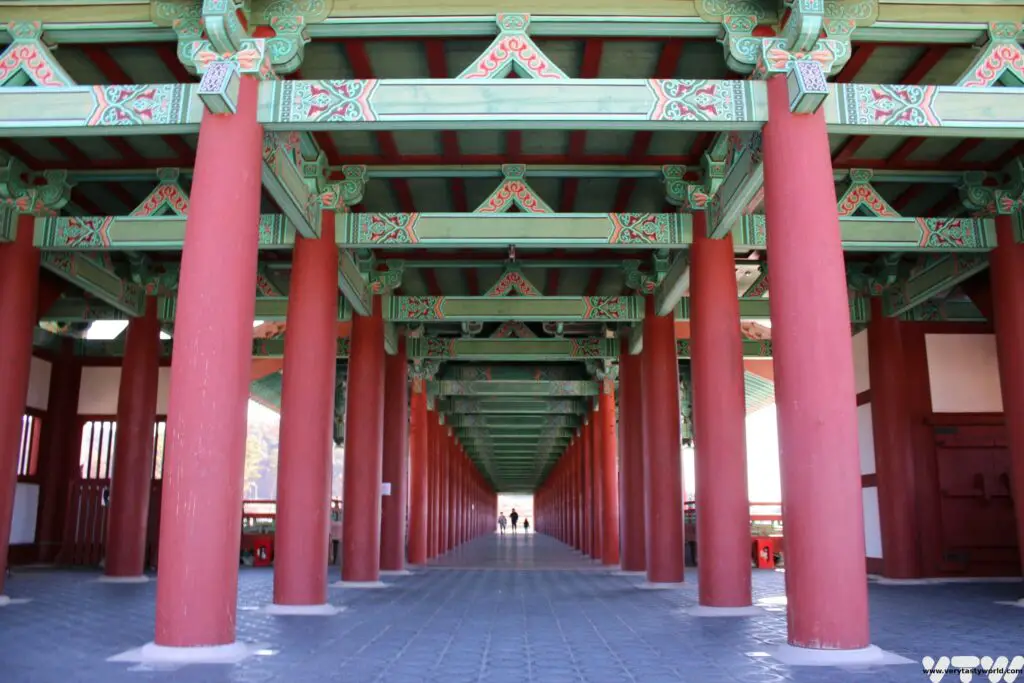
You can also climb the steep steps into the bridge towers to view exhibitions which include a number of historic artefacts.
Oleung Five Tombs Site
Beyond the bridge you can turn right and walk along the riverside until you arrive at a walled complex. Follow the wall along the river and turn left along the main road and follow the wall to reach the entrance. This site has a small fee to enter. It has four earthen mounds and a round grave. They are the tombs of a single king, King Park Hyeokgeose, who founded the Silla Dynasty.
He apparently ruled for 62 years and after he died, according to a legend, his body was ripped into five pieces and fell back to earth from heaven. His people tried to bury him in a single tomb but a giant snake prevented them from doing this, so five tombs were constructed. The tombs have not been excavated.
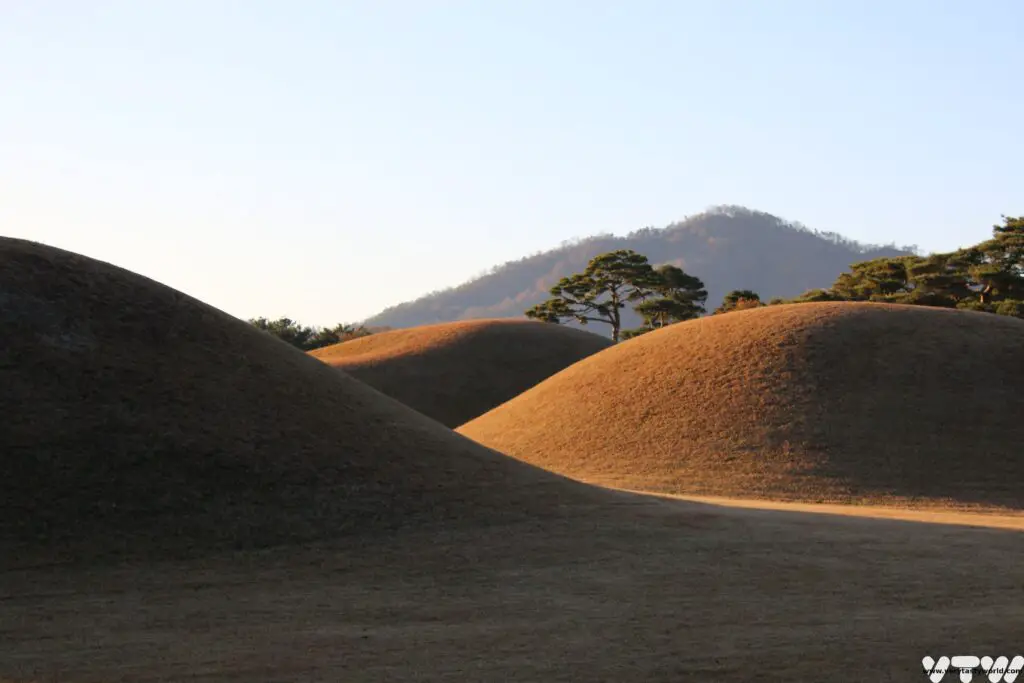
A lovely foodie moment happened after had left the site and were making our way back to the bridge. We were beckoned by a man who wanted us to meet his family and show us how they made kimchi. We were invited into his courtyard and he showed us a bathtub of cabbages which had been halved and brined. He, his sister and 84 year old mother were washing the cabbages. The following day each cabbage leaf would be smothered in a deliciously spicy paste and fermented. It was such an honour to be invited to this delightful family’s home and to see the kimchi making process.
Wolseong Palace
You can walk back along the river, cross the bridge and turn right at the traditional village to go across the park and see the remains of Wolseong. This was a Silla palace that was originally constructed in the 2nd century. No buildings can be seen, save a small ice-house, but the moat has recently been restored.
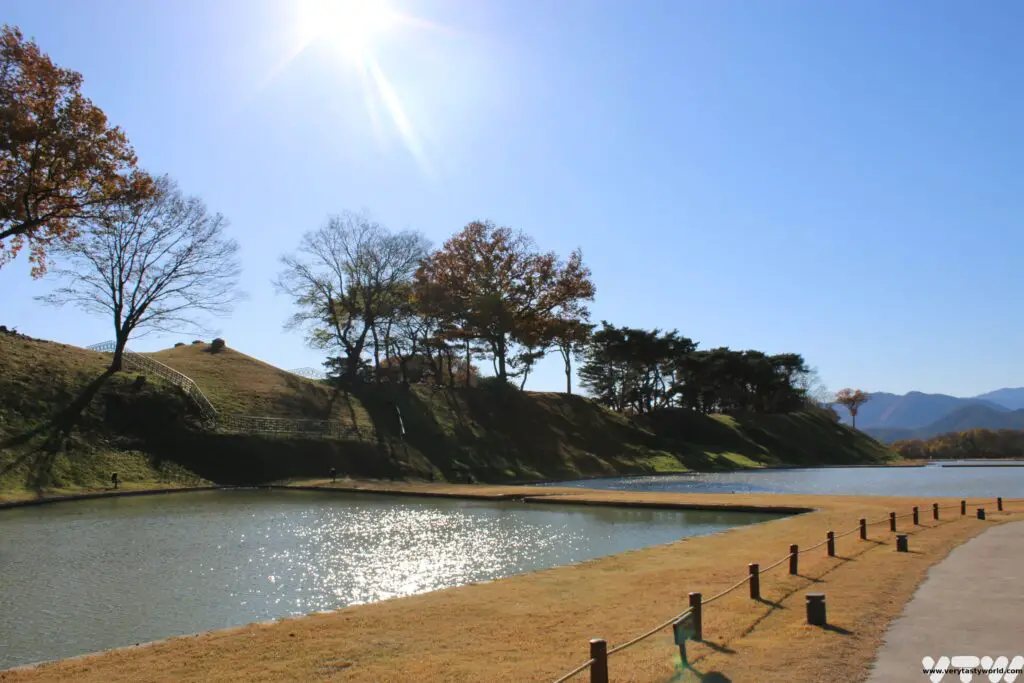
Donggung Palace and Wolji Pond
Follow the moat around and bear right. After exiting the park turn right and walk along the road, then cross to the Donggung Palace and Wolji Pond. This was a palace that was used by the Silla crown prince. The site has a beautiful pond (Wolji means “pond that reflects the moon”) which was constructed in 674 CE and is set in a lovely garden.
There is a small fee to enter the grounds. It’s possible to walk round the lovely lake to view its three islands. There are also some reconstructed lakeside buildings. It’s easy to imagine this as a place of leisure for the crown prince. It was extremely pretty, even in winter.
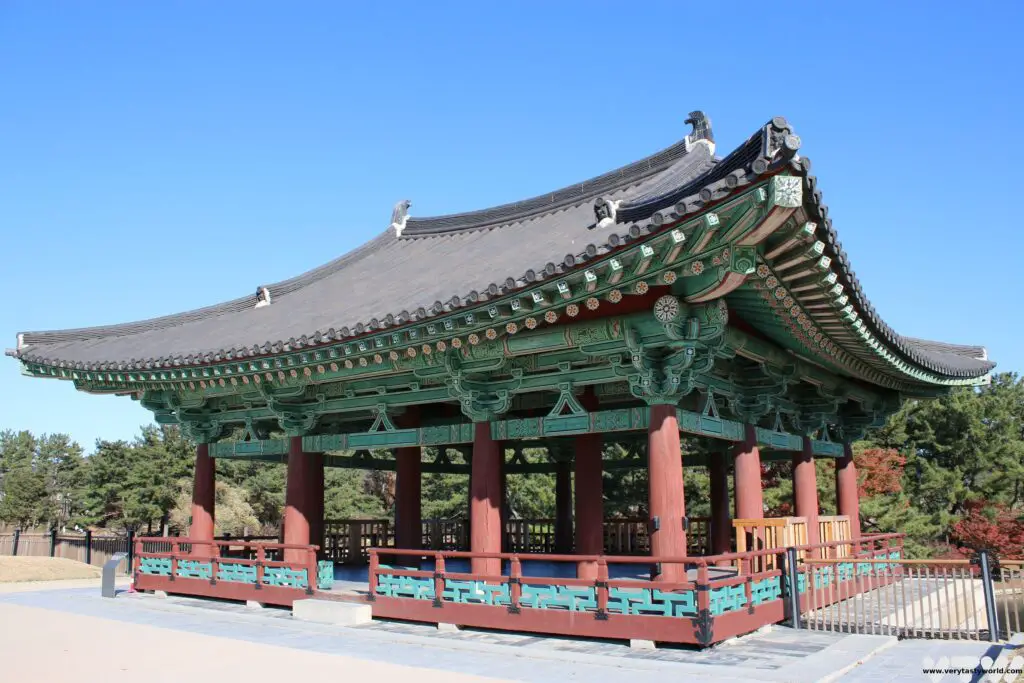
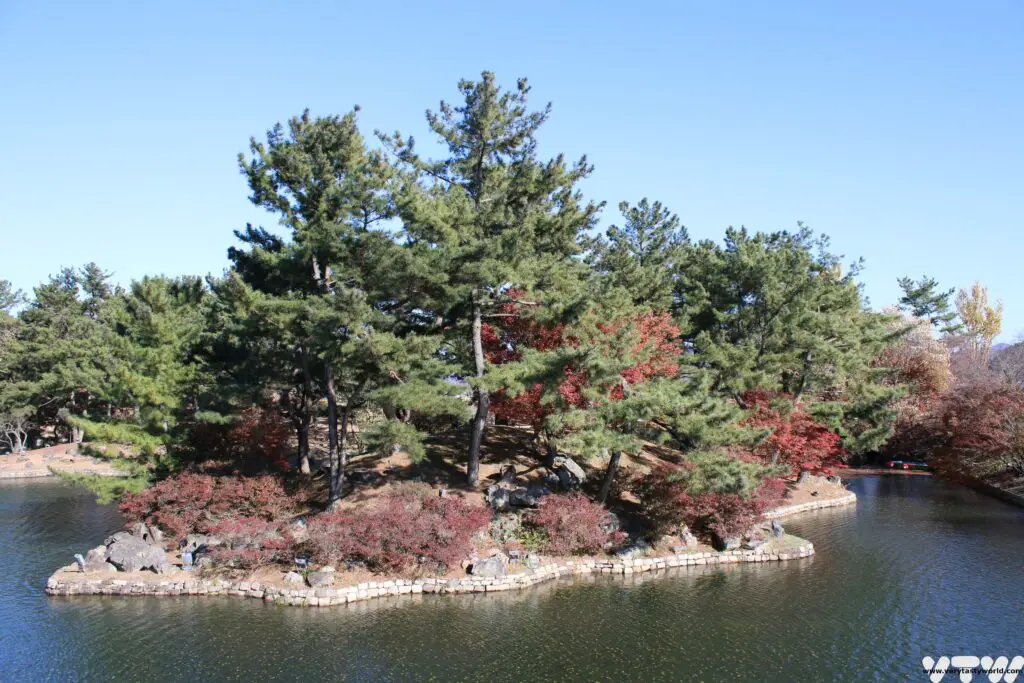
2 day Gyeongju Itinerary: Day 2
On the second day we suggest exploring some of the important historic sights outside the city.
Day 2 Morning – Bulguk-sa and the SeokGuram Grotto
You can catch a bus to visit the UNESCO sites of Bulguk-sa and the SeokGuram Grotto.
Bus numbers 10 and 11 go to Bulguk-sa (number 11 from the city centre is the quickest route) on a loop route.
Bulguk-sa is a historic temple complex set in a beautiful garden and is a triumph of Silla architecture. It was originally built between 751 and 774 and served as the centre for Silla Buddhism and was a place for prayer to protect the country from foreign invaders.

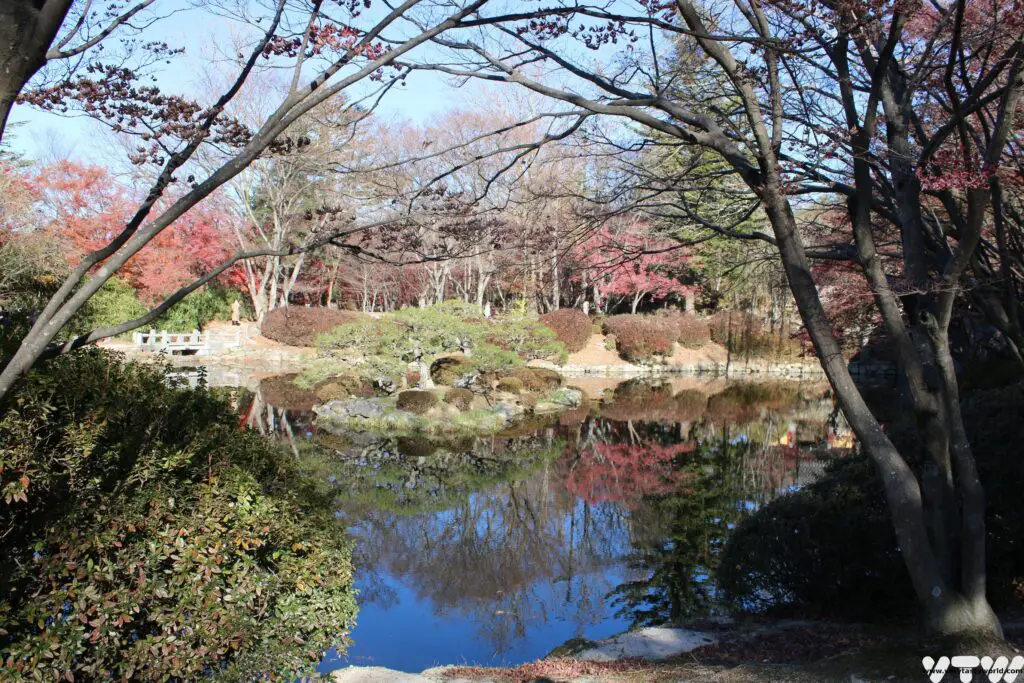
Unfortunately the buildings were destroyed by Japanese invaders in 1593 and have been rebuilt. The main Buddha hall was rebuilt in 1765.
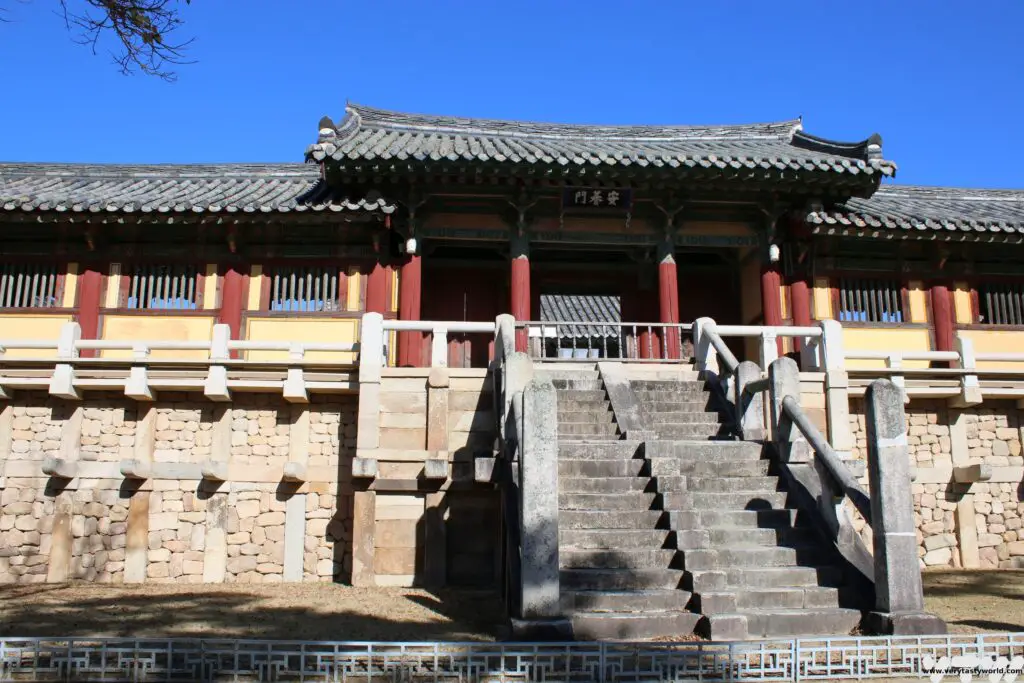
In front of the hall are two pagodas which survived the destruction are considered to be national treasures.
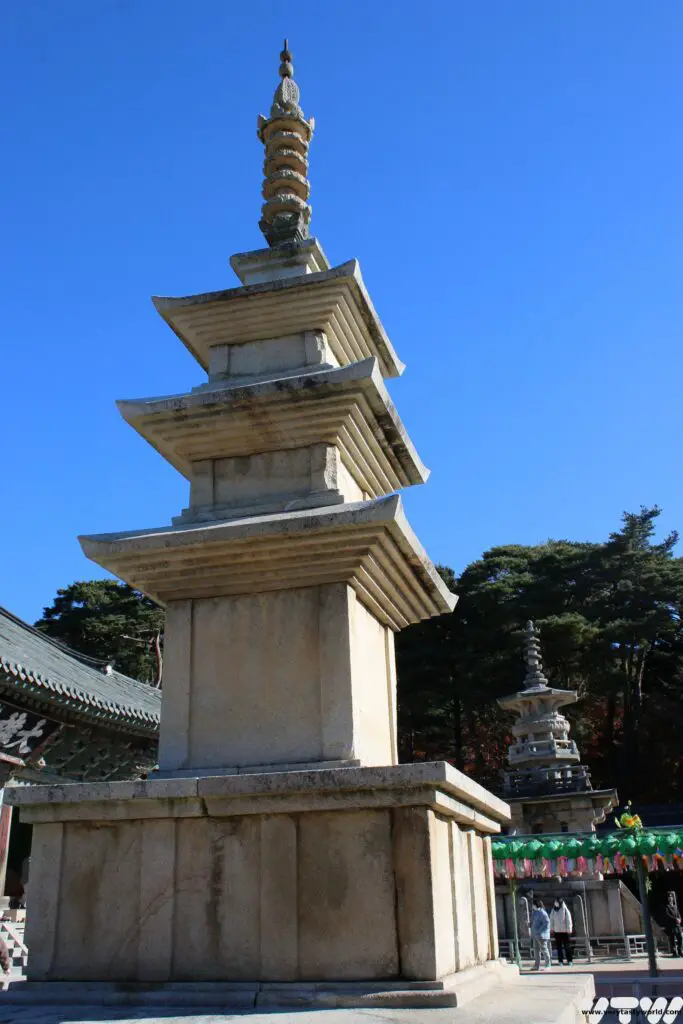
Dabotap , the Many Treasures Pagoda, is a typical Silla construction. The more ornate pagoda is Seokgatap, the Sakyamuni Pagoda, and it’s more reflective of the architecture of the neighbouring Baekje kingdom. In 1966 archaeologists discovered a copy of a sutra inside the pagoda which is an absolute treasure, considered to be amongst the world’s oldest woodblock printed books.
There are numerous other temple buildings and gardens to explore.
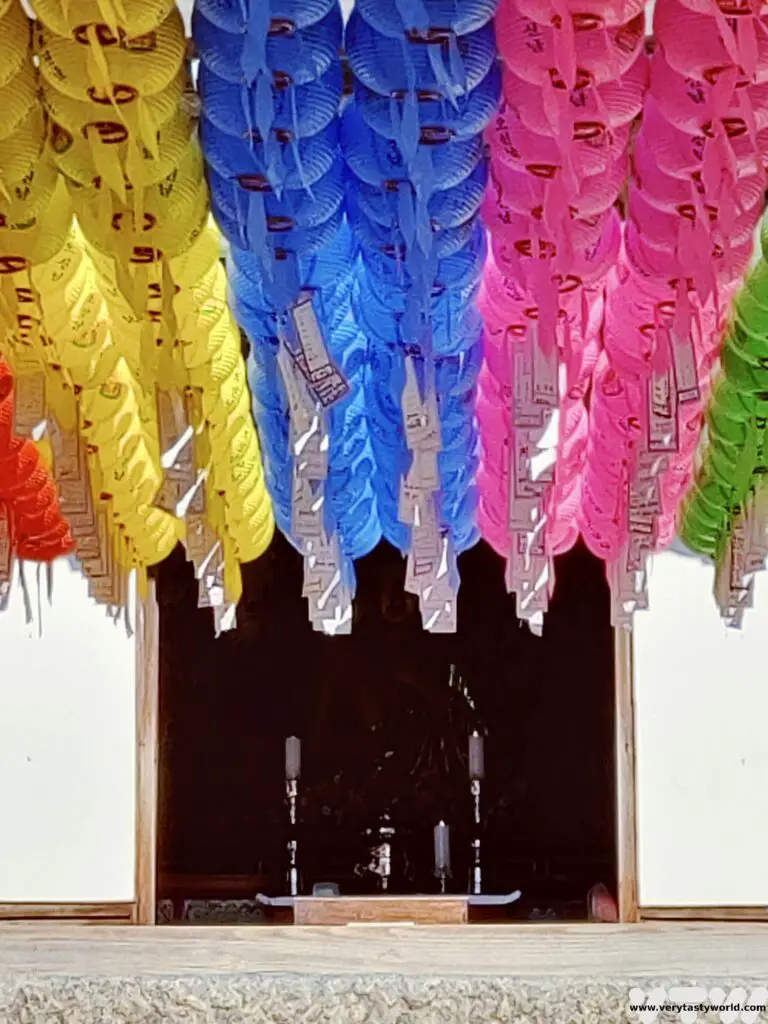
Bus number 12 will take you to the SeokGuram Grotto. If you’re feeling energetic, you can walk up the hill – it’s 2.2km to reach the grotto – but we’d recommend taking the bus as the road doesn’t have a great path for pedestrians. The bus stop to the grotto is at the bottom of the hill on the main road opposite the tourist information centre in the Bulguk-sa lower car park. The tourist centre will be able to give you a bus timetable.
The SeokGuram Grotto is another world heritage site. This is a cave temple, built in 751CE by the Silla people, which contains a Buddha. It is 3.23m tall, sculpted in granite and is considered to be one of the world’s most exquisite heritage carvings. The Silla cleverly designed the cave on a hillside where a stream runs underneath, perfectly regulating the humidity within the cave.
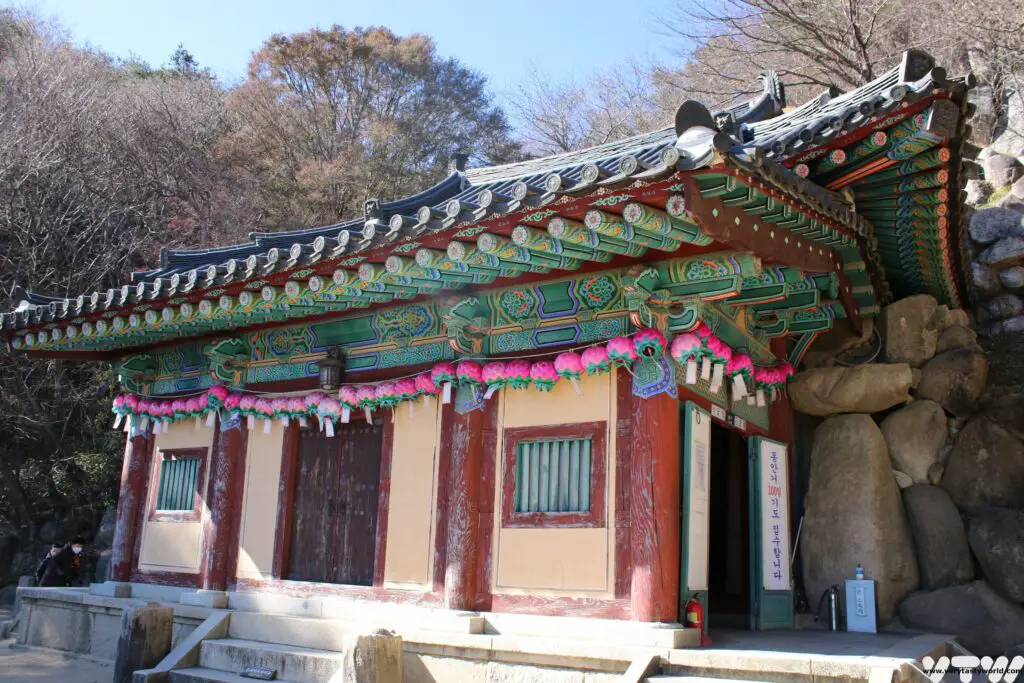
Visitors can walk into the cave and view the Buddha which is located behind a protective screen. There are deities that guard the main Buddha, two on each side. Photos are not allowed.
It is a short walk of around 1km along a pleasant, forested path to the SeokGuram Grotto from the entrance. At the very top of the stairs by the car park there is a traditional bell, which you can ring for a small fee of 1000Won. The money goes to charity.
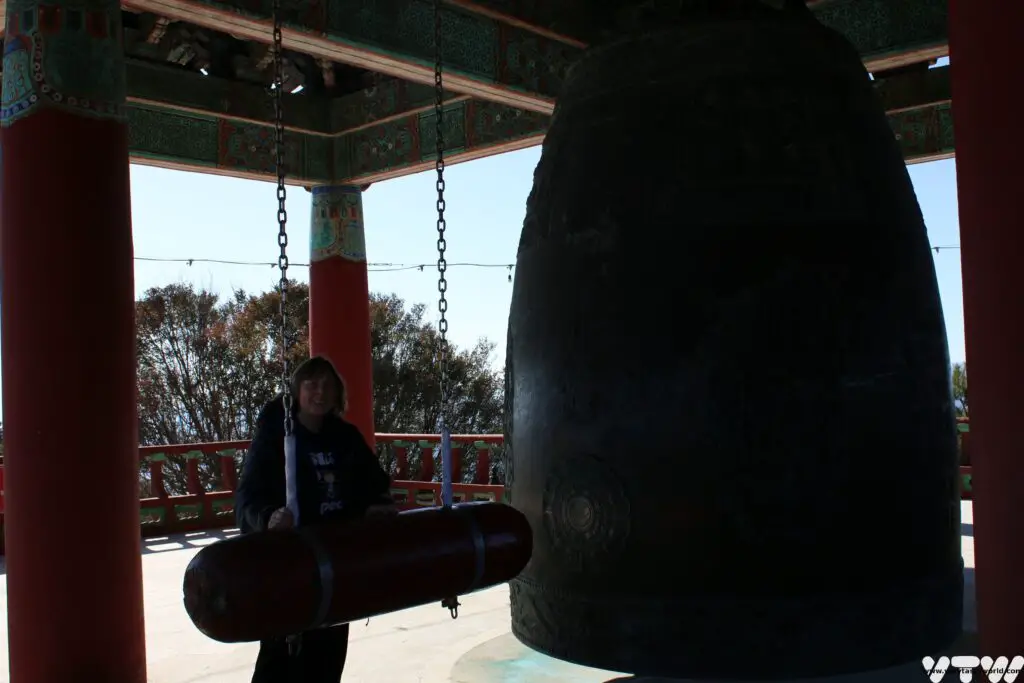
Day 2 Afternoon Choices
There are choices for how to spend the afternoon.
On the way back, the buses pass by the Lake Bomun resort area. If you looking for more modern activities Gyeongju has a popular theme park which is a major draw for younger people in particular. This area also has a K-Pop museum and a museum of contemporary art. You will pass by the park on the no 10 or 11 buses and they both stop there.
Alternatively you could spend the afternoon browsing the Gyeongju Museum (open 10m-6pm, free entry) which has extensive permanent and temporary exhibitions about the Silla.
The history gallery and Silla art gallery are notable highlights, both of which exhibit precious artefacts.
Evening at the Gyeongju Eastern Historic Site
We recommend revisiting the Gyeongju Eastern Historic Site in the early evening. It’s a place where locals and visitors spend time relaxing in the park. Kite-flying is a popular activity.
Many of the historic sites are lit up after nightfall and it is especially worth walking back to Cheomseongdae and the Woljeong Bridge.
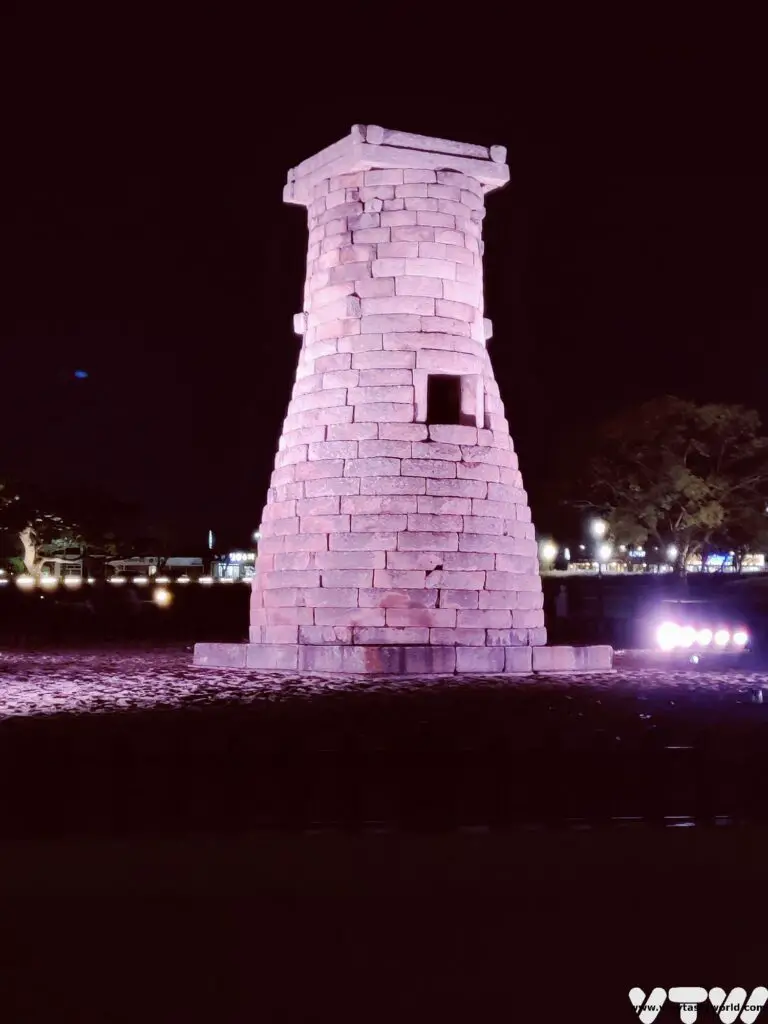
They are both impressive in the daytime but spectacular at night.

Gyeongju for Foodies
We ate very well all over Korea and the cuisine in Gyeongju was no exception. There are a plethora of restaurants in the city and around. Prices are very reasonable – most of the meals we enjoyed were around 10,000 Won (~$8) or less per person. There were a couple of excellent restaurants in the city centre or close to the Eastern Historic Site.
Sukyoung sikdang gyeongju on Gyerim-ro, opposite the The Daereunwong Tomb Complex, offered a home-cooked bibimbap (rice bowl) with lots of banchan side dishes and broth. This is a great option for vegetarians because all the dishes were vegetable based except for an additional order of fish (which we did order and enjoy). The sides comprised omelette, mushroom, water kimchi, radish kimchi, blanched vegetables, tofu. Barley tea was also served because it was a cold day. The proprietor also made his own makgeolli – a kind of rice wine.
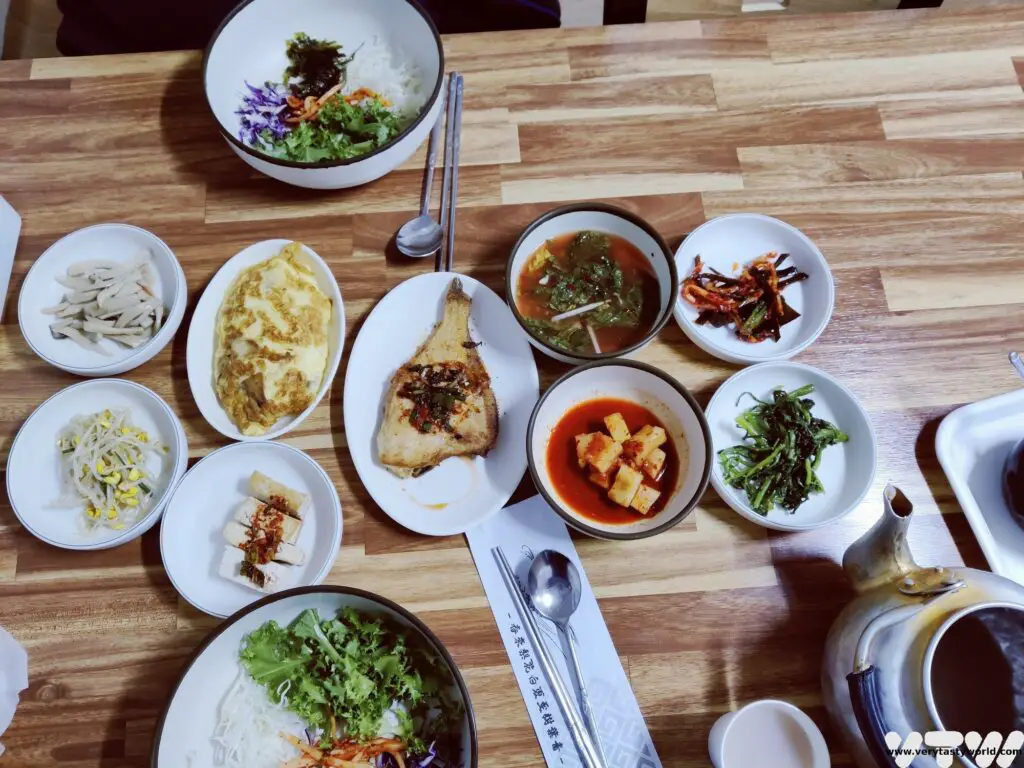
We stopped into 한식집 숟가락 젓가락 located on Taejeong-ro791 Becon-gil because we saw its sign with a huge number of dishes. This wonderful little restaurant offered a feast that was an absolute bargain. You choose a stew and then get rice, 11 side dishes and barley tea. All for 8000 Won each (about $6). And it was utterly delicious.
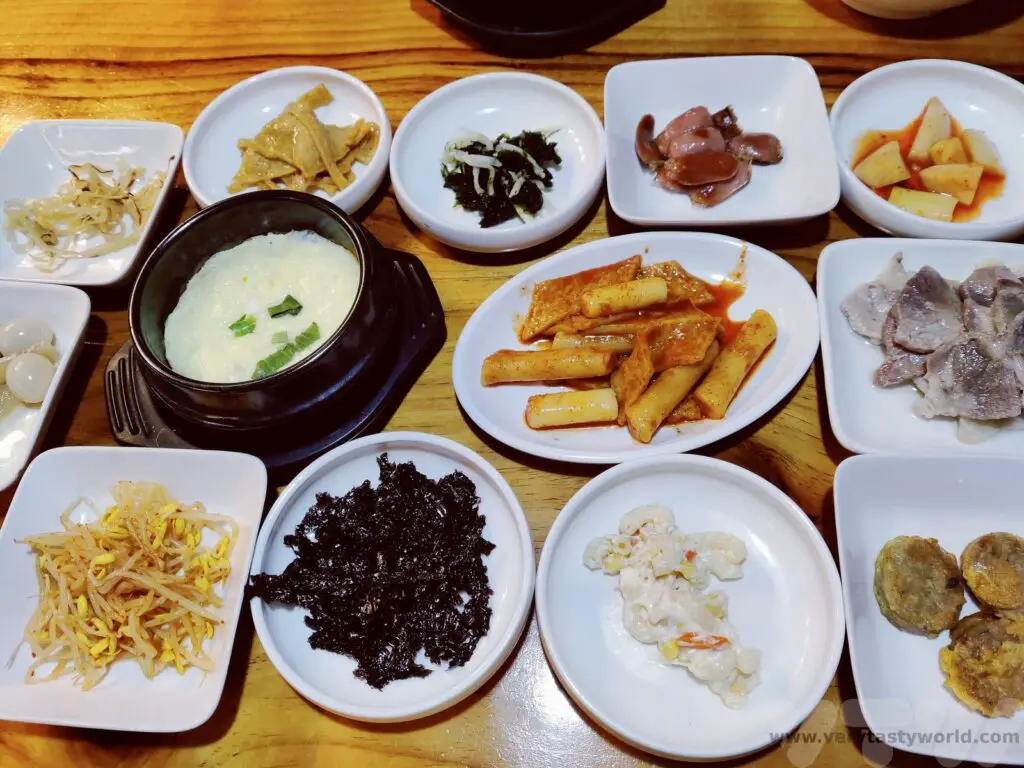
In town there is a dumpling restaurant 울타리없는만두 on Dongseoung-ro. The proprietor speaks good English and is delightful. We enjoyed two different types of dumpling. He steams them outside the shop – puts the dumplings in a basket, passes them through the window into the steamer, whereupon a rush of steam engulfs the side of the street and the dumplings cook in double quick time.
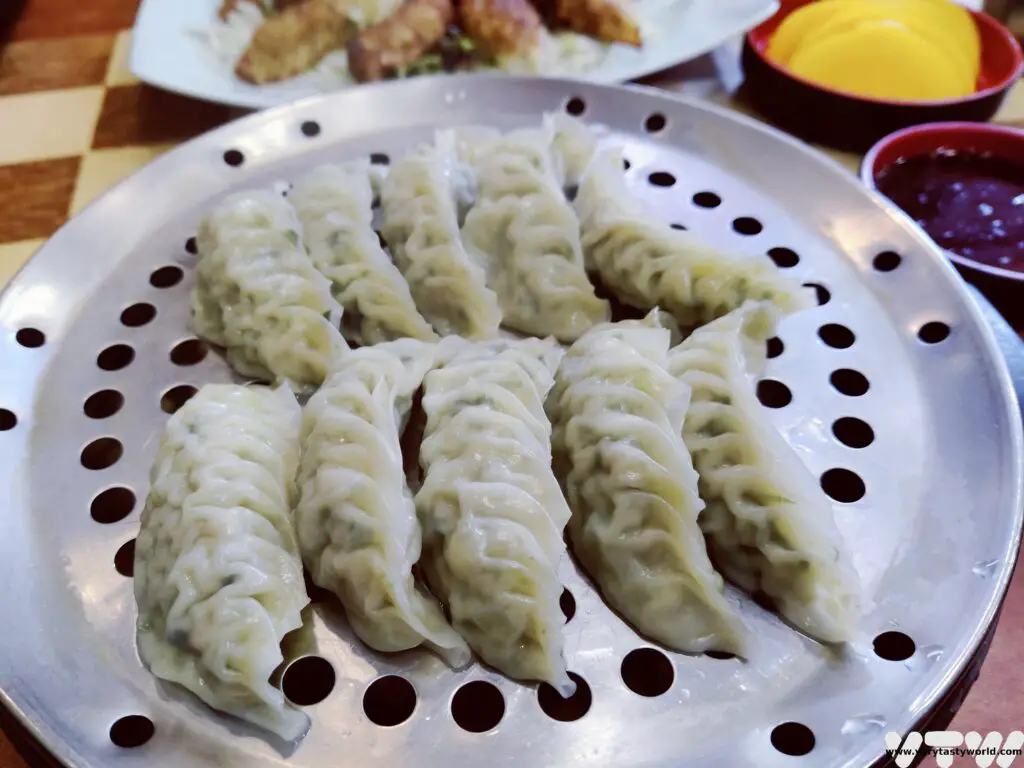
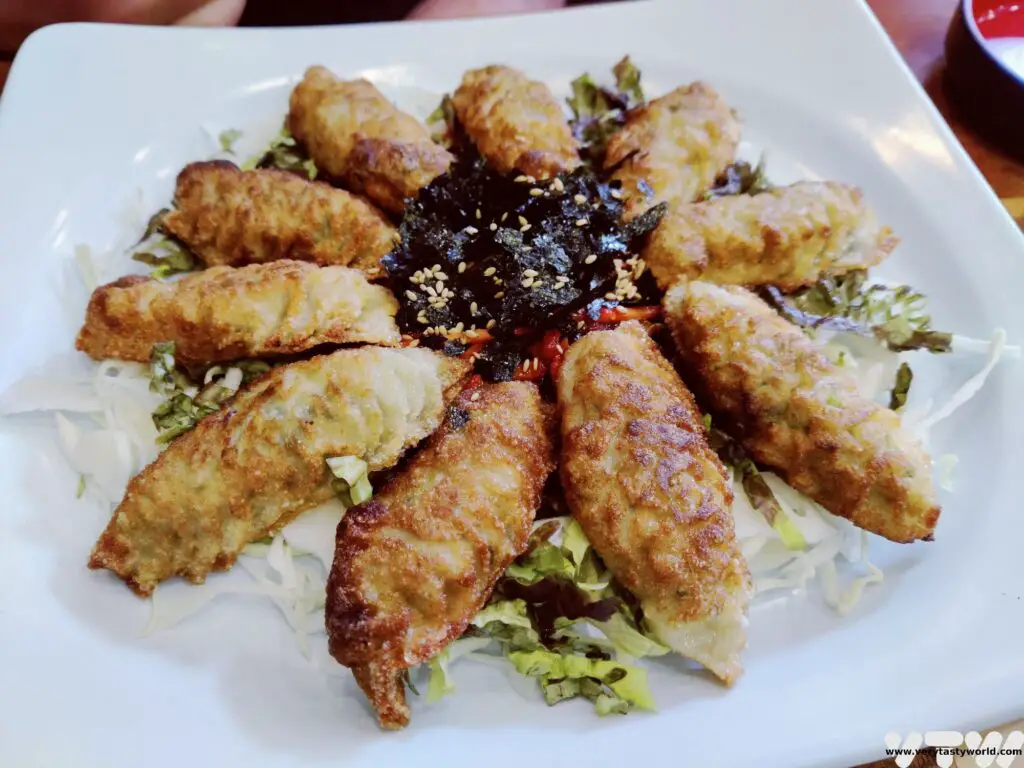
Seongdong Market, opposite the old railway station has a number of stalls if you are seeking street food. And we always advise seeking street food in South Korea – there are so many amazing dishes to try. The market also has an area with some restaurants that also serve a variety of banchan.
Gyeongju Specialty Food
Gyeongju has its own special bread known as hwangnam-ppan. We found it quite difficult to buy in individual portions as it is usually beautifully packaged in presentation boxes. (We were backpacking and didn’t feel that if we were carrying a beautifully packaged presentation box it would survive the rest of the trip!) However, one bakery sold us two single packs. Hwangnam-ppan is a sweet bread, which tastes like a scotch pancake. It’s soft and spongy in texture. The filling is a smooth, sweet red bean paste.
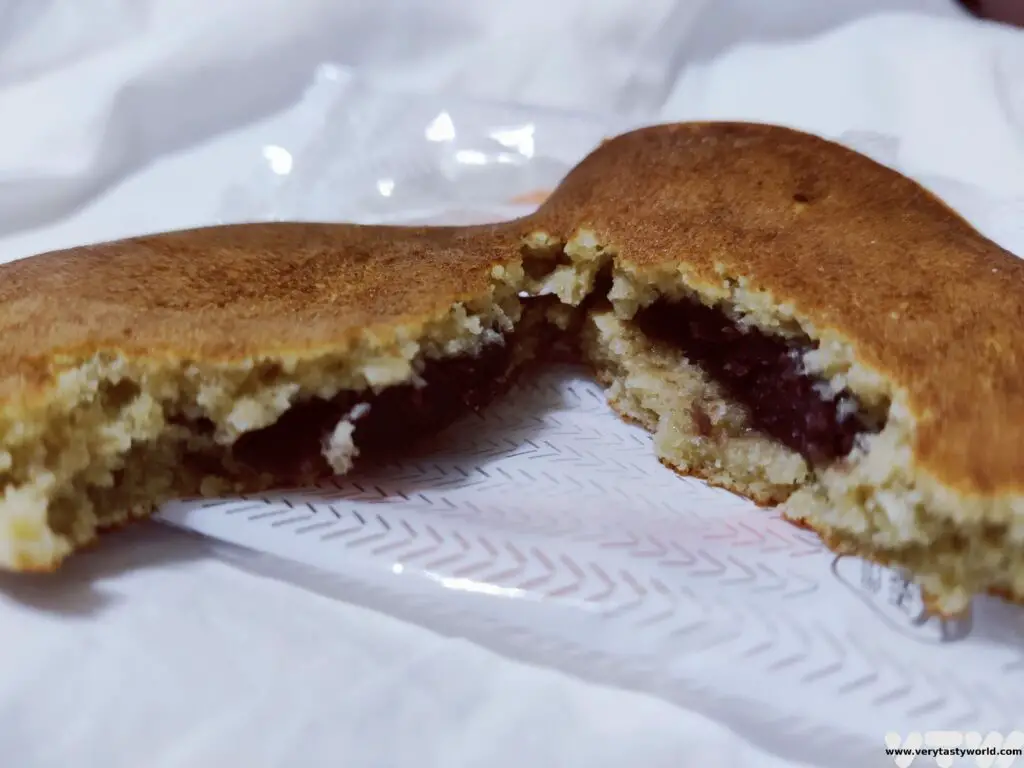
So, how did we do with collecting those site stamps? This is what we covered in two days.
We can’t recommend Gyeongju highly enough. As you can see, our two day Gyeongju itinerary gave us a flavour of the highlights but there are many, many more places to see. We want to return and spend much more time exploring this remarkable region.
Related Posts You May Enjoy
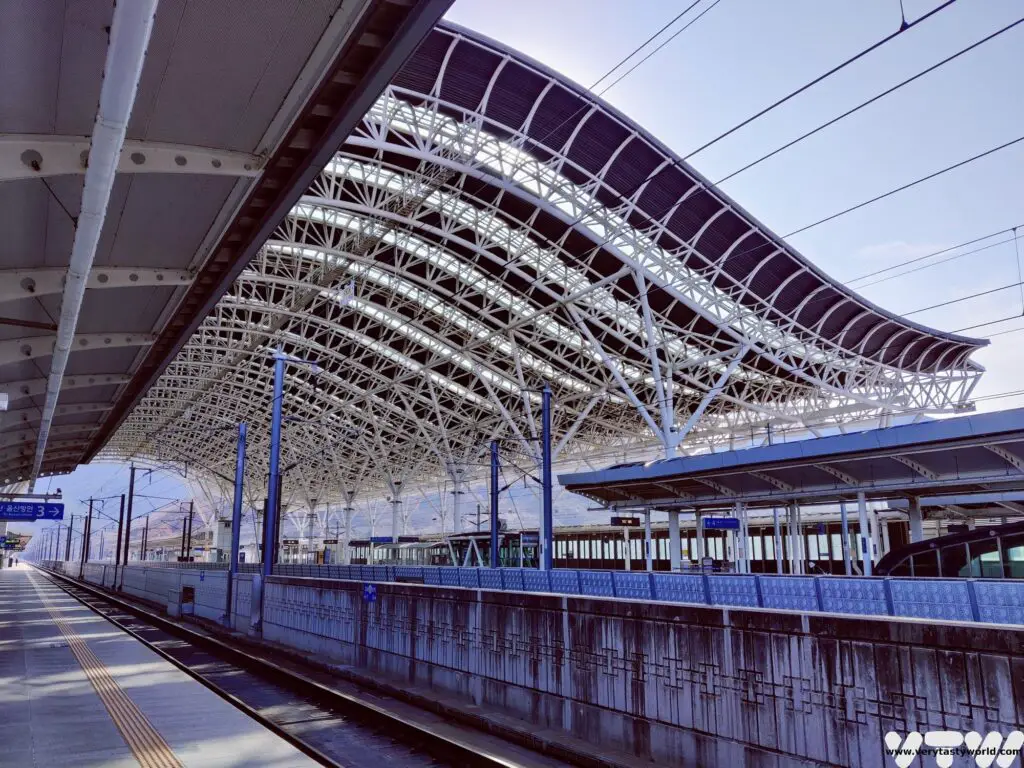

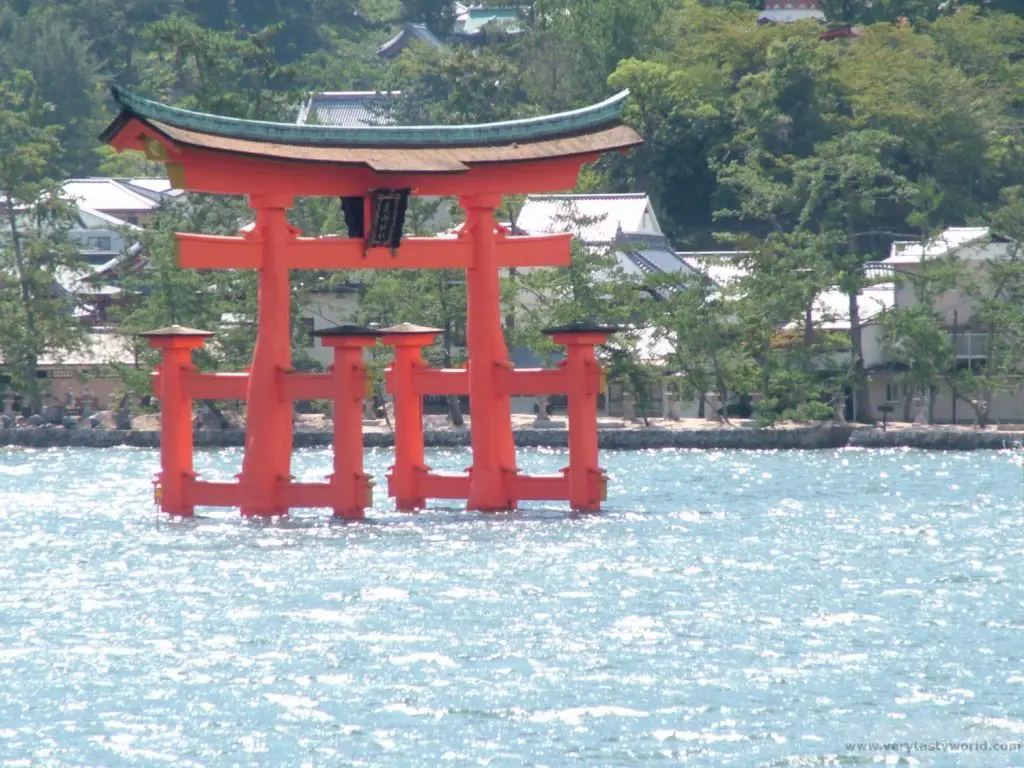
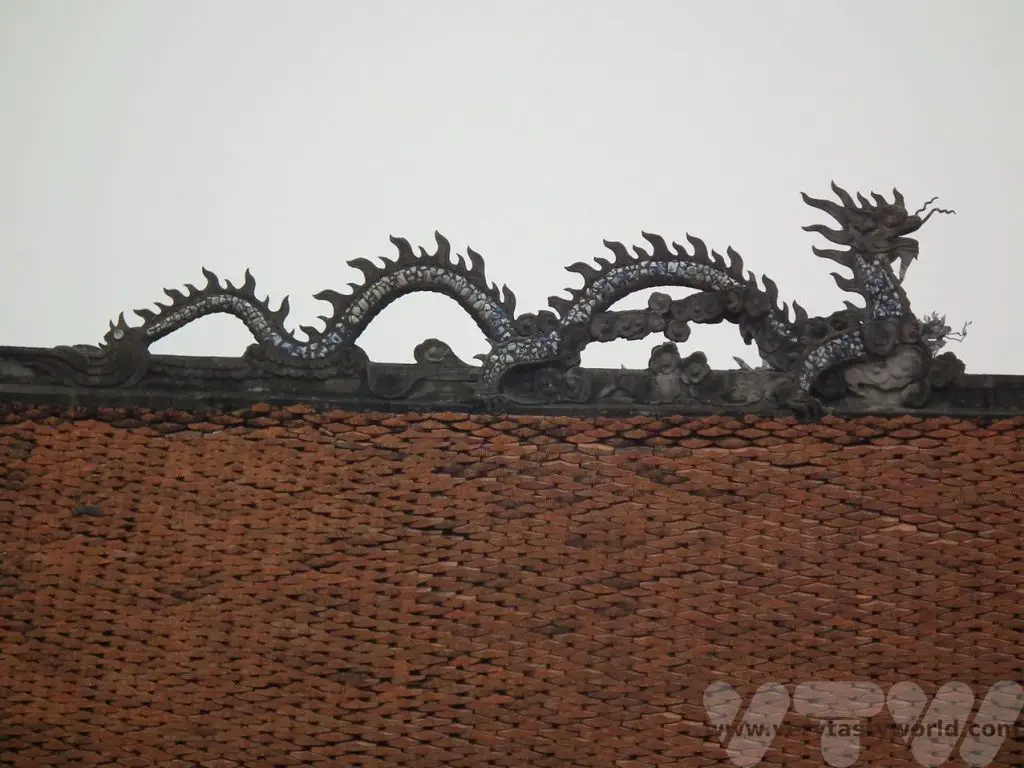
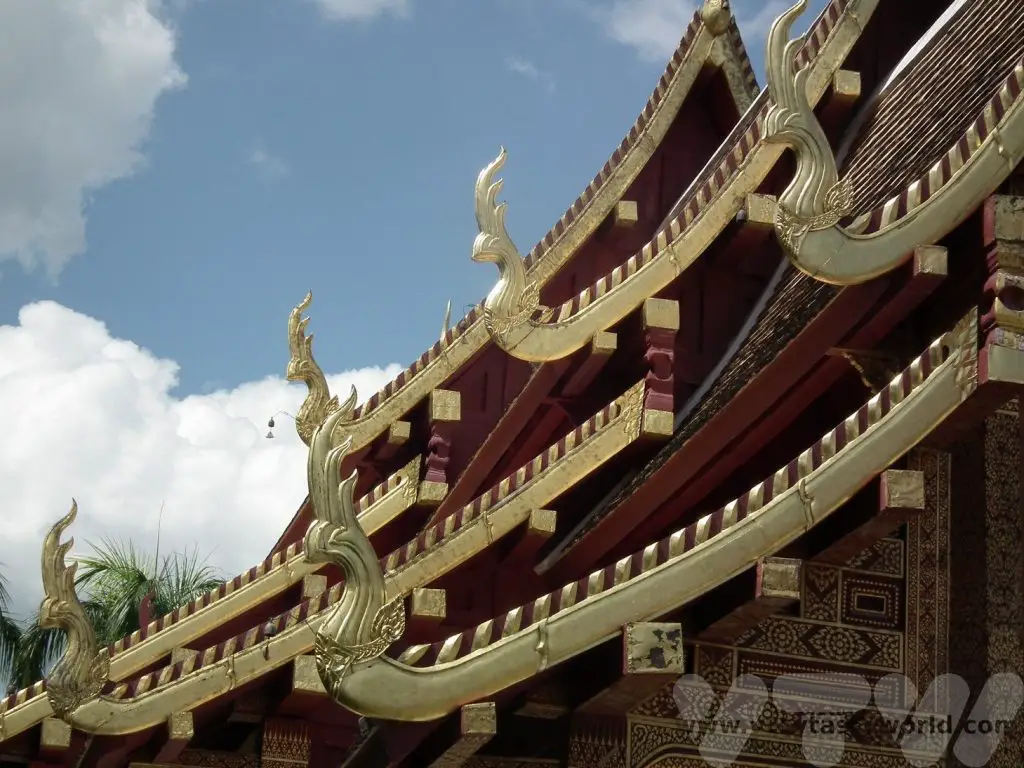
- World’s Best Breakfasts -Breakfast of Champions!
- A One Day Hanoi Itinerary
- Mekong Meanderings
- A Chiang Rai Temple and A Country Retreat
- A Chiang Mai Tour in Northern Thailand
- Sunrise at Angkor Wat & Other Temples To Explore
Thanks so much for reading. We hope you enjoyed this article. If you’d like to keep up to date with new posts and recipes, please subscribe to our newsletter or follow us on social media – X, Facebook or Instagram. We always love hearing from you and would be delighted to read your thoughts about this article.
A Korean Table Setting – Eating Out in Korea
Korean cuisine is one of the finest in the world. It’s so good that UNESCO have acknowledged it. We have recently returned from a trip to this amazing country. We wanted to try as much local food as possible so ate at a variety of restaurants as well as spent time discovering the vibrant street food scene. Korean people are passionate about their cuisine. We also enjoyed learning about the importance of the Korean table setting. Here’s our guide to dining and etiquette in Korea.
Please note that this post contains affiliate links. If you click through and decide to make a purchase we will earn a small commission, at no extra cost to you, which will help towards the costs of running this site.
Our Korea trip took us to Seoul, Gyeongju, Busan, Daegu and back to Seoul, so we were able to taste dishes from all over the country. We found travelling through Korea to be very straightforward – the public transport system is excellent and very easy to use. You can buy a railcard which gives you access to the extensive rail network that will whiz you all over the country.
Dining was also easy in the main – many restaurants have multi-language menus or ordering systems. Everywhere we went, we discovered that the local people were delighted to help us learn about their delicious cuisine.
Dining Etiquette – The Korean Table Setting
The table setting is significant. Rice should be set to the left and soup to the right. (The other way round represents offerings to the dead.) The rough rule is that cold and/or dry foods are set to the left, and hot and/or wet foods to the right.
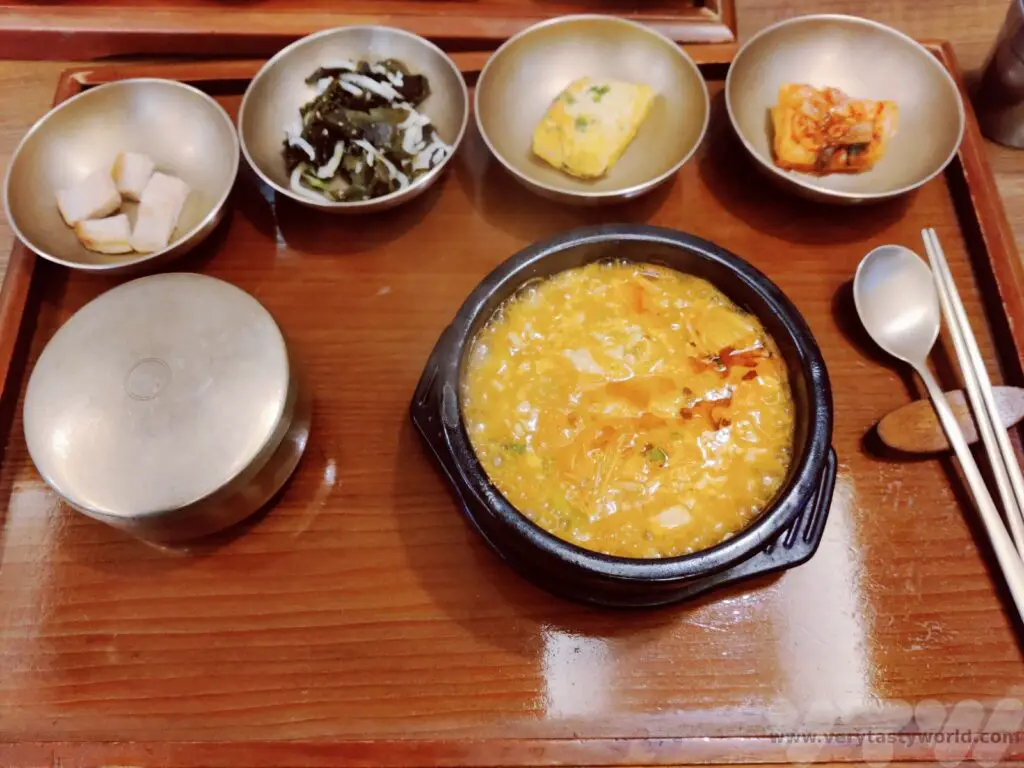
Koreans use chopsticks and a spoon to eat their food. Chopsticks are used to pick up specific items and the spoons used to scoop rice or eat soup.
Chopsticks in other Asian countries are usually made from wood but in Korea chopsticks are metal.
It is polite to use a spoon to drink soup – in fact, unlike many countries in Asia where it is okay to bring the rice or soup bowl to your lips, it is best to keep all bowls on the table. Use the spoon to bring rice or soup to your mouth.
There’s no formal way to eat rice. If served a stew with rice how you eat it depends on personal preference. Some people tip the rice directly into the stew, others scoop a spoonful of rice at a time and dunk it into the stew to pick up some of the flavour. And yet others never mix their rice with sauce and eat it plain.
Using a spoon and chopsticks is an efficient way to eat. In fact, over the course of our trip, we learned to use the spoon with our left hand and hold the chopsticks with our right – maximising eating potential! It’s absolutely fine to swap hands, put down the chopsticks down on the chopstick rest or on top of the bowl and pick up the spoon with the same hand. It’s considered that, as most people are right handed, another reason the soup is set to the right is so that it’s easier to use your right hand with the spoon to avoid spillage.
Don’t stick your chopsticks vertically into your food as that is the way that offerings are made to the deceased at funerals.
If you are eating with a group, the eldest members of the party will eat first.
When it comes to drinks it’s polite to order just a suitable number of bottles of beer, soju (a clear distilled spirit which normally has the strength of fortified wine) or makgeolli (a cloudy rice wine which has a similar ABV to beer) and share rather than order one for each person. You can always order another. You shouldn’t pour your own drink but pour for others using both hands. The recipient should hold the cup or bowl with both hands to receive.
Before starting to eat, say, ‘jalmeokgesseumnida’ which means ‘eat well’. If you get it wrong you won’t be ostracised but the correct etiquette will be appreciated.
One of the most delightful things we found about dining in restaurants was how keen the local people were to show us how to eat the food. For example, if you order bibimbap – mixed delicious things served over rice – you receive a bowl of beauty then dig in with the spoon and mix it all together before scoffing. Even if we couldn’t speak much Korean, the restaurant staff would demonstrate what we should do with each dish. It was very helpful.
Restaurant Dining
Many restaurants offer a self-ordering process where you walk up to a machine and place the order. Pretty much every restaurant we visited that had self-ordering had an English language option, as well as Japanese and Chinese. We found that most restaurants had an English menu which was sometimes quite basic but absolutely fine. Where restaurants didn’t have an English menu, we either guessed (we had learned to read Hangul before travelling so could tell what we were probably eating but didn’t know how it was cooked, but that’s okay as we eat pretty much anything) or we pointed to pictures of the food.
If you have ordered using a machine, order the food and either wait for it to arrive or for the number on your ticket to be called out. Keep an eye out at the serving hatch if you don’t know your number – the staff will most likely know that the food is for you and will beckon you over.
If you can’t find chopsticks and spoons on the table, they will almost certainly be available – either in a box or, rather cleverly, in a drawer under the table. The Golden Rule for a Korean restaurant: always look under the table.
Also, if you want to call over the waiting staff, there is often a button on the table which you can press.
Water is always provided and it’s free of charge. Many restaurants will bring you a bottle or jug of water and some cups but you may have to help yourself. If this is the case there will be a water dispenser and cups available somewhere in the restaurant.
Korean meals always come with banchan – side dishes. Sometimes these will be brought to the table and other times there will be a self-service bar where you can pick up a dish and fill it yourself. Look out for broths as well – there is often soup or broth in a large vat somewhere in the restaurant. It will be a rare meal when you aren’t supplied with kimchi, the ubiquitous and delicious spicy fermented cabbage, which is Korea’s national dish.
At some restaurants the bill was placed on our table when the food was delivered, at others we paid in advance using the machine and yet others the bill was calculated afterwards. You don’t request the bill – just saunter up to the payment area and pay. Cash is fine, cards were accepted in most places. Tipping is not expected nor required. Indeed, like Japan, tipping can sometimes be considered rude.
The Joy of Banchan
One of the most amazing things about Korean dining is banchan – the side dishes. The variety of banchan is quite remarkable. And they aren’t just thrown together. As much care is taken in preparing the banchan as the main dish.
And the very best thing about banchan is that you can order more for free! (It would be a bit rude to ask for more of the dish you have ordered or extra rice, unless you are happy to pay more.)
Of all the banchan, kimchi is the most famous. This crunchy, spicy fermented cabbage dish will be eaten with almost every meal. Even our airline meal to Korea included a packet of kimchi.
It is such a fundamental part of society that it has its own day – 22nd November – and families get together every year to make kimchi. Kimjang: Making and Sharing Kimchi was inscribed on the UNESCO Representative List of the Intangible Cultural Heritage of Humanity.
Korean households usually have two refrigerators – one for normal food and the other, which is set at a specific temperature, for a year’s worth of kimchi! We have been making kimchi for years and have an easy kimchi recipe.
Quintessential Korean Dishes to Try
Bibimbap
This is one of the most well-known of Korean dishes. It is a rice bowl topped with all sorts of delicious ingredients – from vegetables to marinated meat – sometimes garnished with a fried egg. Gochujang, the spicy (not overly spicy) chilli sauce forms the basis for the flavour. Sometimes the bibimbap is presented with the toppings on the rice but in ‘fast food’ bibimbap restaurants the toppings will be placed in the bowl and you will be served the rice separately, to put on top yourself.
The best way to eat bibimbap is to admire it first then get your spoon in and mix it all together, add some sauce, mix some more and then scoff.
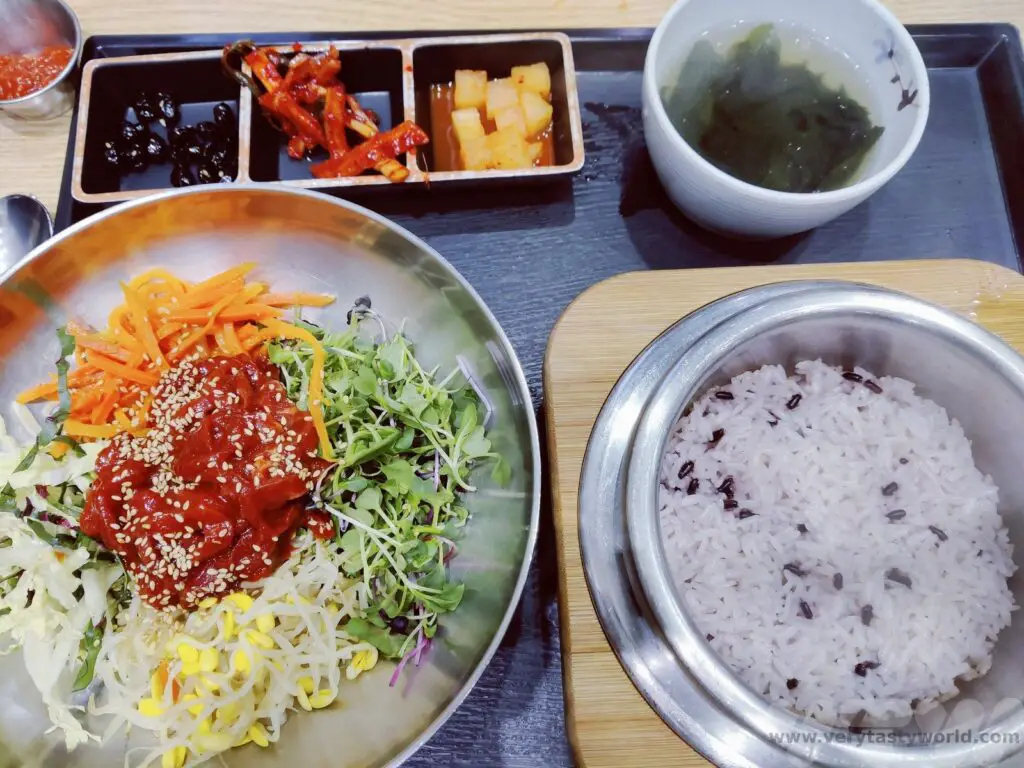
Sharp-eyed readers will notice that in the picture above the rice is served to the right. This is because we were given a tea pot and , after transferring the rice into the bowl of goodies, we then added hot stock to the rice crust inside the bowl to make a lovely soup.
Gimbap
They may look like Japanese sushi maki (sushi rolls) but gimbap (gim = seaweed, bap = rice) are very different. They are not seasoned with vinegar but sesame and they are sauced internally. Whereas maki often largely comprise raw fish, gimbap includes a vast array of ingredients – there is much more filling than rice. You can expect pickles, fresh vegetable, meats/fish or omelette all lovingly wrapped in a seaweed casing. You don’t dip them in soy sauce or wasabi. Many gimbap outlets in the cities are open 24 hours so this makes a great breakfast option.
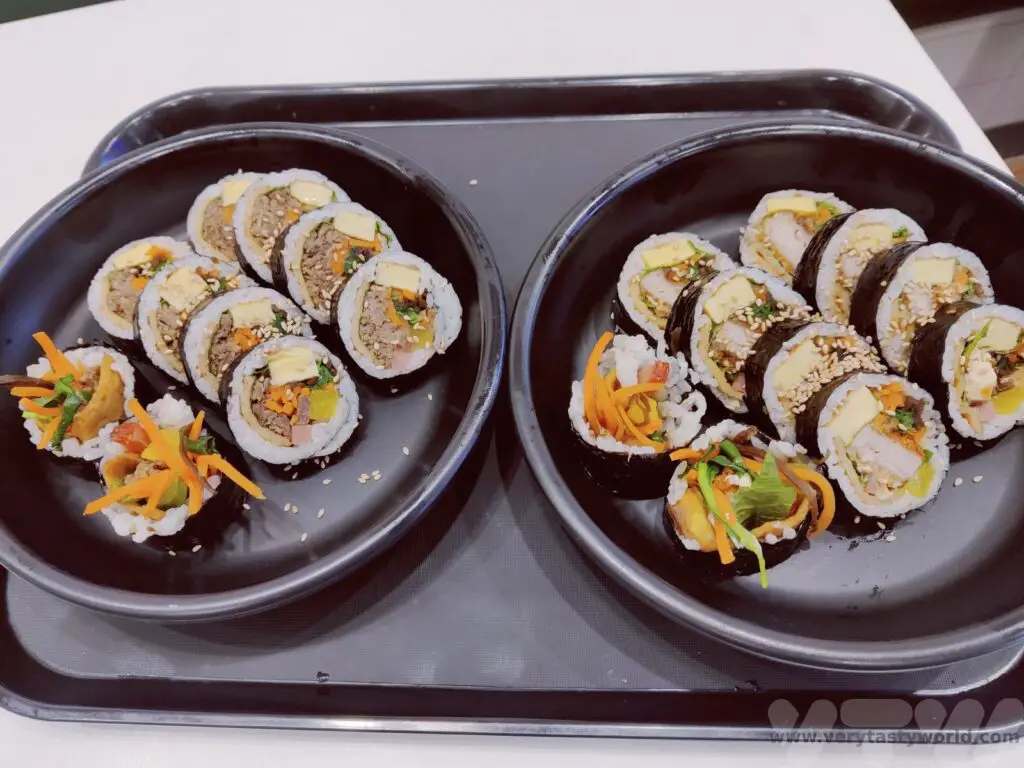
BBQ
Another essential meal to enjoy while visiting Korea is BBQ – luscious cuts of meat, sizzling on a hot plate, cooking over fire (sometimes butane but charcoal is traditional which adds a delightful smoky element).
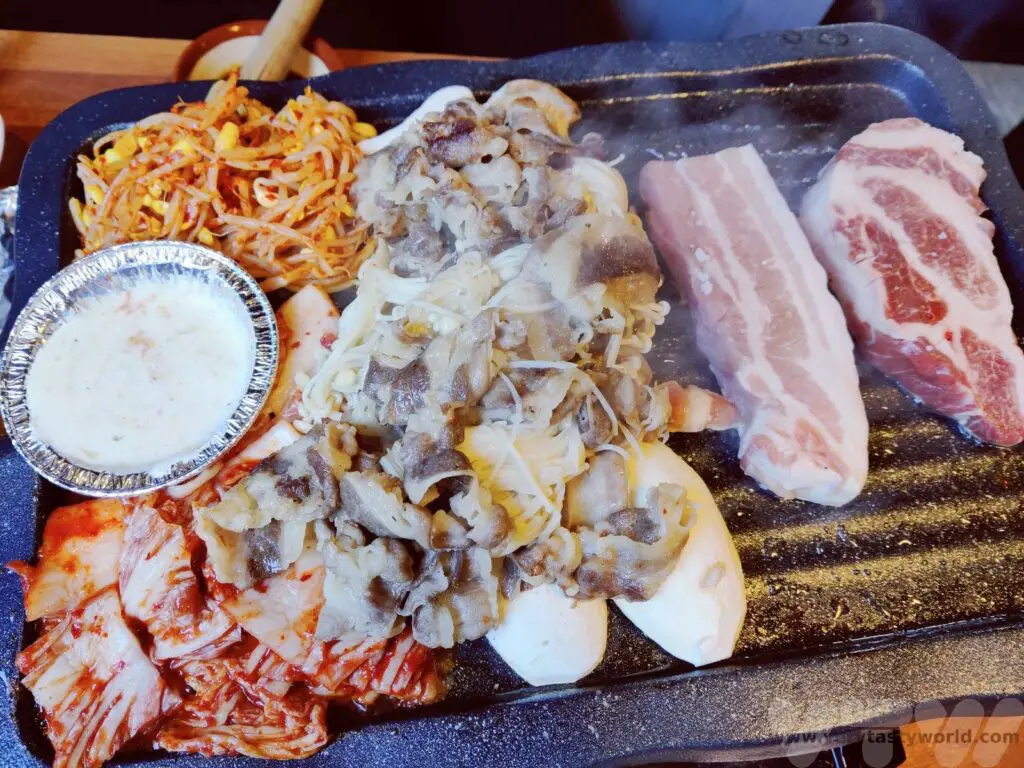
And BBQ is where another brilliant Korean table setting element comes into its own: the scissors! Korean kitchen scissors are the absolute best, they have thicker blades than ordinary scissors and cut food quickly and efficiently.
The meat is initially seared and cooked as a full joint. Then, as it cooks, tongs and scissors are used to cut the meat into bite-sized strips.
If you aren’t confident doing the cooking, the staff are absolute experts and will know exactly what to cook and in what order, so you can sit back, sip a soju and enjoy the show. But if you fancy having a go it’s fine to go for a DIY approach.
Ssam, which means ‘wrapped’, is a great way of enjoying BBQ. As well as banchan, a number of different leafy vegetables will be supplied – lettuce leaves or herbs such as perilla (below). You pick up a juicy piece of bbq meat with your chopsticks, place it on the leaf, add some kimchi and a dab of sauce, then wrap it up and pop it into your mouth – delish! If you run out of leaves, you can always ask for more.
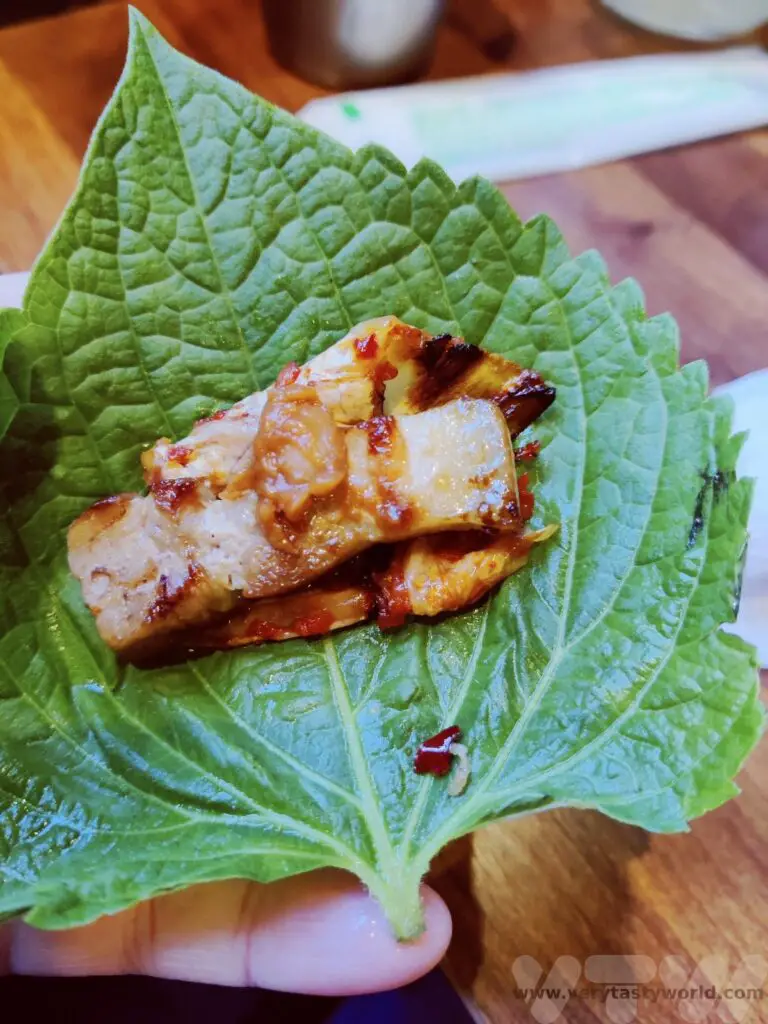
Chimaek (Chicken and Beer)
KFC is an essential item to try when visiting Korea. Not that KFC, of course, but Korean fried chicken. Chimaek 치맥 derives from chikin = fried chicken (unsurprisingly) and maekju = beer.
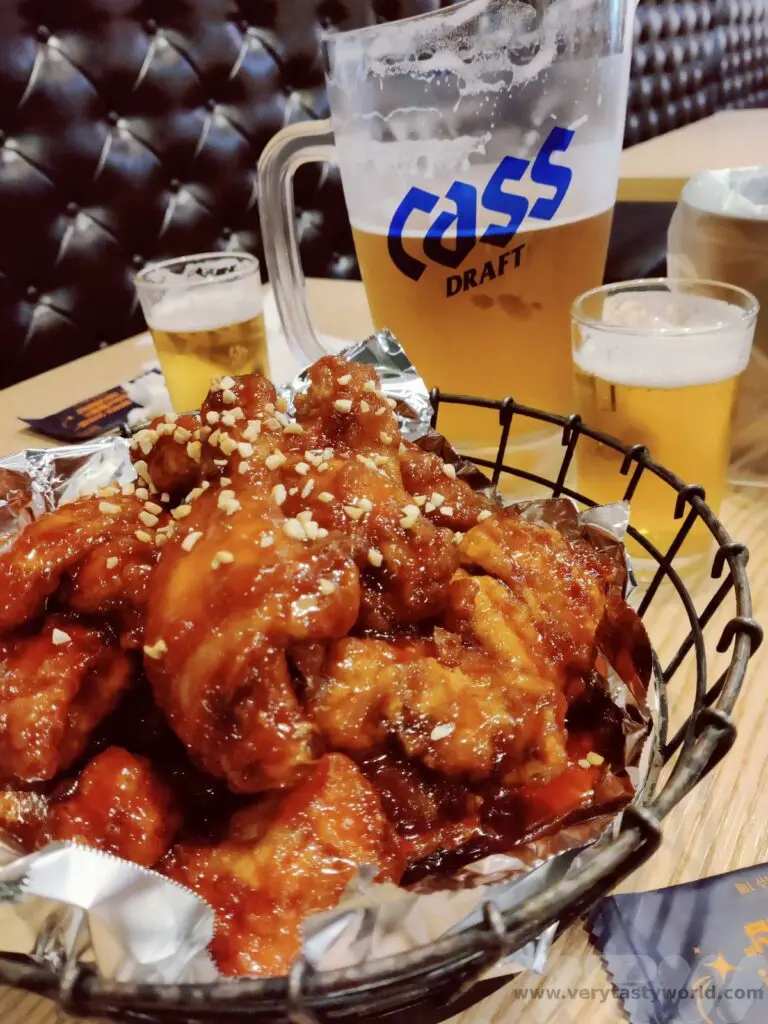
A very sociable way to enjoy fried chicken is to scoff it with beer and enjoy it with friends. When we visited a chicken and beer restaurant in Busan a single order provided a whole chicken’s worth of deep-fried joy, in a spicy sauce. Local beers are much cheaper than imported.
Bulgolgi
Bulgolgi is very popular dish comprised of marinated thinly slices of meat, usually beef, cooked on a griddle. The name translates as fire meat (bul = fire, golgi = meat). Some restaurants will offer a set menu where bulgolgi forms the centrepiece of the dish and you have multiple banchan to accompany, other restaurants let you cook the meat at the table. Just use your chopsticks to pick heavily flavoured, succulent pieces of meat.
Jjigae (Korean stew)
We visited in November and temperatures were dropping fast as winter approached. Jjigae is comfort food – warming and delicious. There are many varieties available – meat, tofu and vegetables – seasoned with a variety of sauces. Gochujang (chilli paste) and doenjang (soy bean paste, a bit like miso) are popular options. Stews will always be accompanied by rice and banchan. It makes for a feast.
Pajeon (Korean pancakes)
Pajeon is a celebratory food. These are pancakes that incorporate vegetables (largely spring or green onions) and other delectable fillings such as seafood.
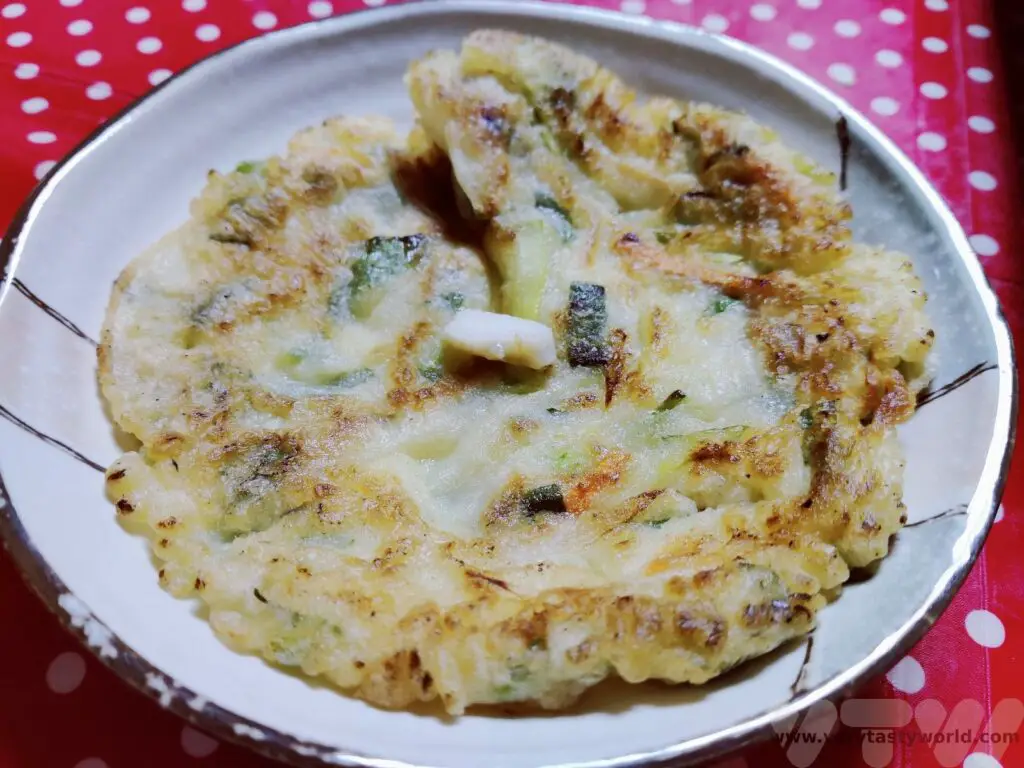
Eomuk – Fishcakes
Minced fish with vegetables and seasonings is another popular dish. These are available in shops/restaurants but are also widely available as street food.
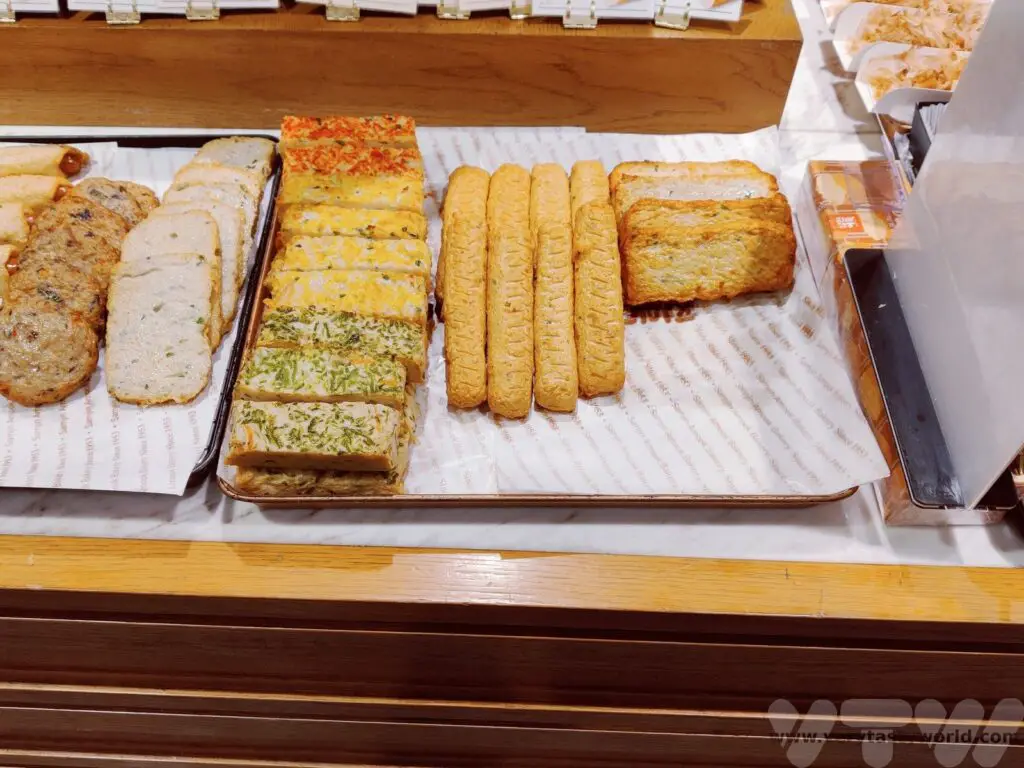
Dining At The Market
Both Seoul and Busan have large and extensive fish markets and it is possible not only to visit them but you can also eat incredibly fresh fish in the restaurants on the upper floors.
If you want, you can buy the fish in the market and then take it upstairs to be cooked to your liking. There will be a table charge (which may be reduced if you decide to order the restaurant’s fish stew) and a cooking charge.
In Busan, the Jalgachi market is the largest in South Korea and has multiple restaurants on the first floor, which all have the same menu. In Seoul some of the restaurants in the Noryangjin fish markets will help you – either by explaining the process, or by offering a picture menu where you can choose your fish/shellfish (they will give the market price) and they will go downstairs to buy the fish for you.
We enjoyed a plate of raw wild fish, sashimi style with eye-wateringly fiery wasabi. It was very different to the Japanese sashimi we have eaten in the past. It didn’t melt in the mouth but had a much firmer texture. The sashimi was accompanied by wonderfully sweet pan-fried rockfish, fresh crab and deliciously umami fish stews.
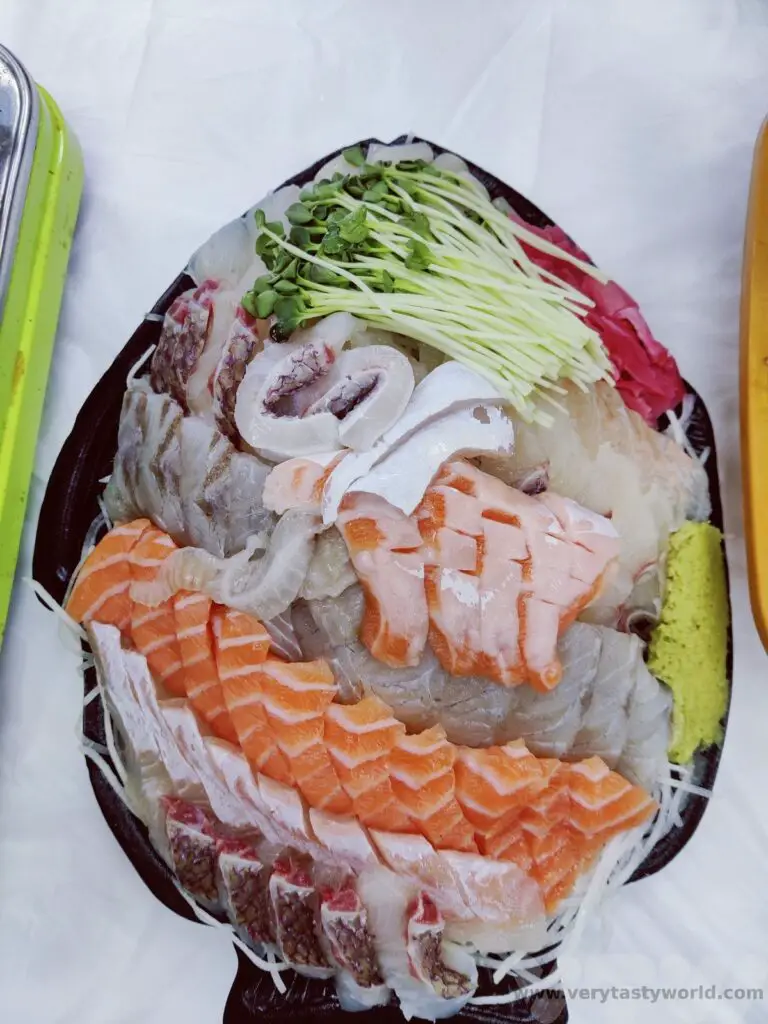
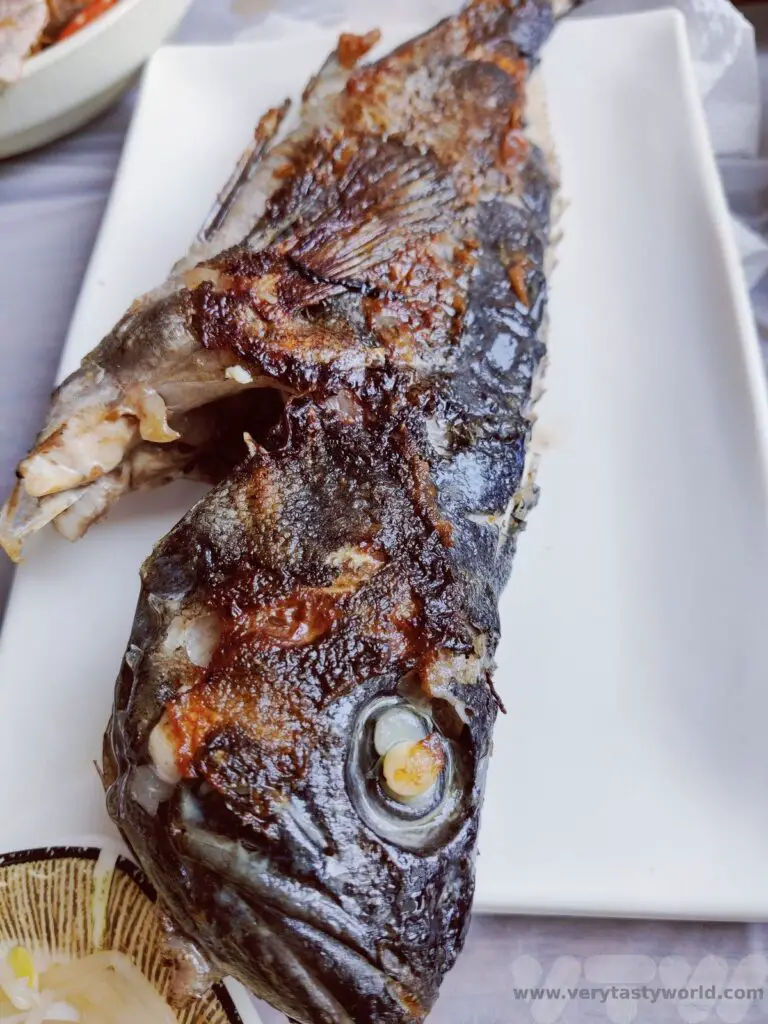
If you’re eating crab those amazing Korean scissors come into play – they will easily cut through the hard shell then you can use a chopstick to pick out the sweet and succulent crabmeat.
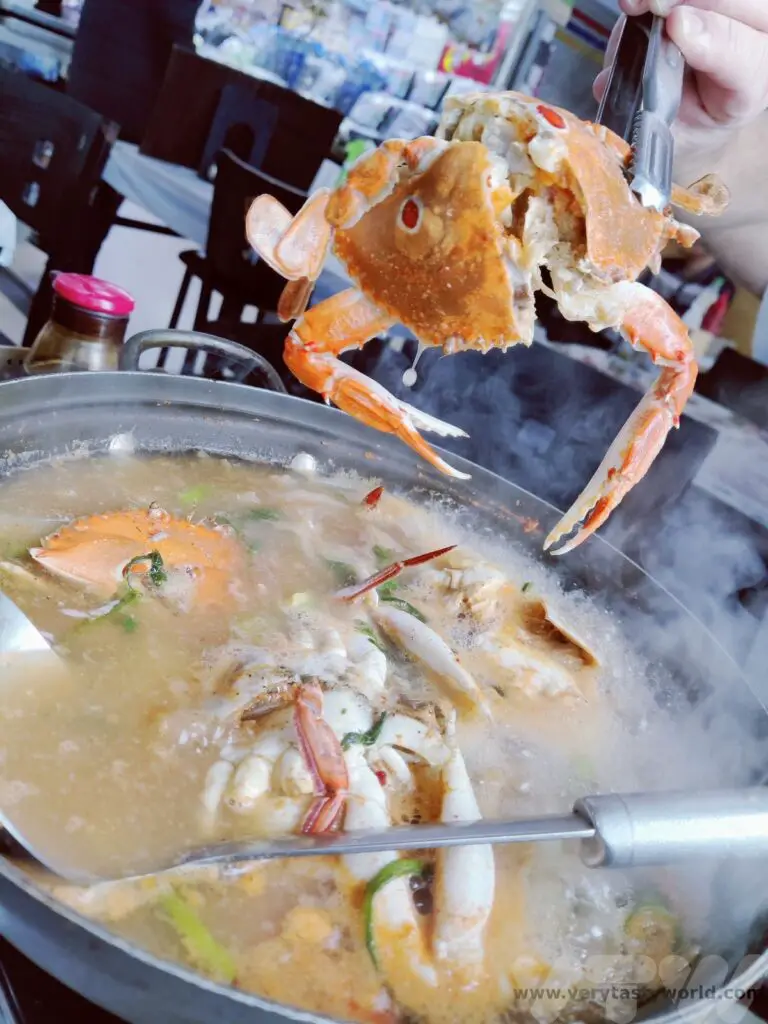
Street Food
The very first Korean food we tried was at a local market which we had decided to explore just as we had arrived in the afternoon in Seoul. Feeling tired and slightly woozy after a 16 hour journey, we sauntered up to a market stall and bought a fishcake for a mere 1000 won (less than $1). This undulating slice of fishy goodness woven along a wooden stick and served in a cup with a generous splash of stock was sublime – warming and packed with umami. We were instantly sold on street food.
We decided to have breakfast at Seomun market in Daegu one day. There was a wide variety of food on offer. Some of the fishcakes keep warm in a broth – watch out for the red-tipped sticks as those will be the spicy ones!
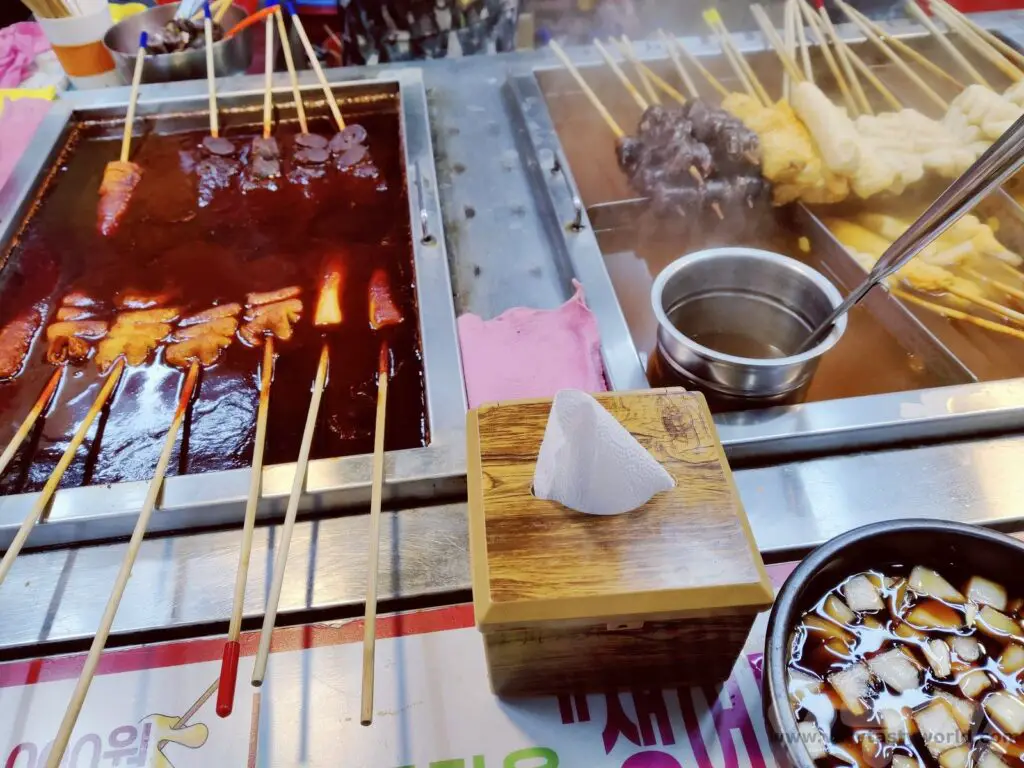
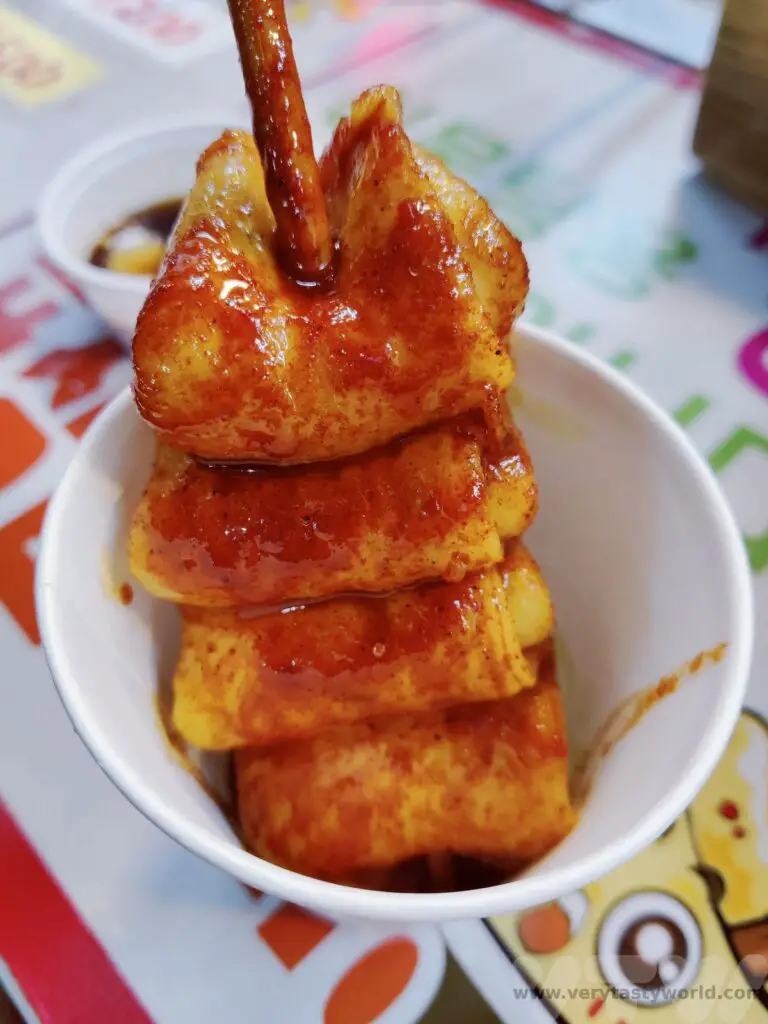
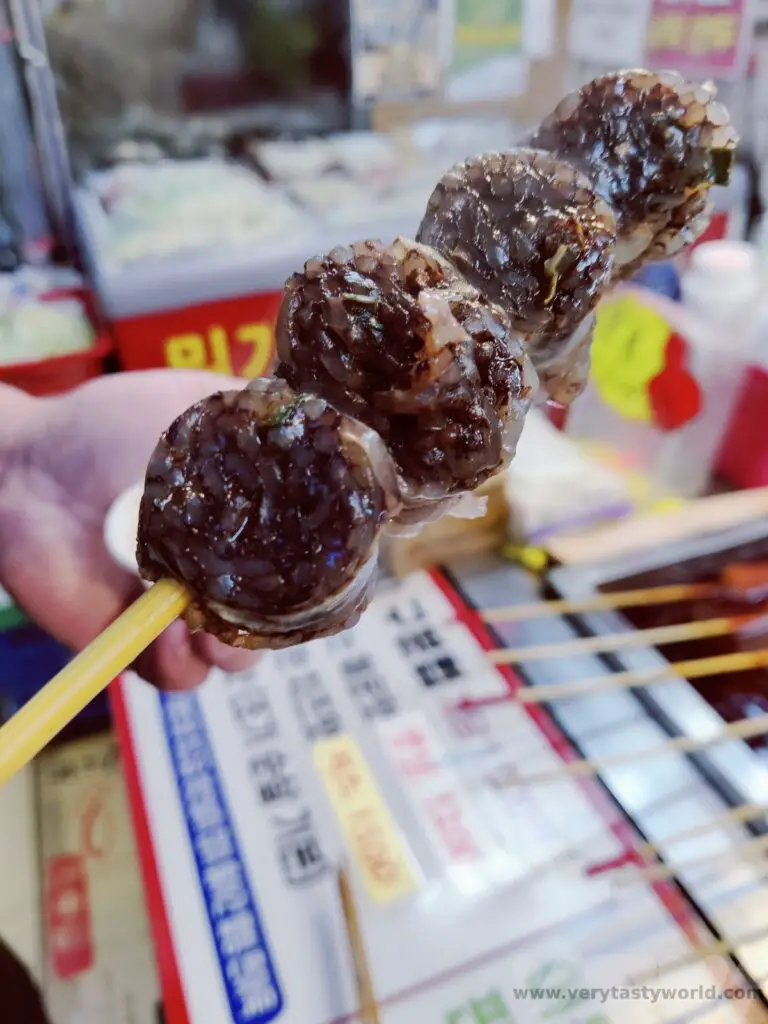
Hotteok (sounds a bit like hot-dog) is a fluffy fried doughnut filled with seeds and nuts.
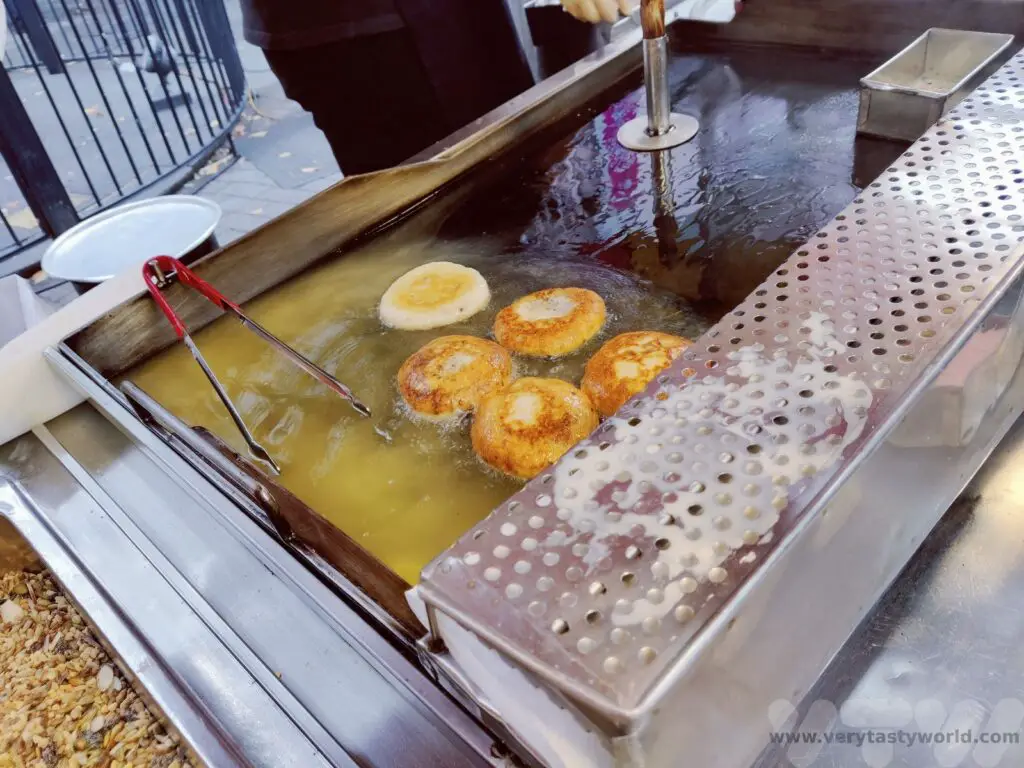

Many market stalls make pancakes fresh to order.
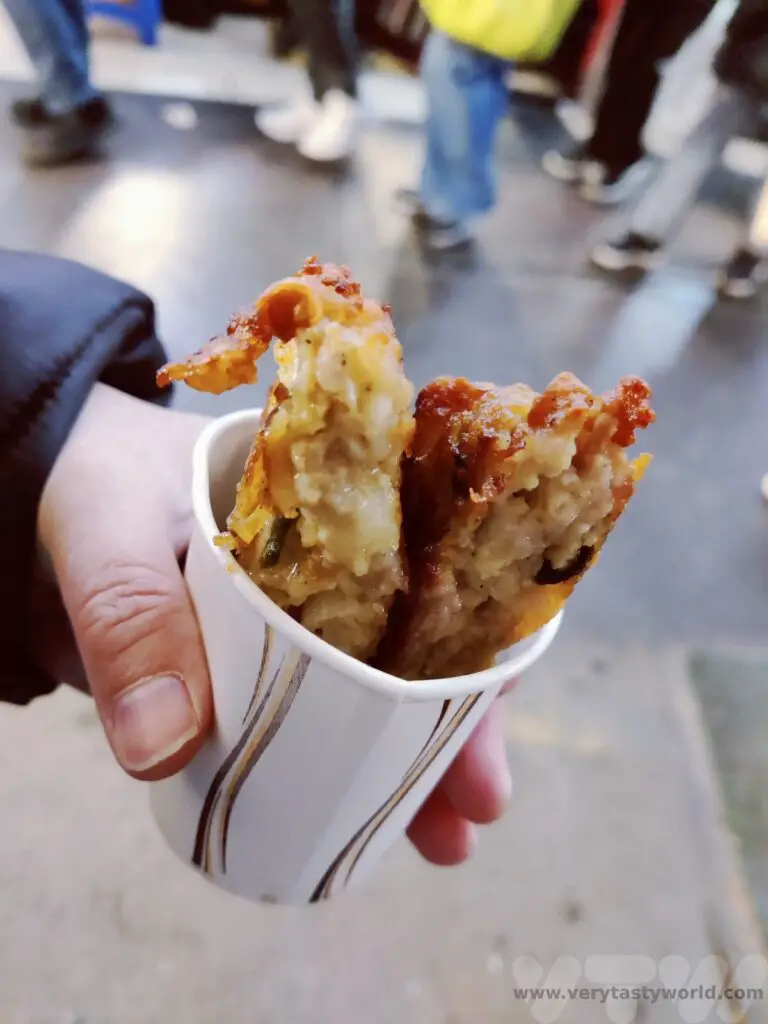
Most street food is served in paper cups.
Vegetarians/Vegans
It is not impossible to dine well if you are vegetarian or vegan. We did spot some vegan restaurants in many of the cities we visited. Veggie options will be available – e.g. tofu stews – but you might have to be careful that the base stock is vegetable based as some of these may use fish.
A menu that did make us laugh a little was a dumpling restaurant in Gyeongju. The proprietor was absolutely delightful and made awesome dumplings, plump and filling, in a variety of styles. But the menu was admirably honest about the fact that there was pork in all the savoury dumplings. Which is actually reassuring.
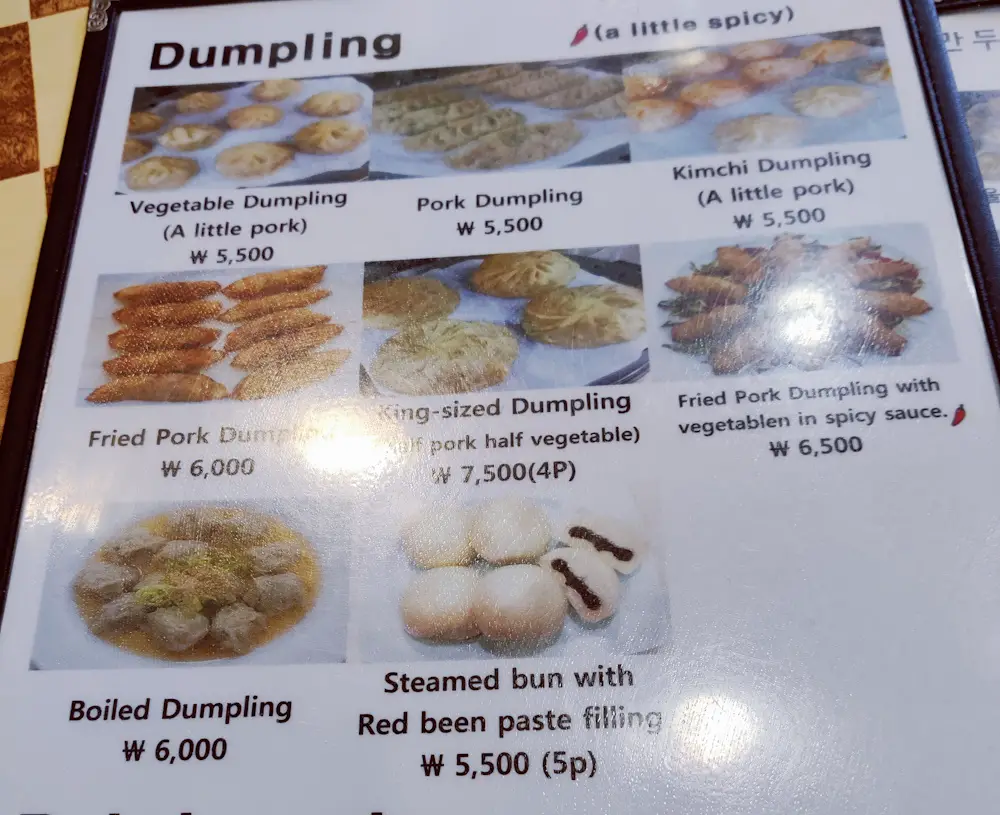
Some Useful Phrases
| Please give me | 주세요 | joo-say-yo | Say at the end of the sentence after the thing you want. e.g. banchan joo-say-yo |
| Excuse me YOU – over here | – 저기요 | juh-gee-oh | To get attention |
| People | 세명 | doo myung | 2 people. If you want a table for 2, it’s fine to just indicate with your fingers |
| Bottle | 맥주 여섯 병 | maek-ju doo byung | maek-ju (beer) doo byung (2 bottles) |
| 1 more bottle of soju please | 소주 두병 더 주세요 | so-ju hana-byung duh joo-say-yo | |
| More | 더 | Duh | |
| Please give me more kimchi | 김치 더 주세요 | kimchi duh joo-say-yo | |
| This please (pointing) | 이거 주세요 | Ee-guh joo-say-yo | |
| Delicious | 맛있어요 | mah-shis-say-yo | Saying this was guaranteed to raise a smile at the end of our meals! |
| NUMBER | KOREAN | Korean pronunciation |
| One | 하나 | hana |
| Two | 둘 | dool |
| Three | 셋 | sayt |
| Four | 더섯 | nayt |
| Five | 더섯 | duh-suht |
| Six | 여섯 | yuh-suht |
| Seven | 일곱 | ill-gope |
| Eight | 여덜 | yuh-duhl |
| Nine | 아홉 | ah-hope |
| Ten | 열 | yuhl |
| Eleven | 열하나 | yuhl-hana |
A Cookery Class
A fun way to spend an afternoon in Seoul or Busan is to join a cookery class. With a small group of fellow travellers these classes usually involve a visit to a local market to learn about the amazing produce on sale – from the familiar to some enticingly unusual foods.
Then you’ll go on to visit your host’s home to cook several delicious dishes. We made pajeon – and had great fun flipping the pancakes. Bibimbap and dakgalgi (a spicy chicken dish) were also on the menu.
Related Posts You May Enjoy
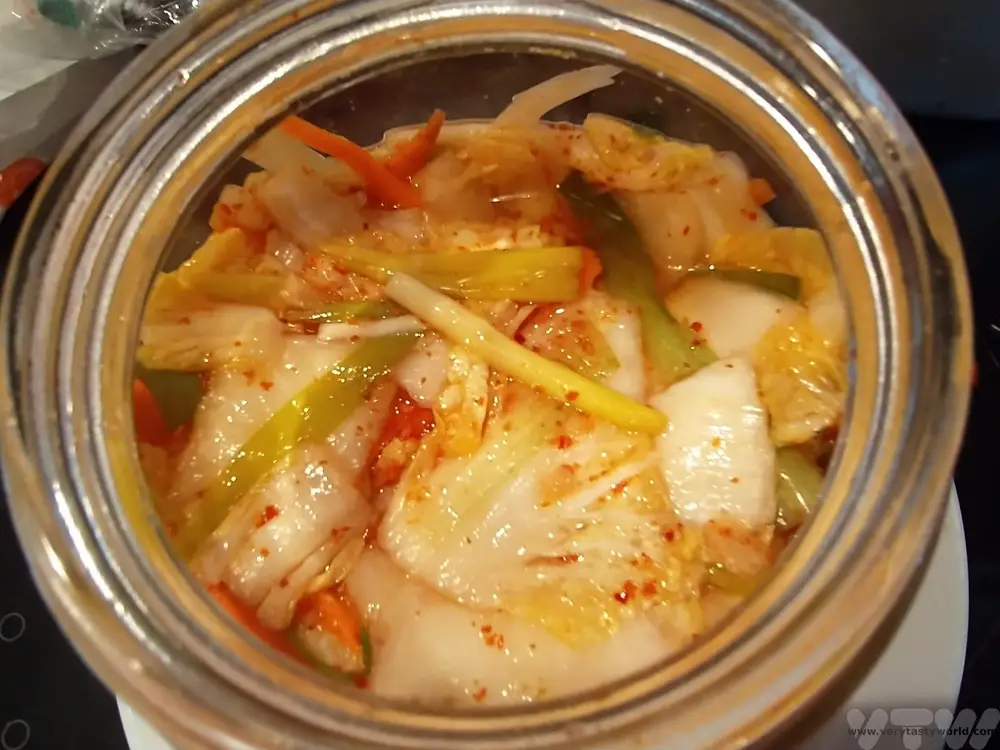
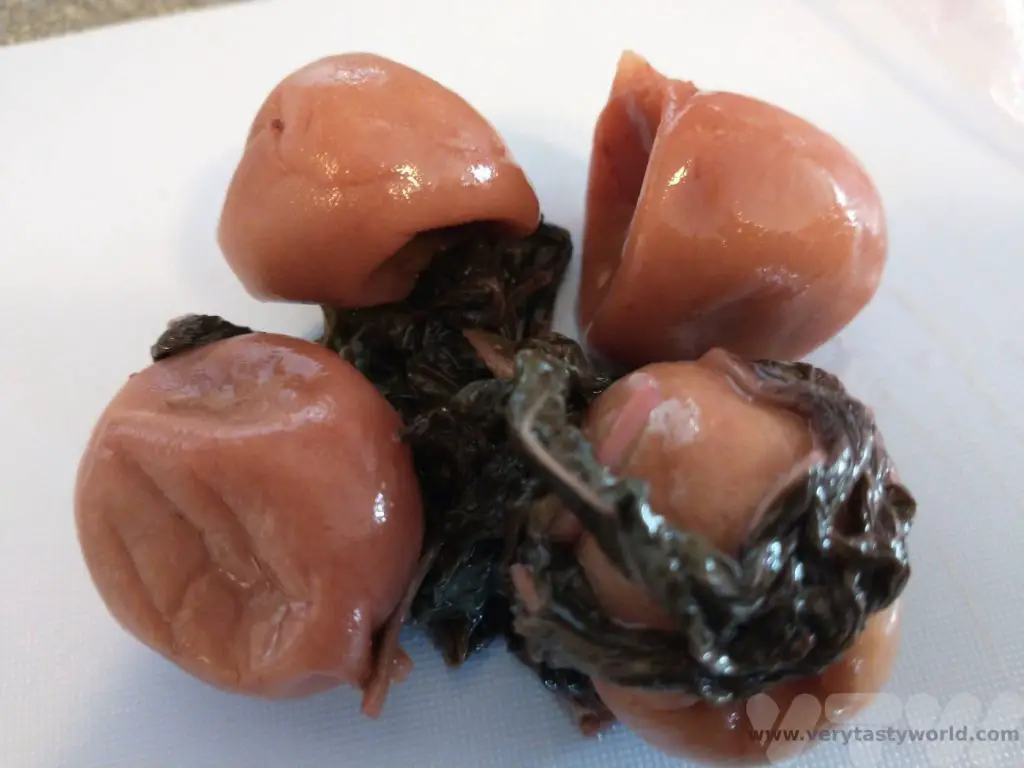
Thanks so much for reading. We hope you enjoyed this article. If you’d like to keep up to date with new posts and recipes, please subscribe to our newsletter or follow us on social media – X, Facebook or Instagram. We always love hearing from you and would be delighted to read your thoughts about this article.
How To Get From Seoul To Gyeongju by Train
Gyeongju in south-eastern Korea is often described as a ‘museum without walls.’ It’s easy to see why. It is the former capital of the Silla Kingdom which ruled a large proportion of the Korean peninsula from around 57 BCE to 935 CE. It is genuinely a treasure trove of historic buildings and artefacts. We recommend visiting this wonderful city if you are travelling in South Korea. Here’s our guide on how to travel from Seoul to Gyeongju.
Please note that this post contains affiliate links. If you click through and decide to make a purchase we will make a small commission, at no extra cost to you, which will help towards the costs of running this site.
Seoul to Gyeongju By Train
South Korea’s rail network is fast and efficient. If you want arrive quickly, we recommend using the KTX, the high-speed train service, from Seoul Station. You can reach the main railway station on lines 1 and 4 on the metro. The train station is bright and airy and the departure board will indicate the train number, time, destination and departure track in multiple languages, including English.
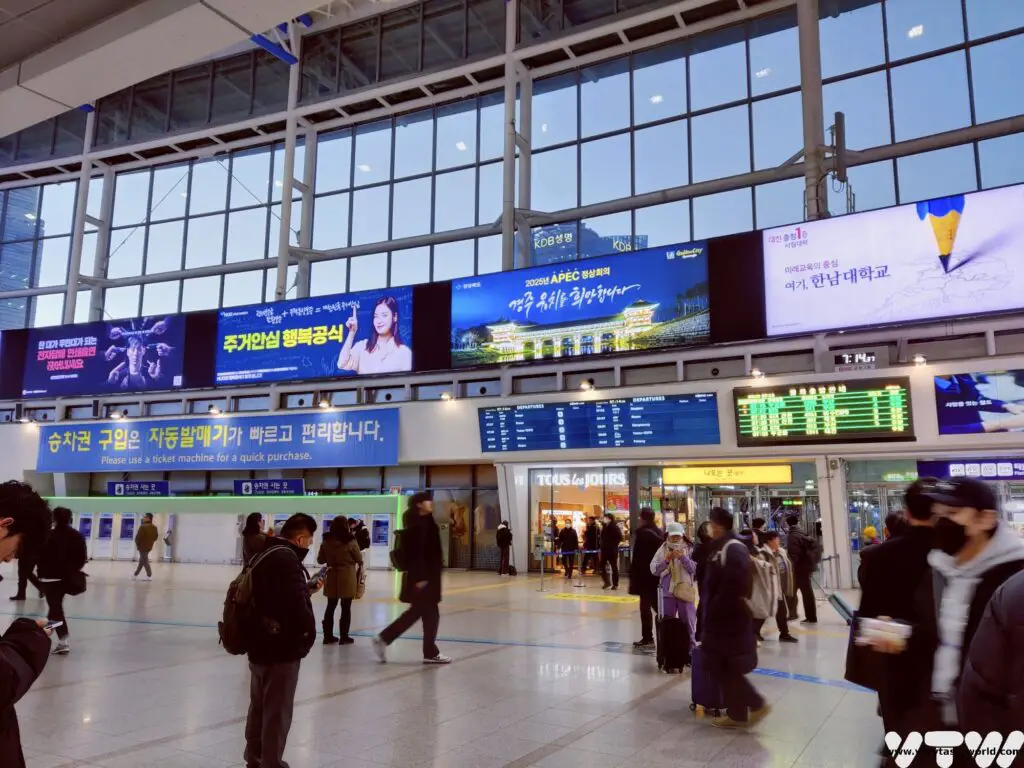
When you arrive on the platform, there will be an indication where your train’s car will be located. Your seat reservation will indicate a car and seat number. There is an overhead shelf for smaller bags above the seats inside the carriage, and a storage area for larger luggage at the end of each car by the doors. The train journey takes around two and a half hours from Seoul to Gyeongju.
However, the KTX does not reach Gyeongju centre. The train will stop at Singyeongju station which is located a few kilometres out of town. It’s the city’s newest station and was opened in 2010.
You will need to catch a bus or take a taxi to the city centre.
Taxis are definitely easier. They take around 10-15 minutes and cost between 15,000 and 20,000 Won (around $11-15 at current prices). You can also put your luggage into the boot/trunk of the taxi. There are plenty of taxis waiting at the station.
The bus journey takes around 25-30 minutes. Bus numbers 50, 70 or 700 run to and from the station regularly and will take you into town. The cost is 2,500 won (2023 price).
If you have a T-money card you can use this to pay for your bus fare. Just tap your card on entering the bus at the front by the driver and don’t forget to tap out when you exit at the middle of the bus.
We recommend getting a T-money card when you arrive in South Korea which you can pick up on arrival at the airport. They are so convenient for paying for public transport and other services. You can charge them with cash all over the country, including at convenience stores. (N.B. you can only charge them with cash)
One thing that’s worth noting is that when a train comes in there may well be a lot of passengers, so getting a seat on the bus might not be easy. We were the last ones on and had to stand. Not a problem except…
…well, Gyeongju does have a popular theme park but you can truly experience the thrills of a rollercoaster simply by travelling on the bus. Our journey into Gyeongju city was ‘enhanced’ by a driver who was either in a hurry or was a sadist who enjoyed watching hapless tourists in his rearview mirror, loaded with luggage, clinging to the handrails whilst trying to avoid flying around the bus, as he sped up, hurtled around corners and slammed on the brakes.
We think this was a one-off – our bus ride back to the station was much more sedate.
Train Travel Tips
If you are planning to travel by train through South Korea you might want to consider buying a KoRail Pass. These are passes that allow foreign visitors unlimited journeys on the rail network on particular days. There are various options available:
Consecutive Passes: You can use these on either 3 days or 5 days in a row – useful if you are travelling on consecutive days.
Select Passes: You can use these on any 2 individual days or any 4 individual days within a 10 day period. These are useful if you are travelling around Korea and want to spend some time at different locations before moving on.
You can buy the pass within 31 days of travel and you need to know which day you plan to activate the card.
The pass can be ordered online and printed off. You need to carry the pass with you and it is linked to your passport.
The pass can represent good value if you are planning on travelling to lots of locations in South Korea. We recommend checking prices to see whether the cost of a rail pass is cheaper than buying individual tickets.
Tip: If you know your travel dates, book your KTX seats early, several days in advance if possible. Seoul’s railway station has a ticket office where you can purchase tickets and book seats. We went to the office to validate our rail passes and book our seats. We planned to travel on a weekday, three days after our arrival, and had difficulty getting seats together on the train. It meant that we had to leave really early in the morning to catch a train, which turned out to be a blessing as it meant we had more time to explore Gyeongju.
The Korea Trains website has information about timetables and ticket booking.
If you are travelling on the train using a pass you will need to carry a printout of the pass, the seat reservations and your passport to confirm your identity – which should match the name on your pass. We were never challenged during our journey through Korea but the terms of the pass state that you must be able to produce this documentation if requested.
Alternative Ways to Travel From Seoul To Gyeongju
It is possible to catch the express bus to Gyeongju. The price is cheaper and the bus will take you directly into the city centre. The total journey time is around three and a half hours.
The bus leaves from Seoul Express Bus Terminal which is located in the Banpo-dong part of Seocho district. You can reach the bus terminal via metro lines 3, 7 and 9.
You can check the bus route information and ticket availability at the express bus website.
If you want maximum flexibility you can hire a car. The journey time will take around 5-6 hours, depending on where you are travelling from in Seoul and how congested the traffic is. A car would also be very useful when exploring Gyeongju as many of the historic attractions are located a few kilometres from the city centre.
Getting from Busan to Gyeongju
Gyeongju is also a popular day trip from Korea’s southern city of Busan. It’s an hour away on the train. Once again you can use a KTX pass to reach Singyeongju.
Alternatively, there are companies that offer day trips to see the main sights. Although we realise that time can be tight when travelling, we loved Gyeongju so much that we recommend staying in the area if possible. There is so much to see, a day trip would only really scratch the surface.
Related Posts You May Enjoy